LAZO MINNIE/MINNIE BOW
6
About :
Hello, dear Creative Hivers! May the Muse be with you always. hehe!
What girl or woman doesn't love Minnie Mouse?
I'd say almost all of us love this cute little mouse who is Mickey Mouse's sidekick.
Fun fact, did you know that the short name for Minerva is Minnie? That's right, Minerva is the real name of our little friend Minnie Mouse.
This Disney character, has a very flirtatious personality, kind, attentive, sings, dances and as if that wasn't enough, she loves fashion. Therefore, she has worn more than 200 different outfits. In addition to her costumes, she also has many accessories that complement them, such as her emblematic bow.
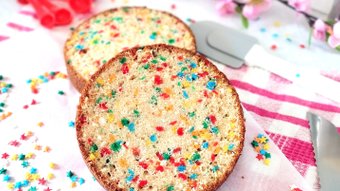
On the other hand, one of the most requested cakes among little girls between 3 and 6 years old is the beautiful Minnie Mouse, either with her red and black or pink outfit.
Which brings me to tell you that last week, a client, the same one fromquesillo, ordered me a Pink Minnie themed cake with a huge and beautiful pink bow as a topper.
And speaking of bow, today I bring you a Short where I show you how to make this characteristic Minnie accessory in fondant that makes her look so sweet and tender, although when she gets upset, she shows she has a bad temper. I guess she has a balance like everyone else.
So put on your apron and join me in my Kitchen, "Zu cocina "!
You will need the following materials:
• Pink fondant.
• White fondant.
• Red or fuscia matte blusher.
• A little bit of water that we will use as glue.
• 2 brushes, one for the water and the other one for the matting agent.
• A nozzle with a diameter of 1.5 cm.
• A rolling pin.
• Vegetable shortening.
• Scissors.
The amount of fondant used will depend on the size of the bow you are going to make, that's why I didn't want to give you an exact amount.
Recommendation:
Place the shader before gluing the polka dots to the bow. I made this little mistake by gluing the polka dots first, as some of them were stained and the idea is to make the work as neat as possible.
I hope you like this mini tutorial and find it useful. I would be very happy if you share it and leave me your valuable comment.
Thanks for staying until the end and for all your support!
Your friend, Zuuu!
You can also find me on instagram as: @zu_pasteleria, @tayiitos and on RedBubble in my clothes and products store.
All photos and videos in this post were taken with my Xiaomi Redmi 10 cell phone.
Resources: Capcut and Deepl Translator.
ESPAÑOL
¡Hola, queridos Hivers Creativos! Que la Musa los acompañe siempre. ¡Jeje!
¿A qué niña o mujer no le encanta Minnie Mouse?
Yo diría que casi todas amamos esta linda ratoncita que es la compañera de Mickey Mouse.
Como dato curioso, ¿sabías que el diminutivo de Minerva es Minnie? Exacto, Minerva es el nombre real de nuestra pequeña amiga Minnie Mouse.
Este personaje de Disney, tiene una personalidad muy coqueta, amable, atenta, canta, baila y como si fuera poco, le encanta la moda. Por lo tanto, ha llevado más de 200 vestidos diferentes. Además de sus vestuarios también tiene muchos accesorios que los complementan, como su emblemático lazo.
Por otro lado, una de las tortas más pedidas entre las niñas de entre 3 y 6 años es la hermosa Minnie Mouse, ya sea con su traje rojo y negro o rosa.
Lo que me lleva a contarles que la semana pasada, una cliente, la misma del quesillo, me encargó una torta con temática de Minnie Rosa que tenía como topper un enorme y bello lazo rosado.
Y hablando de lazo, hoy les traigo un Short donde les muestro como hacer este característico accesorio de Minnie en fondant que la hace ver tan dulce y tierna, aunque cuando se molesta, muestra que tiene mal carácter. Supongo que tiene un equilibrio como todos.
¡Así que ponte tu delantal y acompáñame a mi Cocina, "Zu cocina"!
Vas a necesitar los siguientes
• materiales:
• Fondant rosa.
• Fondant blanco.
• Matizador mate rojo o fuscia.
• Un poquito de agua que usaremos como pegamento.
• 2 pinceles, uno para el agua y el otro para el matizador.
• Una boquilla con un diámetro de 1,5 cm.
• Un rodillo.
• Manteca vegetal.
• Tijeras.
La cantidad de fondant que se usa dependerá del tamaño del lazo que vayas a realizar, por eso no quise darte una cantidad exacta.
Recomendación:
Colocar el matizador antes de pegarle los lunares al lazo. Yo cometí ese pequeño fallo al pegarle primero los lunares, ya que algunos quedaron manchados y la idea es que el trabajo quede los más prolijo posible.
Espero les guste este mini tutorial y les sea de utilidad. Me haría muy feliz si lo compartes y me deja tu valioso comentario.
¡Gracias por quedarte hasta el final y por todo tu apoyo!
¡Tu amiga, Zuuu!
También me puedes encontrar en instagram como: @zu_pasteleria, @tayiitos y en RedBubble en mi tienda de ropas y productos.
Todas las fotos y videos de esta publicación fueron realizadas con mi celular Xiaomi Redmi 10.
Recursos: Capcut y Deepl Translator.
Show more
Tags :
Woo!
This creator can upvote comments using 3speak's stake today because they are a top performing creator!
Leave a quality comment relating to their content and you could receive an upvote
worth at least a dollar.
Their limit for today is $0!
Their limit for today is $0!
5 views
a year ago
$
10 views
a year ago
$
11 views
a year ago
$

9 views
2 months ago
$

21 views
9 months ago
$
More Videos
4 views
4 months ago
$

13 views
a month ago
$
0 views
2 years ago
$
12 views
3 months ago
$

3 views
a year ago
$

14 views
a year ago
$
11 views
4 months ago
$

18 views
2 years ago
$
16 views
a year ago
$
4 views
2 years ago
$

17 views
a year ago
$

4 views
2 months ago
$
5 views
9 months ago
$
2 views
a year ago
$

7 views
2 years ago
$

3 views
2 years ago
$

9 views
a year ago
$

5 views
2 years ago
$

24 views
a week ago
$
48 views
9 months ago
$

9 views
3 months ago
$

5 views
a year ago
$
10 views
a year ago
$

14 views
9 months ago
$
Comments:
Reply:
To comment on this video please connect a HIVE account to your profile: Connect HIVE Account