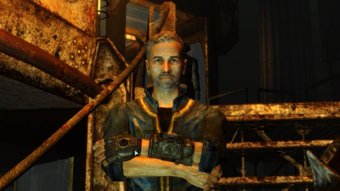
Fallout 3 Walkthrough (Modded) Part 205
3
About :
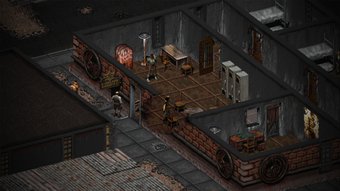
This is the third episode in the ruins of Crystal City. It's a place added by the A World of Pain mod.
DISCLAIMER: This episode was recorded after the Windows Fall Creators update that partially broke Fallout Stutter Remover. You may notice more stutters and instability when I travel through the map and play the game. This problem was solved only after the release of the F3TF (Fallout 3 Tick Fix).
The mods I used in this series are listed here. Also, the complete playlist is now available on Youtube and Odysee.
Here are the timestamps:
- 00:35 - The terminal that opens that door is broken. Is there a key to open the door?
- 00:44 - I can't use the Sector D Access Terminal to open the door next to it.
- 01:01 - The path to the quarters (Sector B) is blocked by debris.
- 01:10 - A Magnum and ammo on the table.
- 01:19 - Stairs to the lower level. I kill the deathclaws downstairs.
- 02:11 - I go north through the irradiated water. Some rooms are blocked by rubble and debris.
- 02:36 - Another blocked room near the Nuka Cola Machine. A Quantum bottle is on the floor.
- 02:59 - I unlock the terminal near the Gunking sign. I open the door. Lots of ammo boxes in the room.
- 04:32 - A Guns And Bullets on the table.
- 04:43 - Lockpicking the drawers near the safe (very hard). A unique Defective Auto-Plasma is in one of them.
- 05:23 - Lockpicking the safe (very hard). More ammo and a US Army: 30 Handy Flamethrower Recipes.
- 05:50 - A rare 32 Cal Submachine Gun. More guns in the cabinets.
- 06:53 - Testing the Defective Auto-Plasma. I return upstairs.
- 07:23 - I was thinking about where the key to that door might be.
- 07:44 - Repairing the Defective Auto-Plasma.
- 08:36 - Heading to Crystal City Sector A.
- 09:15 - The team will wait while I go downstairs. More Deathclaws in the area. I sneak around the place.
- 10:24 - Sneak attack on the Deathclaw Young.
- 10:38 - Checking the door to the west. The Cold Storage Access Terminal requires a key.
- 10:50 - The terminal upstairs is locked too.
- 11:25 - Looting the room where I killed the Deathclaw.
- 13:13 - A grenade box in the previous room with beds. There's ammo on the beds.
- 14:08 - Two Plasma Mines on the briefcase. Many items and containers are on the counter.
- 15:51 - Ammo and first aid boxes under and above the table. More containers on the beds too.
- 16:26 - Oops! A Deathclaw was nearby.
- 16:53 - My not-well-planned attack almost goes completely wrong.
- 17:27 - Heading south through the tunnel. I throw a grenade at the Deathclaw to the left.
- 18:15 - I find Stanley Dawson's Diary Part 10 (did I miss the other part?) in the room to the east.
- 19:08 - The Cold Storage Password is on the floor near the skeleton.
- 19:14 - I couldn't interact with the knife stuck in the machinery.
- 19:19 - Accessing 4D Containment Terminal. I can use my high Science or Repair skills to retrieve the 4D Storage Mark 4. Now I can carry even more stuff.
- 19:57 - Now I check the west end of the corridor. I call the team while I open the containers.
- 20:25 - Folks were using the area as the toilet. The pit ahead is highly irradiated.
- 21:02 - Back to the first Cold Storage Terminal with the password. Lots of crates to loot in the now-opened area.
- 22:07 - Medical supplies, AWOP food, and drinks.
- 23:10 - Unlocking the second Cold Storage Terminal upstairs. I can now enter the upper floor of the area storage area. More AWOP food and drinks.
- 24:38 - A closer look at the map. I imagined I may have missed something.
- 26:09 - Back to the Sub Levels.
- 26:24 - That locked door with a broken terminal was frustrating me. The locked Sector D too.
- 27:03 - Back to Crystal City. More Deathclaw spawned outside, including a Deathclaw Alpha (note the Enclave one).
- 28:10 - Testing the Defective Autoplasma on the remaining creatures. Collecting more meat and blood.
- 30:11 - Checking the local map and back to the Vault-Tec Office. I didn't find any key.
- 32:20 - I leave Crystal City without opening the sub-level doors.
- 33:11 - Back to Metro Hub tunnels. I return to Chelk's body location to find the unique Silenced Sniper Rifle.
- 34:40 - Leaving the Metro Hub and the fire station.
- 36:04 - Some Deathclaws (including Matriarchs) spawned around Old Olney.
- 37:39 - Heading to Cooper's Hotel to tell The Taxidermist about his friend's whereabouts. Killing the Talon Mercs nearby.
- 39:21 - Entering Cooper's Hotel. Some raiders respawned inside.
- 40:22 - Talking to The Taxidermist about Chelk and Doomfist. I earn 1000 caps as a reward.
- 41:10 - Buying and selling stuff.
- 43:40 - Leaving The Taxidermist Room and Cooper's Hotel.
That's all, folks! I'm considering updating this video with the stuff I missed in Crystal City.
Show more
Tags :
Woo!
This creator can upvote comments using 3speak's stake today because they are a top performing creator!
Leave a quality comment relating to their content and you could receive an upvote
worth at least a dollar.
Their limit for today is $0!
Their limit for today is $0!
1 views
a year ago
$

4 views
7 months ago
$

1 views
a year ago
$
5 views
2 years ago
$

1 views
2 years ago
$
More Videos

2 views
4 years ago
$
2 views
a year ago
$

34 views
2 years ago
$

4 views
a year ago
$

6 views
a year ago
$

12 views
a year ago
$

5 views
2 years ago
$

2 views
a year ago
$

12 views
11 months ago
$

1 views
2 years ago
$

0 views
2 years ago
$

2 views
a year ago
$

2 views
a year ago
$

4 views
2 years ago
$
1 views
9 months ago
$

2 views
2 years ago
$

6 views
5 months ago
$

0 views
7 months ago
$

8 views
a year ago
$
3 views
3 years ago
$

3 views
2 years ago
$
2 views
2 years ago
$
2 views
2 years ago
$
Comments:
Reply:
To comment on this video please connect a HIVE account to your profile: Connect HIVE Account