MOONCONTEST: Composition of the moon in filigree. TUTORIAL
7
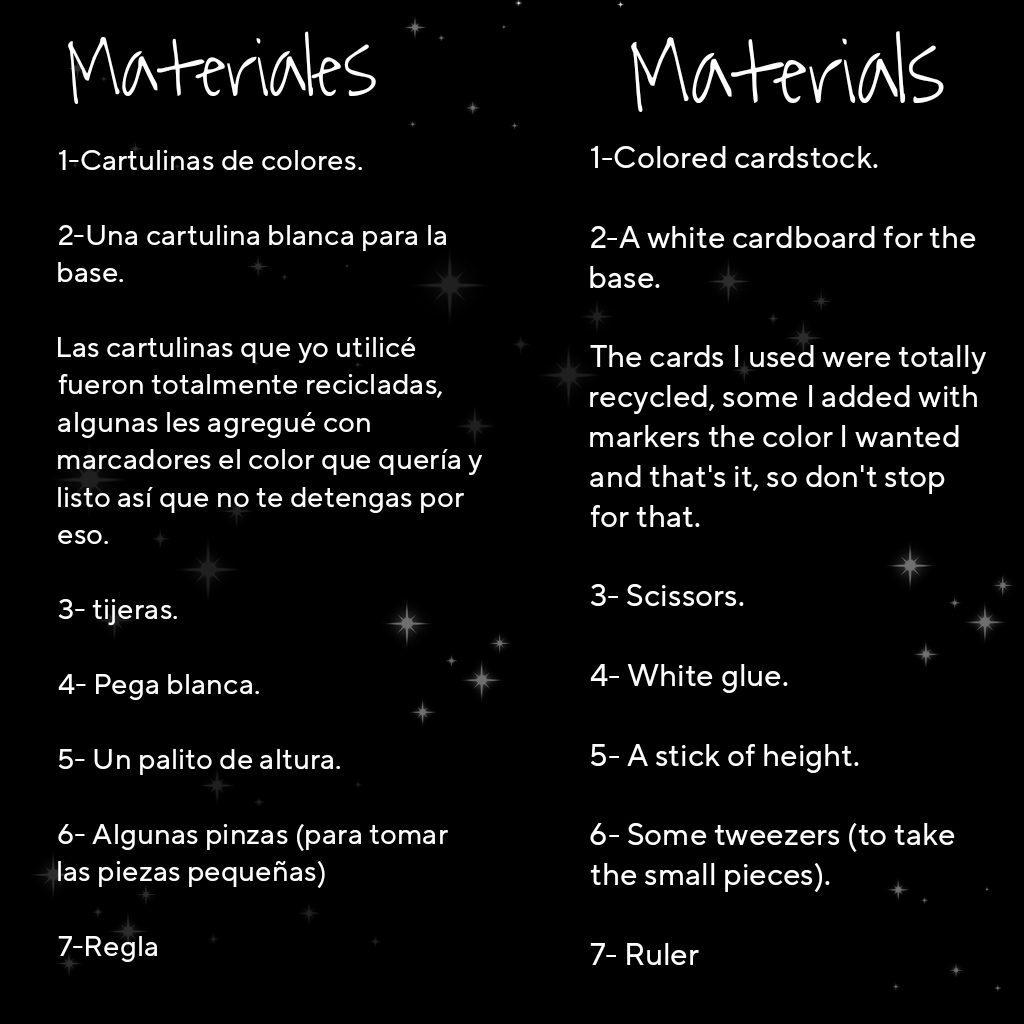
About :

Hola hola a todos queridos amigos de hive, espero tengan un día lleno de bendiciones, buena energía y sobre todo muchas ganas de crear. Estoy súper emocionada de compartir por primera vez dentro de esta comunidad y qué mejor manera de iniciar que con este lindo concurso como lo es el #MOONCONTEST.
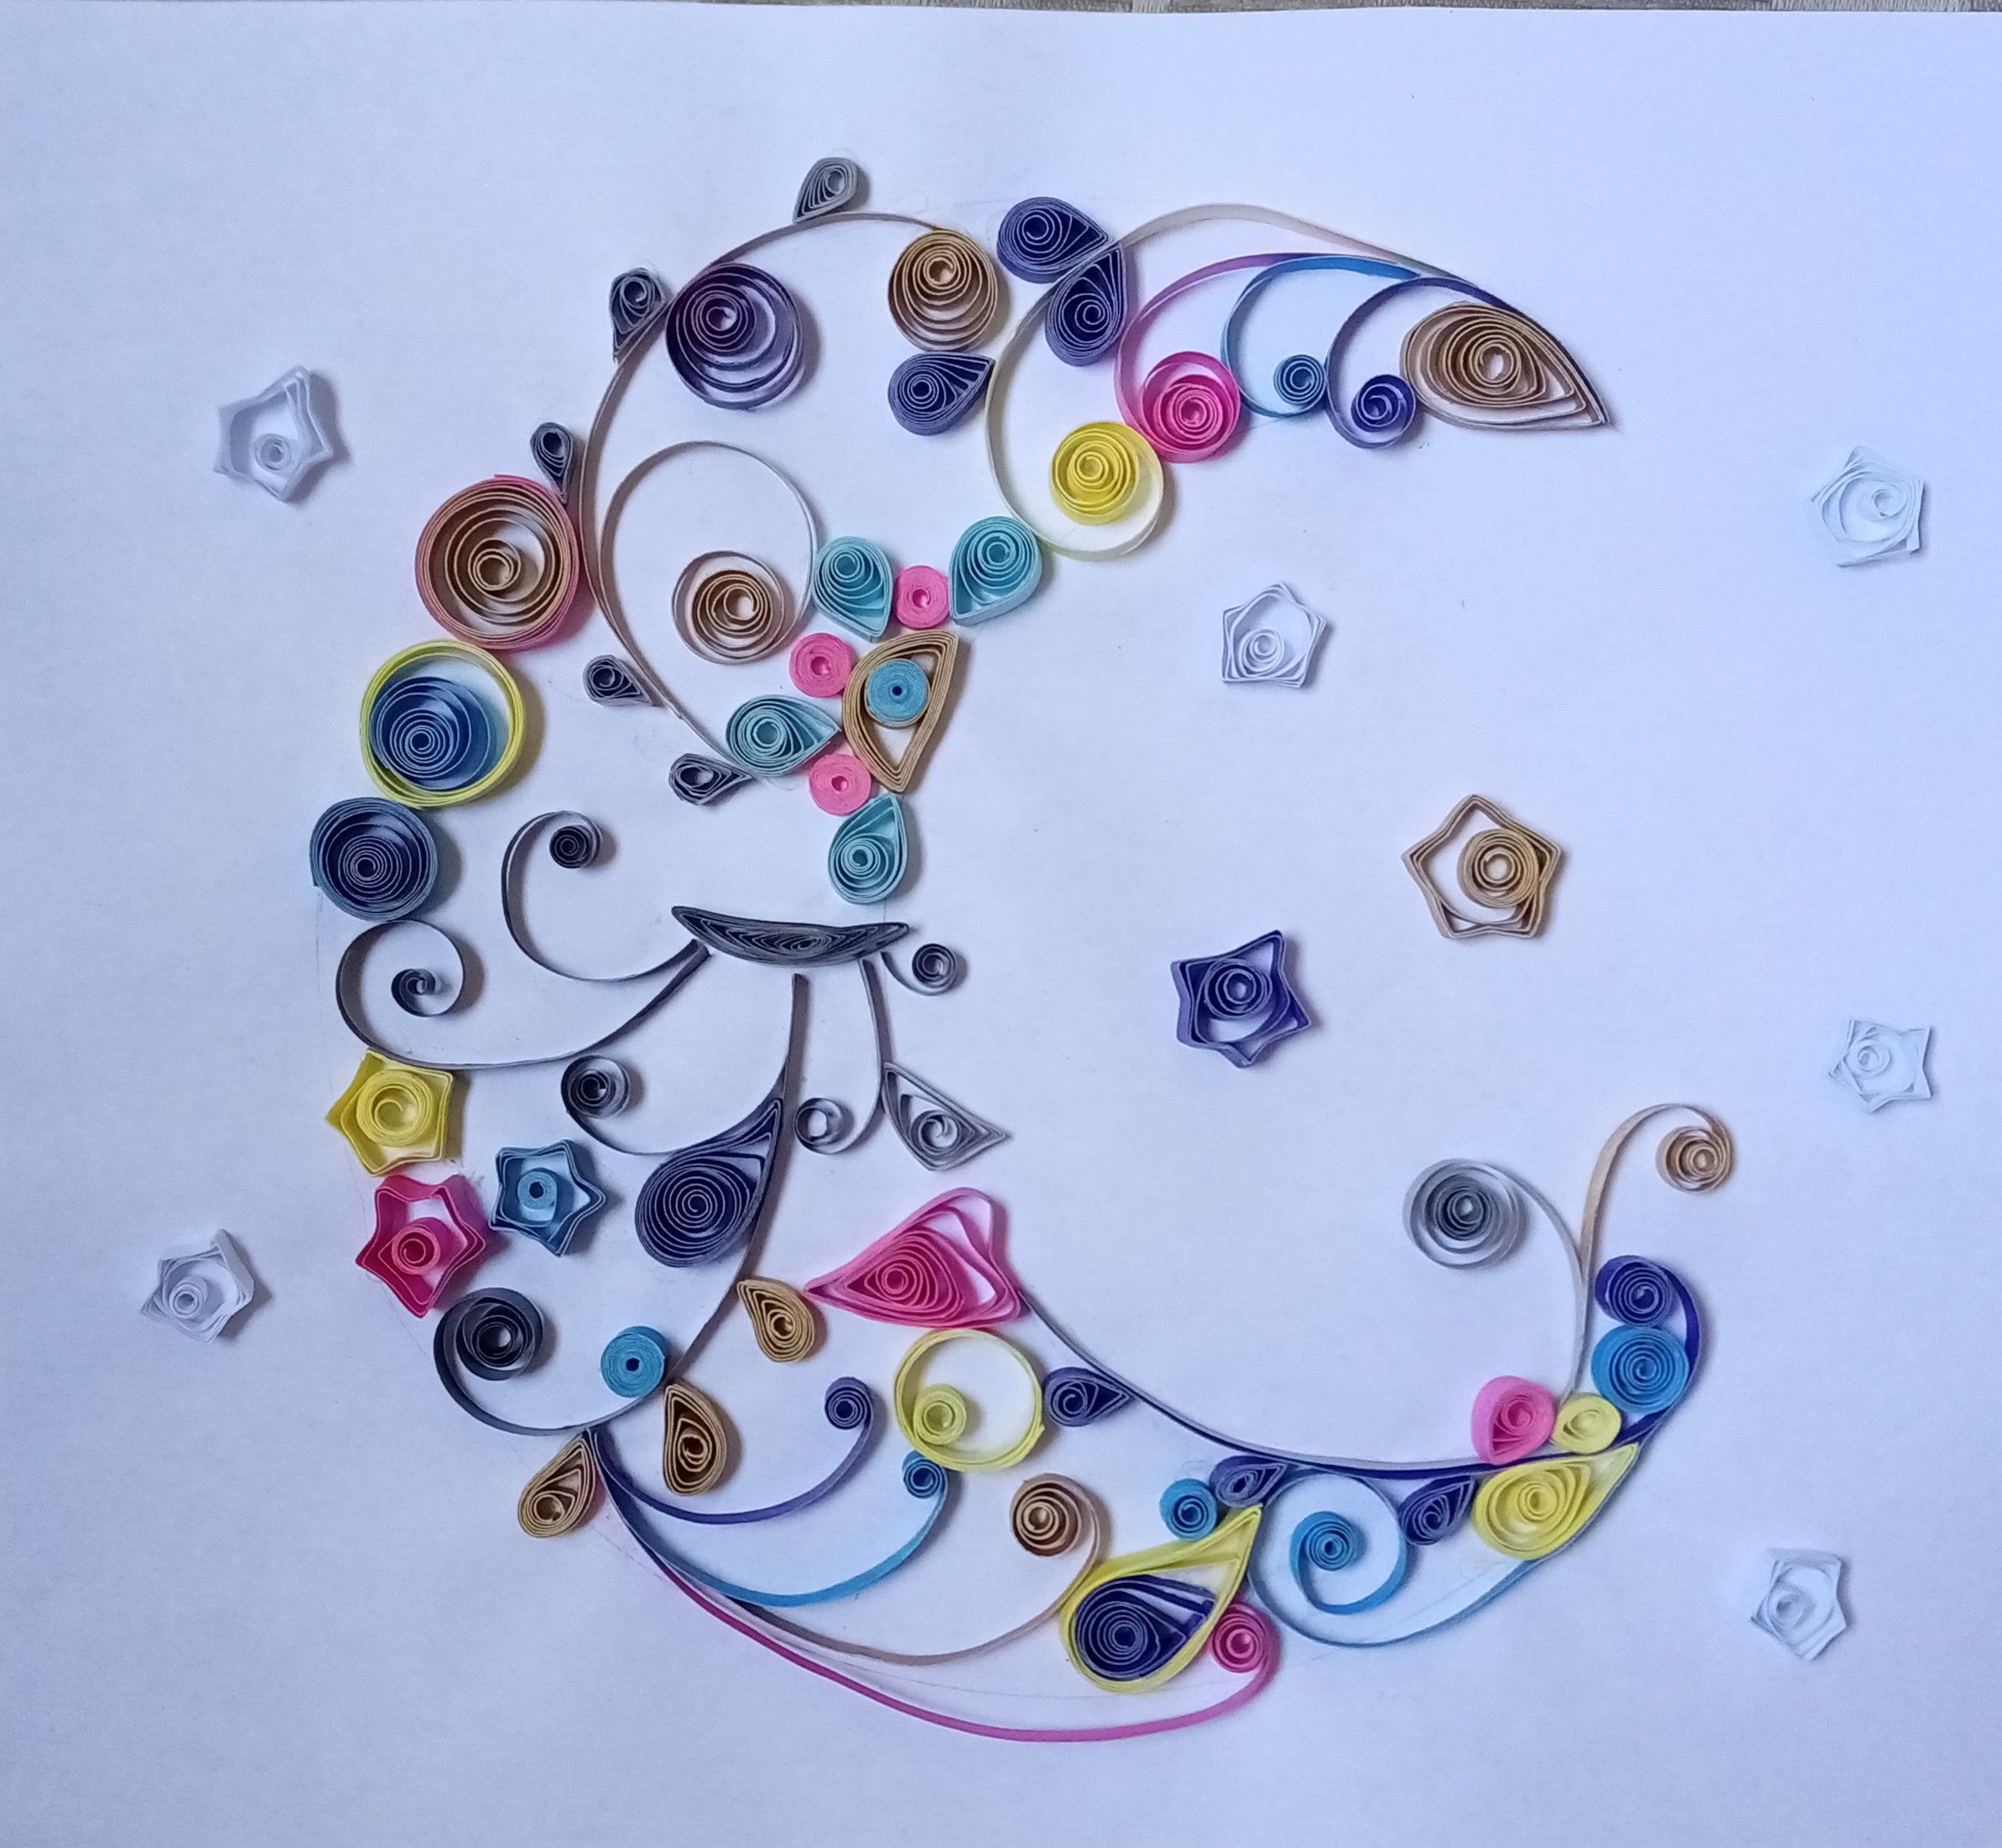
La luna es ese astro maravilloso lleno de luz que inevitablemente nos inspira a todos cuando la miramos en todas sus fases, hay tantas formas de representarla artísticamente y está vez yo elegí hacerlo con una hermosa composición en la técnica de filigrana.
Desde siempre me ha encantado este arte pero en realidad nunca me había dedicado a hacerlo y a investigar de qué se trata.
Básicamente la filigrana es el arte de enrollar finas tiras de papel para crear hermosos diseños decorativos. Es genial para la relajación y la creatividad.
Aclarado esto te muestro como realice mi composición de la luna.
Hello hello to all dear friends of hive, I hope you have a day full of blessings, good energy and above all a lot of desire to create. I am super excited to share for the first time in this community and what better way to start than with this beautiful contest as it is the #MOONCONTEST.
The moon is that wonderful star full of light that inevitably inspires us all when we look at it in all its phases, there are so many ways to represent it artistically and this time I chose to do it with a beautiful composition in the filigree technique.
I have always loved this art but I had never really dedicated myself to do it and investigate what it is all about.
Basically filigree is the art of rolling thin strips of paper to create beautiful decorative designs. It's great for relaxation and creativity.
That being cleared up I show you how I made my moon composition.
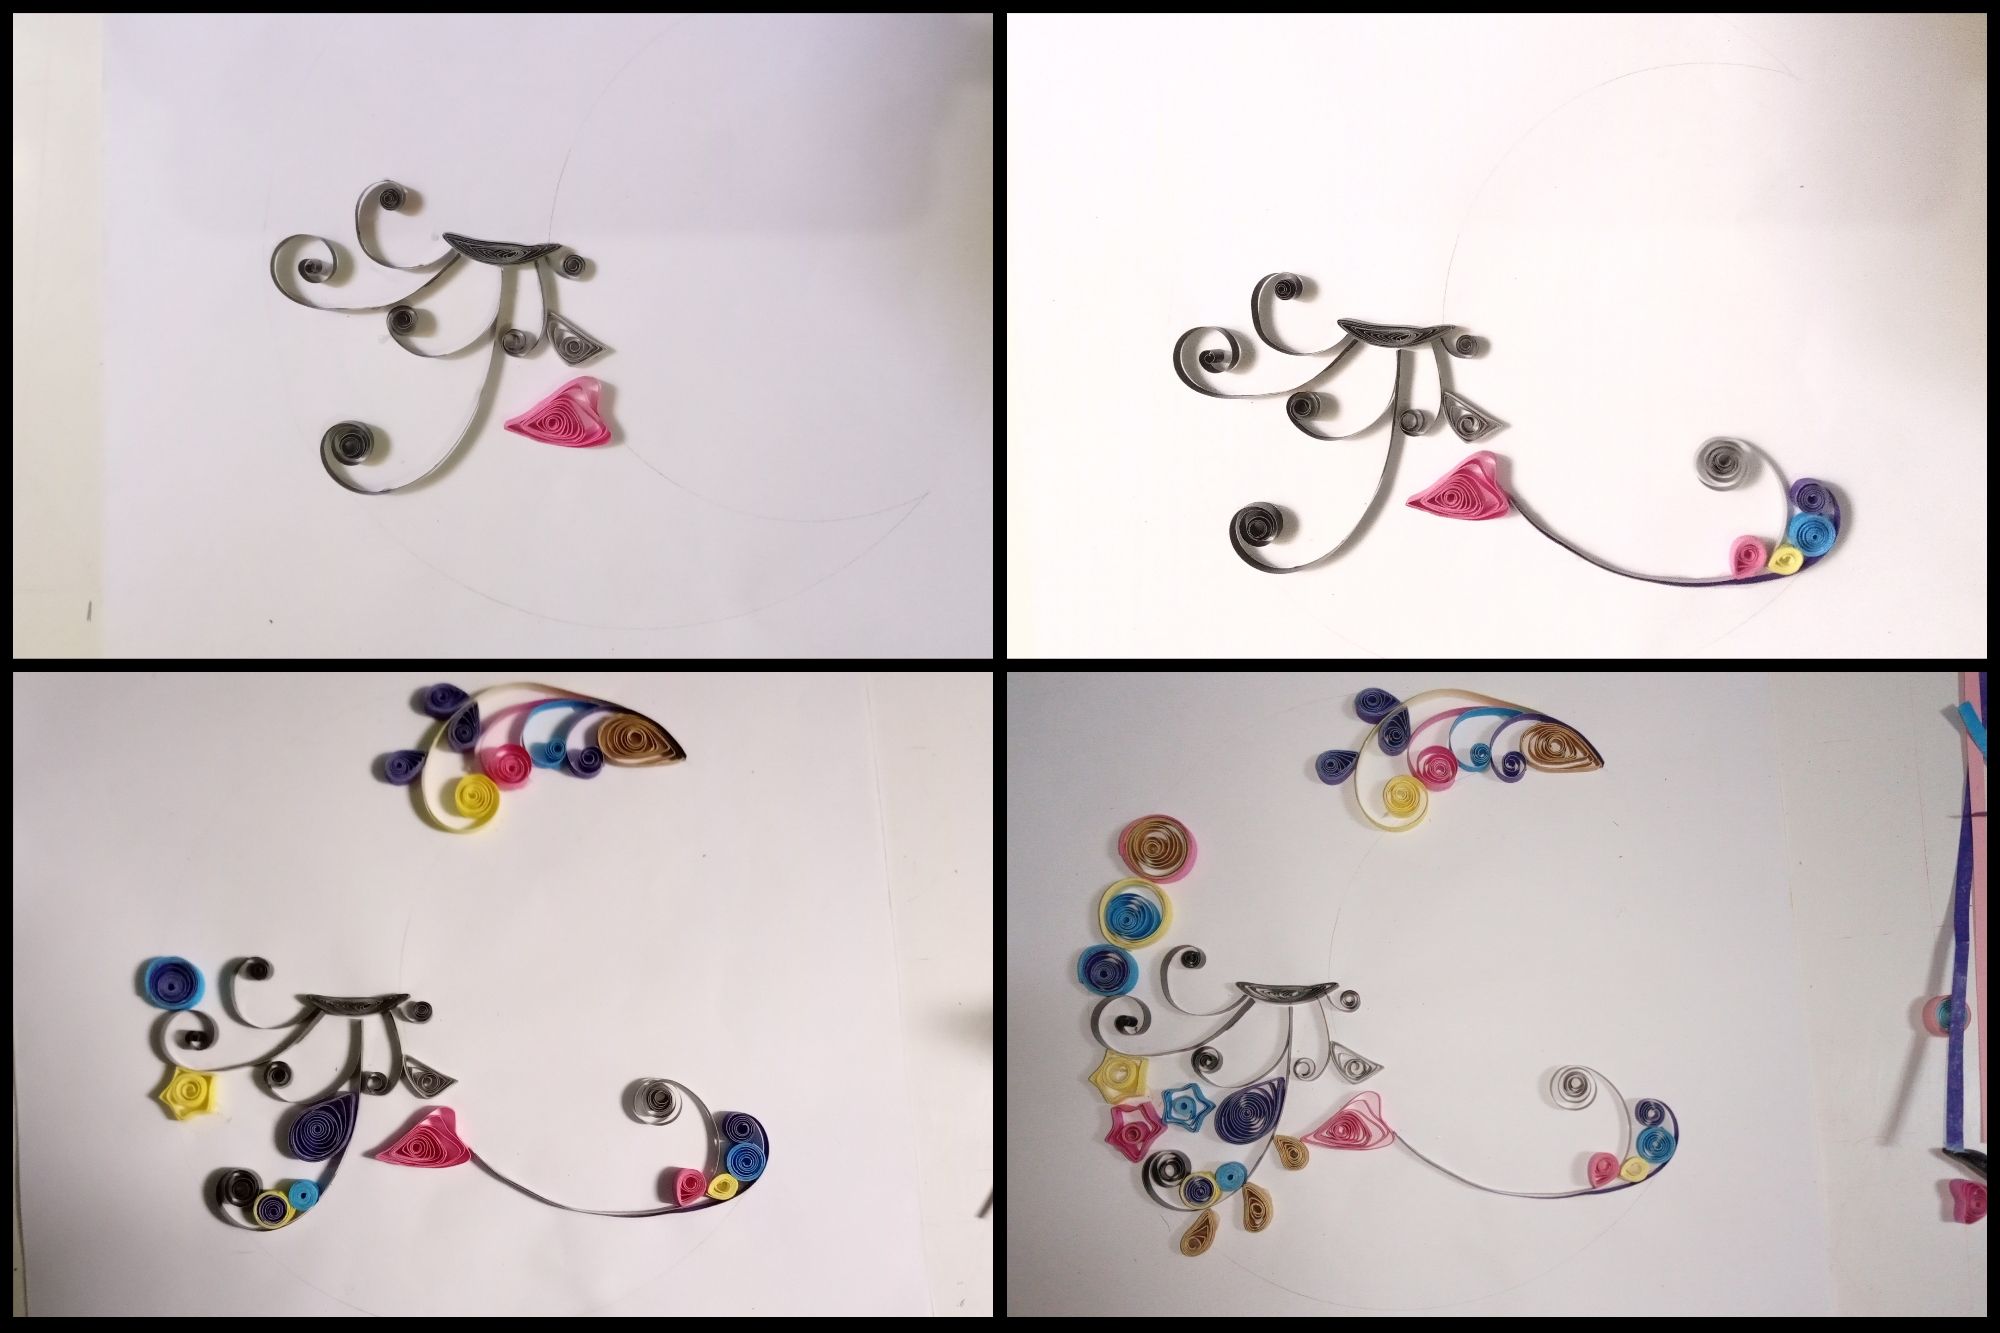
Lo primero que debemos hacer es dibujar en una hoja aparte la idea que queremos para nuestro diseño para no rayar la cartulina blanca base. Yo dibuje muy suave la forma de la luna en la cartulina base para guiarme.
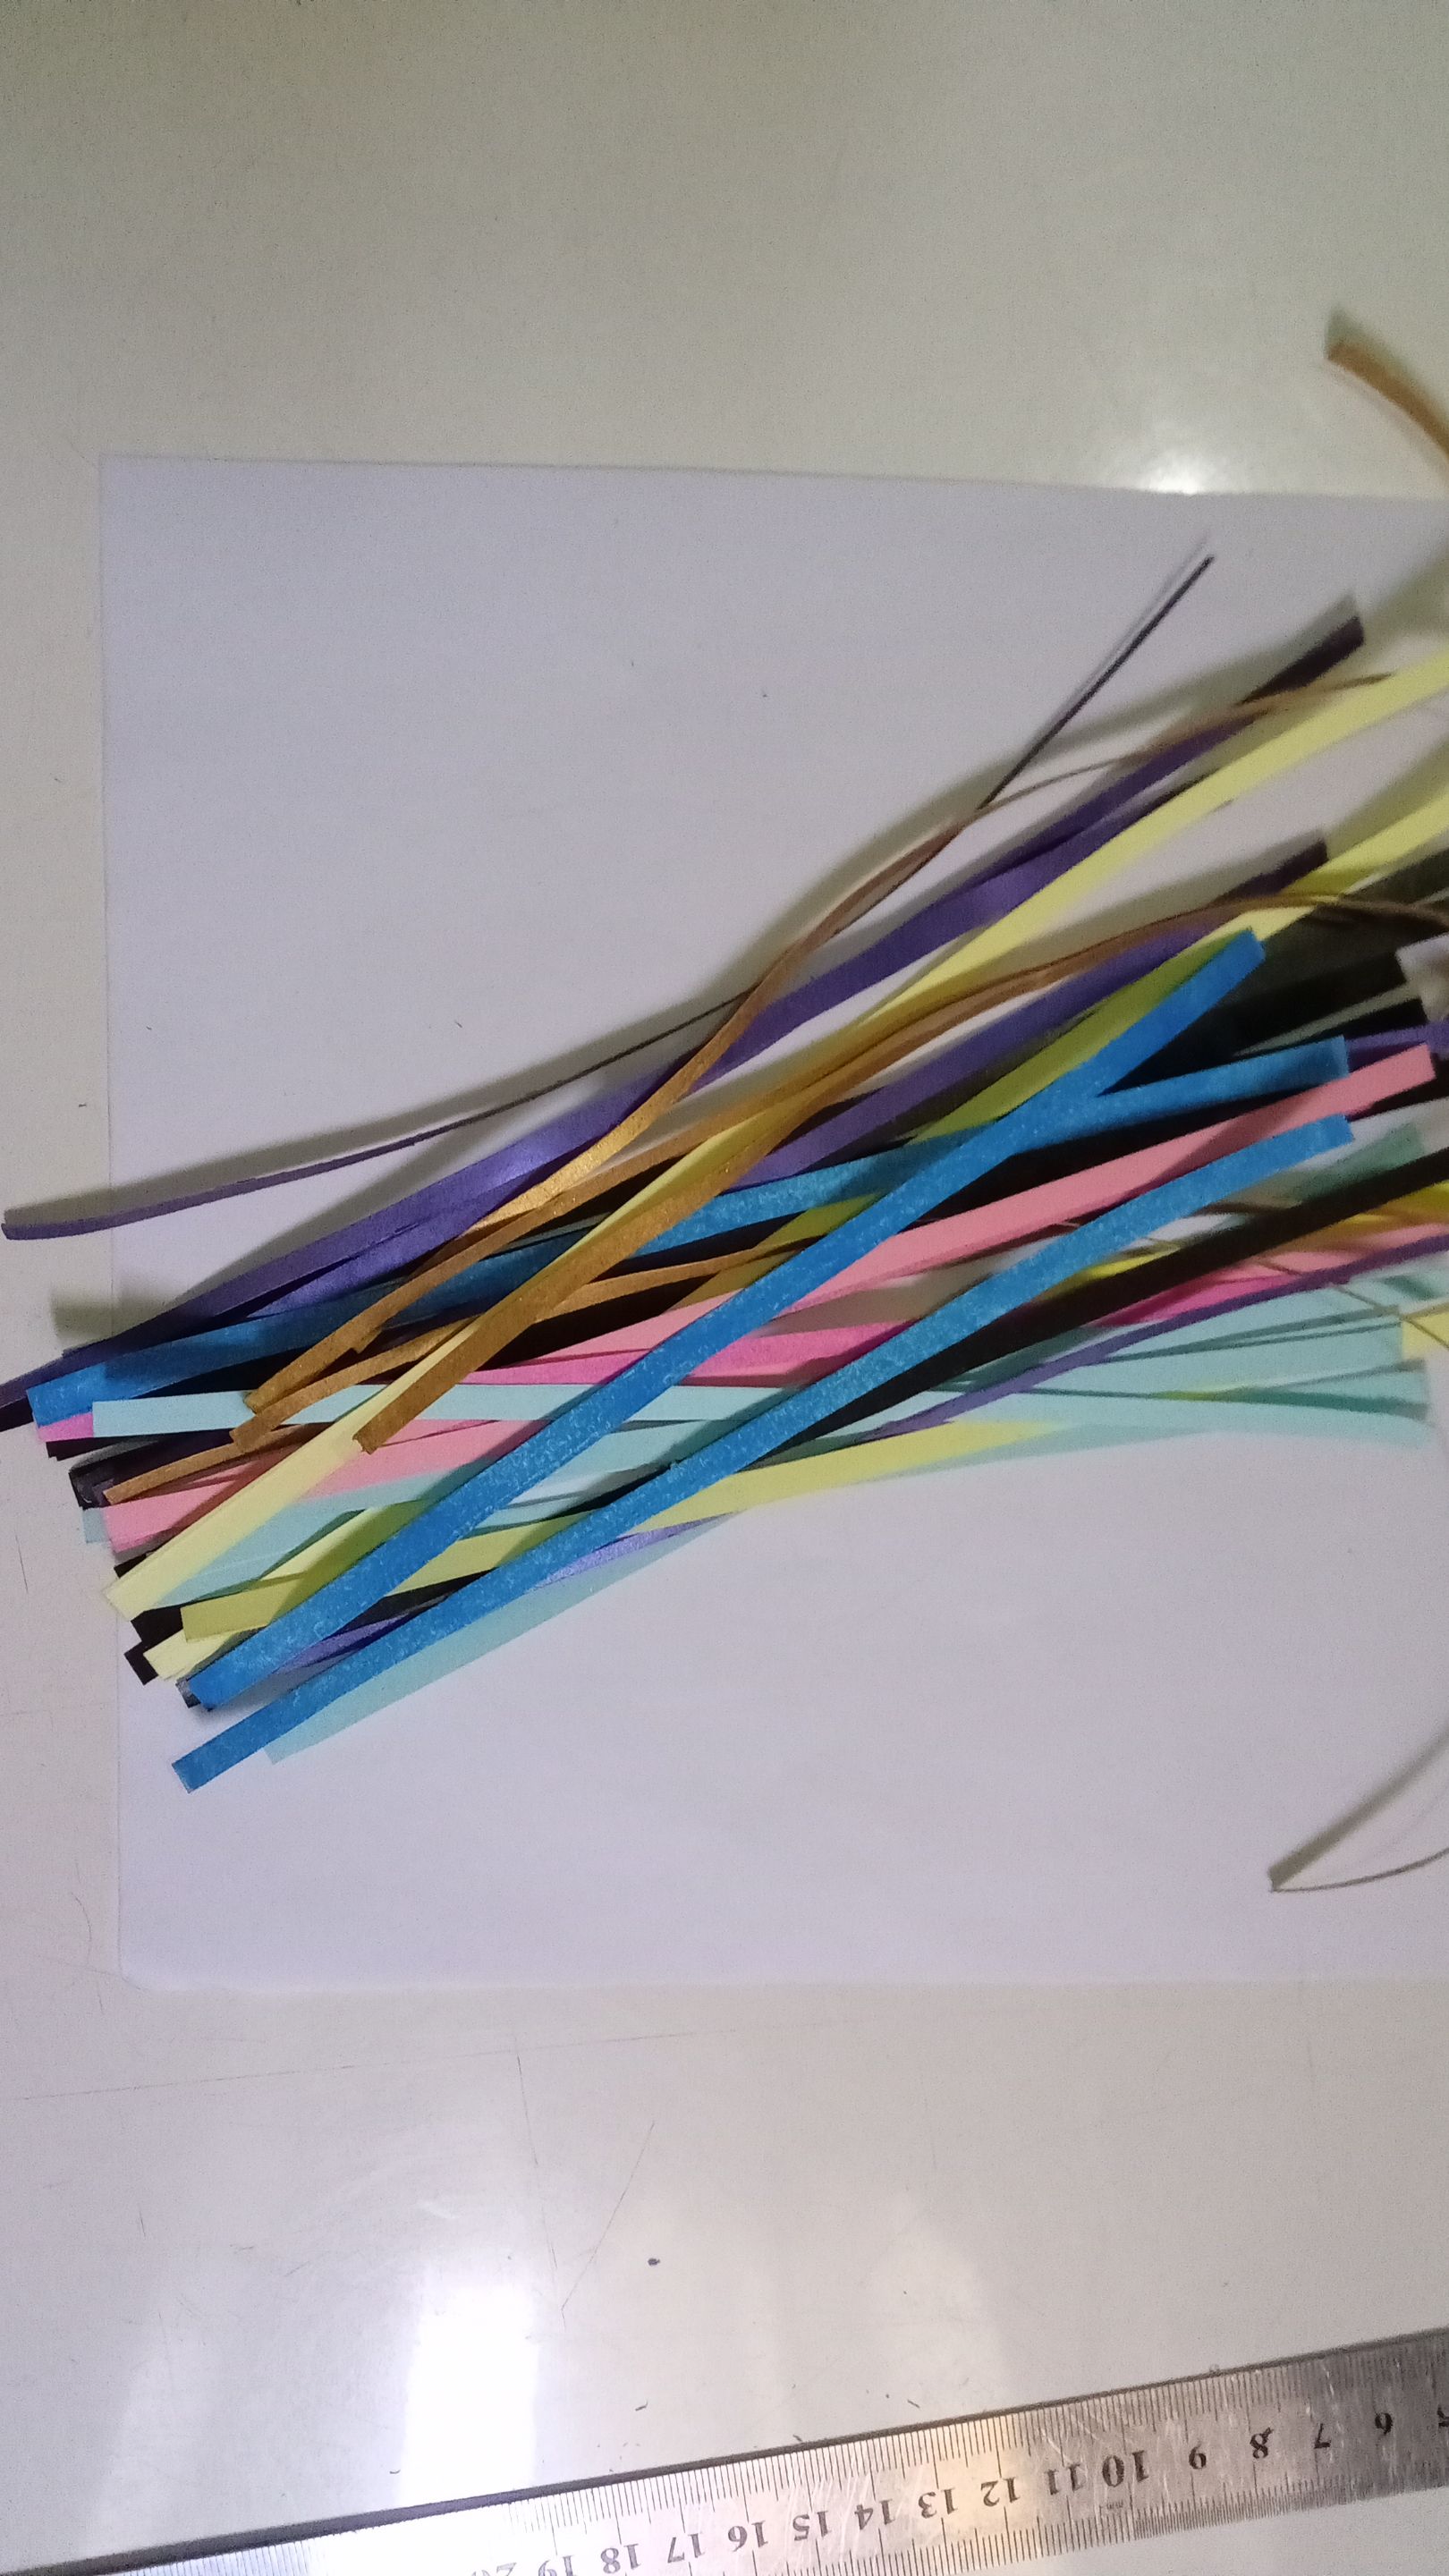
Luego cortamos en finas tiras nuestras cartulinas de colores, midiendo con la regla aproximadamente 5 mm o si prefieres un poco más delgadas.
The first thing to do is to draw on a separate sheet of paper the idea we want for our design so as not to scratch the white cardboard base. I drew very smoothly the shape of the moon on the base cardboard to guide me.
Then we cut our colored cardboard into thin strips, measuring with the ruler approximately 5 mm or if you prefer a little thinner.
Luego de tener la tiras de papel cortadas comenzamos con la parte divertida, enrollar el papel.
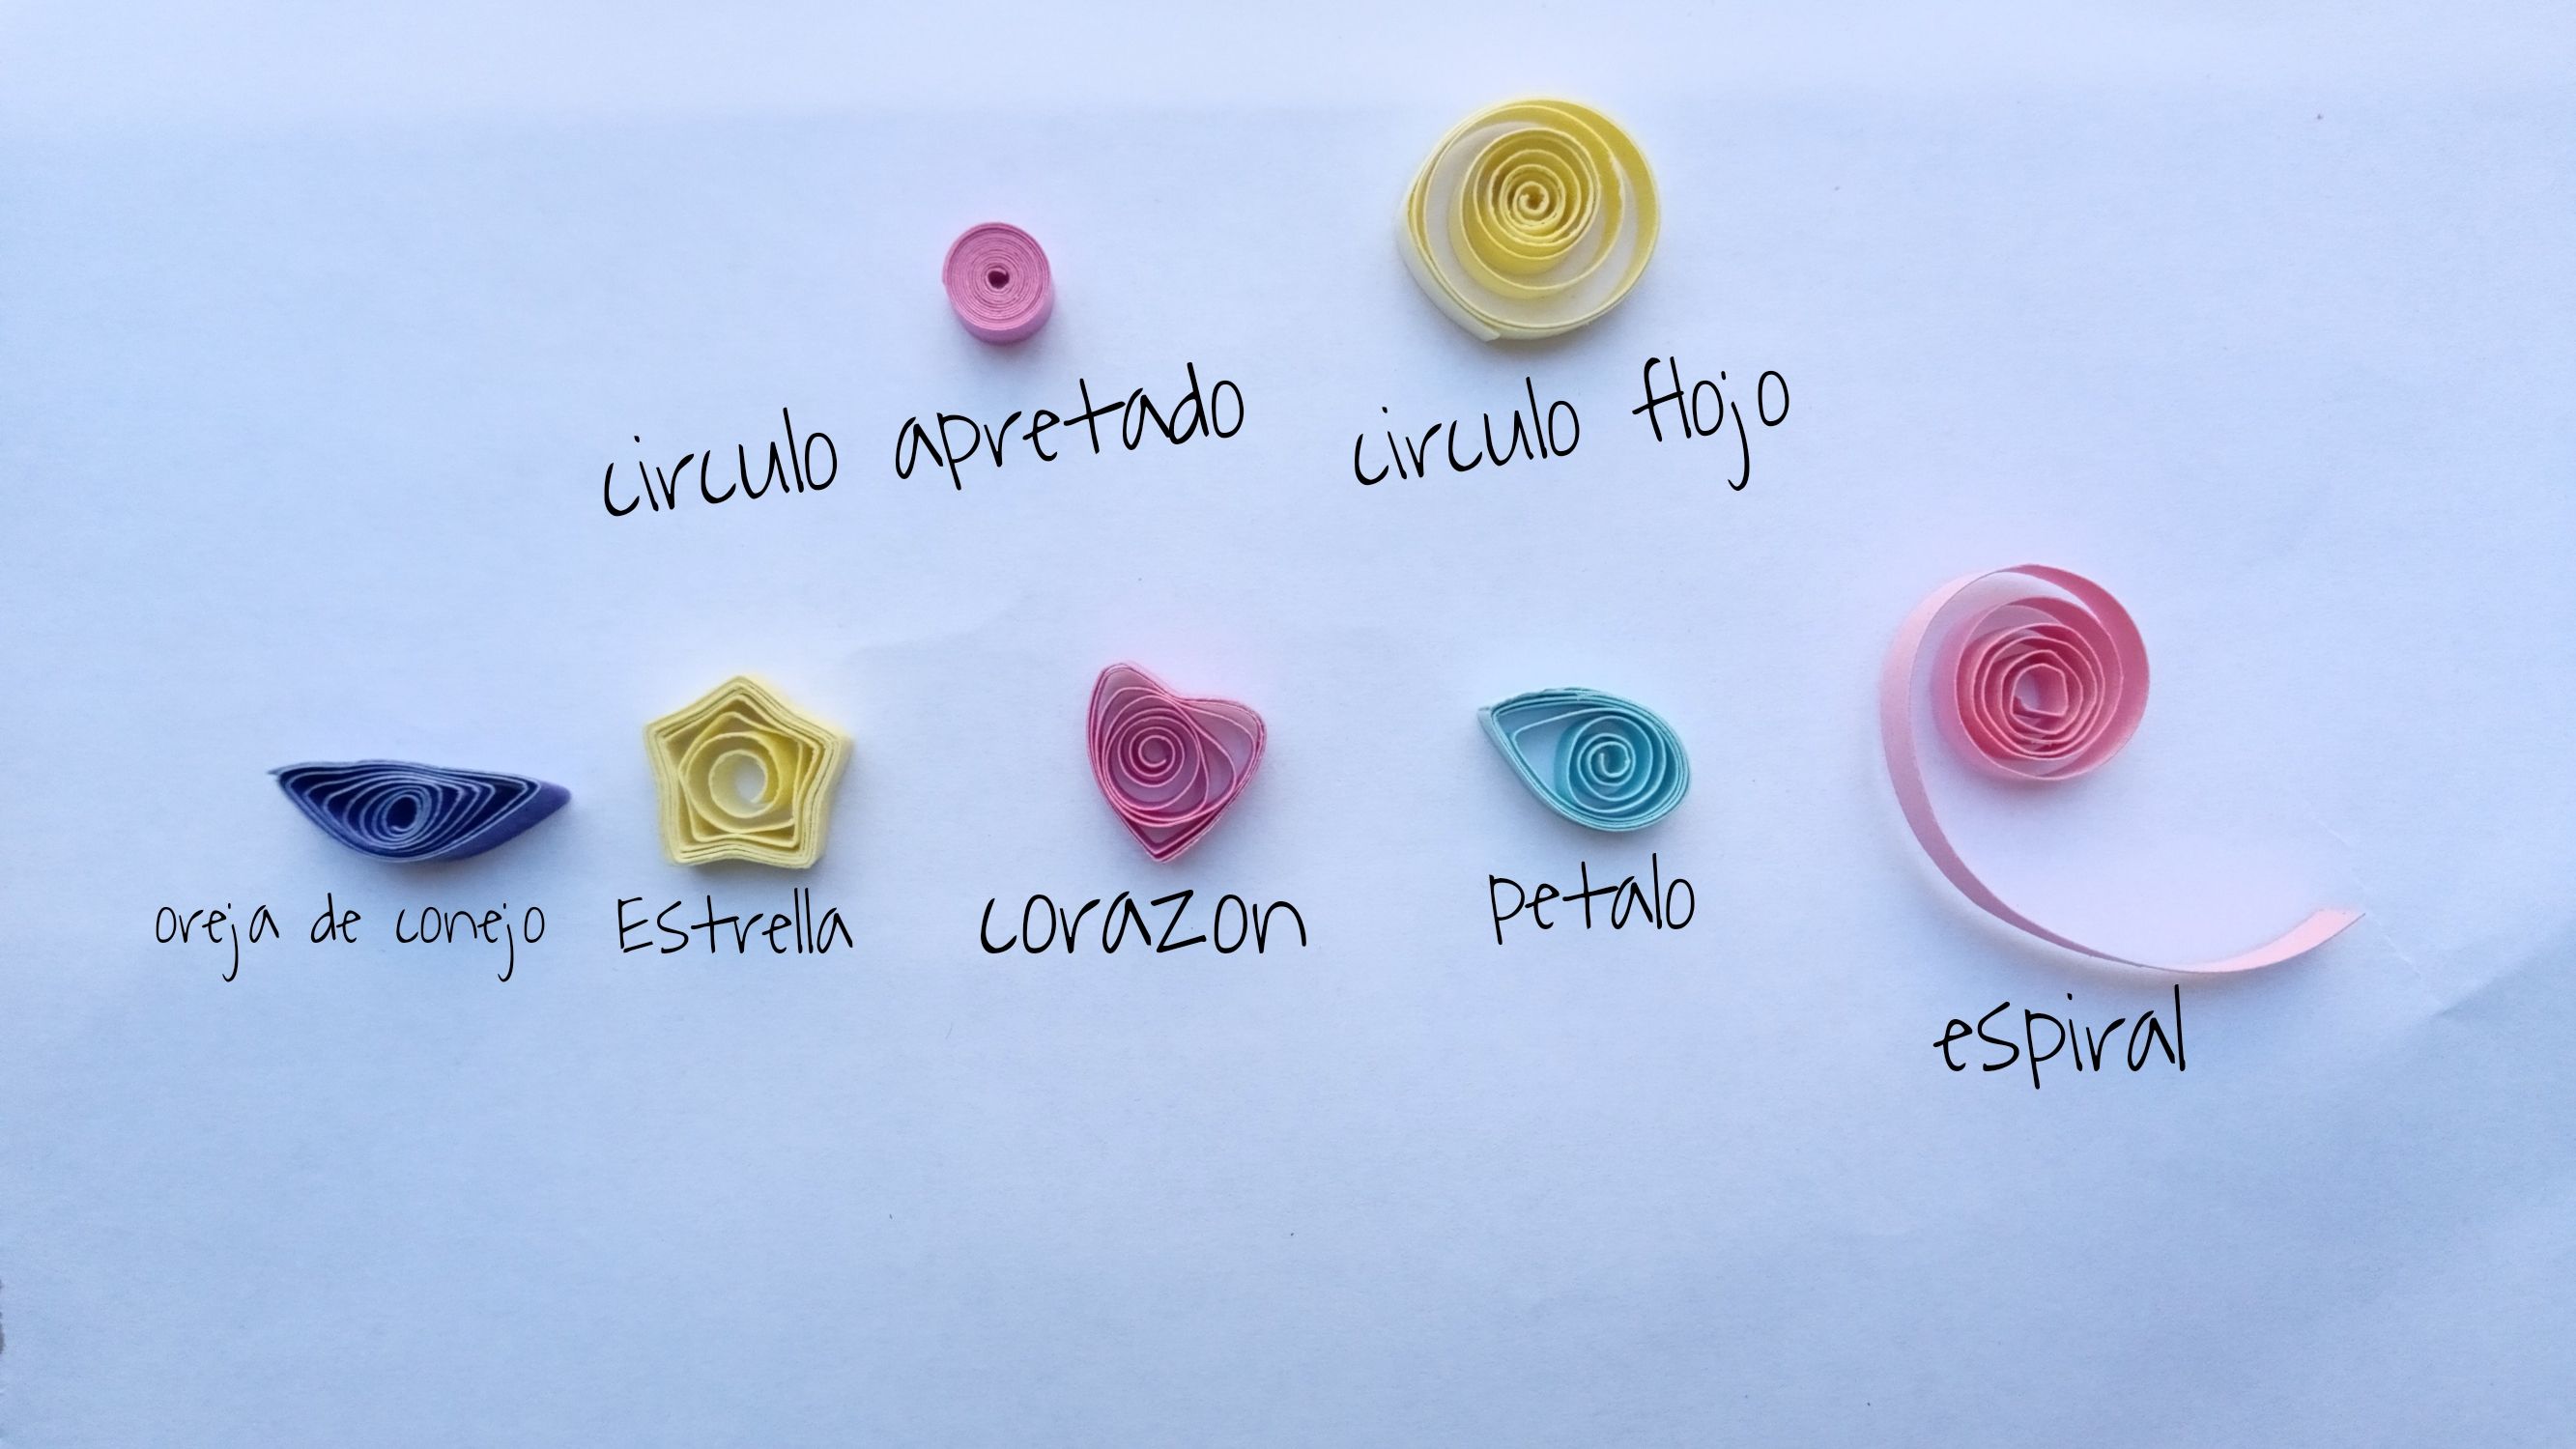
Utilizando el palito de altura, vamos enrollando poco a poco alrededor de éste hasta terminar con la tira, pegamos el borde si queremos un círculo apretado o soltamos un poco el rollito según el tamaño que necesitemos para hacer un círculo flojo que nos servirá para hacer las formas a continuación y luego pegamos el borde del papel.
After we have the paper strips cut we start with the fun part, rolling the paper.
Using the height stick, we roll little by little around it until we finish with the strip, we glue the edge if we want a tight circle or we loosen a little the roll according to the size we need to make a loose circle that will serve us to make the shapes below and then we glue the edge of the paper.
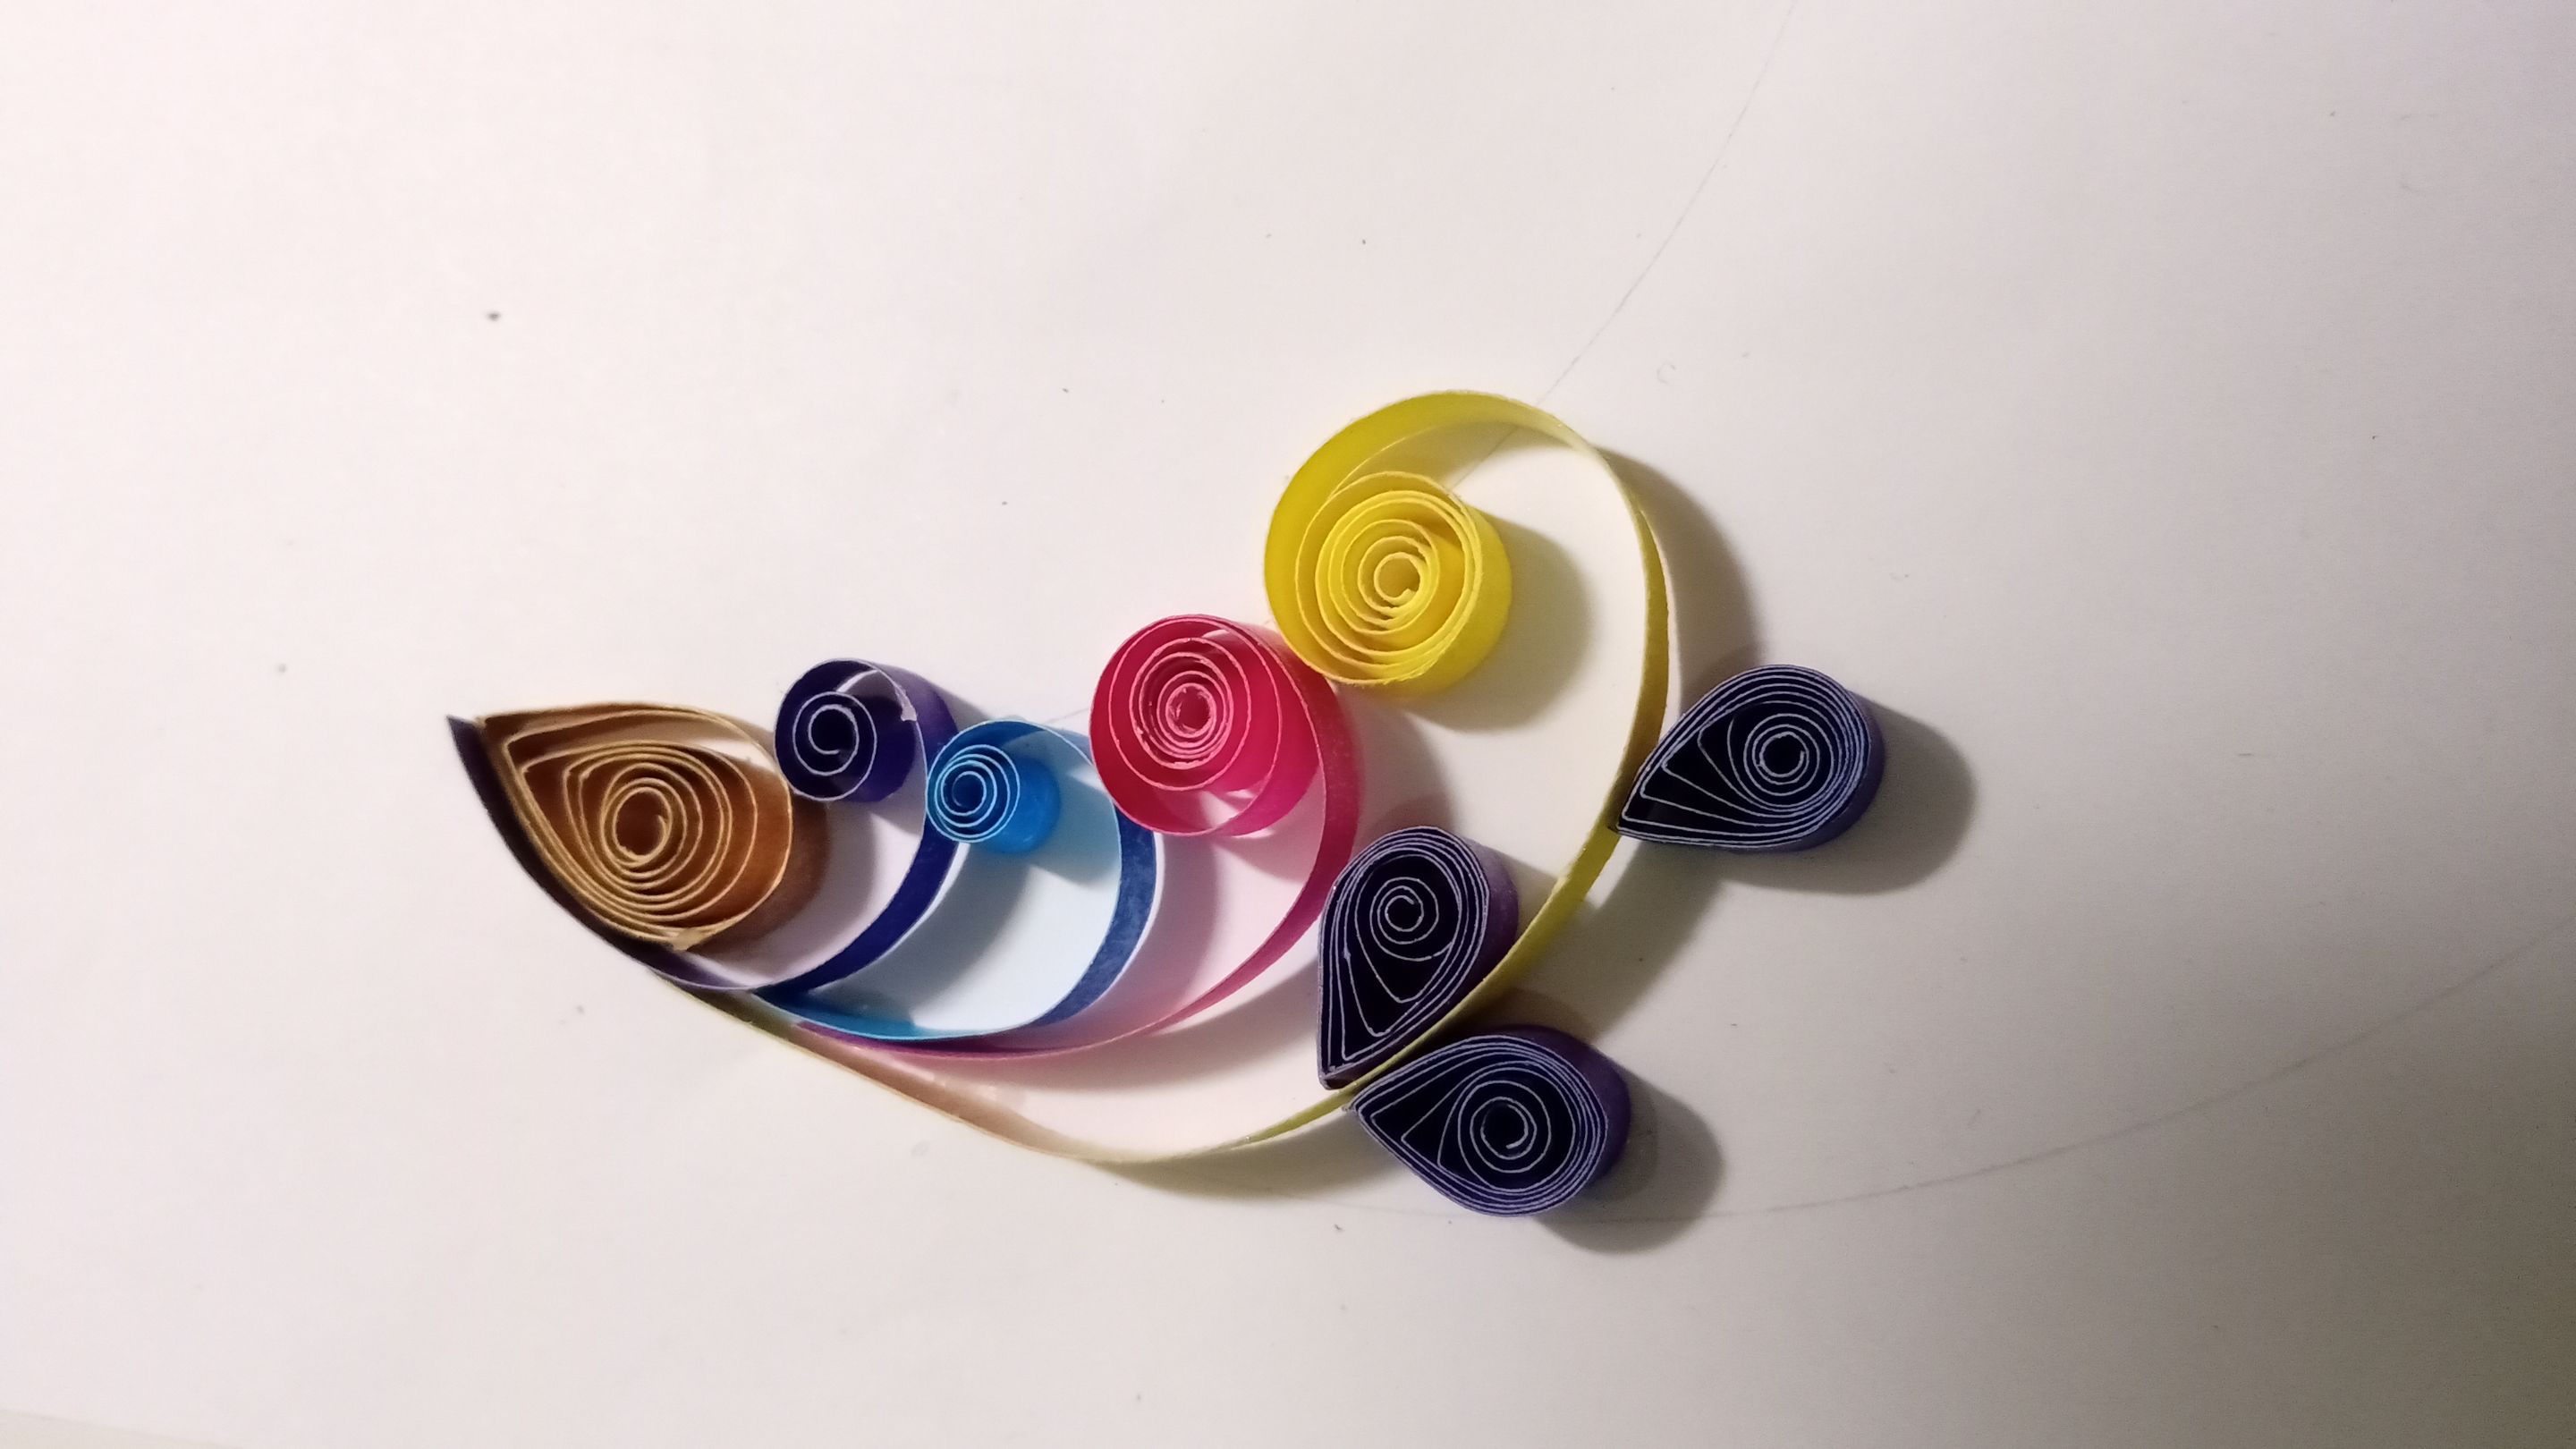
Teniendo ya varios rollitos de papel de los colores elegidos para nuestra decoración, procedemos a darles la forma con nuestros dedos como te muestro en mi vídeo, recordando siempre doblar los rollitos primero por la parte de la unión del papel, ( también podemos combinar los colores pegando los extremos de las tiras con dos colores diferentes y luego enrollar)
Las formas que yo utilice para mí decoración fueron, el pétalo, el corazón, la estrella y la oreja de conejo. También utilice círculos apretados y espirales, es decir que no se cierran aplicando pegamento como muestro en la imagen.
Having already several rolls of paper of the colors chosen for our decoration, we proceed to give them the shape with our fingers as I show you in my video, always remembering to fold the rolls first by the part of the junction of the paper, (we can also combine the colors by gluing the ends of the strips with two different colors and then roll up).
The shapes I used for my decoration were the petal, the heart, the star and the bunny ear. I also used tight circles and spirals, that is to say that they are not closed by applying glue as I show in the picture.
Mi consejo es tener la idea del diseño clara y así vamos manipulando cada pieza poco a poco dentro del trabajo, de esta manera podremos ir decidiendo de qué tamaño y forma queremos cada rollito de papel.
Para ir armando mí decoración comencé a pegar los primeros círculos de papel, aplicando un punto de pega en la parte más tupida del rollito y haciendo un poquito de presión sobre la cartulina base para que pegará bien, yo comencé haciendo la cara de la luna con la forma de oreja de conejo para el ojo y un corazón para la boca.
My advice is to have the idea of the design clear and so we manipulate each piece little by little within the work, this way we can decide what size and shape we want each roll of paper.
To start assembling my decoration I began to glue the first paper circles, applying a dot of glue in the thickest part of the roll and making a little pressure on the cardboard base so that it would stick well, I started making the face of the moon with the shape of a rabbit's ear for the eye and a heart for the mouth.
Es muy relajante y bonito ir completando poco a poco el diseño que queremos, agregándole colores y formas, a mí me encantó este trabajo, es la primera vez que lo hago así que si tú ya lo has hecho antes, me encantaría leer tu opinion.
It is very relaxing and nice to complete little by little the design we want, adding colors and shapes, I loved this work, it is the first time I do it so if you have done it before, I would love to read your opinion.
Thank you very much for reading my post and I hope it will be helpful for you.⭐
🌜✨
Todas las imágenes fueron tomadas con mi teléfono, editadas en PicsArt.
Video editado con la aplicación Youcut.
All images were taken with my phone, edited in PicsArt.
Video edited with the Youcut application.
Traducción/Translation: https://www.deepl.com/translator-mobile
Show more
Tags :
Woo!
This creator can upvote comments using 3speak's stake today because they are a top performing creator!
Leave a quality comment relating to their content and you could receive an upvote
worth at least a dollar.
Their limit for today is $0!
Their limit for today is $0!
pomboadri has no more videos yet.
More Videos

22 views
2 years ago
$

6 views
2 years ago
$
4 views
a year ago
$
13 views
a year ago
$

37 views
a year ago
$
0 views
a year ago
$

9 views
4 years ago
$
22 views
a year ago
$
12 views
4 months ago
$

3 views
4 years ago
$

52 views
3 years ago
$
2 views
a year ago
$
7 views
2 years ago
$

7 views
4 years ago
$

20 views
a year ago
$

¡Cazando Zombies y a Garrapata/Chiripa/Escorpión junto a mi Mo @ladyunicorn! | CoDM Gameplay [ES|EN]
10 views
a year ago
$
26 views
a year ago
$

4 views
a year ago
$

4 views
2 years ago
$

5 views
8 months ago
$
3 views
8 months ago
$

7 views
a year ago
$
9 views
a year ago
$
13 views
a year ago
$
Comments:
Reply:
To comment on this video please connect a HIVE account to your profile: Connect HIVE Account