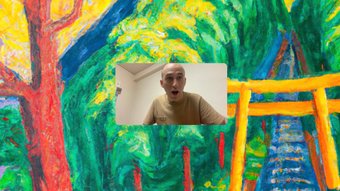
MY FIRST PHOTOGRAPHY EDITING OF THE YEAR AFTER SOME BREAK
3
About :

Before editing
It's been a while I did some photograph editing after the break I had last year so today I started been the first week of the year to resume my photography editing as I use to do before. So this picture is the one of a young boy wearing a native attire and the picture was taken in a small studio.
Coming back to my editing I made use of some mobile application for it and one of them is snap seed which I use to start my editing and I made use of the healing tools which is used to clear some spot on the skin and making it look neat also in the tool menu, I made use of the tune image which helps to add brightness, contrast, saturation, ambiance, and those I can't remember. So I use a portrait option to make the face focus and look clearer.
Then I move to AIRBRUSH app which I use to make the skin look brighter and make it shine more. I finally move it to LIGHTROOM because there was no much work on airbrush because the picture is clear. So I just made the final touch on lightroom just like Photoshop application.
Check through the video to see the steps in editing it.

After editing
Show more
Tags :
Woo!
This creator can upvote comments using 3speak's stake today because they are a top performing creator!
Leave a quality comment relating to their content and you could receive an upvote
worth at least a dollar.
Their limit for today is $0!
Their limit for today is $0!

4 views
2 years ago
$

5 views
9 months ago
$

16 views
4 months ago
$

3 views
a year ago
$

11 views
3 weeks ago
$
More Videos

31 views
a year ago
$

174 views
4 years ago
$

4 views
a year ago
$
8 views
10 months ago
$

2 views
9 months ago
$

6 views
6 days ago
$

12 views
5 months ago
$

9 views
a year ago
$

9 views
a year ago
$

70 views
4 years ago
$

3 views
11 months ago
$

29 views
a year ago
$

2 views
2 years ago
$

7 views
a year ago
$

0 views
4 years ago
$

5 views
a year ago
$

9 views
a year ago
$

1 views
a year ago
$
1 views
a year ago
$

5 views
2 years ago
$

3 views
4 years ago
$

8 views
2 years ago
$

2 views
2 years ago
$

4 views
2 years ago
$
Comments:
Reply:
To comment on this video please connect a HIVE account to your profile: Connect HIVE Account