(Esp/Eng) Ángel libre ❤️ Free angel - AV Design
27
About :

del silencio del universo,
alzándose entre las nubes,
entre las estrellas de colores,
un destello intermitente,
libera al ángel de sus ataduras,
la luz que lo ilumina lo hace libre,
le permite brillar en medio,
de la profunda oscuridad.
La danza del ángel libre.
In the midst of the darkness,
the silence of the universe,
rising among the clouds,
among the coloured stars,
an intermittent flash,
frees the angel from his bonds,
the light that illuminates him sets him free,
allows him to shine in the midst
of the deep darkness.
The dance of the free angel.
Buenos días, tardes o noches a toda la bella comunidad de @espavlog en HIVE.
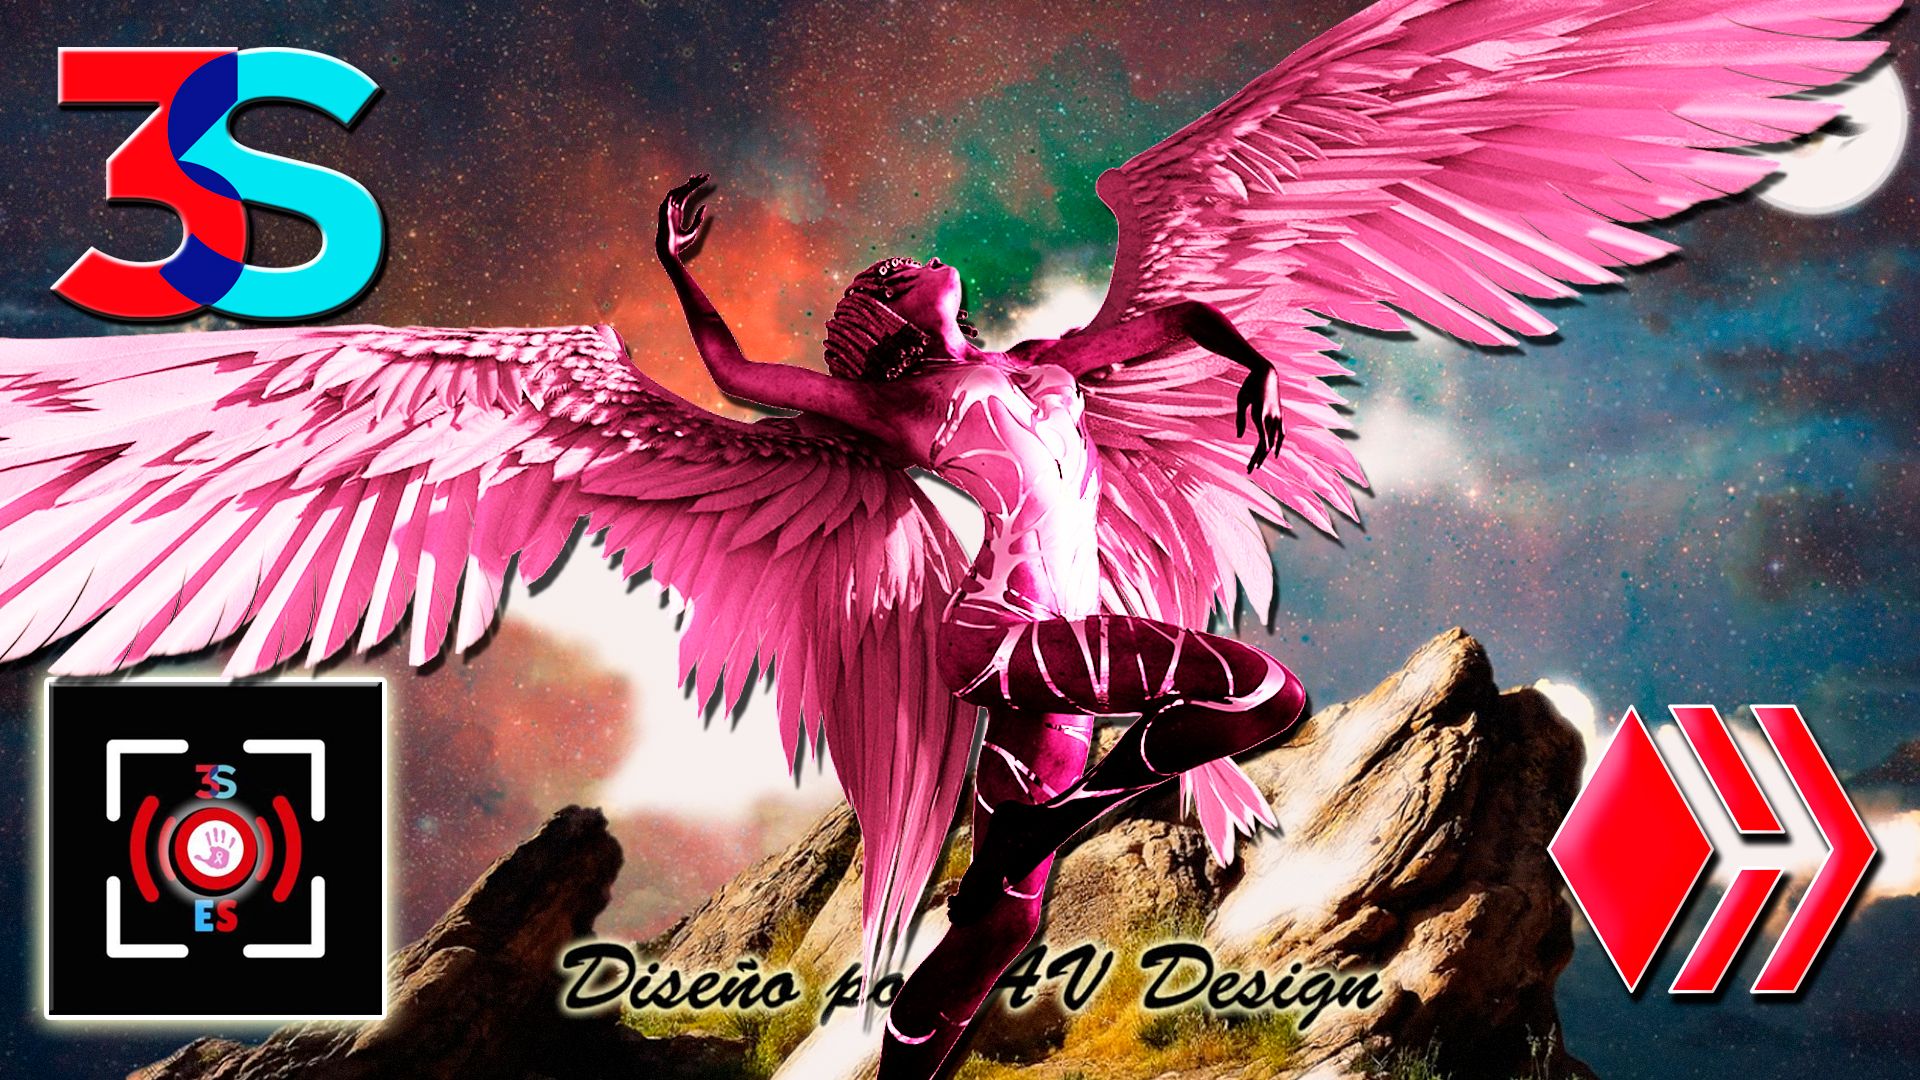
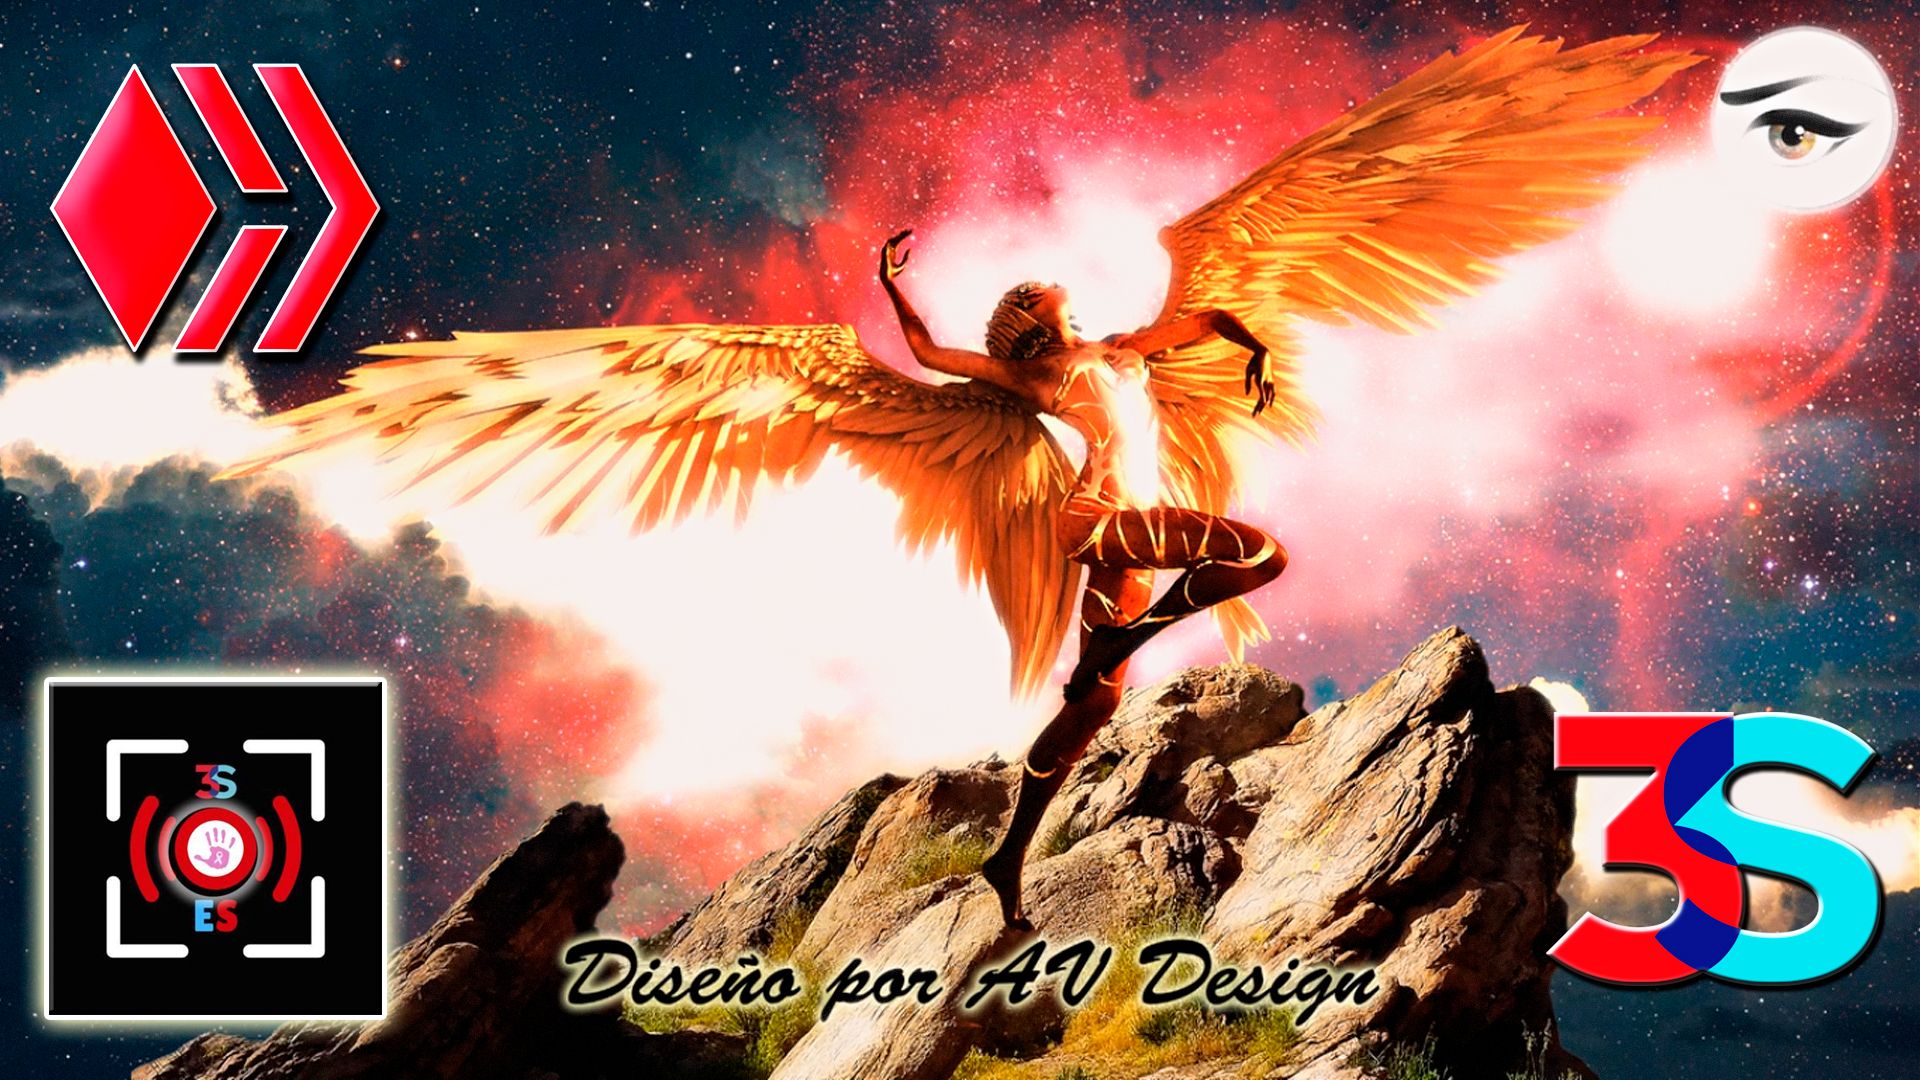
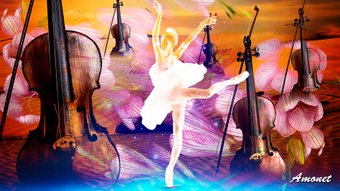
En esta oportunidad les traigo un diseño donde expreso que la luz que internamente hay en nosotros nos puede liberar y brillar en medio de todo lo que nos rodea.
Aunque haya momentos difíciles y oscuros, esa luz nos muestra el camino, el sendero a recorrer, a estar despiertos. Brillar con luz propia, esa energía que está en nuestro interior y nos impulsa a vivir y a volar más allá de lo inimaginable, danzando y sonriendo.
Los escritos que están debajo del diseño son siempre escritos por mí, inspirados en el diseño.
Good morning, afternoon or evening to all the beautiful community of @espavlog in HIVE.
This time I bring you a design where I express that the light within us can liberate us and shine in the midst of everything that surrounds us.
Although there are difficult and dark moments, that light shows us the way, the path to follow, to be awake. To shine with our own light, that energy that is within us and drives us to live and fly beyond the unimaginable, dancing and smiling.
The writings below the design are always written by me, inspired by the design.
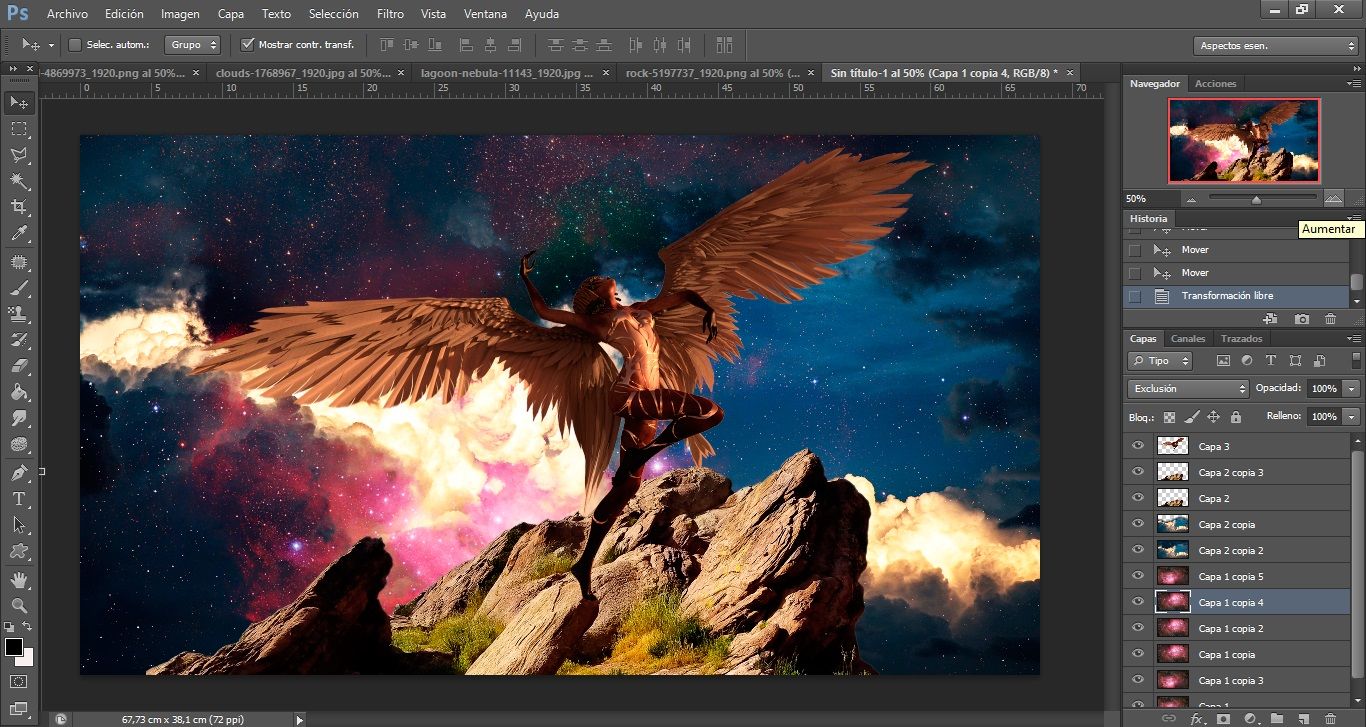

Proceso del diseño:
Está realizado y editado en Photoshop con 4 imágenes y 14 capas.
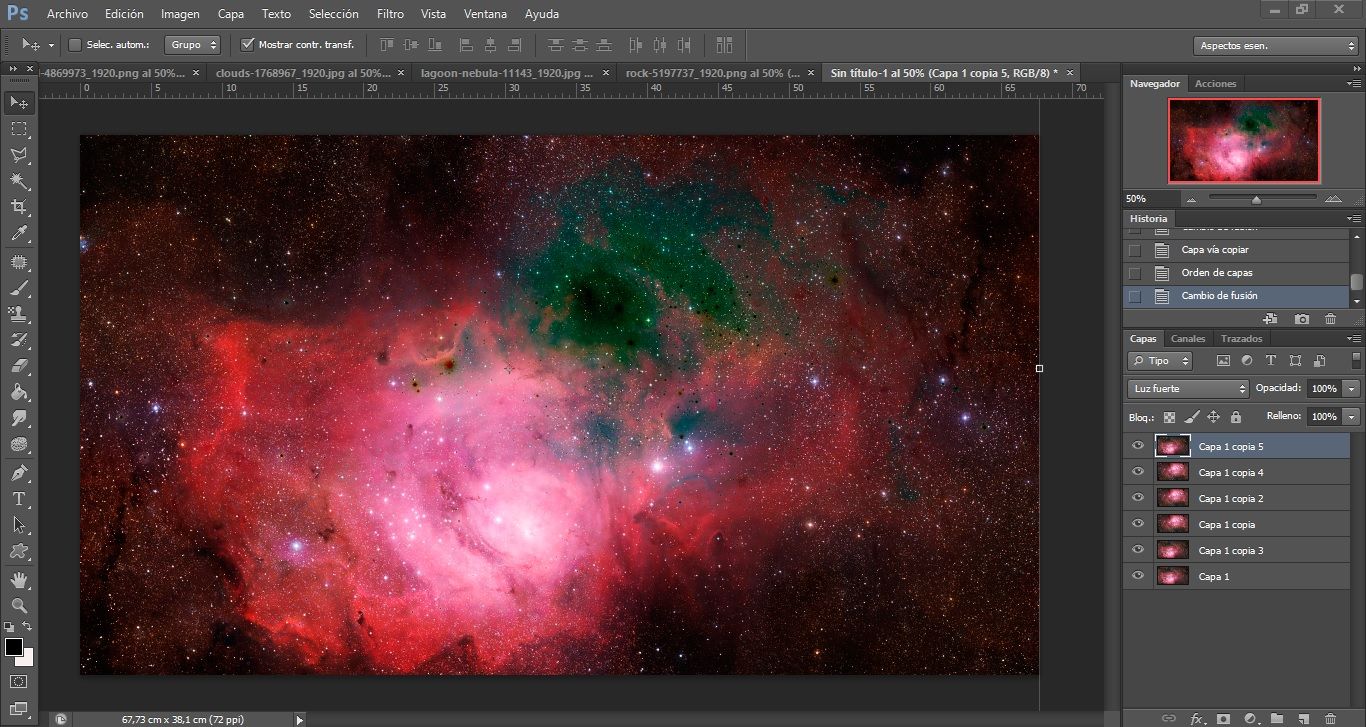
Seleccione una imagen de universo para el fondo, la cual la duplique y en total hice 7 capas de la misma imagen. Algunas las rote, les cambie la iluminación, y los modos de fusión. Utilice en orden: Normal, exclusión, luz focal, luz fuerte, exclusión, luz fuerte y luz fuerte con un destello creado con filtros (filtros, interpretar, destello). Esta cantidad de capas con estos modos hace que cambien los colores y los realce. Luego en la animación se intercalan las capas dando la sensación de movimiento.
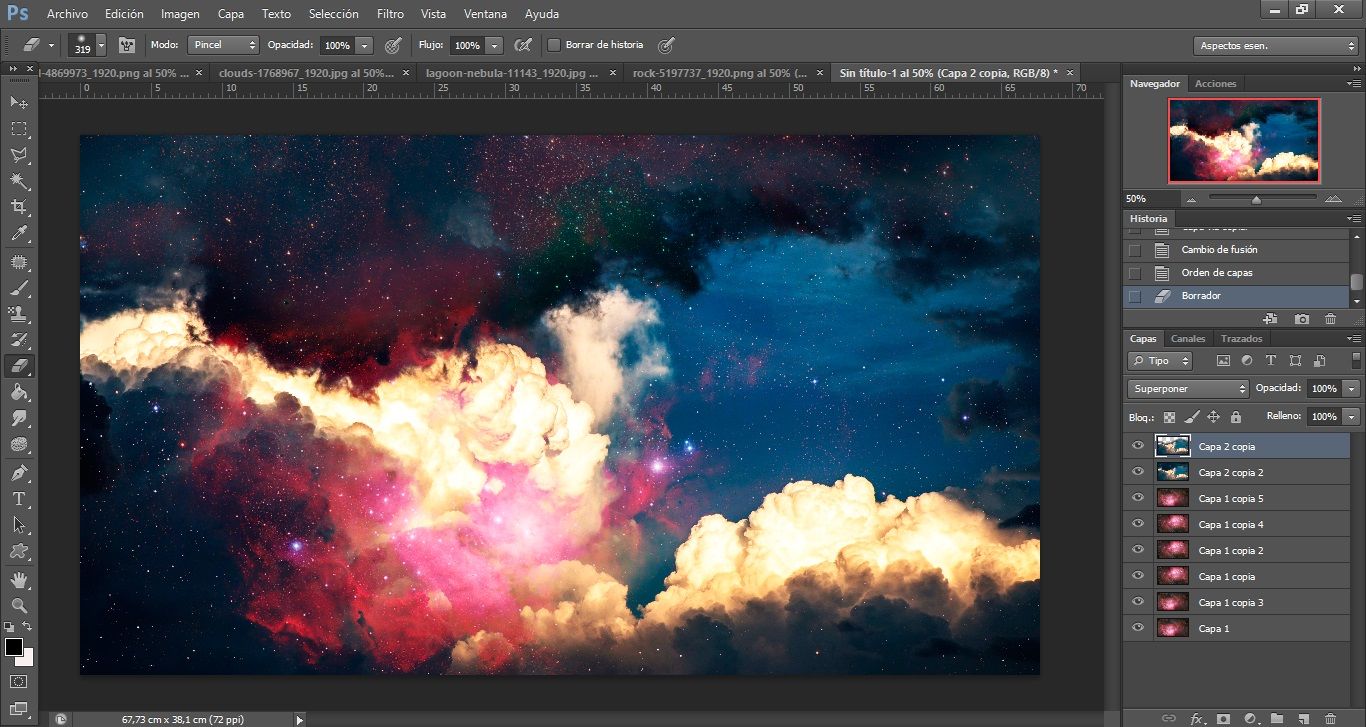
Luego coloque la imagen de las nubes, la primera (siempre comenzando desde abajo) con modo de fusión aclarar y la segunda con superponer, borrando un poco la parte superior porque quedaba muy oscura.
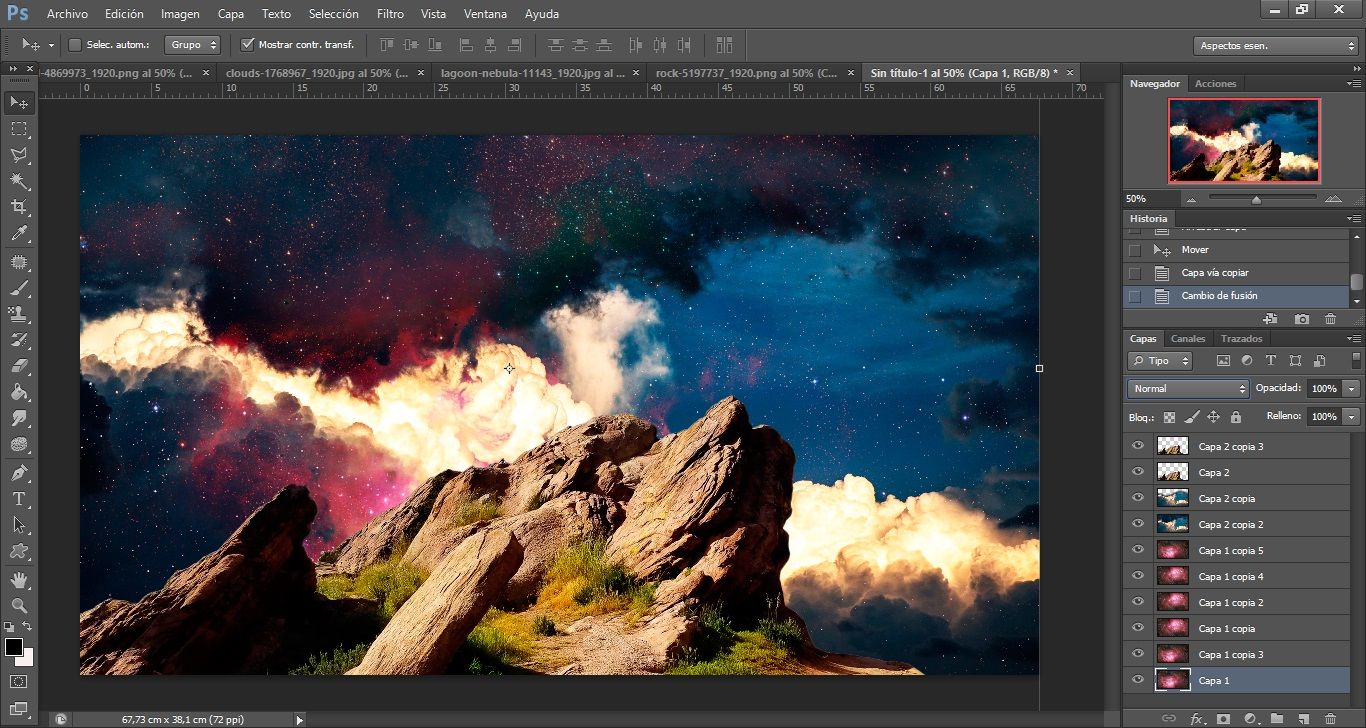
La tercera imagen que utilice fue la de las rocas, es una imagen PNG, eso significa que tiene fondo transparente lo que ahorra el tema de borrar el fondo para sólo utilizar la piedra.
De ella hice dos capas una normal y otra con modo suave que realza el color.
La cuarta imagen es la del ángel al cual le borre la roca que traía. Y de ella hice 3 capas. Los modos de fusión que utilice fueron en orden: Normal, luz suave y trama.
La animación la realice totalmente en After Effects, utilizando efectos de luces y trabajando las imágenes en su opacidad, eso hace que aparezca o desaparezca una determinada capa y dando la sensación de movimiento.
Esperando sea de su agrado la obra que he realizado y siempre muy agradecida, les envío un gran saludo a todos y cada uno de los que conforman esta hermosa comunidad.
Gracias por leer y mirar mi trabajo.
Amonet - AV Design
Design process:
It is made and edited in Photoshop with 4 images and 14 layers.
I selected a universe image for the background, which I duplicated and made a total of 7 layers of the same image. I rotated some of them, changed the lighting, and the blending modes. I used in order: Normal, exclusion, focal light, strong light, exclusion, strong light, strong light and strong light with a flare created with filters (filters, interpret, flare). This number of layers with these modes changes the colours and enhances them. Then in the animation the layers are interspersed giving the feeling of movement.
Then I placed the image of the clouds, the first one (always starting from the bottom) with blending mode lighten and the second one with overlay, erasing a bit the upper part because it was too dark.
The third image I used was the one of the rocks, it is a PNG image, that means that it has a transparent background which saves the issue of erasing the background to only use the stone.
From it I made two layers, one normal and one with soft mode that enhances the colour.
The fourth image is the one of the angel and I erased the rock he was carrying. And from it I made 3 layers. The blending modes I used were in order: Normal, soft light and raster.
The animation was made totally in After Effects, using light effects and working the images in their opacity, that makes a certain layer appear or disappear and giving the sensation of movement.
Hoping you like the work I have done and always very grateful, I send a big greeting to each and every one of you who make up this beautiful community.
Thank you for reading and watching my work.
Amonet - AV Design
Diseño realizado en Photoshop CS6 - Design made in Photoshop CS6
Separadores creados por mí en Photoshop - Separators created by me in Photoshop
Animación en After Effect - Animation in After Effect
Traductor utilizado Deepl.com versión gratuita - Used translator Deepl.com free version
Show more
Tags :
Woo!
This creator can upvote comments using 3speak's stake today because they are a top performing creator!
Leave a quality comment relating to their content and you could receive an upvote
worth at least a dollar.
Their limit for today is $0!
Their limit for today is $0!

44 views
a year ago
$

39 views
a year ago
$
14 views
a year ago
$
24 views
6 months ago
$
37 views
5 months ago
$
More Videos
10 views
3 years ago
$

12 views
a year ago
$
8 views
4 years ago
$
4 views
a year ago
$
Invitation to the Freestyle event in Guarenas FlowInvitación al evento de Freestyle en Guarenas Flow
4 views
a year ago
$

4 views
9 months ago
$
2 views
2 years ago
$
29 views
a year ago
$

2 views
a year ago
$

7 views
3 years ago
$
5 views
3 years ago
$

3 views
8 months ago
$

1 views
3 years ago
$
18 views
a year ago
$
7 views
a month ago
$
15 views
2 years ago
$
11 views
a year ago
$
12 views
a year ago
$
1 views
2 years ago
$
25 views
2 years ago
$

6 views
a year ago
$

8 views
7 months ago
$
11 views
a month ago
$
Comments:
Reply:
To comment on this video please connect a HIVE account to your profile: Connect HIVE Account