[ESP-ENG] 🌿💖🌿 HERMOSO PORTA RETRATO CONCARTON DE RECICLAJE. 🌿💖🌿
0
About :
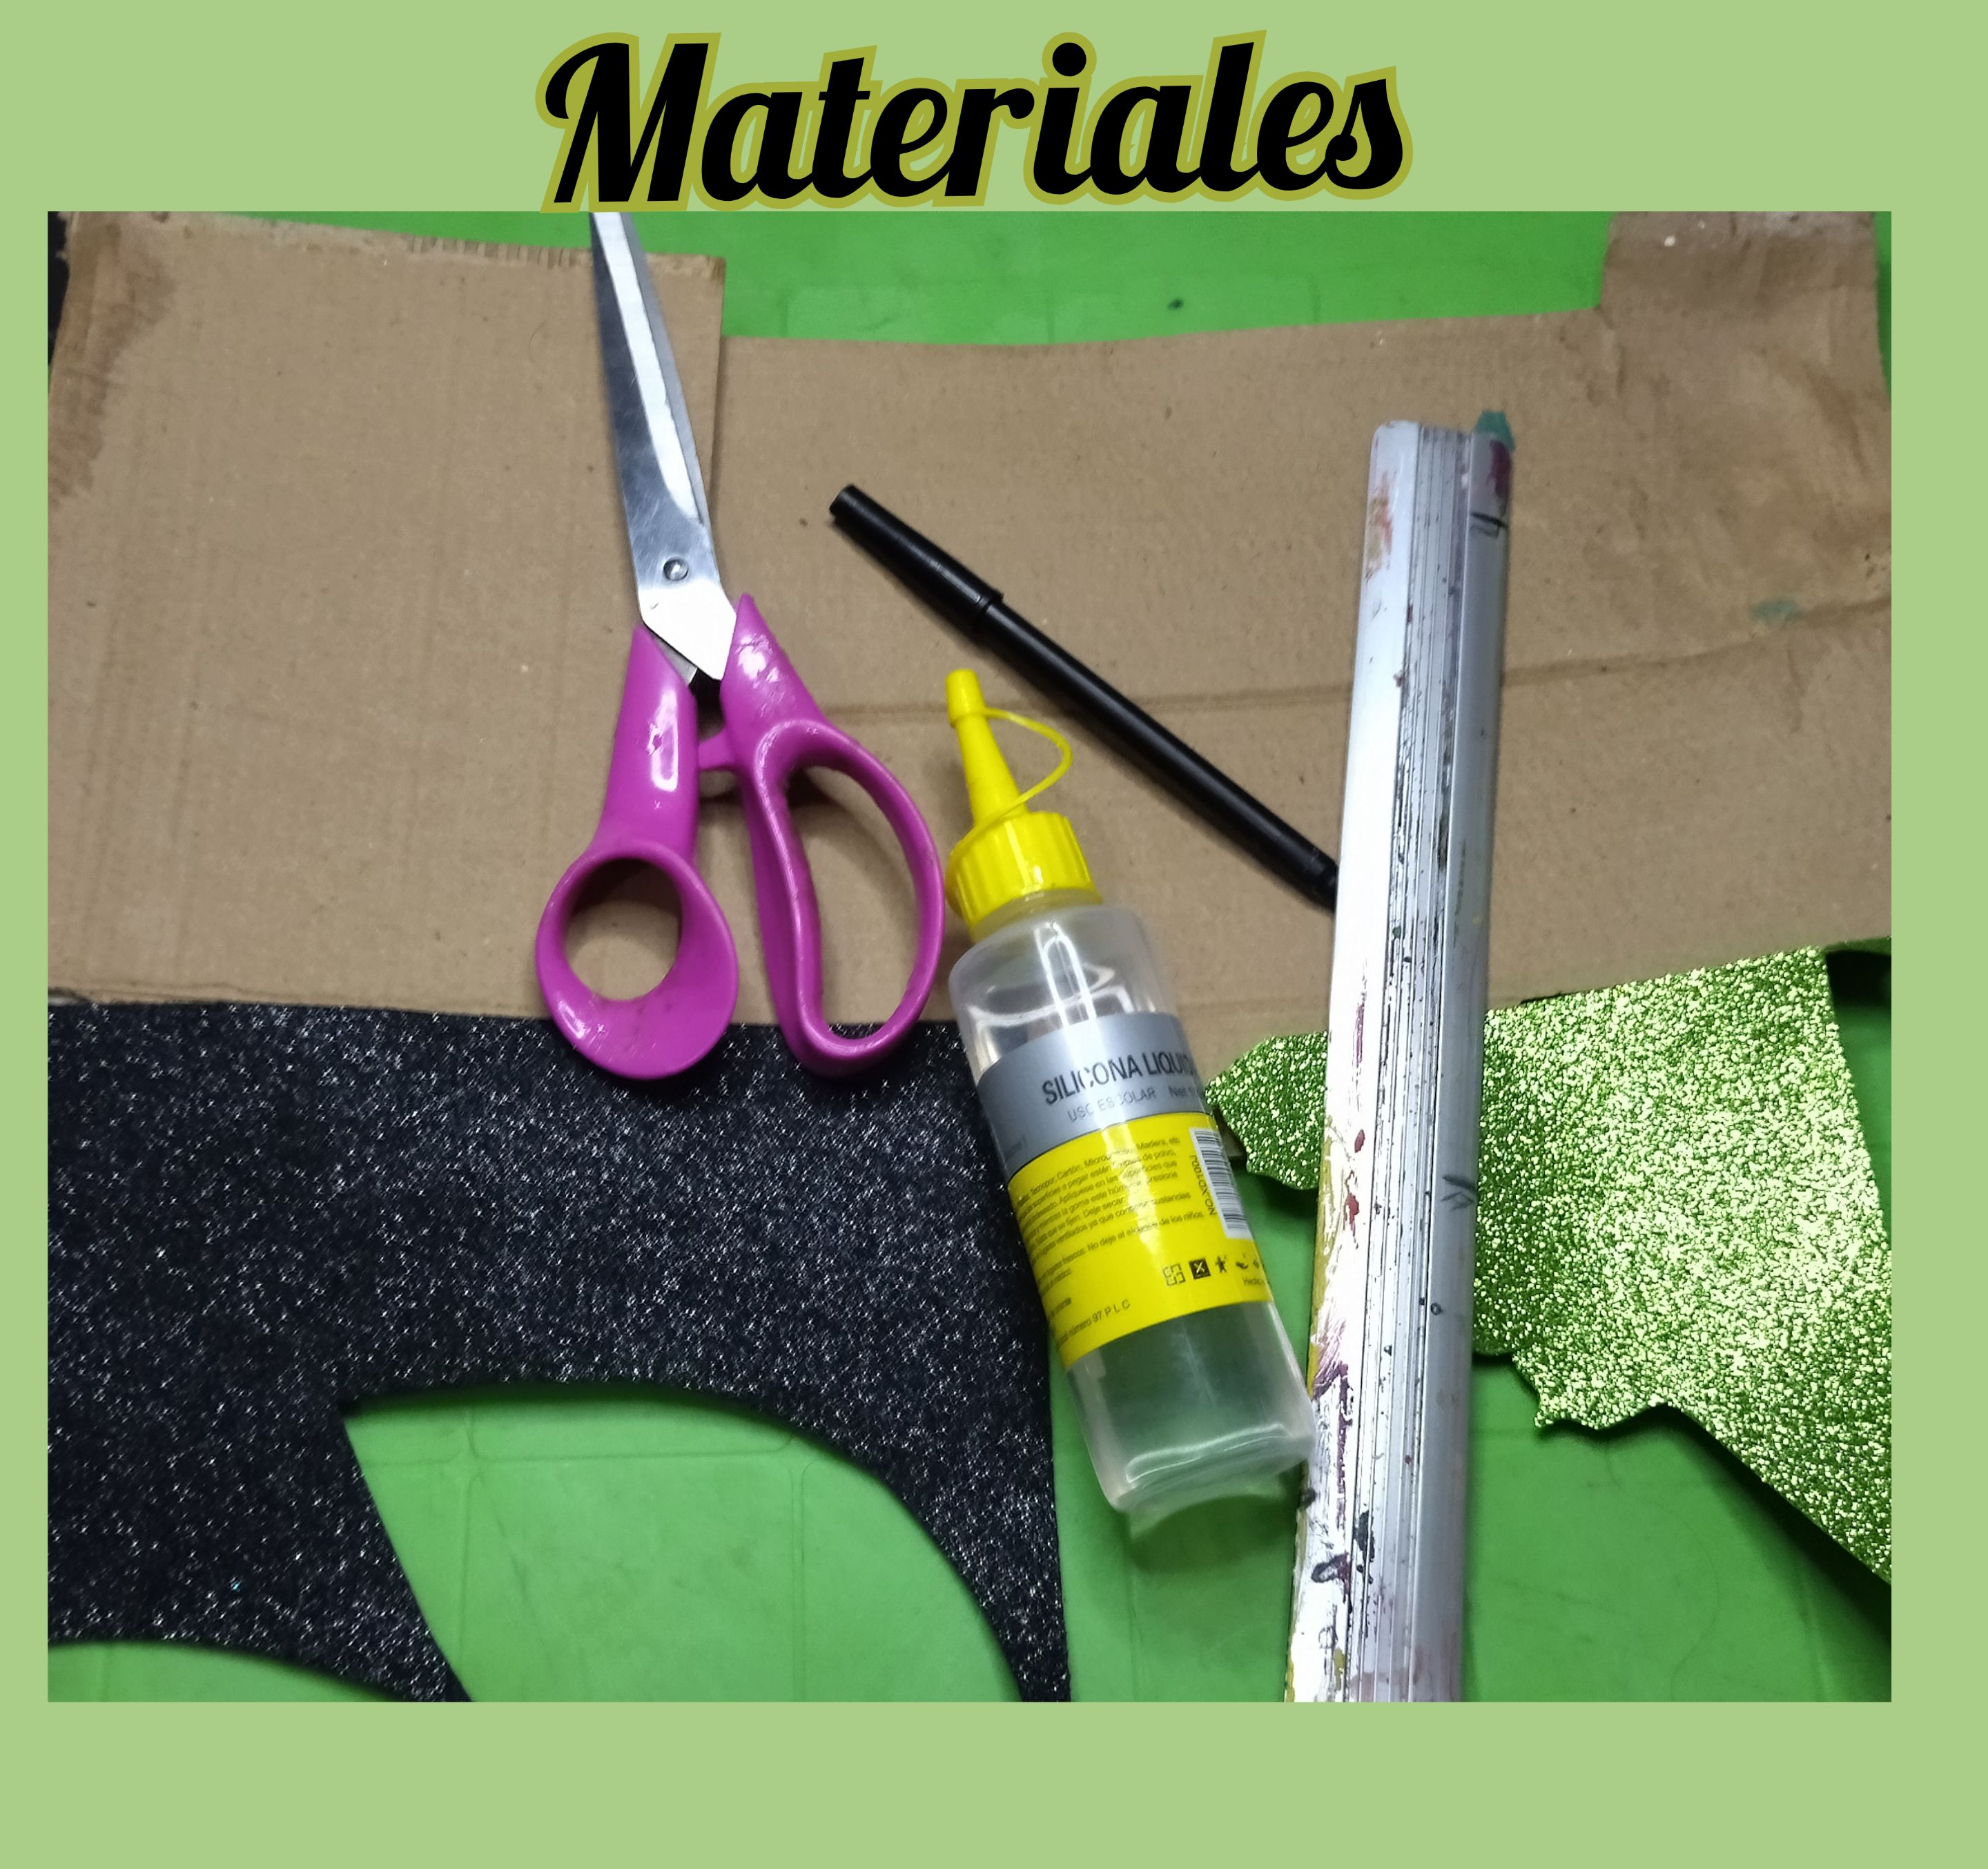
Holis amigos de #hive espero que se encuentren bien y esten pasando un feliz inicio de fin de semana, el día de hoy les traigo un trabajo manual de los que a mí me gusta realizar, con materiales de reciclaje.
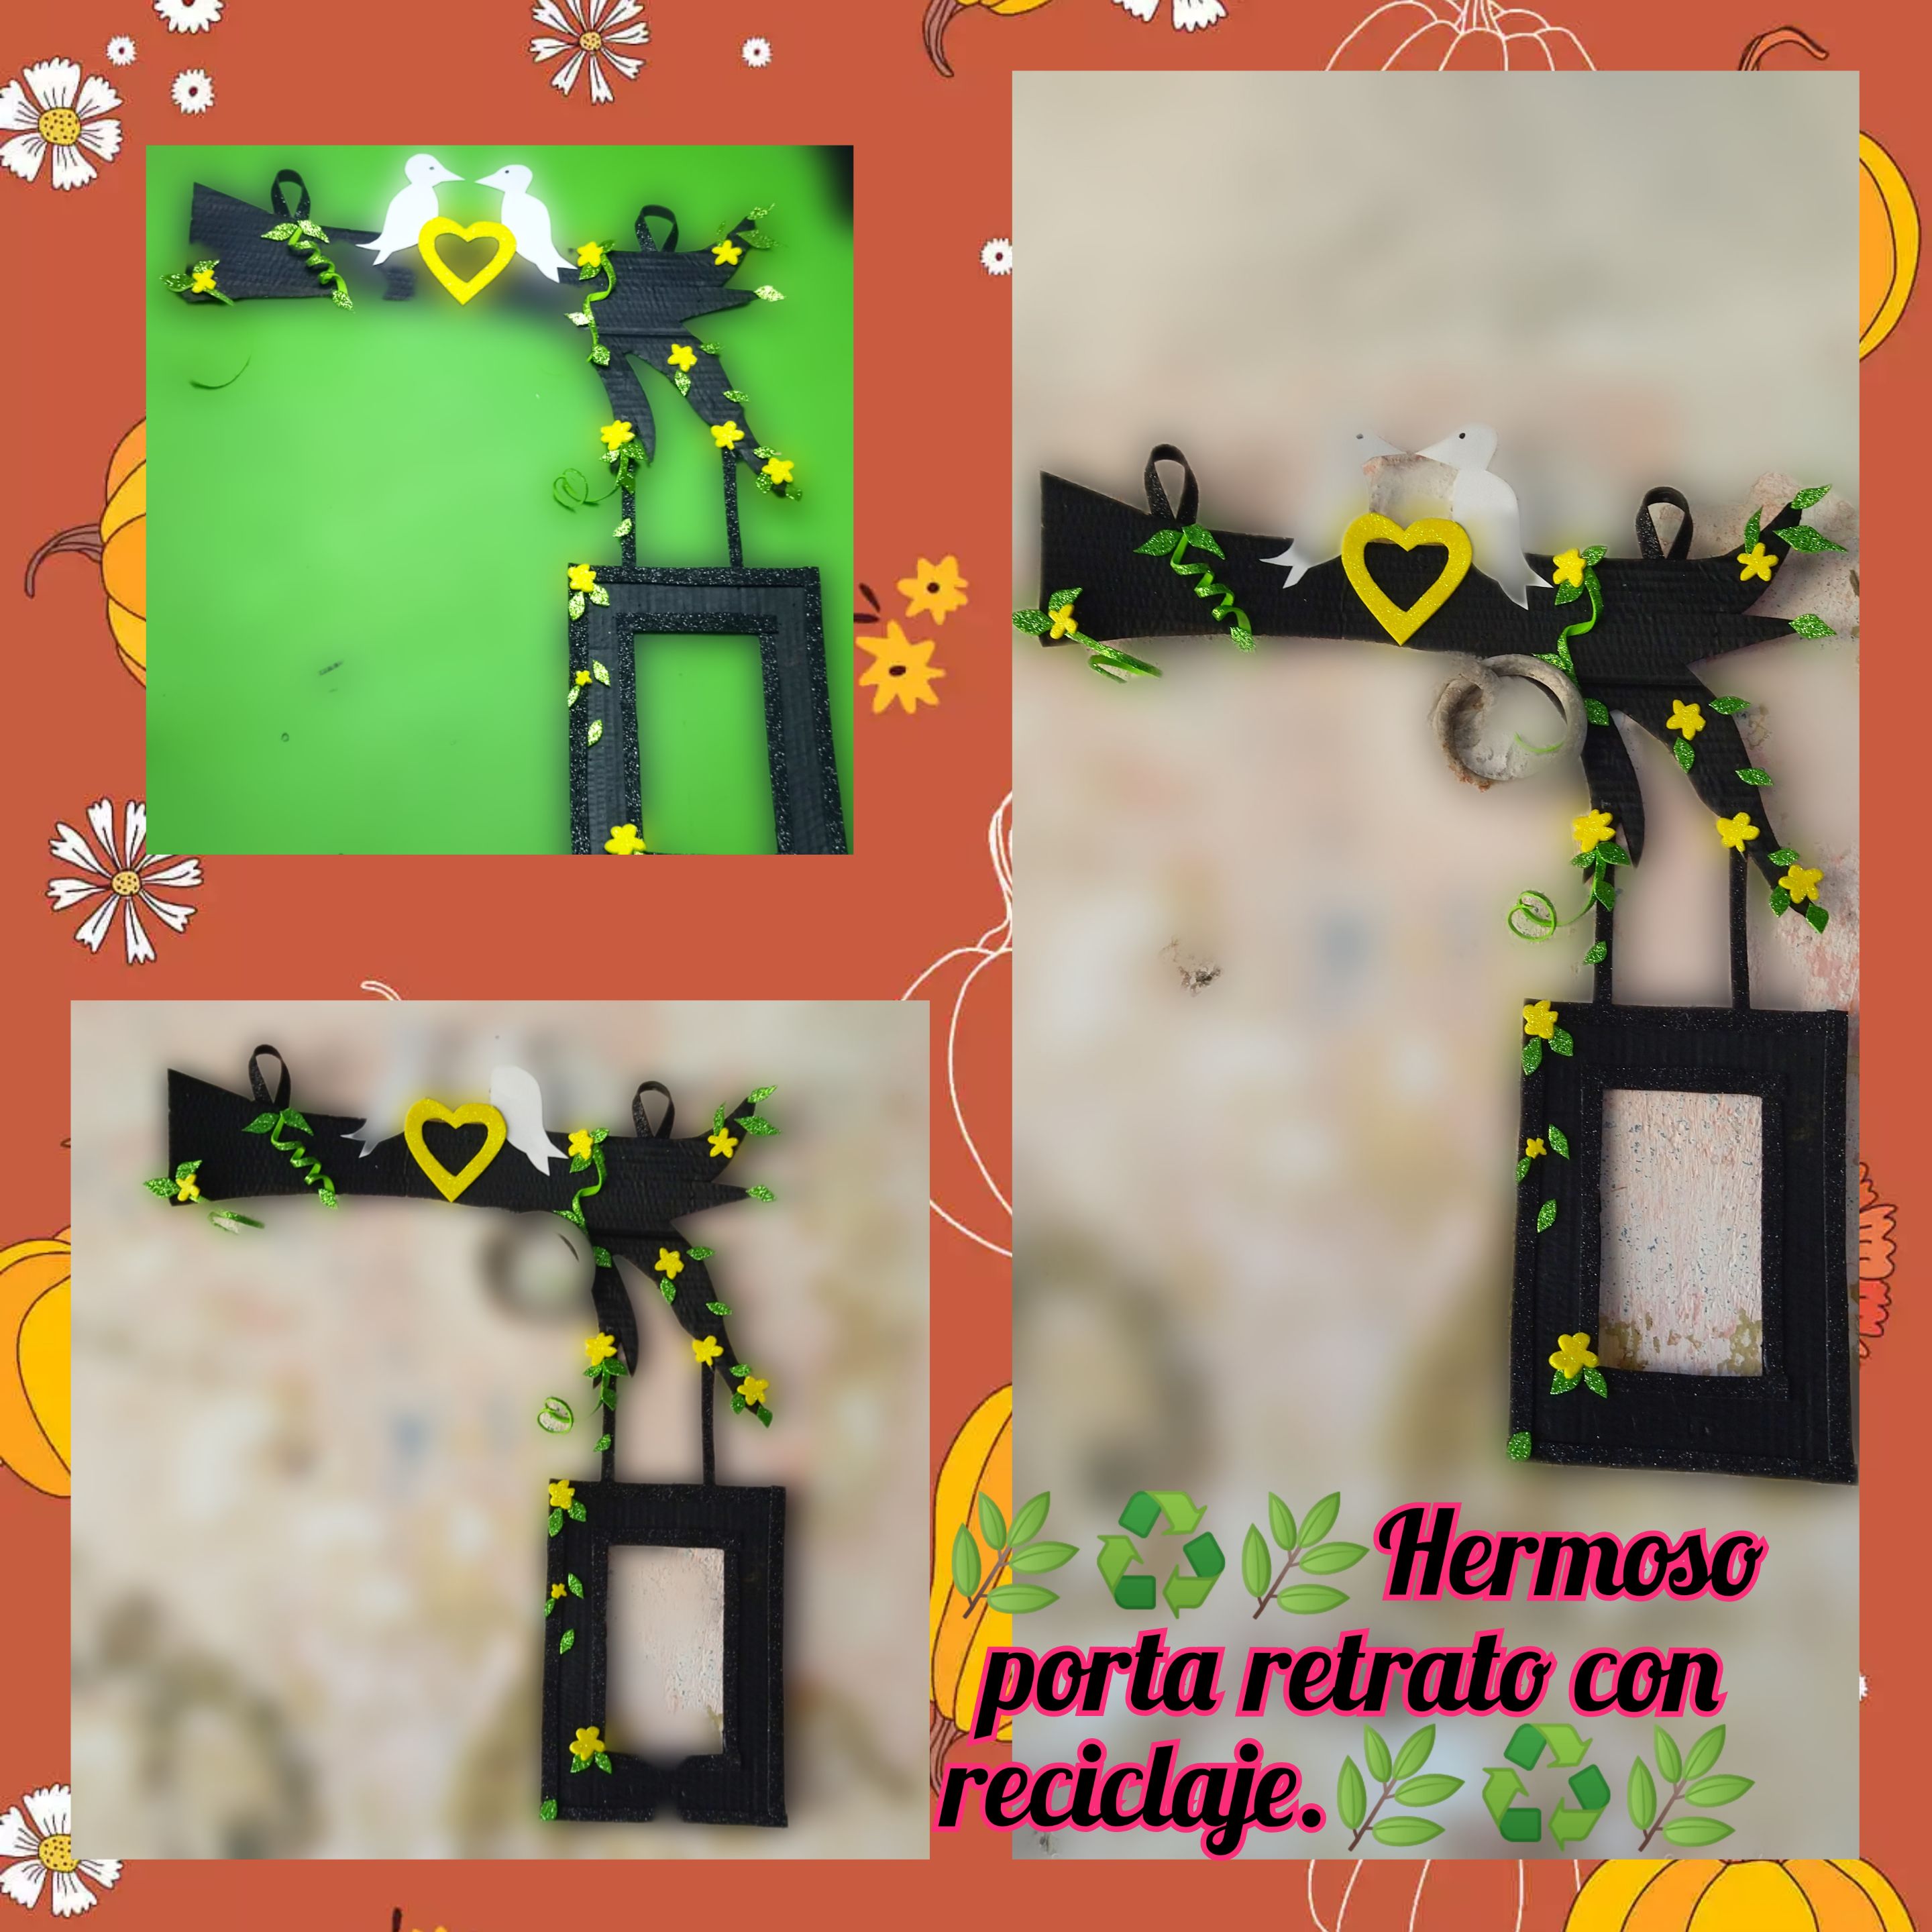
Les voy a realizar un lindo porta retrato con cartón de caja, aquí les dejo un poco de lo que fue el paso a paso de mi trabajo.
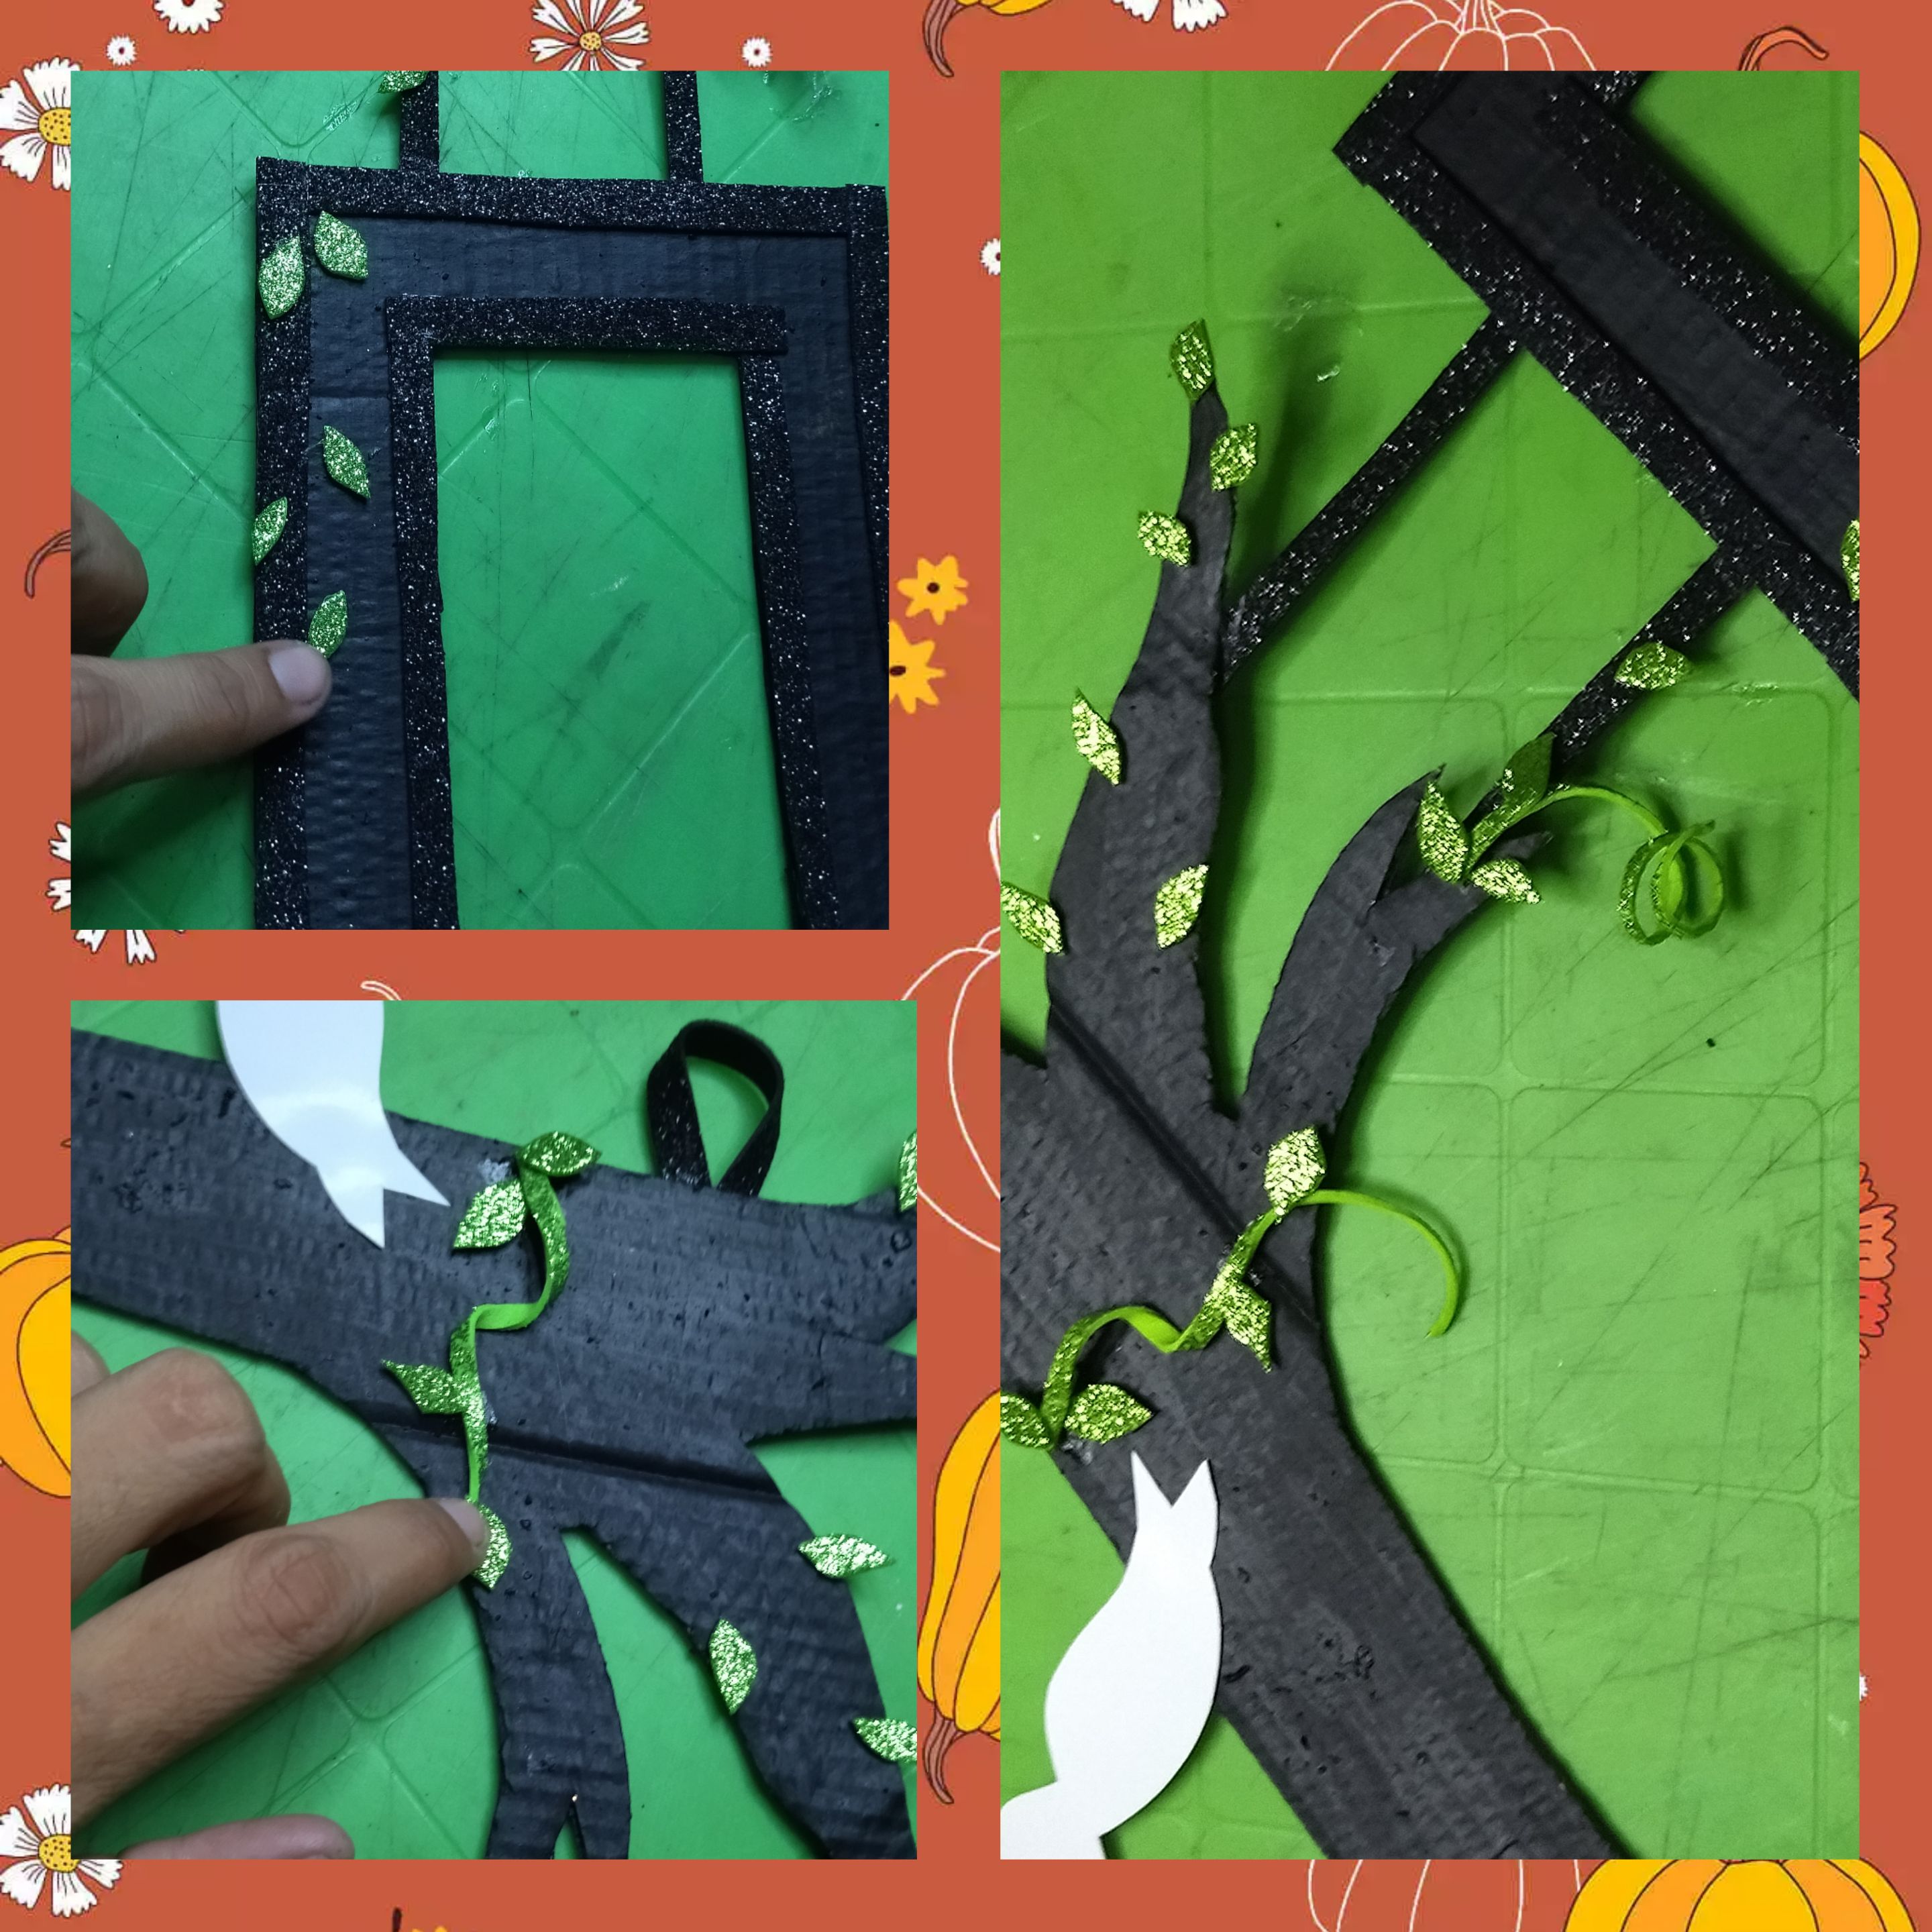
Primero marque en el cartón de caja, un rectangulo de unos 12x2 cm y recortamos con ayuda de la tijera.
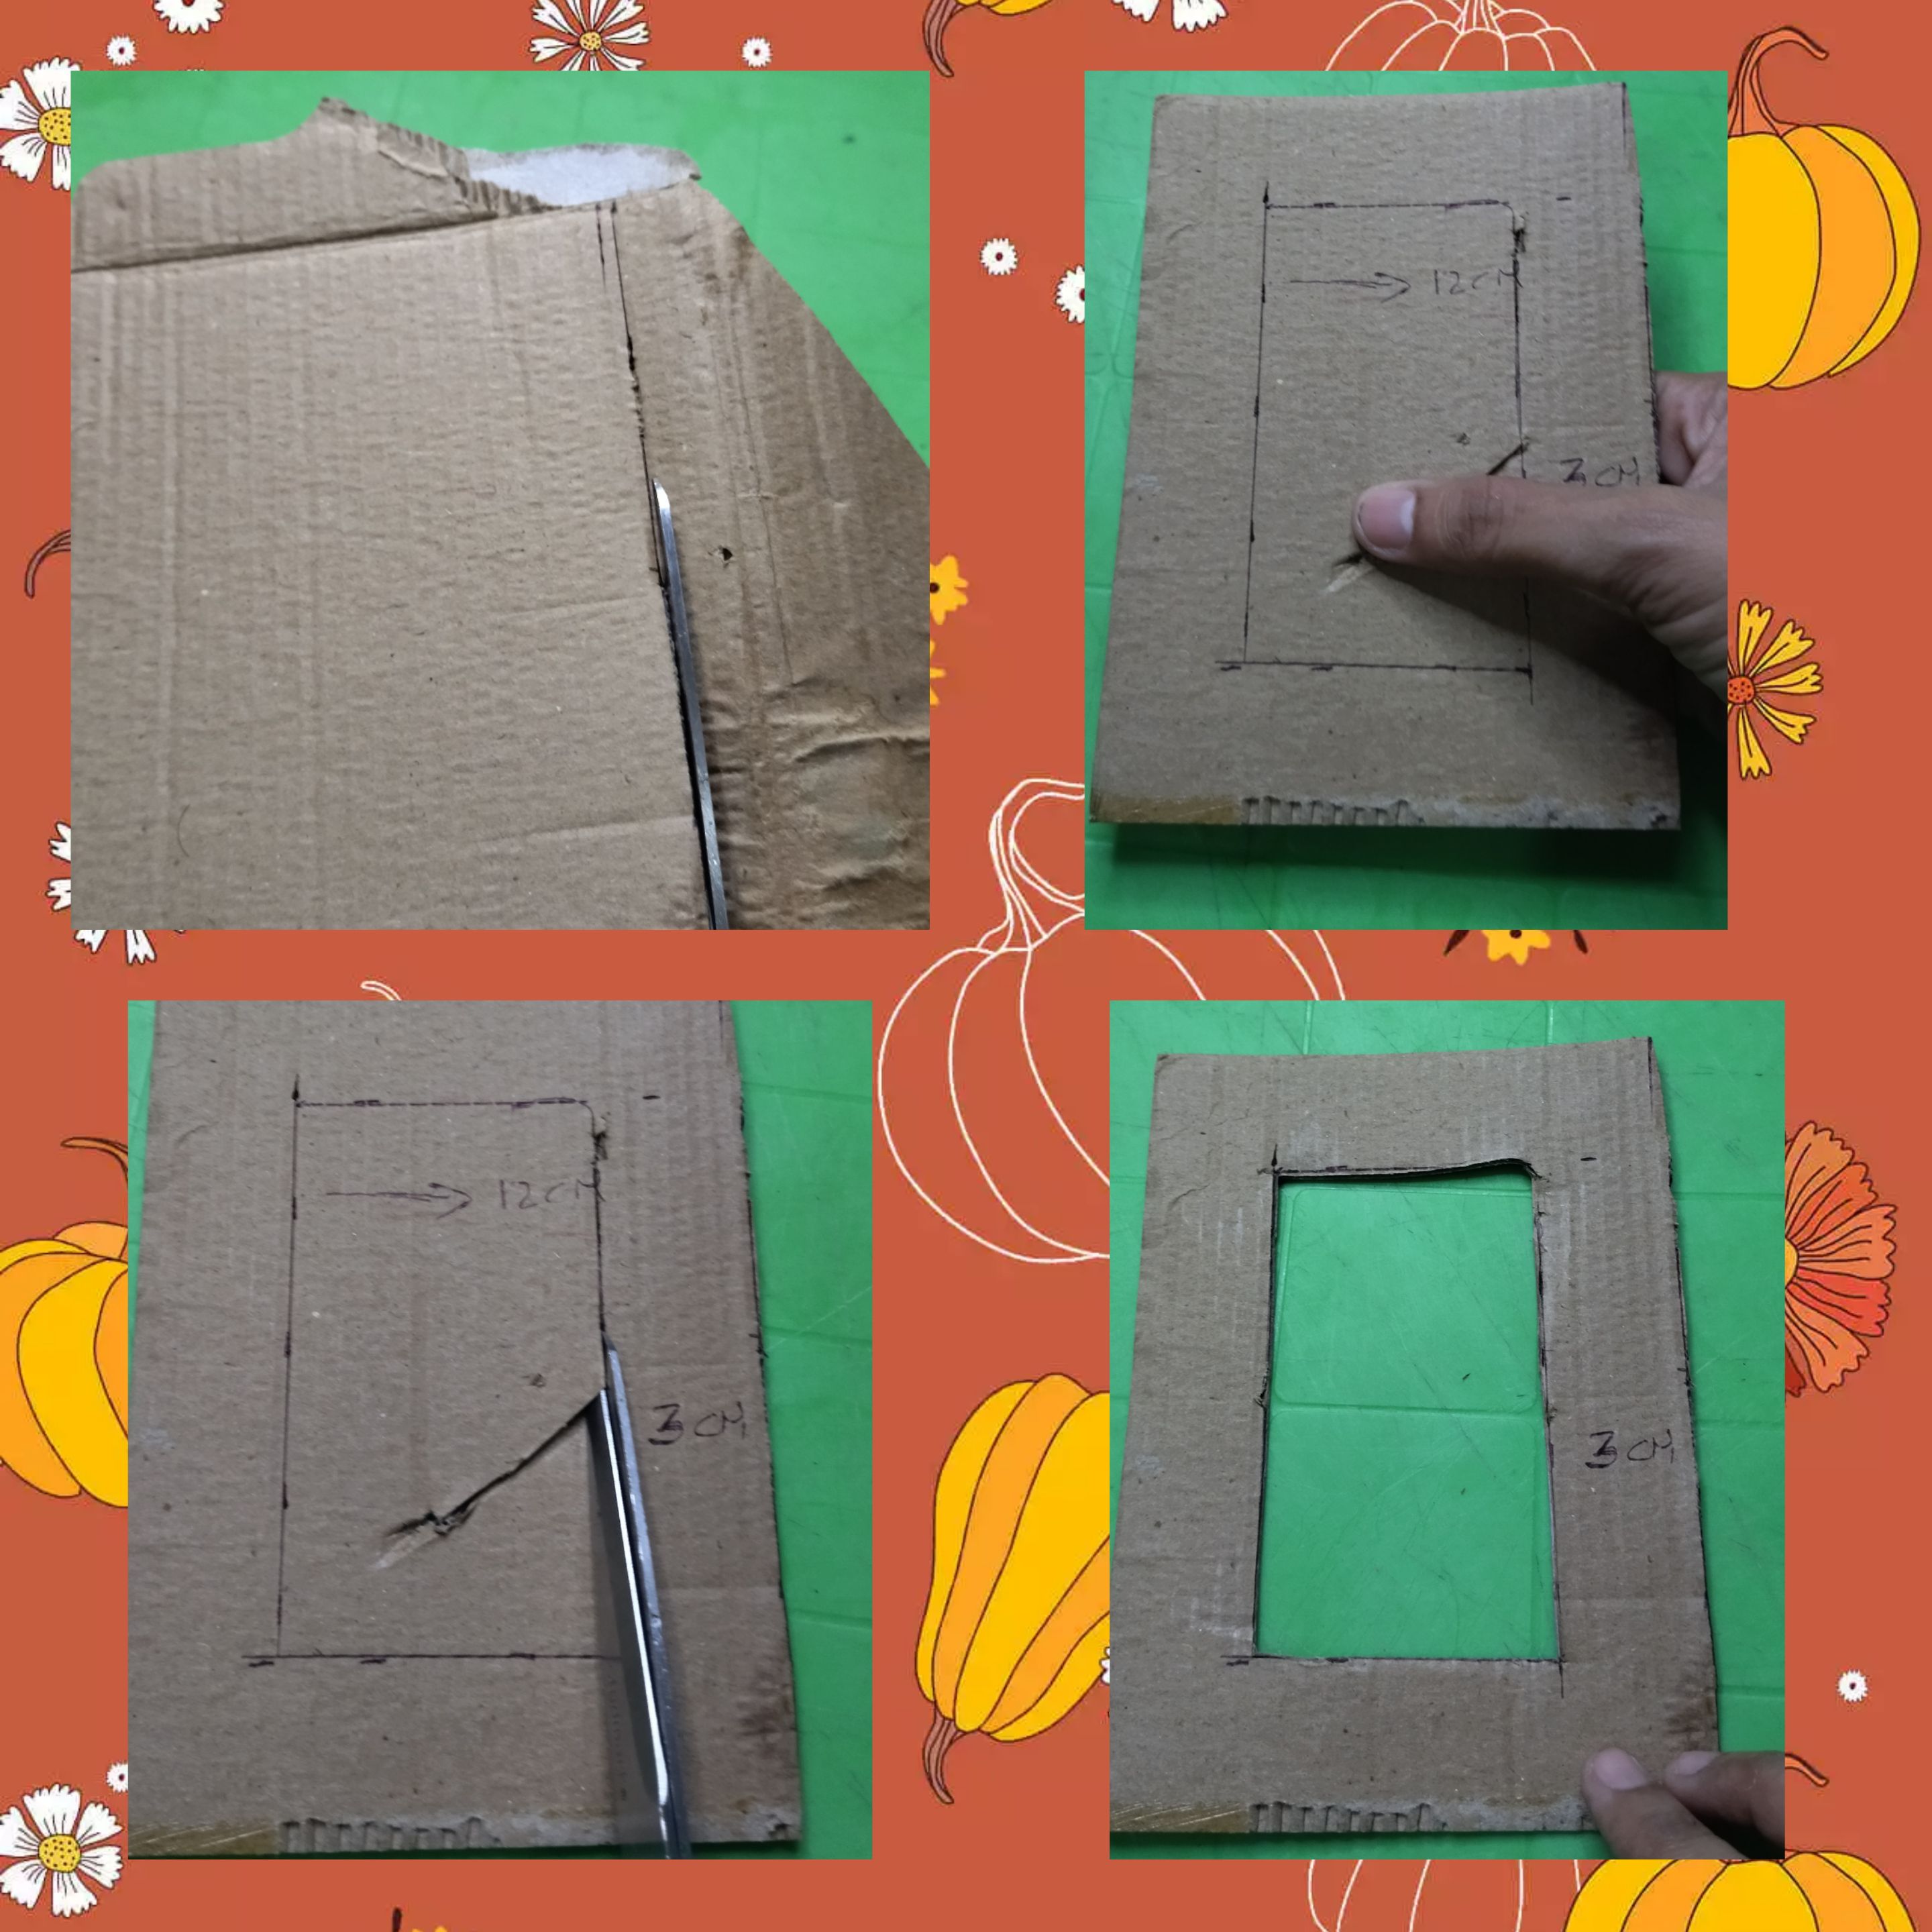
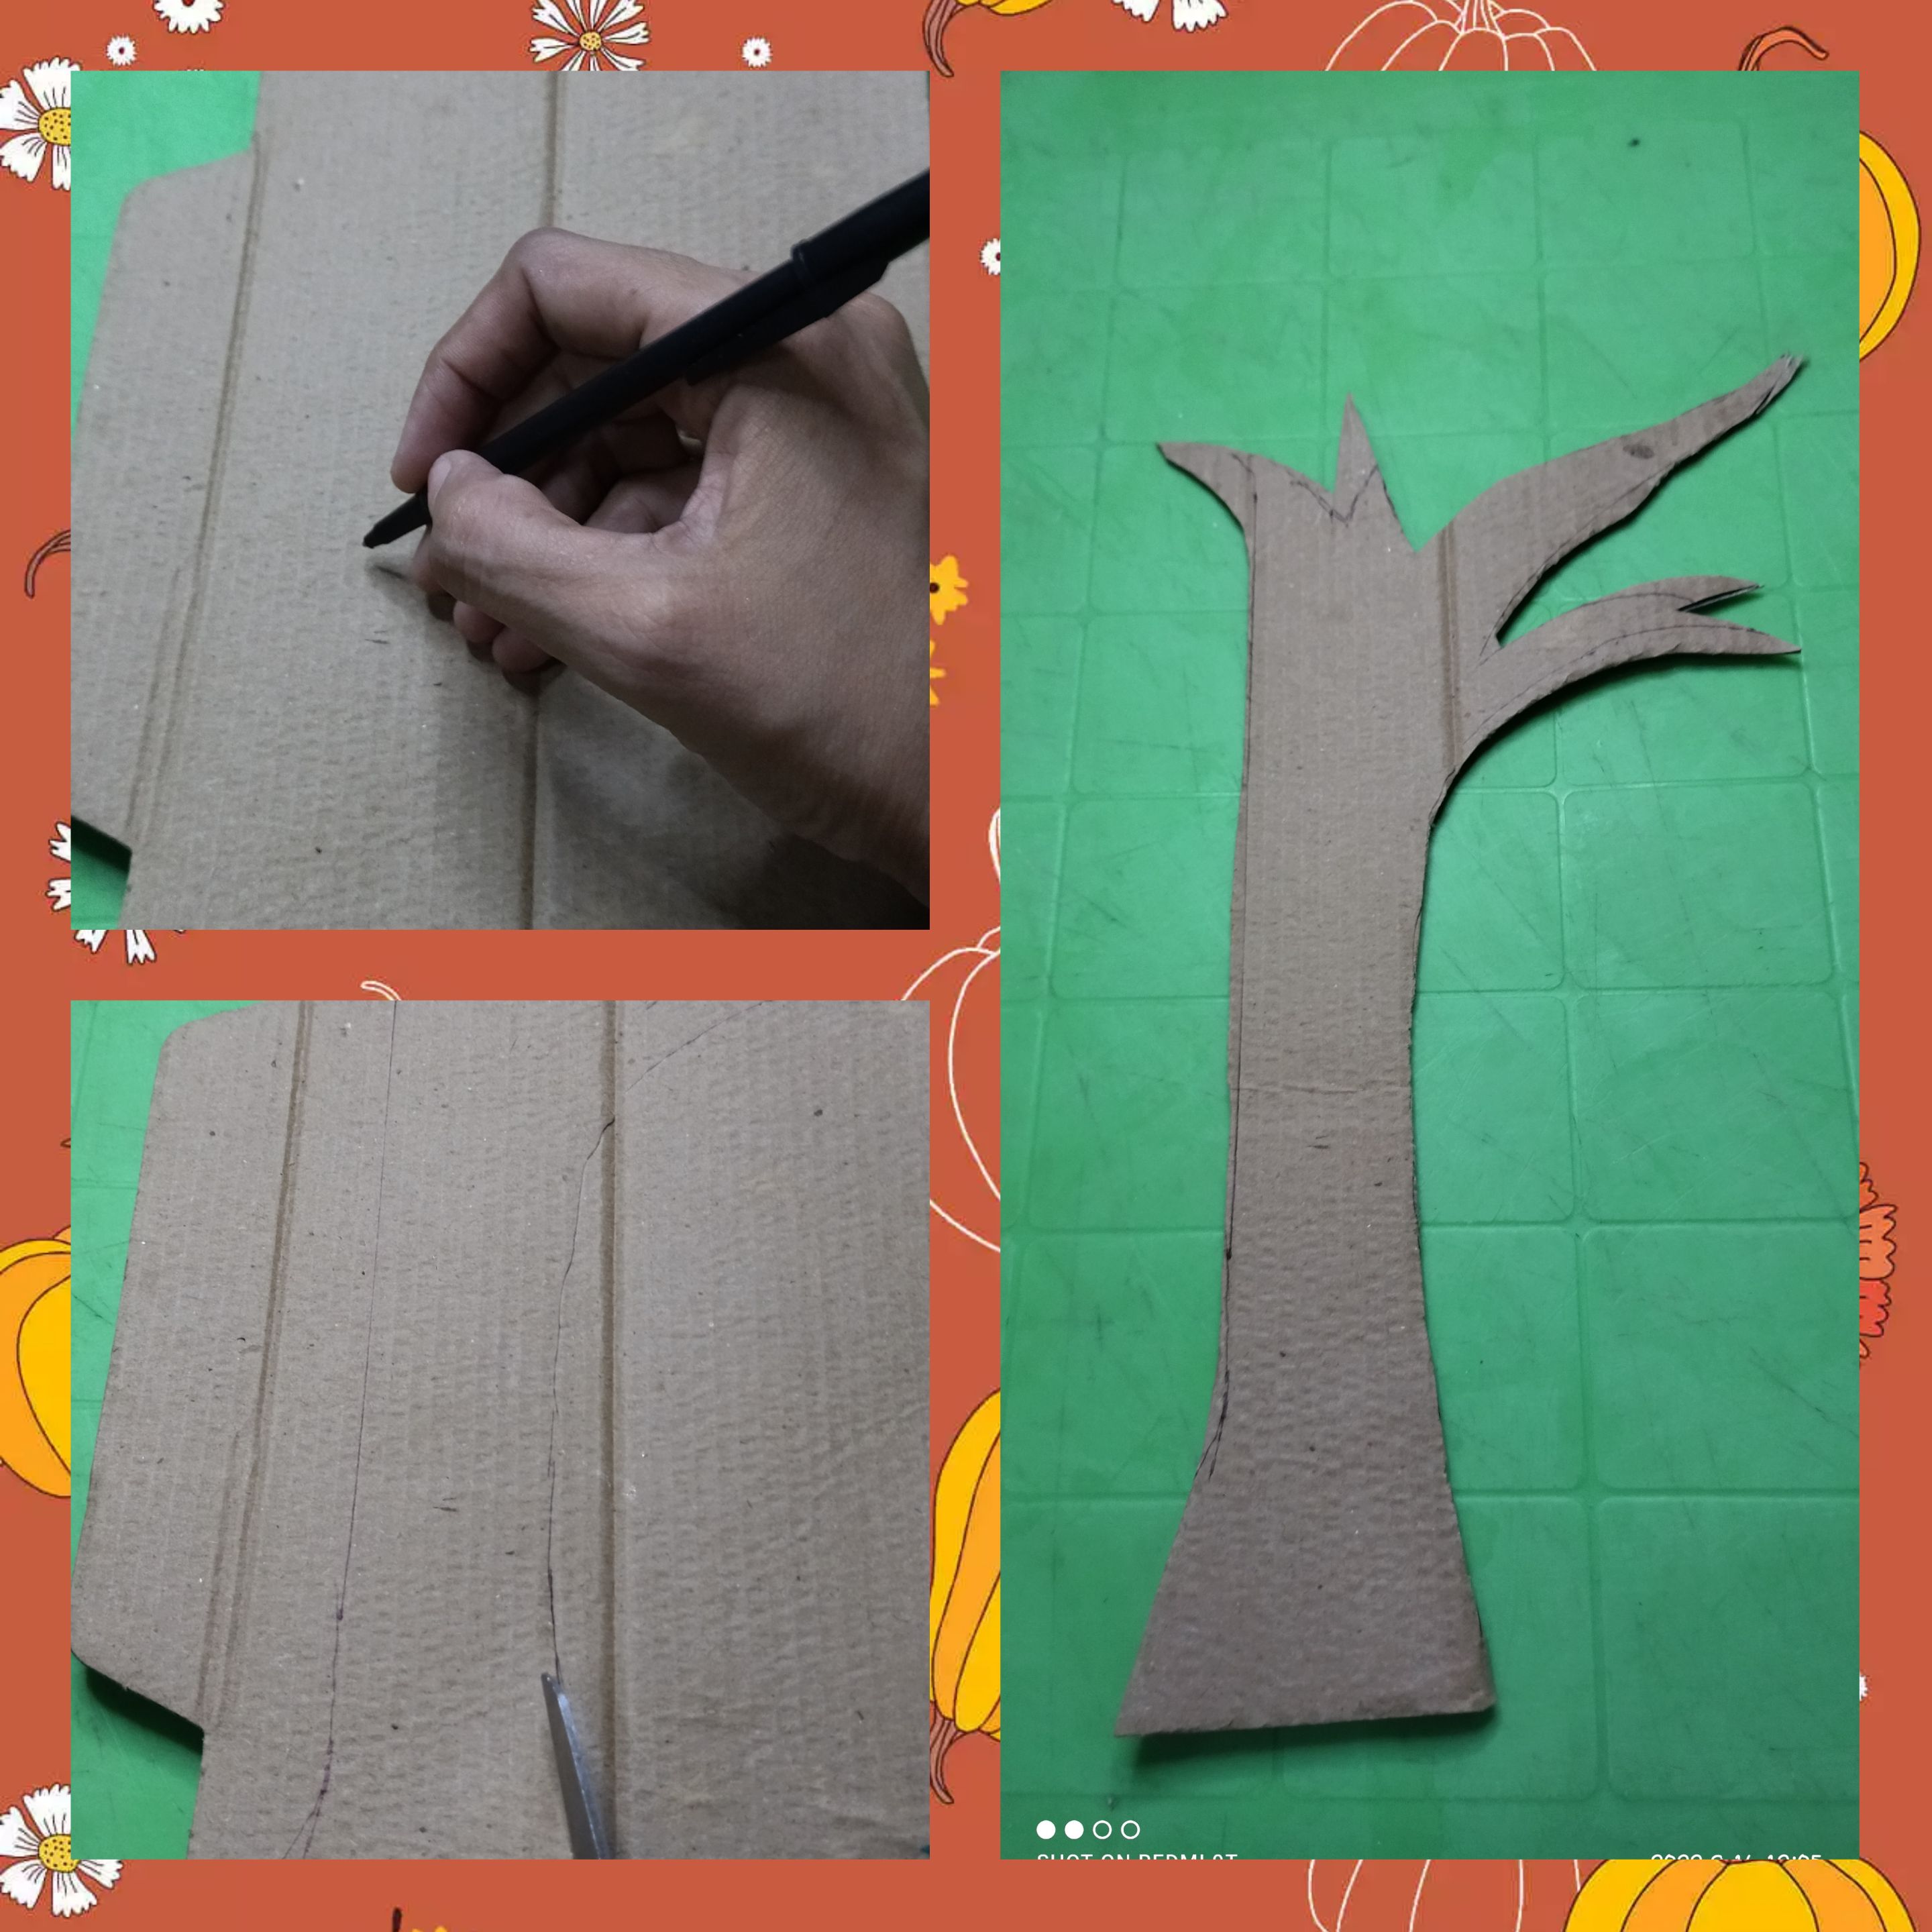
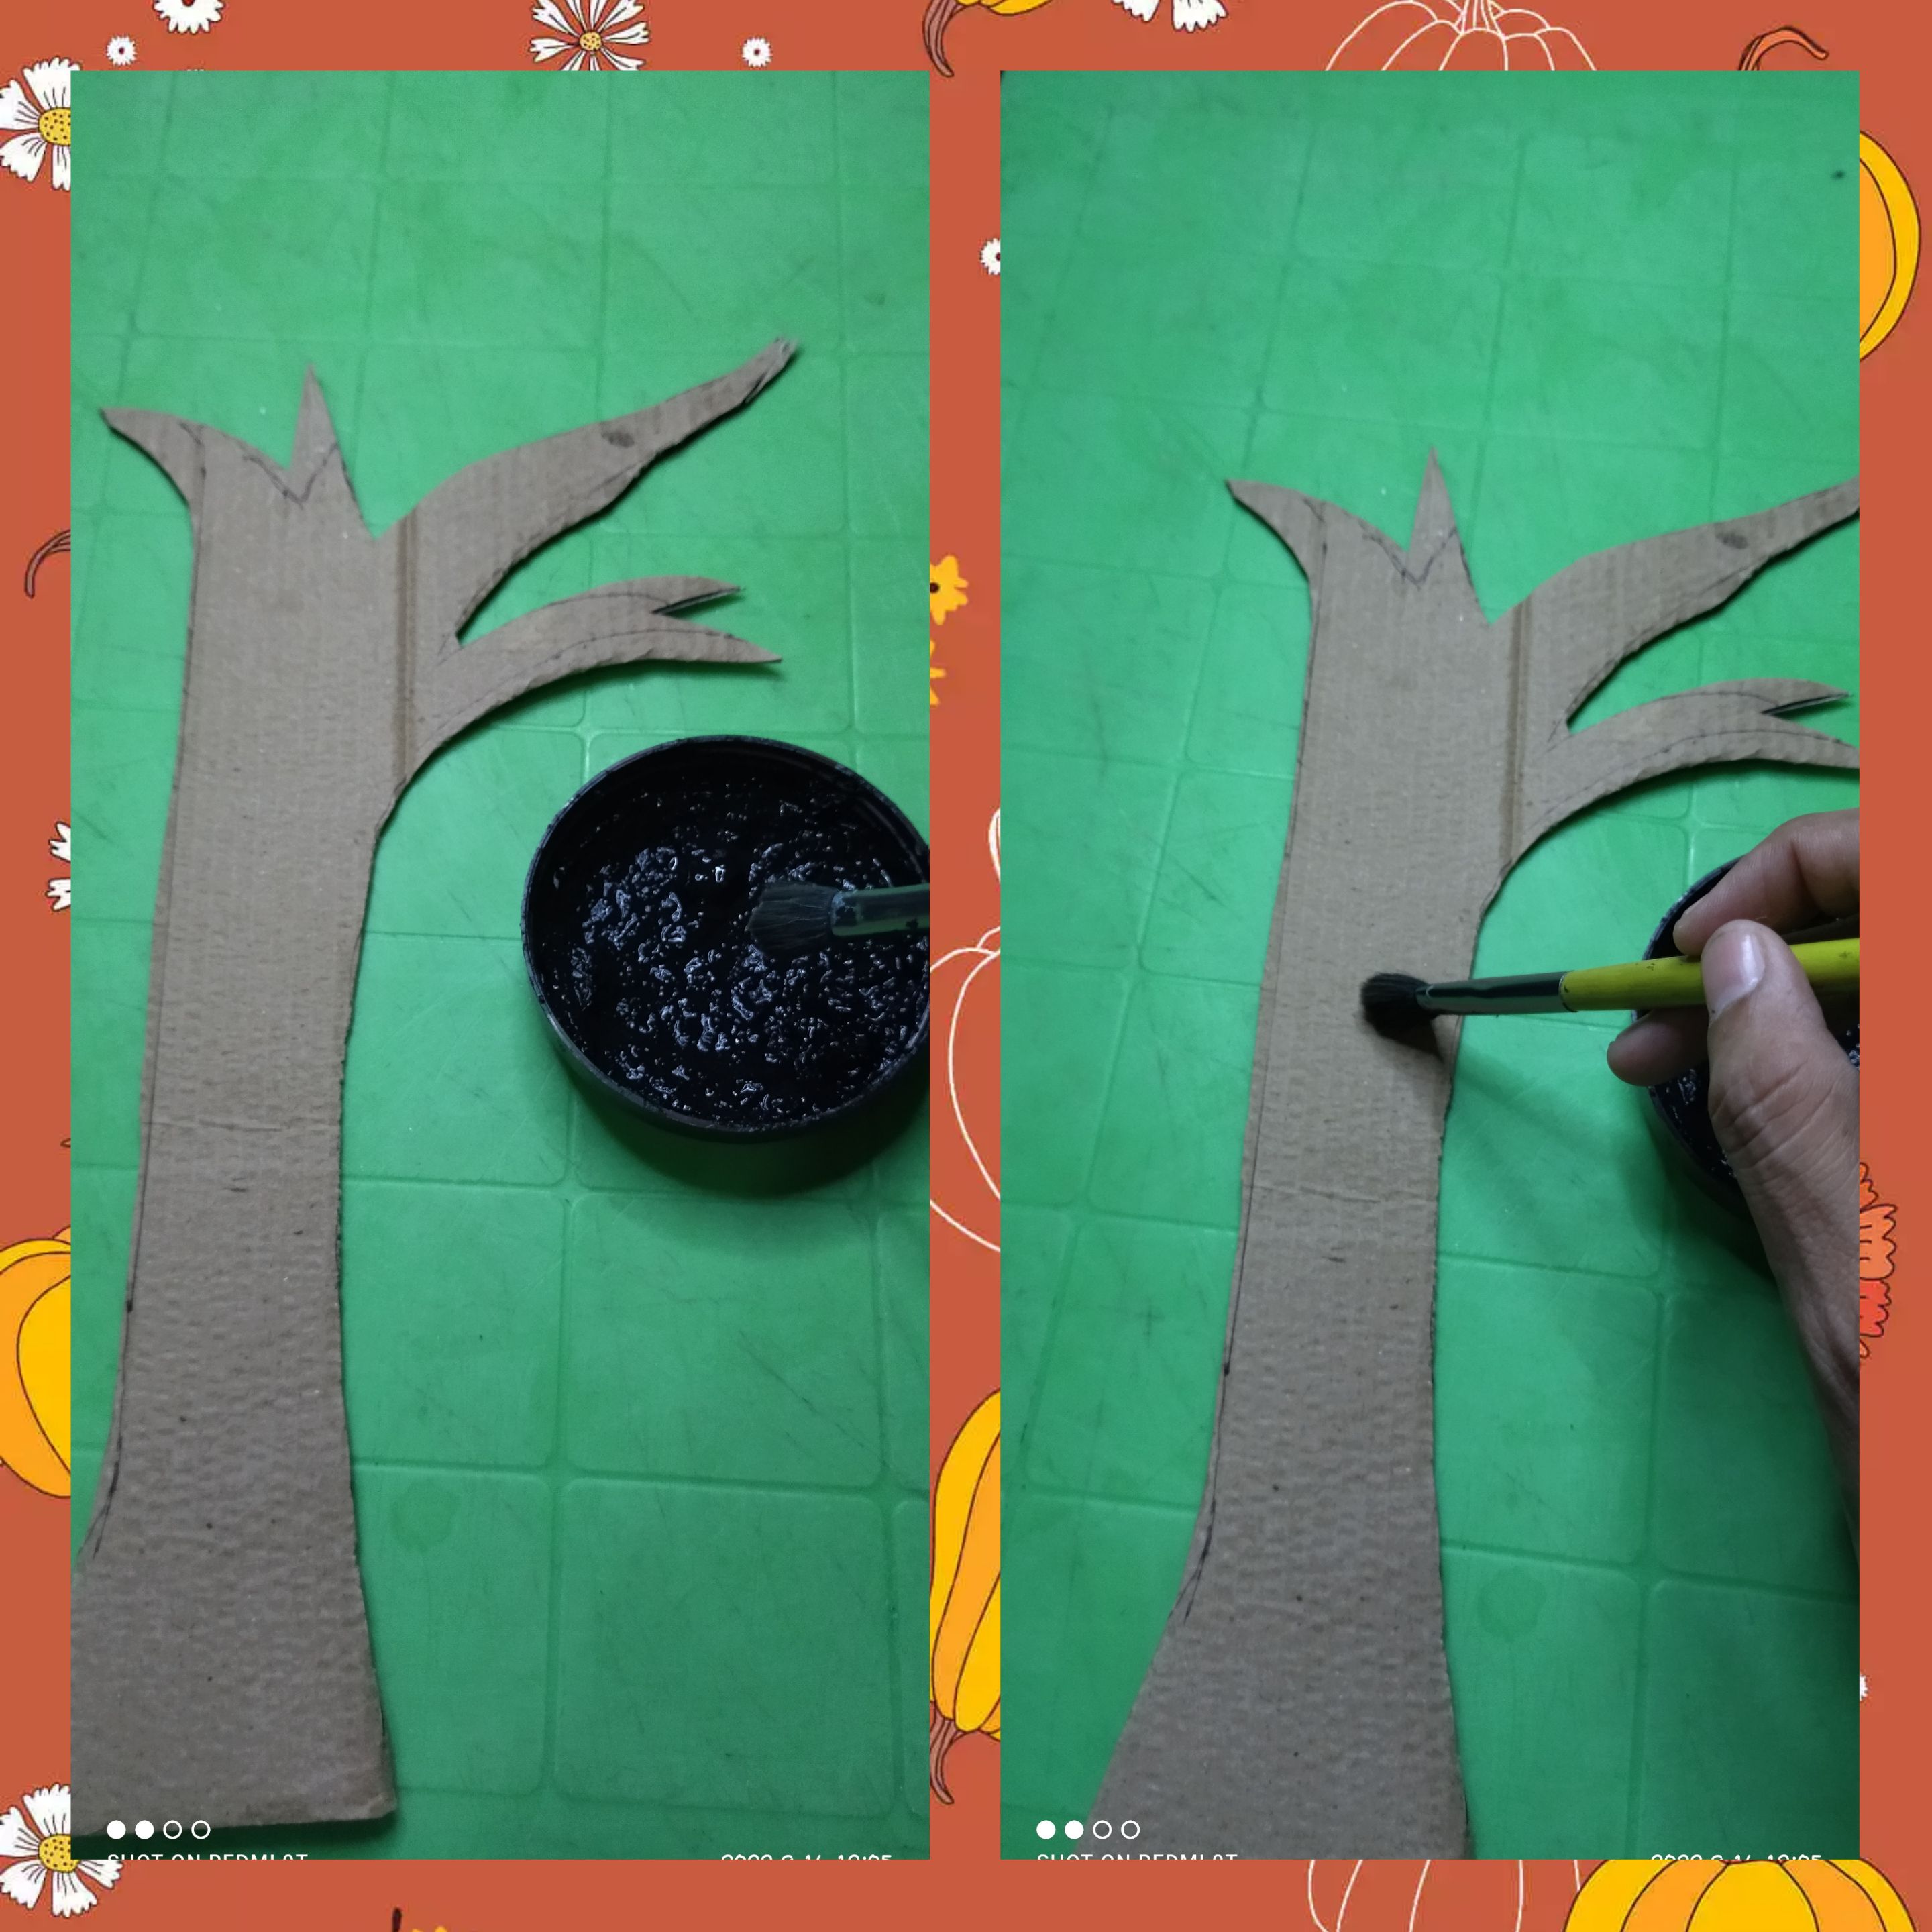
En otro trozo de cartón marcamos un dibujo del tronco de un árbol y luego recortamos.
Luego tome la pintura negra y con el pincel le aplicamos al tronco y al rectangulo que recortamos.
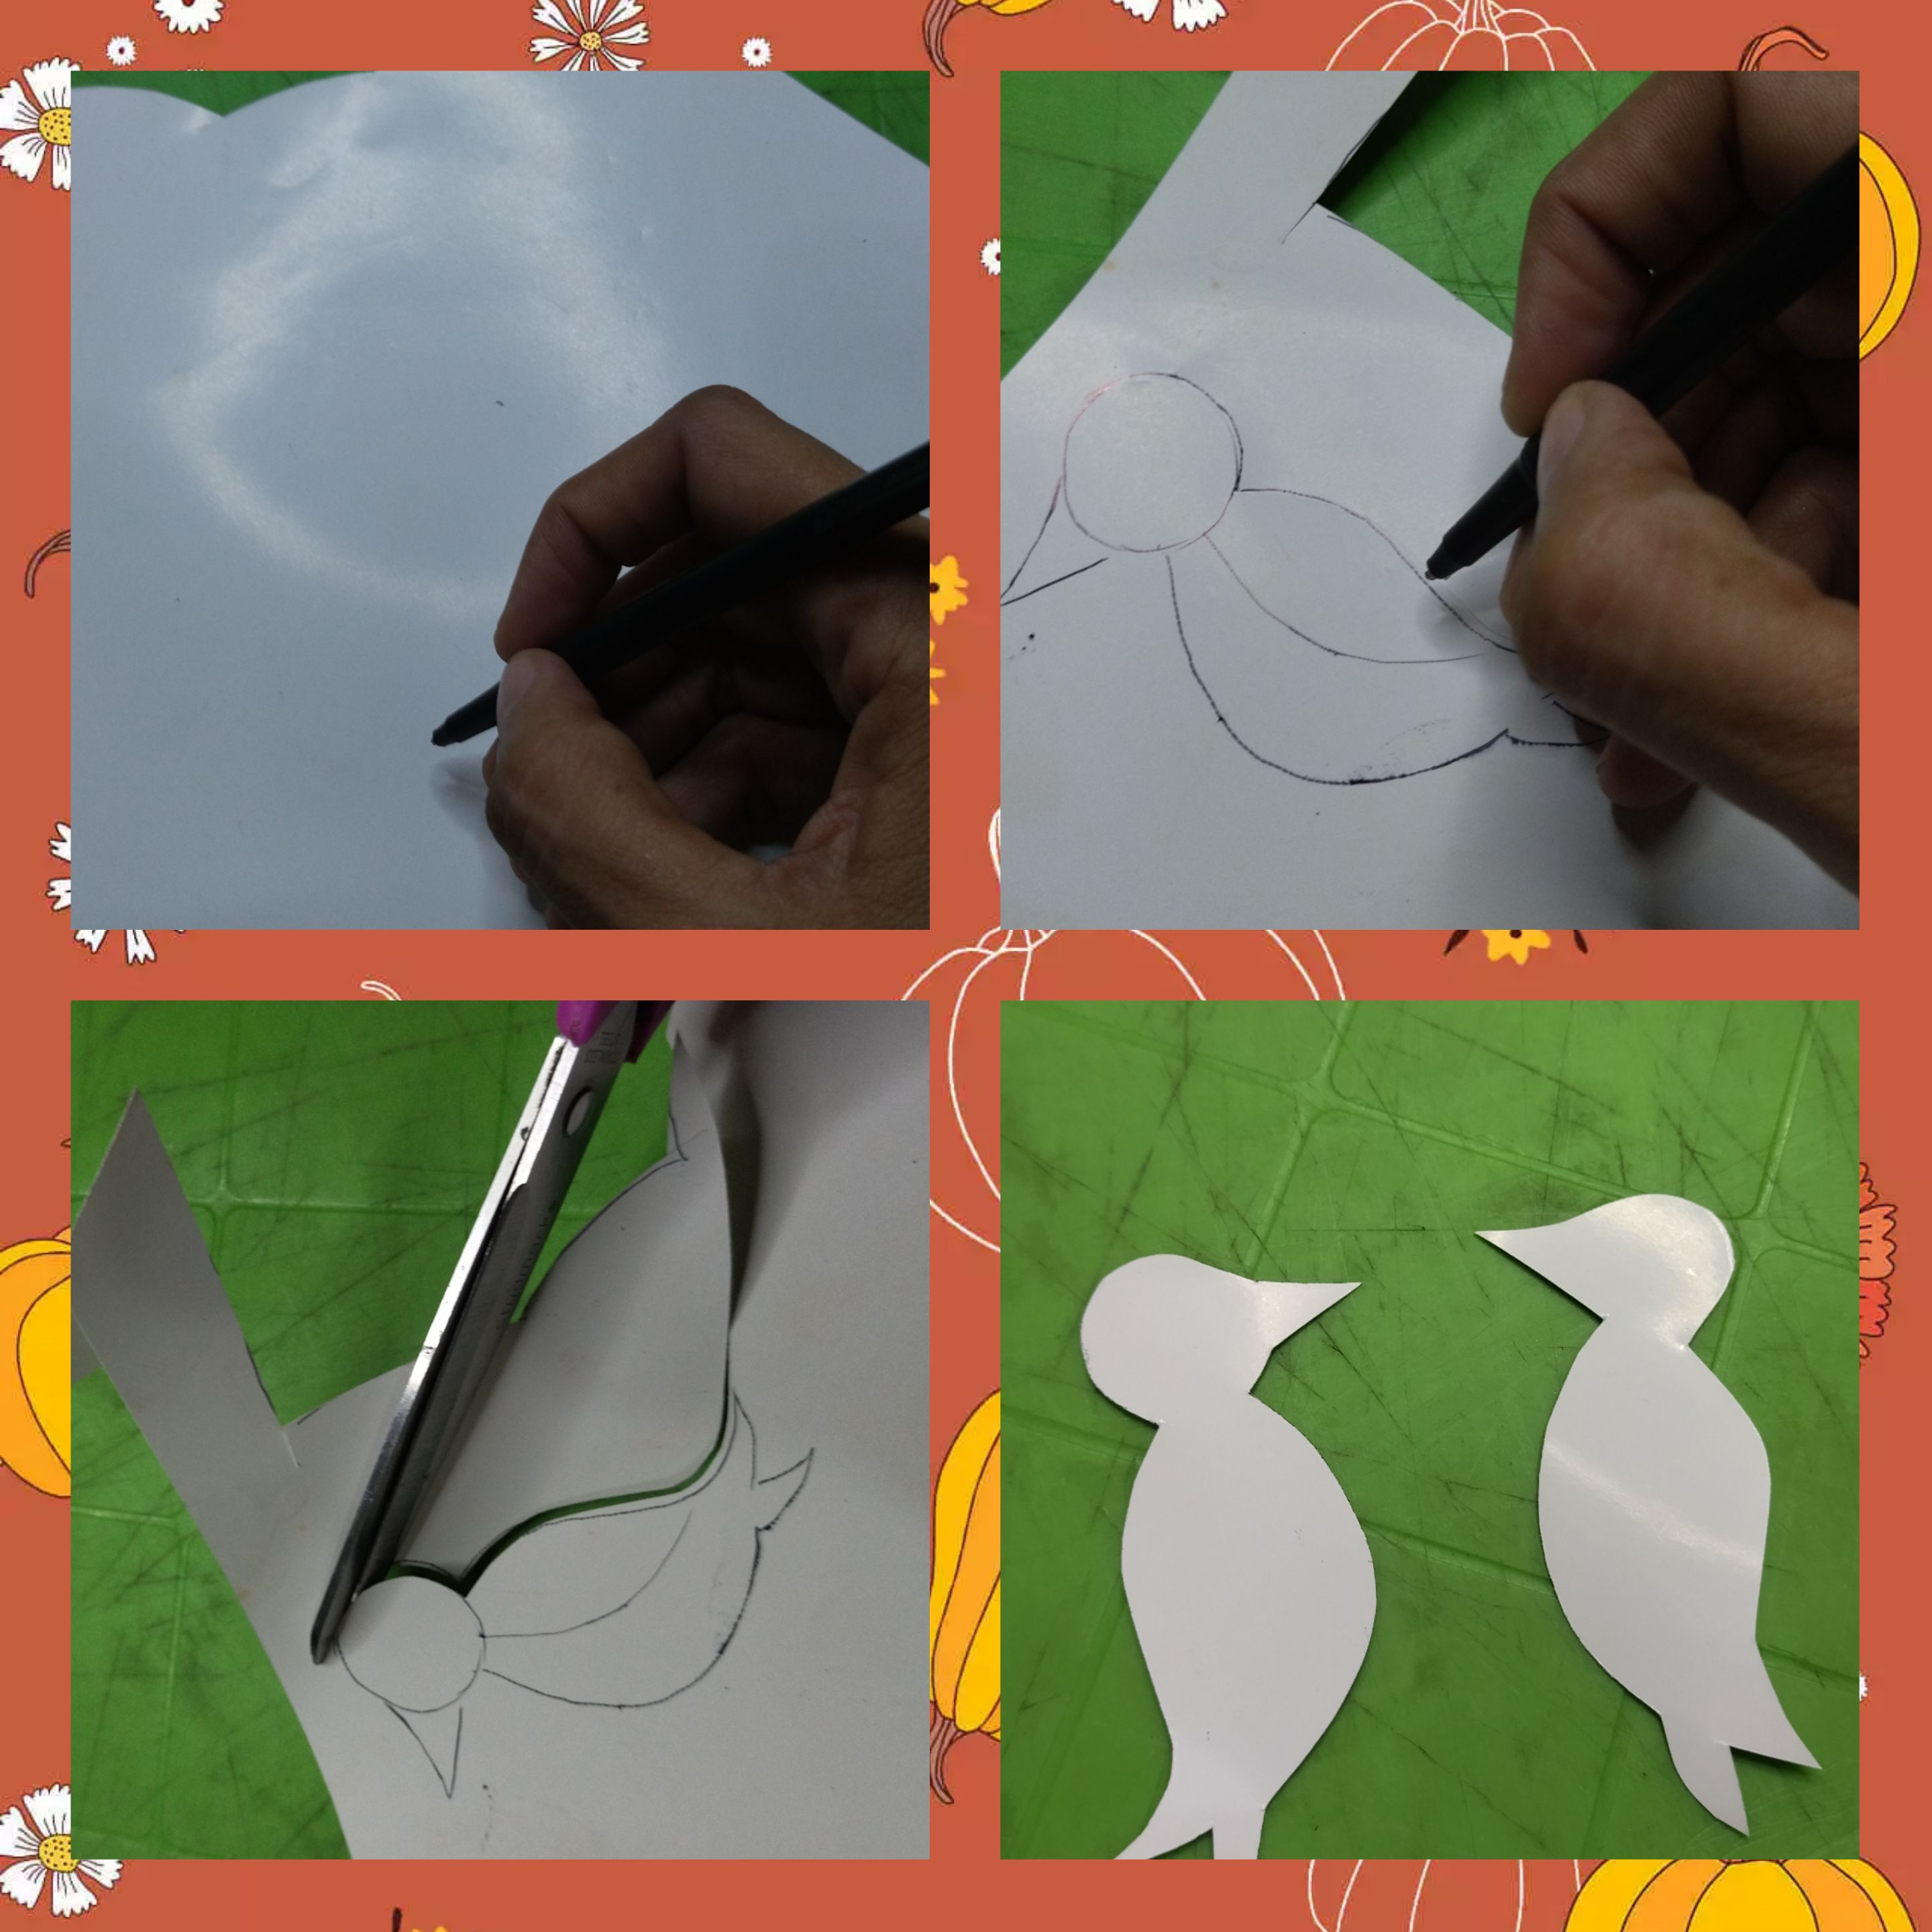
En un trocito de de cartón blanco dibujamos unos dos pajaritos y recortamos.
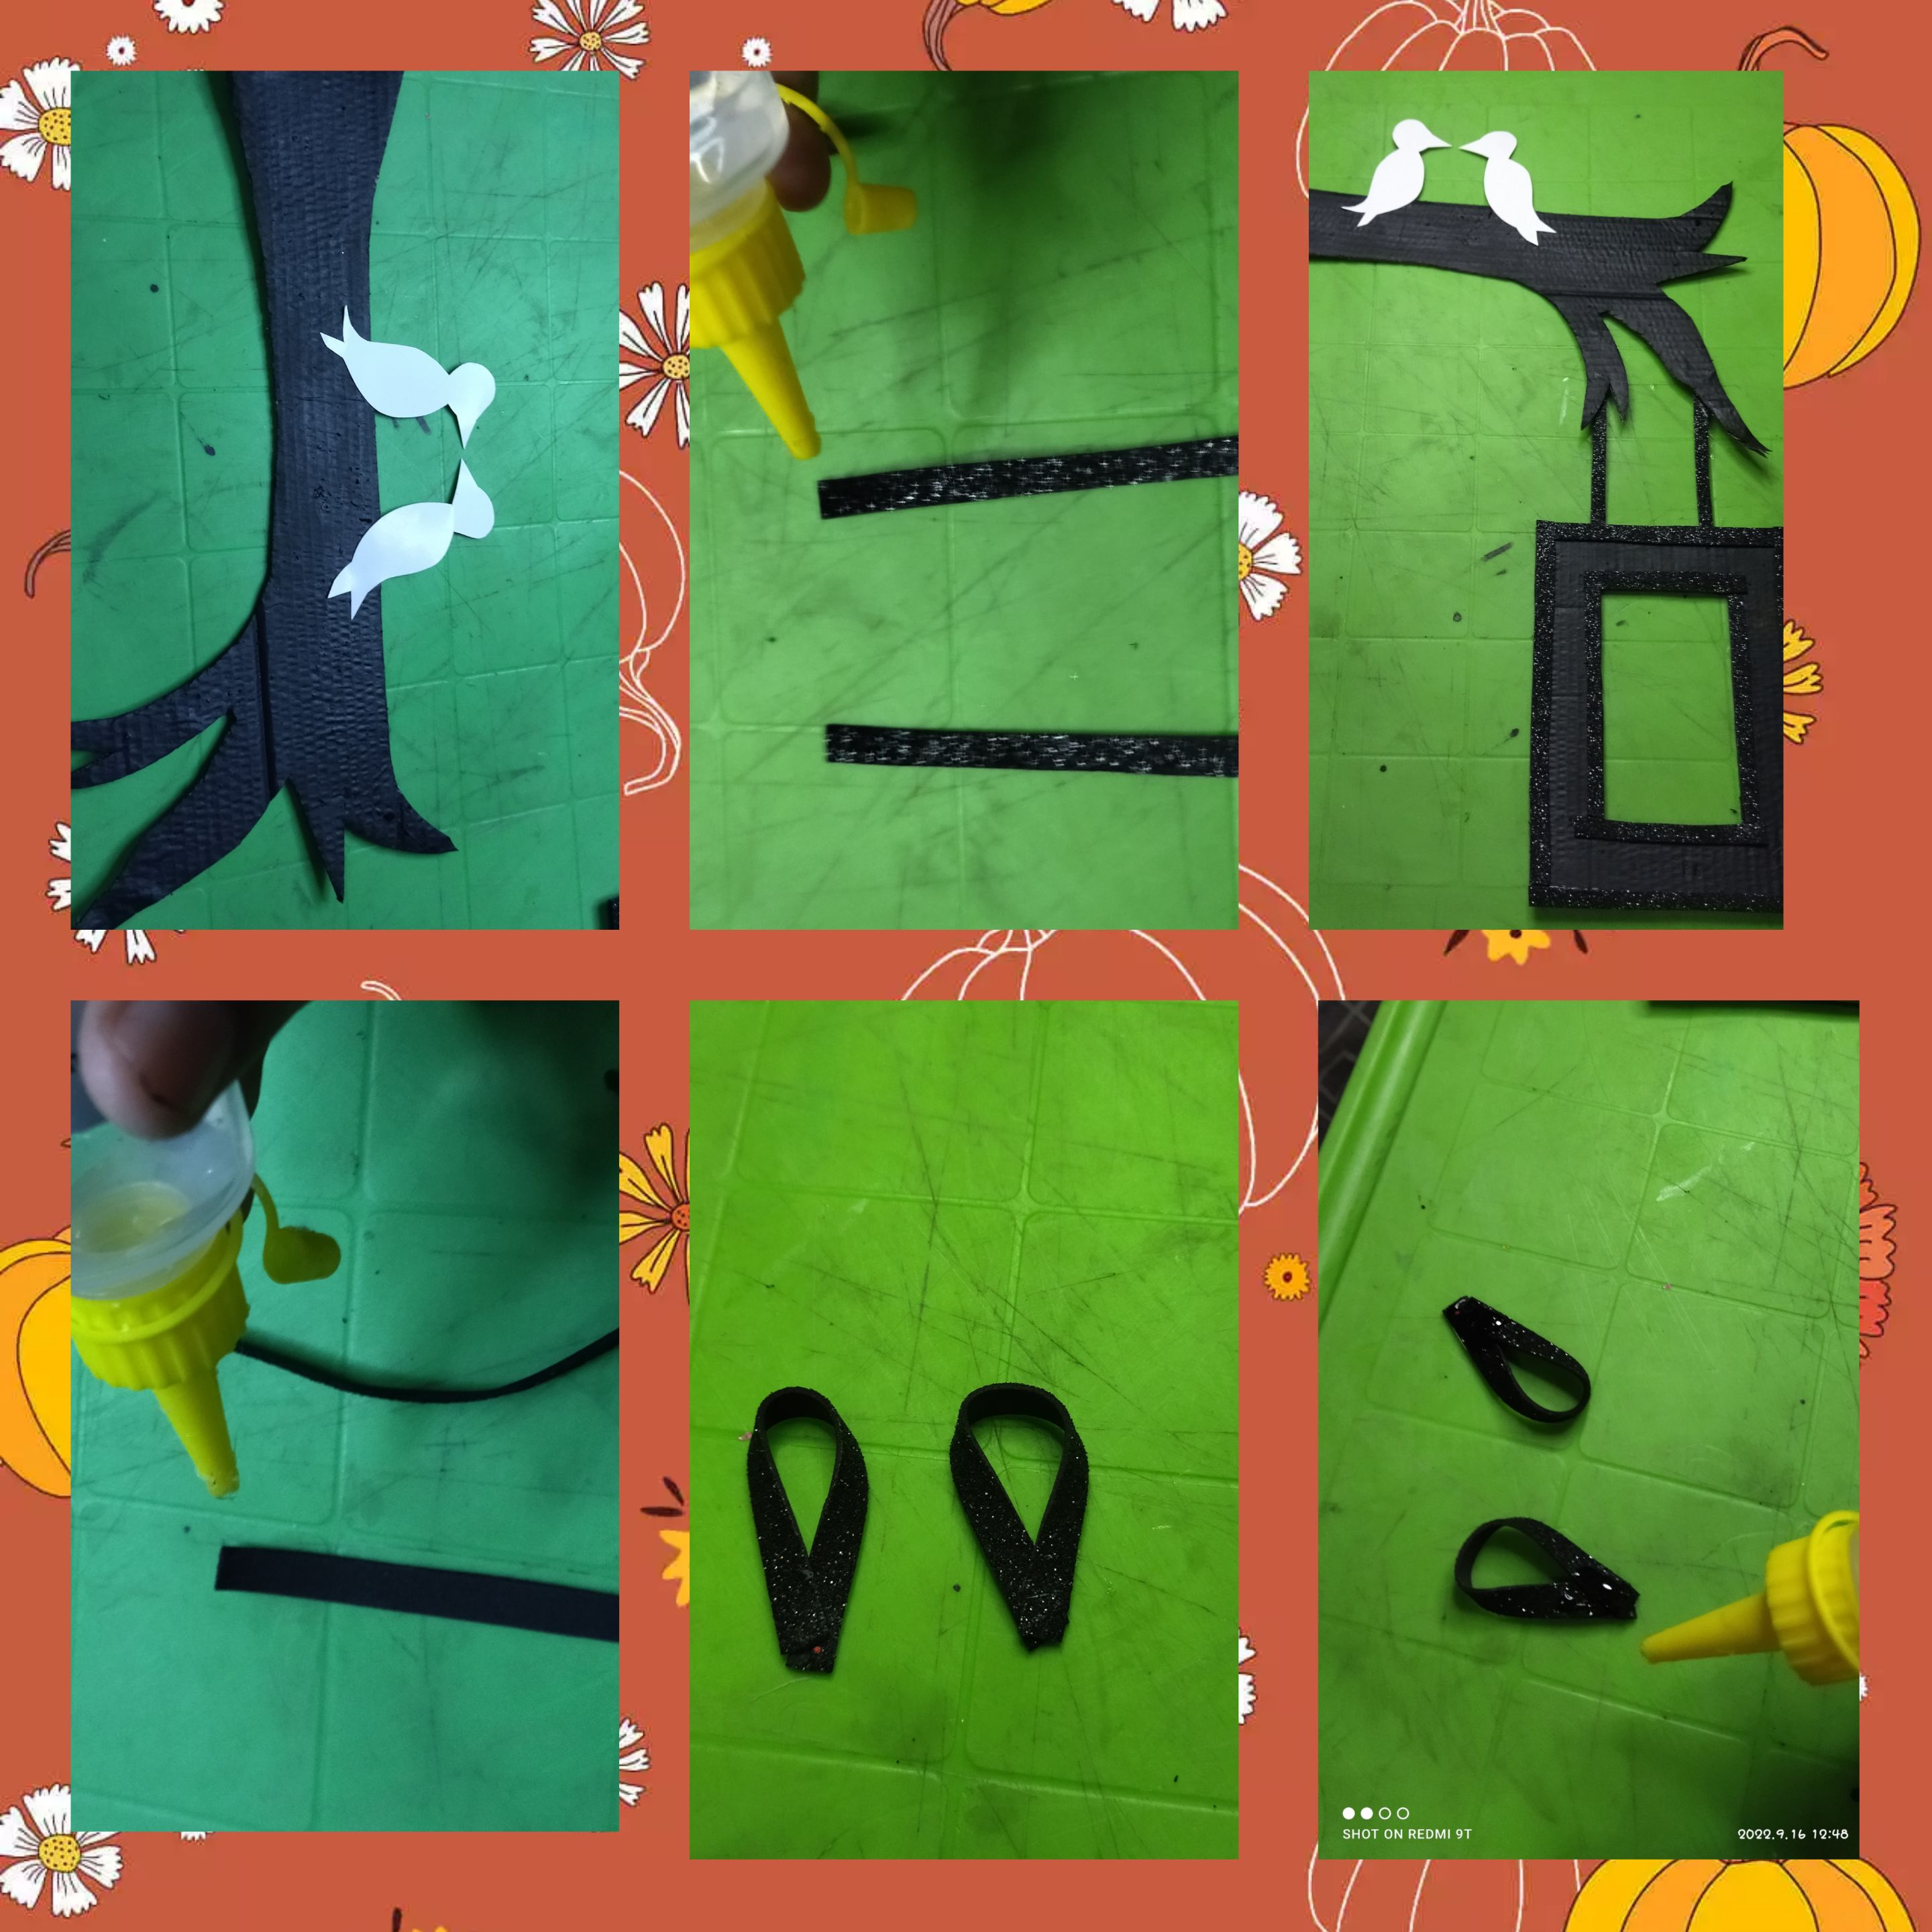
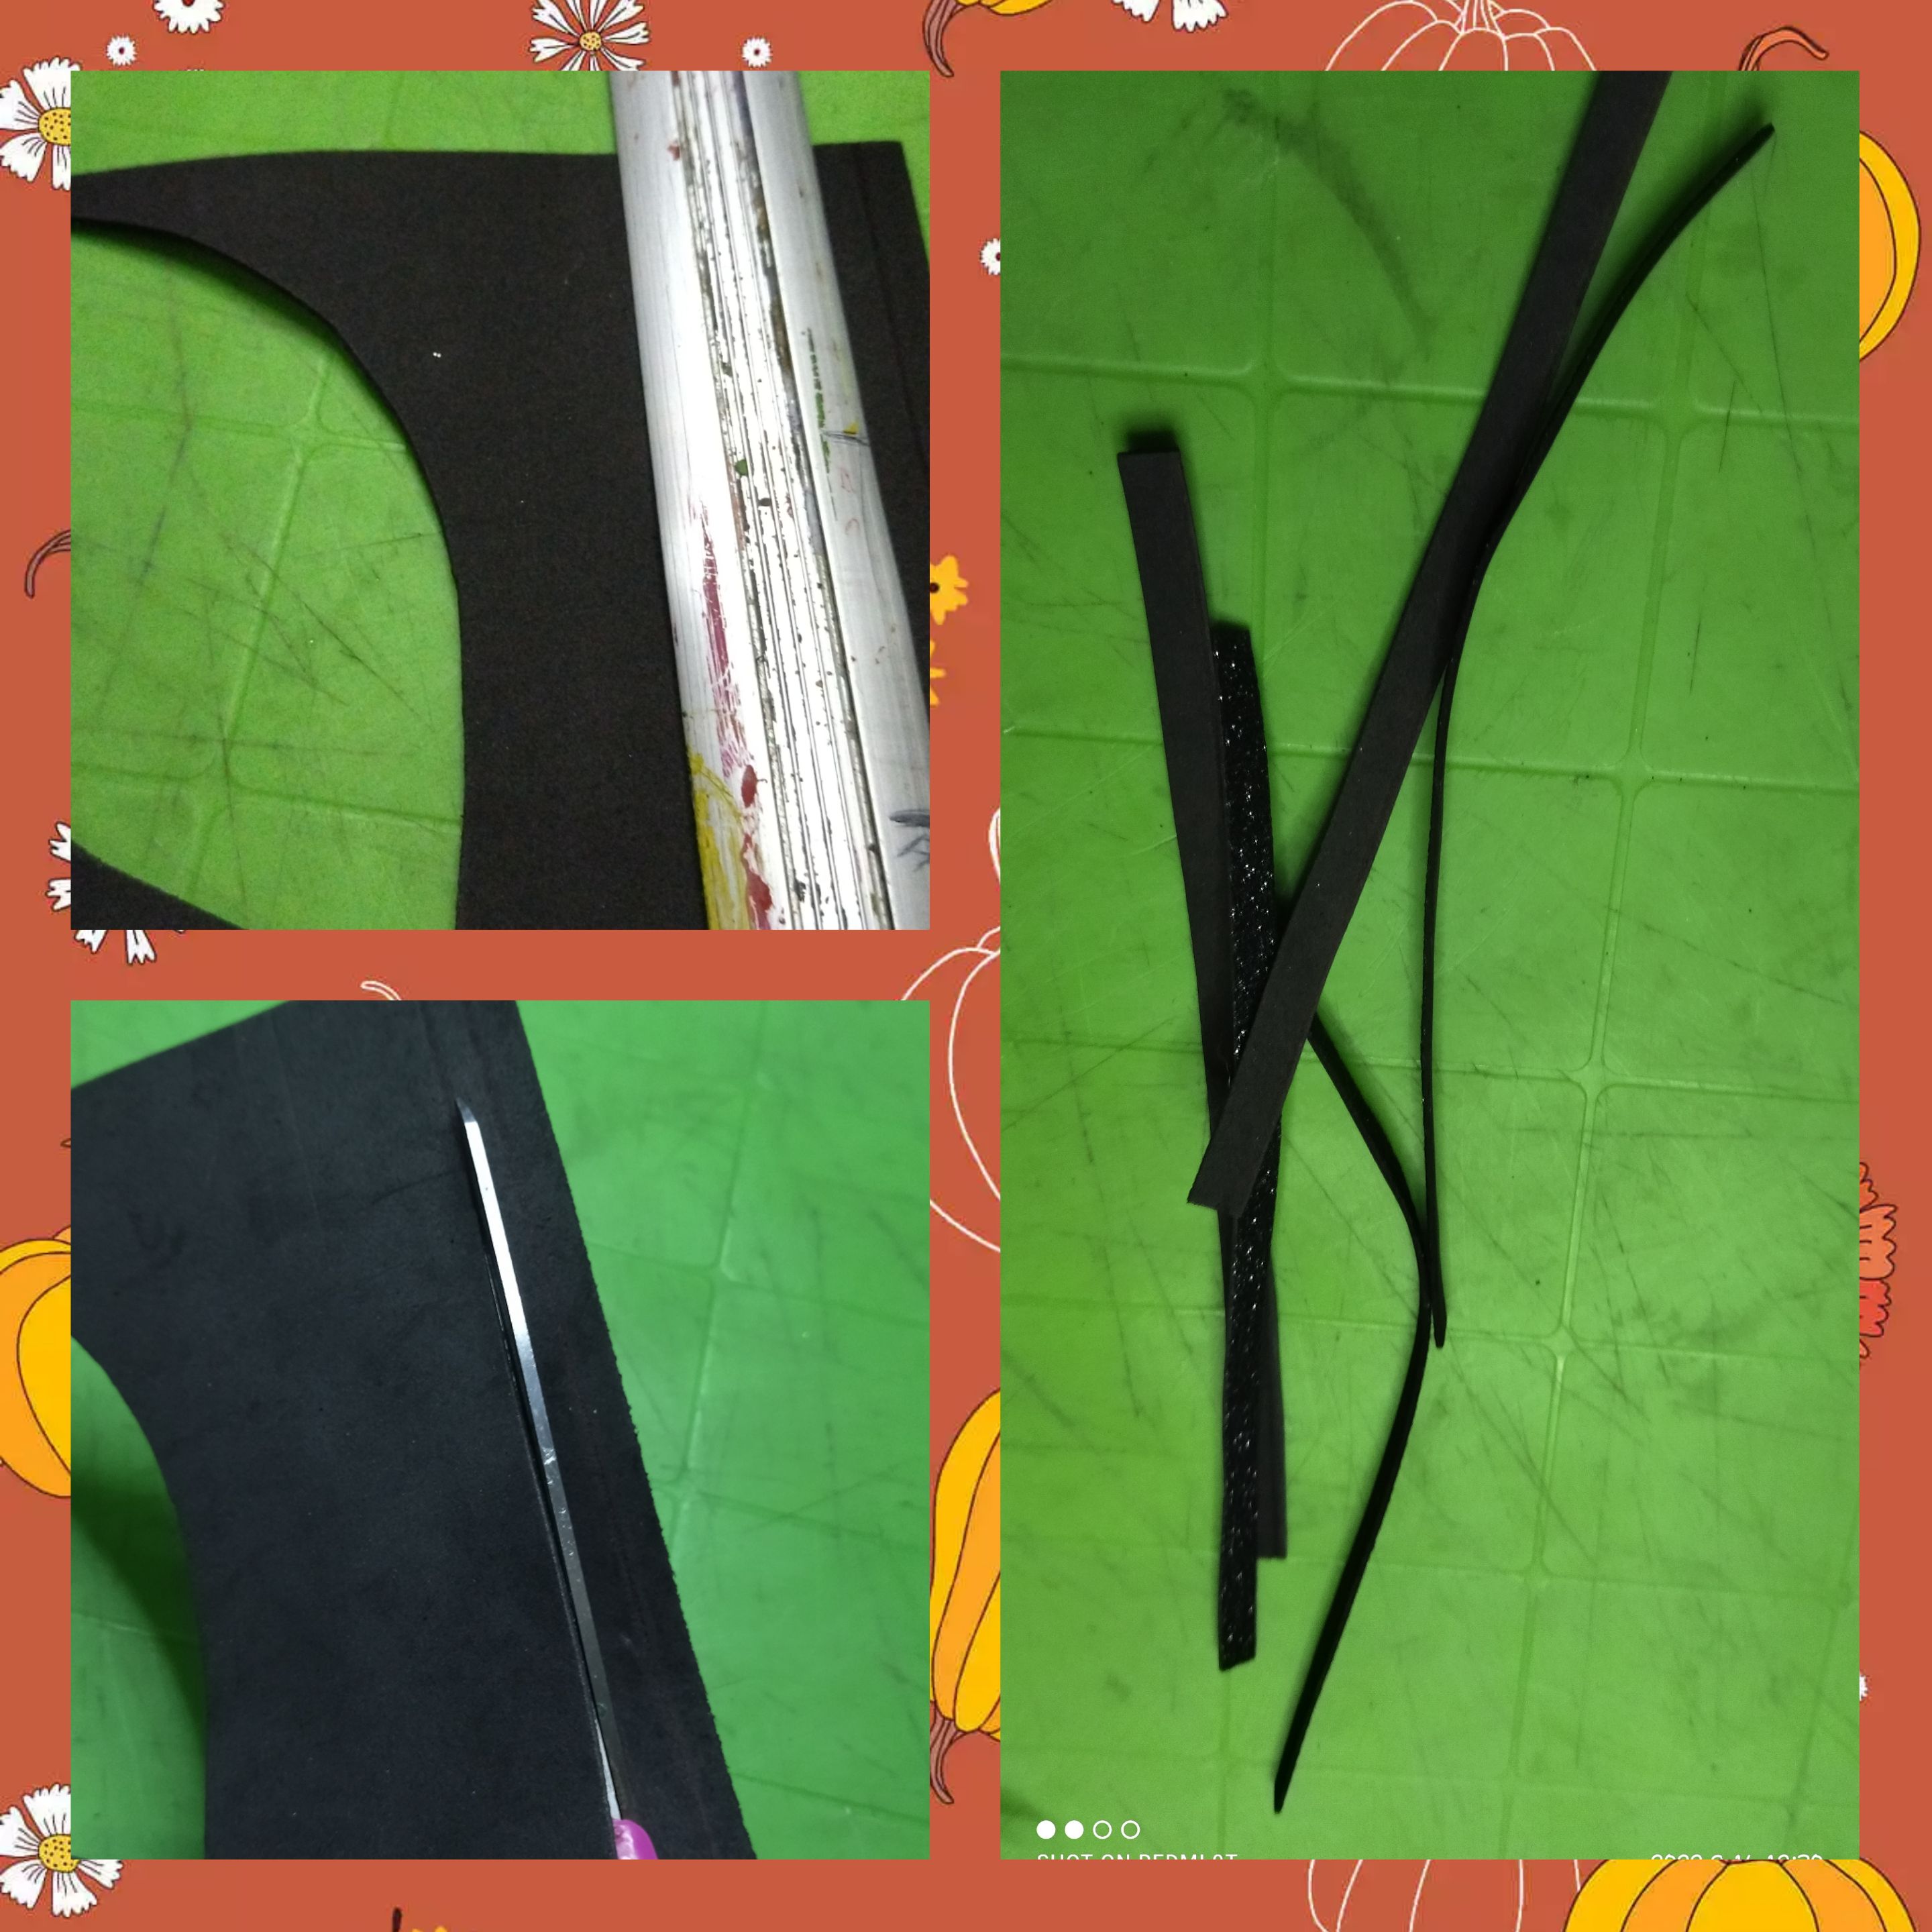
Cómo tenía un trocito de foami escarchado de color negro, y marcamos y recortamos varios listones.
Los listones que recortamos de foami los pegamos con el silicón liquido en los bordes del rectángulo.
Luego le aplique Silicón a los pajaritos y lo pegamos en el tronco, luego recortamos dos listones y formamos dos azas las cuales se pegan al tronco, después recorte dos tiras de foami escarchado negro las cuales pegue en el rectangulo y lo uni con el tronco.
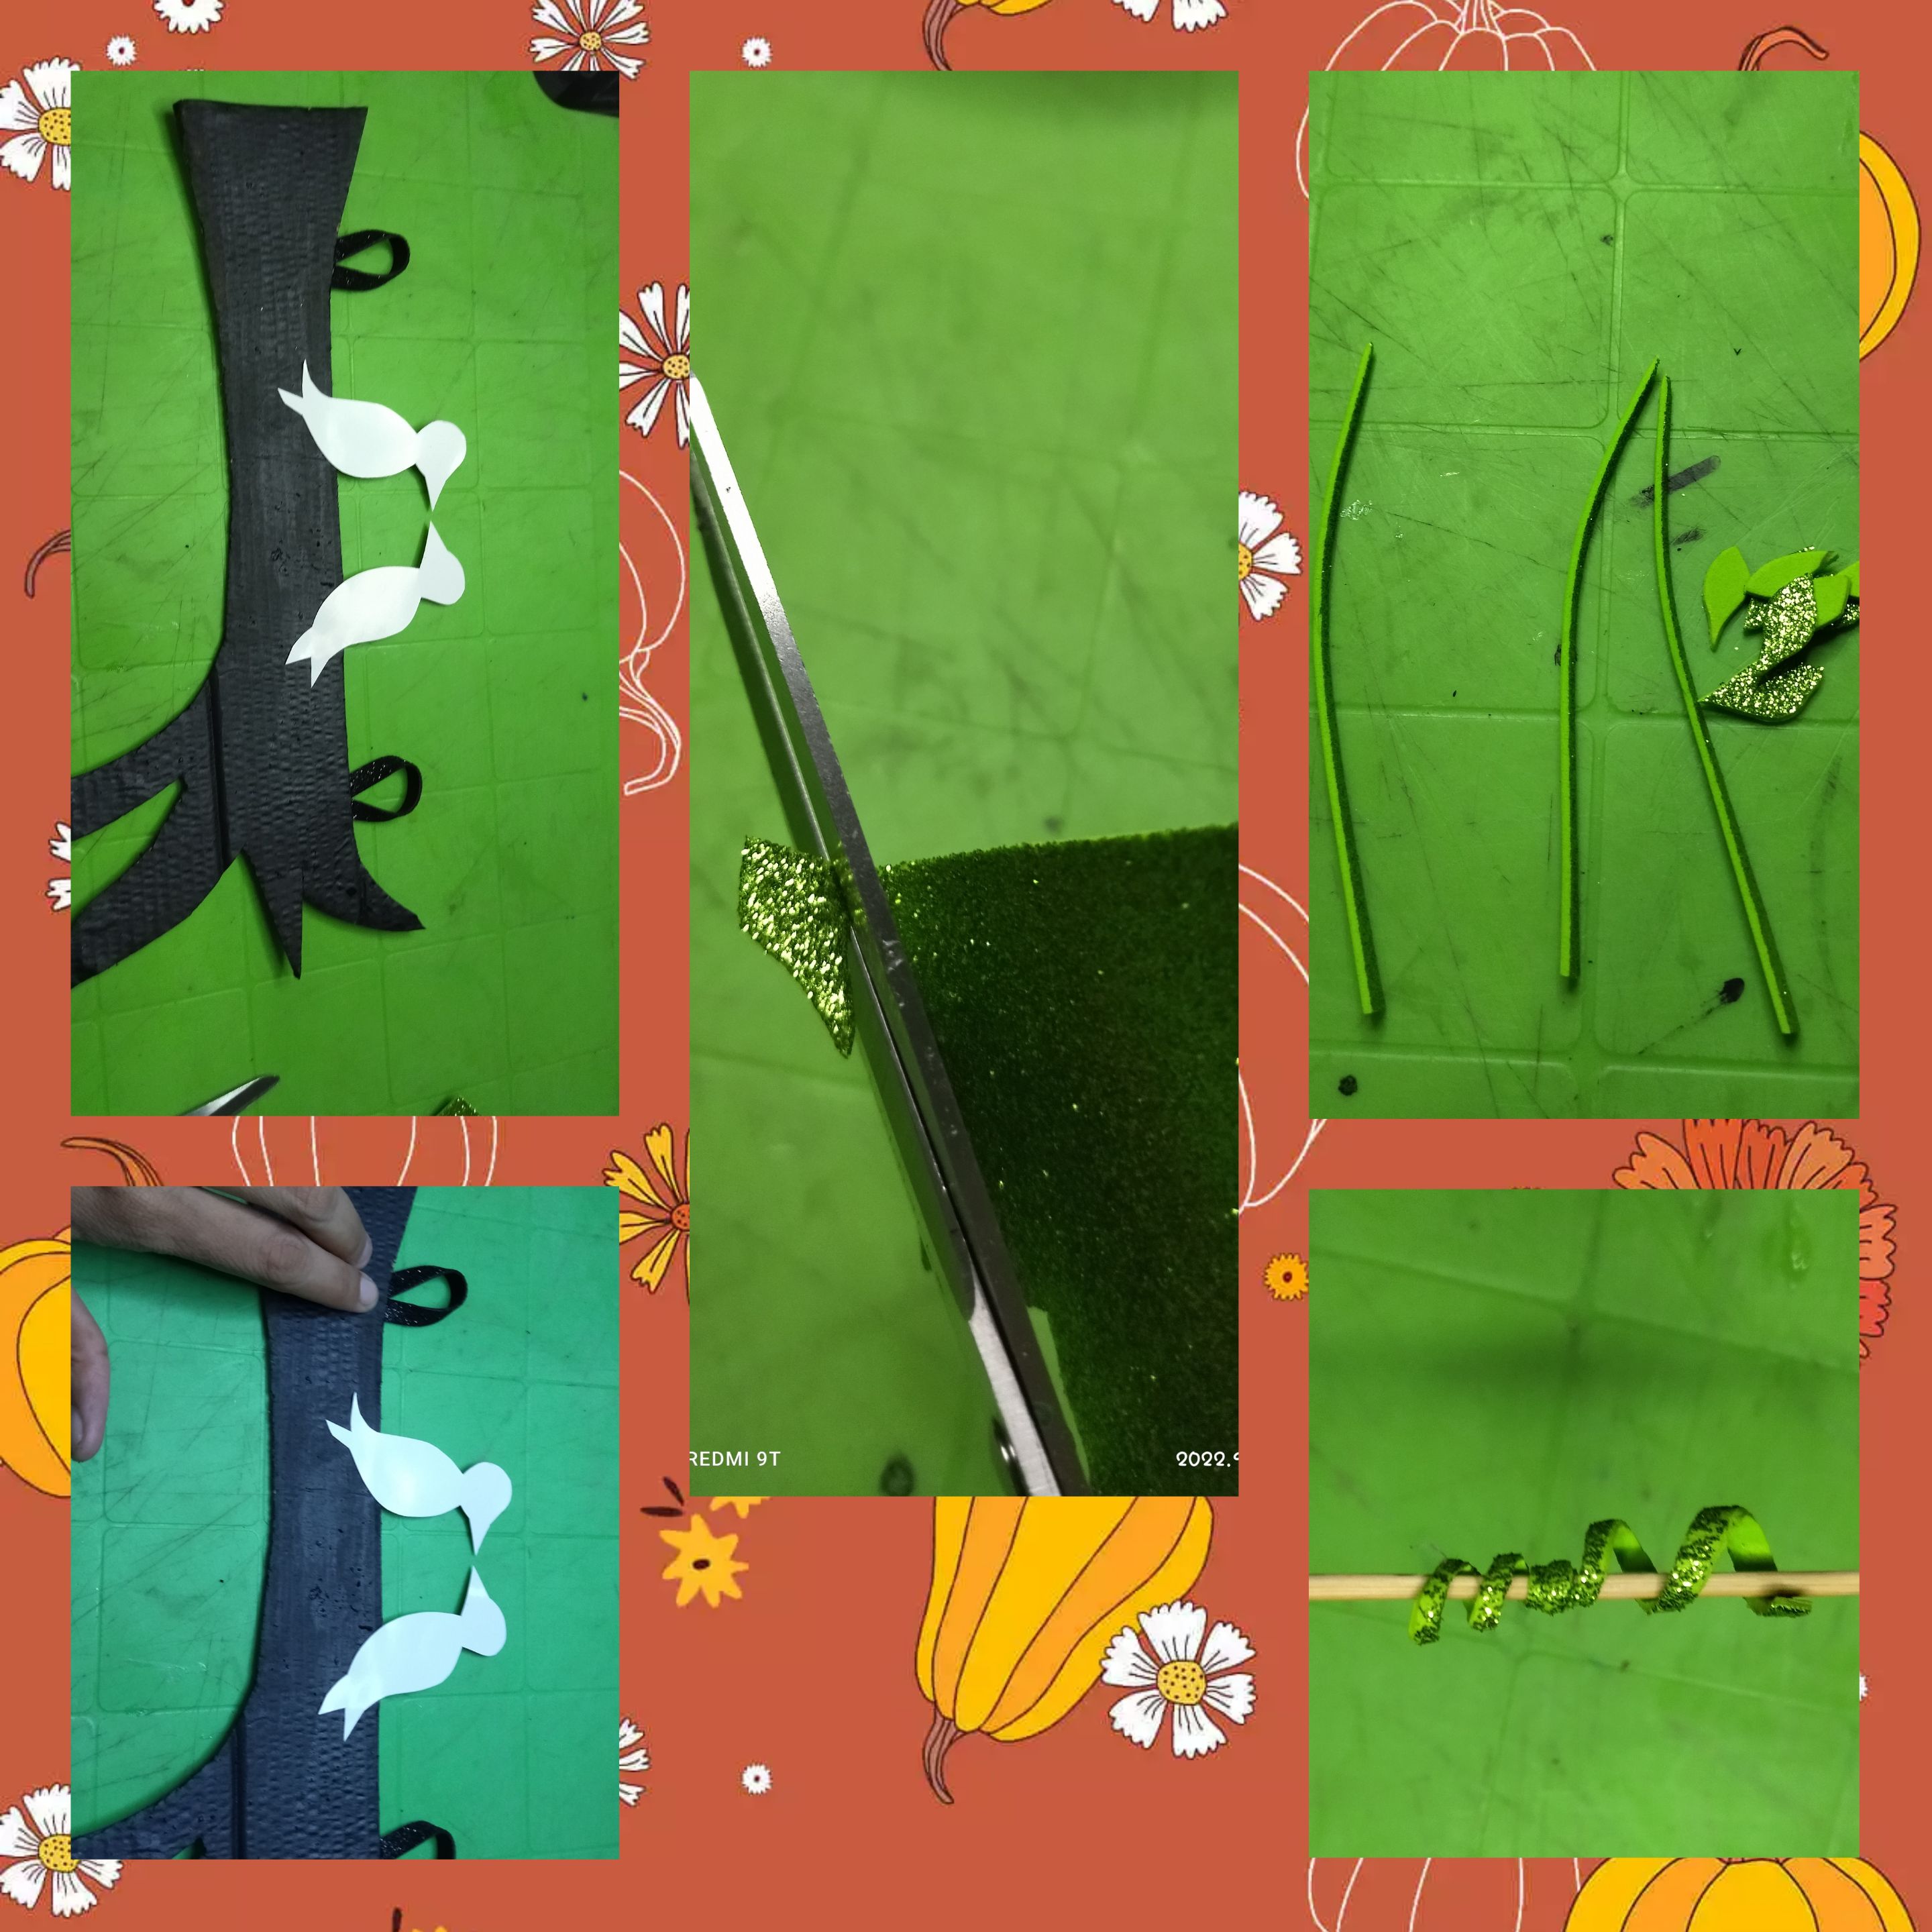
También tenía un trocito de foami escarchado verde manzana y recorte unas pequeñas hojitas así como también los listones de foami verde, los cuales enrolle en un palillo.
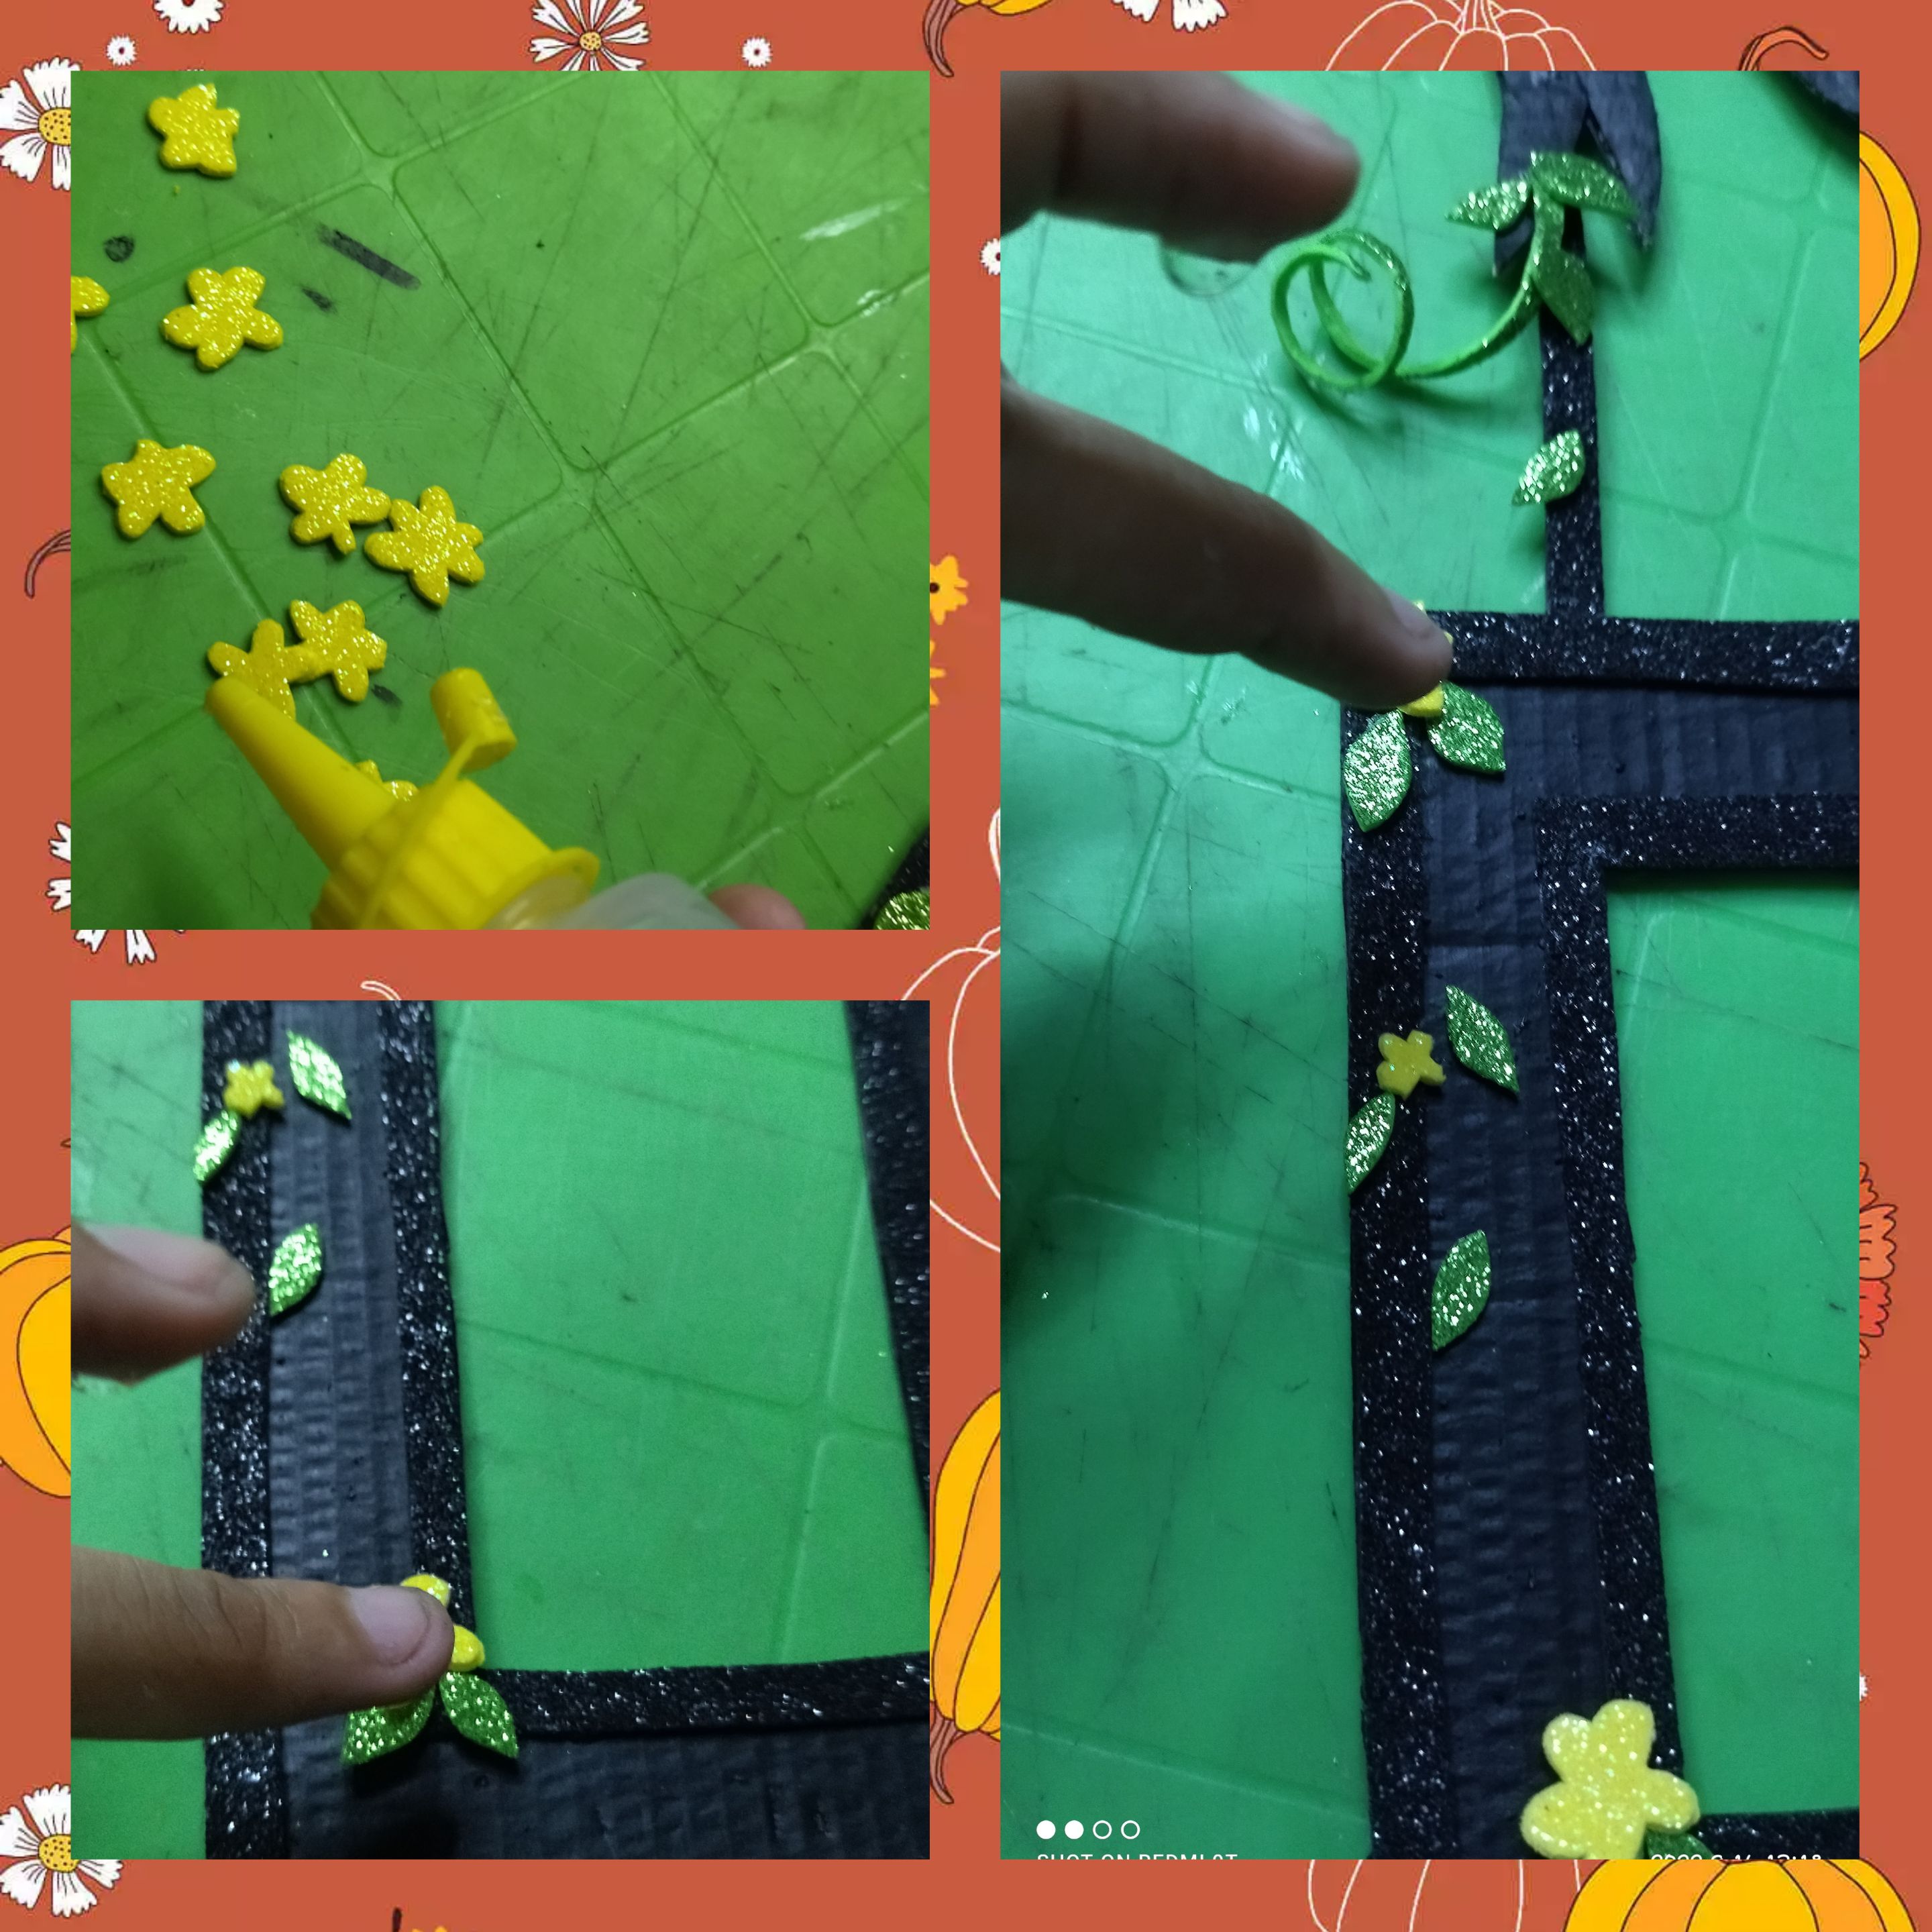
Ahora tome las hojas y las pegue en el tronco, así como también los listones de foami verde.
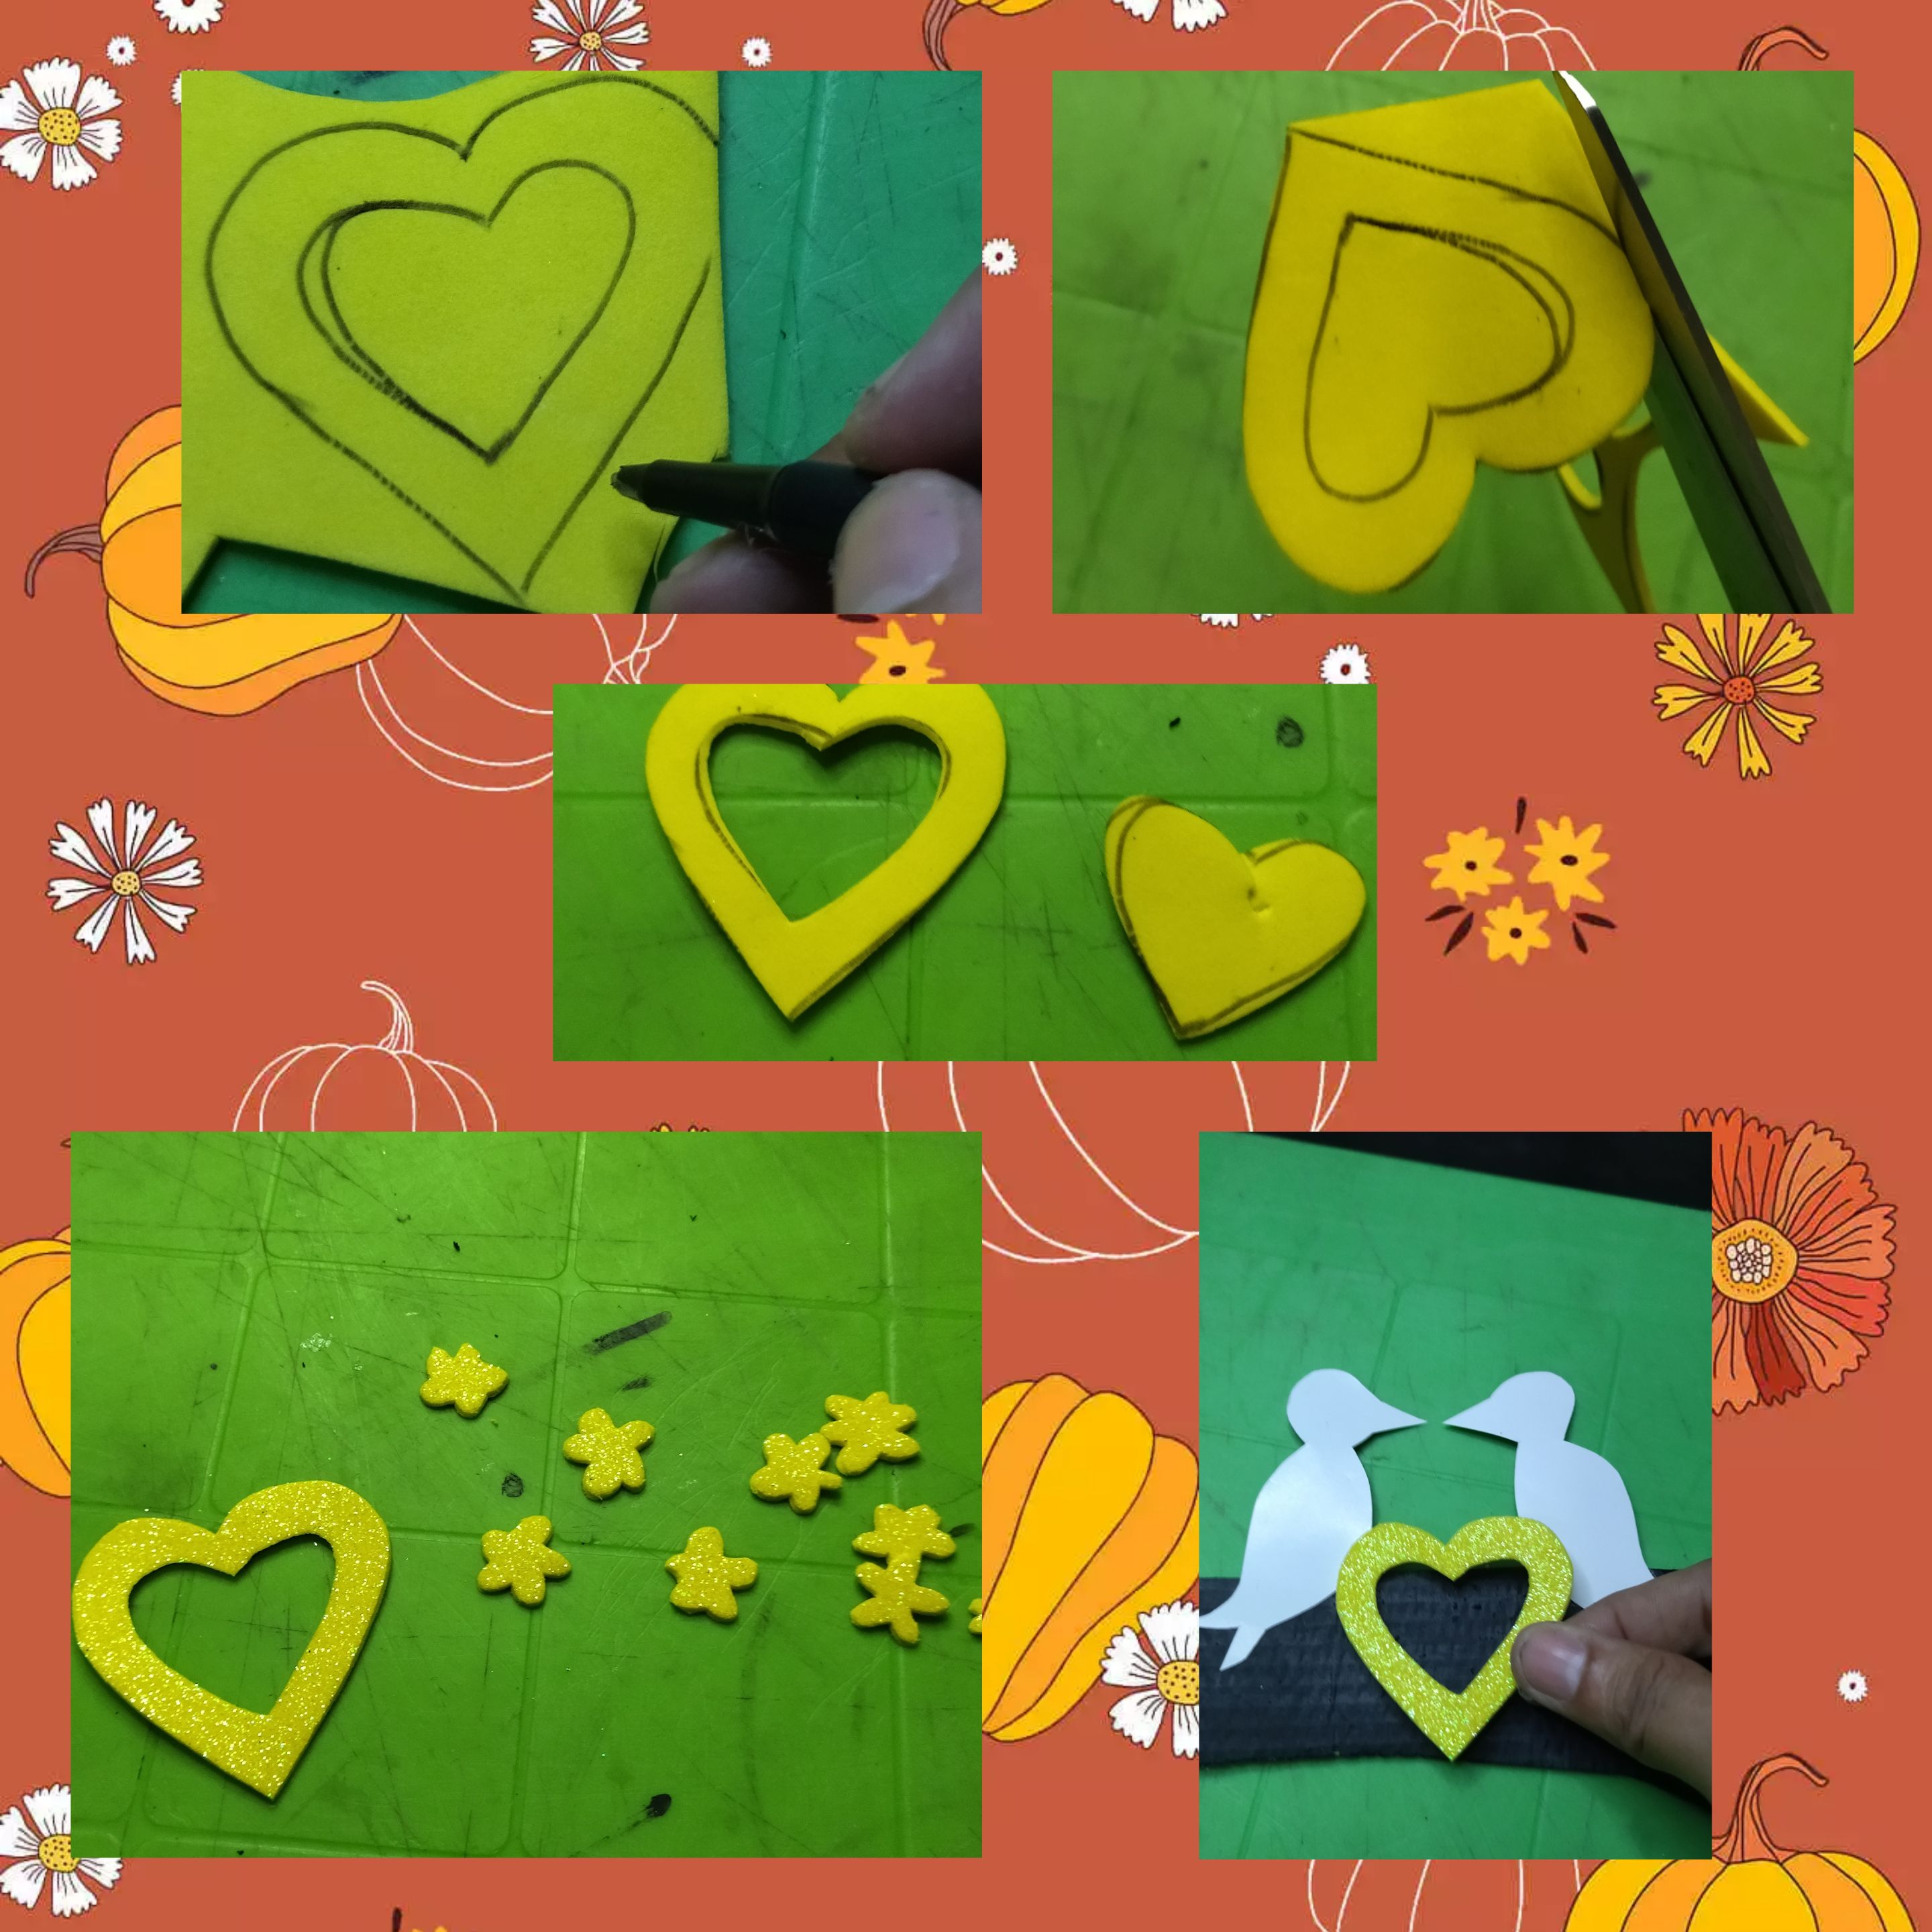
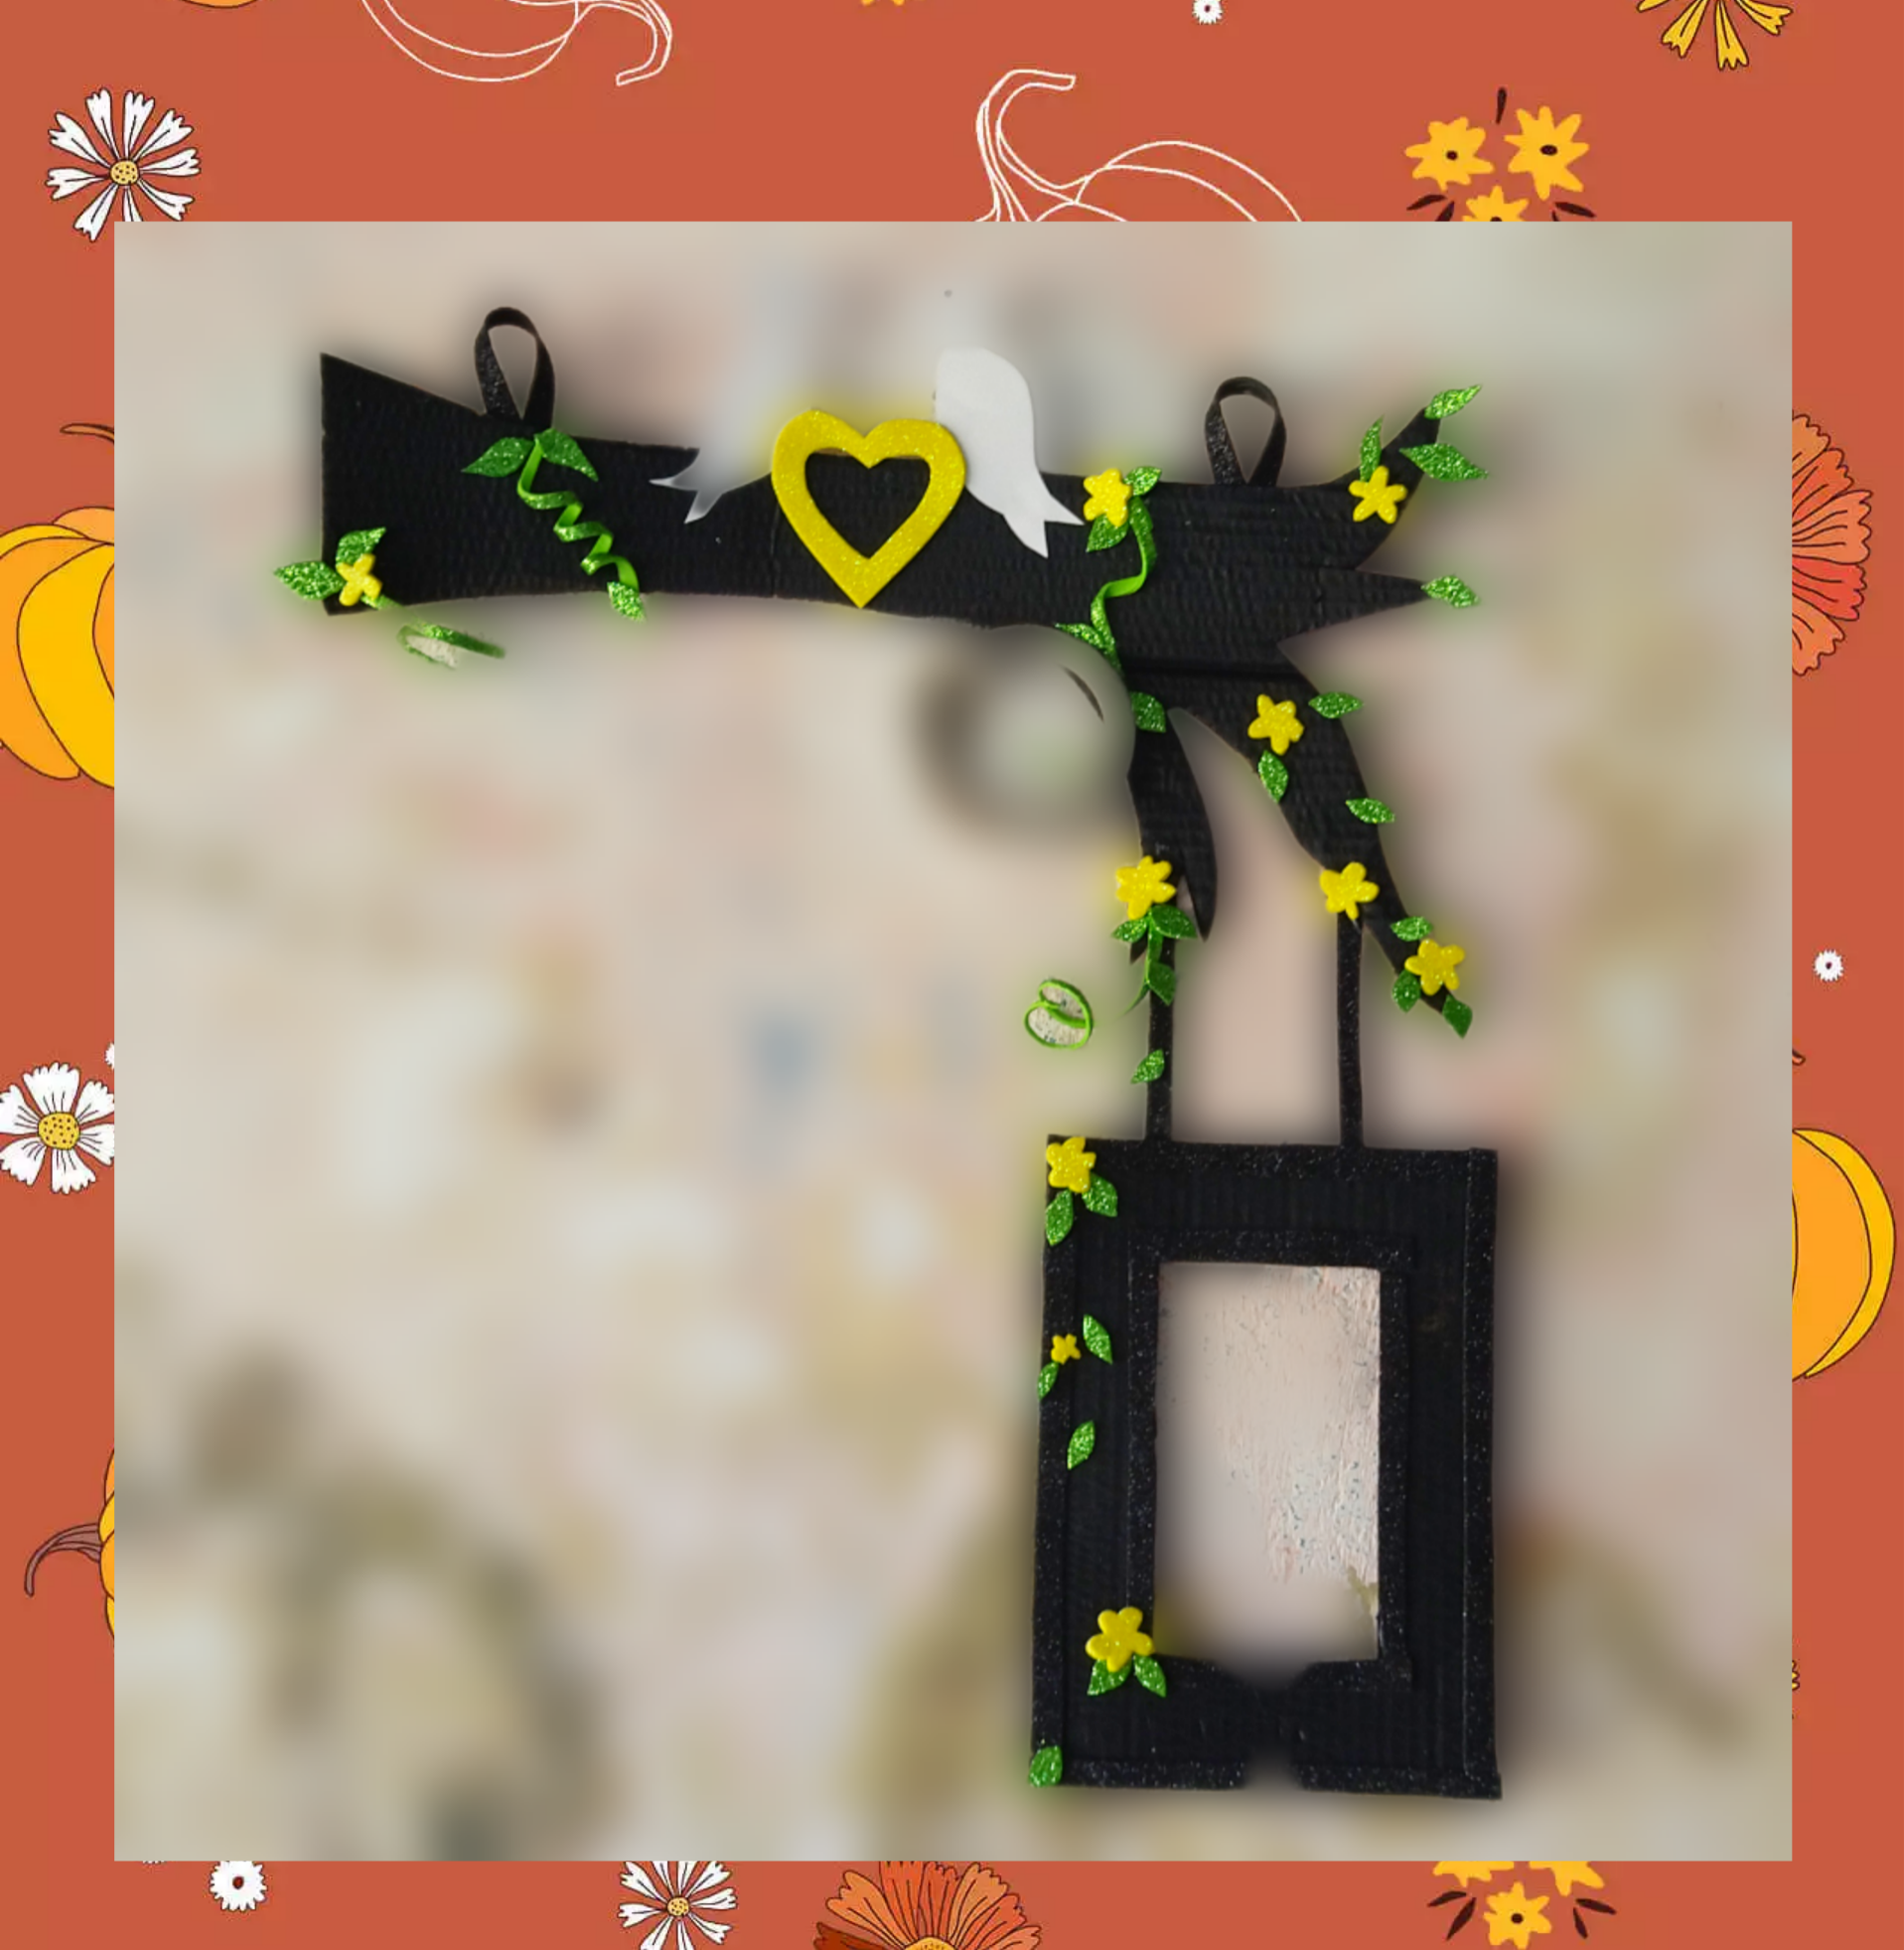
En un trocito de foami escarchado amarillo dibuje un corazón y unas florecitas y recortamos.
Luego pegamos todos los detalles y listo.

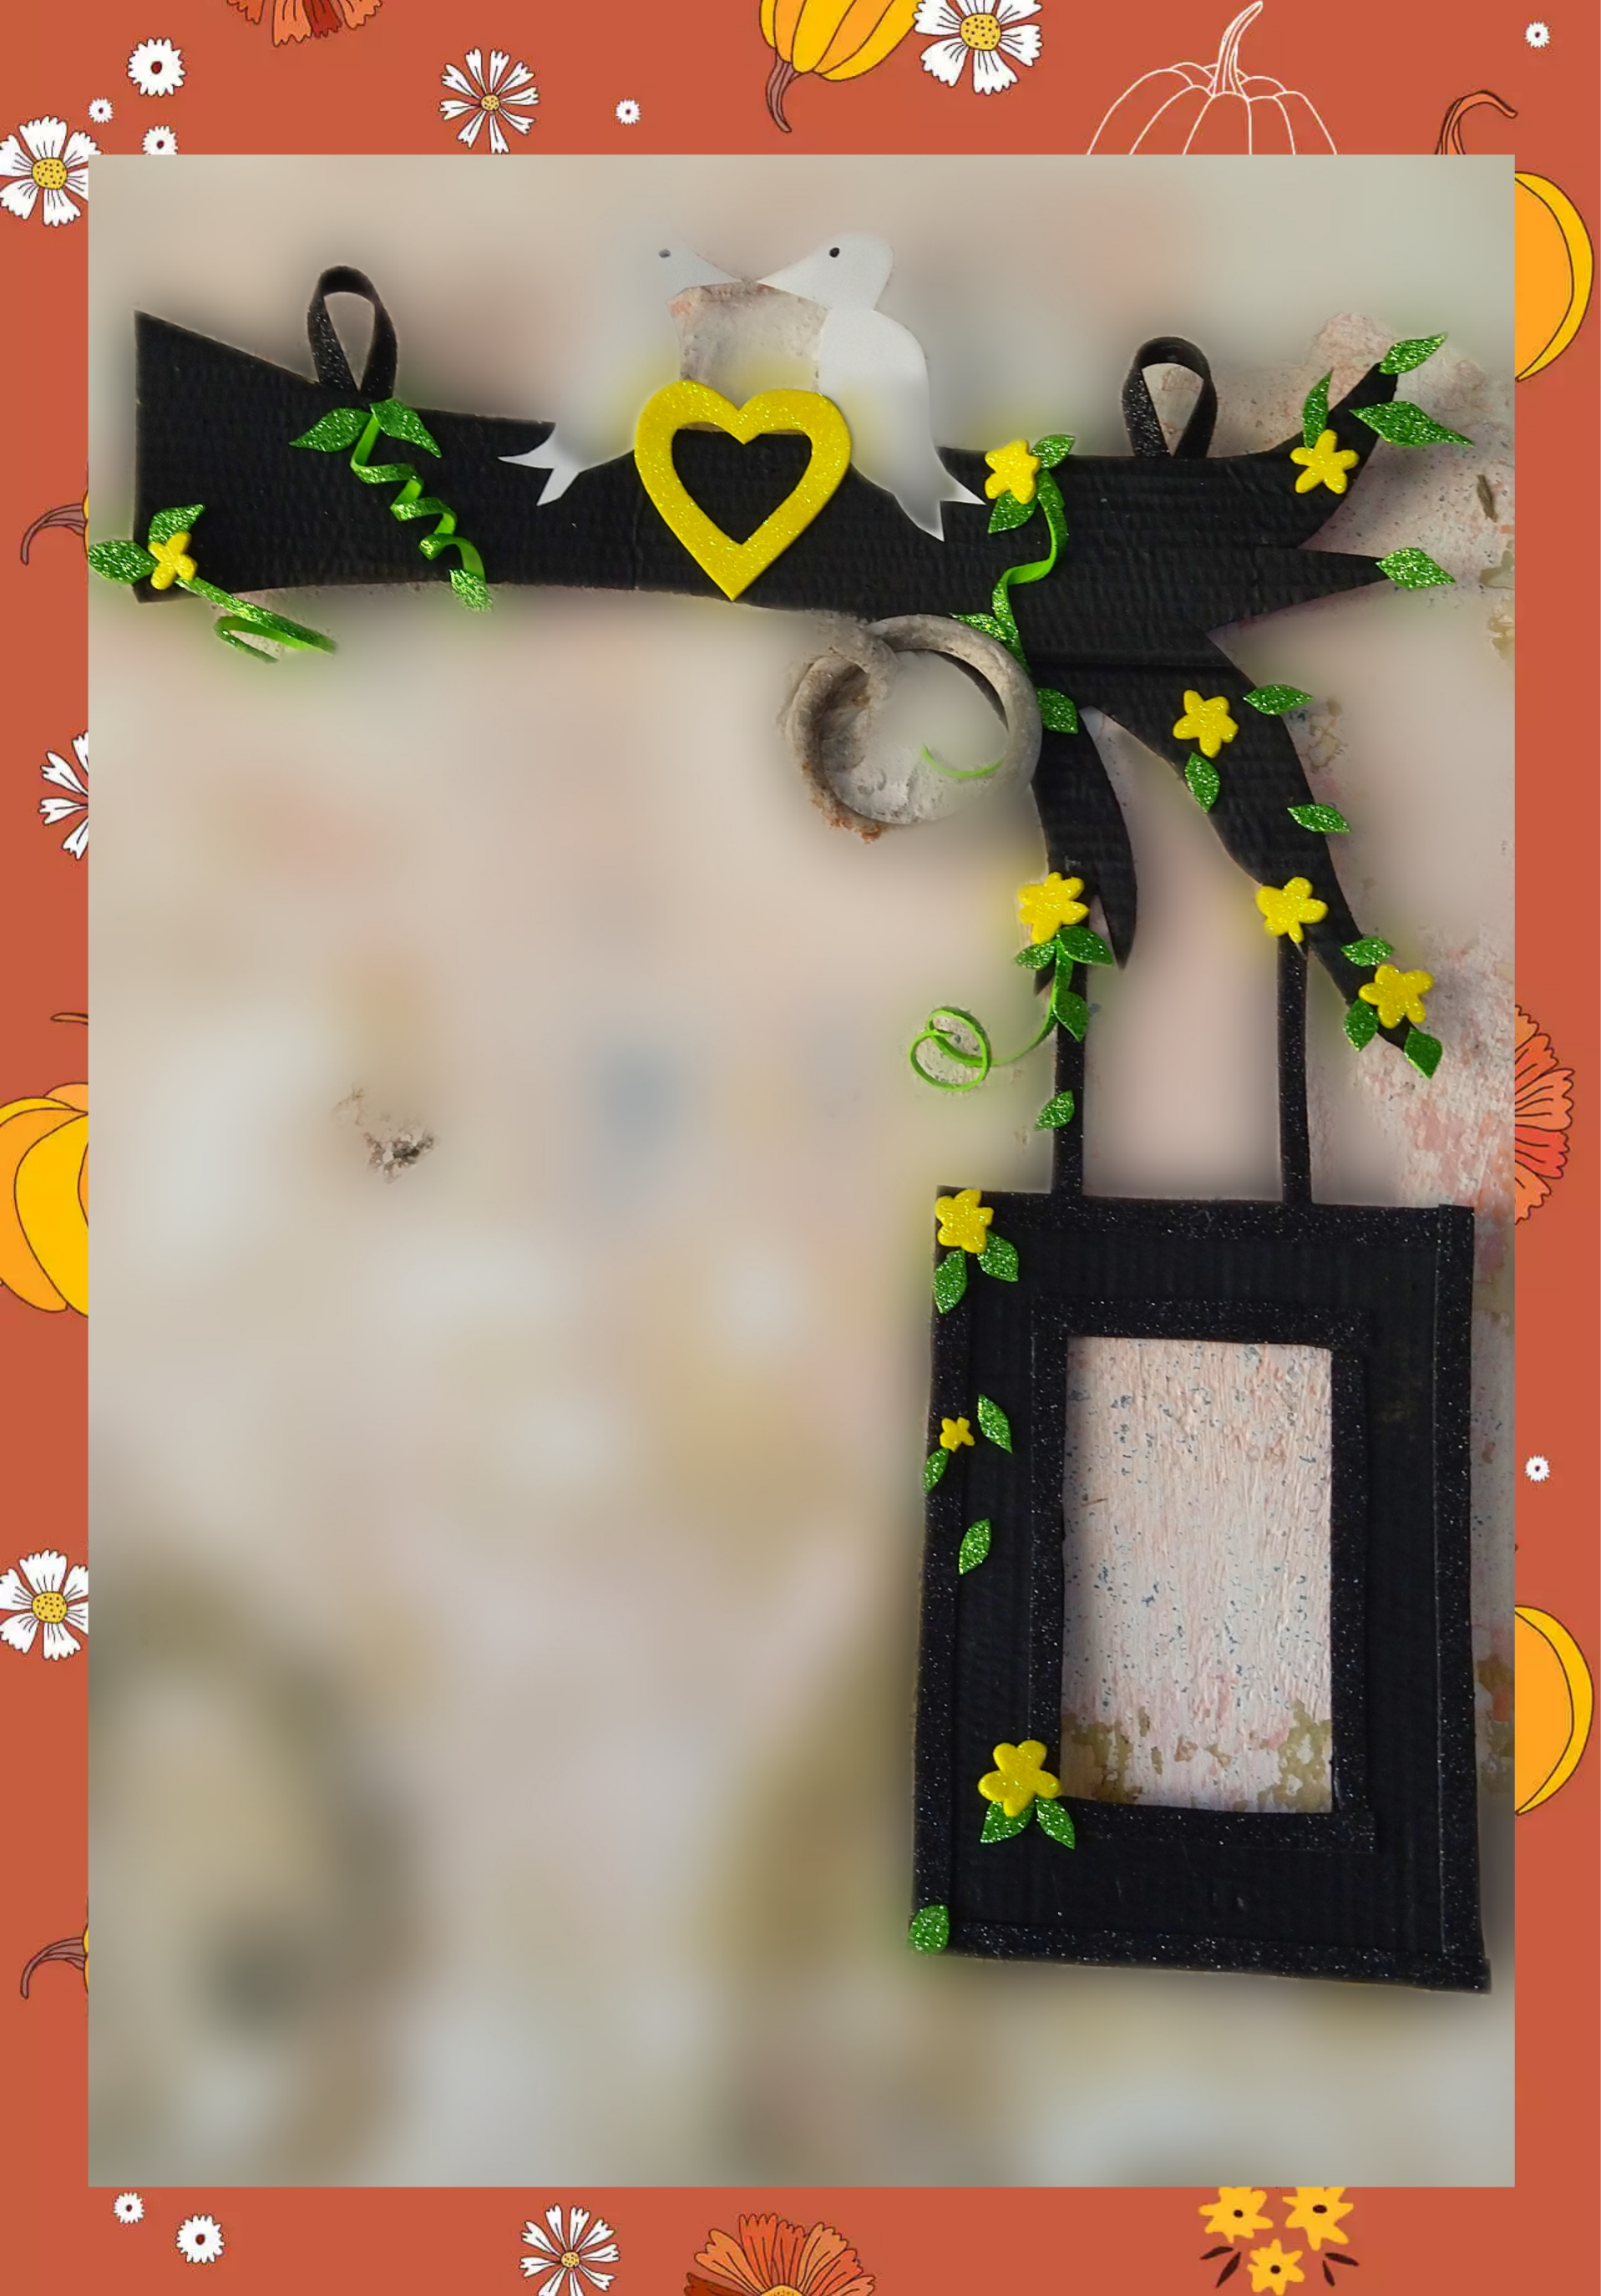
Espero que les haya gustado, por ahora es todo, ven que fácil y sencillo es realizar un trabajo bonito que nos sirva para obsequiar, solo es cuestión de proponernos hacerlo, solo con esos materiales que nos van sobrando de otros trabajos realizados.
📸Todas las fotos fueron tomadas con mi teléfono Xiaomi readmi 9T y son de mi propiedad utilice el traductor de Google y el programa polish para la edición y para la edición del vídeo utilice el programa video maker.
🌿💖🌿 ENGLISH 🌿💖🌿
Hello friends of #hive I hope you are well and are having a happy start to the weekend, today I bring you a manual work that I like make, with recycling materials.
I'm going to make a nice portrait frame with box cardboard, here I leave you a little of what was the step by step of my work.
First mark a rectangle of about 12x2 cm on the cardboard box and cut it out with the help of scissors.
On another piece of cardboard we mark a drawing of a tree trunk and then cut it out.
Then take the black paint and with the brush we apply it to the trunk and the rectangle that we cut out.
On a piece of white cardboard we draw two little birds and cut them out.
How I had a piece of black frosted foami, and we marked and cut several ribbons.
The strips that we cut out of foami are glued with liquid silicone on the edges of the rectangle.
Then apply silicone to the birds and stick it on the trunk, then cut two strips and form two hoops which are glued to the trunk, then cut two strips of black frosted foami which I glued on the rectangle and joined it with the trunk.
I also had a piece of apple green frosted foami and cut out some small leaves as well as the green foami ribbons, which I wrapped around a toothpick.
Now take the leaves and glue them to the trunk, as well as the green foam strips.
Draw a heart and some flowers on a piece of frosted yellow foami and cut it out.
I hope you liked it, that's all for now, you see how easy and simple it is to do a beautiful job that can be used as a gift, it's just a matter of proposing to do it, just with those materials that are left over from other work we have done.
📸All the photos were taken with my Xiaomi readmi 9T phone and they are my property. Use the Google translator and the polish program for editing and for the video editing use the video maker program.
Show more
Tags :
Woo!
This creator can upvote comments using 3speak's stake today because they are a top performing creator!
Leave a quality comment relating to their content and you could receive an upvote
worth at least a dollar.
Their limit for today is $0!
Their limit for today is $0!

We continue to talk about #hive doing marketing, in our second installment of Talking Inside the Cot
30 views
10 months ago
$

15 views
2 years ago
$

4 views
2 years ago
$

8 views
2 years ago
$

18 views
a year ago
$
More Videos
7 views
2 years ago
$

5 views
4 months ago
$

13 views
7 months ago
$

2 views
2 years ago
$

5 views
6 months ago
$

11 views
3 years ago
$

9 views
a year ago
$

7 views
2 months ago
$

8 views
2 years ago
$

44 views
2 years ago
$

14 views
3 years ago
$

39 views
10 months ago
$

3 views
9 months ago
$
6 views
a year ago
$

87 views
2 years ago
$

5 views
2 years ago
$

16 views
10 months ago
$

5 views
2 years ago
$
7 views
3 years ago
$

3 views
a year ago
$

9 views
2 years ago
$

1 views
3 years ago
$

Comments:
Reply:
To comment on this video please connect a HIVE account to your profile: Connect HIVE Account