"LOCOS POR CAPCUT" video #5 "Aparición de Texto"📽️📹📱 [Esp/Ing]
14
About :
Hola, Comunidad de Espavlog espero que se encuentren muy bien, bienvenidos a otro video de la serie de “LOCOS POR CAPCUT” el video de hoy es muy entretenido y es una técnica que me parece genial a la hora de hacer una intro para un video.
Hello, Espavlog Community, I hope you are feeling very well, welcome to another video in the “LOCOS POR CAPCUT” series. Today's video is very entertaining and it is a technique that I think is great when making an intro for a video.
Este tutorial es de nivel medio, tienes que tener previo conocimiento de Capcut y de todas las herramientas que usaremos hoy ya la hemos usado en videos anteriores. Así que espero que disfruten de este video y díganme que tal les pareció esta técnica. Les dejare paso a paso lo que tienen que hacer de manera escrita y que se entienda por si quedan con dudas amigos.
This tutorial is at a medium level, you have to have prior knowledge of Capcut and we have already used all the tools that we will use today in previous videos. So I hope you enjoy this video and tell me what you think of this technique. I will leave you step by step what you have to do in writing and so that it is understood in case you have any doubts, friends.
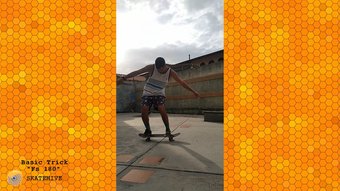
Paso 1: Grabarte caminando de un lado a otro y colocar el texto que quieras en el medio del video y exportar.
Paso 2: Después de exportar el video, crearas un nuevo proyecto y eligieras el video exportado con el texto y el video original. El video original lo usaras en superposición.
Paso 3: Te colocaras al inicio del video original e iras a la opción de máscaras eliges la horizontal y colocas un Keyframes al inicio del video.
Paso 4: Mientras avance el video iras moviendo cuidadosamente la máscara mientras siga avanzando el video y mueves la máscara se irán creando keyframes y dejaras de seguir la máscara hasta que salgas de la imagen. “En el video lo podrás ver mejor”
Step 1: Record yourself walking from one side to the other and place the text you want in the middle of the video and export.
Step 2: After exporting the video, you will create a new project and choose the exported video with the text and the original video. You will use the original video as an overlay.
Step 3: You will be placed at the beginning of the original video and go to the masks option, choose the horizontal one and place a Keyframes at the beginning of the video.
Step 4: As the video progresses, you will carefully move the mask as the video continues and as you move the mask, keyframes will be created and you will stop following the mask until you leave the image. “In the video you can see it better”
Música:
Wedding sound no copyright - Andika rasyid
Logo Hive.
https://es.wikipedia.org/wiki/Hive_%28criptomoneda%29
**Miniatura:
https://www.fotojet.com/es/
El video fue grabado con un teléfono redmi A1 y fue editado con la aplicación de capcut.**
Logo Capcut:
https://freelogopng.com/capcut-logo-png
Show more
Tags :
Woo!
This creator can upvote comments using 3speak's stake today because they are a top performing creator!
Leave a quality comment relating to their content and you could receive an upvote
worth at least a dollar.
Their limit for today is $0!
Their limit for today is $0!
2 views
a year ago
$
2 views
10 months ago
$

2 views
a year ago
$
5 views
a year ago
$

46 views
a month ago
$
More Videos

17 views
3 months ago
$
58 views
4 years ago
$

9 views
a year ago
$

46 views
2 years ago
$

31 views
3 years ago
$
58 views
4 years ago
$

8 views
2 weeks ago
$

2 views
8 months ago
$

5 views
4 years ago
$

15 views
8 months ago
$
3 views
8 months ago
$
4 views
2 years ago
$

7 views
a month ago
$

2 views
3 years ago
$

31 views
a year ago
$

13 views
2 years ago
$

12 views
7 months ago
$

0 views
2 years ago
$

3 views
a year ago
$

7 views
2 months ago
$

47 views
2 years ago
$

82 views
3 years ago
$

38 views
4 years ago
$

4 views
10 months ago
$
Comments:
Reply:
To comment on this video please connect a HIVE account to your profile: Connect HIVE Account