Little Christmas Trees ǀ Arbolitos de Navidad
16
About :
Hello, creative people of Hive DIY! The Christmas season is just around the corner and that's why I want to show you a very colorful craft. It's about Foamy Christmas trees, perfect for our decorations at home. Let's see the step by step.
¡Hola, gente creativa de Hive DIY! La época navideña está a la vuelta de la esquina y es por eso que quiero mostrarles una manualidad muy colorida. Se trata de unos Arbolitos de Navidad de Foamy, perfectos para nuestras decoraciones en casa. Veamos el paso a paso.

We will need / Vamos a necesitar:
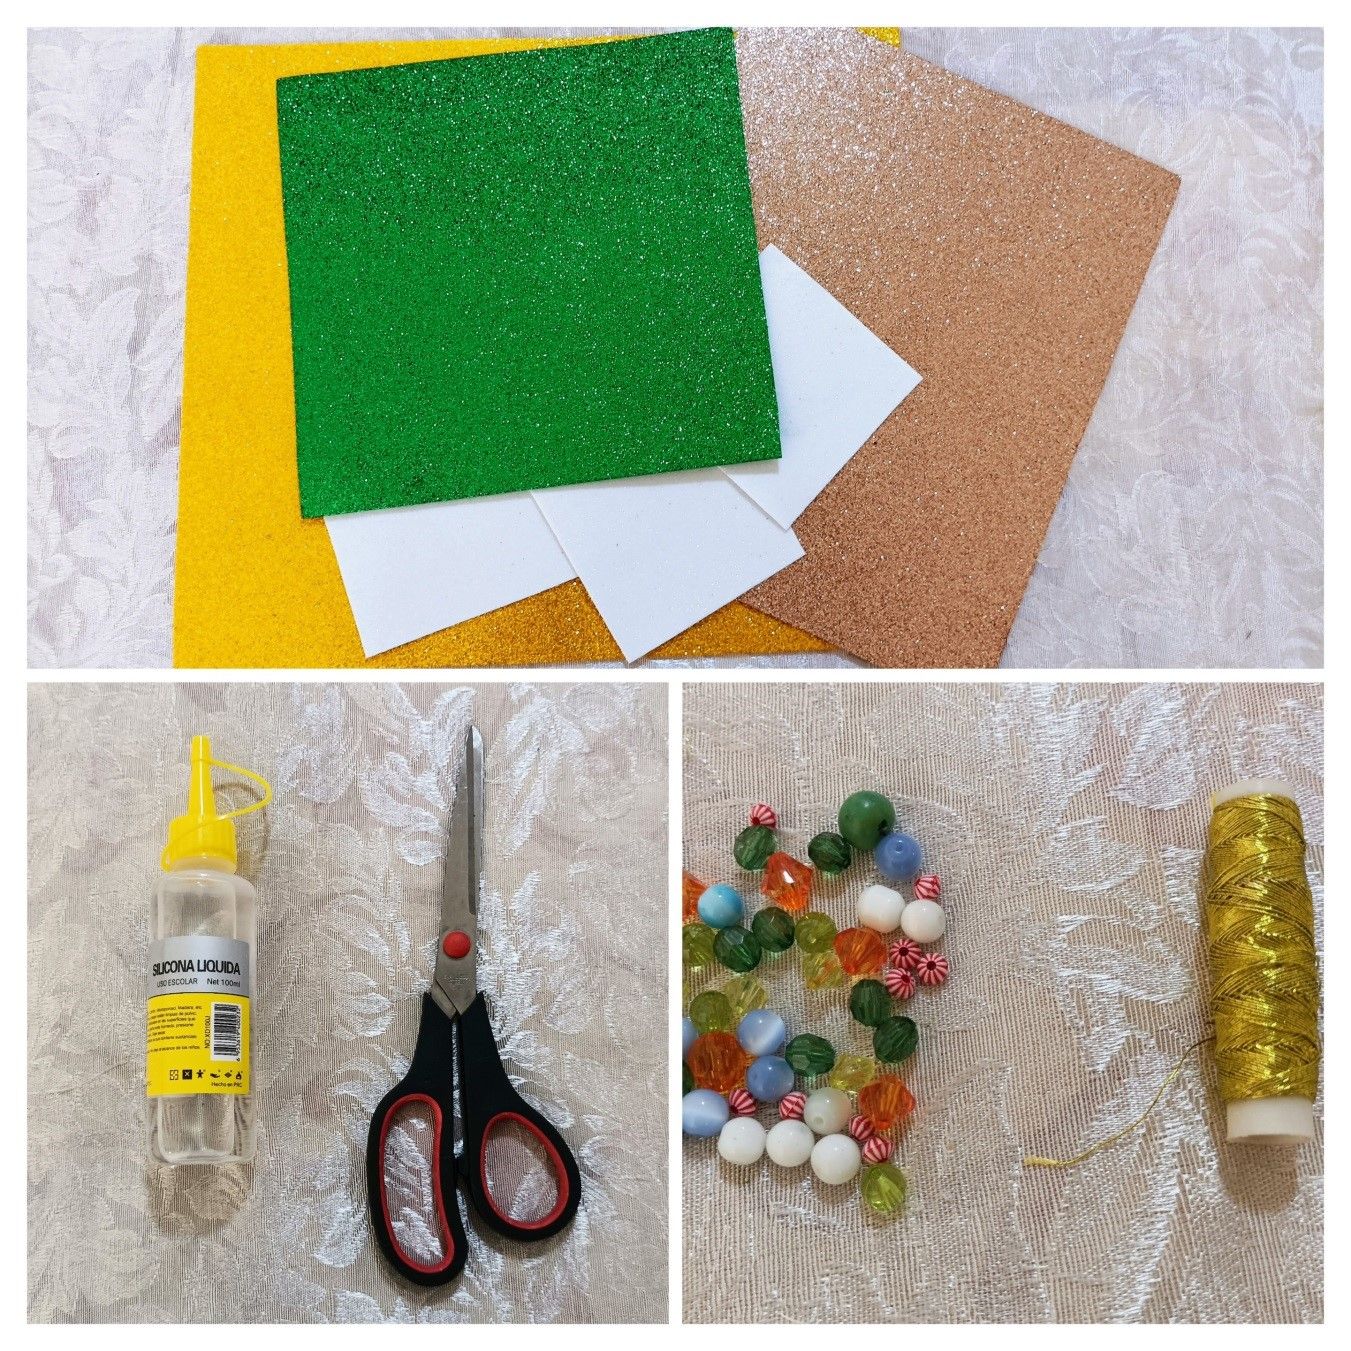
Sheets of glittered Foamy, Liquid Silicone, Scissors, Decorative beads and golden thread.
Pliegos de Foamy escarchado, Silicón líquido, Tijera, Cuentas decorativas e Hilo dorado.
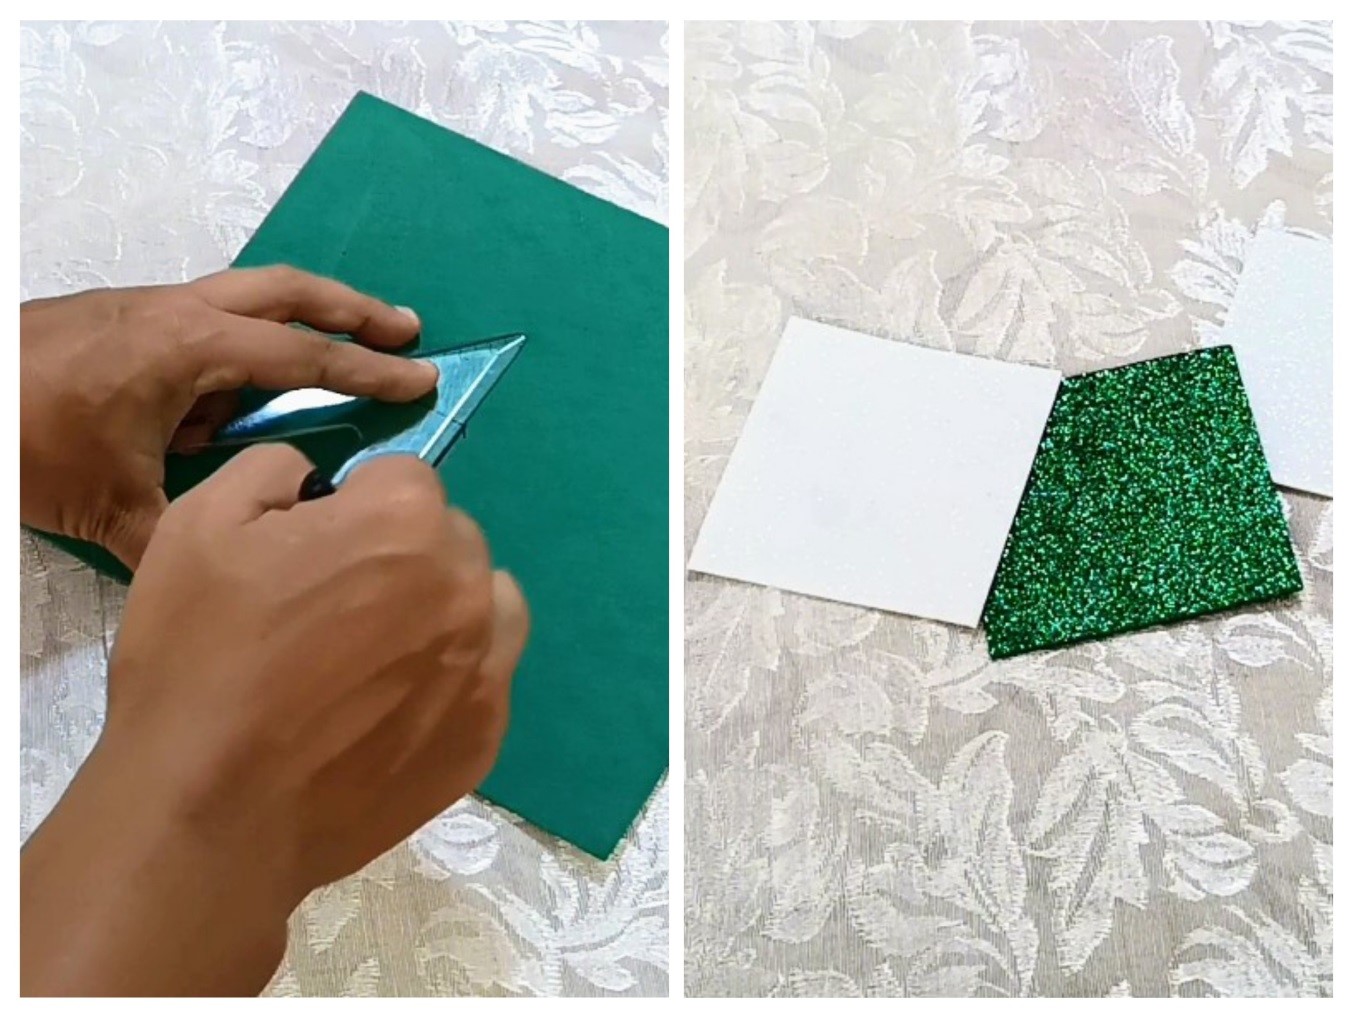
We start by marking a size of 5x5 cm on the Foamy sheet to obtain pieces in the shape of squares.
Iniciamos marcamos unas medidas de 5x5 cm en la lámina de Foamy para obtener piezas en forma de cuadros.
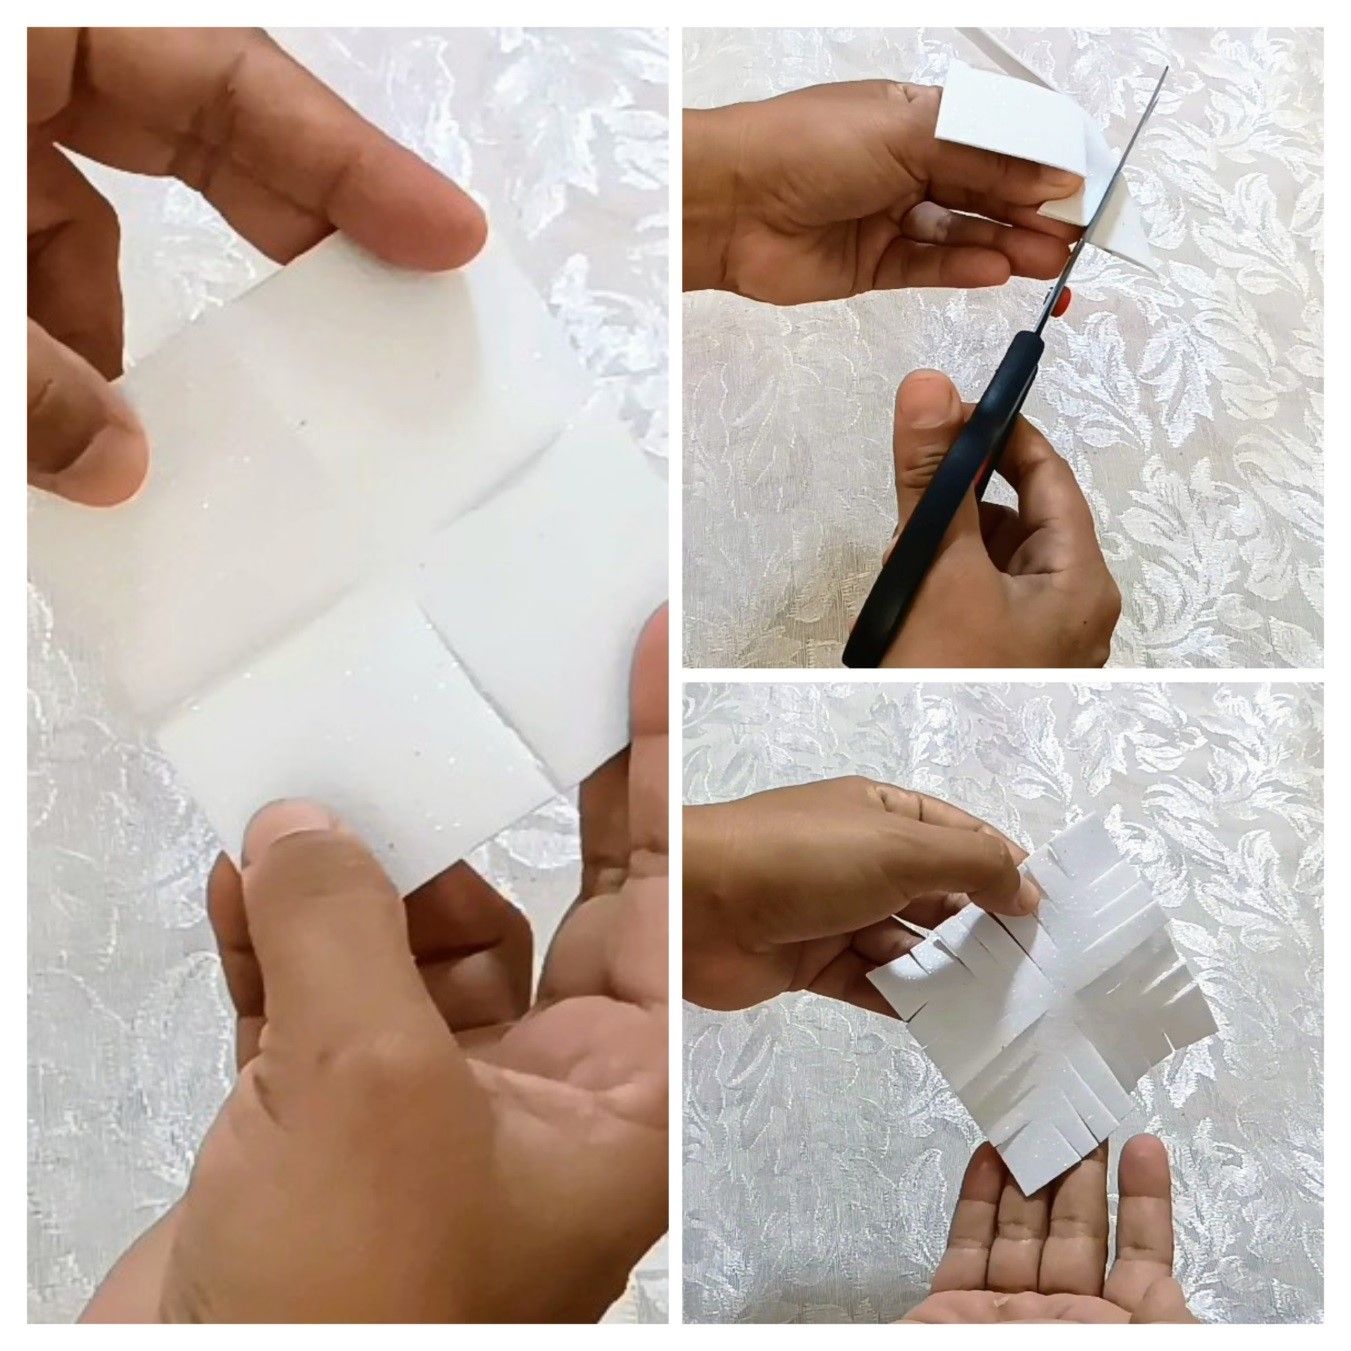
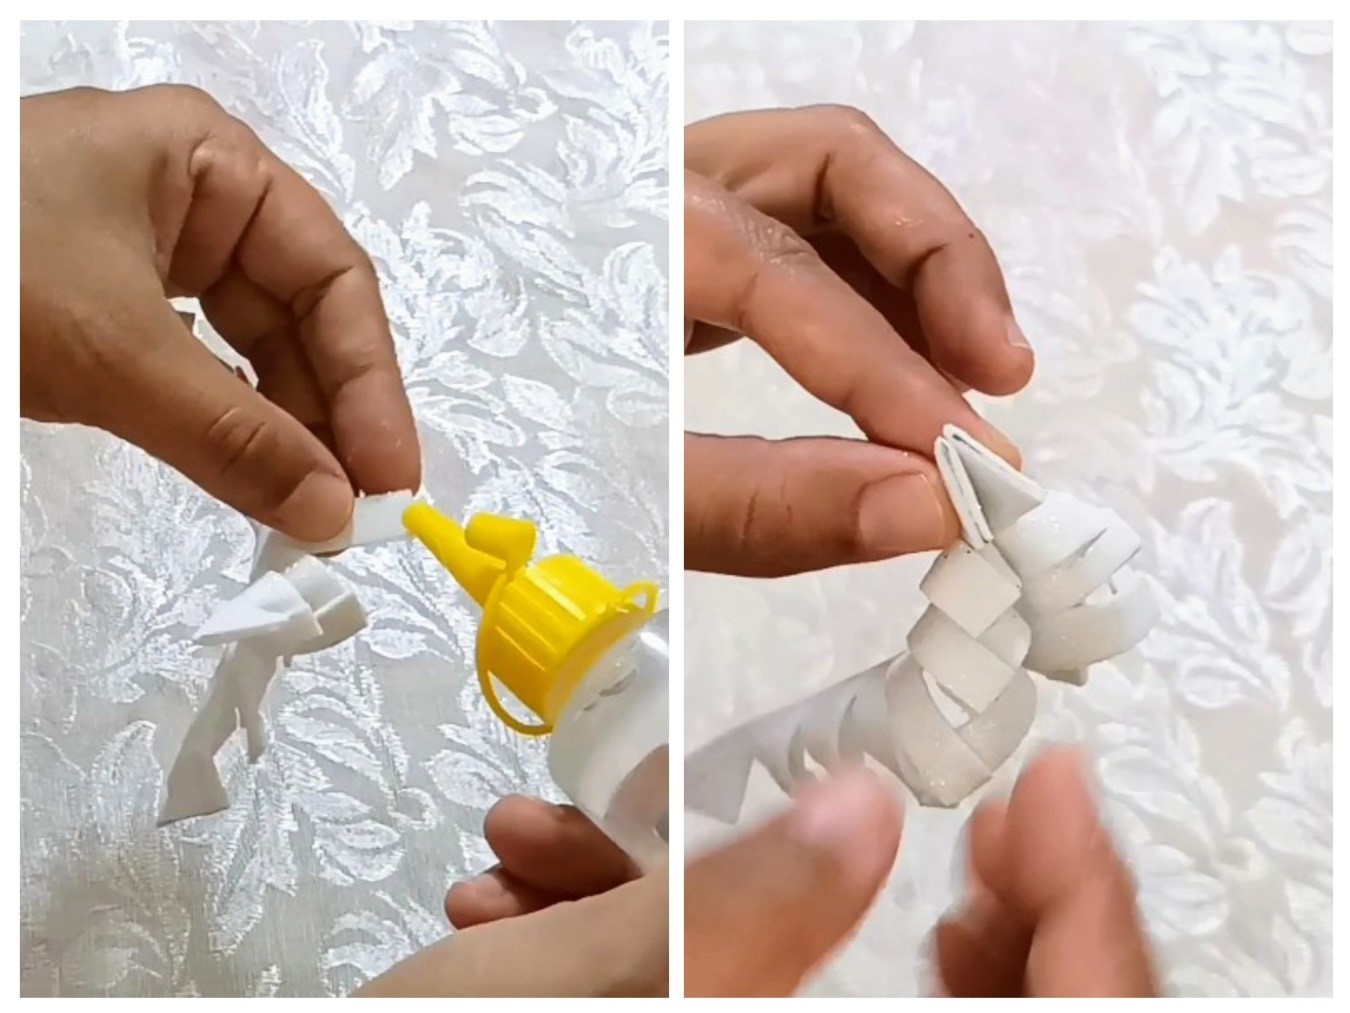
These pieces are going to be folded in half in both directions, then we make cuts from the ends to the center without completely reaching the middle of the piece, as you can see in the image. We fold each square until we get a triangle, to which we are going to make 3 transversal cuts with the scissors, to get a pattern like the one you can see here.
Estas piezas las vamos a doblar por la mitad en ambos sentidos, luego hacemos cortes desde los extremos al centro sin llegar completamente a la mitad de la pieza, como se puede ver en la imagen. Pasamos a doblar cada cuadrito hasta lograr un triángulo, al cual le vamos a hacer 3 cortes trasversales con la tijera, para que quede un patrón como el que se puede observar aquí.
We are going to glue the ends inwards, making sure that the shiny part is on the outside; we can help ourselves with a tweezers to make it easier to glue.
Vamos a ir pegando las puntas hacia adentro, procurando de la parte brillante quede por fuera; podemos ayudarnos con una pinza para que pegue más fácilmente.
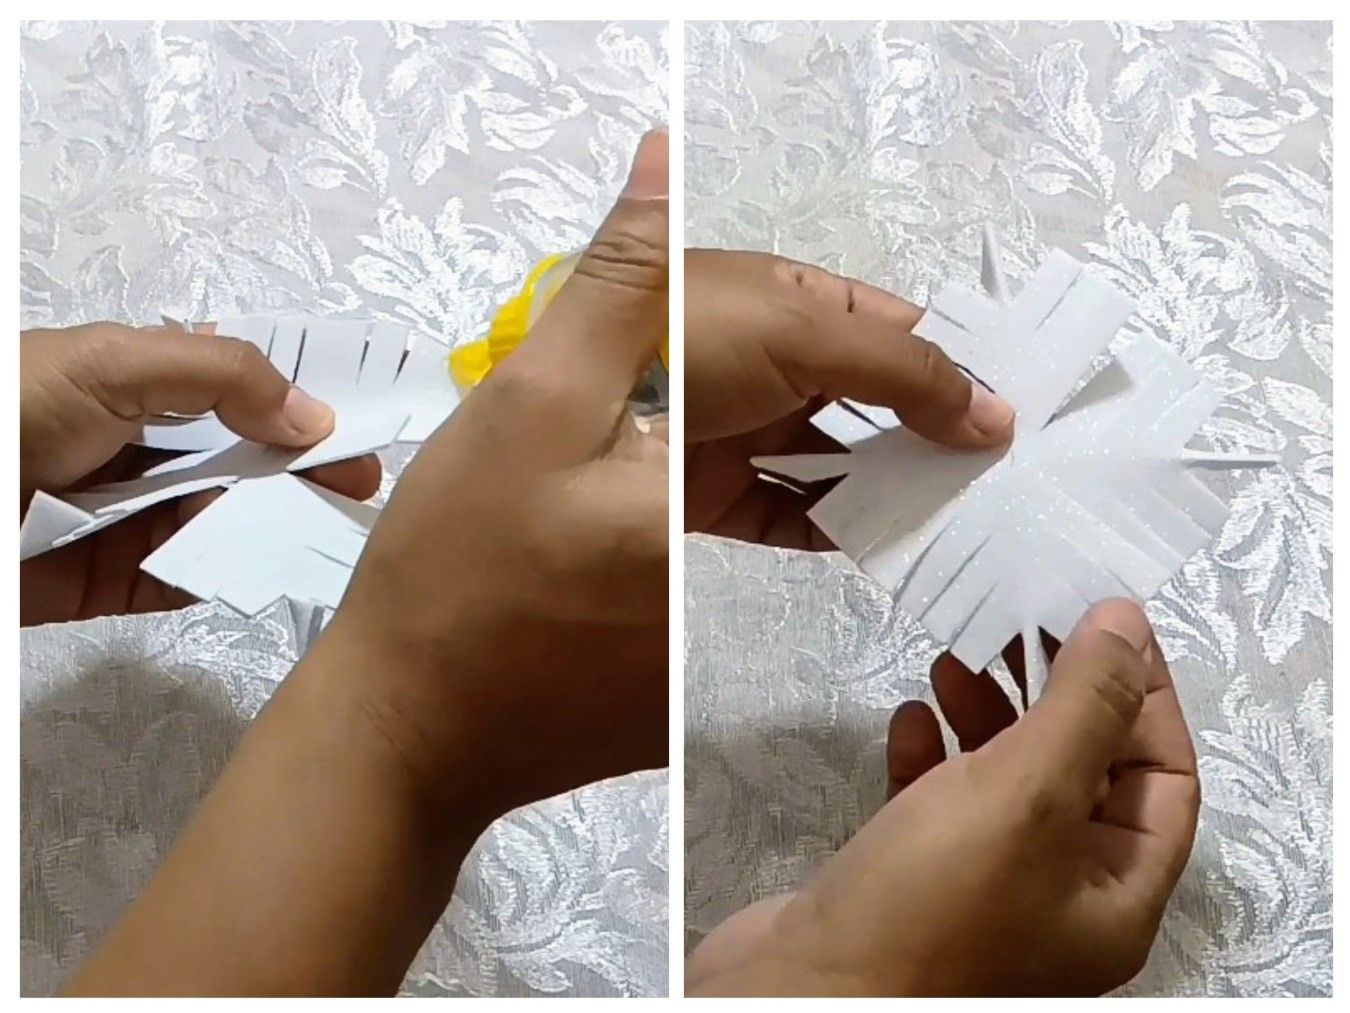
Once we have glued the 4 ends, we overlap and glue the strips in this way, until we have this piece. Then we glue the sides of one pair of the pieces, then the other pair and finally we join all the parts together to obtain the shape of the tree.
Una vez que hayamos pegado las 4 puntas, pasamos a sobreponer y pegar las tiras de esta manera, hasta que nos quede esta pieza. Posteriormente pegamos los lados de un par de las piezas, luego el otro par y finalmente unimos todas las partes, para obtener ya la forma de arbolito.
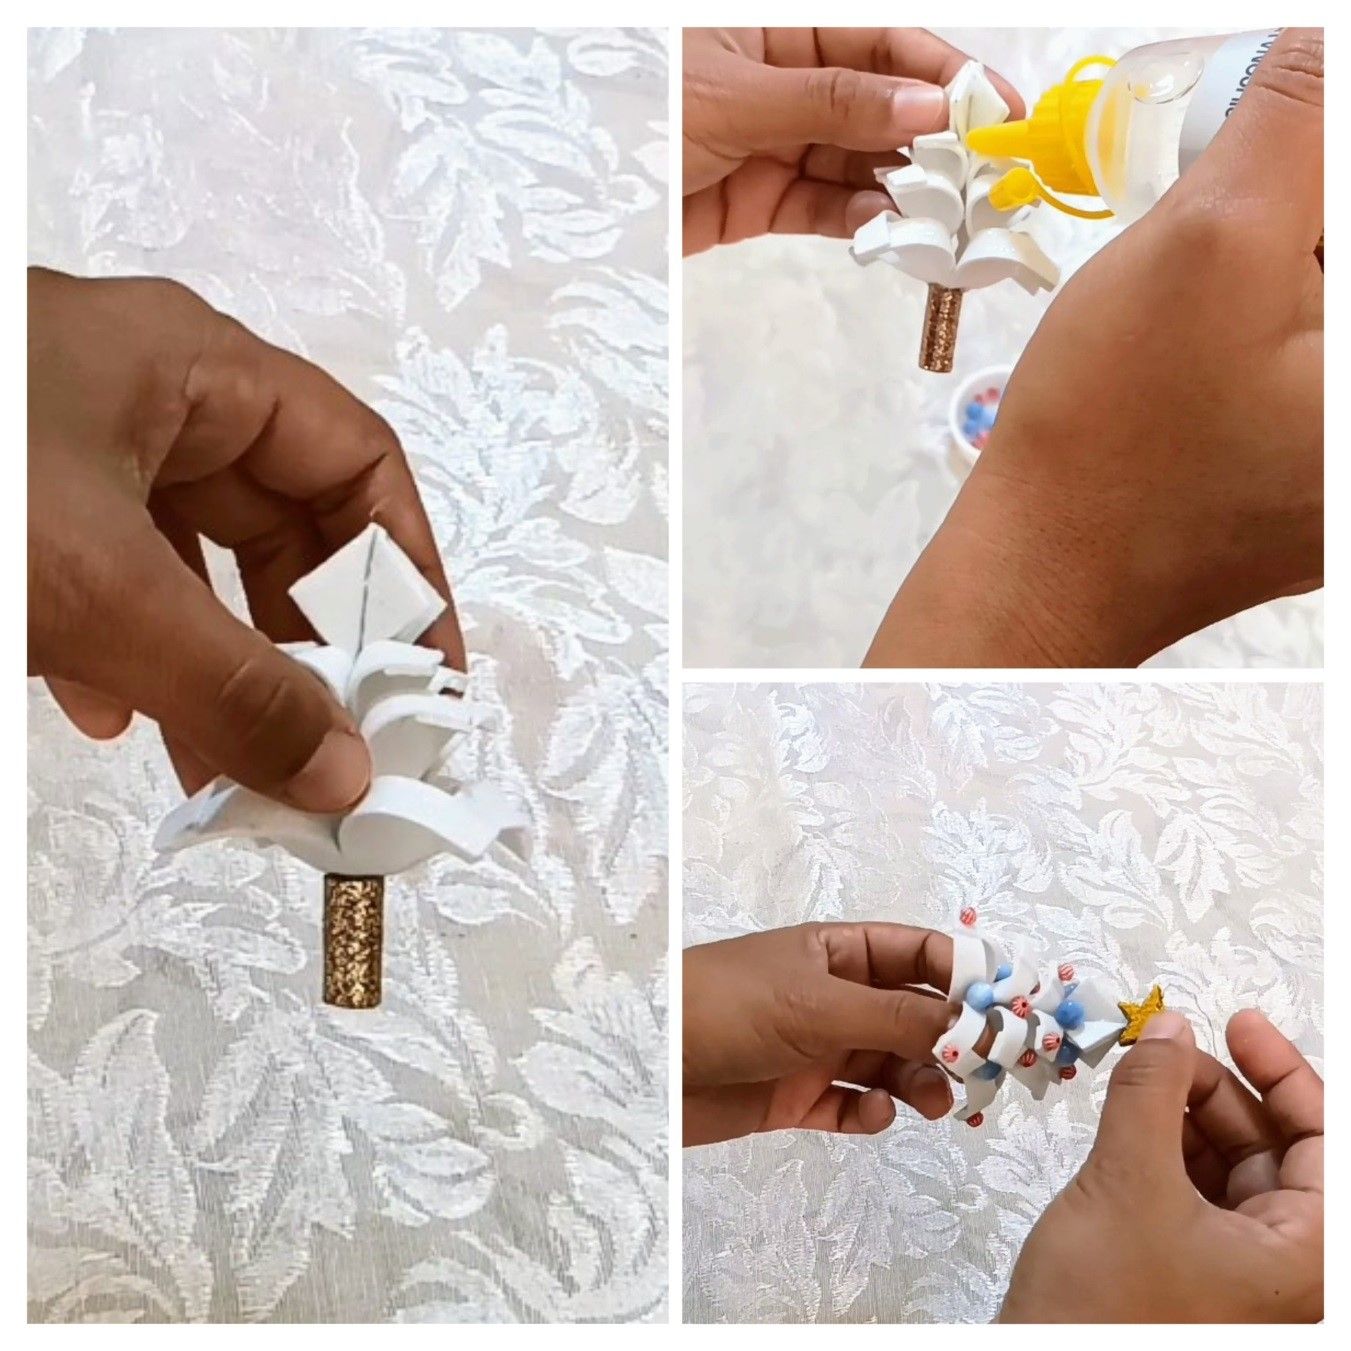
For the trunk of the tree, we are going to use a piece of brown Foamy which we are going to fold to the desired shape and glue it. Then we attach it to the tree.
Para el tronco del arbolito, vamos a usar un trozo de Foamy color marrón, el cual vamos a doblar hasta lograr la forma deseada y lo pegamos. Luego lo unimos al árbol.
For the star, we will use yellow or golden frosted Foamy, according to your preference. We make two shapes, cut them out and glue one against the other so that both sides are shiny on the outside. It is to this piece that we will attach the golden thread that serves as a fastener.
While the stars are drying, we decorate the tree with colored beads; you can also use sequins or any ornament you wish. Finally we crown the tree with the star and our craft is ready.
Para la estrella, utilizaremos Foamy escarchado color amarillo o dorado, según su preferencia. Hacemos dos formas, recortamos y pegamos una contra la otra de modo que queden ambos lados brillantes por fuera. Es a esta pieza a la que le vamos a adherir el hilo dorado que sirve de sujetador.
Mientras se secan las estrellas, nos toca decorar el arbolito con cuentas de colores; también se pueden utilizar lentejuelas o cualquier adorno que deseemos. Finalmente coronamos el árbol con la estrella y nuestra manualidad esta lista.
If you liked these beautiful Christmas trees let me know in the comments, thanks for your attention. See you in a future craft.
Si te gustaron estos hermosos arbolitos de navidad déjamelo saber en los comentarios, gracias por su atención. Nos vemos en una próxima manualidad.


Show more
Tags :
Woo!
This creator can upvote comments using 3speak's stake today because they are a top performing creator!
Leave a quality comment relating to their content and you could receive an upvote
worth at least a dollar.
Their limit for today is $0!
Their limit for today is $0!

11 views
3 years ago
$

13 views
2 years ago
$

29 views
a year ago
$

39 views
2 years ago
$

10 views
2 years ago
$
More Videos

34 views
a year ago
$

16 views
4 years ago
$

10 views
2 years ago
$

5 views
7 months ago
$

2 views
2 years ago
$

6 views
10 months ago
$

5 views
4 years ago
$

19 views
a year ago
$

23 views
a year ago
$

12 views
3 years ago
$

2 views
3 years ago
$

43 views
3 years ago
$

0 views
2 years ago
$
4 views
3 years ago
$

2 views
2 years ago
$

19 views
2 years ago
$

29 views
a year ago
$

11 views
2 years ago
$

14 views
2 years ago
$

29 views
9 months ago
$

3 views
2 years ago
$

5 views
2 years ago
$

7 views
2 years ago
$

5 views
a year ago
$

19 views
2 years ago
$
Comments:
Reply:
To comment on this video please connect a HIVE account to your profile: Connect HIVE Account