DIY Beautiful Fashion Fantasy Bracelet Tutorial [Eng/Esp]
9
About :

Hello it is a pleasure to start creating my blog here on Hive after several weeks reviewing the content and learning how to use the tools to publish I decided to make a video to show my skills in making jewelry, crafts and paintings, I started with jewelry since I found this beautiful community and I have seen an attractive content of making necklaces, earrings and rings, one of my passions is the development of clothing, bags and jewelry, I love the design and work with making jewelry and bags, apart from being a passion I have been developing this venture for some time.
Hola es un gusto poder empezar a crear mi blog acá en Hive después de varias semanas revisando el contenido y aprendiendo como usar las herramientas para publicar decidí hacer un vídeo para mostrar mis habilidades en la elaboración de bisutería, artesanías y pinturas, empecé por la bisutería ya que encontré esta hermosa comunidad y he visto un contenido atractivo de elaboración de collares, zarcillos y anillos, una de mis pasiones es la elaboración de prendas de vestir, bolsos y bisutería, me encanta el diseño y trabajo con elaboración de bisutería y bolsos, aparte de ser una pasión desarrollo este emprendimiento desde hace un tiempo.

In this opportunity I designed a nice bracelet very simple but that serves to accompany a dress or casual outfit, depending on the taste of each woman, their colors or combination give it that versatility to be used with different clothes, in my case I like the vintage style, so I chose this type of materials that resembles.
En esta oportunidad diseñé una bonita pulsera muy sencilla pero que nos sirve para acompañar un atuendo de vestir o casual, dependiendo del gusto de cada mujer, sus colores o combinación le dan esa versatilidad de ser usadas con diferentes prendas de vestir, en mi caso me gusta el estilo vintage, por eso escogí este tipo materiales que se asemeja.

Materials:
- Waxed jute thread 1mm brown color.
- Gold-colored costume jewelry wire of 1mm.
- 1 large brown Fantasy Stone of 2,5cm.
- 2 small golden stones.
Tools:
-Cutting pliers for wire.
- Tweezers for costume jewelry.
- Silicone tip tweezers for doubles.
- Scissors.
- Tinder.
- Tape measure or ruler.
Materiales:
- Hilo yute encerado 1mm color marrón.
- Alambre de Bisutería color dorado de 1mm.
- 1 Piedra de Fantasía color marrón grande de 2,5cm.
- 2 Piedras pequeñas doradas.
Herramientas:
-Pinza de corte para alambre.
- Pinza de entorche para bisutería.
- Pinza punta de silicón para dobles.
- Tijera.
- Yesquero.
- Cinta métrica o Regla.
Procedure:
The first thing I did was the measurements of the bijouterie wire and thread to then proceed to assemble, take the ruler in this case I measured the central stone and a few millimeters on each side to twist, the first cut I made eight centimeters for the central stone, then I proceeded to measure the small golden stones to cut the bijouterie wire with which I would assemble, in this case for each small stone I cut 5 centimeters of golden bijouterie wire, I repeated this step, then I measured the brown jute thread to make the right and left side of the bracelet, I measured 21 centimeters of thread for each edge and finally I measured 20 centimeters of brown jute thread to make the fastening knots.
Procedimiento:
Lo primero que realice fue las medidas del alambre de bisutería y hilo para luego proceder a armar, tome la regla en este caso medí la piedra central y de unos milímetros de cada lado para entorchar, el primer corte lo realice de ocho centímetros para la piedra central, luego procedí a medir las piedras pequeñas doradas para cortar el alambre de bisutería con el que armaría, en este caso para cada piedra pequeña corte 5 centímetros de alambre de bisutería dorado, este paso lo repetí, luego medí el hilo yute marrón para realizar el lado derecho y lado izquierdo de la pulsera, medí 21 centímetros de hilo para cada borde y por ultimo medí 20 centímetros de hilo yute marrón para hacer los nudos sujetadores.
After making the measurements and cuts of the wires and brown jute thread, I proceeded to start assembling the bracelet, I started making the lateral entorches of the main stone, I did it in the following way I introduced the stone in the wire and placed it in the center of it, I started making the entorche of the wire with the entorche clamp, I was winding from the right side to the left side and gave 2 and a half turns to the excess wire on the right side, I did the same with the excess wire on the left side, I did this with the intention of making a ring shape with the wire and thus be able to assemble the next golden stone.
Después de realizar las medidas y cortes de los alambres y hilo yute marrón, procedí a empezar armar la pulsera, empecé hacer los entorches laterales de la piedra principal, esto lo realice de la siguiente forma introduje la piedra en el alambre y la coloque en el centro del mismo, empecé hacer el entorche del alambre con la pinza de entorche, fui enrollando del lado derecho al izquierdo y di 2 vueltas y medias al sobrante del alambre del lado derecho, realice lo mismo con el sobrante del alambre del lado izquierdo, esto lo hice con la intención de hacer una forma de argolla con el alambre y así poder ensamblar la siguiente piedra dorada.

After making the entorche on each side of the big stone I twisted the wires of the small stones which I measured 5cm, first on the right side I put the small golden stone and then twisted making 2 and a half turns forming a ring, I repeated this procedure with the other wire of 5cm I put the stone and closed making the same entorche of 2 and a half turns, I had the armed base of the bracelet, there I took the measures of the brown jute thread I put inside the rings and center the thread to leave it double, in the tip I made a double knot and with the tinder I sealed the tips, I did this for the second time to make the other edge of the bracelet.
Después de hacer los entorche de cada lado de la piedra grande entorche los alambres de las piedras pequeñas los que medí de 5cm, primero del lado derecho metí la piedra pequeña dorada para luego entorchar dando 2 vueltas y medias formando una argolla, repetí este procedimiento con el otro alambre de 5cm metí la piedra y cerré haciendo el mismo entorche de 2 vueltas y medias, me quedo la base armada de la pulsera, allí tome las medidas del hilo de yute marrón metí dentro de las argollas y centre el hilo para dejarlo doble, en la punta realice un nudo doble y con el yesquero selle las puntas, realice esto por segunda vez para realizar el otro borde de la pulsera.
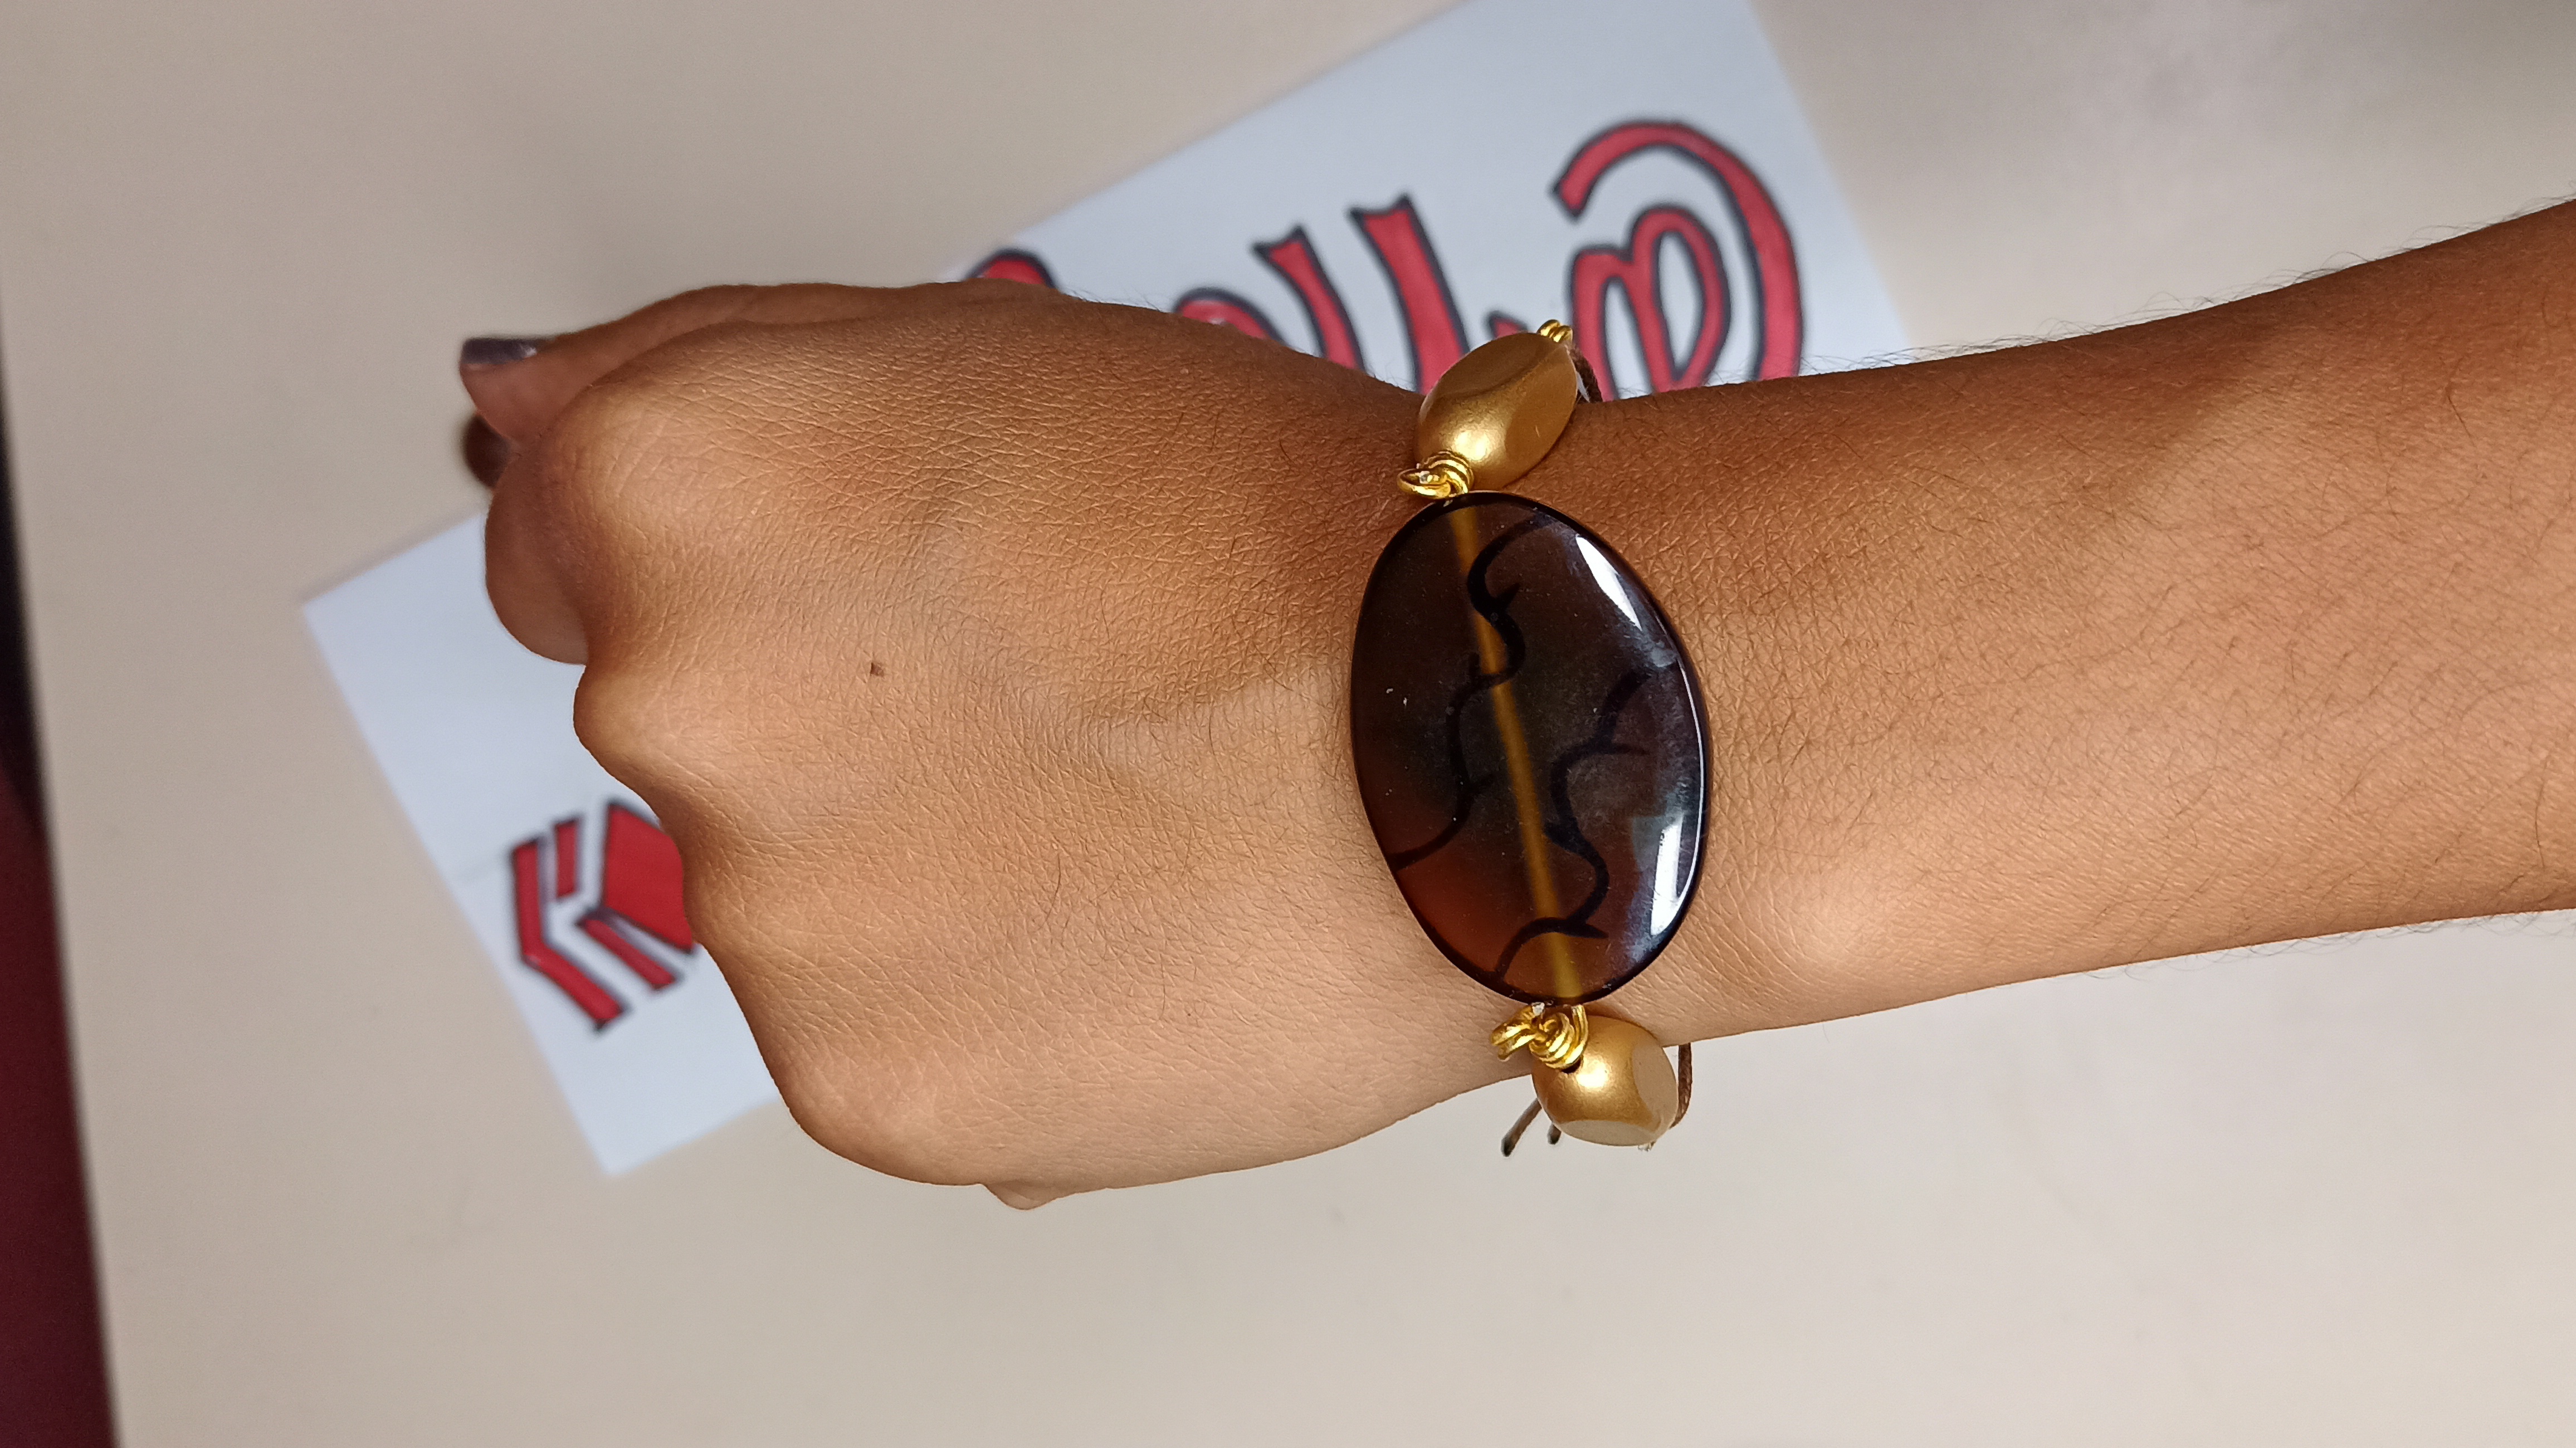
Finally I take the measure of the brown jute thread that I cut of 20 centimeters and I wove the bracelet fastener knot, this knot is sliding which makes the bracelet to fit the wrist of each lady, I will leave you a complementary video of how to make the sliding knot for bracelet and necklaces, it is very easy and simple, I hope all members of the community like this easy and simple tutorial of a beautiful fine fantasy bracelet. Thank you for your attention and visit.
Por último tomo la medida del hilo yute marrón que corte de 20 centímetros y tejí el nudo sujetador de la pulsera, este nudo es corredizo lo que hace que la pulsera se ajuste a la muñeca de cada dama, les dejare un video complementario de cómo hacer el nudo corredizo para pulsera y collares, es muy fácil y sencillo, espero que a todos los miembros de la comunidad le guste este tutorial fácil y sencillo de una hermosa pulsera de fantasía fina. Gracias por tu atención y visita.
I will be creating more content like this on my blog so I appreciate your constant visits. Success and many blessings, Remember that nothing is impossible for the one who believes.
Estaré creando más contenido como este en mi blog asi que agradezco tus visitas constantes. Éxito y muchas bendiciones, Recuerda que no hay nada imposible para el que cree.

Show more
Tags :
Woo!
This creator can upvote comments using 3speak's stake today because they are a top performing creator!
Leave a quality comment relating to their content and you could receive an upvote
worth at least a dollar.
Their limit for today is $0!
Their limit for today is $0!
4 views
a year ago
$
9 views
a year ago
$
5 views
a year ago
$

9 views
a year ago
$
6 views
a year ago
$
More Videos

6 views
a year ago
$

14 views
a year ago
$

15 views
a year ago
$
27 views
3 years ago
$
4 views
3 years ago
$

4 views
3 months ago
$

16 views
3 years ago
$

16 views
11 months ago
$

13 views
a year ago
$

18 views
a year ago
$

0 views
2 years ago
$
13 views
3 years ago
$

2 views
10 months ago
$

4 views
2 years ago
$

23 views
2 months ago
$

11 views
9 months ago
$

46 views
a year ago
$

22 views
3 years ago
$
4 views
2 years ago
$

8 views
2 years ago
$
Comments:
Reply:
To comment on this video please connect a HIVE account to your profile: Connect HIVE Account