Learned creativity to my students [creative Sunday]
11
About :
Hello everyone!!!
I hope so you all are fine and happy 😃
It's Sunday here again so let's share my second post about creativity in hl-blog. It's a little different type of creativity because i tried to learn this creativity to my students in class. As I'm a teacher so it's my responsibility to make my children's some creative and it's my first priority that they learn something new. As it's the era of technology and every children use YouTube and watch some creative material there but they can't understand until they practiced about it.
Made a van with shoebox!!!
There are many other such type's of creativity and practical work in their last chapter of science. As it's November and our syllabus is almost about to end, on Friday I decided to do an activity in class from their science book. When I announced about the activity in class every children show excitement.
Material required!!
Two days before activity, I asked students to bring this material to school in order to perform a activity, we need

- Shoebox
- Scissor
- Coloured paper
- Scotch tape
- Glue
Let's start the activity!!!
Step 1:
First of all, take the shoebox as it's cover with lid so I cut it's cover and make it an open box.
Step 2:
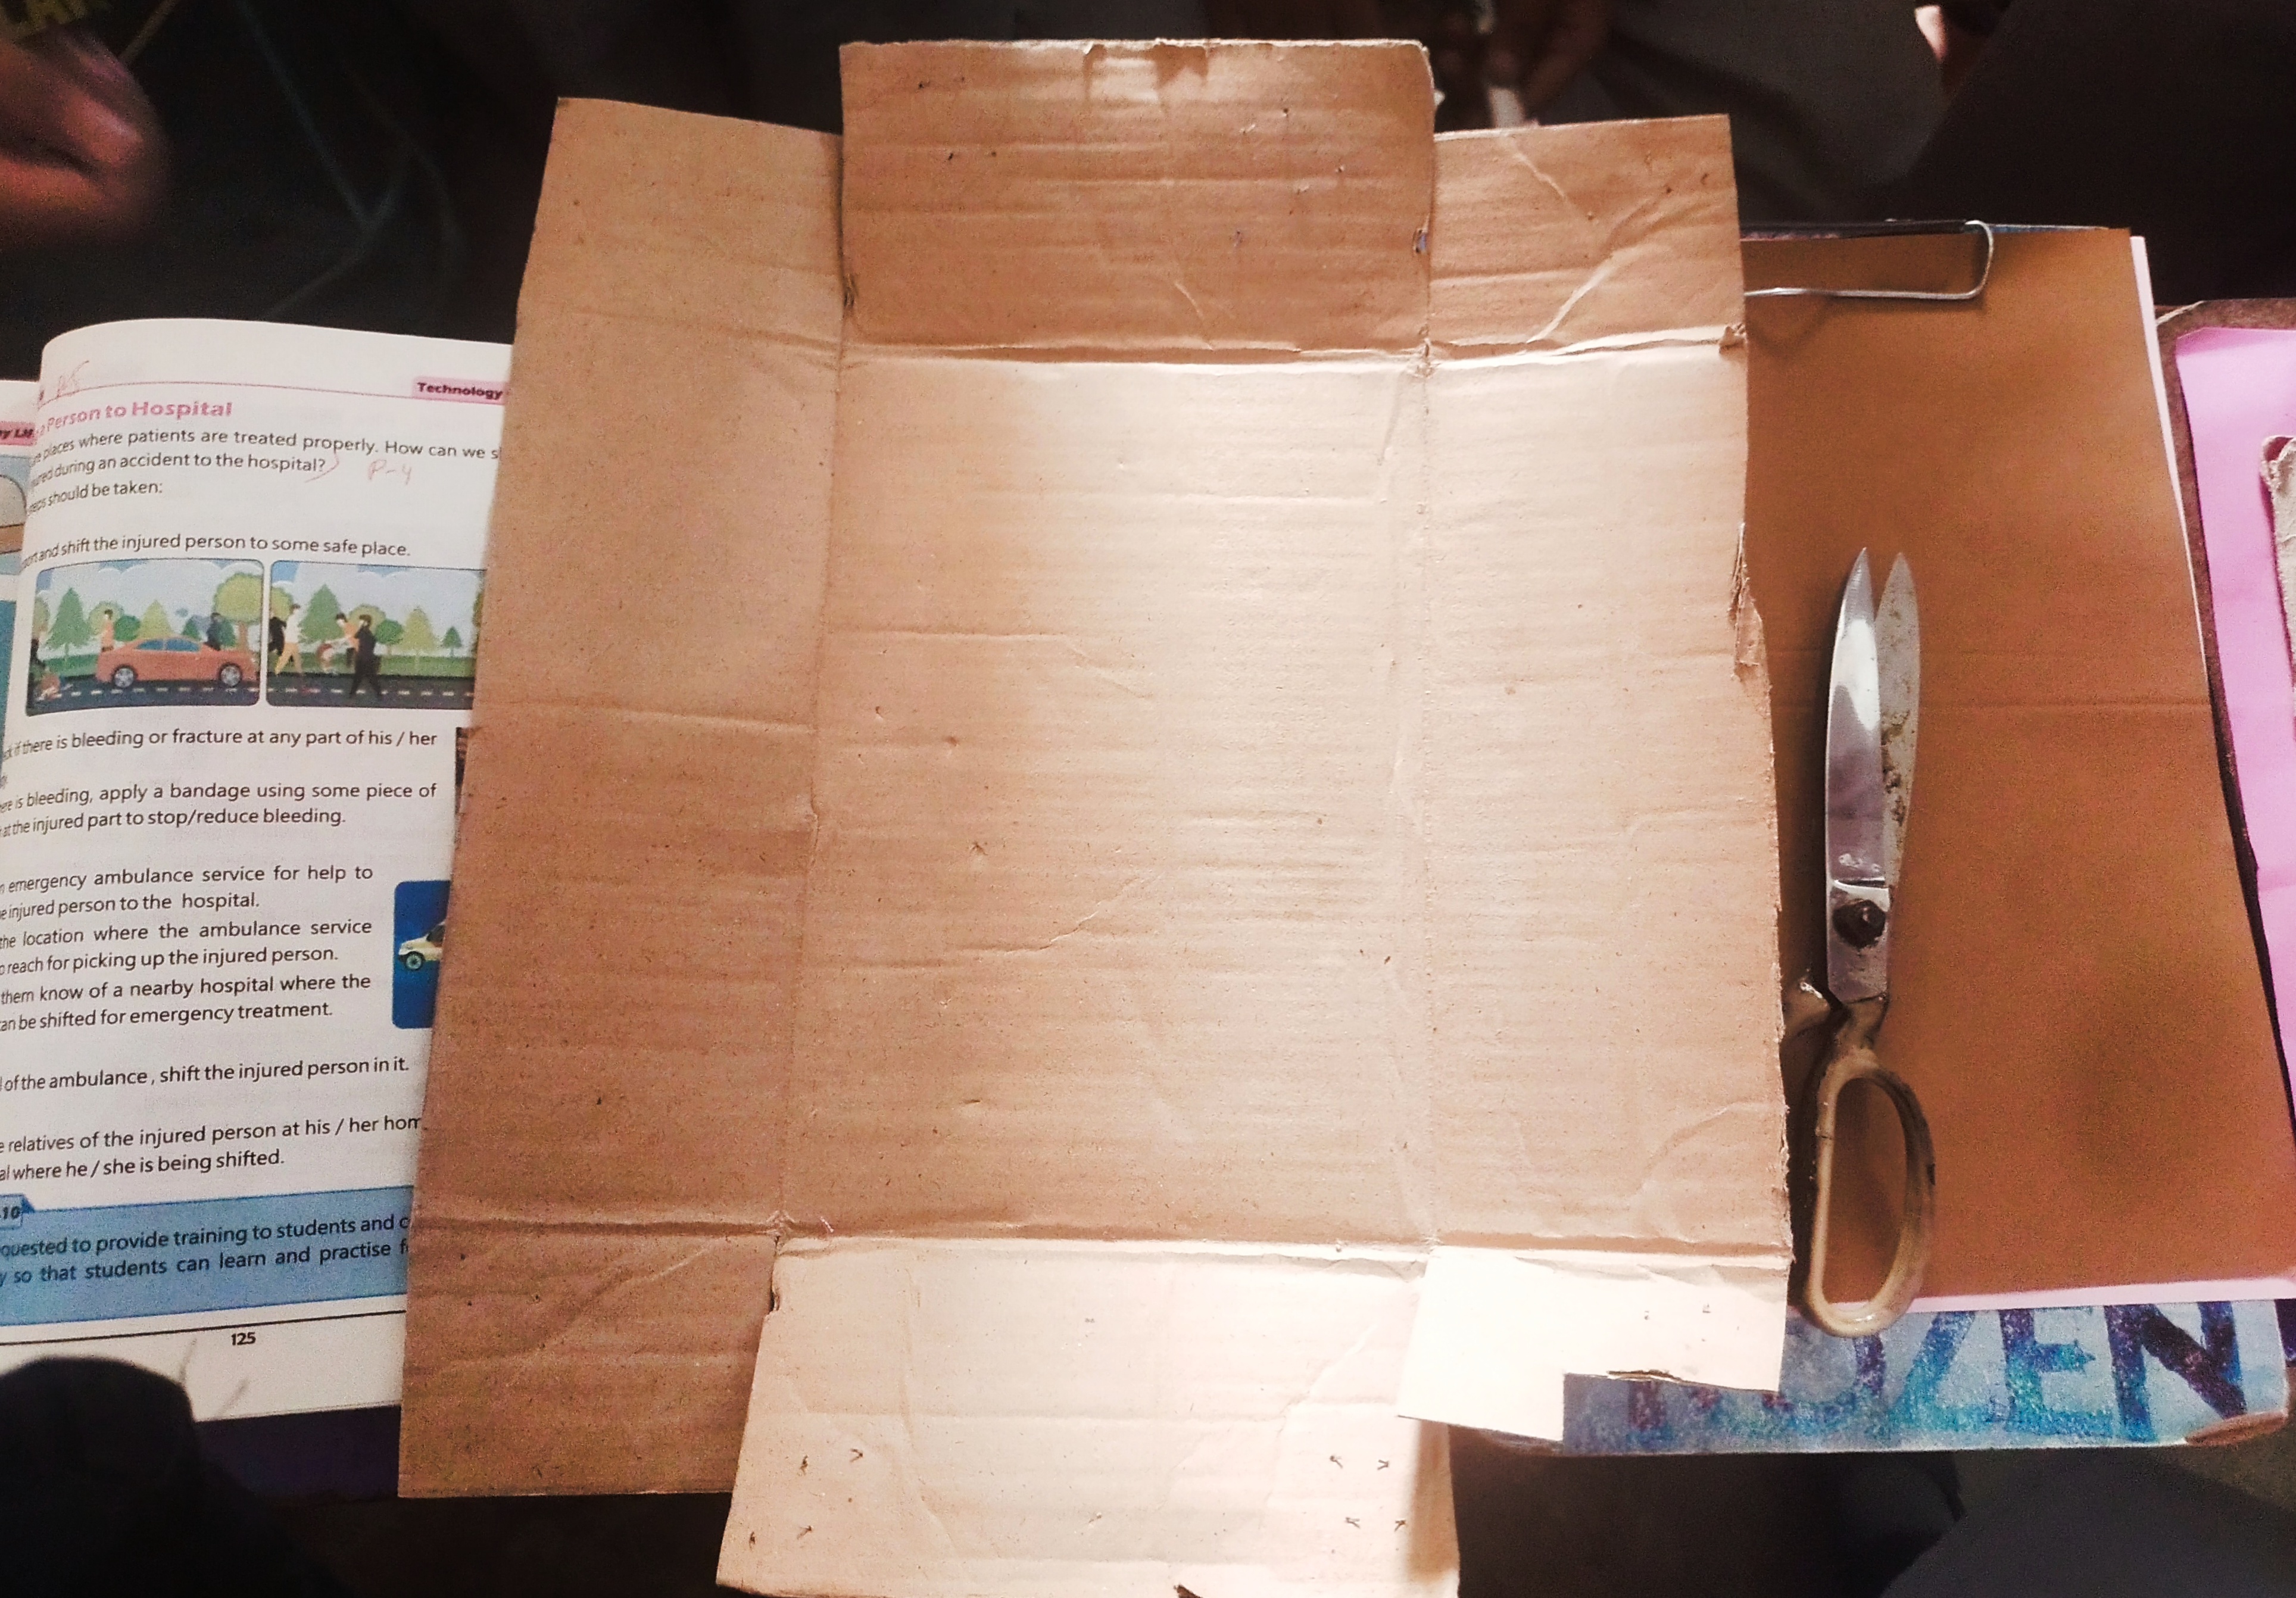
Open the pin with which in shoebox and which make it a box, actually there's no need to open the pin but actually in book description they took a simple cardboard and then fold it. So it's necessary to told my student how to make a box with plane cardboard.
Step 3:

Cut the extra cardboard and fold it to make a box, you can cut it from sides too but it'll reduce the size of van body.
Step 4:
Joined the sides of cardboard with scotch tape which we fold and it appeared in the form of box.
Step 5:

Take the lid of shoebox, and divide it into four part by mark it with pencil.
Step 6:


Draw circle in each part for making four wheels of wagon. And cut it in circular shape with scissors.
Step 7:

Attach the circle with glue on the lower side of box and then put the scotch tape too on it so that it's tightly held with box.
Step 8:

Now cover the box from top in the shape of car or wagon top and make it little convex to give it a shape of wagon.
Step 9:


Now wrapped the wagon with the help of colored paper, you can take any color paper which you like. I took which my student bring.

<> And here it's final look, ain't it's pretty!!!

Some students want to take a picture with it
Note:
I'm not the alone who did work on this science project but students also help me to make it better as they always with me. And they learned too how to make a beautiful wagon at home.
- That's all for today and it's my entry for this week #creative-sunday theme.
Thank you for your time and support 💫🤍
Show more
Tags :
Woo!
This creator can upvote comments using 3speak's stake today because they are a top performing creator!
Leave a quality comment relating to their content and you could receive an upvote
worth at least a dollar.
Their limit for today is $0!
Their limit for today is $0!
10 views
3 months ago
$

2 views
5 months ago
$

9 views
5 months ago
$

4 views
5 months ago
$

1 views
4 months ago
$
More Videos

5 views
a year ago
$

10 views
6 days ago
$

16 views
a year ago
$
4 views
a year ago
$

10 views
a year ago
$

9 views
6 months ago
$

5 views
2 years ago
$

13 views
a year ago
$

10 views
7 months ago
$

3 views
2 years ago
$

10 views
3 months ago
$

24 views
a year ago
$

14 views
7 months ago
$

11 views
a year ago
$

4 views
a year ago
$

8 views
a year ago
$

26 views
a year ago
$

3 views
7 months ago
$
2 views
7 months ago
$

12 views
a year ago
$

15 views
a year ago
$

11 views
2 years ago
$
Comments:
Reply:
To comment on this video please connect a HIVE account to your profile: Connect HIVE Account