Fallout 3 Walkthrough (Modded) Part 307
1
About :
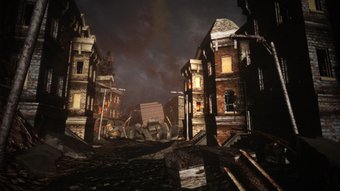
I inspect the Rolfe Hospital building, looking for clues about some people. This is the ninth episode of Washington Malevolence.
Note: The mod was updated since I played it, so things may differ when you play it.
The mods I used in this series are listed here. Also, the complete playlist is now available on Youtube and Odysee
Follow the timestamps:
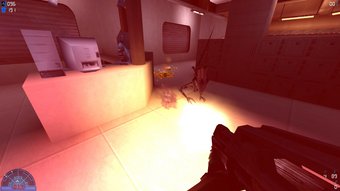
- 00:40 - Entering Rolfe Hospital - 1st floor. Thermal vision reveals we are not alone.
- 01:44 - I go west to the corridor. I sneak attack the pirates I find and turn south. The path continues west and turns north. I switch to the Demon's Dance earned in the previous episode to dispatch the pirates in one hit.
- 03:19 - The restrooms. My right arm is crippled because of the lengthy exposure to the Demon's Dance. Switch to another weapon if not using it.
- 04:46 - Inspecting the rooms to the north side. First aid boxes, blood packs, clutches, and medical braces may be scattered around.
- 06:29 - Opening the door on the north corridor. Pirates are guarding it but are quickly dispatched.
- 06:47 - Inspecting the room. A blood pack and some bottle caps are on the table.
- 07:16 - I go east through the corridor. I loot the dead (ammo) and enter another room. More bottlecaps on a table, a first aid box on the wall, and a blood pack.
- 08:28 - A 3rd room. One first aid box. I continue through the corridor and take more ammo from the dead pirate.
- 09:03 - A 4th room. One first aid box. I open another door in the corridor. Three pirates are dispatched.
- 09:59 - I enter the last room on the north side. One first aid box is on the wall.
- 10:28 - I skip the room right in front of me. I opened the door on the east corridor and eliminated more pirates.
- 10:38 - Now I return to enter the room (previously ignored) and open the door on the west side. To the south, I kill one more pirate near the doorway to the east corridor.
- 11:40 - The local map (I'm on the east side). I returned to the north corridor but alerted one pirate (I missed him somehow). I took the passage on the east side, walked south, and turned west, north, and west. The stairs took me to the Rolfe Hospital - 2nd floor.
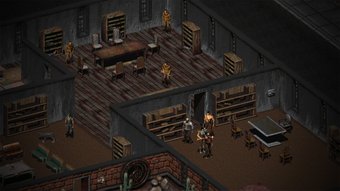
- 13:20 - The corridor on the south side seems empty. The room near the 1st-floor door has some medical supplies.
- 14:22 - A few pirates are on the corridor (and rooms) on the north side.
- 14:39 - 1st room on my right. One pirate dies. Some medical supplies.
- 15:12 - 1st room on my left. Some medical supplies.
- 15:38 - 2nd room on my left. Same as before.
- 15:57 - 3rd room on my left. Same as before. The wall is broken, so I cross to the 4th room. The corridor ahead is at the center. I see heat signs (more pirates).
- 16:32 - 2nd room on the right. A pirate is eliminated. The door on the corridor is locked. I enter the room to open the first aid box.
- 17:02 - Back to the room with the broken wall. I reach the west side corridor and kill the pirates there. I enter the 3rd room on the right.
- 18:07 - (On the central corridor) I kill the pirates in the cafeteria/kitchen. I open the door on the passage with gas leaks. I return to the cafeteria/kitchen.
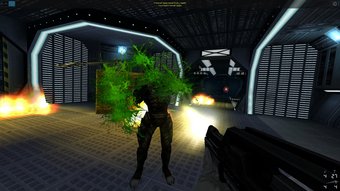
- 19:37 - 1st room in the central corridor. I go south to the corridor connecting the west and east sides (I check the map). The path to the west is blocked, so I return to the kitchen and use a grenade to ignite the gas in the room and the north corridor.
- 21:24 - 4th room on the right. Same as before.
- 22:02 - The 5th room on the left has only some pipes. The 5th room on the right is the same as the others.
- 22:42 - Back in the corridor, I open the door to the path connecting the south and the north side.
- 23:00 - Pirate in the west room.
- 23:45 - Door to the third floor. The next door is to the first floor but is marked as inaccessible. I go south, then east, to open a door in the corridor. I return to the third-floor door.
- 25:00 - I take the only path available to the offices. A door to the right leads to another corridor (not yet).
- 25:45 - The path on the left has a door to the 2nd floor marked as inaccessible. I go to the corridor seen above. I turn right x3 before entering the room in front of the men's room.
- 27:24 - This part is confusing. I was lost. Watch as I lose myself in the office.
- 29:16 - I found Ian Horner's Terminal on a desk behind a blocked path (lockers on the north and west sides of the corridor. The Scouting Reports are corrupted, but the Jimmy entry isn't. The note is added, and we must go to Vault 89.
- 31:32 - I return to the levels below. Memorize the path.
- 35:30 - Back outside. We fast travel to Vault 89. I talk to Scribe Newman on its tent inside the cave. The Vault 89 Access Code has been added.
- 37:37 - Opening the door. I walk in and meet Officer Richards. We are taken to see the Overseer (I was so stupid, I thought I had to follow the woman).
- 39:53 - Meeting Rachel O'Connolly. I ask about Marion Baker and Ian Horner.
- 41:10 - I'll find the two in Apartment 17.
- 41:24 - A Nuka Cola Vending Machine.
I'll check Vault 89 for a while.
Show more
Tags :
Woo!
This creator can upvote comments using 3speak's stake today because they are a top performing creator!
Leave a quality comment relating to their content and you could receive an upvote
worth at least a dollar.
Their limit for today is $0!
Their limit for today is $0!
2 views
9 months ago
$

1 views
7 months ago
$

18 views
a year ago
$

3 views
9 months ago
$

3 views
8 months ago
$
More Videos
27 views
a year ago
$

5 views
a year ago
$
45 views
a year ago
$

5 views
3 years ago
$
1 views
a year ago
$
2 views
2 years ago
$
3 views
a year ago
$

0 views
2 years ago
$

11 views
a year ago
$

3 views
11 months ago
$

8 views
a year ago
$

21 views
a year ago
$

37 views
2 years ago
$
2 views
2 years ago
$
2 views
a year ago
$

2 views
9 months ago
$

19 views
2 years ago
$

15 views
4 months ago
$

0 views
a year ago
$

25 views
10 months ago
$

18 views
a year ago
$

1 views
11 months ago
$
5 views
a year ago
$
Comments:
Reply:
To comment on this video please connect a HIVE account to your profile: Connect HIVE Account