PROMO AND DIY: Posatazas de tulipanes/Tulip coasters.
13
About :
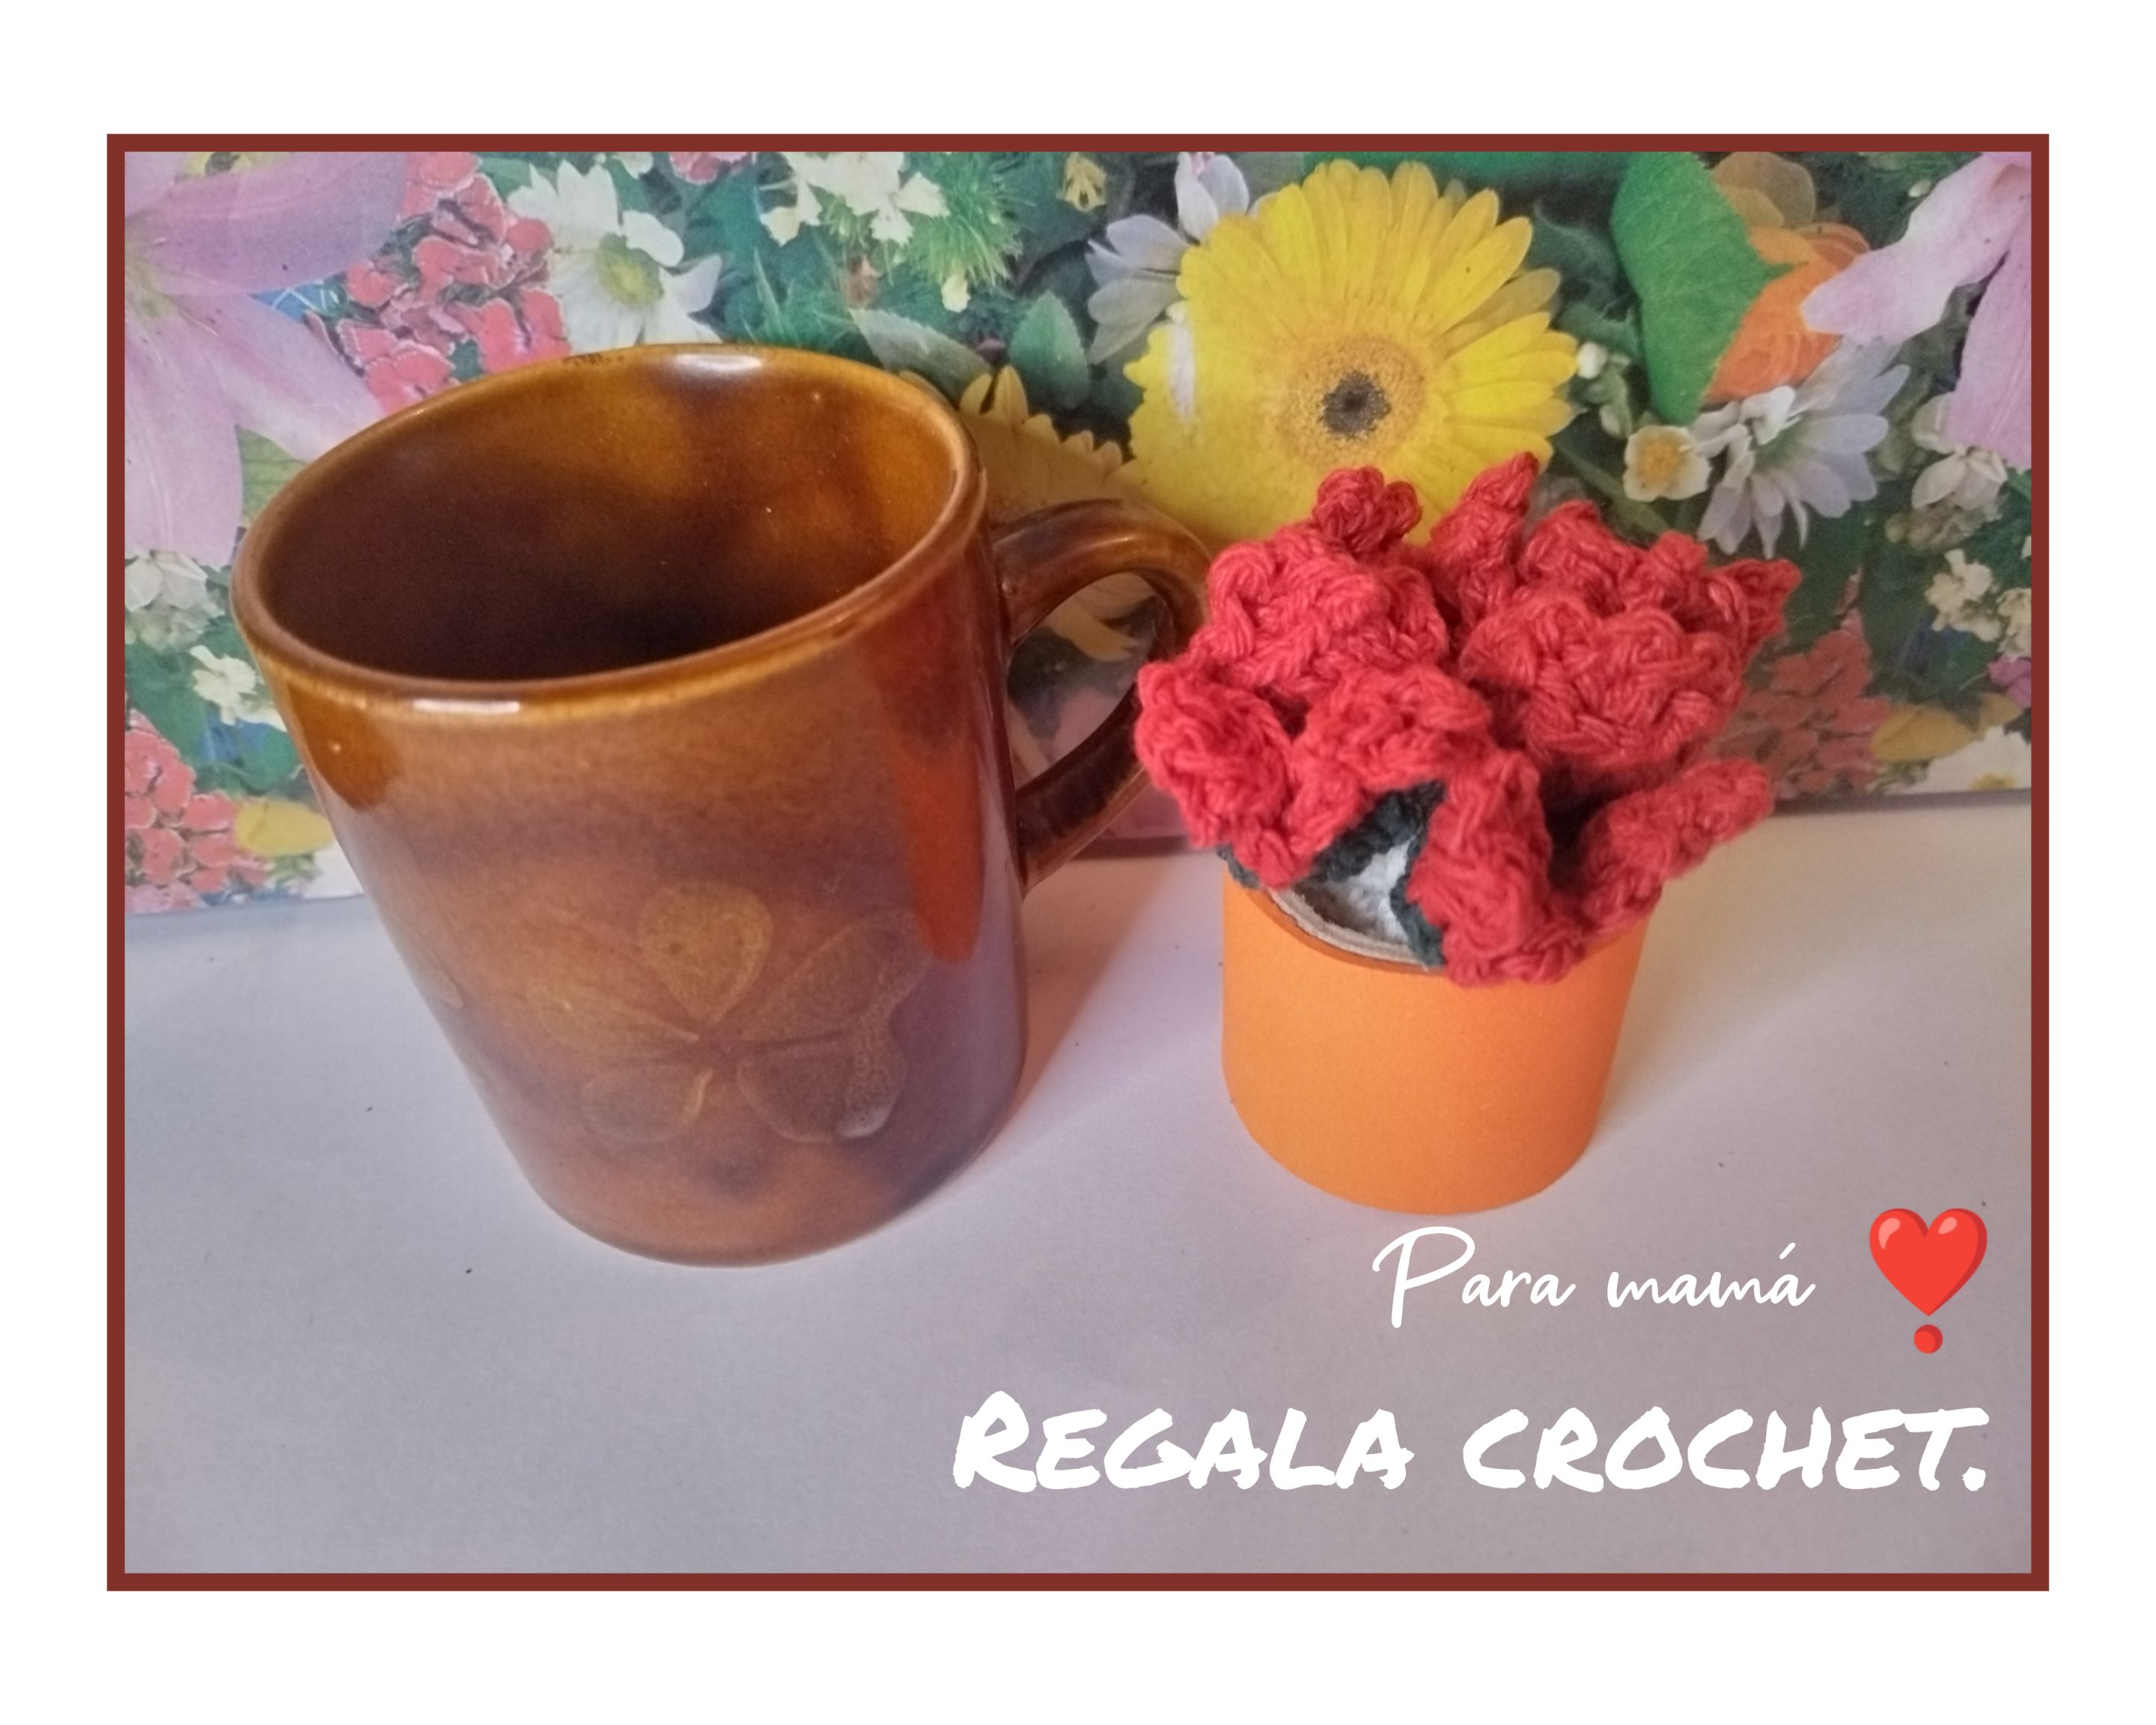
Hola a todos. Les envío un fuerte abrazo. Agasajar a las madres es una tarea diaria, debemos hacerlo con amor y dedicación, con muchos detalles no importa su tamaño. En cualquier día del año le podemos regalar un lindo 🎁 presente, por eso te traigo una idea 💡 de proyecto que te encantará, si sabes tejer puedes hacerlo tu mismo, si no sabes pues lo encargas y yo te los hago 🤣. Son unos lindísimos posatazas con motivo de flores de tulipanes. Lo que más me encanta de este detalle es que podemos preparar con ellos un florero en maceta baja, se ven súper lindos. Ahora te voy a mostrar solo cómo se teje, pero ya te dejo la idea de hacer con él un ramo en 🪴 maceta, con seis u ocho posatazas debe verse genial.
Hello to all of you. I send you a big hug. To entertain mothers is a daily task, we must do it with love and dedication, with many details no matter their size. On any day of the year we can give her a nice 🎁 present, so I bring you an idea 💡 project that you will love, if you know how to knit you can do it yourself, if you do not know you order it and I'll make them 🤣. They are very cute little coasters with a tulip flower motif. What I love most about this detail is that we can prepare with them a low potted vase, they look super cute. Now I'm going to show you how to weave them, but I'll leave you with the idea of making a bouquet in a 🪴 pot, with six or eight posatazas it should look great.

Posatazas de tulipanes/Tulip coasters.
Hace unos meses realicé un tapete para mi peinadora y quedé pendiente de hacerle un posavasos para hacer el juego. Me gustan muchos los tulipanes y desde que aprendí a tejerlos quiero verlos por todos lados. Les voy a mostrar el proceso para su elaboración mediante fotografías. Sé que les va a encantar.
A few months ago I made a mat for my hairdresser and I wanted to make her a coaster to match it. I love tulips and since I learned to weave them I want to see them everywhere. I am going to show you the process of making them through pictures. I know you will love it.
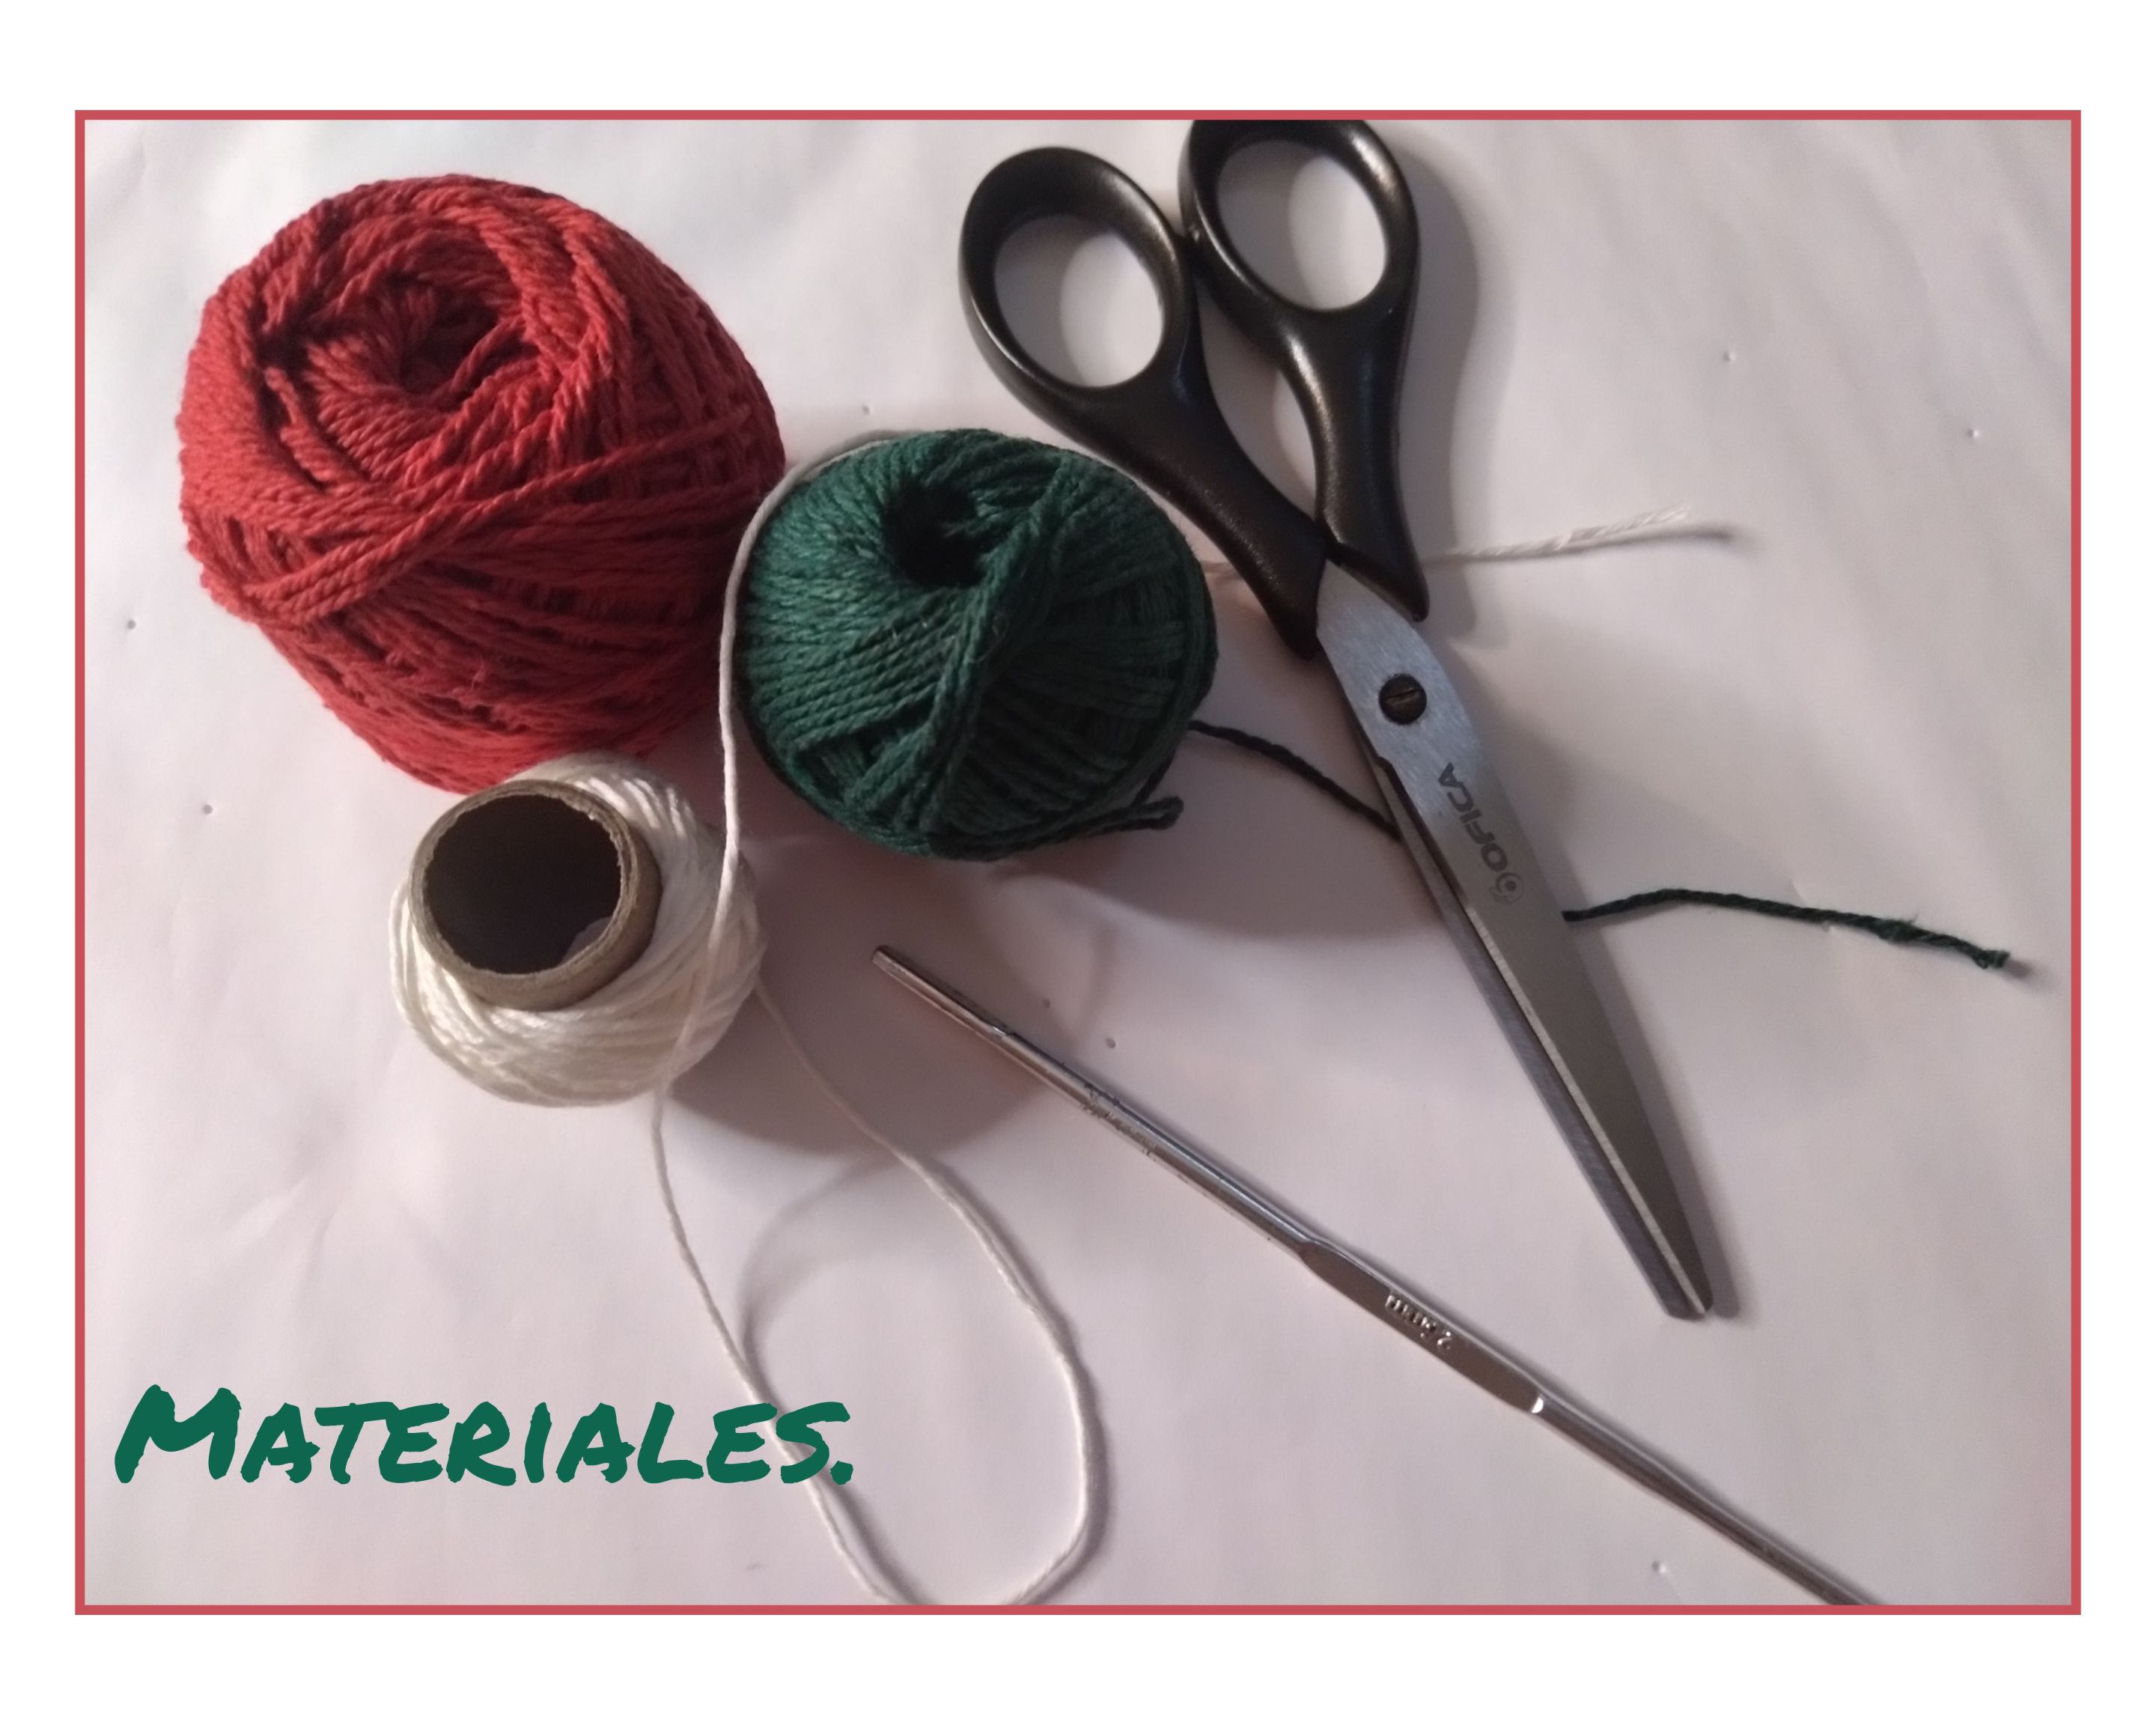
Materiales usados/Materials used:
- Hilos pabilos colores verde, rojo y beis.
- Aguja de crochet de 2,25mm
- Aguja lanera.
- Tijeras.
- Green, red and beige wick yarns.
- Crochet needle of 2,25mm.
- Wool needle.
- Scissors.
Procedimiento/Procede.
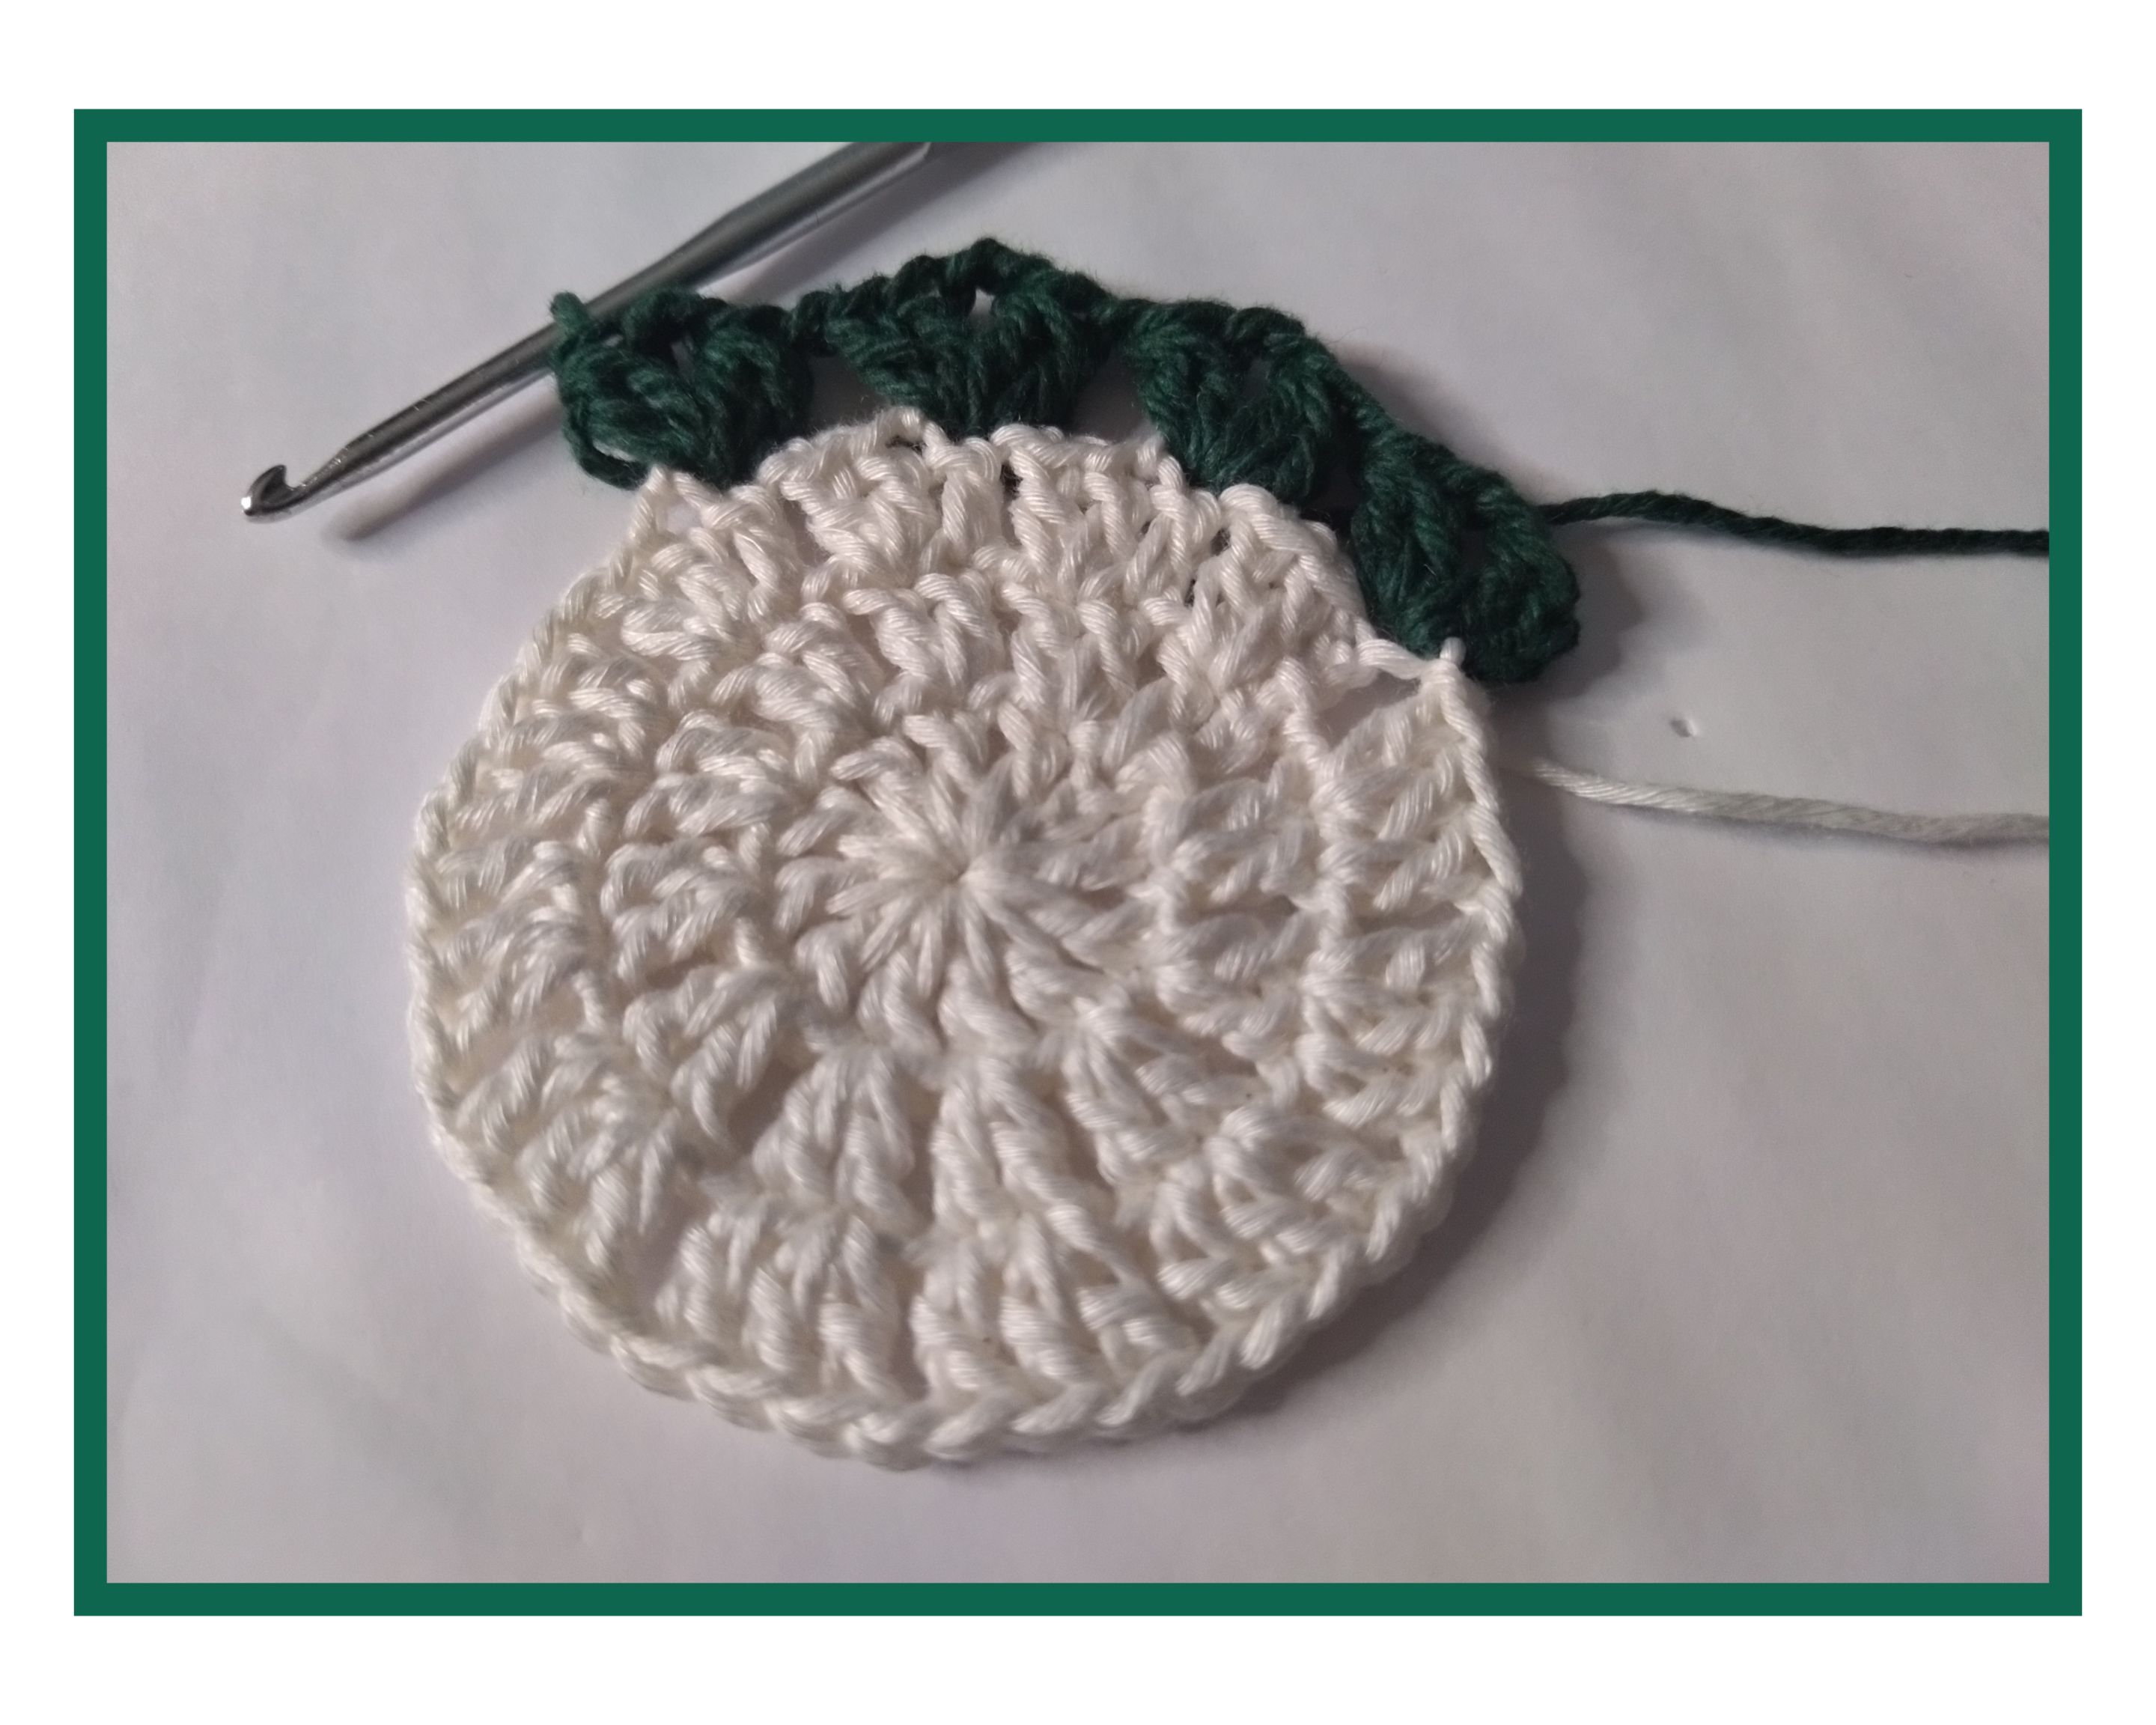
- Se empieza tejiendo con el color beis. Haremos un tapete circular iniciando con un am y dentro de él levantamos 12puntos altos separados por 1 cadena.
- En la segunda vuelta tejeremos 2puntos altos encima de los puntos altos de la vuelta anterior y los separamos por 1 cadena.
- En la tercera vuelta tejeremos 1punto y 1aumento de punto alto sobre los dos puntos de la vuelta anterior, iremos separando estos grupos de puntos altos con 1cadena.
- Para la cuarta vuelta haremos un cambio de hilo a color verde. Empezaremos tejiendo 3cadenas y 1punto alto, separamos con 2cadenas y levantamos dentro de ese mismo punto donde empezamos 2puntoss altos más.
- Ahora contamos dos puntos de la vuelta anterior y los dejamos sin trabajar, ya en el tercero tejeremos 2pa-2cd-2pa dentro de ese mismo punto. Esto lo vamos a repetir hasta terminar toda la vuelta.
- We start by knitting with the color beige. We will make a circular mat by starting with an am and inside it we will pick up 12 double crochet stitches separated by 1 chain.
- In the second row we will knit 2 double crochet over the double crochet of the previous row and separate them by 1 chain.
- In the third row, we will knit 1 stitch and 1 double crochet over the two stitches of the previous row, separating these groups of double crochets with 1 chain.
- For the fourth row we will change the yarn to green. We will start by knitting 3 chains and 1 double crochet, separate with 2 chains and pick up 2 more double crochet stitches in the same stitch where we started.
- Now we count two stitches of the previous row and leave them without working, and in the third one we will knit 2pa-2cd-2pa inside that same stitch. We will repeat this until we finish the whole row.
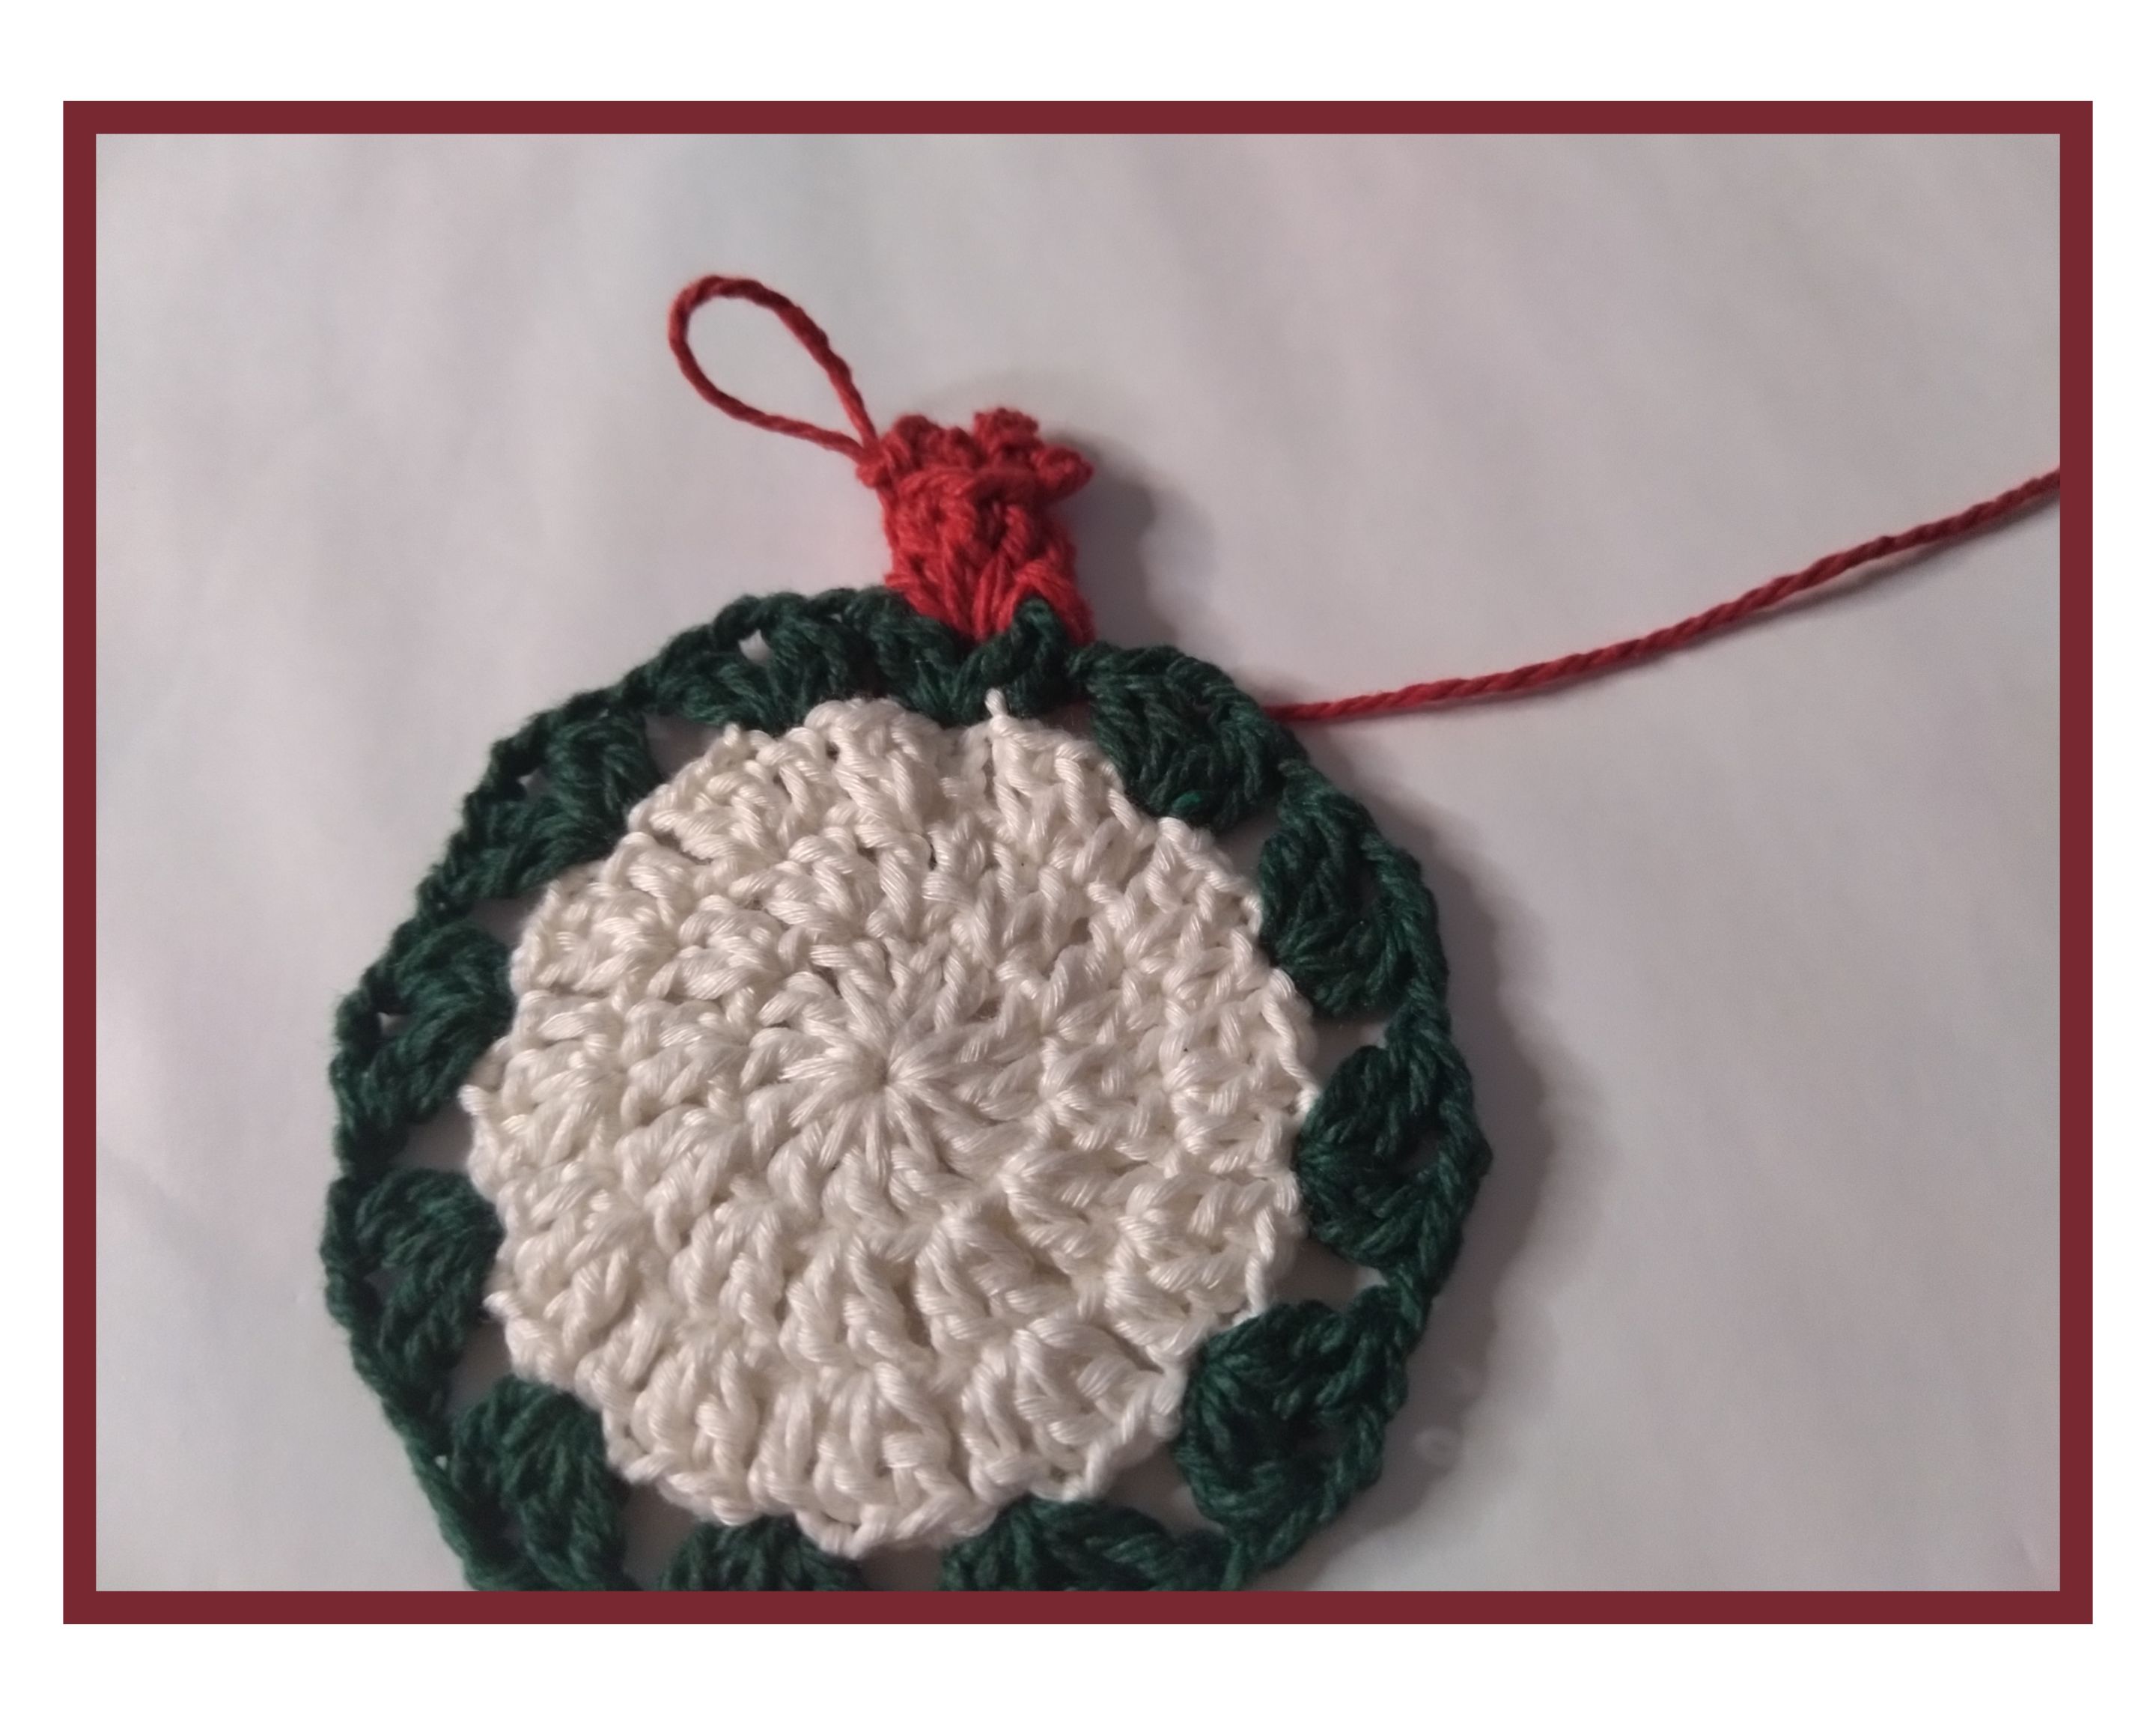
- Así debe verse la vuelta número 4 finalizada. Cambiamos el hilo a color rojo para iniciar la quinta vuelta.
- This is what row 4 should look like when it is finished. We change the yarn to red to start the fifth row.
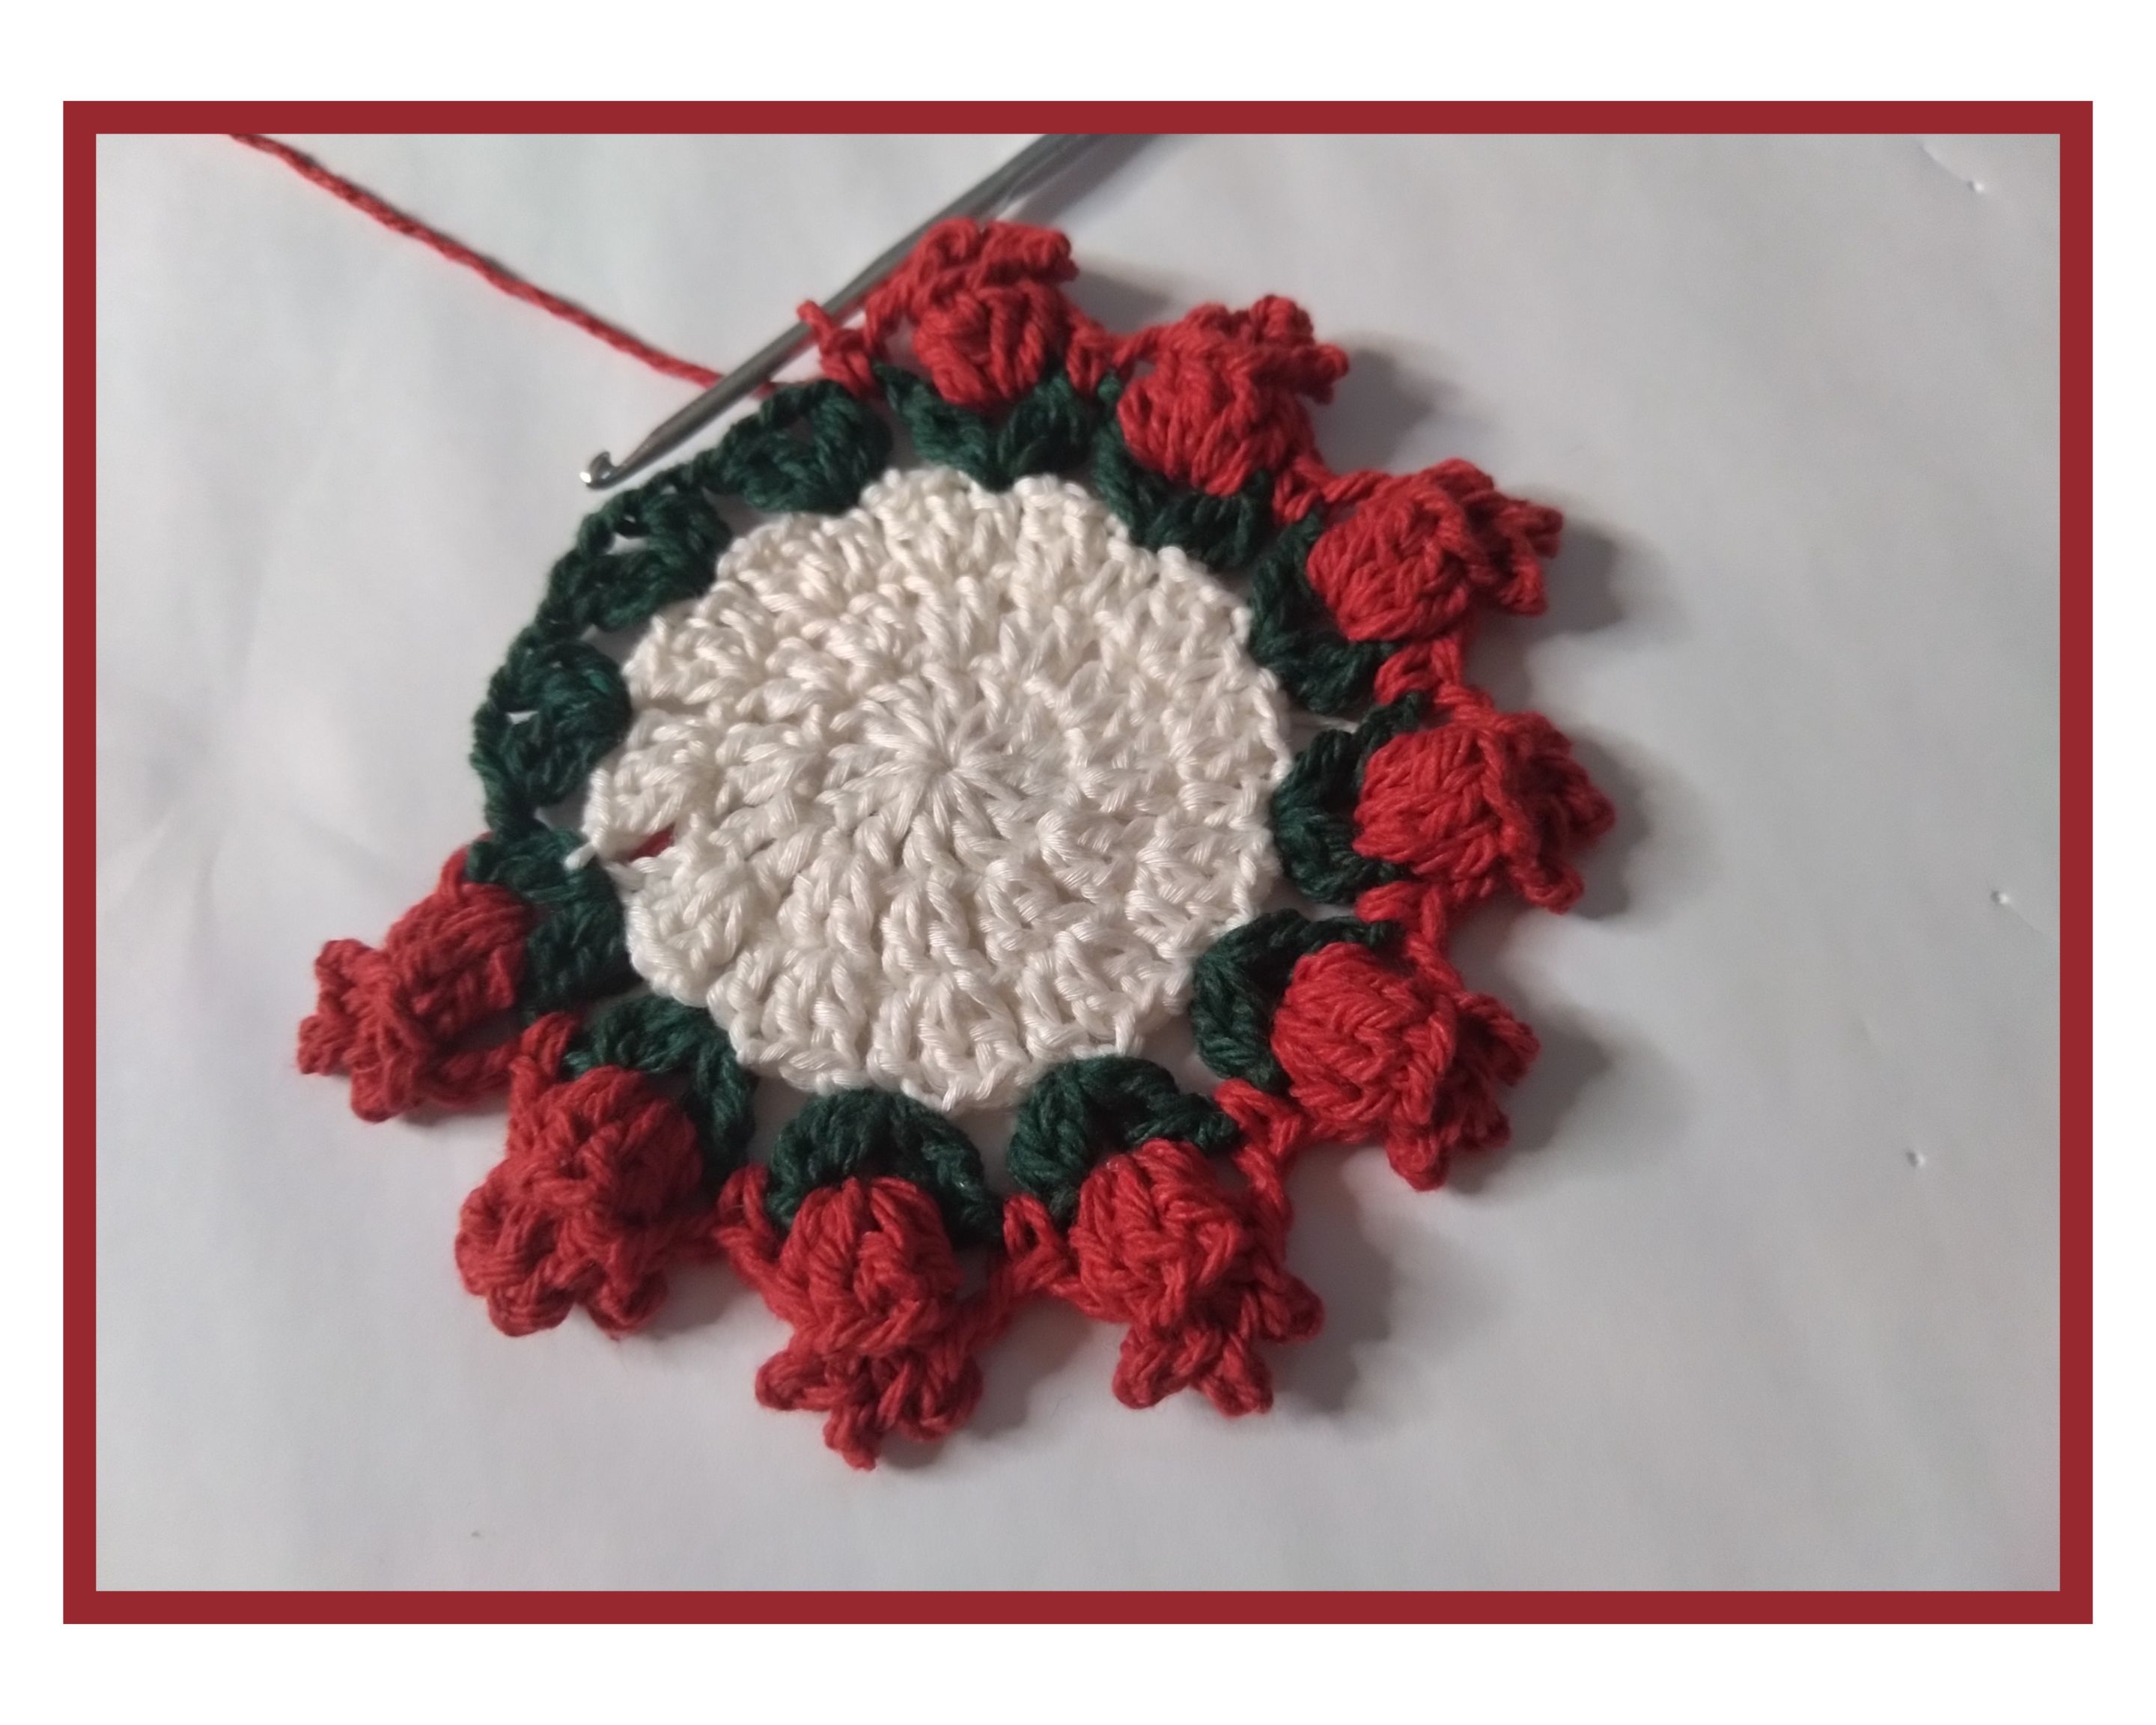
- Los tulipanes se forman tejiendo el siguiente 🪡 punto: entramos al abanico de la vuelta anterior y levantamos 5pa, soltamos el hilo y pasamos el gancho desde donde levantamos el primer pa, desde allí tomamos el hilo y tejeremos 1pd.
- Luego tejeremos 2cd y en el siguiente punto tejeremos 1pb. De esta manera tejeremos toda la vuelta.
- Tulips are formed by knitting the following 🪡 stitch: we enter the fan from the previous round and pick up 5pa, we drop the yarn and pass the hook from where we picked up the first pa, from there we pick up the yarn and we will knit 1pd.
- Then we will knit 2cd and in the next stitch we will knit 1pb. In this way we will knit the whole round.
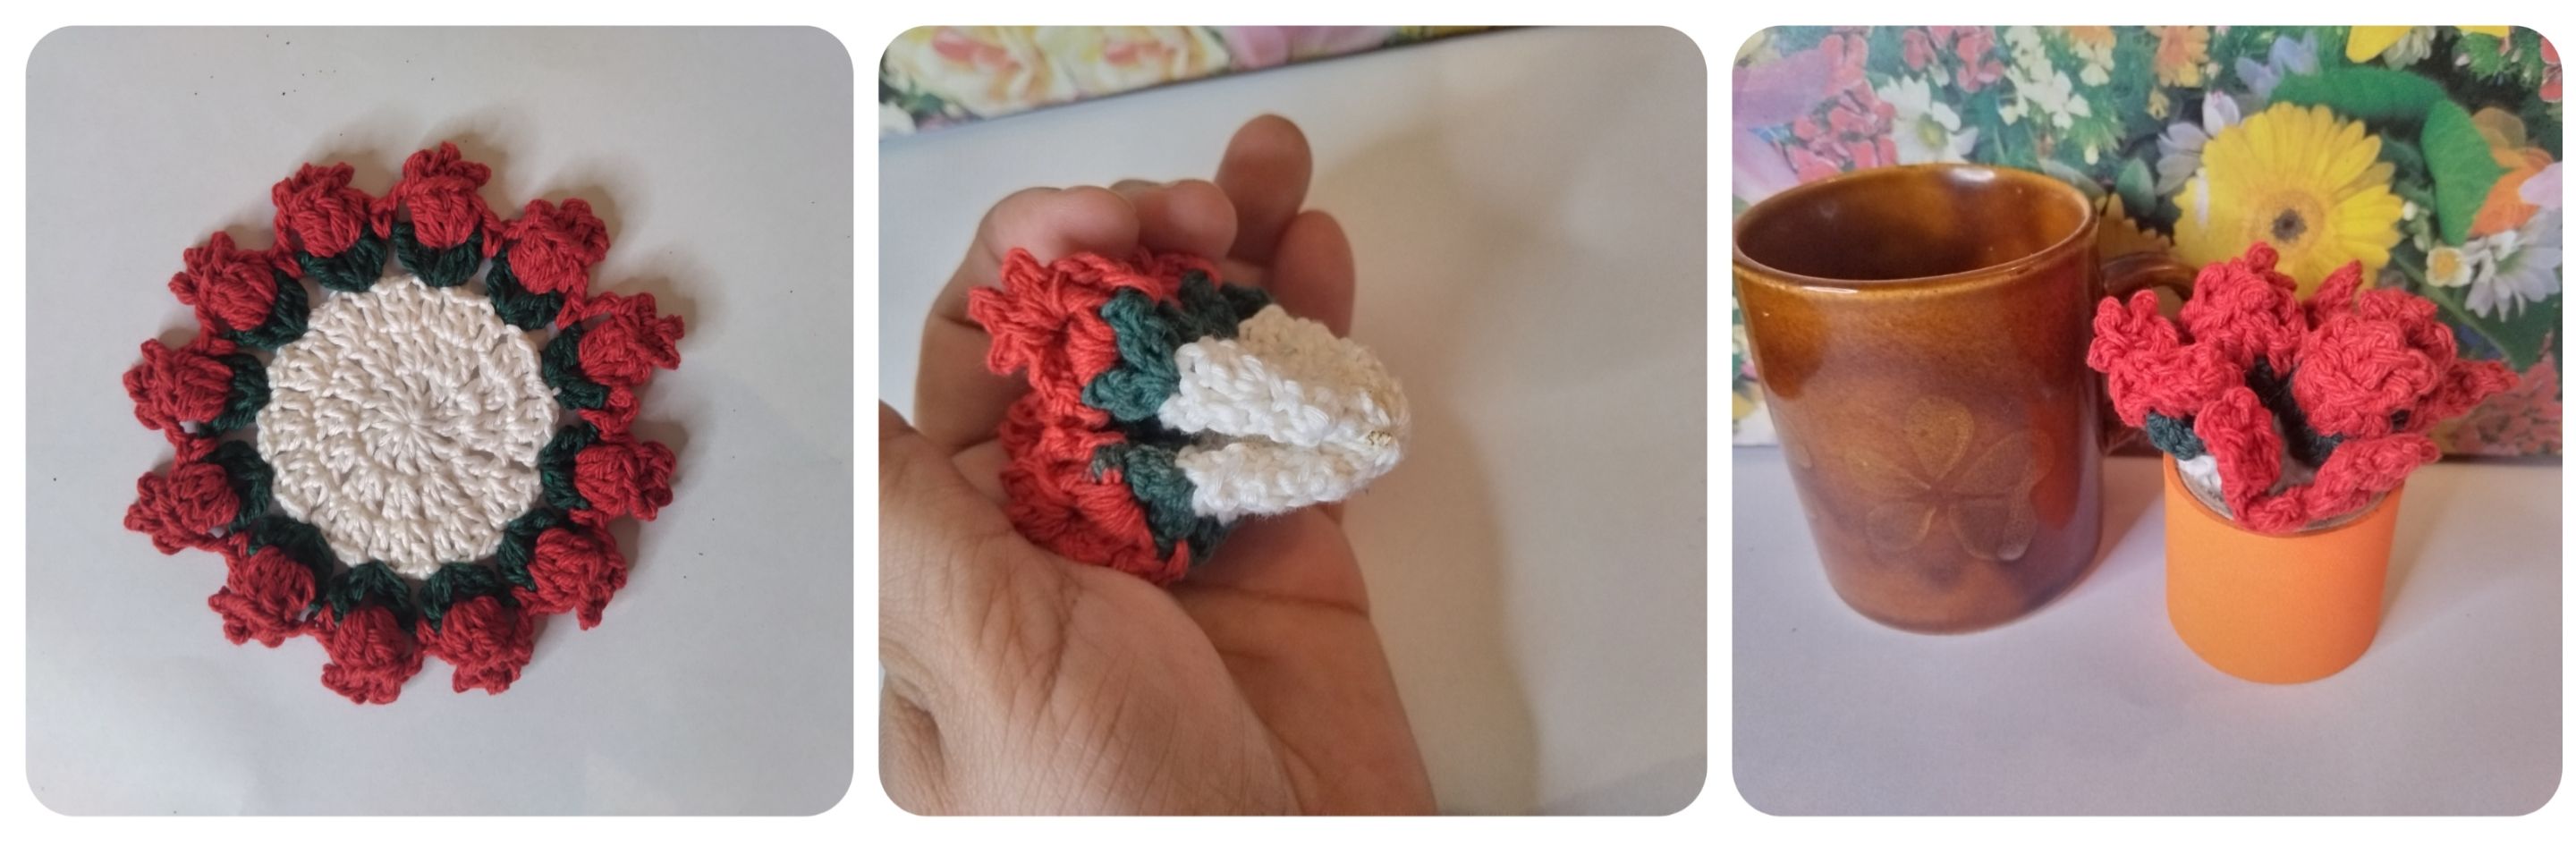
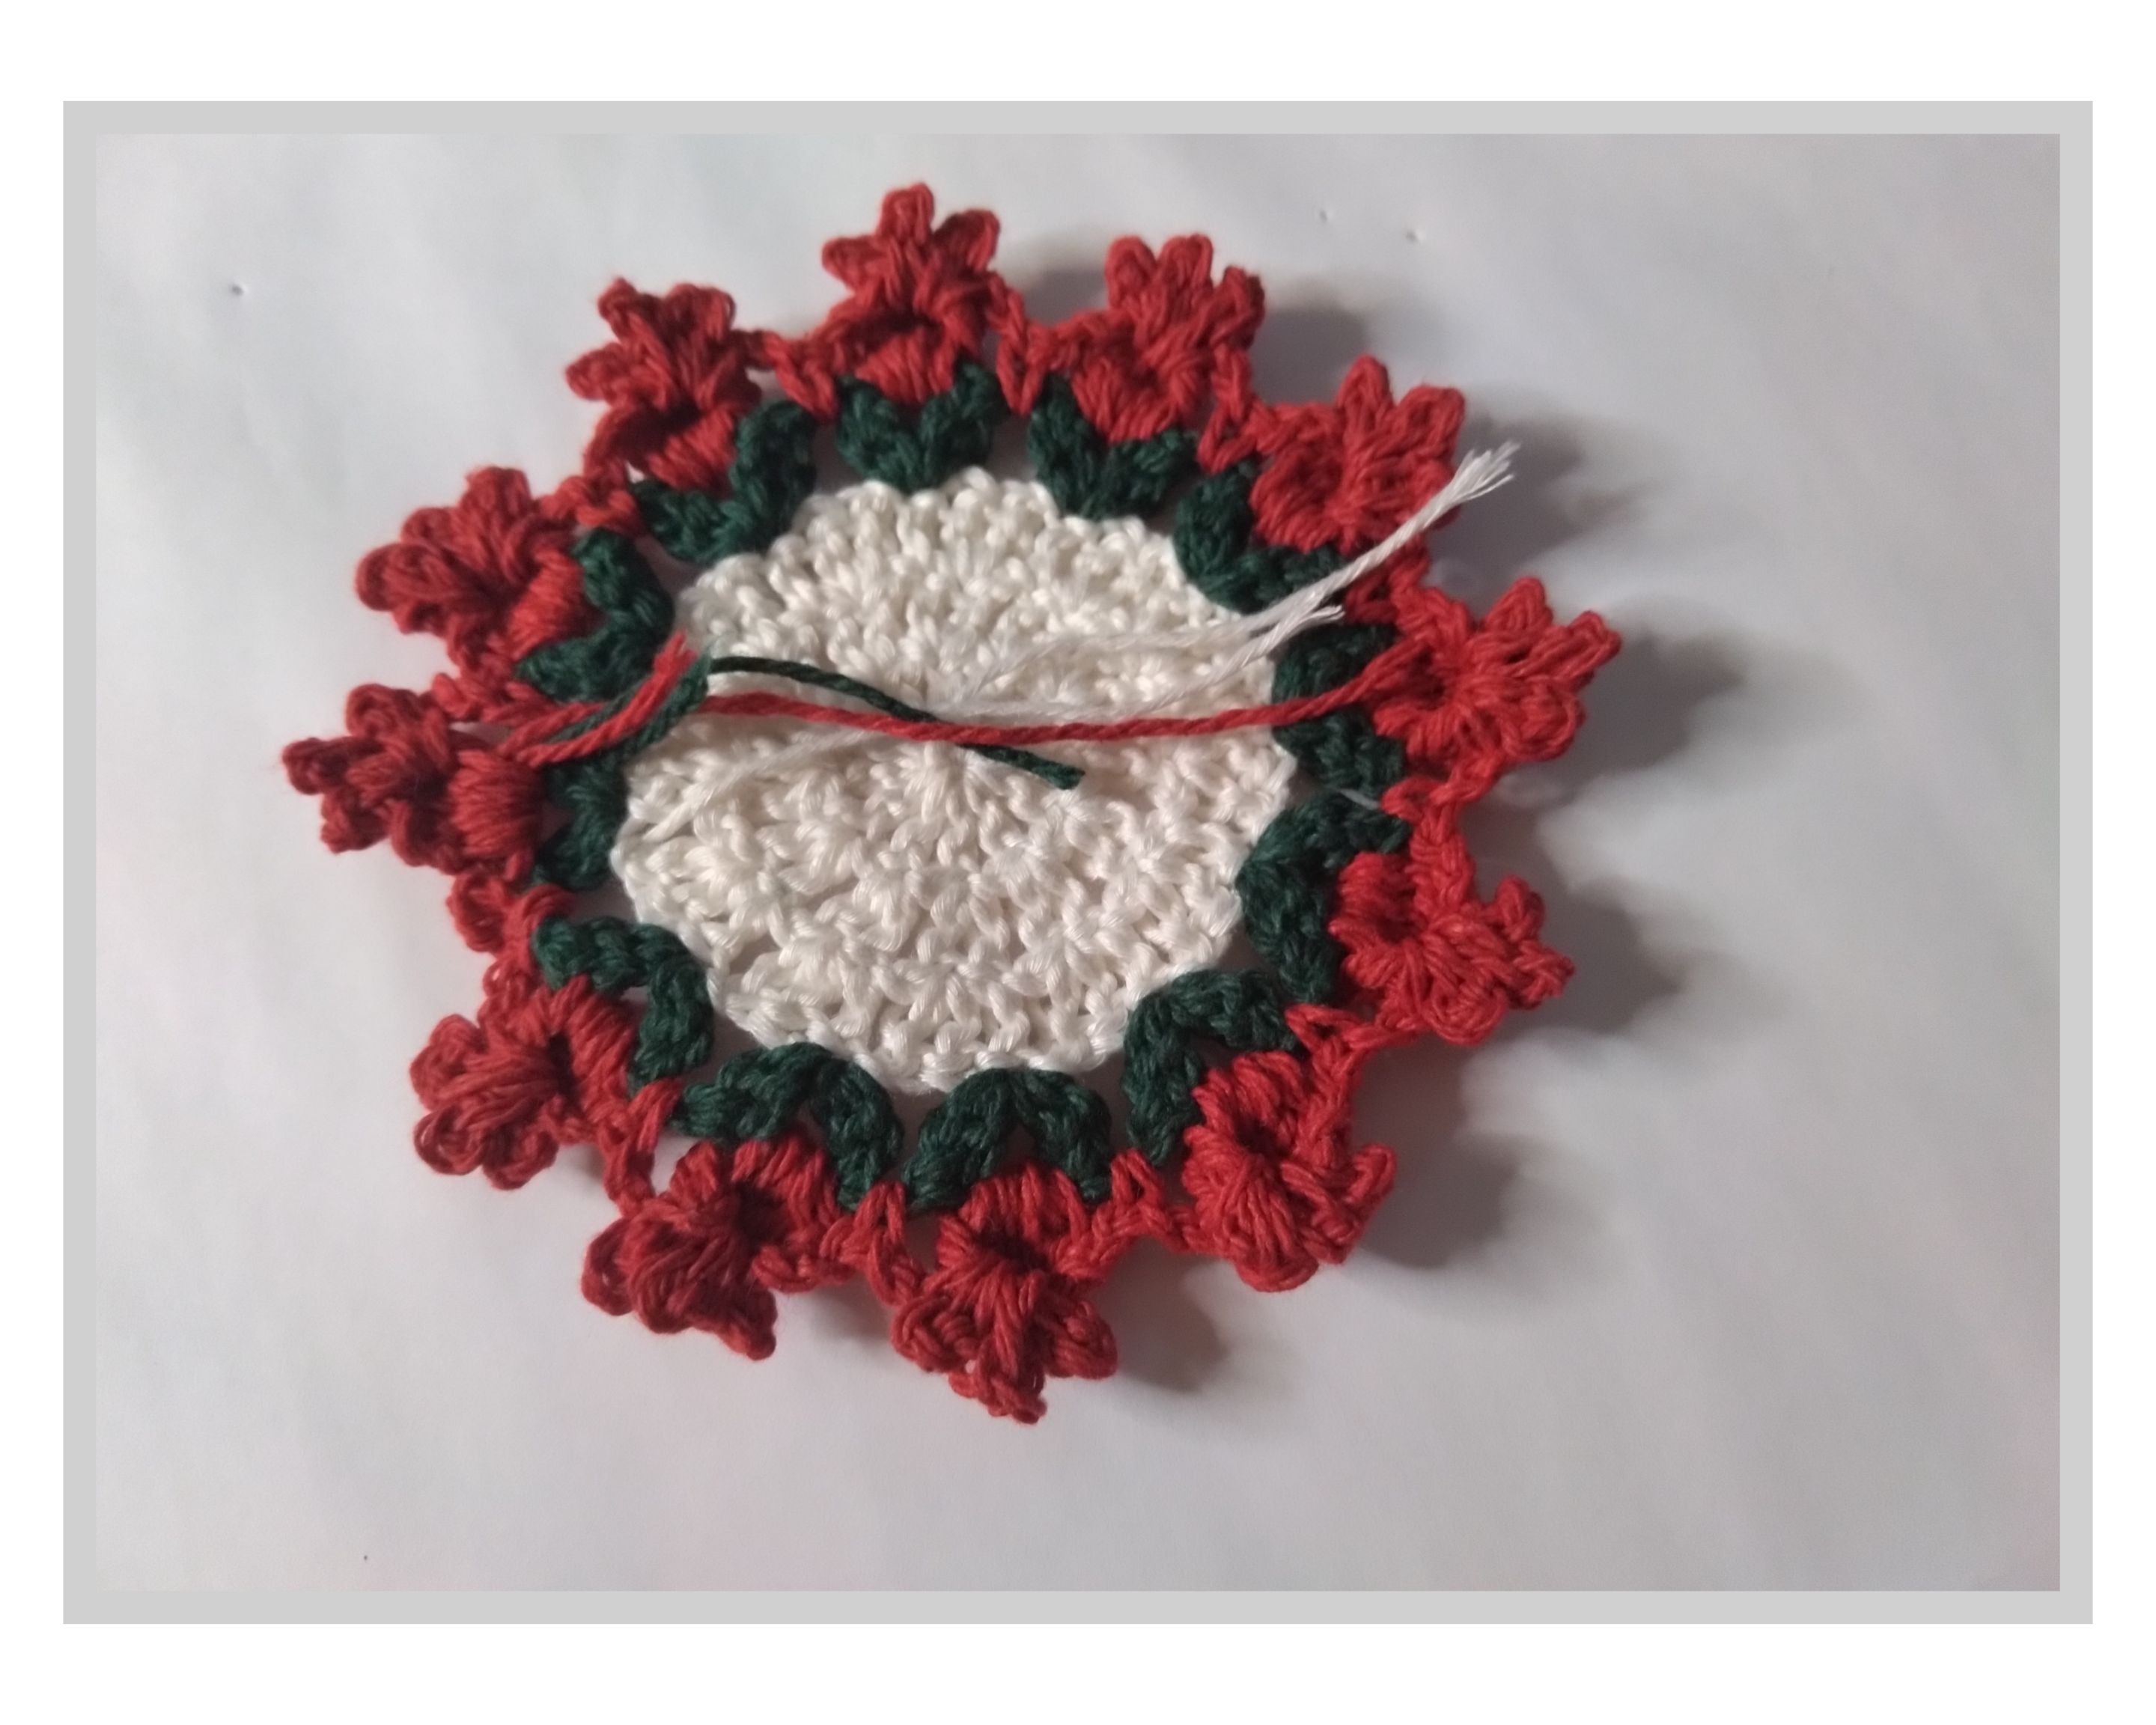
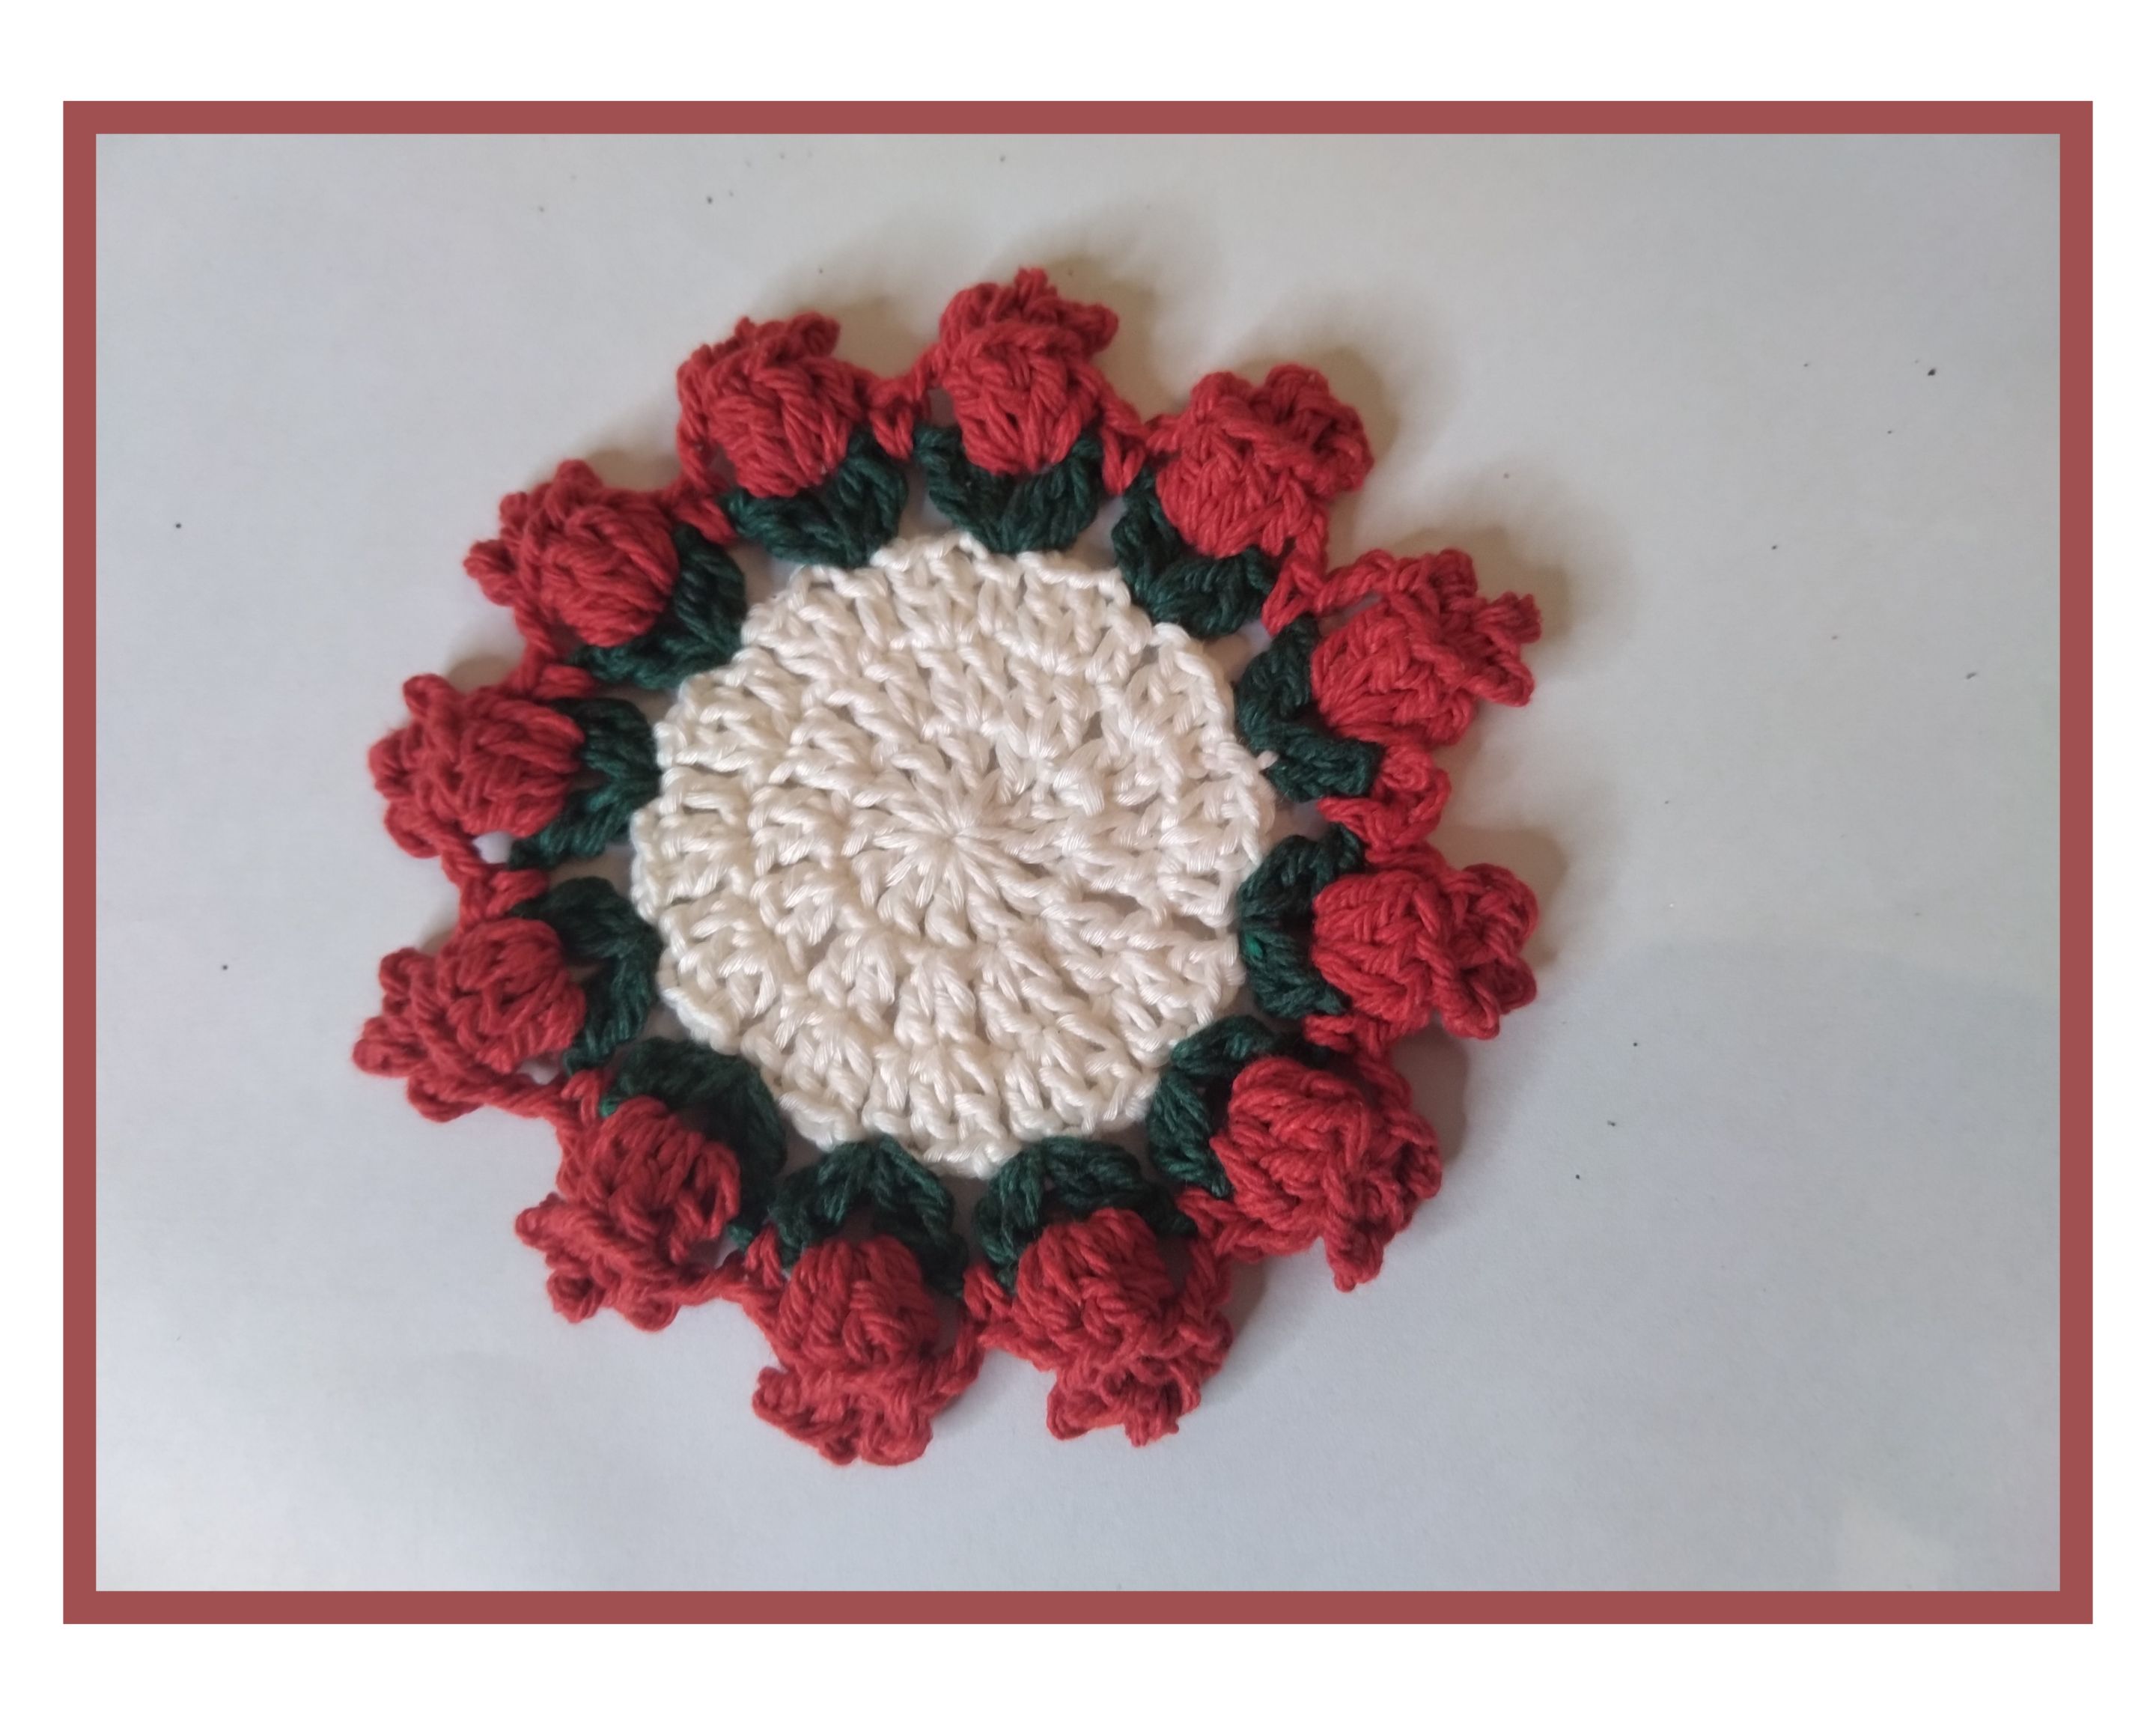
- Al terminar el tejido cortamos los hilos, metemos las hebras en la aguja lanera y las escondemos entre los puntos. Así quedará terminado nuestro posatazas de tulipanes.
- When the knitting is finished, we cut the threads, put the strands in the knitting needle and hide them between the stitches. This is how our tulip coaster will be finished.
🙋 Quería hacer un posavasos, pero el hilo beis no fue suficiente para hacer el círculo más grande, de todos modos me encanta y lo usaré para poner mi taza de café.
🙋 I wanted to make a coaster, but the beige thread wasn't enough to make the circle bigger, anyway I love it and will use it to put my coffee cup on.
- Muchas gracias por tu visita. Todas las fotos son de mi propiedad. Edité con Polish. Usé el traductor de Deepl. Hasta pronto 😚
- Thank you very much for your visit. All photos are my property. I edited with Polish. I used Deepl translator. See you soon 😚

Show more
Tags :
Woo!
This creator can upvote comments using 3speak's stake today because they are a top performing creator!
Leave a quality comment relating to their content and you could receive an upvote
worth at least a dollar.
Their limit for today is $0!
Their limit for today is $0!

13 views
2 years ago
$

5 views
a year ago
$
4 views
a year ago
$
8 views
a year ago
$

14 views
a year ago
$
More Videos

6 views
a year ago
$

6 views
3 years ago
$

10 views
a year ago
$

21 views
a year ago
$
93 views
4 years ago
$

3 views
2 years ago
$

10 views
a month ago
$

Brotato: "El mutante goloso y El amo de la espada" // ""The Greedy Mutant and The Master of the Swo"
11 views
a year ago
$

6 views
4 months ago
$

3 views
3 months ago
$

12 views
a year ago
$
4 views
2 years ago
$

10 views
2 years ago
$

1 views
a year ago
$

10 views
3 years ago
$

33 views
a year ago
$

1 views
4 years ago
$

18 views
4 years ago
$

13 views
2 years ago
$

2 views
4 years ago
$

12 views
2 years ago
$

5 views
a year ago
$

18 views
a year ago
$
31 views
3 years ago
$
Comments:
Reply:
To comment on this video please connect a HIVE account to your profile: Connect HIVE Account