¿Cómo hacer una edición tipo fantasía? / Video in Spanish and text in English
5
About :
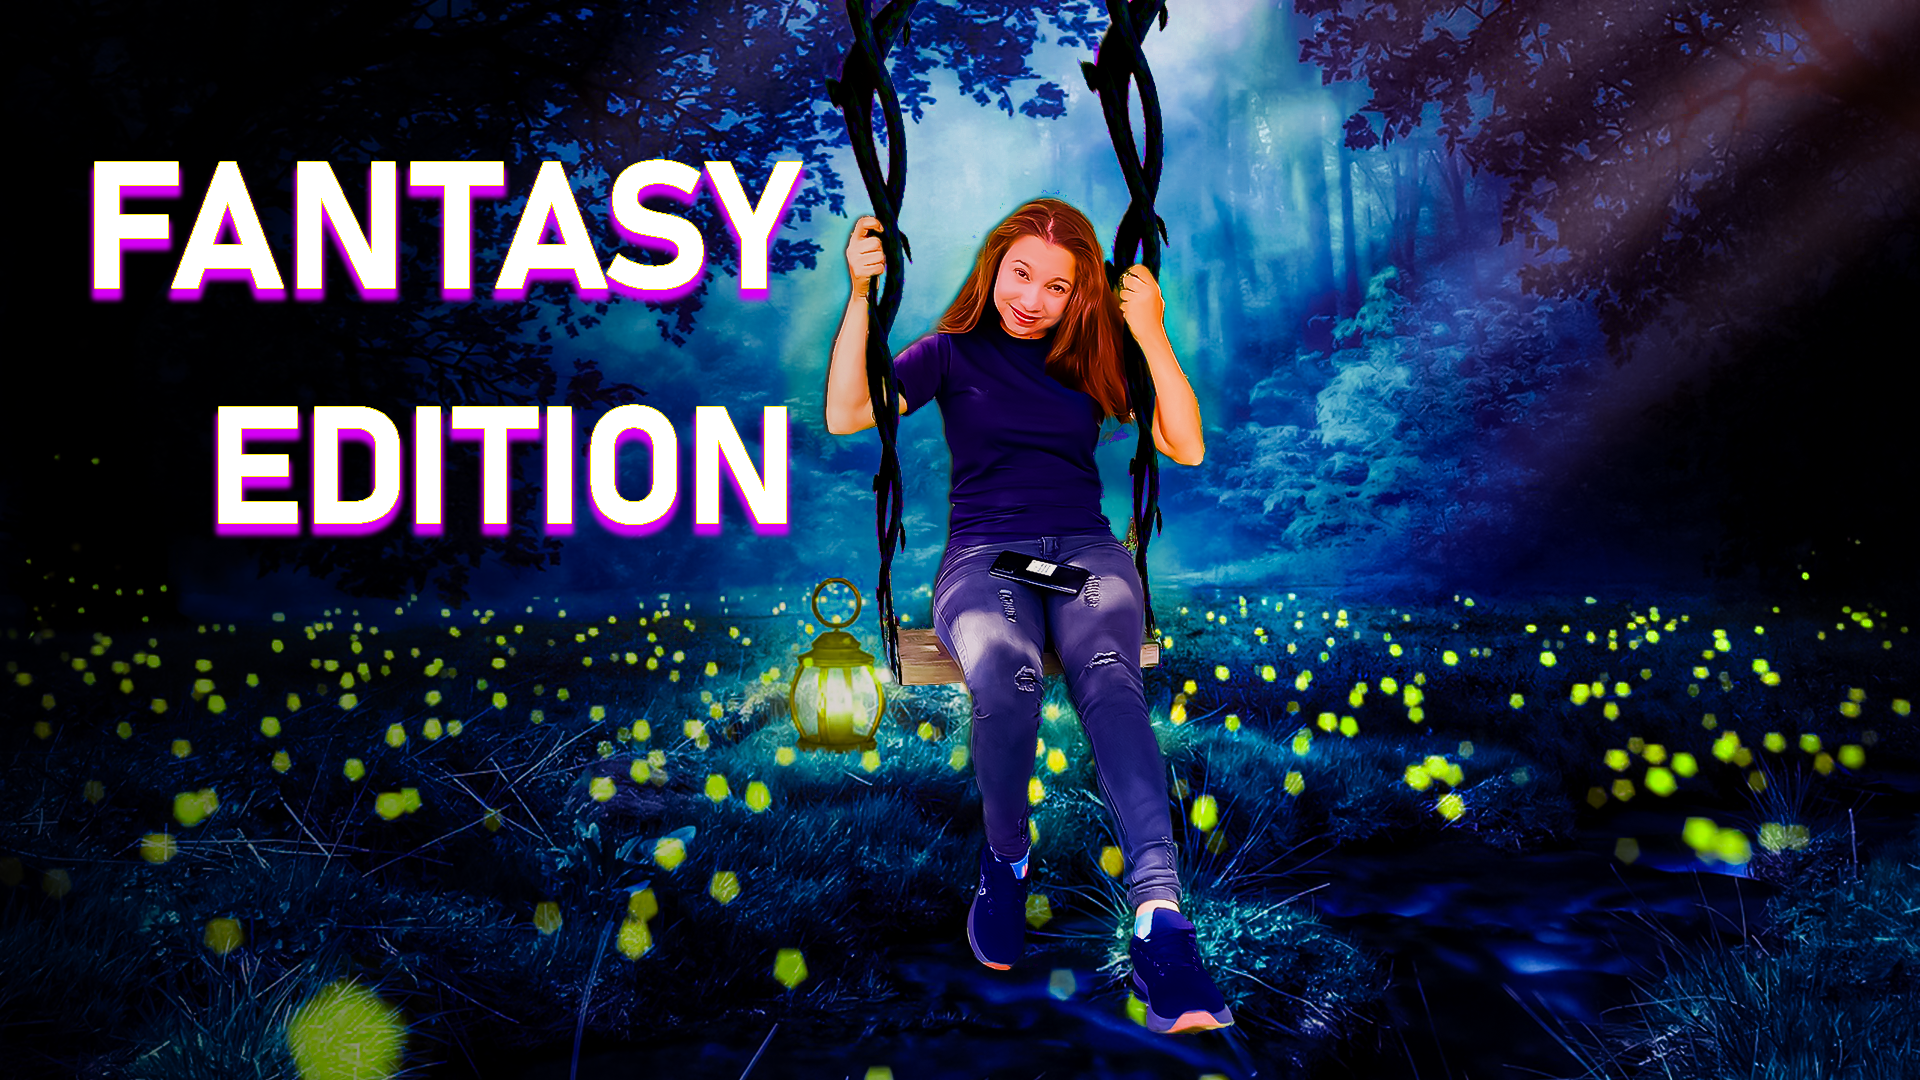
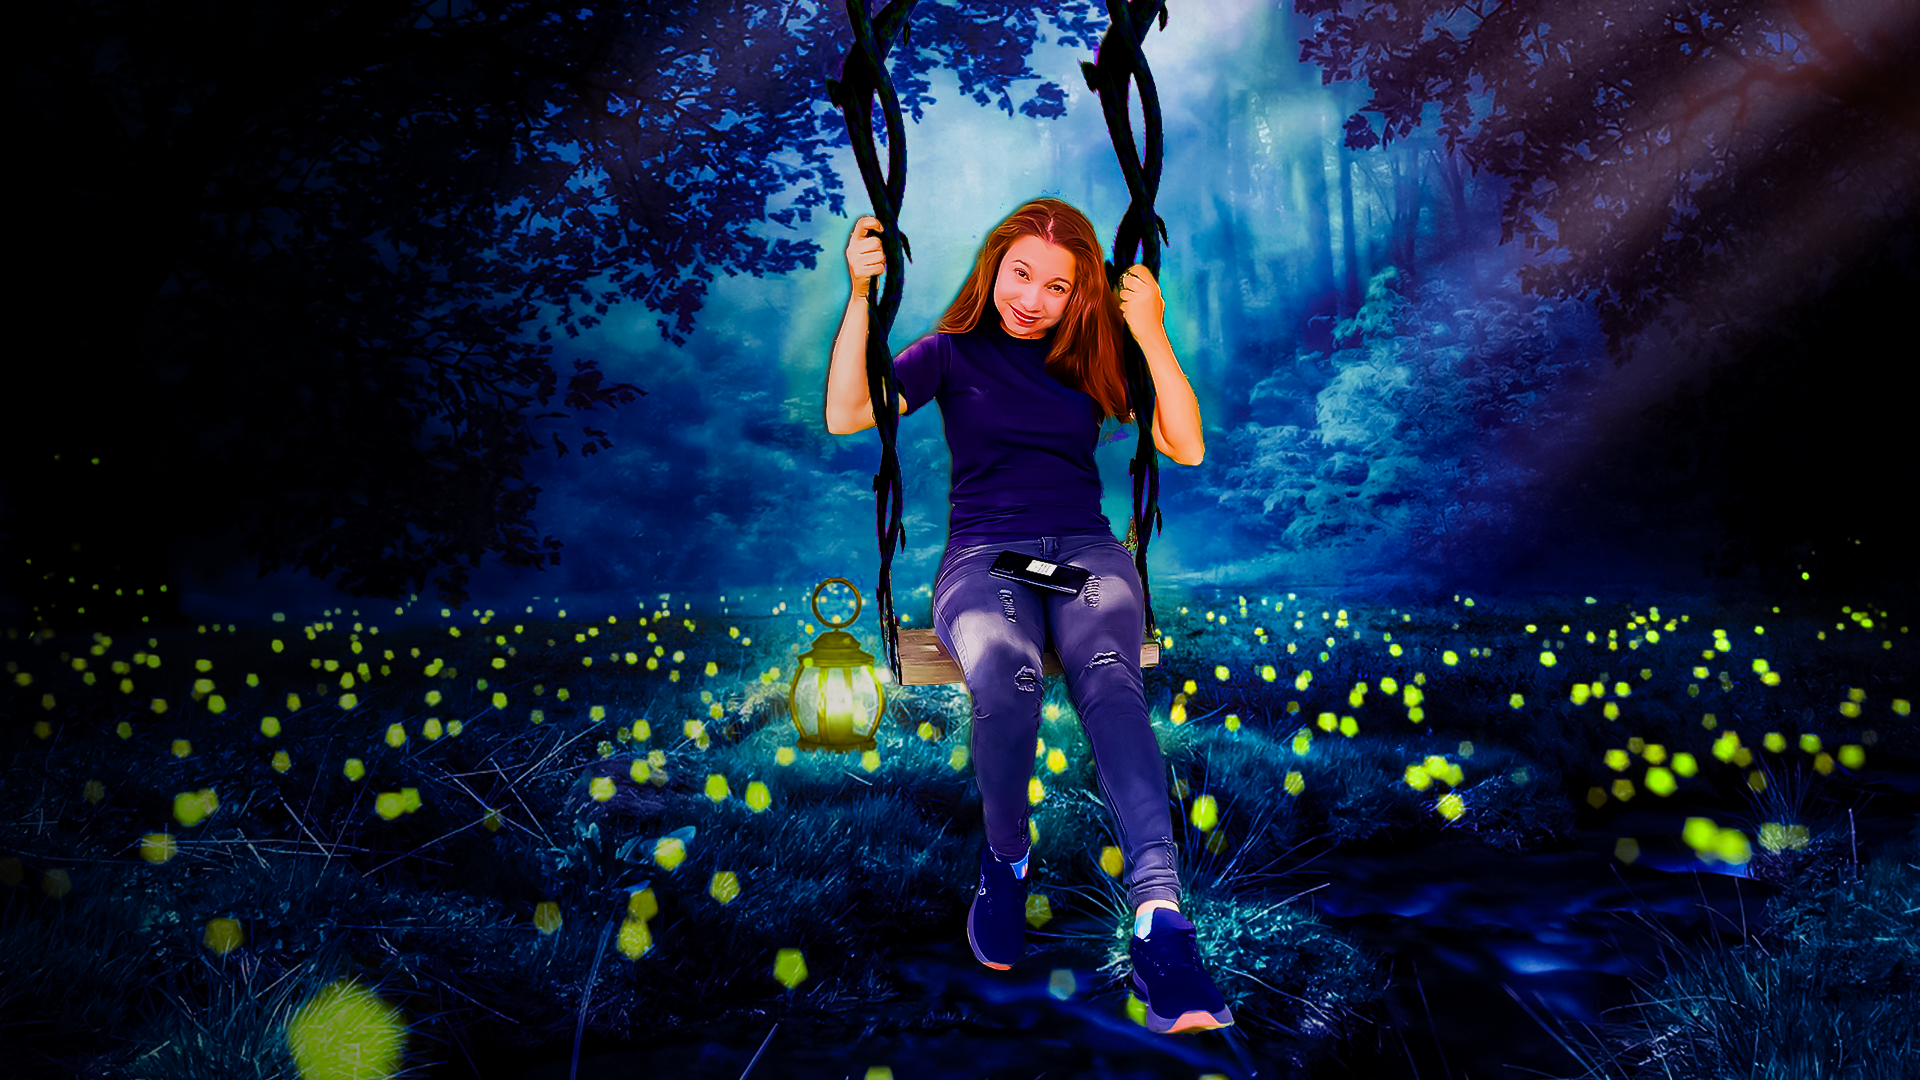
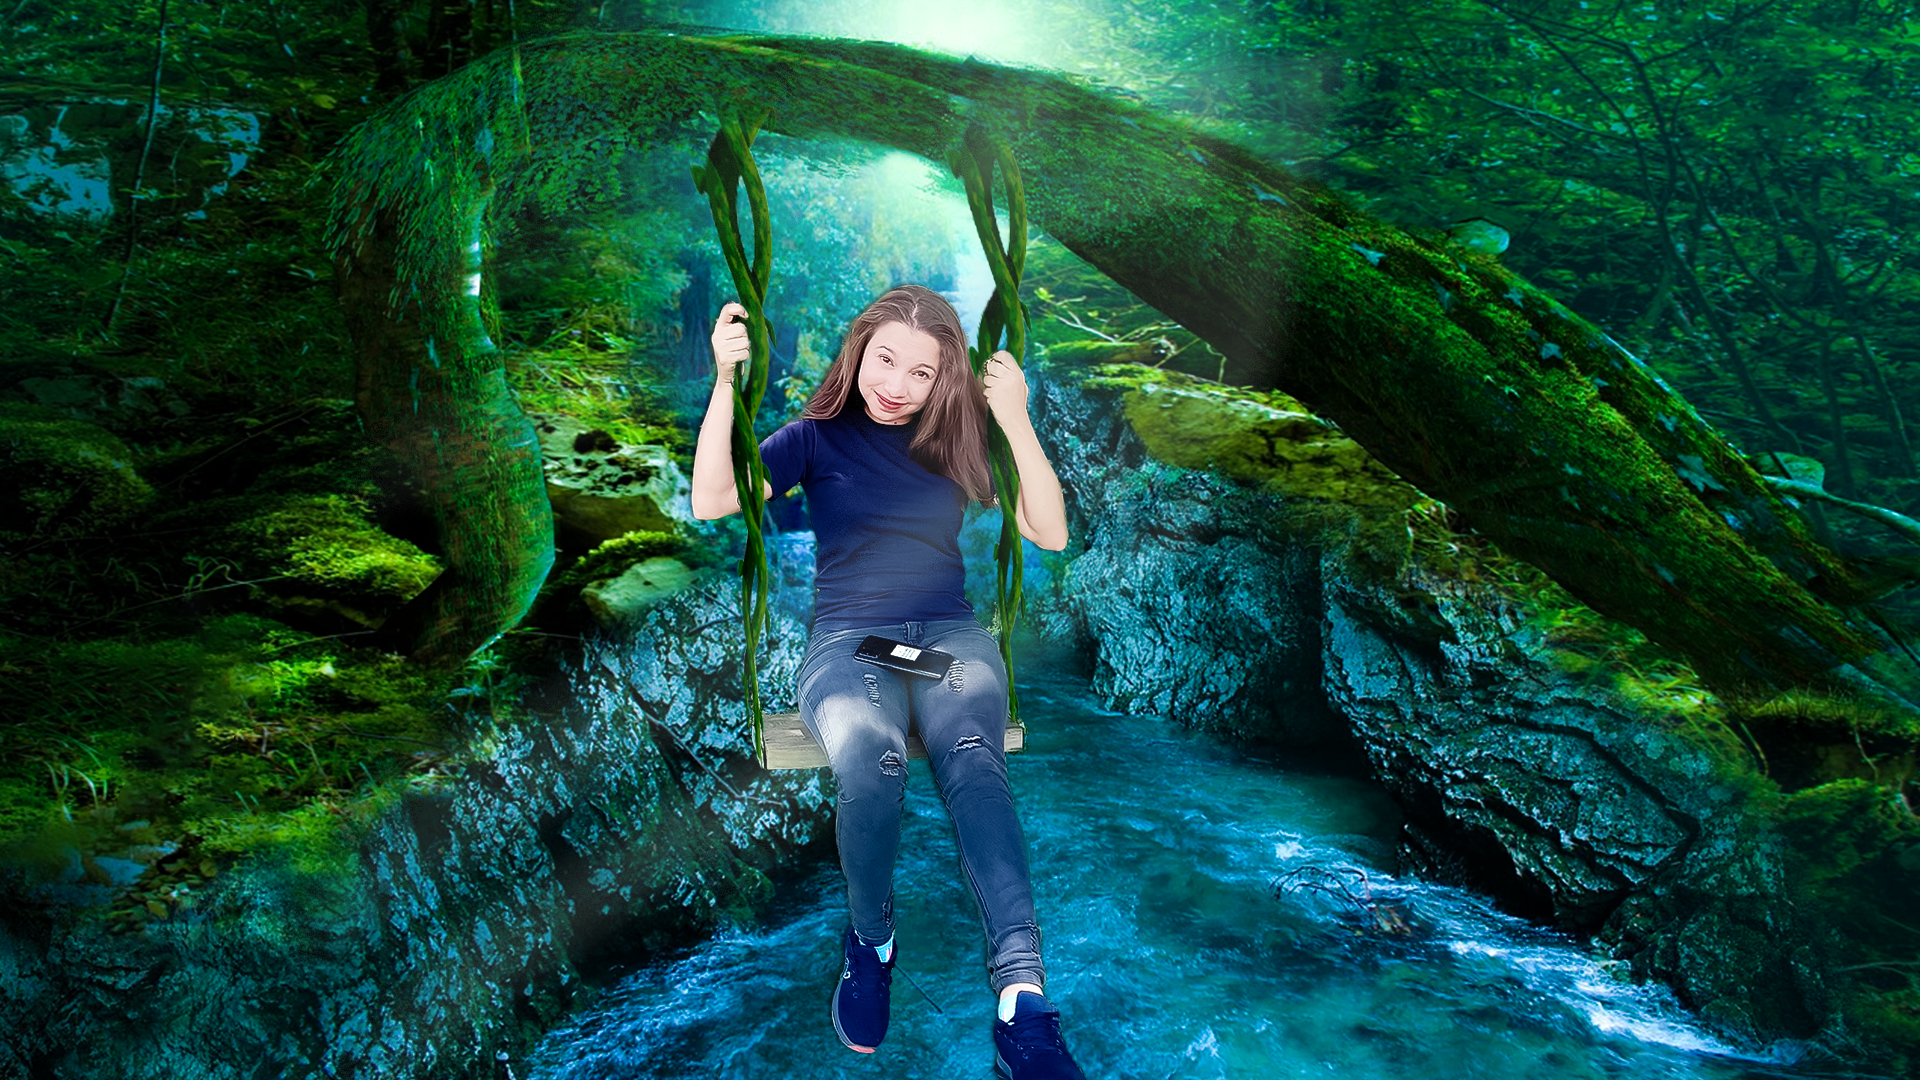
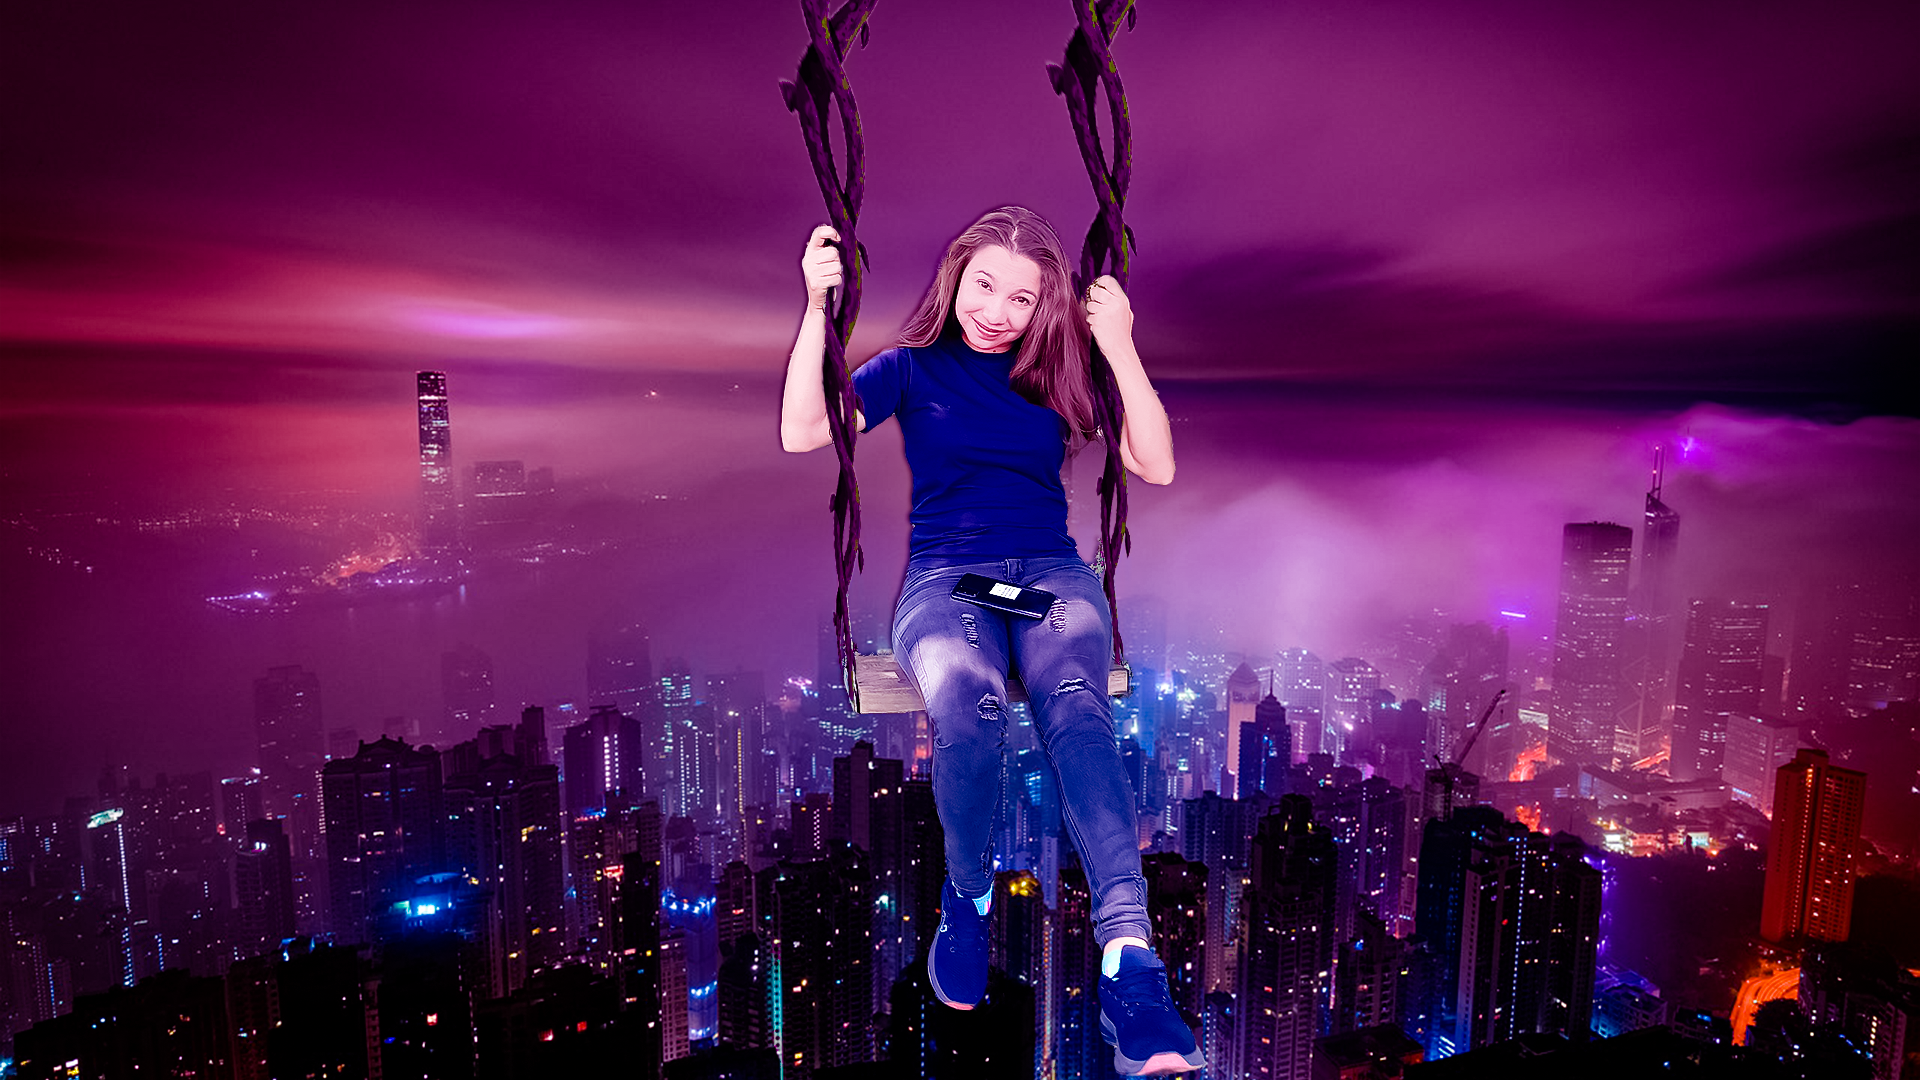
Hola amigos, ya tengo días que no comparto en esta linda comunidad de Threeshorts y en esta oportunidad les vengo a compartir un tutorial de Photoshop de como hacer un edición tipo fantasía, usando colores que uno lo asocia con la fantasía, este edición me gusto mucho al principios estuve indecisa y realice 3 imágenes diferente usando una imagen base que era del columpio, en las parte final del post les mostrare todas estas, pero el tutorial lo hice de la que mejor edición según mi criterio.

Les dejare acá debajo el paso a paso escrito para que se ayuden si en algún momento piensan hace una edición de esta magnitud.
I will leave here below the written step by step to help you if you ever think of doing an edition of this magnitude.
Tener listas las imágenes y la idea clara de la edición que deseas hacer, en mi caso ya tengo descargada la imagen libre de uso y uno también una fotografía mía sin fondo.
Paso dos coloque la imagen que usaría de fondo, mas la fotografía mía fin fondo.
En este tercer paso vamos a cambiar el color de la liana, yo primero fui a gama de colores seleccione el color de esta, luego cree una capa de de tono y saturación y por ultimo una de relleno de color y guala ya cambie el color de la liana buscando a un azul oscuro.
En este paso jugué con poco con las capas de brillo y contraste, intensidad, tono y saturación, por ultimo equilibro de color.
Crea una nueva capa, luego presionas las teclas Ctrl+alt+E y se funcionara todas las capas creando una imagen con todos los efectos.
En este paso, voy a convertir la imagen en objeto inteligente y luego vamos a Cámara Raw y ajuste la imagen buscando los tonos azules y morados, aquí uno juega un poco con la imagen en general para que se vea bien.
Crear una capa de color uniforme, esta la ajustas en color suave.
Crear una capa en blanco, seleccionar el pincel y con Alt dar clip para seleccionar el color que deseo, esto lo hice para suavizar la líneas de expresión en el rostro.
Por ultimo cree una capa de degradado, esta la coloque en negro y ajuste la orientación por donde quería que callera el color, esta la ajuste colocándola en multiplicar y le baje la opacidad y listo ya tengo mi imagen de tipo fantasía lista.
Have the images ready and a clear idea of the edition you want to do, in my case I have already downloaded the free image and one of my pictures without background.
Step two place the image that I would use as background, plus the photograph of me at the end of the background.
In this third step we are going to change the color of the vine, I first went to color range select the color of the vine, then create a hue and saturation layer and finally a color fill layer and then change the color of the vine looking for a dark blue.
In this step I played a little with the layers of brightness and contrast, intensity, hue and saturation, and finally color balance.
Create a new layer, then press the keys Ctrl+alt+E and it will work all the layers creating an image with all the effects.
In this step, I will convert the image to smart object and then go to Camera Raw and adjust the image looking for the blue and purple tones, here one plays a little with the image in general to make it look good.
Create a uniform color layer, this one you adjust it in soft color.
Create a white layer, select the brush and Alt-click to select the color I want, I did this to soften the expression lines on the face.
Finally I created a gradient layer, this I placed it in black and adjust the orientation where I wanted the color to fall, this I adjusted it by placing it in multiply and lowered the opacity and ready I have my fantasy type image ready.
En esta edición es mas compleja que las demás que eh traído, espero que les haya gustado esta, la hice con mucho cariño.
This edition is more complex than the others that I have brought, I hope you liked this one, I made it with love.
Nota: En la edición de este video me costo un poco porque la entrada y el final los tenia en vertical y la parte del tutorial estaba horizontal, así que ajuste este todo el video en vertical.
Note:In the edition of this video it cost me a little bit because the entrance and the end I had them in vertical and the part of the tutorial was horizontal, so I adjusted the whole video in vertical.
Música tomada de Filmara
Music taken from Filmara
Thanks for your support, see you in the next post Kisses!

Sígueme para más contenido.

Creador de contenido Original.
Twitter | Hive
Traducido con https://www.deepl.com/
Show more
Tags :
Woo!
This creator can upvote comments using 3speak's stake today because they are a top performing creator!
Leave a quality comment relating to their content and you could receive an upvote
worth at least a dollar.
Their limit for today is $0!
Their limit for today is $0!
11 views
2 years ago
$

6 views
2 years ago
$

2 views
a year ago
$
9 views
a year ago
$
8 views
a year ago
$
More Videos

19 views
2 months ago
$
4 views
11 months ago
$
10 views
2 years ago
$
10 views
2 years ago
$

29 views
11 months ago
$
7 views
a year ago
$

19 views
a year ago
$
1 views
a year ago
$

7 views
10 months ago
$
6 views
2 years ago
$
14 views
3 years ago
$

2 views
4 months ago
$

20 views
a year ago
$

3 views
2 years ago
$

7 views
7 months ago
$
9 views
11 months ago
$
47 views
a year ago
$
0 views
3 days ago
$
30 views
2 months ago
$
4 views
a month ago
$

14 views
a year ago
$
5 views
a year ago
$
10 views
a year ago
$
Comments:
Reply:
To comment on this video please connect a HIVE account to your profile: Connect HIVE Account