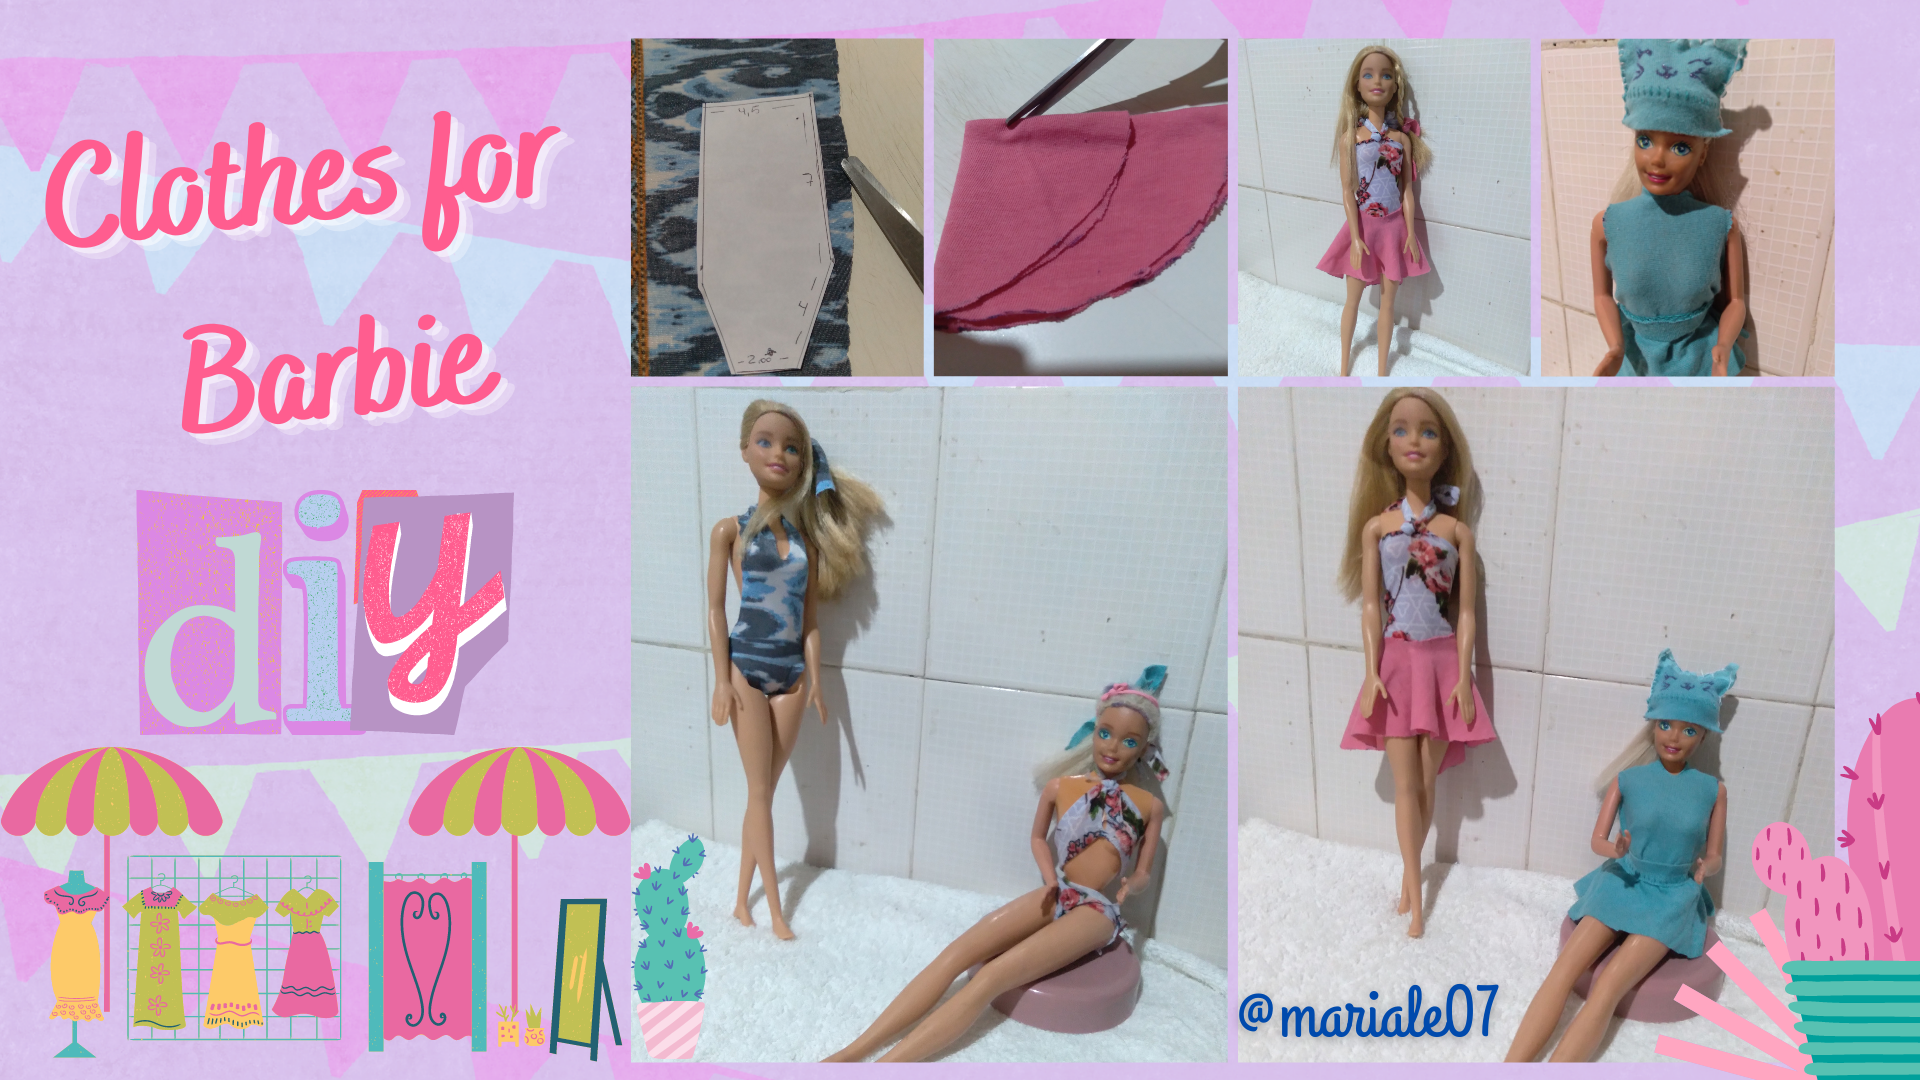
Making Clothes for Barbies Diy / Haciendo ropas para Barbies - World of Cloth [ENG/ESP]
15
About :
¡Saludos Comunidad HiveDiy!
Hoy vengo a compartir con ustedes mi participación en el concurso de esta semana de World of Cloth, para el que hicimos varios modelos de ropa para barbies.
Si hablamos de ropa para Barbies, mi hija y yo somos fanáticas, es uno de nuestros pasatiempos favoritos, ya he publicado algunas creaciones aquí, y esta vez les mostraré un modelo de traje de baño que originalmente creamos nosotras mismas, no lo sacamos de ningún tutorial, es un traje de baño sencillo basado en una forma geométrica. Luego les mostraré dos vestidos que hemos hecho ahora si guiándonos por tutoriales que nos encantan y que hemos probado y funciona de maravilla, así que lo recomendamos 100%.
¡¡¡Manos a la obra!!!
Greetings HiveDiy Community!
Today I come to share with you my participation in this week's World of Cloth contest, for which we made several models of clothes for barbies.
If we talk about clothes for Barbies, my daughter and I are fans, it is one of our favorite hobbies, I have already published some creations here, and this time I will show you a swimsuit model that we originally created ourselves, we did not get it from any tutorial, it is a simple swimsuit based on a geometric shape. Then I will show you two dresses that we made now if guided by tutorials that we love and we tested and it works great, so we recommend it 100%.
Let's get to work!!!

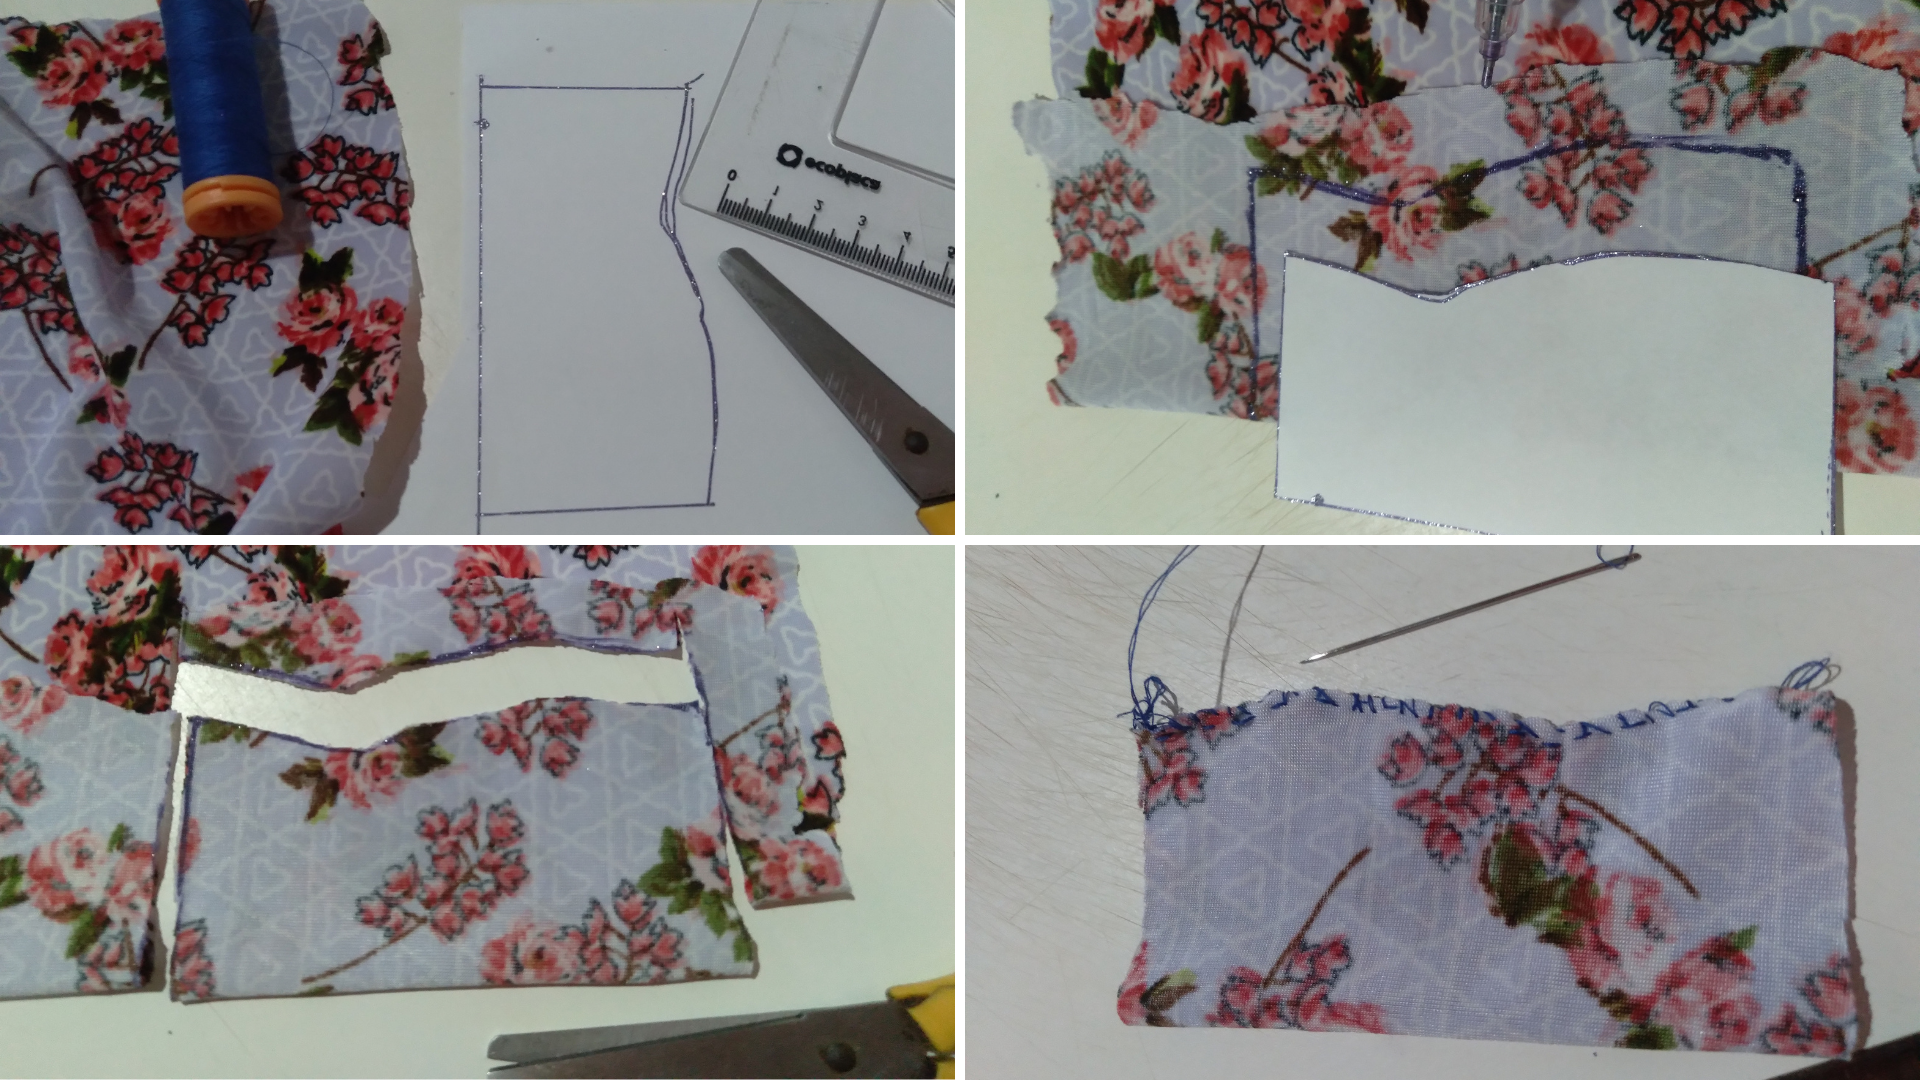
Traje de baño de Barbie:
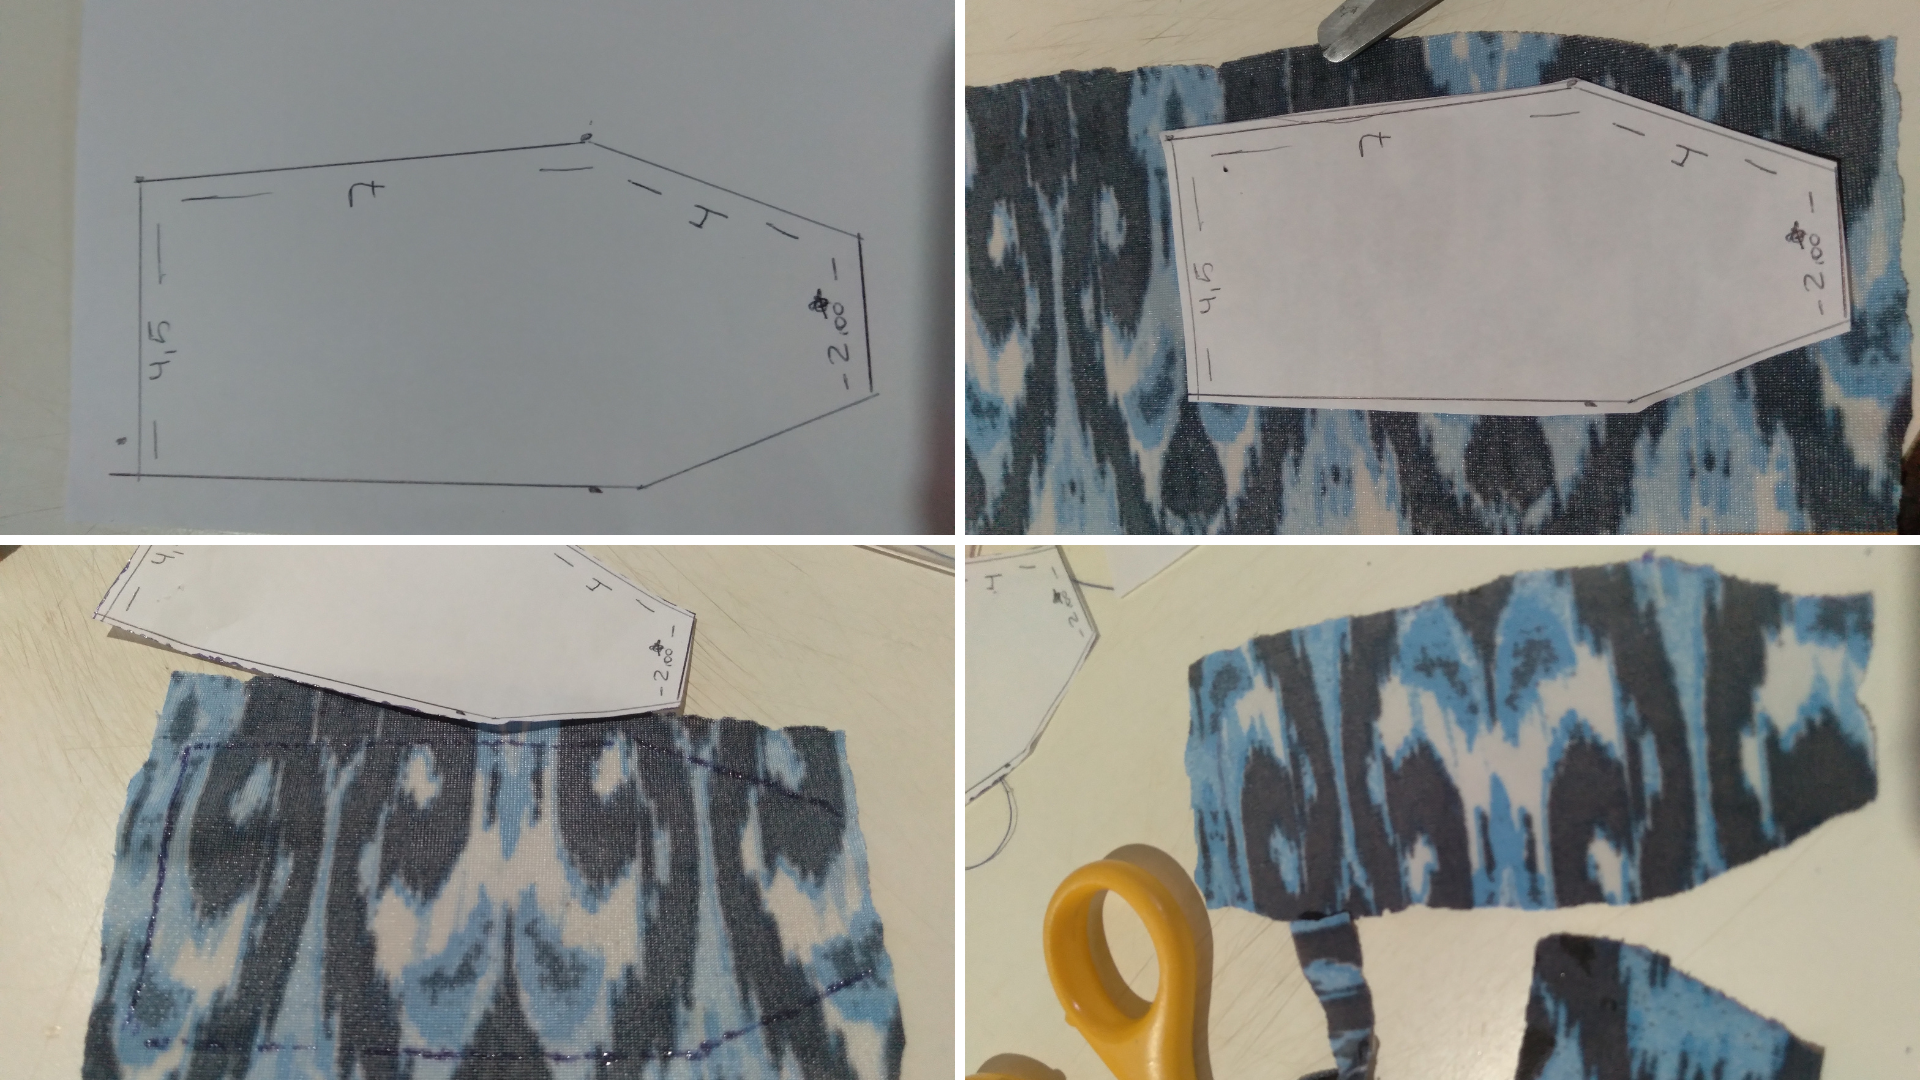
Empezamos haciendo un patrón en una hoja de papel, dibujando rectángulo de 7cm de largo y 4,5cm de ancho, medidas tomadas de la muñeca Barbie. Luego, junto al rectángulo dibujamos un trapecio de 4cm de largo y 2cm de ancho, como se ve en la imagen. Lo recortamos.
Colocamos el patrón sobre la tela y marcamos la forma en la tela, y luego recortamos ahí, usamos una tela semielástica, por lo que es un poco difícil de recortar, pero con paciencia lo podemos hacer. También recortamos un trapecio que será la parte trasera del bañador.
Barbie swimsuit:
We started by making a pattern on a sheet of paper, drawing rectangle 7cm long and 4,5cm wide, measurements taken from the Barbie doll. Then, next to the rectangle we draw a trapezoid 4cm long and 2cm wide, as shown in the picture. Cut it out.
We place the pattern on the fabric and mark the shape on the fabric, and then cut out there, we use a semi elastic fabric, so it is a little difficult to cut out, but with patience we can do it. We also cut out a trapeze that will be the back of the swimsuit panty.
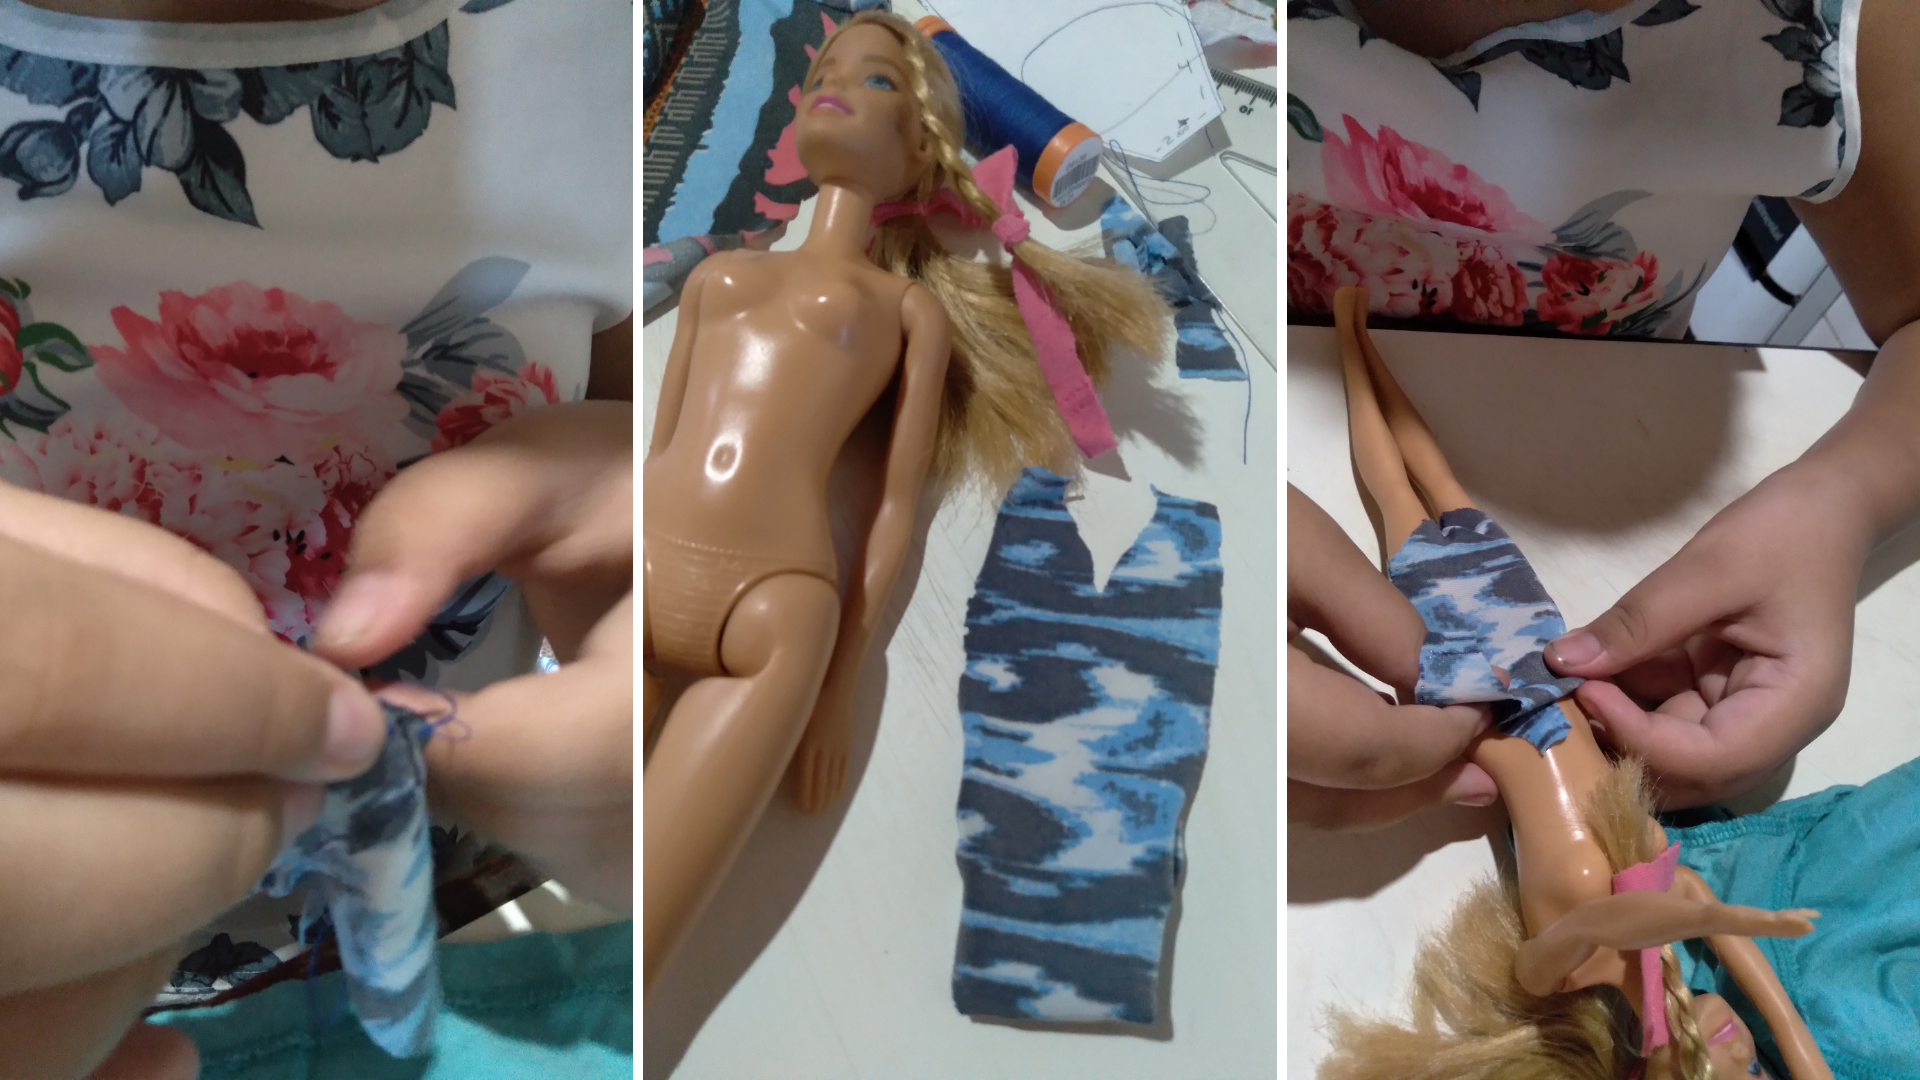
Cosemos las dos partes de la tela, uniendo sólo la parte que corresponderá a la cintura y a la entrepierna, como se ve en la imagen, y luego cortamos por la mitad parte del rectángulo, para formar dos tiras que se atarán al cuello de la muñeca.
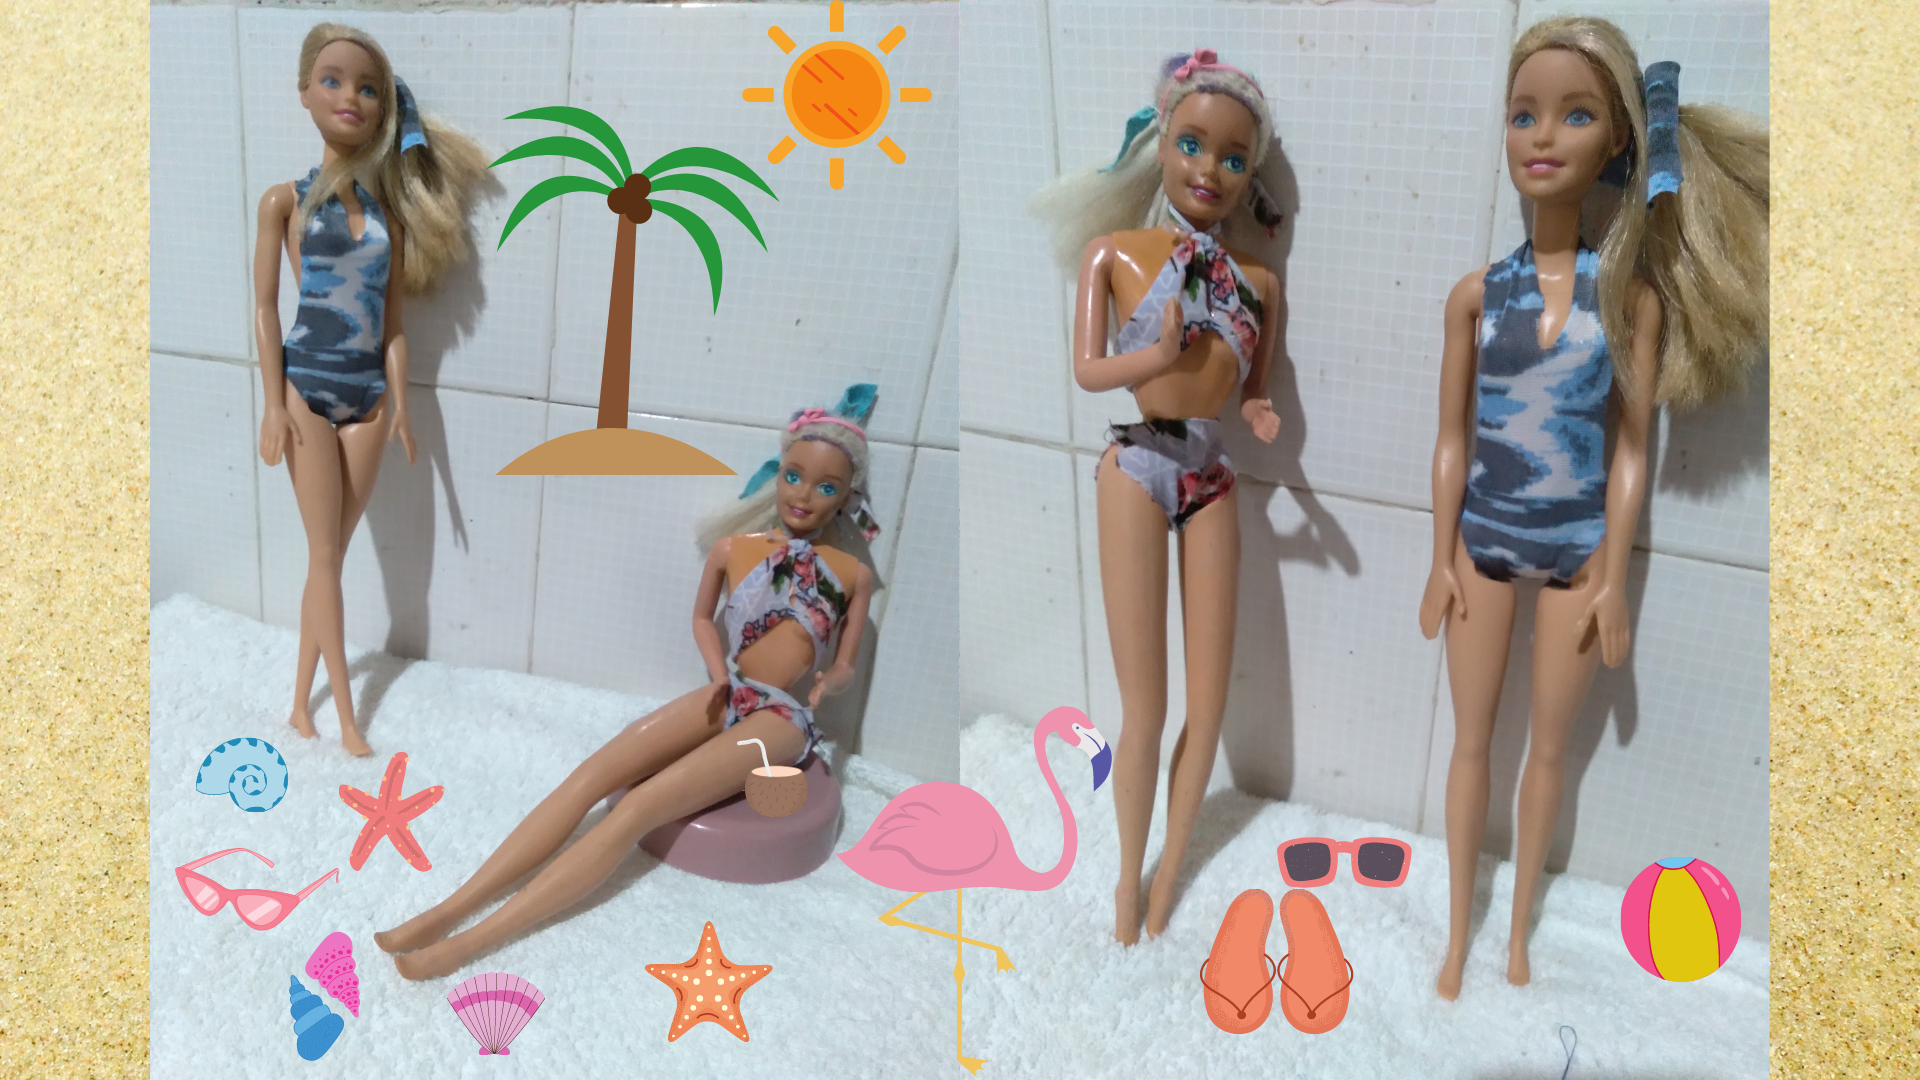
Y así queda listo el traje de baño para Barbie, es súper fácil y rápido de hacer. Incluso si no quieres coser, o tienes miedo de que la niña use una aguja de coser, puedes sujetar la parte de la cintura con cintas hechas con la misma tela.
We sew the two parts of the fabric, joining only the part that will correspond to the waist and crotch, as shown in the picture, and then cut in half part of the rectangle, to form two strips that will be tied to the neck of the doll.
And so is ready the swimsuit for Barbie, it is super easy and quick to do. Even if you don't want to sew, or you are afraid that the girl will use a sewing needle, you can attach the waist part with ribbons made with the same fabric.
Vestido nº 1
Para este vestido me guié por un tutorial que encontramos en YouTube enlace aquí y la falda.
Comenzamos dibujando la silueta de la muñeca en un papel, dibujamos la silueta de la barbie por un lado y el otro lado es recto y recortamos este patrón.
Colocamos el patrón sobre un trozo de tela doblado por la mitad, dibujamos la forma del patrón y recortamos la tela.
Cosemos la tela por el lado que muestra la silueta, y ya está lista la primera parte del vestido, podemos colocar una cinta en la parte que sería el pecho de la muñeca, para atar el cuello y que el vestido quede más firme.
Dress #1
For this dress I was guided by a tutorial we found on YouTube link here.
We start by drawing the silhouette of the doll on a piece of paper, we draw the silhouette of the barbie on one side and the other side is straight and we cut out this pattern.
We place the pattern on a piece of fabric folded in half, draw the shape of the pattern, and then cut out the fabric.
Sew the fabric on the side that shows the silhouette, and the first part of the dress is ready, we can place a ribbon on the part that would be the chest of the doll, to tie the neck and the dress is firmer.
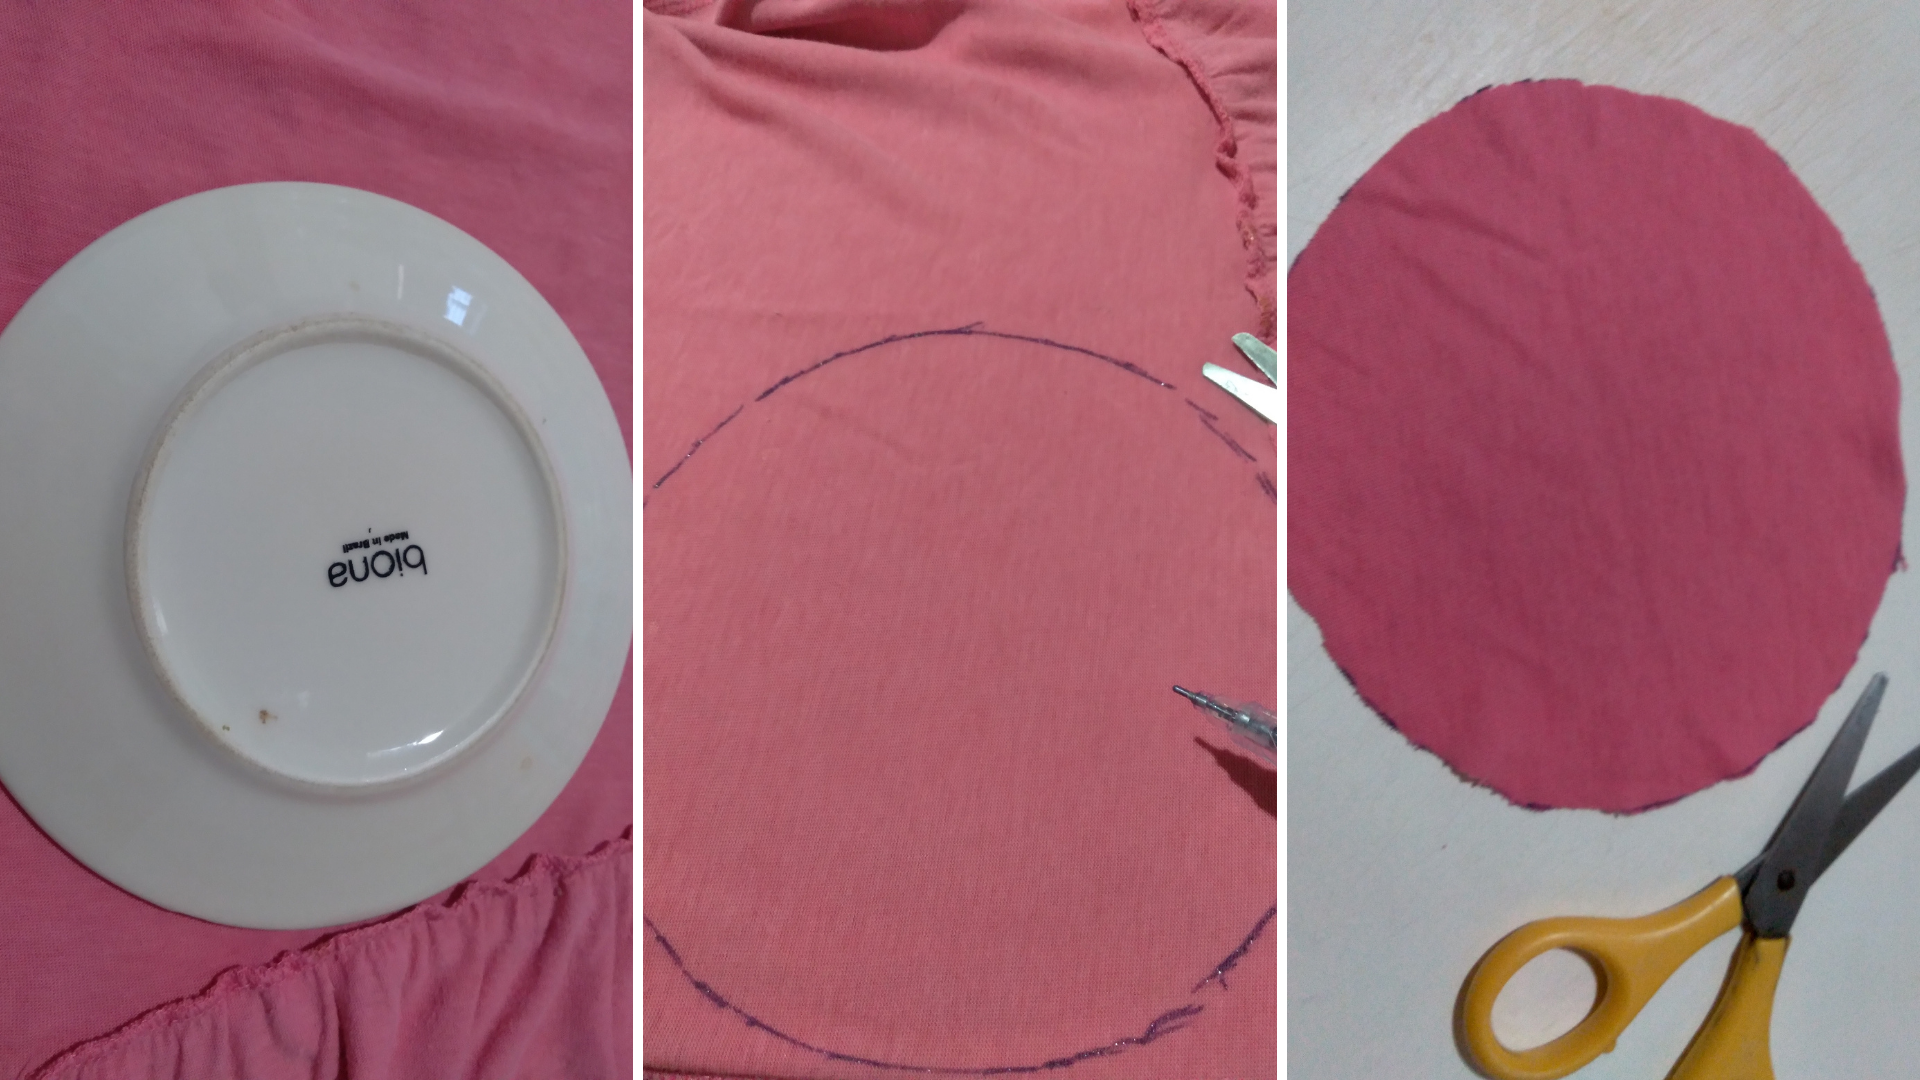
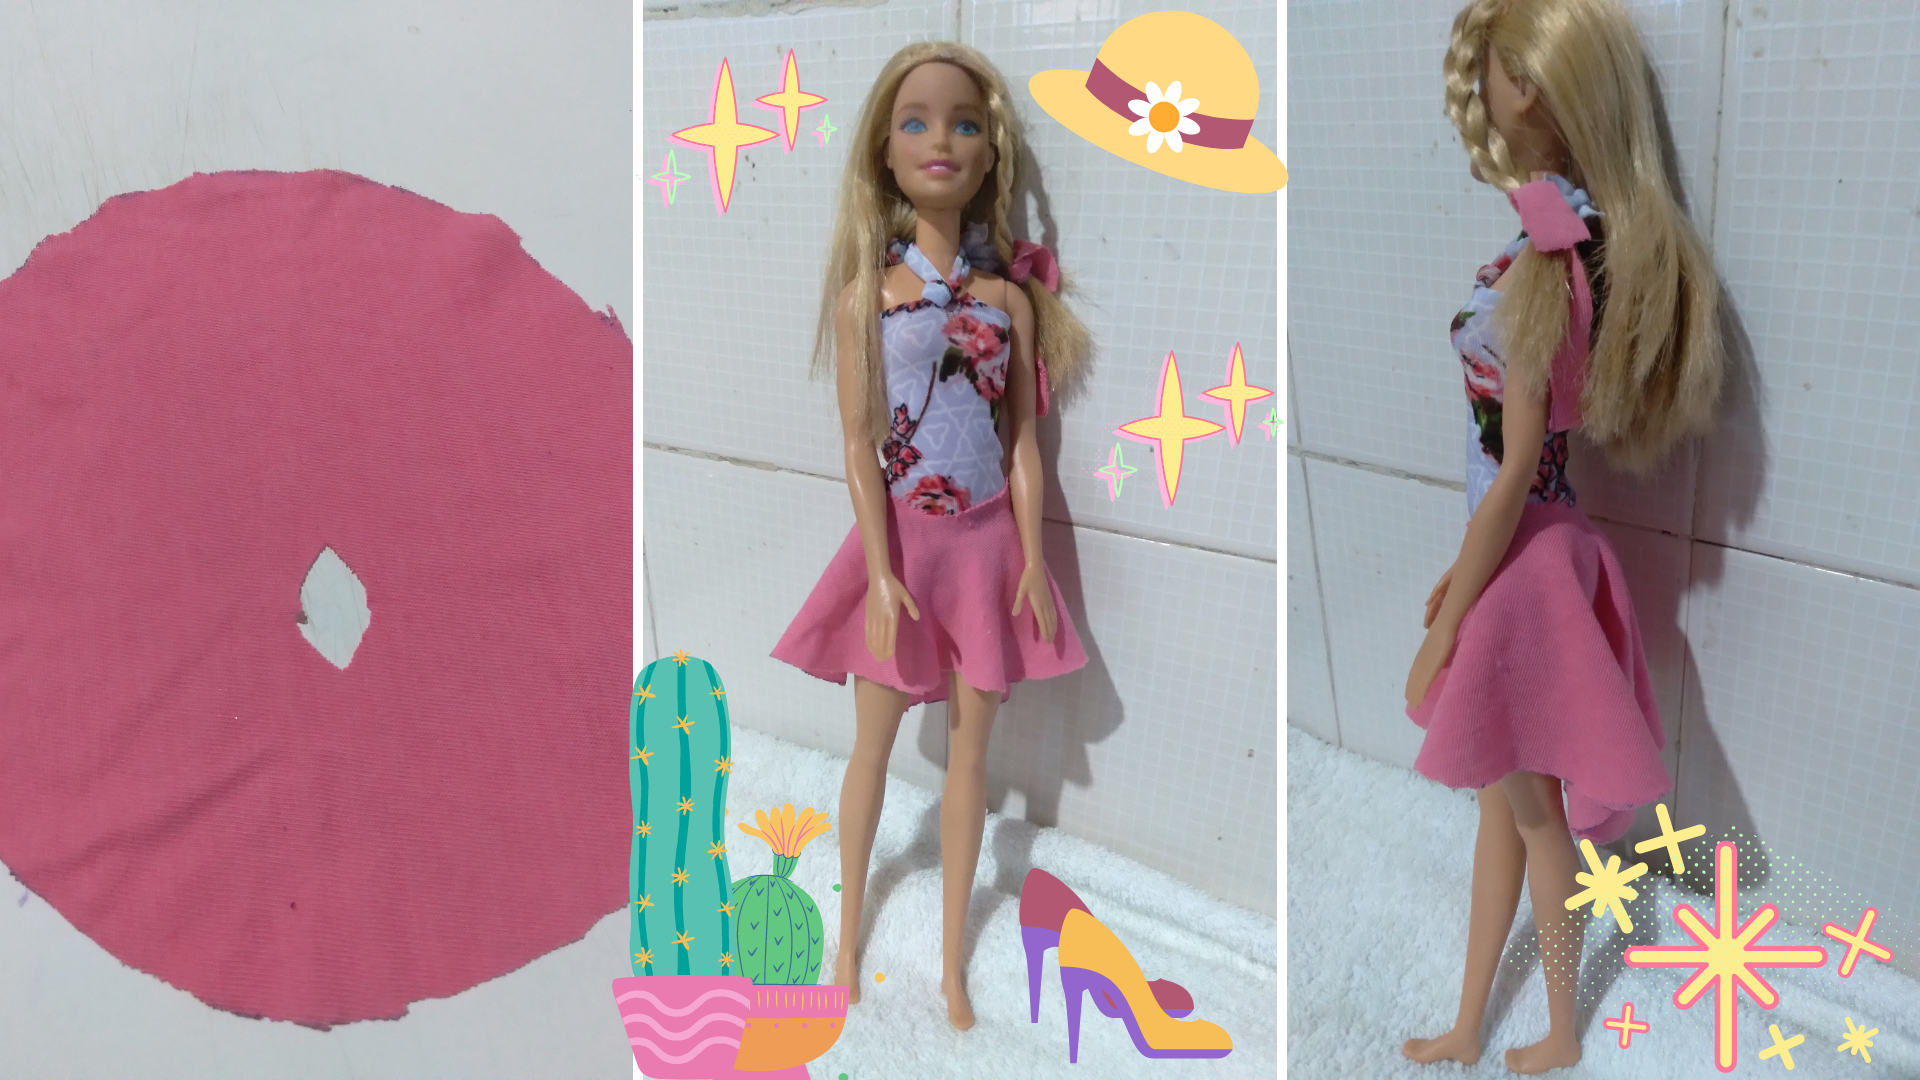
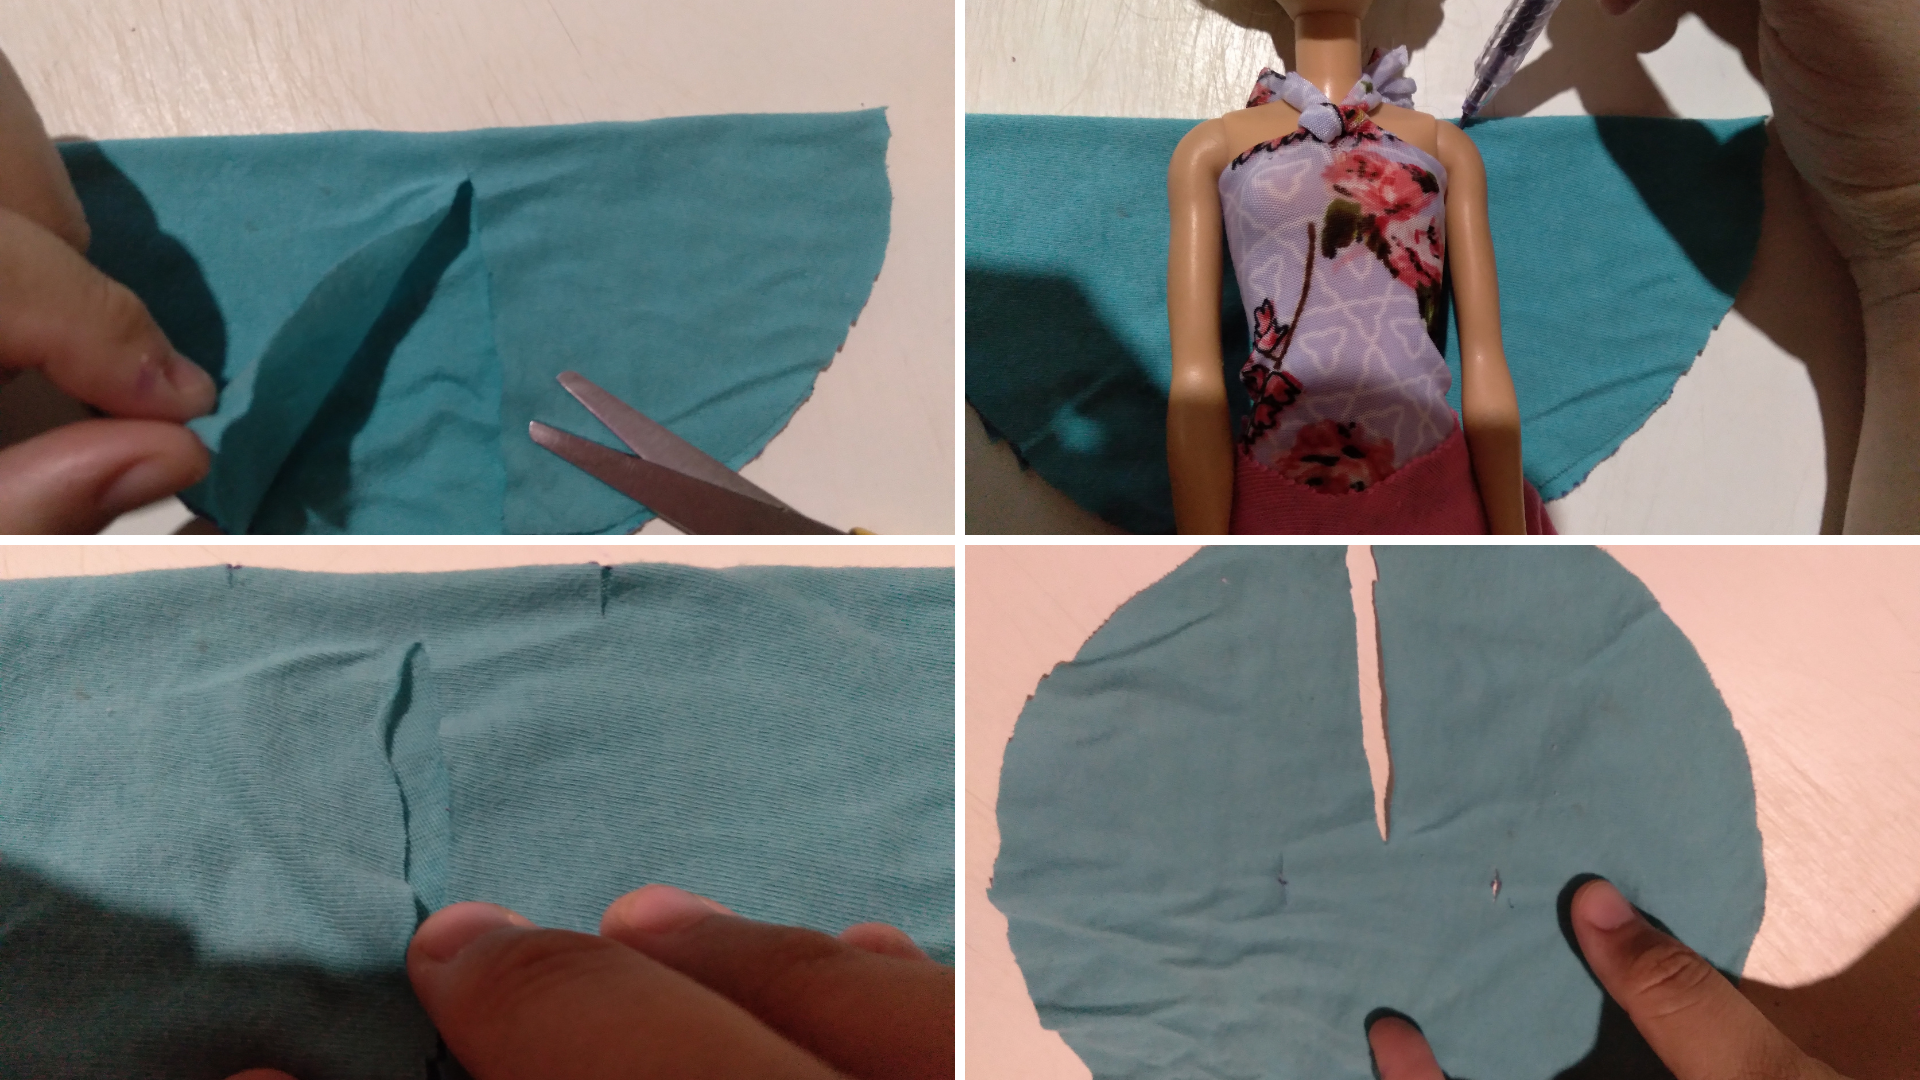
Para la falda, dibujamos un círculo con la ayuda de un plato pequeño, recortamos este círculo, luego lo doblamos por la mitad, yo hice otro pliegue en una de las mitades, formando una pequeña esquina, que recorté para formar la abertura de la cintura de la falda, y queda así, como se ve en la imagen, una abertura un poco separada del centro del círculo,
Y ya está listo el look de Barbie, colocamos la falda sobre el vestido que hicimos antes y queda súper bonito.
For the skirt, draw a circle with the help of a small plate, cut out this circle, then fold it in half, I made another fold in one of the halves, forming a small corner, which I cut out to form the opening of the waistband of the skirt, and it looks like this, as seen in the image, an opening a little separated from the center of the circle,
And now the Barbie look is ready, we place the skirt over the dress we made earlier and it looks super cute

Vestido #2
Para este vestido me guié por un tutorial que encontramos en el enlace de YouTube aquí, lo llaman Vestido Infinito, porque se puede utilizar de miles de maneras, yo os mostraré sólo una, pero podéis ir al vídeo de esta chica y os fascinará.
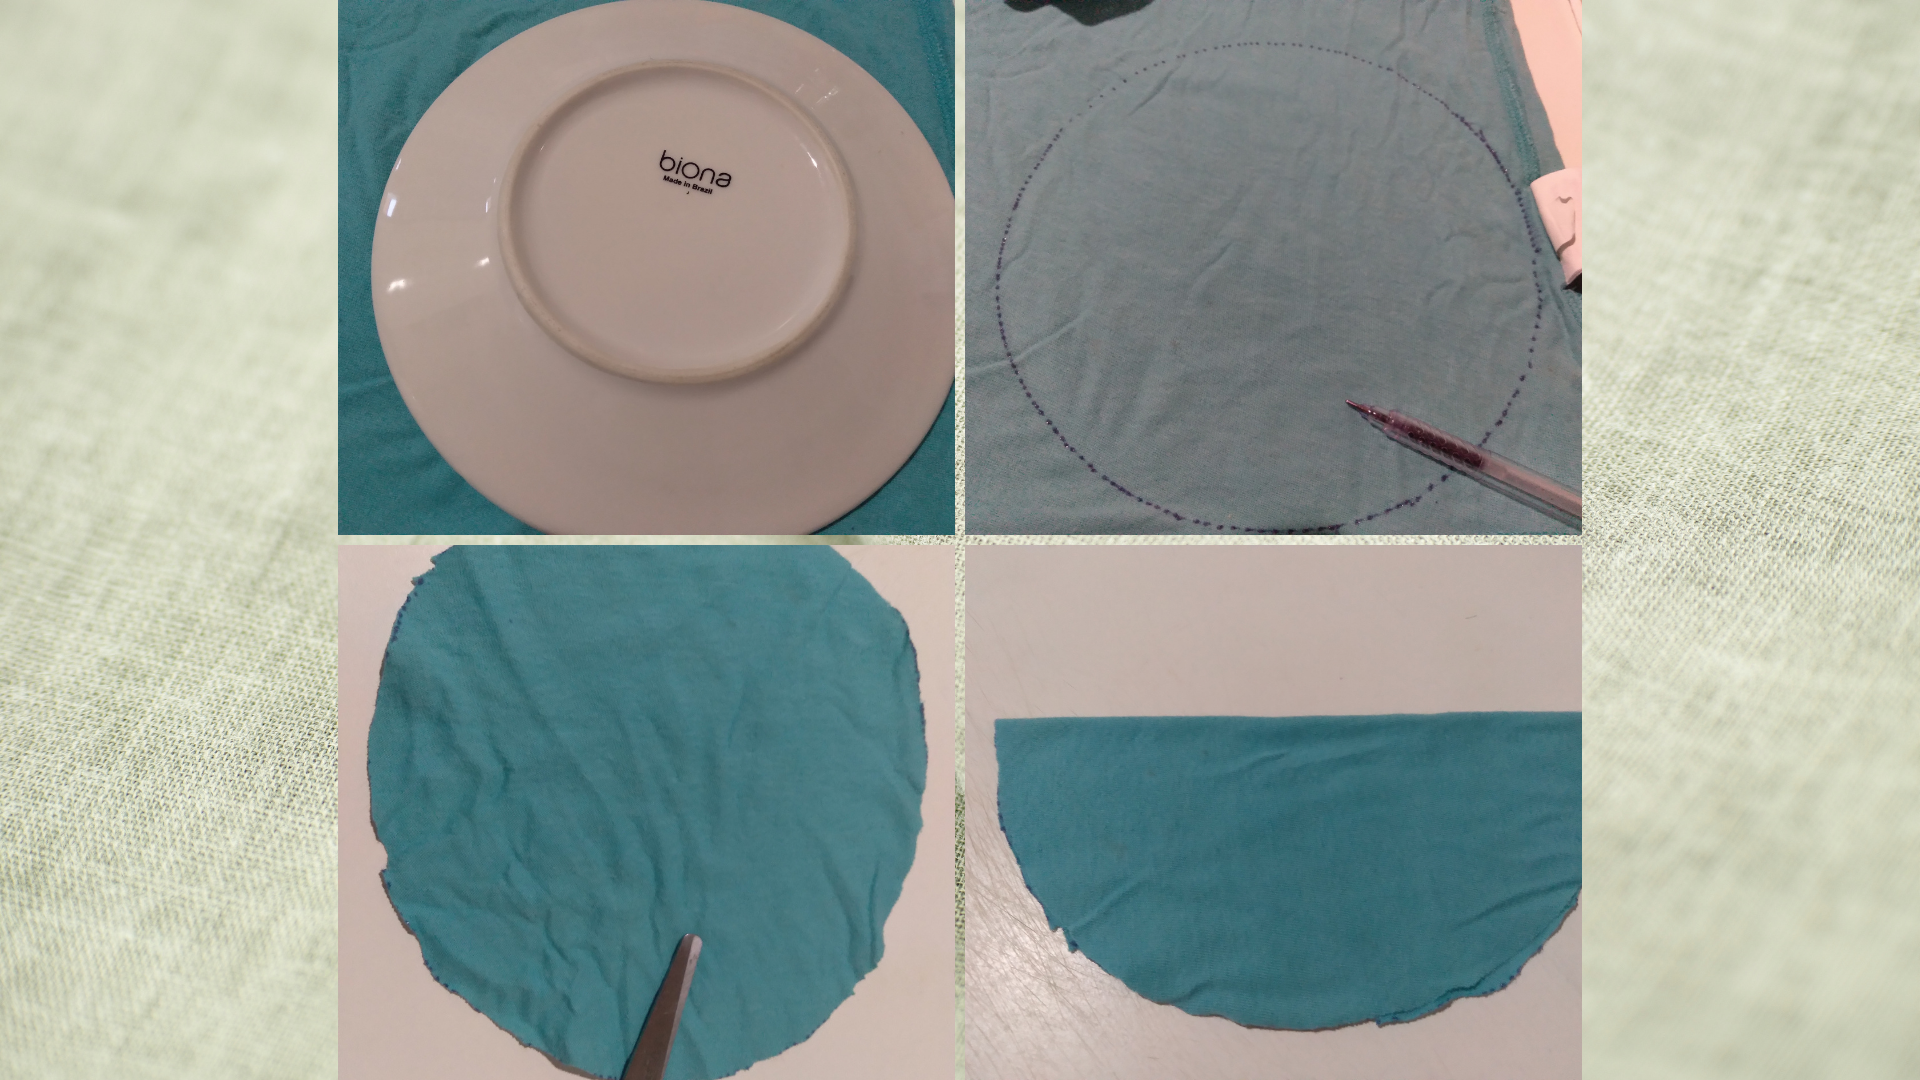
Haremos un círculo en la tela, ayudándonos con una plancha grande, y recortamos este círculo. luego lo doblamos por la mitad, cortamos una de las partes superiores en el centro, en línea recta creando una abertura, por último, medimos con la muñeca donde deben ir las aberturas para los brazos, hacemos dos pequeños cortes ahí.
Dress #2
For this dress I was guided by a tutorial that we found on YouTube link here, they call it Infinite Dress, because it can be used in thousands of ways, I will show you only one, but you can go to the video of this girl and you will be fascinated.
We will make a circle in the fabric, helping us with a large plate, and cut out this circle. then fold it in half, cut one of the tops in the middle, in a straight line creating an opening, finally, we measure with the wrist where the openings for the arms should go, we make two small cuts there.
Y ya está, puedes vestir a la muñeca de mil maneras, aquí hicimos la prueba y funciona muy bien, es un vestido fácil y bonito, que además no necesita costuras.
And that's it, you can dress the doll in a thousand ways, here we did the test and it works very well, it is an easy and beautiful dress, which also does not require seams.
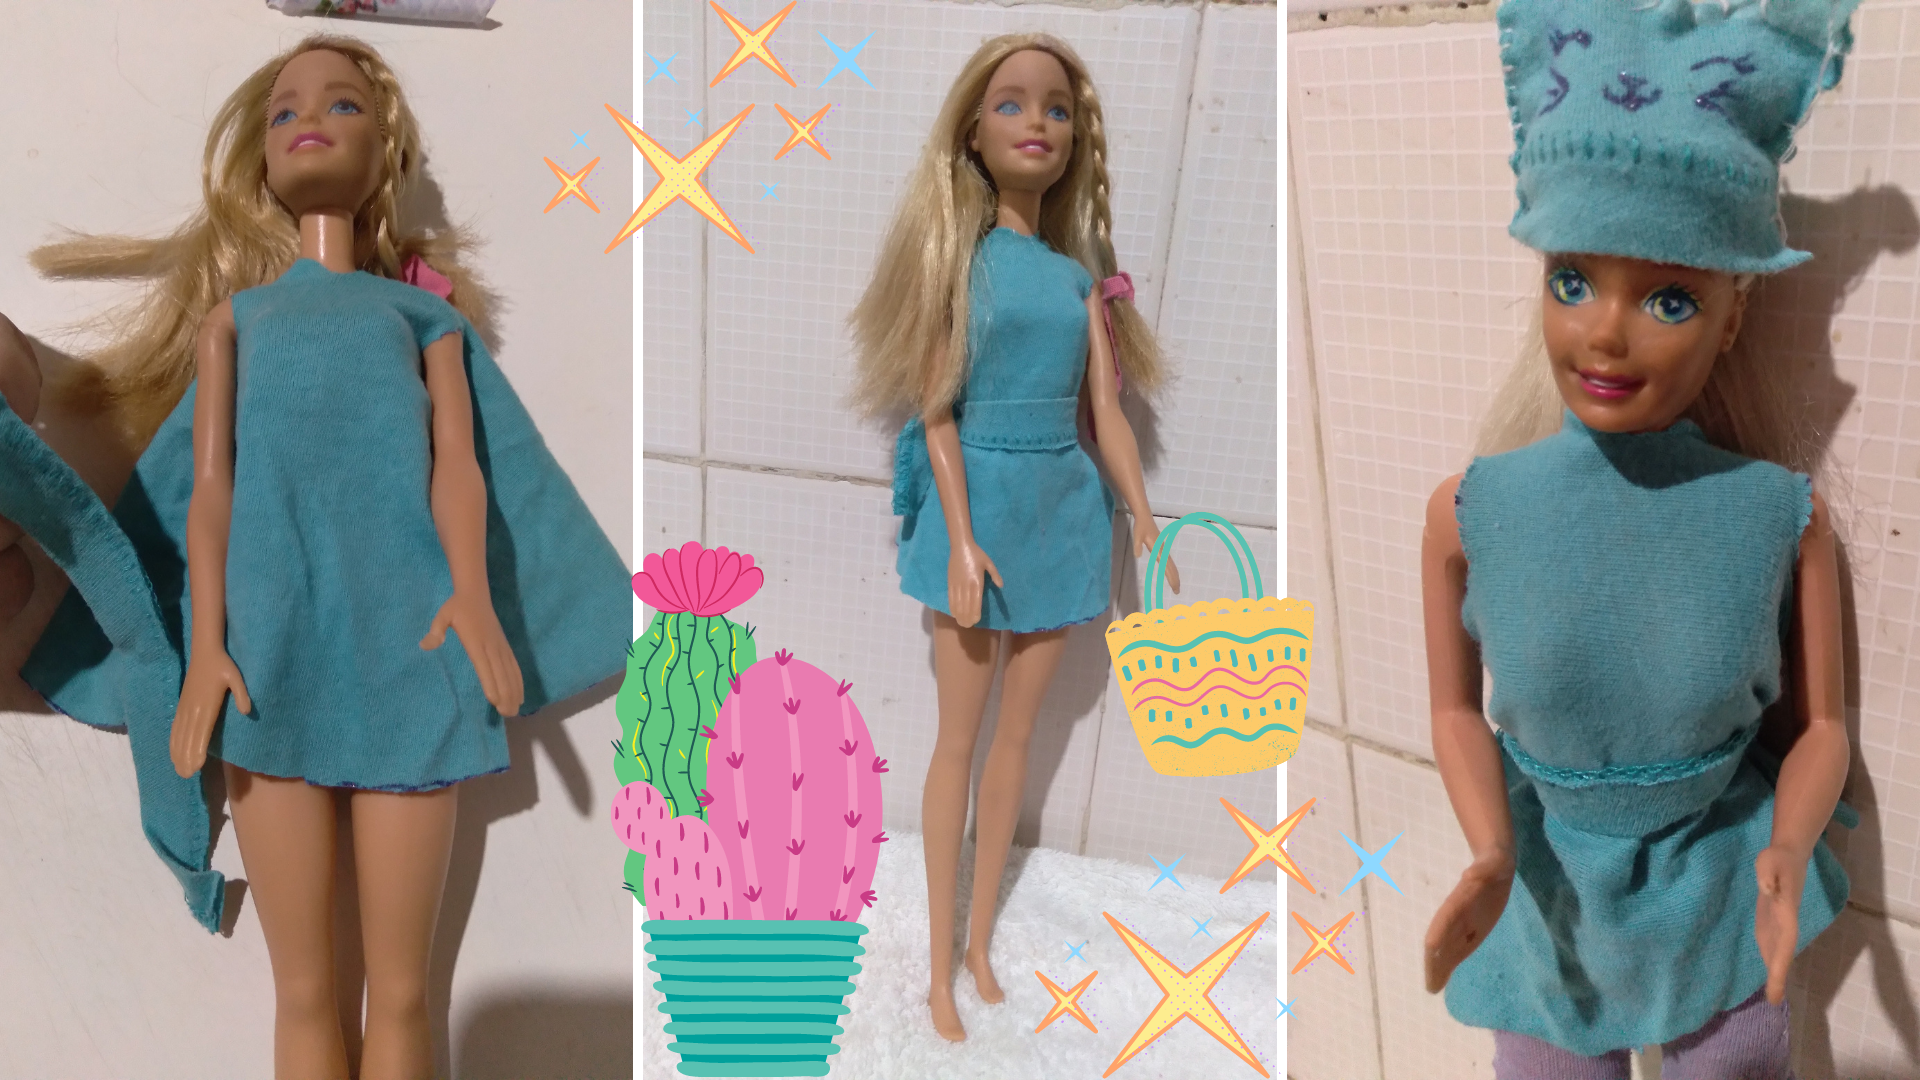
¡¡¡Eso es todo!!! Espero que les guste y se animen a hacerlos, son súper fáciles de hacer, a mi hija Isabella le encantan, de hecho, se me olvidó comentar que el gorro que lleva la muñeca lo hizo totalmente ella, incluso lo decoró con la cara de un gatito. Y por ahí podéis ver sus manitas haciendo el bañador.
Saludos y feliz semana para todos.
That's all!!! I hope you like it and you are encouraged to make them, they are super easy to make, my daughter Isabella loves them, in fact, I forgot to mention that the hat that the doll is wearing was totally made by her, she even decorated it with the face of a kitten. And over there you can see her little hands making the bathing suit.
Greetings and Happy week to all.
Todas las fotos son de mi propiedad, ediciones en Canva.com.
All photos are my property, editions on Canva.com.


Show more
Tags :
Woo!
This creator can upvote comments using 3speak's stake today because they are a top performing creator!
Leave a quality comment relating to their content and you could receive an upvote
worth at least a dollar.
Their limit for today is $0!
Their limit for today is $0!
10 views
3 years ago
$
10 views
2 years ago
$
9 views
a year ago
$
7 views
3 years ago
$
9 views
2 years ago
$
More Videos

84 views
2 years ago
$

14 views
2 years ago
$

11 views
3 years ago
$

15 views
3 years ago
$
8 views
2 years ago
$

28 views
a year ago
$

9 views
a year ago
$

26 views
2 years ago
$

1 views
a year ago
$
4 views
3 years ago
$

18 views
2 years ago
$

8 views
2 years ago
$

20 views
2 years ago
$

9 views
3 years ago
$
6 views
4 months ago
$

31 views
a year ago
$

7 views
a year ago
$

3 views
3 years ago
$

6 views
a year ago
$
18 views
2 years ago
$
2 views
a year ago
$
4 views
2 years ago
$

23 views
a year ago
$
Comments:
Reply:
To comment on this video please connect a HIVE account to your profile: Connect HIVE Account