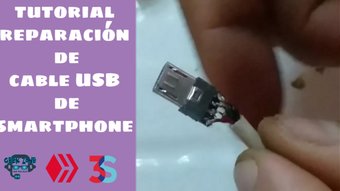
Tutorial how to fix the charging pin of a rechargeable led lamp. For geek zone. [Eng/Esp] [Eng/Esp
5
About :
Ingles
| Hello friends of the beautiful geek zone community, how are you? |
|---|
For those of you who live in the country of Venezuela the power is going out very often, and it seems that this will be for 3 months.
We are used to buying these rechargeable light bulbs when the power goes out and they are very useful. However, unfortunately they come with a flaw from the factory and that is that their charging pin is very delicate.
To my workshop arrive numbers of these bulbs to just place the charging pin, since a small child, or perhaps a carelessness, or blow, or dropped it, makes the charging pin of this lamp simply receive the damage. So here is the video.
Here you can learn that with just an inexpensive soldering iron and a Phillips screwdriver, you can get the job done. Here is the video.
Talking about the content, this not only works for us, but also for people who don't have a heating station. They can take this video as a reference, since I only used a soldering iron, it is very simple.
This video can also serve as a reference for people who have damaged the charging pin of any other rechargeable lamp OR anything else that has this charging pin, because the procedure is simple, you just have to have good eyesight, good pulse and patience. You can do it.
| Enough with the introduction, let's go to the video! |
|---|
Tools:
- A soldering iron.
- A number 5 slotted screwdriver.
- A small fine tweezers for mobile equipment.
- Tin
- Multimeter
Procedure:
- Using the screwdriver remove the side screws holding the lamp cover.
- Then lift off the lamp cover.
- Then you must loosen the screw that holds the base plate to the board (being very careful not to pull the wires and break them).
- After locating the charging pin you must test that it is good to mount it. If it is not, you must buy another one.
How to verify that it is good?
|------------|
Place the multimeter on voltage scale and place the leads of the multimeter on each pole of the charging pin, and that the multimeter is connected to the charger. If it sends enough 4.7 volts, then it is good.
- Then we must clean the charging pin of tin residue with the same soldering iron.
- Then you must clean the base of the board where the charging pin is soldered with the same soldering iron.
- You must also clean the pins of the negative and positive poles of the charging pin.
-Then you must bend the pins outwards so that when it sticks with the board then they are well pressed. - After this with the tweezers we must hold the charging pin to the board.
- With the soldering iron and tin we must solder each side of the charging pin to the base which is the board.
- Then we must solder the poles of the charging pin to the board.
| There we will have our charging pin soldered. The only thing left to do is to assemble and test. |
|---|
Caution:
- When uncovering the lamp cover. Be careful with the wires that hold to not break them.
- When soldering the pin we must do it carefully so as not to touch any component of the board and damage it.
- When cleaning the charging pin and the base of the board we must be careful not to get too hot and not to bend the poles of the charging pin.
- When you are soldering this part, put more tin on it than this to make it harder than before.
Thanks so much for reading my friends 💪🏻
| content sources |
|---|
- Text translation: www.deepl.com
- Photo and video: Picsart pro. YouCut. Samsung Galaxy j6 plus.
- Source of authorship: own original
- Gift creation: www.canva.com
- Music of the video Copyright free: Here
Español
| Hola amigos de la hermosa comunidad de geek zone. ¿Cómo están? |
|---|
Para los que viven en el país de Venezuela última mente se está yendo la luz muy seguido, y parece que esto será por 3 meses.
Acostumbramos a cuando se va la luz comenzar a comprar estos bombillos recargables que son muy útiles. Sin embargo, lamentablemente vienen con una falla de fábrica y es que su pin de carga es muy delicado.
A mi taller llegan números de estos bombillos para solo colocarle el pin de carga, ya que un niño pequeño, o tal vez un descuido, o golpe, o lo dejaron caer, hace que el pin de carga de esta lámpara simplemente reciba el daño. Por eso aquí está el video.
Aquí puedes aprender que con únicamente un cautín económico y un destornillador de estría, puedes hacer el trabajo. Por acá les dejo este video.
Ablando del contenido esto no nada más funciona para nosotros, sino que también sirve para las personas que no tienen estación de calor. Ellas pueden tomar este video de referencia, ya que únicamente use un cautín, es muy sencillo.
Este video también puede servir de referencia para las personas que tiene daño el pin de carga de cualquier otra lámpara recargable O cualquier otra cosa que tenga este pin de carga, porque el procedimiento es simple, solamente debes tener buena vista, buen pulso y paciencia. Que tú lo puedes hacer.
| ¡¡Ya vasta de introducción, vamos con el video!! |
|---|
Herramientas:
- Un cautín.
- Un destornillador de estría número 5.
- Una pinza fina pequeña para equipos móviles.
- Estaño
- Multímetro
Procedimiento:
- Con el destornillador sacar los tornillos laterales que sujetan la tapa de la lámpara.
- Luego levantar la tapa de la lámpara.
- Después debes soltar el tornillo que sujeta la placa base a la placa (con mucho cuidado de no jalar los cables y romperlos).
- Luego de localizar el pin de carga debes probar que esté bueno para montarlo. Si no lo está debes comprar otro.
| ¿Como verificar que esté bueno? |
|---|
Colocar el multímetro en escala de voltaje y colocar los cables de él en cada polo del pin de carga, y que el este conectado al cargador. Si te manda lo suficiente 4.7 volts, entonces está bueno.
- Luego debemos limpiar el pin de carga de los residuos de estaño con el mismo cautín.
- Después debes limpiar la base de la placa donde va soldando el pin de carga con el mismo cautín.
- También debes limpiar los pines de los polos negativo y positivo del pin de carga.
-Luego debes doblar los pines hacia fuera para que cuando pegue con la placa entonces estén bien presionados. - Después de esto con la pinza debemos sujetar el pin de carga a la placa.
- Con el cautín y estaño debemos soldar cada lado del pin de carga a la base que es la placa.
- Después debemos soldar los polos del pin de carga a la placa.
| Allí ya tendremos nuestro pin de carga soldado. Solo queda armar y probar. |
|---|
Precauciones:
- Al destapar la tapa de la lámpara. Tener cuidado con los cables que sujetan para no romperlos.
- Al soldar el pin debemos hacerlo con cuidado para no tocar ningún componente de la placa y dañarlo.
- Al limpiar el pin de carga y la base de la placa debemos tener cuidado de no calentar mucho y no doblar los polos del pin de carga.
- Cuando estés soldado esta pieza, colócale más estaño que el que tiene esto para que quede más duro que antes.
Muchas gracias por leer mis amigos 💪🏻
| fuentes del contenido |
|---|
- Traducción del texto: www.deepl.com
- Foto y video: Picsart pro. YouCut. Samsung Galaxy j6 plus.
- Fuente de Autoría: original propio
- Creación de gift: www.canva.com
- Musica del video Sin derecho de autor: Aqui


Show more
Tags :
Woo!
This creator can upvote comments using 3speak's stake today because they are a top performing creator!
Leave a quality comment relating to their content and you could receive an upvote
worth at least a dollar.
Their limit for today is $0!
Their limit for today is $0!
3 views
a year ago
$

5 views
a year ago
$

3 views
10 months ago
$

11 views
11 months ago
$

5 views
2 years ago
$
More Videos

5 views
5 months ago
$

5 views
2 years ago
$

26 views
a year ago
$

21 views
2 months ago
$

5 views
a year ago
$

7 views
2 years ago
$

6 views
2 years ago
$

1 views
4 weeks ago
$

4 views
a year ago
$

9 views
8 months ago
$

30 views
a year ago
$

12 views
a year ago
$

8 views
a year ago
$

17 views
4 months ago
$

8 views
3 weeks ago
$

25 views
3 years ago
$
1 views
a year ago
$

6 views
10 months ago
$

6 views
a year ago
$

15 views
a year ago
$

13 views
a year ago
$

9 views
3 months ago
$
Comments:
Reply:
To comment on this video please connect a HIVE account to your profile: Connect HIVE Account