COMO ELABORAR BELLOS LAZOS. [ESP-ENG]
4
About :
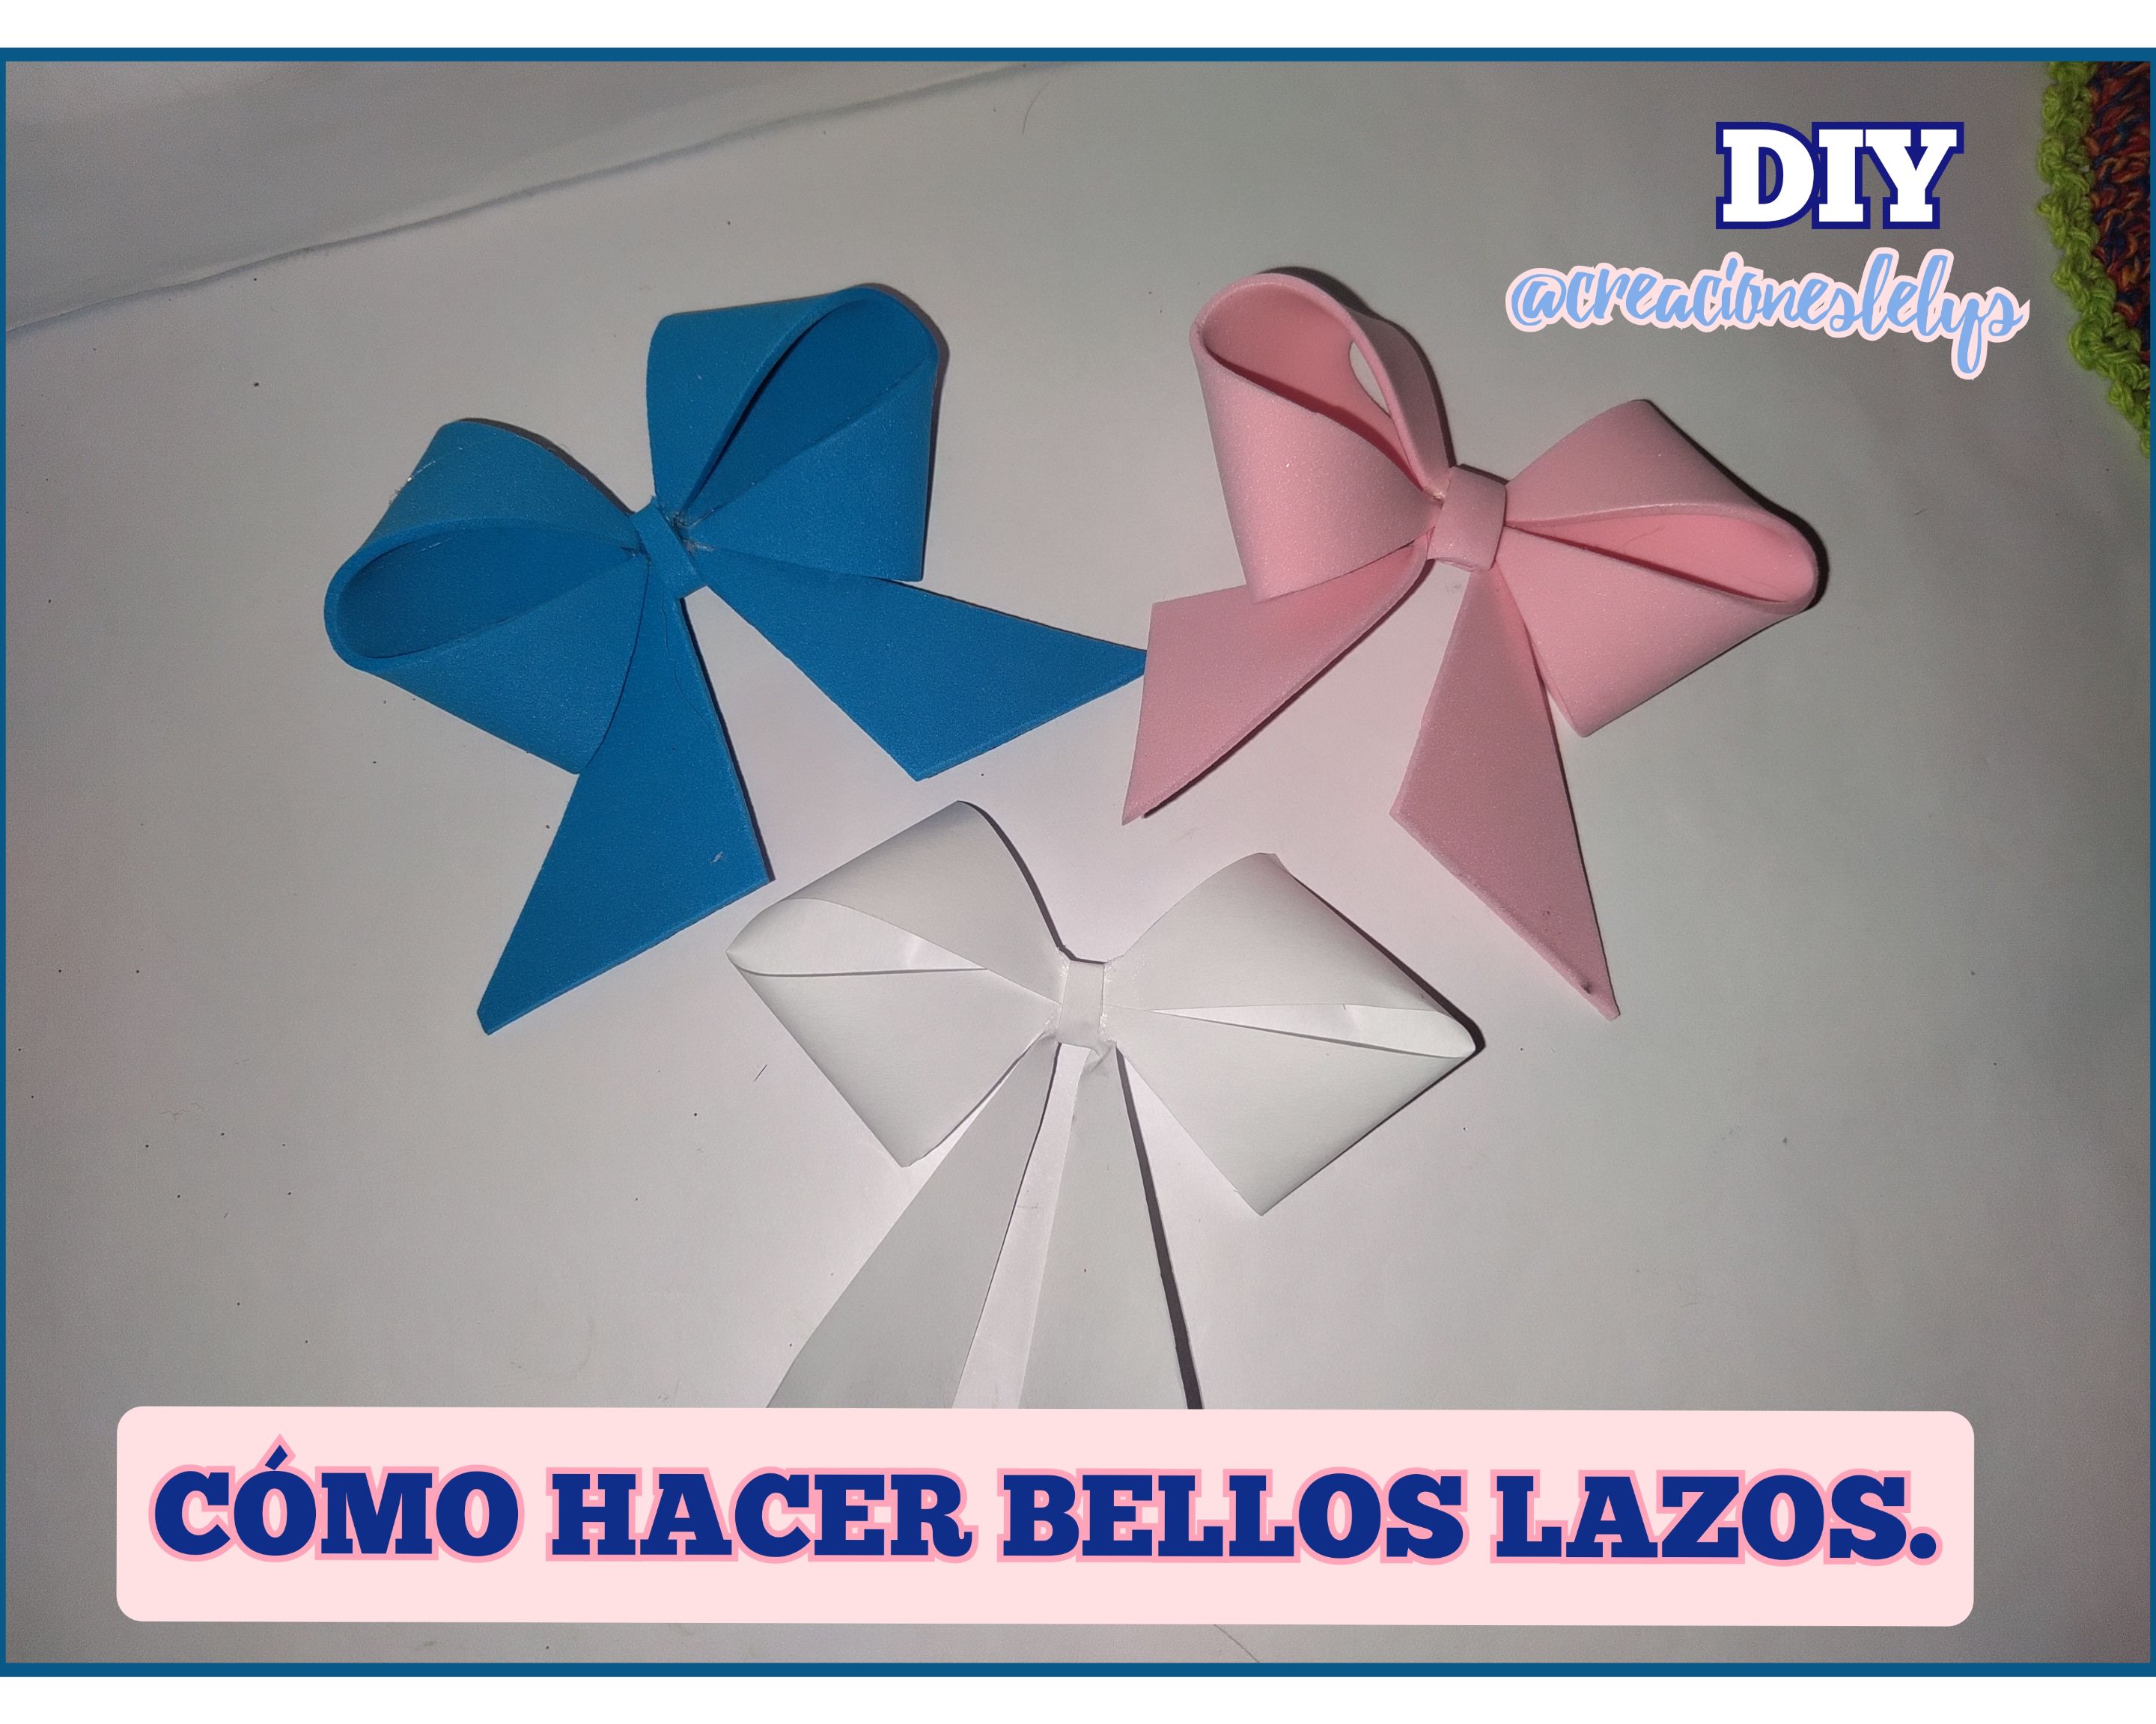
Cómo realizar bellos lazos. Vídeo/Tutorial.
🎀
Hola amigos. Espero que estén muy bien. Cómo siempre les deseo una feliz semana y un próspero año 2023. Nunca es tarde ni muy temprano para desearnos lo mejor. En estos tiempos difíciles es cuando más entusiasmo debemos ponerle a todo lo que hacemos. "Al mal tiempo buena cara" 😊 "Mientras haya vida hay esperanzas." Así que el día de hoy me siento estupendamente bien porque les traigo un nuevo tutorial. ¡Les va a encantar!
Bienvenido ❣️ a mi blog.
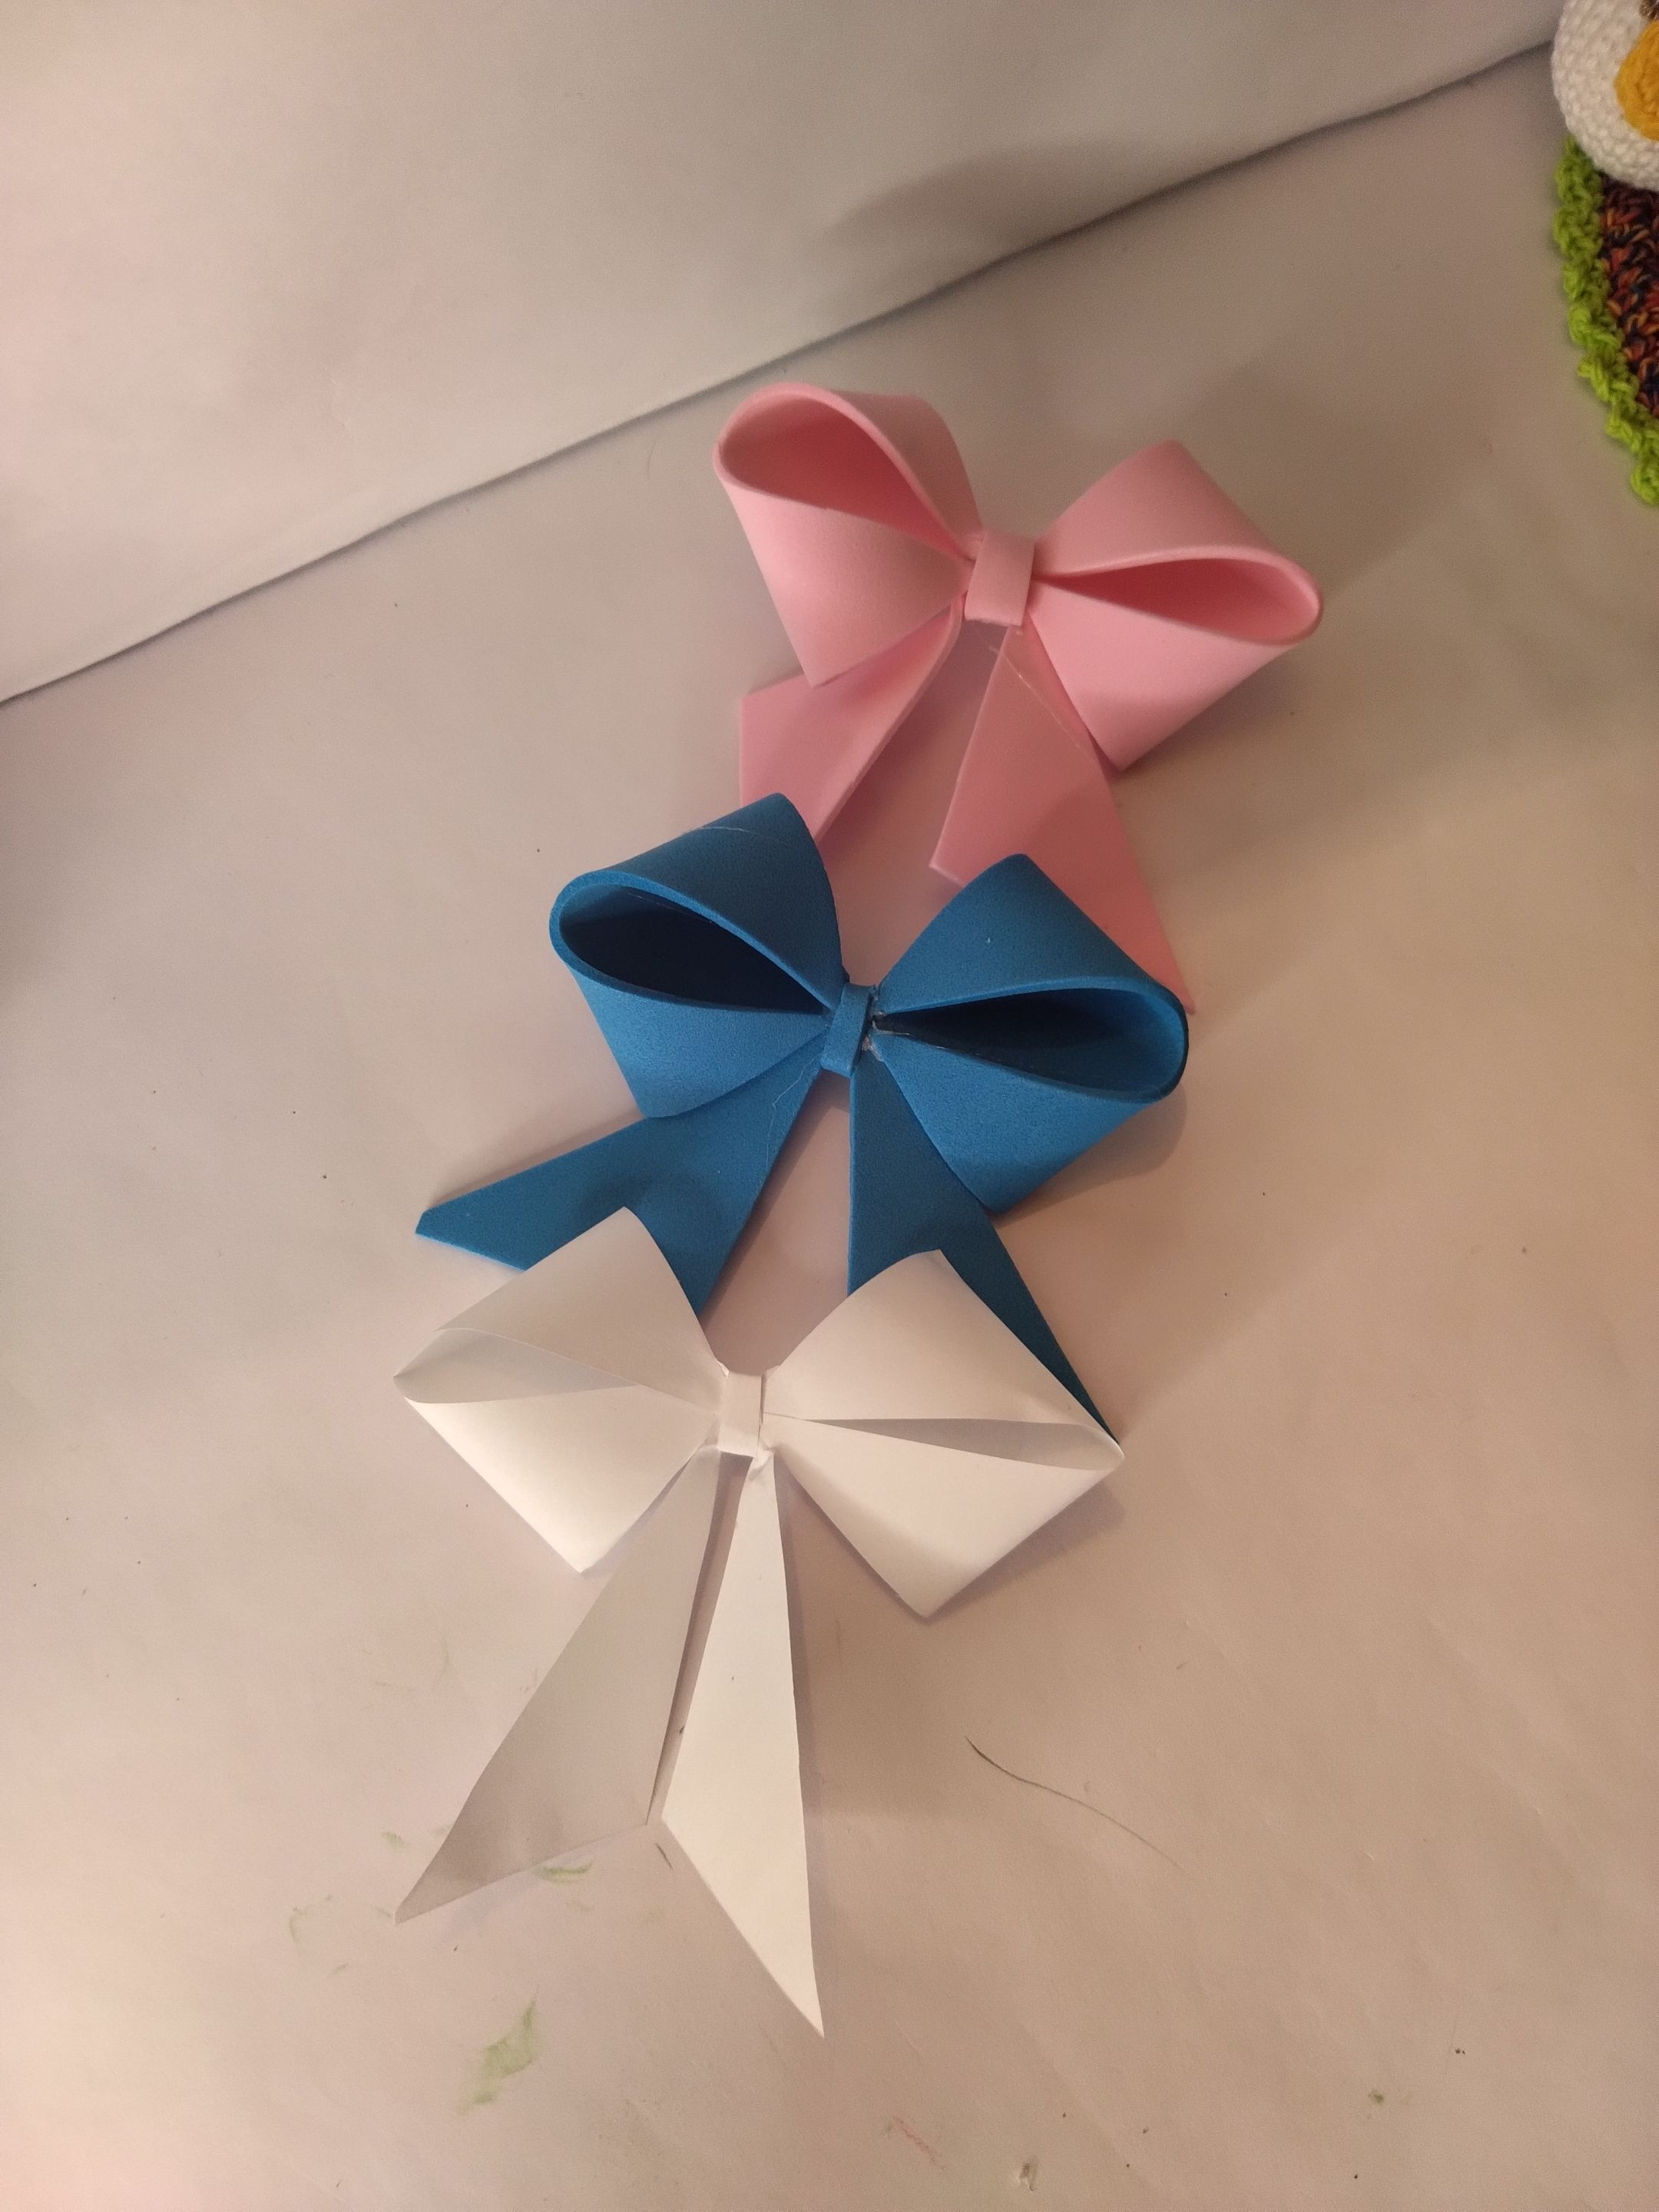
Sucede que en la publicación anterior les compartí el paso a paso para elaborar una linda cajita de regalos con material reciclado, de ella coloqué como adorno un lazo pequeñito que tenía en reserva. Pues bien, una amiga me preguntó cómo lo hice y por supuesto que le expliqué enseguida. A ella le encantó este modelo de lazo porque se hace de una manera muy fácil y rapidito.
Lazo decorativo para cualquier ocasión.
🎀 Aprendí a realizar este lazo hace algunos años, recuerdo perfectamente el momento. Estábamos reunidos todos los docentes organizando las carteleras correspondientes al dia del maestro. Una de mis colegas llevó varios de estos lazos y no dudé en preguntar cómo los hizo. Ahora les voy a explicar lo fácil y rápido que se hacen. Lo mejor es que podemos hacerlos de todos los tamaños. ¡Empecemos!
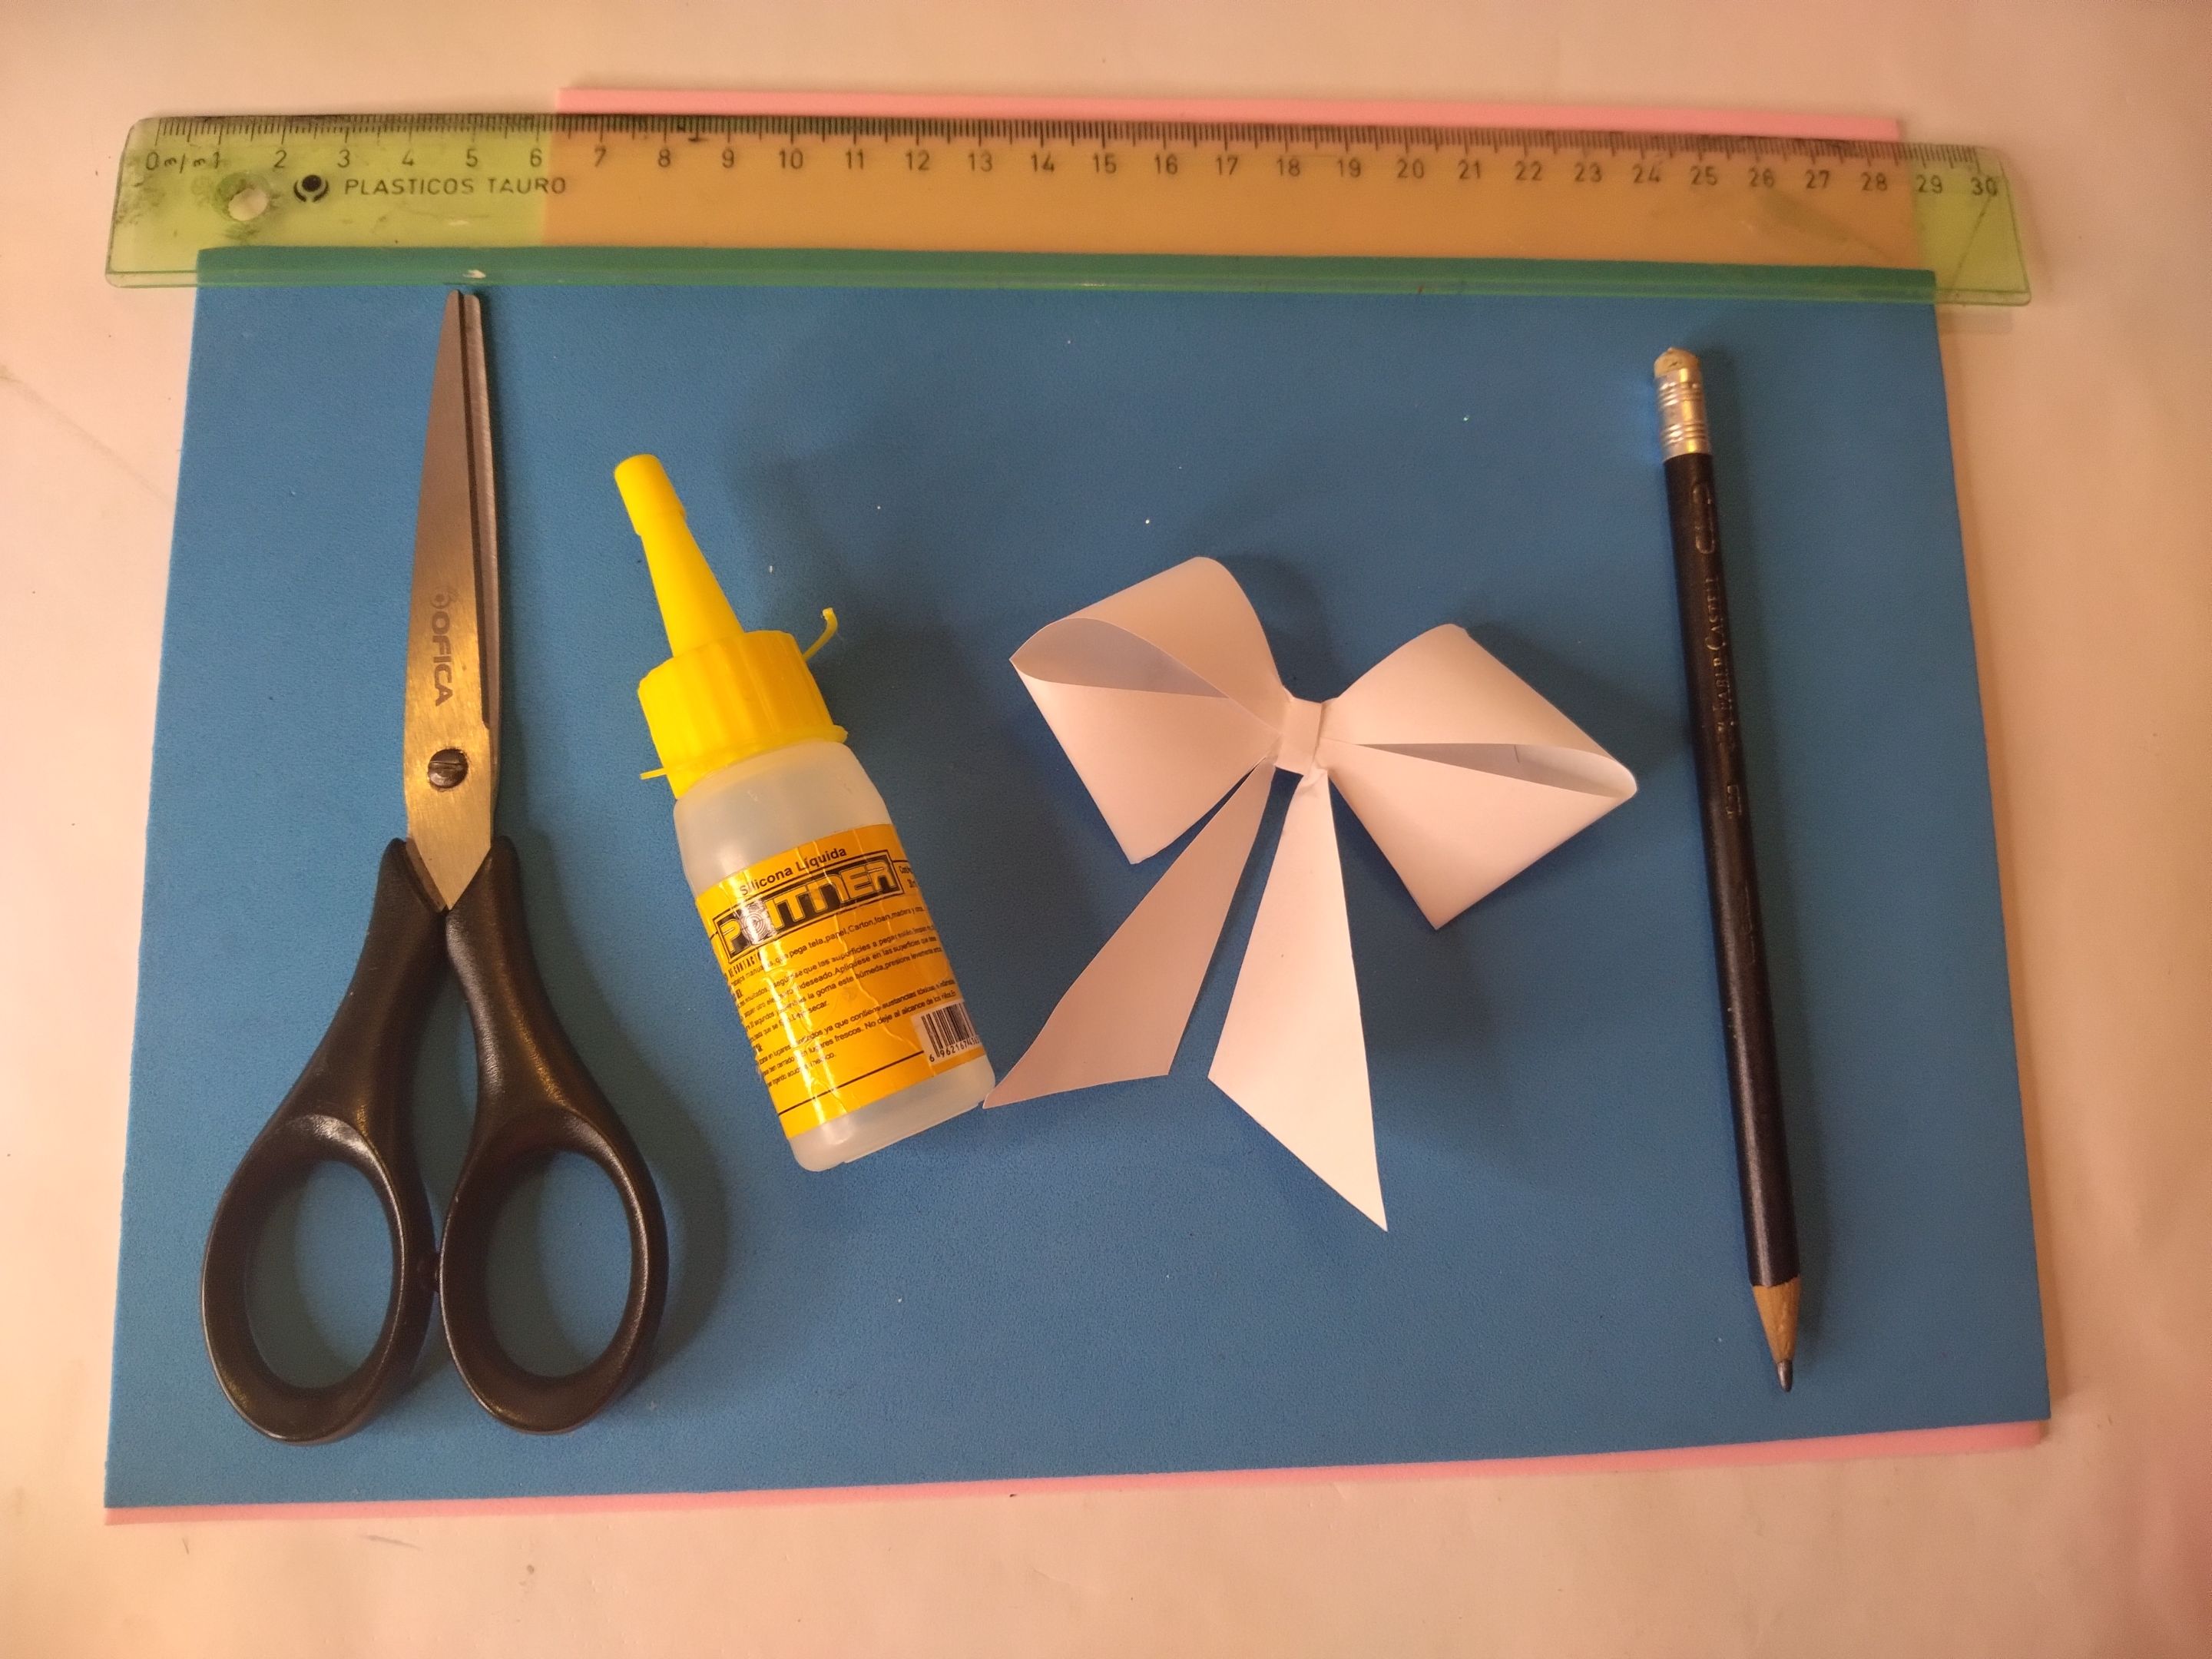
MATERIALES UTILIZADOS:
🪄 Foami liso.
🪄 Regla.
🪄 Lápiz de grafito.
🪄 Tijeras.
🪄 Pegamento.
PROCEDIMIENTO PARA ELABORARLO:
🪄 Empezamos midiendo un cuadrado en el foami elegido, es muy importante que todos los lados tengan la misma medida.
🪄 Una vez recortado el cuadrado vamos a doblar juntando las puntas tal cual como lo verás en la siguiente imagen. Hazlo varias veces o hasta que se haya quedado marcado el doblés, esto facilitará el corte que haremos luego.
🪄 Con la tijera cortaremos sobre cada una de las líneas que hemos trazado, sin llegar a cortar el centro del cuadrado.
🪄 Ahora vamos a tomar los laterales (izquierdo y derecho) es decir, dos de las pestañas que han quedado cortadas en el cuadrado. Llevamos hasta el centro del cuadrado la primera pestaña, uniendo a la vez las dos puntas extremas de la pestaña. Debemos colocar un punto de pegamento en el centro del cuadrado para que se fijen las dos pestañas.
🪄 Una vez pegada la primera pestaña procedemos a pegar la otra, también en el centro.
🪄 ¡Muy bien! Ahora nos quedan dos pestañas disponibles. Con una haremos la parte baja del lazo y con la otra la cinta que envuelve el lazo. La pestaña de abajo la vamos a cortar por todo el medio.
🪄 La pestaña de arriba la vamos a cortar por los lados dejando en el centro una cinta cuyo tamaño sea proporcional al centro del lazo. Todo esto dependerá del tamaño del cuadrado.
🪄 Pasamos la cinta por el medio del lazo llevándola hasta atrás. Allí pondremos un punto de pegamento.
🎀 ¡Me encanta hacerlos! ¡Súper fácil! ¡Súper rápido! ¡Preciosos!
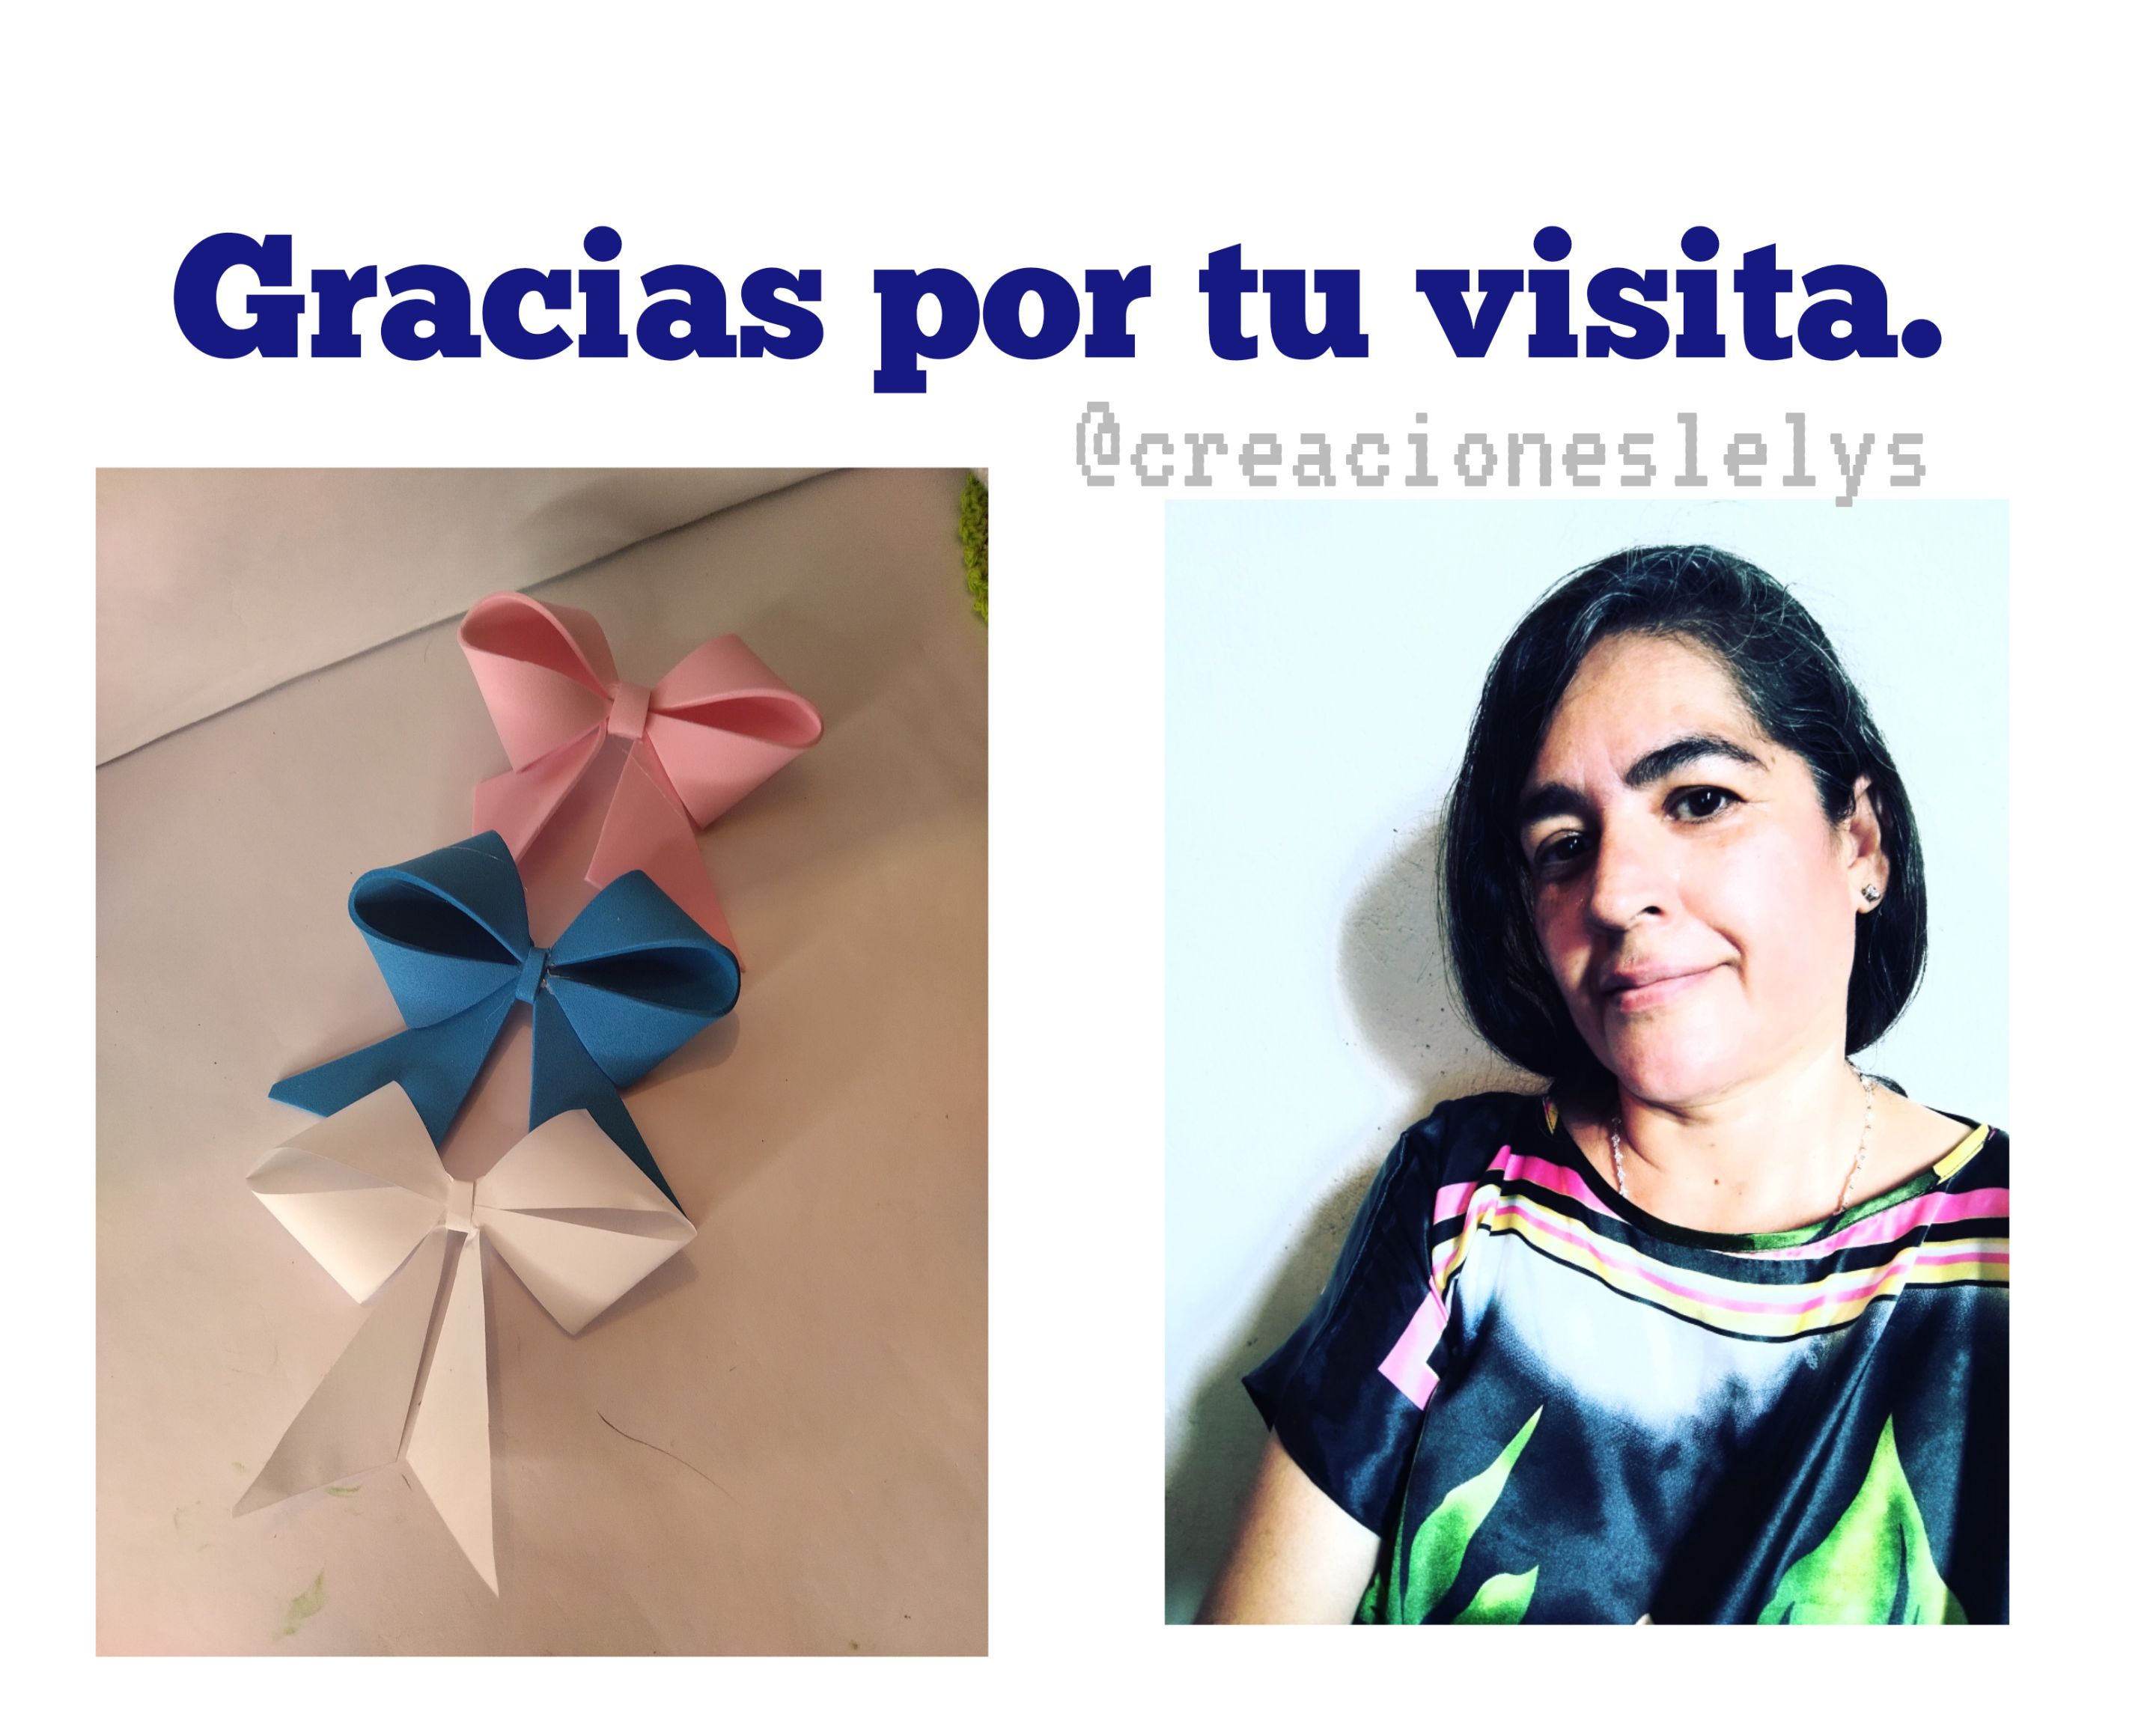
🙋 Muchas gracias por tu apoyo. Me hace sentir muy bien leer tus comentarios, dime si te gustó este proyecto 😃 y si te será útil alguna vez. Todas las fotos son de mi propiedad. Edité con Polish. Usé el traductor de Deepl. Vídeo editado en Capcut. Comprimido con Panda. Hasta pronto. Bendiciones 🙏
🎀
How to make beautiful bows. Video/Tutorial.
Hello friends. I hope you are doing very well. As always I wish you a happy week and a prosperous 2023. It is never too late or too early to wish each other the best. In these difficult times is when we should put more enthusiasm to everything we do. "All's well that ends well" 😊 "As long as there is life there is hope." So today I'm feeling great because I'm bringing you a new tutorial. you're going to love it!
Welcome ❣️ to my blog.
It happens that in the previous post I shared with you the step by step to make a cute little gift box with recycled material, from it I placed as an ornament a tiny bow that I had in reserve. Well, a friend of mine asked me how I did it and of course I explained it to her right away. She loved this bow pattern because it is very easy and quick to make.
Decorative bow for any occasion.
🎀 I learned how to make this bow a few years ago, I remember the moment perfectly. We were all the teachers gathered to organize the posters for teacher's day. One of my colleagues brought several of these ribbons and I did not hesitate to ask how she made them. Now I am going to explain how easy and quick they are to make. The best part is that we can make them in all sizes. let's get started!
MATERIALS USED:
🪄 Smooth Foami.
🪄 Ruler.
🪄 Graphite pencil.
🪄 Scissors.
🪄 Glue.
.
PROCEDURE TO ELABORATE IT:
🪄 We start by measuring a square on the chosen foami, it is very important that all sides have the same measurement.
🪄 Once the square is cut out, we are going to fold the ends together as you will see in the following image. Do it several times or until you have marked the fold, this will facilitate the cut that we will make later.
🪄 With the scissors we will cut on each of the lines that we have drawn, without cutting the center of the square.
🪄 Now we are going to take the sides (left and right) that is, two of the tabs that have been cut in the square. We bring to the center of the square the first tab, joining at the same time the two extreme ends of the tab. We must place a dot of glue in the center of the square so that the two tabs are attached.
🪄 Once the first tab is glued we proceed to glue the other one, also in the center.
🪄 Very good! Now we have two tabs available. With one we will make the lower part of the bow and with the other the ribbon that wraps the bow. The bottom tab we are going to cut all the way down the middle.
The top tab we will cut along the sides leaving in the center a ribbon whose size is proportional to the center of the bow. All this will depend on the size of the square.
🪄 We pass the ribbon through the middle of the loop taking it all the way to the back. There we will put a glue dot.
🎀 I love making them! Super easy! Super fast! Beautiful!
🙋 Thank you so much for your support. It makes me feel great to read your comments, tell me if you liked this project 😃 and if it will be useful to you sometime. All photos are my property. I edited with Polish. I used Deepl translator. Video edited in Capcut. Compressed with Panda. See you soon. Blessings 🙏
Show more
Tags :
Woo!
This creator can upvote comments using 3speak's stake today because they are a top performing creator!
Leave a quality comment relating to their content and you could receive an upvote
worth at least a dollar.
Their limit for today is $0!
Their limit for today is $0!
16 views
a year ago
$
22 views
a year ago
$
8 views
2 years ago
$
15 views
a year ago
$
29 views
a year ago
$
More Videos

3 views
2 years ago
$

43 views
3 years ago
$

Cape Cod National Seashore - Walking Down the Beach - Great Island Trail - Wellfleet - July 20, 2020
6 views
3 years ago
$

3 views
9 months ago
$
1 views
6 months ago
$

3 views
a year ago
$

24 views
2 years ago
$

16 views
4 months ago
$

26 views
a year ago
$
15 views
a month ago
$

13 views
a year ago
$

3 views
2 years ago
$

21 views
2 years ago
$
0 views
2 years ago
$

10 views
3 years ago
$
14 views
a year ago
$

5 views
a year ago
$

4 views
a year ago
$

10 views
2 months ago
$

25 views
a year ago
$

2 views
2 years ago
$

22 views
2 years ago
$

13 views
3 years ago
$
27 views
10 months ago
$

6 views
3 months ago
$
Comments:
Reply:
To comment on this video please connect a HIVE account to your profile: Connect HIVE Account