PROMO Y DIY: Portalápices mosaico.//Mosaic pencil holder.
6
About :
¡LISTO! PROMO CON TUTORIAL! NO DEJES DE VISITAR MI BLOG.
Video editado con la app Capcut.
READY! PROMO WITH TUTORIAL! BE SURE TO VISIT MY BLOG.
Video edited with Capcut app.
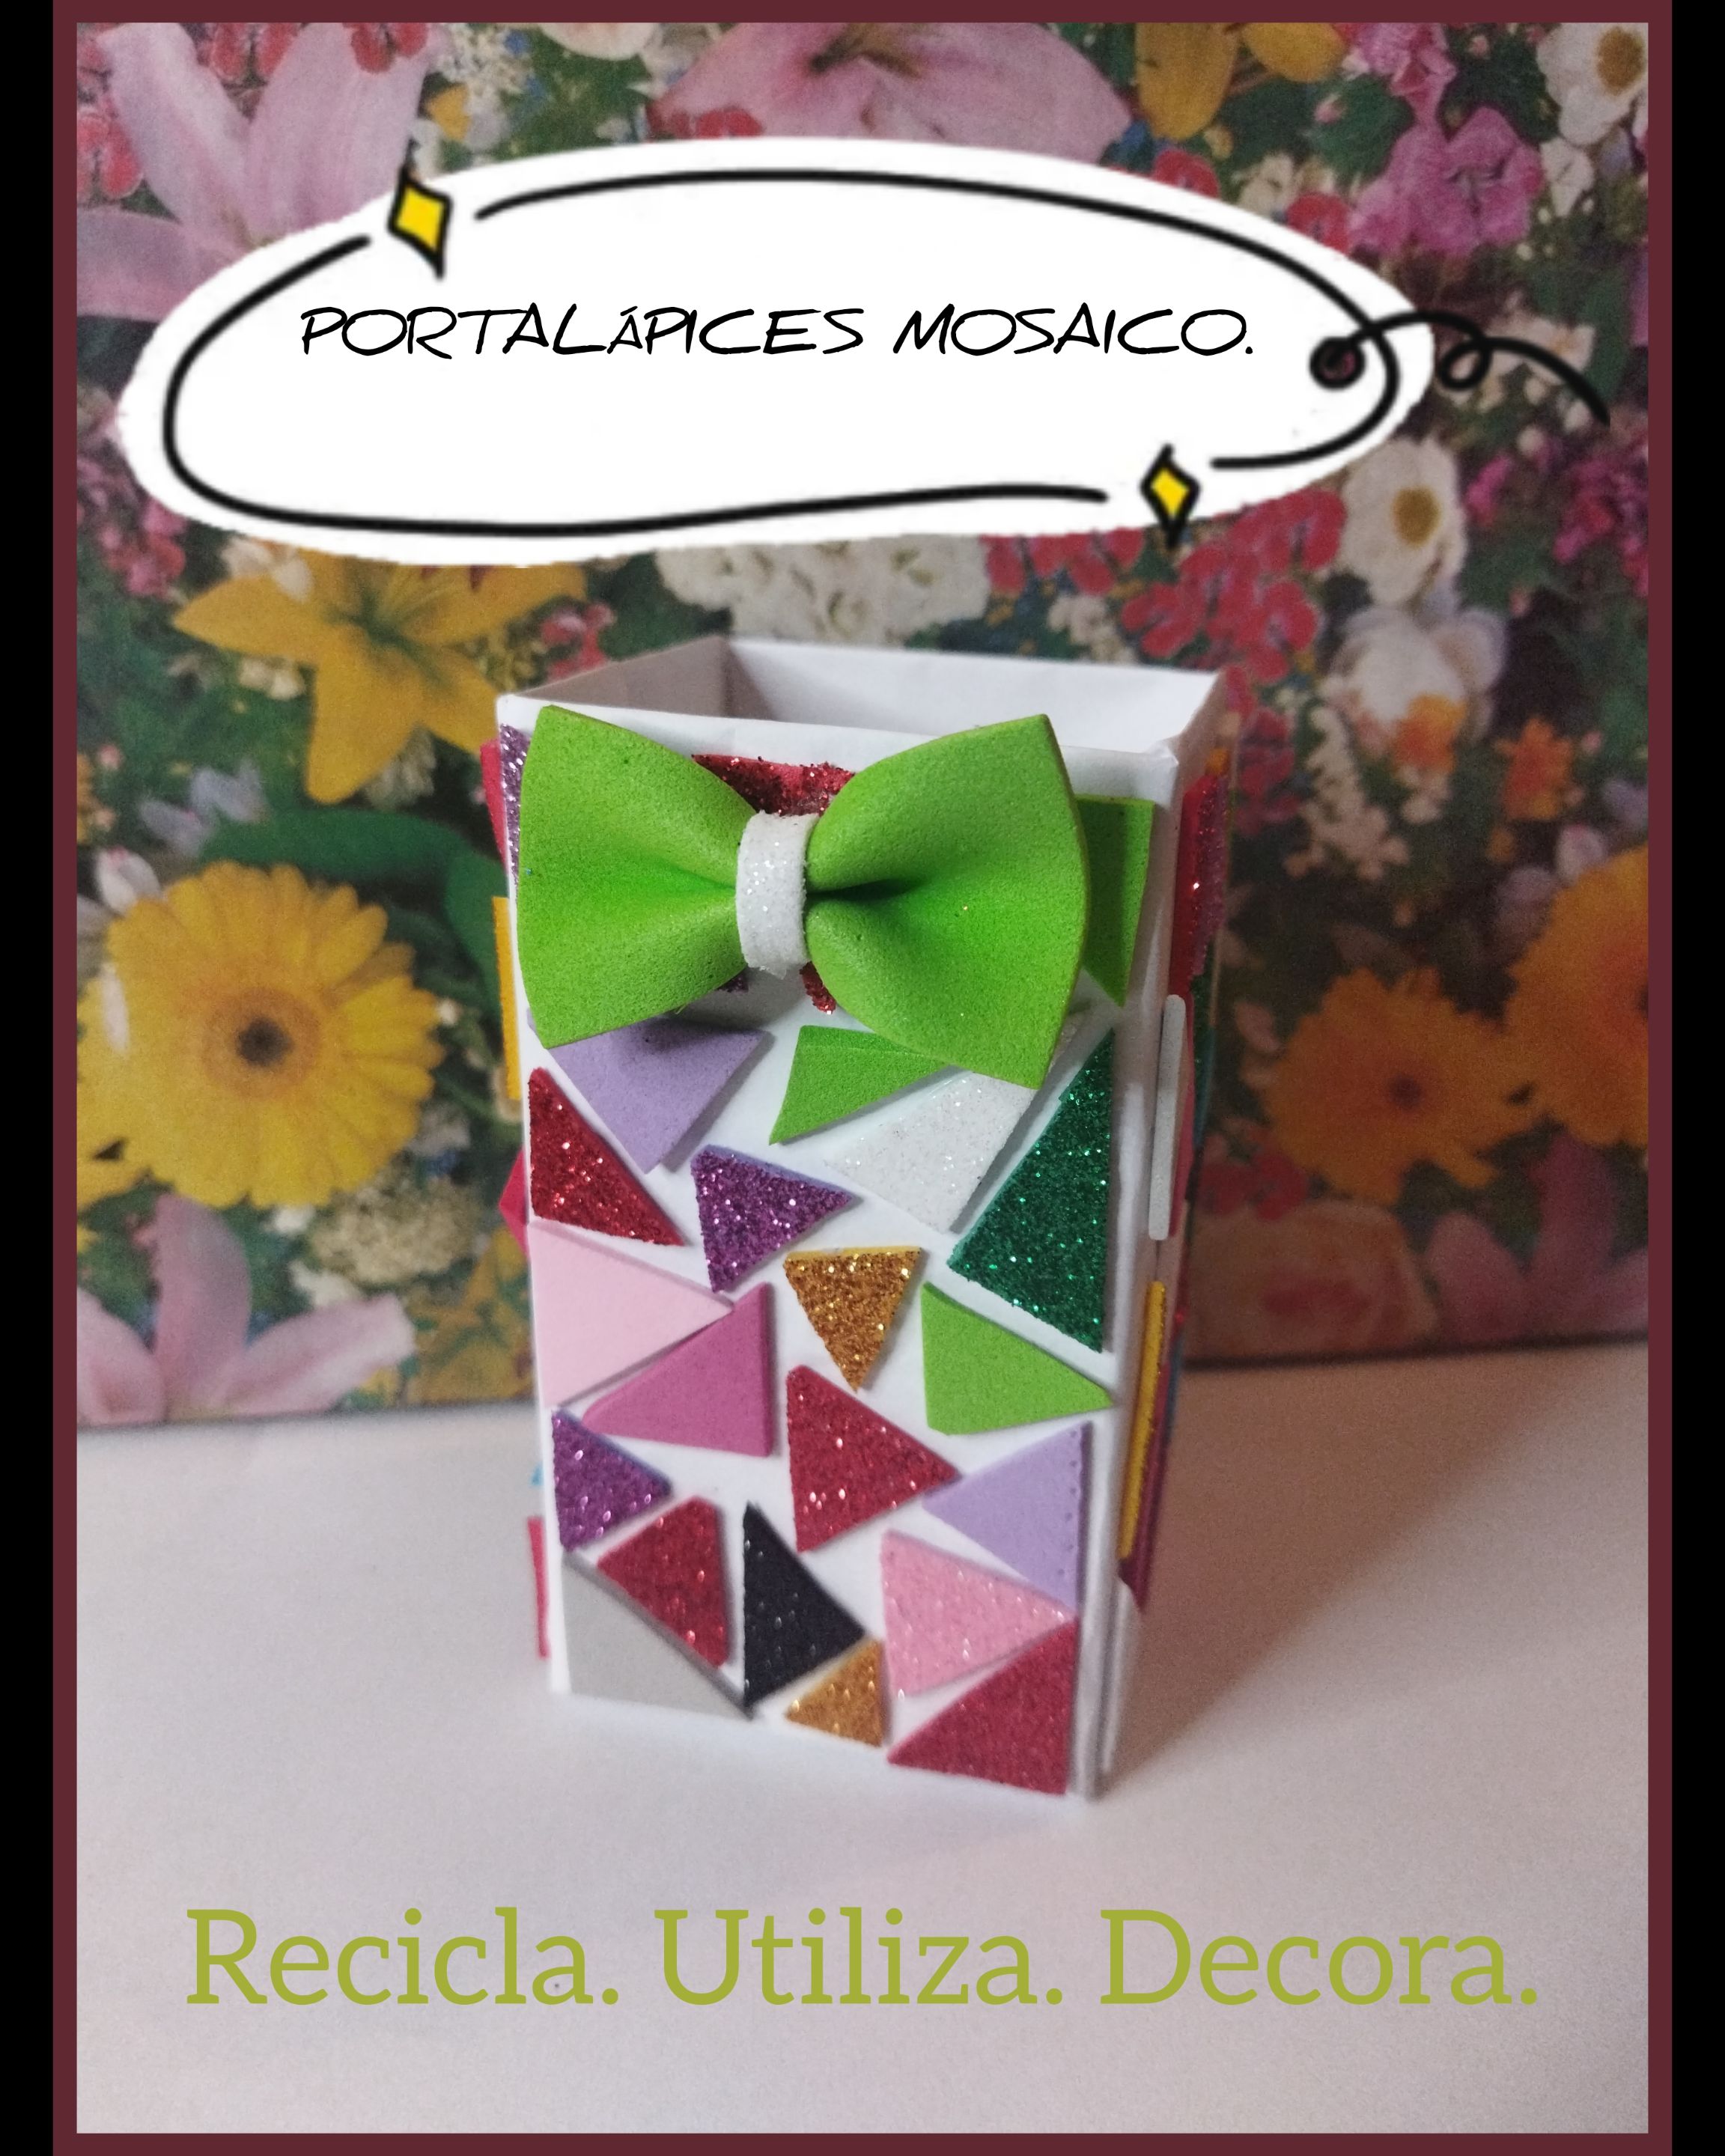
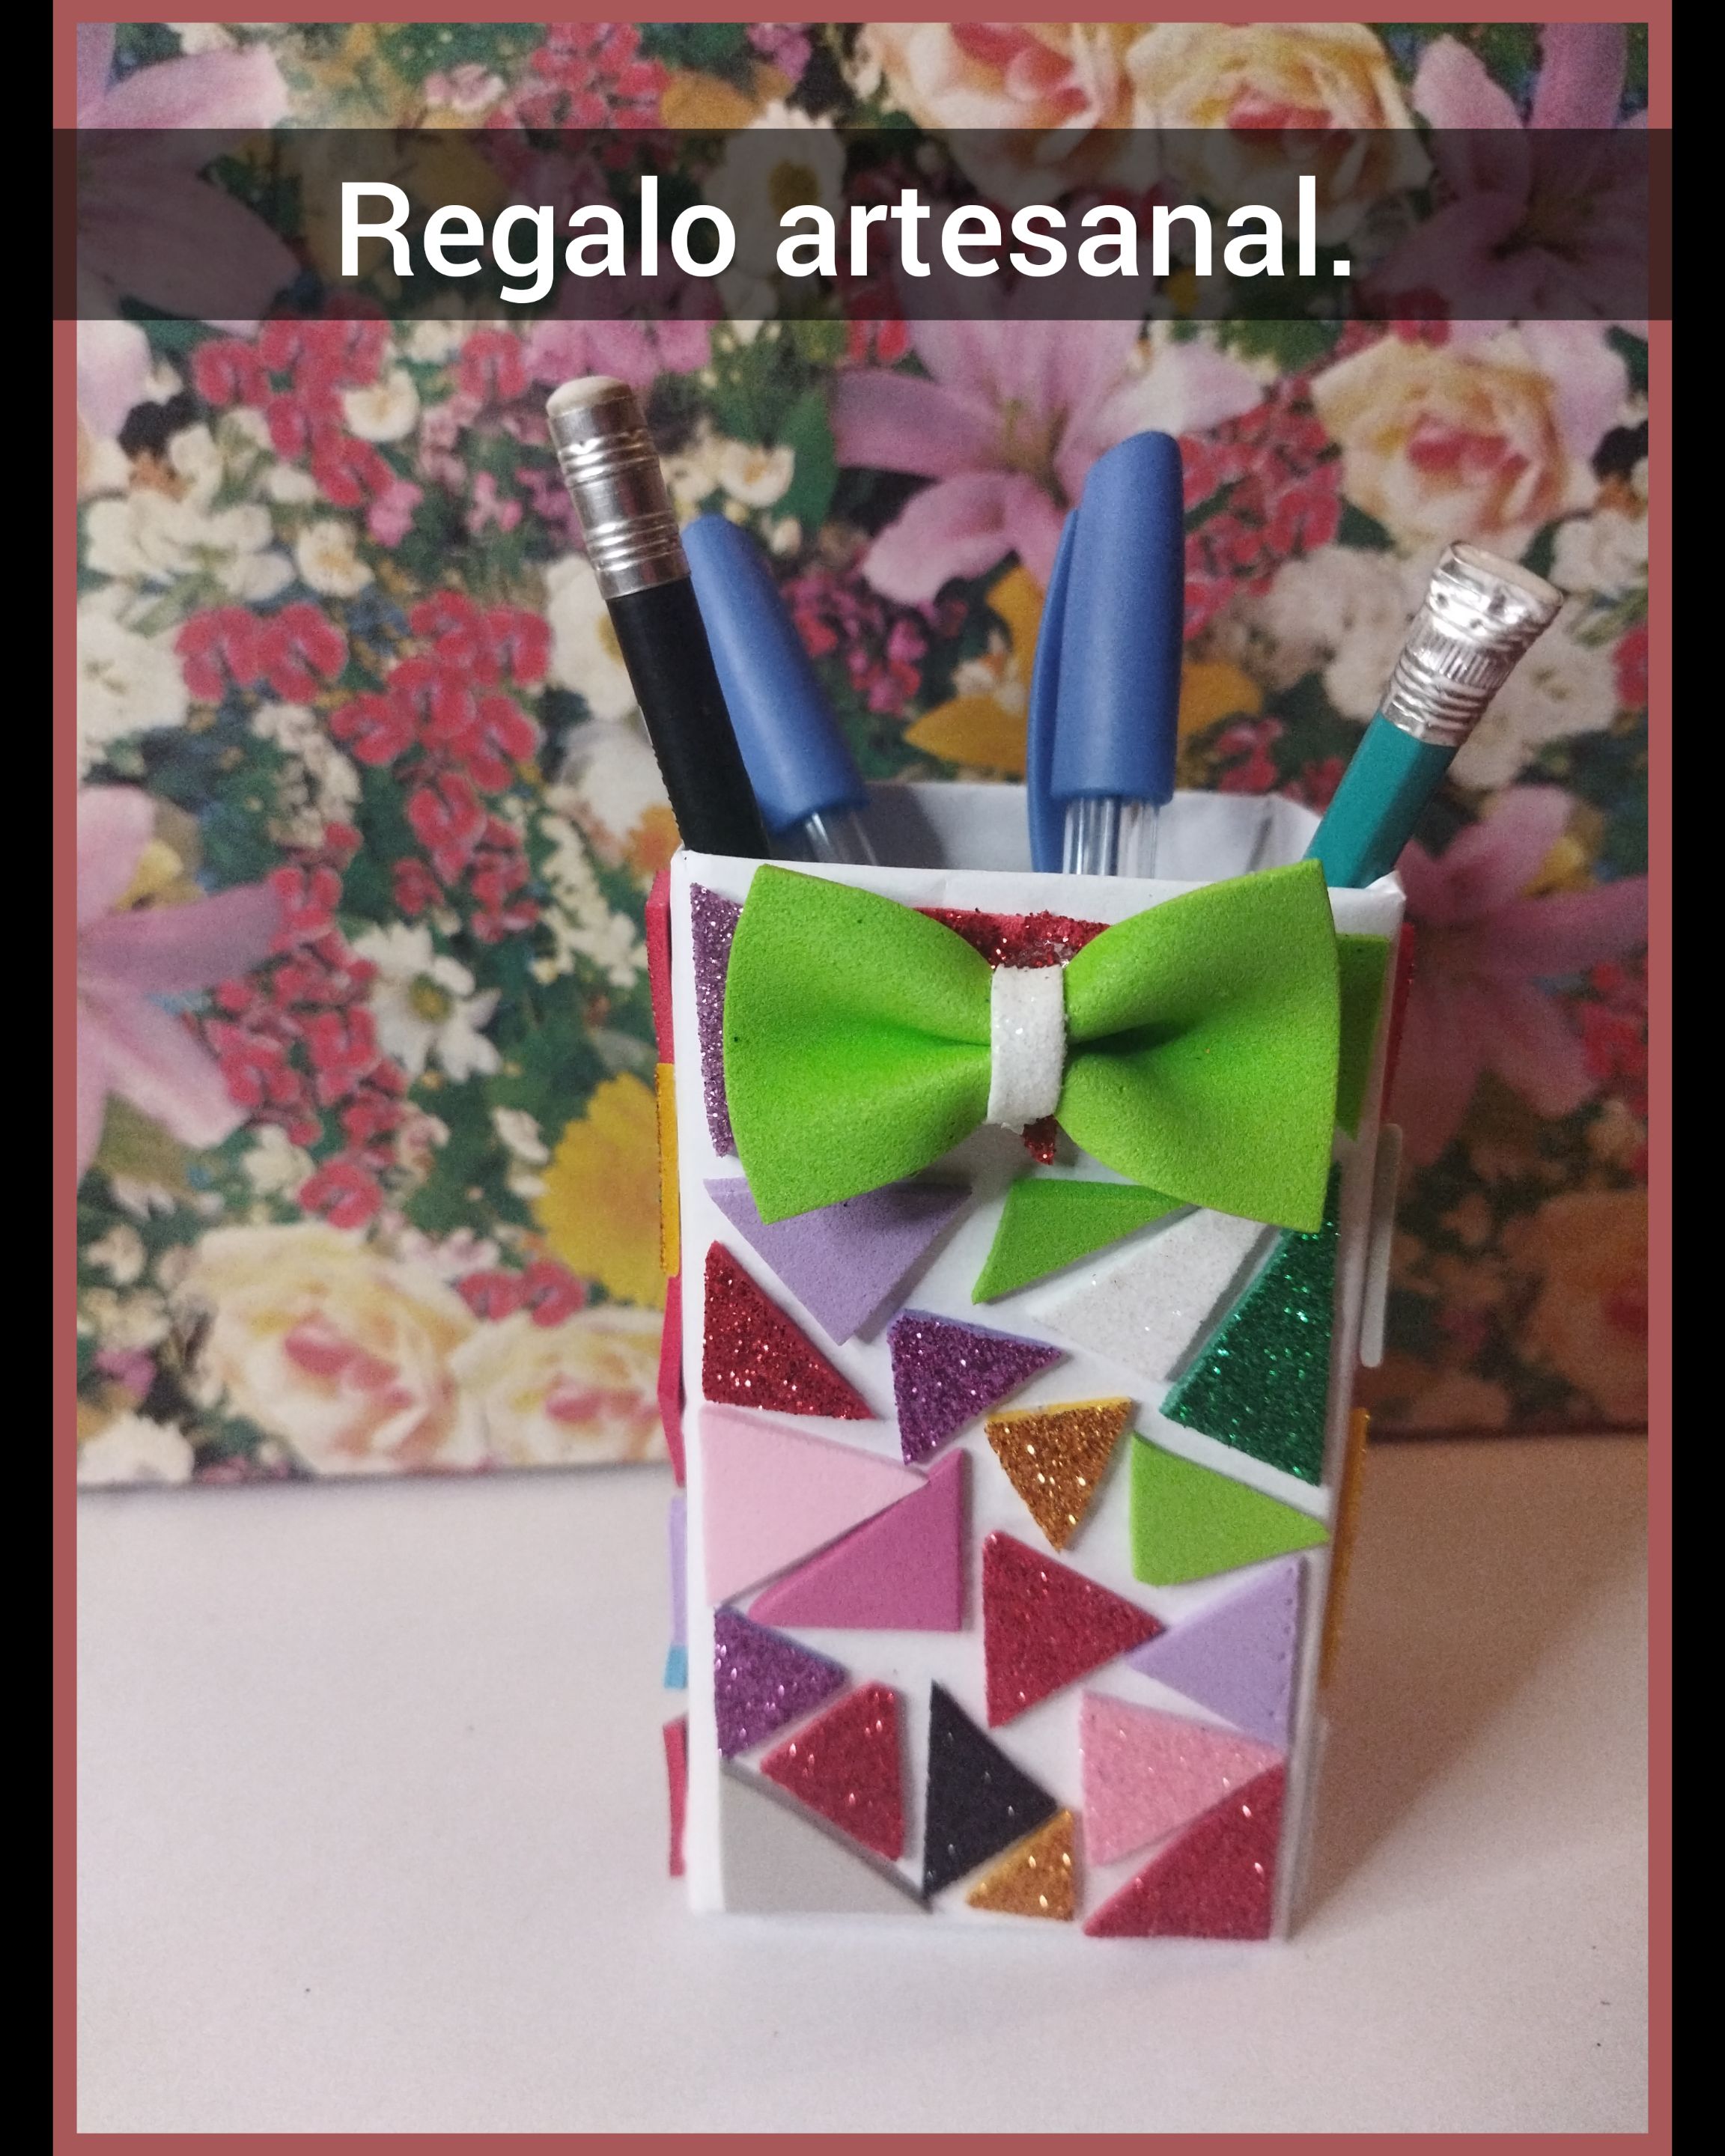
Portalápices mosaico.Mosaic pencil holder.
Hola amigos. Feliz día 🎉 como es de costumbre quiero desearles mucha salud, paz y prosperidad. El día de hoy vengo a mostrarles el paso a paso para elaborar un lindo portalápices que denominé MOSAICO, precisamente porque está elaborado con pequeños retazos de foami de diferentes colores. Los invito a leer este tutorial y a compartir sus impresiones.
Hello friends. Happy day 🎉 as usual I want to wish you lots of health, peace and prosperity. Today I am here to show you the step by step to make a beautiful pencil holder that I called MOSAICO, precisely because it is made with small pieces of foami in different colors. I invite you to read this tutorial and share your impressions.

Tengo una cesta repleta de pequeños trozos de foami, la verdad es que los voy guardando porque yo realizo proyectos pequeños, entonces creo que me serán útiles en algún momento. Tampoco quiero acumular tantos, por eso hoy decidí empezar a usarlos y se me ocurrió hacer un objeto decorativo con algunos de estos retazos.
I have a basket full of small pieces of foami, the truth is that I keep them because I do small projects, so I think they will be useful to me at some point. I also don't want to accumulate so many, that's why today I decided to start using them and it occurred to me to make a decorative object with some of these scraps.
Sigo con la idea de realizar una cesta más grande aplicando esta misma técnica, espero conseguir una caja más grande para así poder usar todos los restos de foami que aún me quedan. Mientras tanto les voy a compartir como hice este pequeño adorno, además muy útil porque podemos organizar en él todos los lápices y lapiceros que tenemos.
I continue with the idea of making a bigger basket applying this same technique, I hope to get a bigger box so I can use all the remains of foami that I still have. Meanwhile I'm going to share how I made this little ornament, also very useful because we can organize all the pencils and pens we have in it.
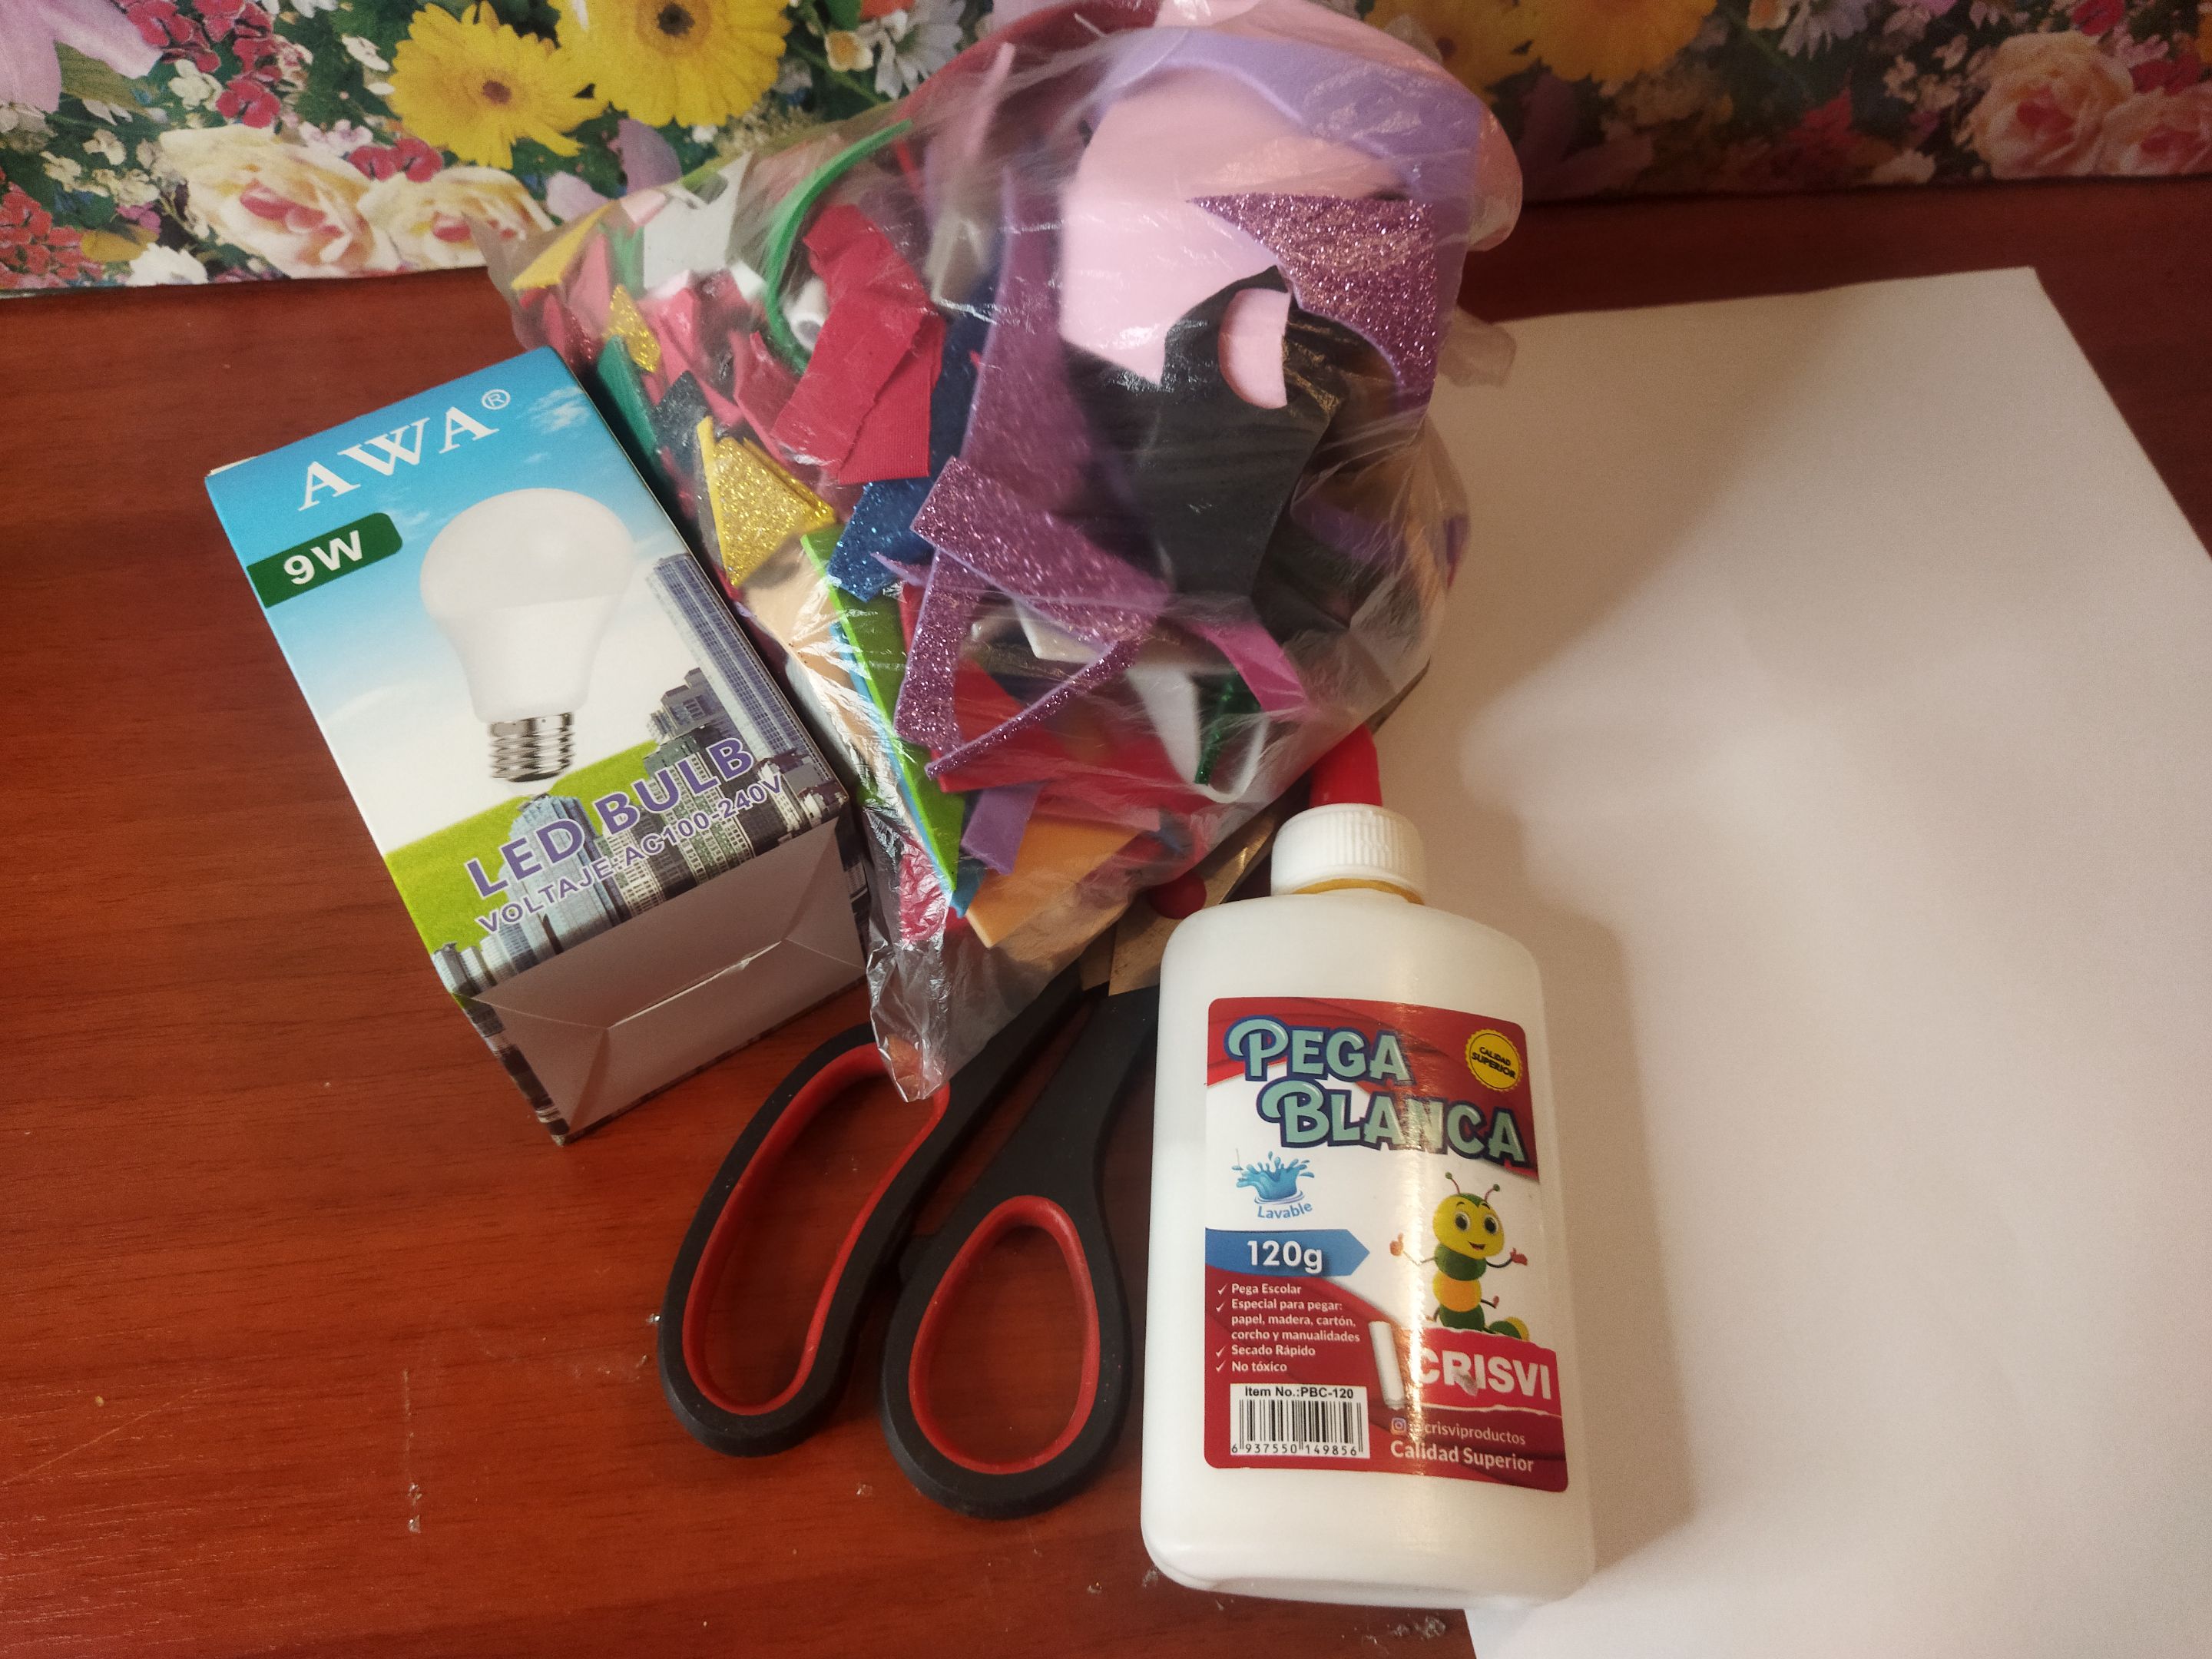
Materiales.
- Trozos de foami.
- Caja de cartón reciclada.
- Hoja blanca.
- Pegamento.
- Tijeras.
Materials.
- Pieces of foami.
- Recycled cardboard box.
- White sheet.
- Glue.
- Scissors.
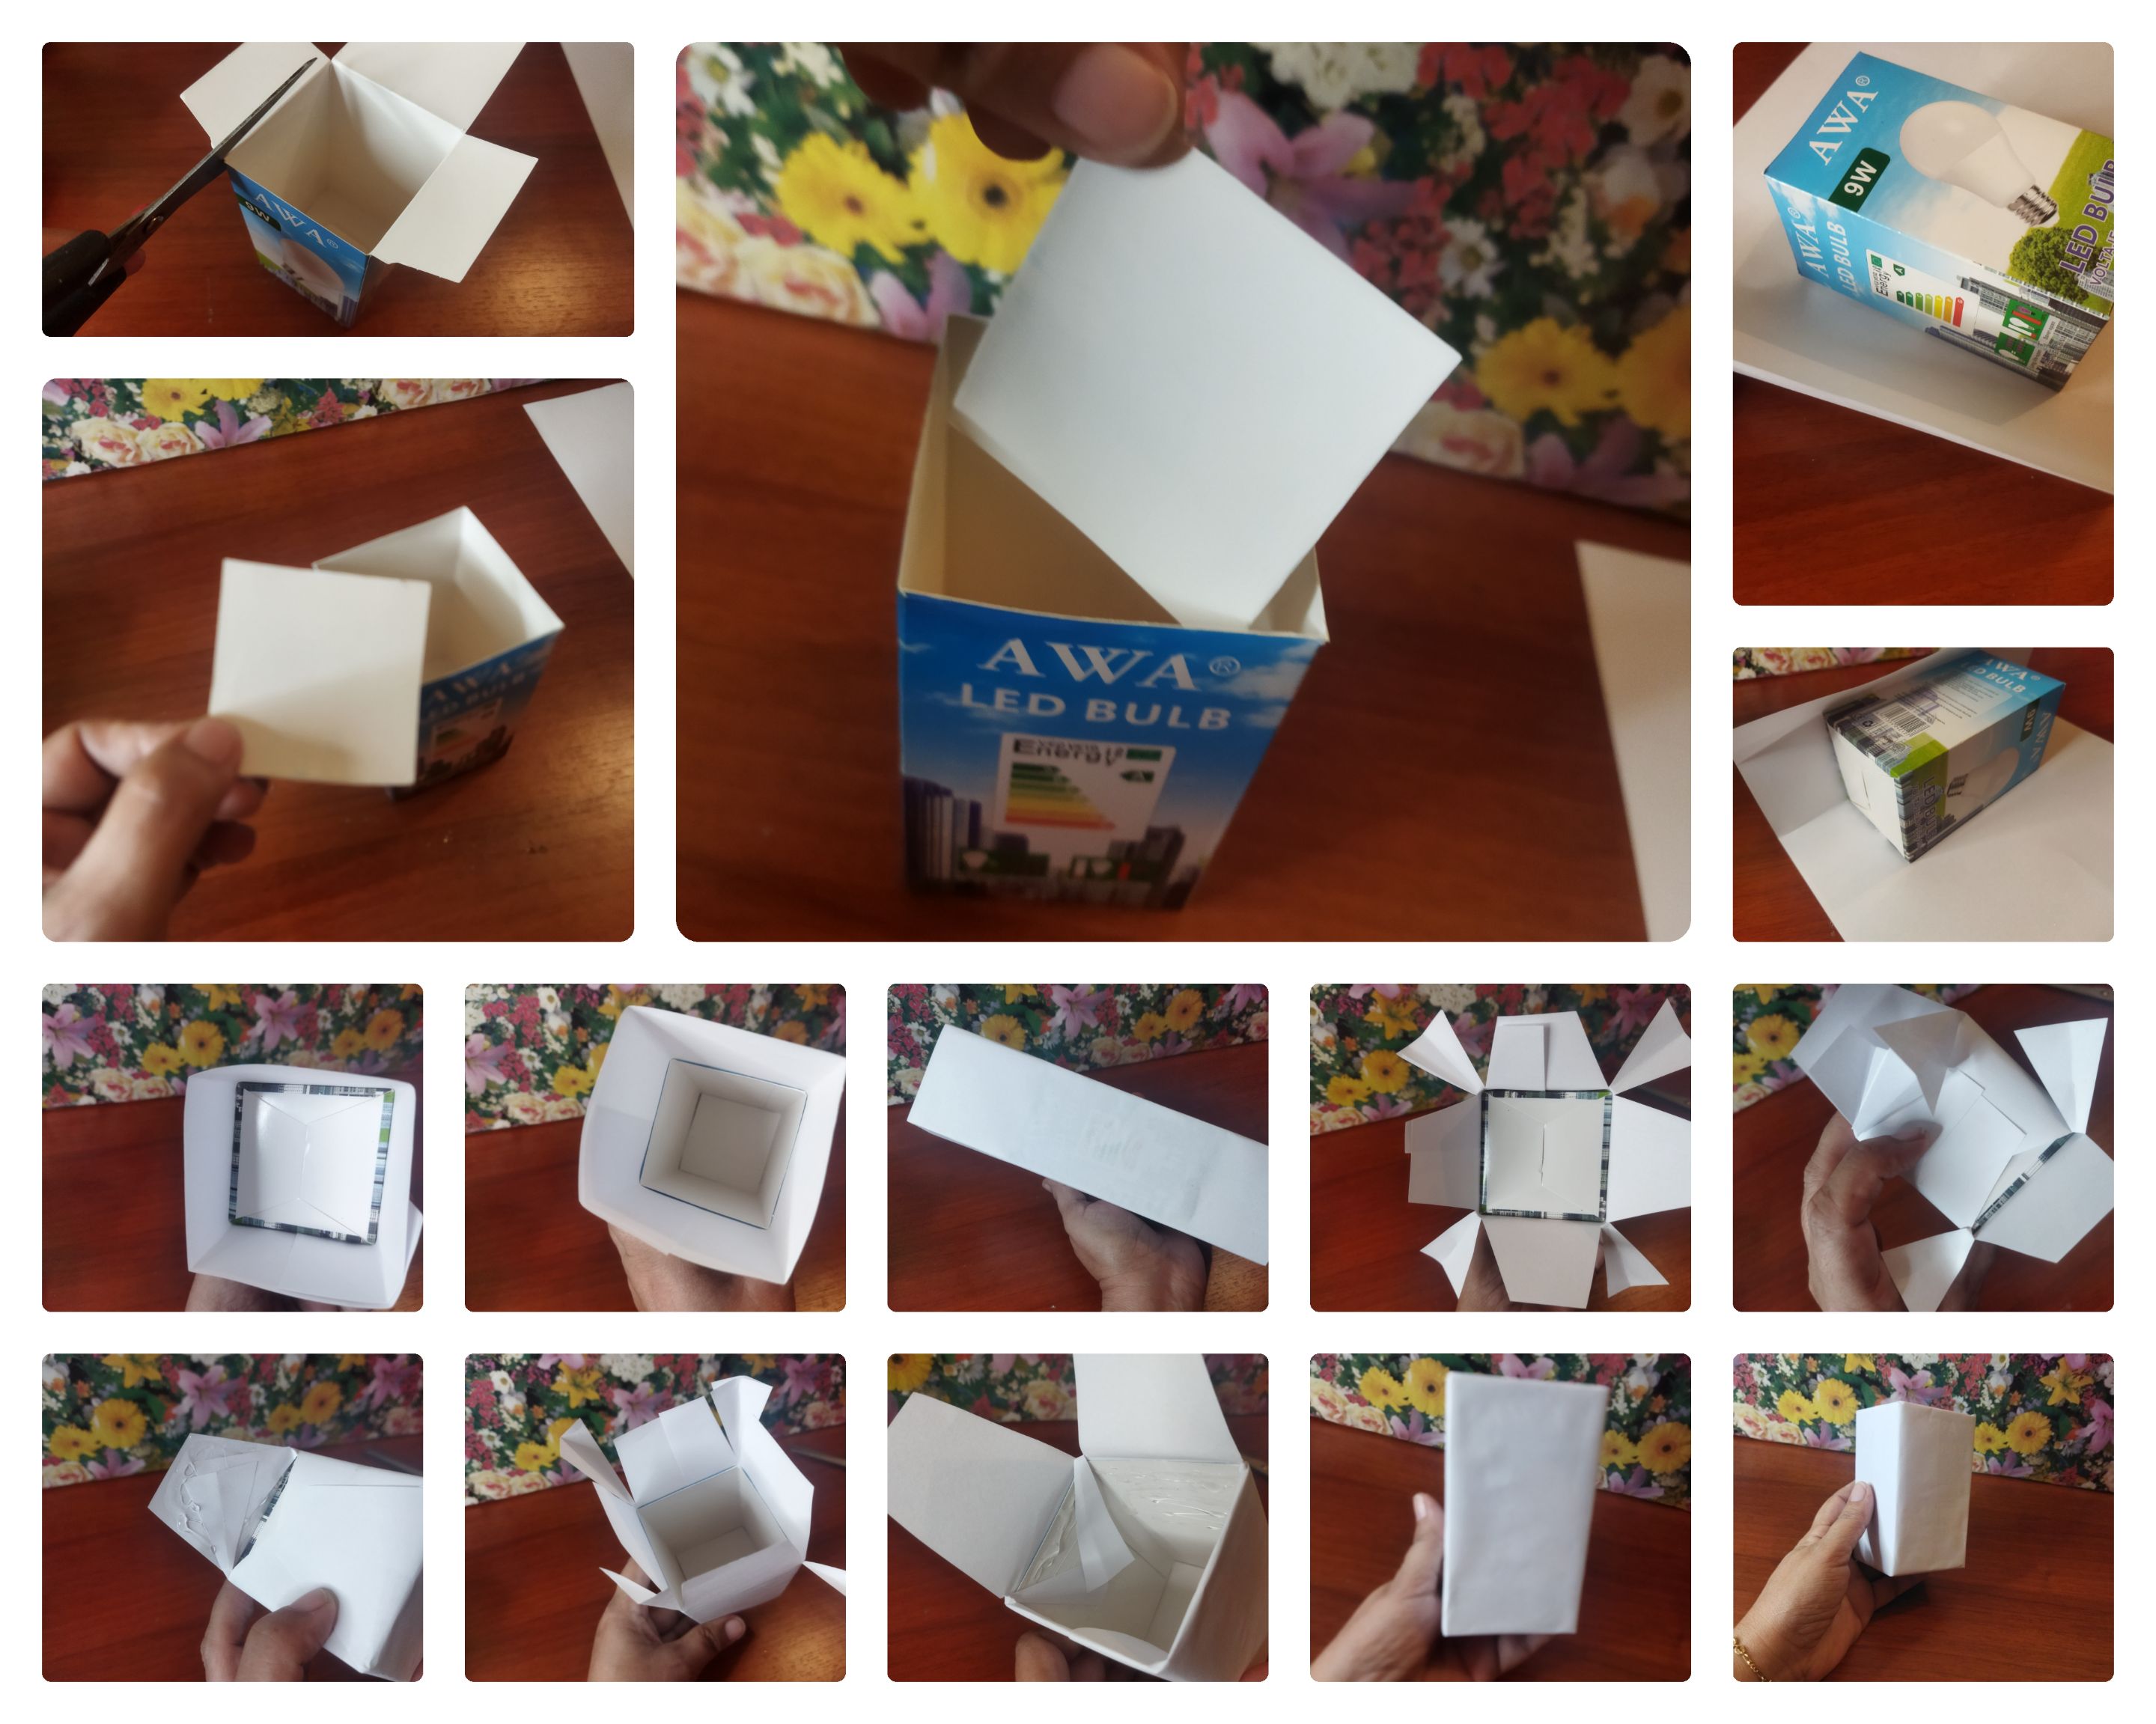
Procedimiento.
- Vamos a empezar quitando las tapas de la cajita, esta es una caja pequeña de bombillo.
- Con la parte cuadrada de la tapa vamos a reforzar la base, para ello colocamos un poquito de pegamento por dentro en la base de la caja y luego pegamos esta tapita.
- Ahora vamos a cortar la caja para que no se vea de qué era. Tomamos la hoja blanca y sobre ella colocamos la caja. Vamos a utilizar toda la hoja tamaño carta.
- La cajita es pequeña y el cartón es frágil, forrarla se puede complicar un poco por el movimiento. Te sugiero que cubras la caja con la hoja y vayas haciendo la marca en las partes donde vas a doblar el papel. Después colocas el pegamento parte por parte y vas pegando hasta cubrirla toda por fuera.
- Con todo el papel sobrante tanto de arriba como de abajo de la caja vas a forrar por dentro y la base externa. Si te fijas yo no desperdicié ni un poquito de papel.
Procedure.
- We are going to start by removing the lids of the box, this is a small light bulb box. * With the square part of the lid we are going to reinforce the base, for this we put a little bit of glue on the inside at the base of the box and then we glue this little lid.
- Now we are going to cut the box so you can't see what it was made of. We take the white sheet and place the box on it. We are going to use the entire letter size sheet.
- The box is small and the cardboard is fragile, lining it can be a bit complicated by movement. I suggest you cover the box with the sheet and mark the parts where you are going to fold the paper. Then you place the glue part by part and you stick until you cover it all on the outside.
- With all the excess paper from both the top and bottom of the box, you will cover the inside and the external base. If you notice, I didn't waste a bit of paper.
- Lo que sigue es cortar en forma de triángulos los retazos de foami procurando cortar de todos los colores disponibles y que sean más o menos del mismo tamaño. Es muy entretenido hacer este paso. ¡No se crean! Se ve todo muy fácil, pero se lleva su tiempo.
- What follows is to cut the pieces of foami in the form of triangles, trying to cut all the available colors and that they are more or less the same size. It is very entertaining to do this step. They are not created! Everything looks very easy, but it takes time.
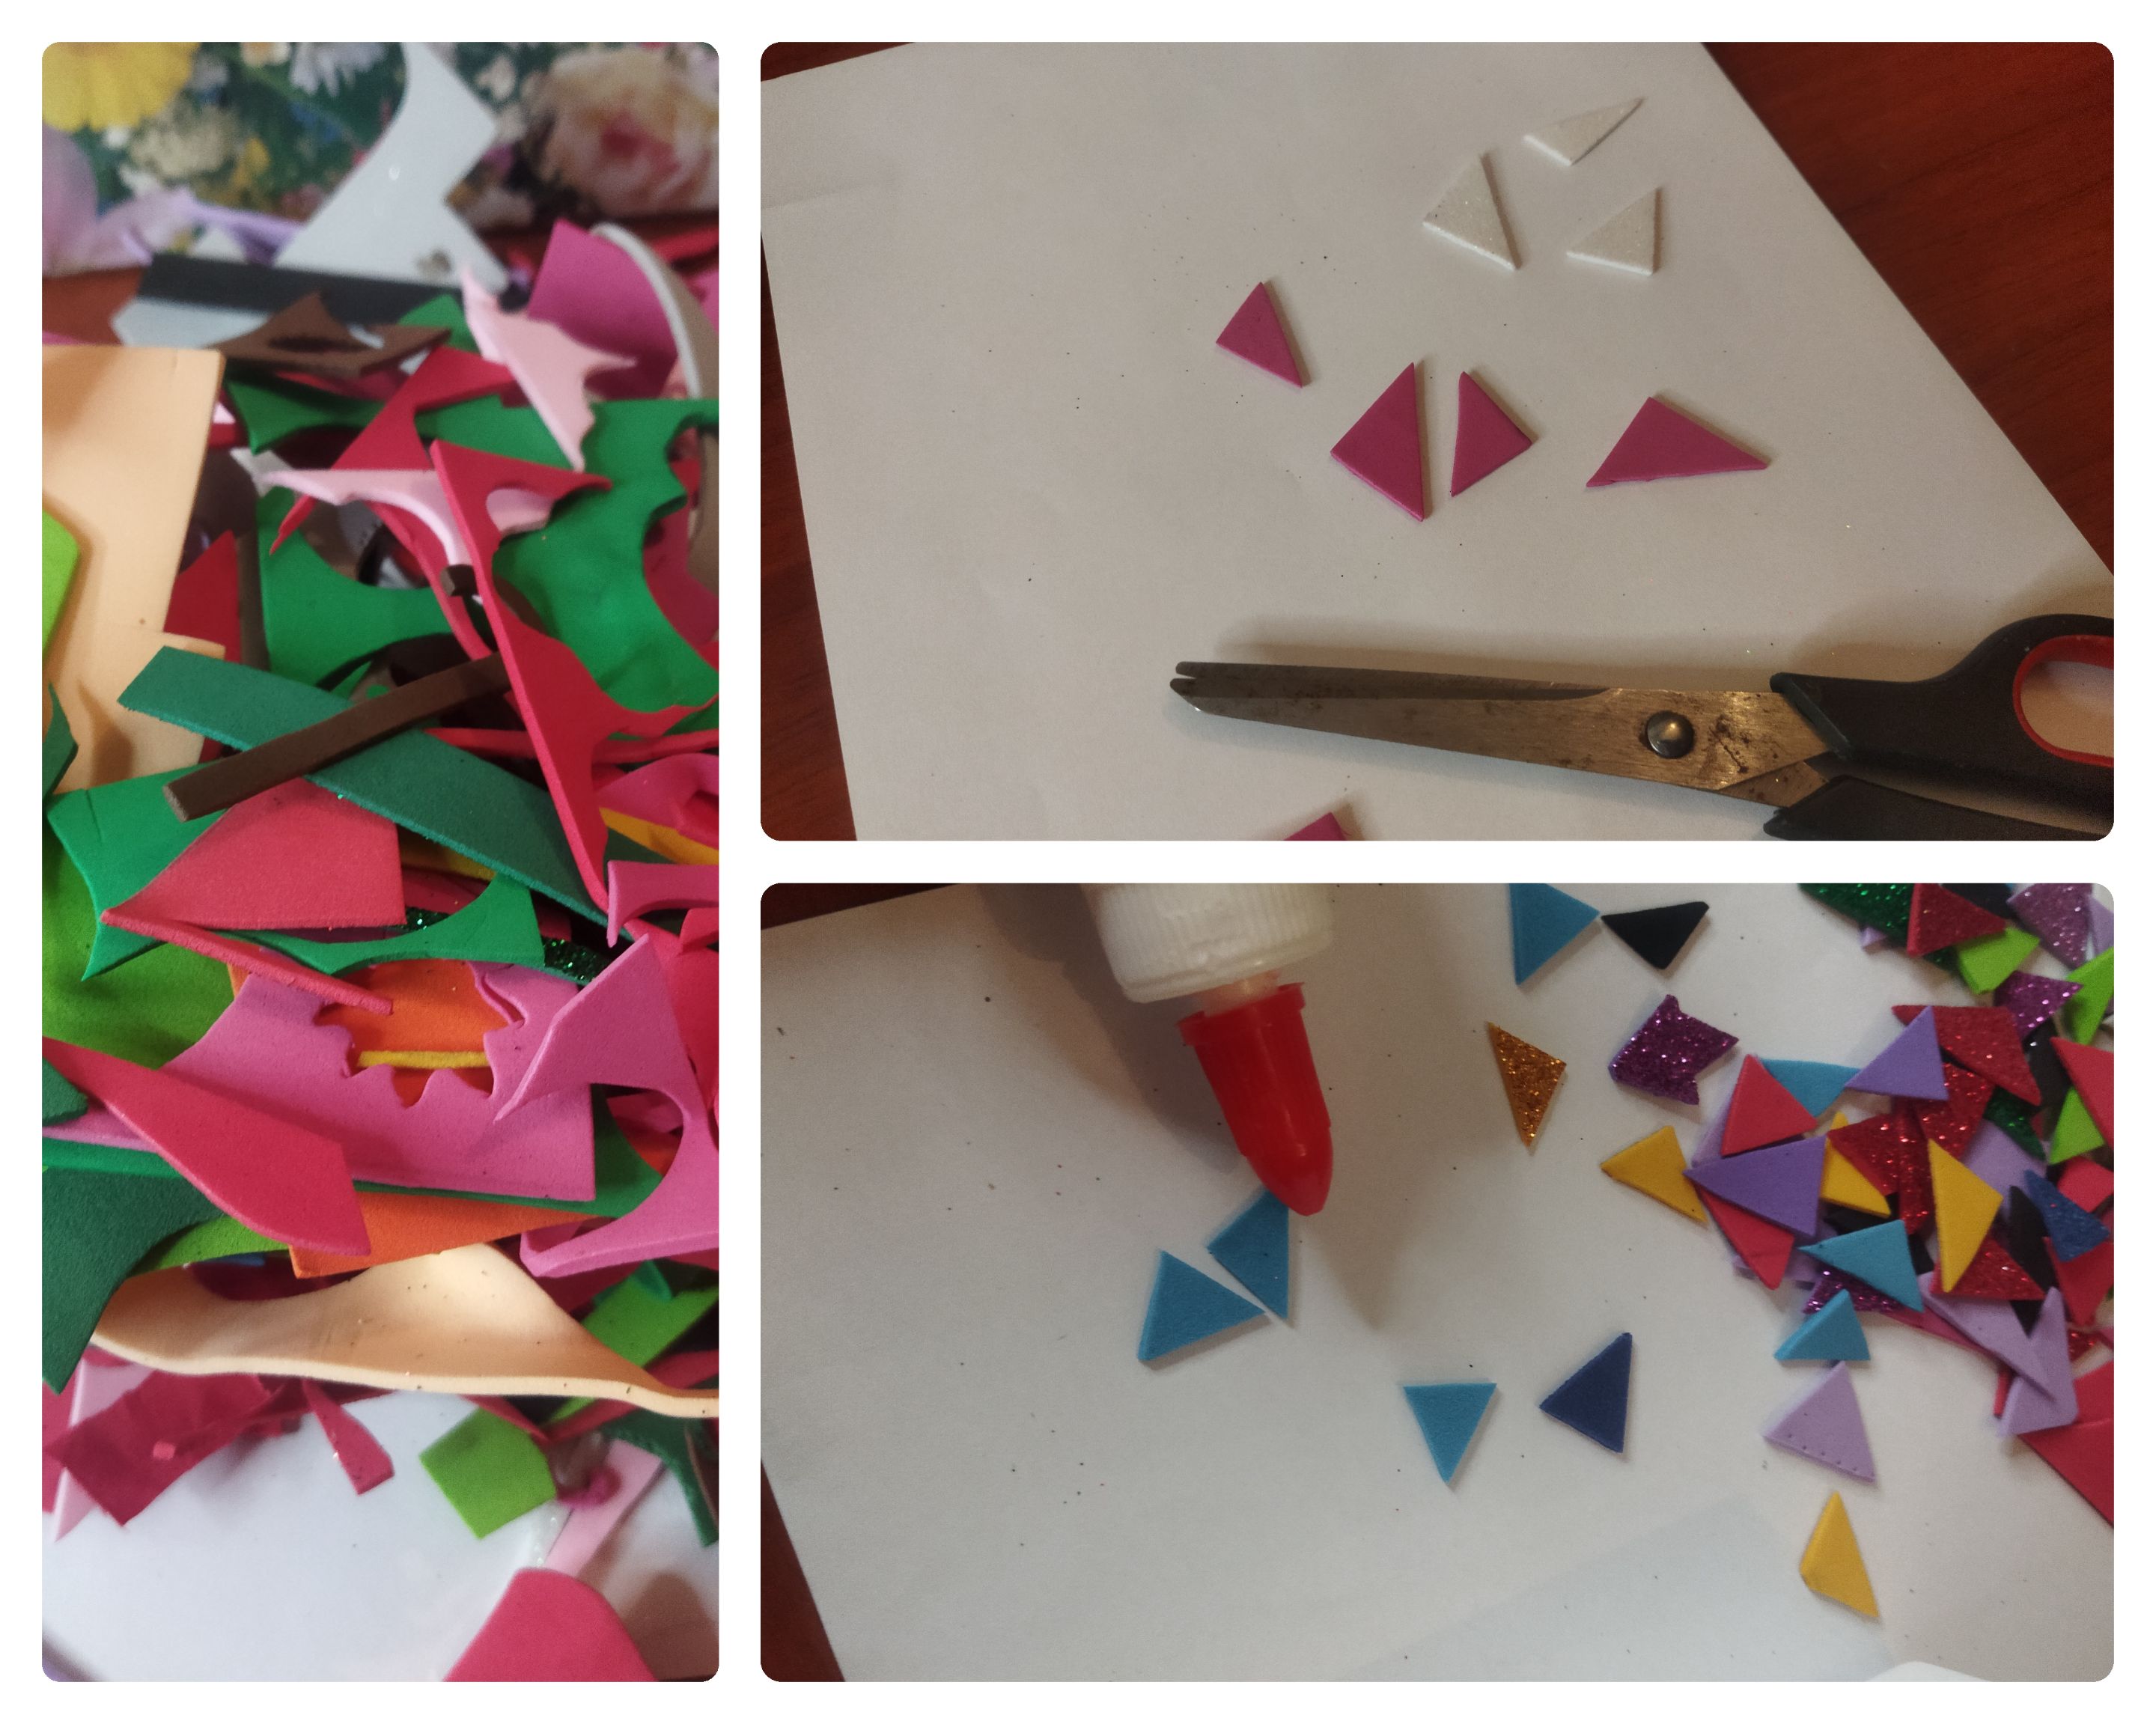
- Cuando tengamos todos los triángulos recortados procedemos a pegarlos en la parte externa de la cajita forrada. La forma para colocarlos la decides tú. Yo empecé tratando de hacerlo muy ordenadito, sin embargo me quedaron algunos espacios vacíos. Es importante que al organizar todos los triángulos estos no queden pegados, sino con un margen de distancia para que se vea bonito el mosaico.
- When we have all the triangles cut out, we proceed to paste them on the outside of the lined box. The way to place them is up to you. I started trying to make it very tidy, however I had some empty spaces. It is important that when organizing all the triangles they are not stuck together, but with a margin of distance so that the mosaic looks beautiful.

- La segunda cara de la cajita la realicé con menos orden y se nota. Usé más triángulos que en la primera.
- The second side of the box was made with less order and it shows. I used more triangles than in the first one.
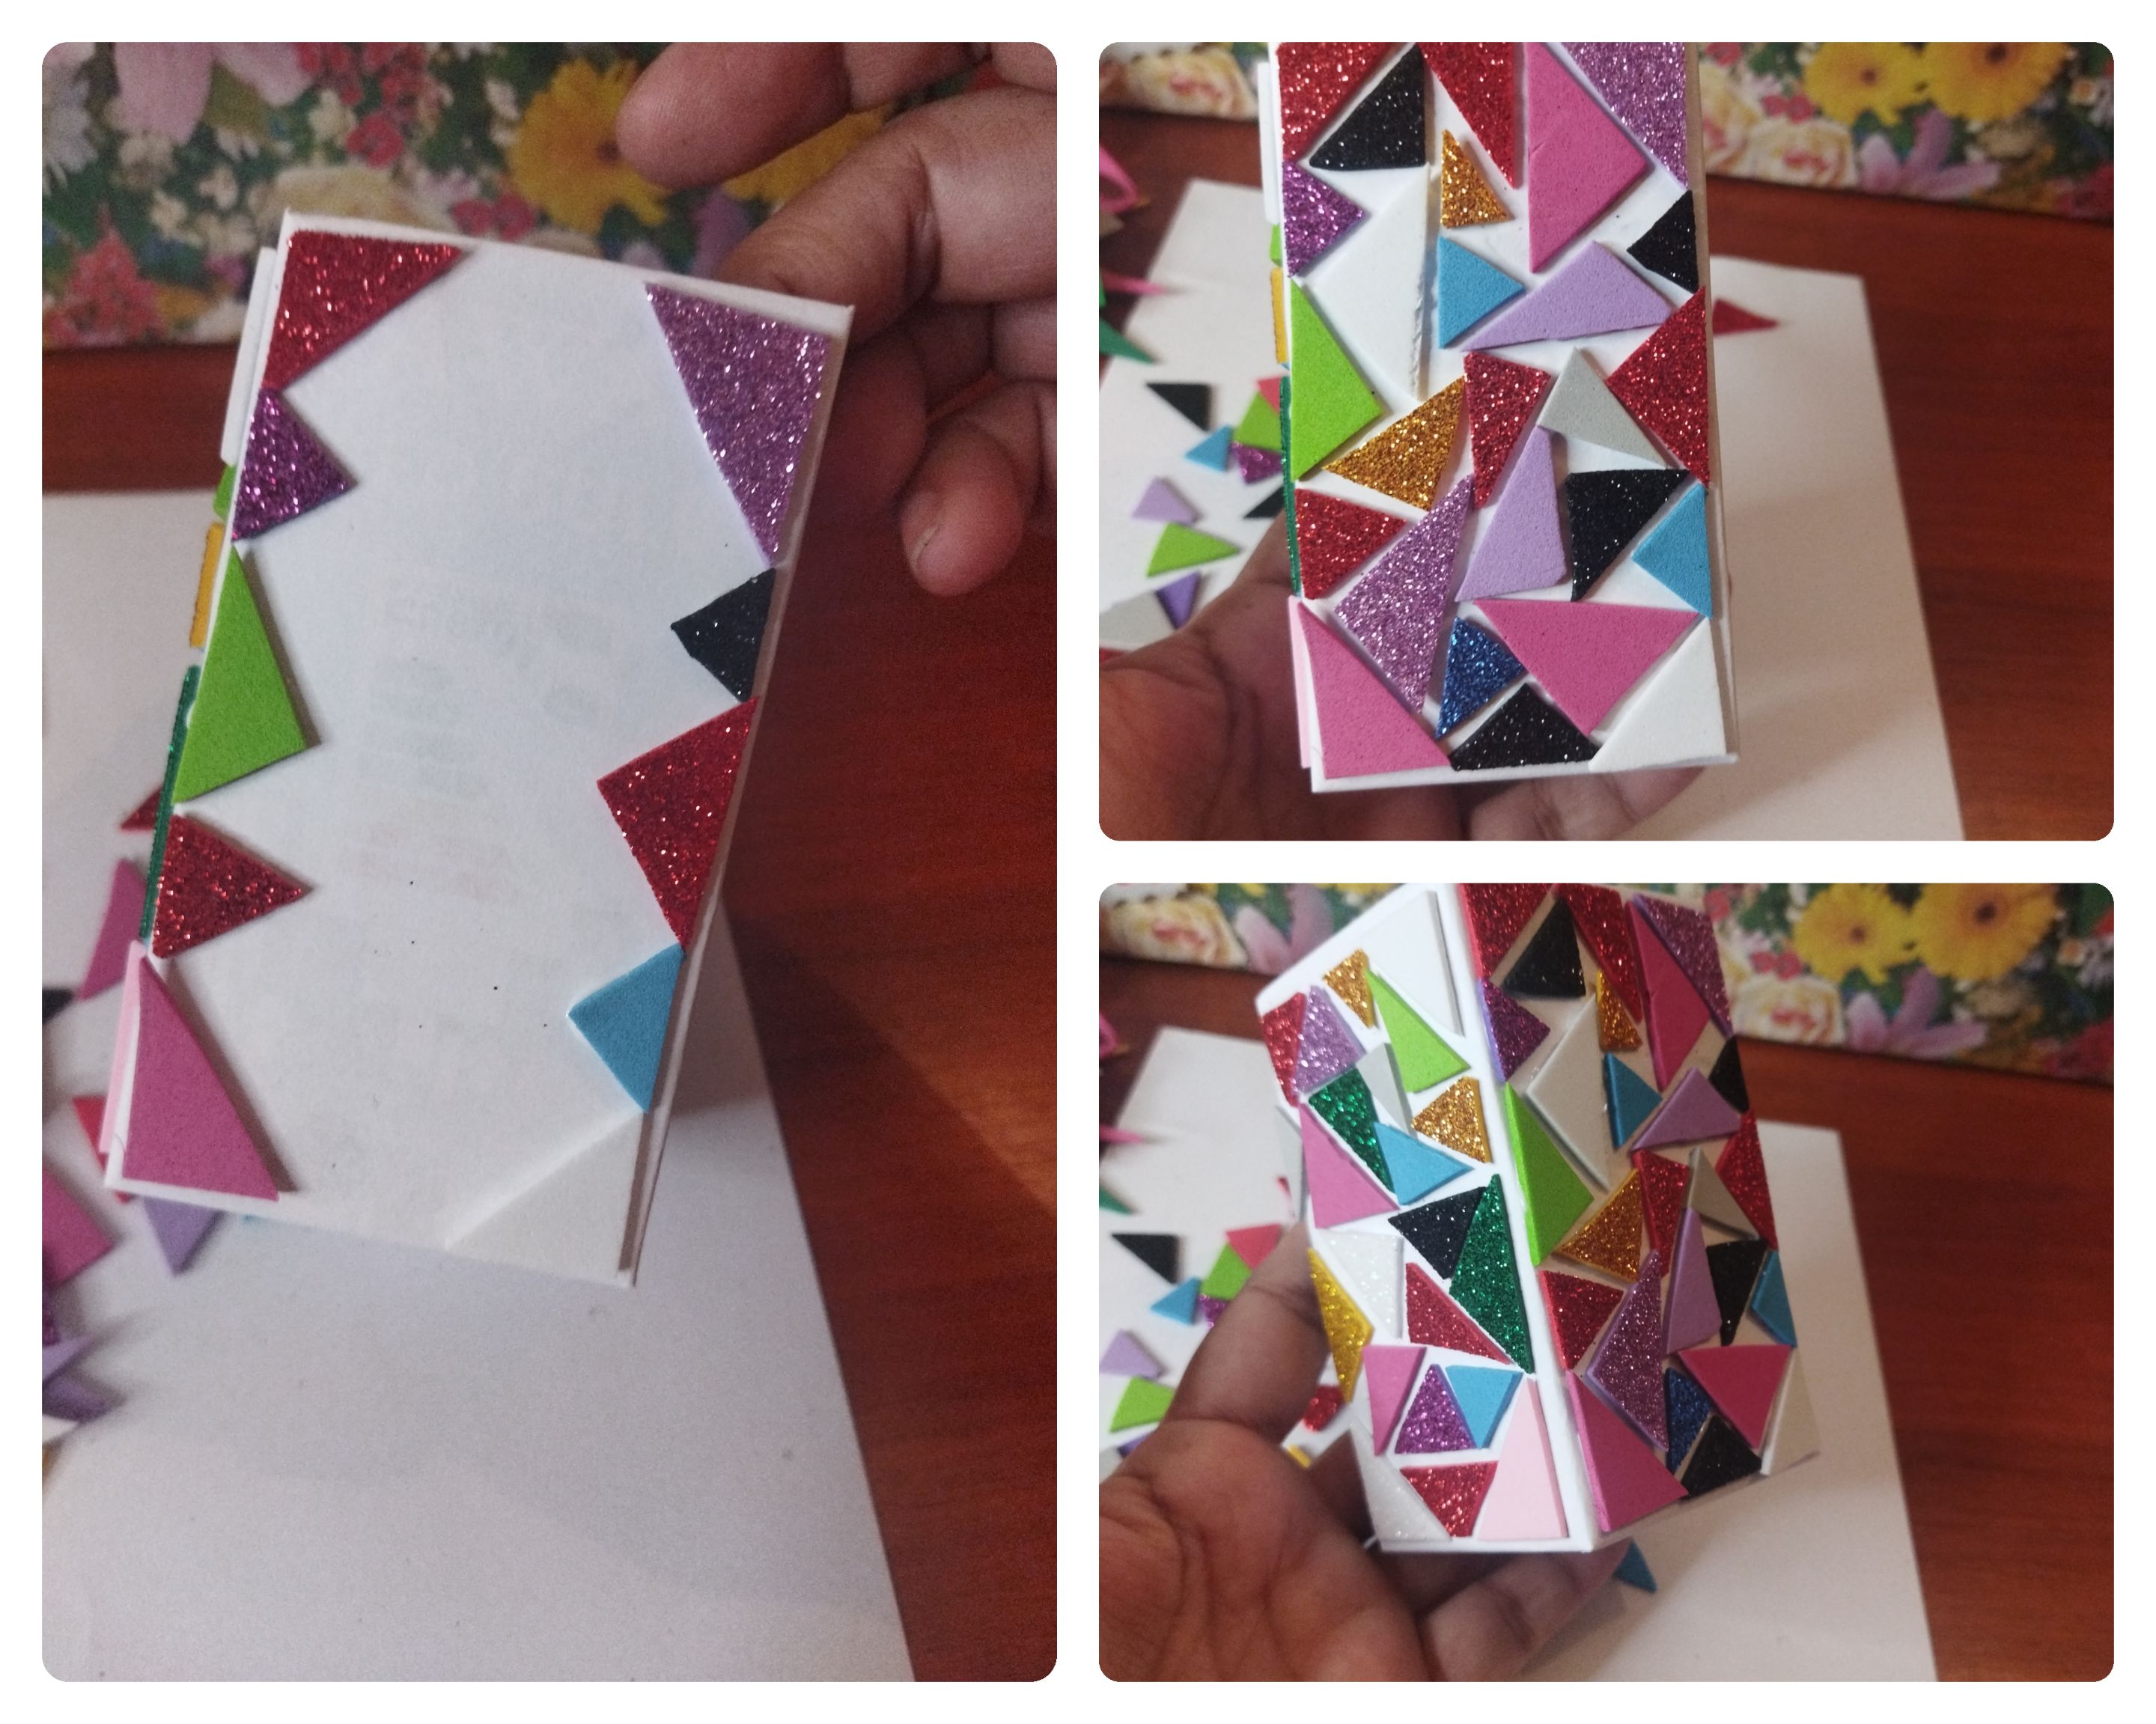
- La tercera y cuarta cara de la caja las realicé con más seguridad y procuré que quedaran más bonitas que las anteriores.
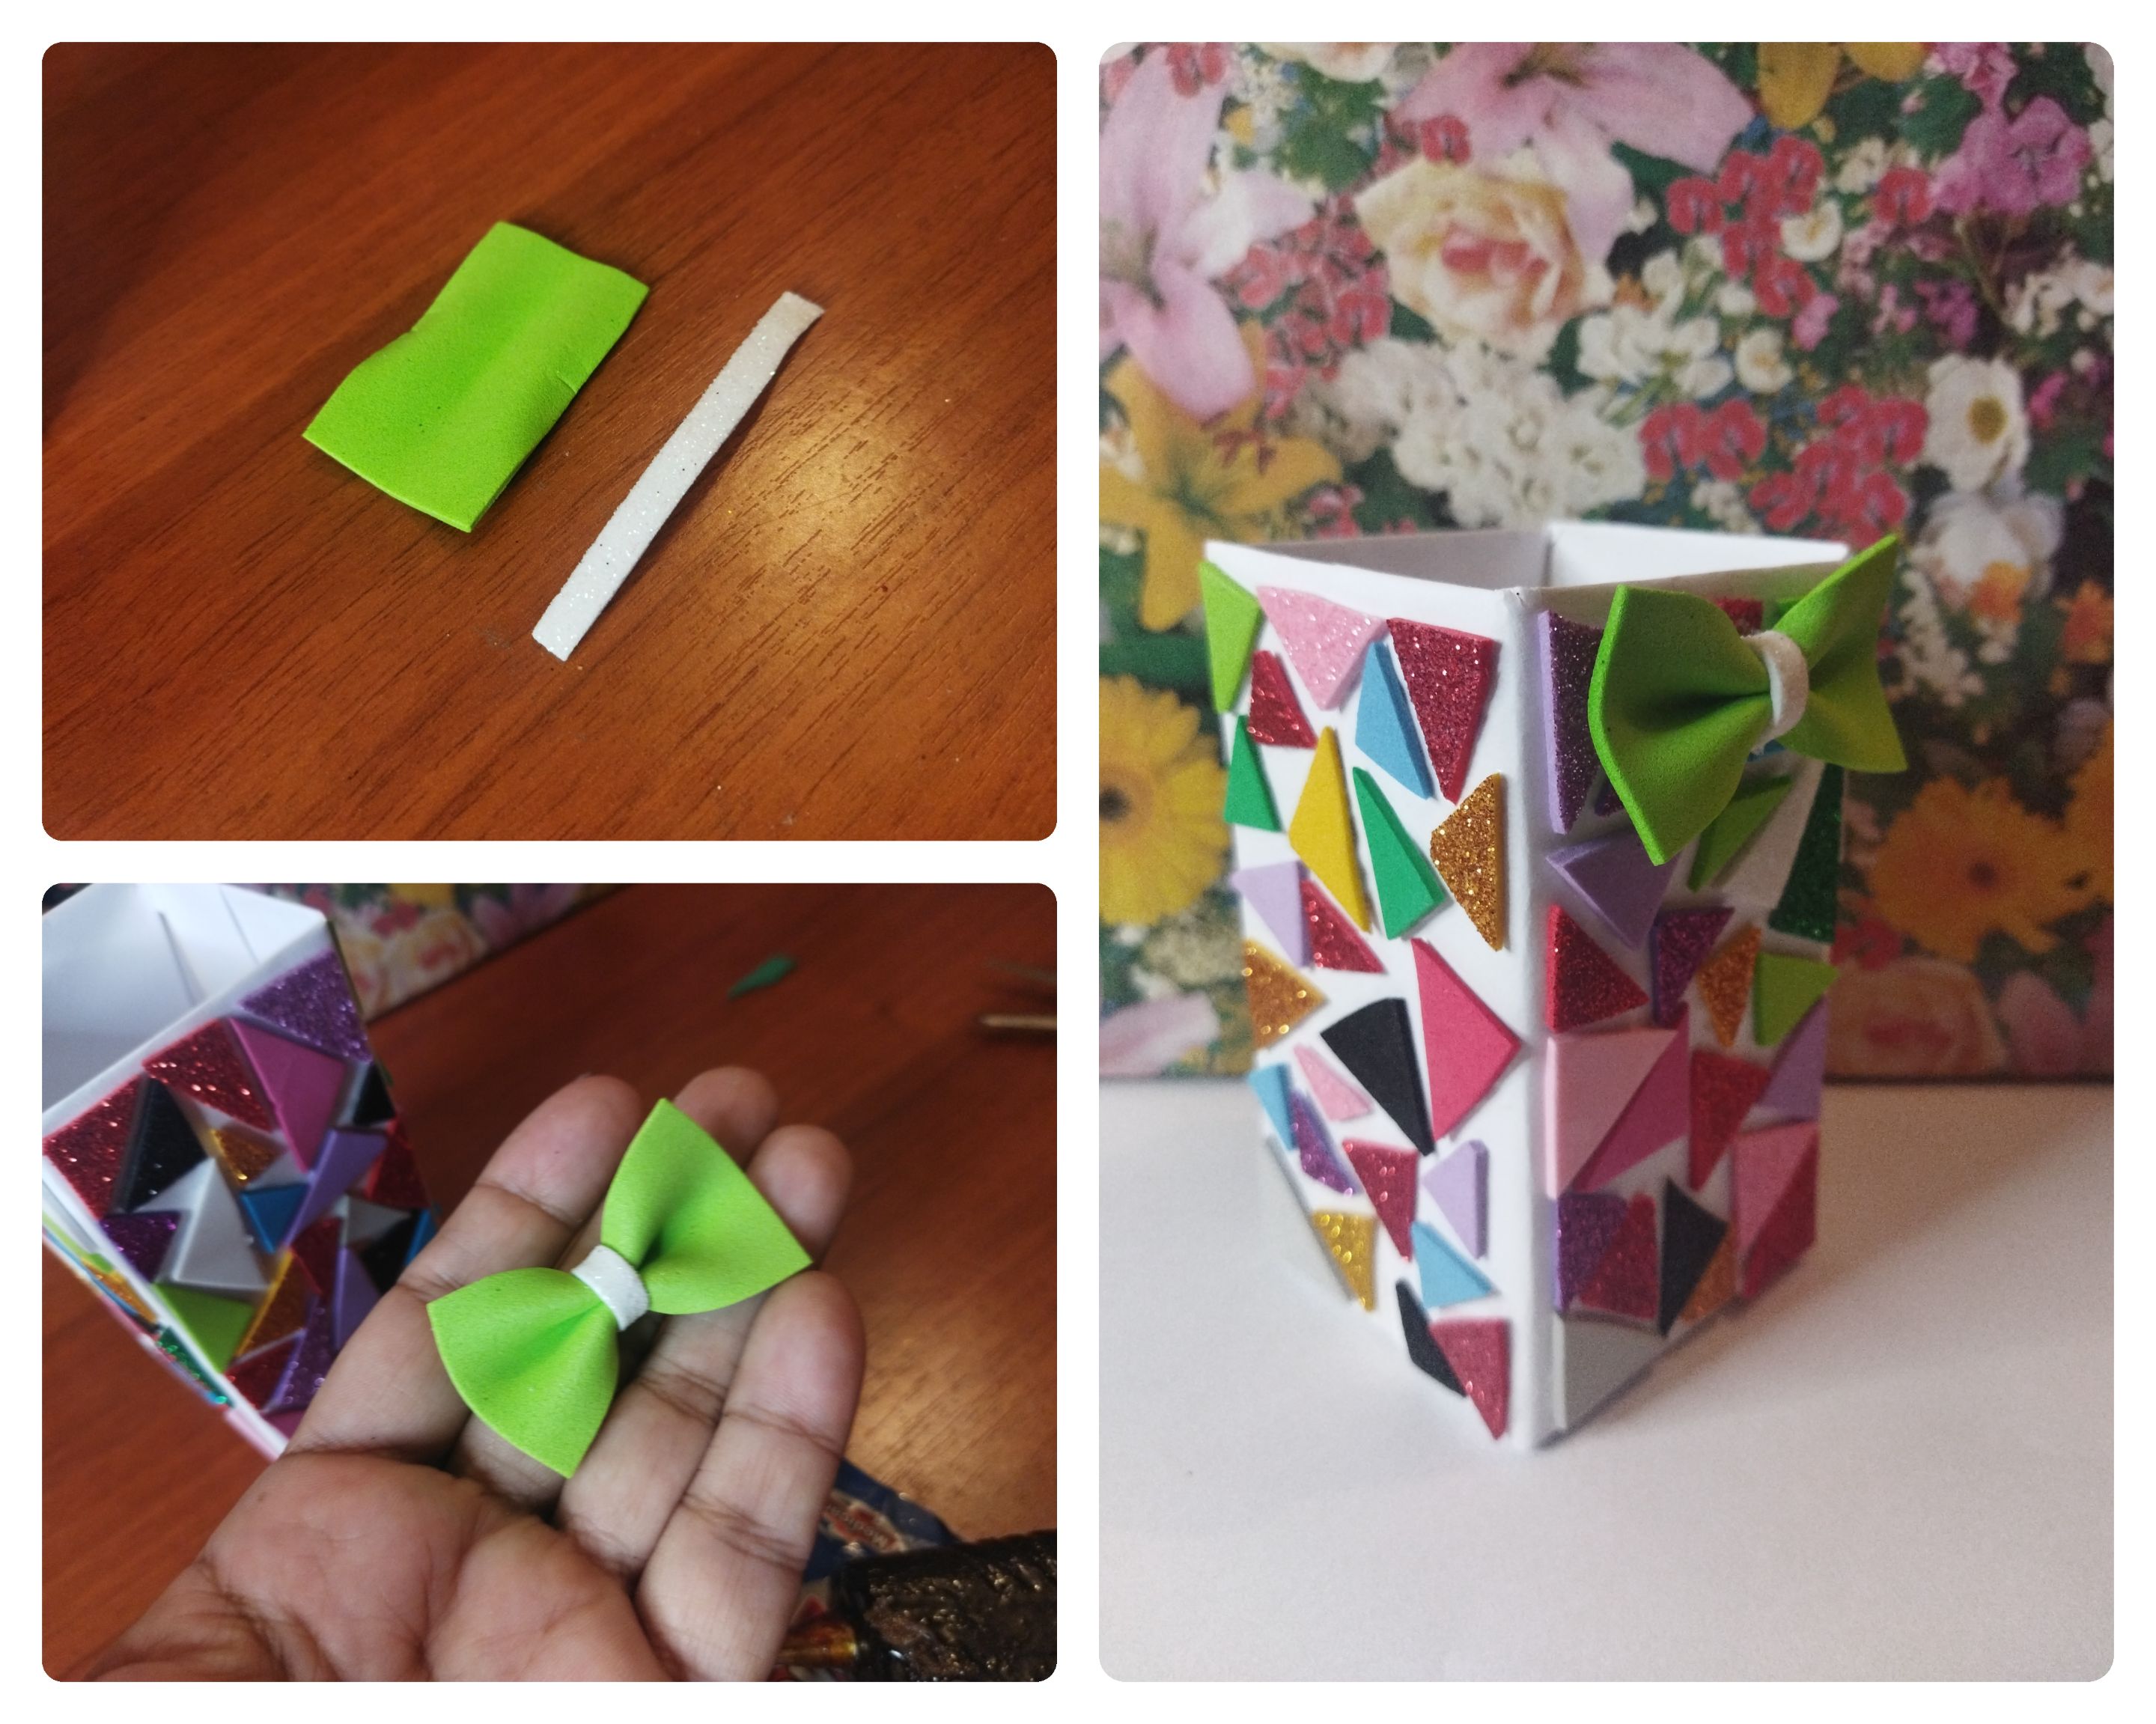
- Para finalizar este proyecto hice un lacito con foami también y se lo pegué al frente de la cajita. ¡Me gustó mucho el resultado!
- The third and fourth sides of the box were made with more confidence and I tried to make them look prettier than the previous ones. * To finish this project I also made a bow with foami and glued it to the front of the box. I really liked the result!
Espero que les guste. Ya quiero tener la caja grande para decorarla 😄 es muy entretenido hacer este proyecto. Me gusta mantenerme ocupada, es la mejor terapia contra el aburrimiento, el ocio y me ayuda a olvidar el dolor. Muchas gracias por su apoyo 🙂. Todas las fotos son de mi propiedad. Edité con Polish. Usé el traductor de Google. Hasta pronto.
Hope you like. I already want to give you the big box to decorate it 😄 it is very entertaining to do this project. I like to keep myself busy, it is the best therapy against boredom, leisure and it helps me to forget the pain. Thank you very much for your support 🙂. All photos are my property. I edited with Polish. I used Google translate. See you soon.
Show more
Tags :
Woo!
This creator can upvote comments using 3speak's stake today because they are a top performing creator!
Leave a quality comment relating to their content and you could receive an upvote
worth at least a dollar.
Their limit for today is $0!
Their limit for today is $0!

27 views
a year ago
$
13 views
11 months ago
$
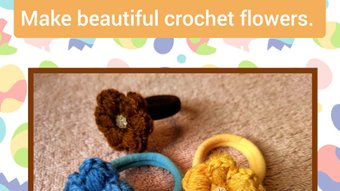
Promotional video: Make beautiful crochet flowers. // Vídeo promocional: Haz hermosas flores a croch
5 views
a year ago
$
13 views
a year ago
$
3 views
a year ago
$
More Videos

6 views
2 years ago
$
26 views
2 years ago
$

10 views
4 months ago
$
2 views
3 years ago
$

8 views
a year ago
$

0 views
3 weeks ago
$

50 views
a year ago
$
4 views
a year ago
$
9 views
a year ago
$

24 views
9 months ago
$

15 views
a year ago
$

38 views
a year ago
$

2 views
2 years ago
$

31 views
3 years ago
$

6 views
a year ago
$

4 views
4 months ago
$

6 views
2 years ago
$

4 views
a year ago
$

5 views
8 months ago
$

5 views
3 months ago
$
18 views
2 years ago
$

4 views
5 days ago
$
32 views
a year ago
$

19 views
3 weeks ago
$
Comments:
Reply:
To comment on this video please connect a HIVE account to your profile: Connect HIVE Account