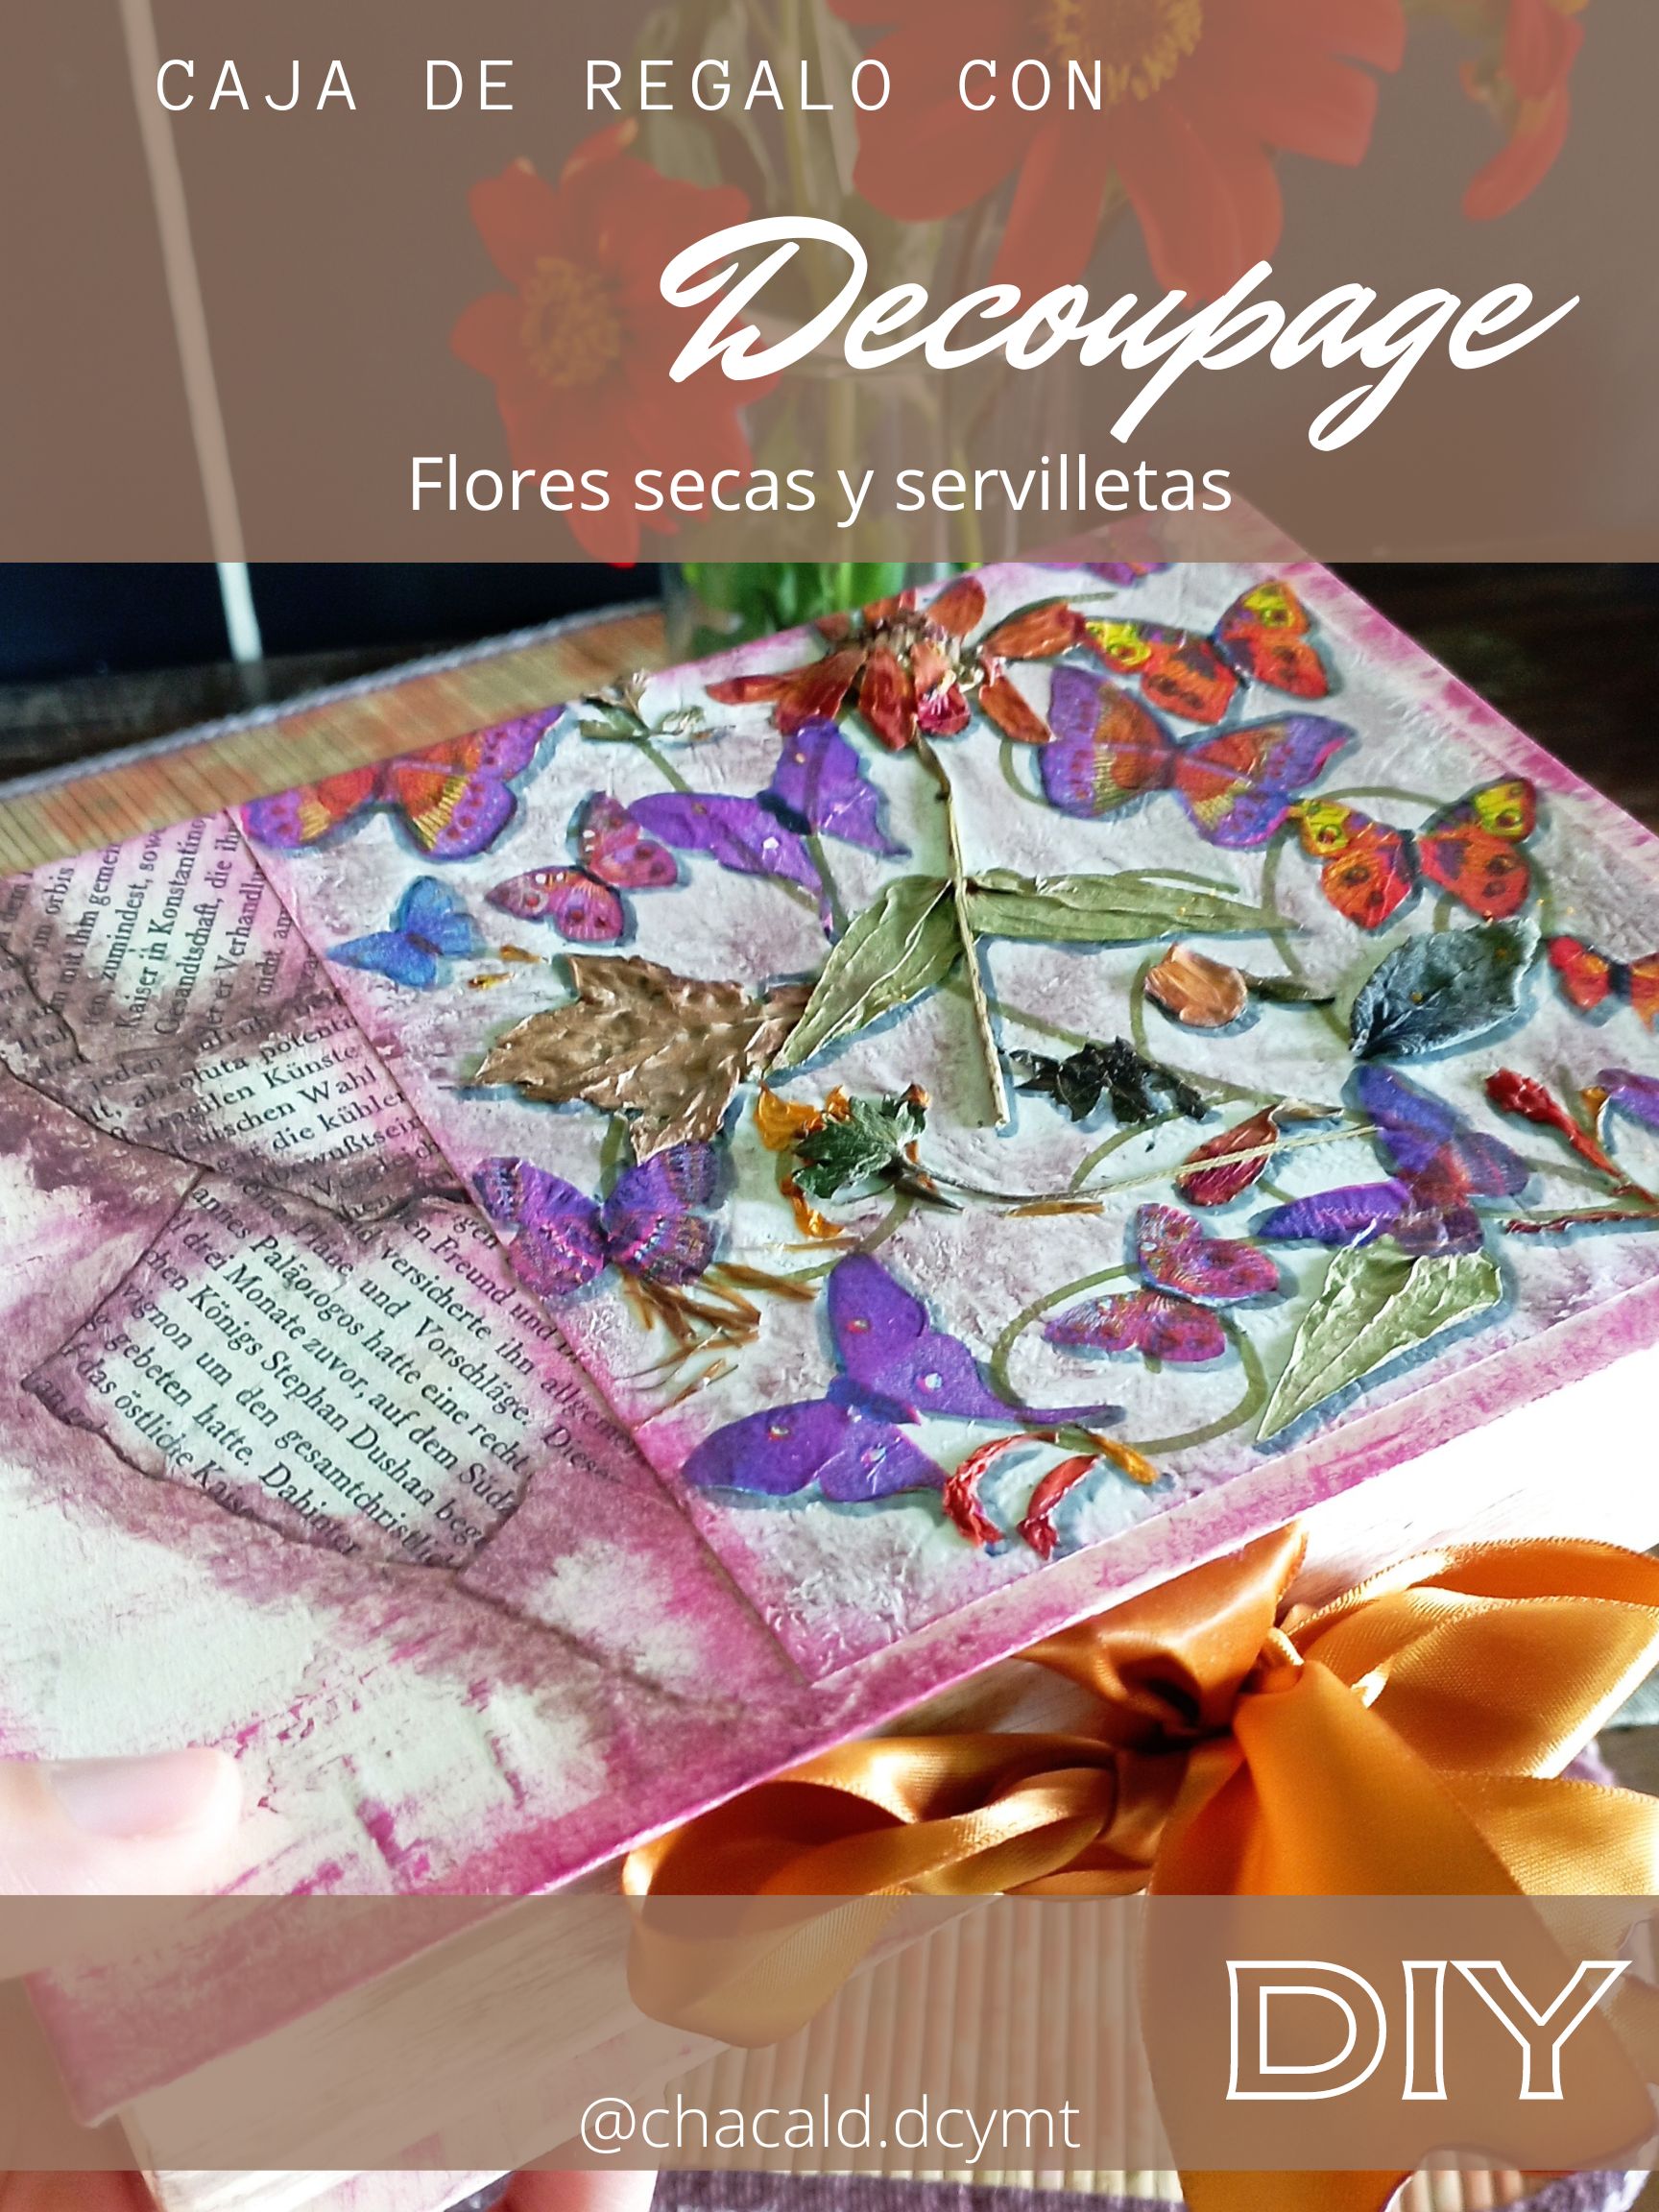
Gift box with decoupage, napkins and dried flowers [Esp-Eng]
8
About :
¡Saludos a todos los amantes de las artes manuales! Hoy quiero sumarme al concurso de decoupage propuesto por esta comunidad que siento como mi hogar. Para esta oportunidad, voy a realizar una tipo libro, que está muy de moda para dar regalos y pienso que combina con cualquier cosa que pensemos de obsequiar ya que su diseño es muy versátil y para aplicar la técnica de decoupage, seleccioné mariposas de una servilleta y flores secas para darle un toque primaveral. Acompáñenme en este paso a paso.
Greetings to all lovers of handmade crafts! Today I want to join the decoupage contest proposed by this community that I feel like my home. For this opportunity, I am going to make a book, which is very fashionable for gift giving and I think it combines with anything we think of giving as its design is very versatile and to apply the decoupage technique, I selected butterflies from a napkin and dried flowers to give it a springtime touch. Join me in this step by step.
Para este trabajo necesitaremos:
Cartón doble faz
Cartulina (yo utilicé una carpeta amarilla para reciclar)
Cartulina texturizada
Tijera
Pegamento blanco escolar
Pinceles
Acuarela
Pintura acrílica color cerezo y marrón
Marcador color dorado y negro
Servilleta de mariposas
Flores secas
Hojas de libro con textos (utilicé un libro en un idioma que no entiendo y que utilizo para manualidades)
1/2 metro de Cinta de tela gruesa
For this job we will need:
Double sided cardboard
Cardboard (I used a yellow folder to recycle)
Textured cardboard
Scissors
White school glue
Brushes
Watercolor
Cherry and brown acrylic paint
Gold and black marker
Butterfly napkin
Dried flowers
Book pages with text (I used a book in a language I don't understand and that I use for crafts)
1/2 meter of thick fabric ribbon
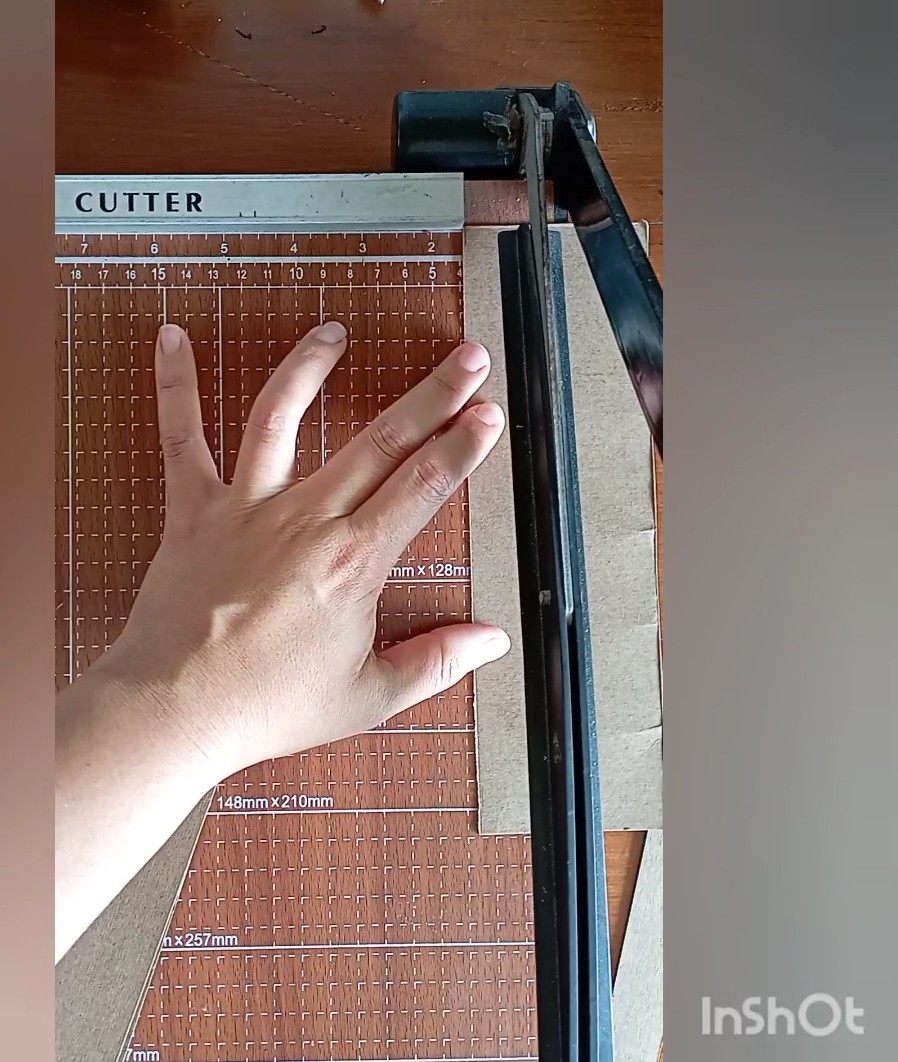
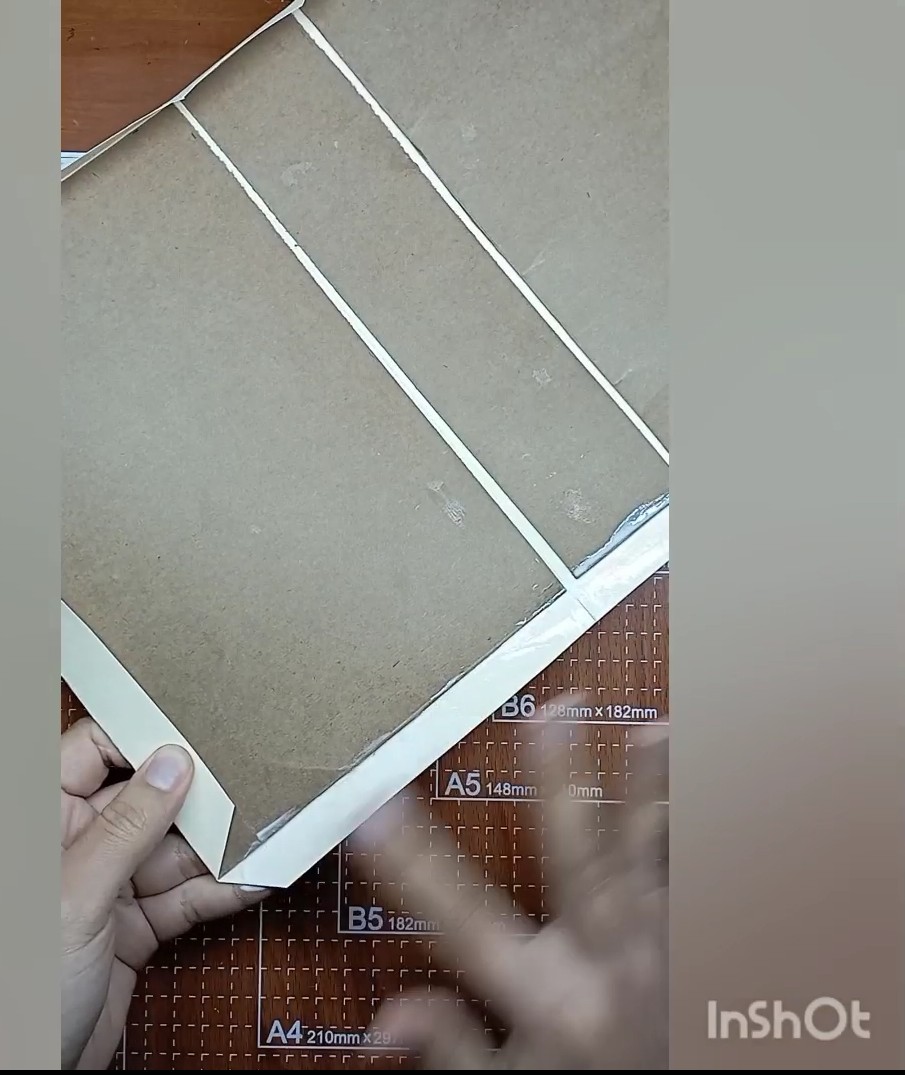
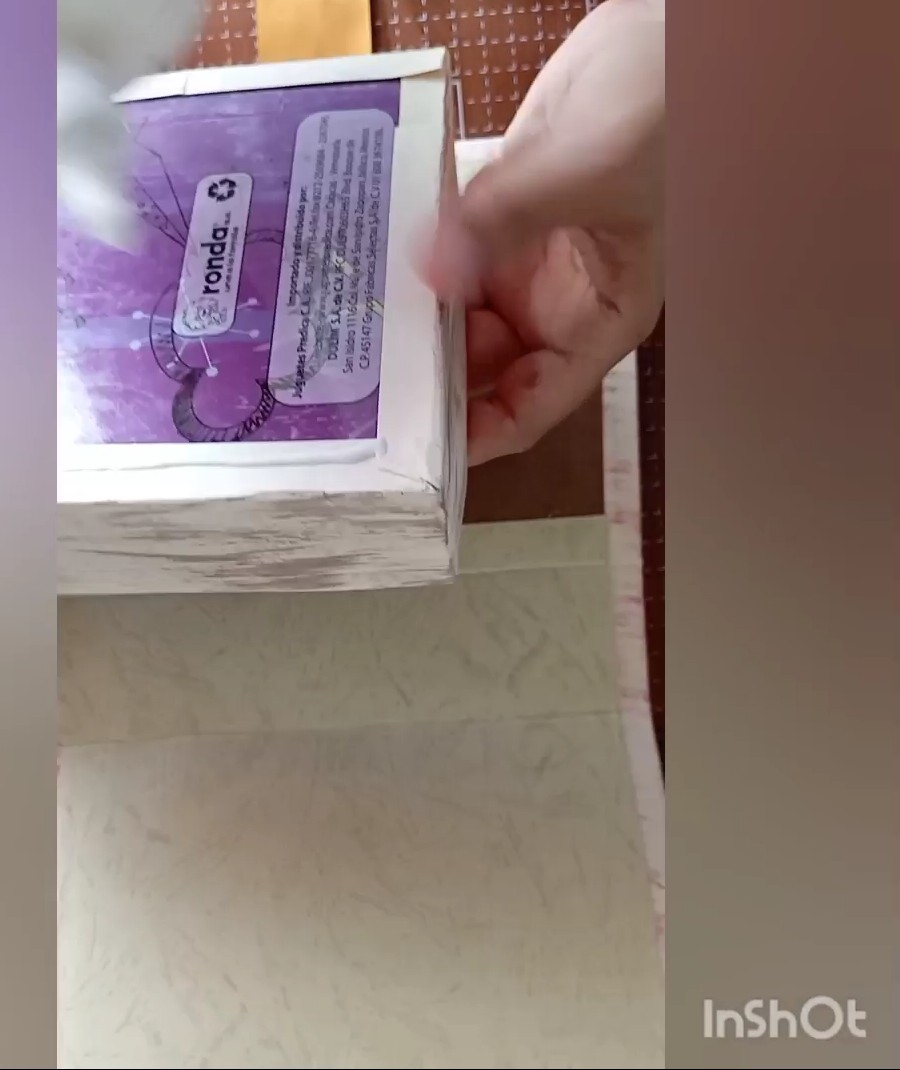
Una vez que tenemos todos los materiales, vamos a iniciar con el armado de la caja. El cuerpo de esta caja es muy sencillo, consiste en 3 partes que serán la 2 rectángulos de 15 centímetros de ancho por 22 centímetros de largo y un rectángulo de 5.5 centímetros de ancho por 22 centímetros de largo. Estas piezas las corté en el cartón doble faz que era de una carpeta antigua que ya no utilizaba.
Once we have all the materials, let's start with the assembly of the box. The body of this box is very simple, it consists of 3 parts that will be the 2 rectangles of 15 centimeters wide by 22 centimeters long and a rectangle of 5.5 centimeters wide by 22 centimeters long. I cut these pieces on the double-sided cardboard that was from an old folder that I no longer used.
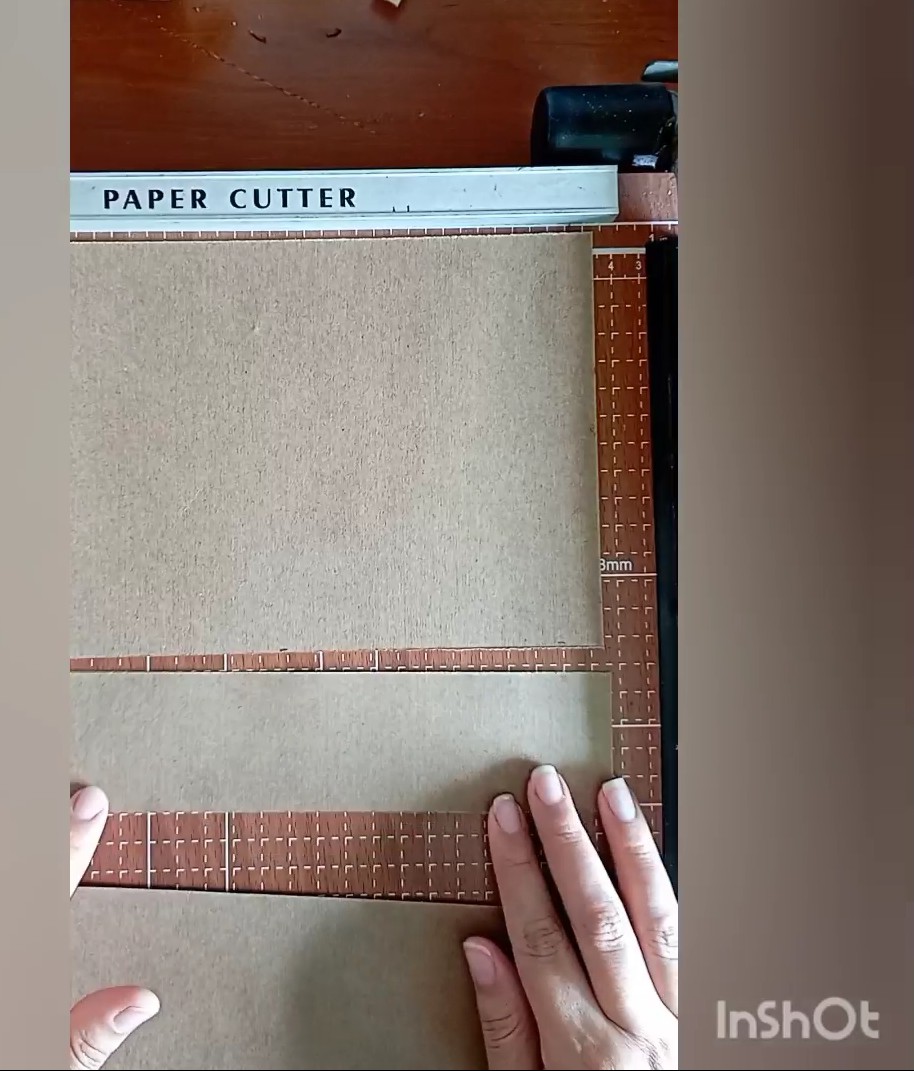
En una cartulina sencilla, yo utilicé una carpeta amarilla de reciclaje, vamos a pegar los 3 rectángulos dejando 3 milímetros de distancia.
On a simple cardboard, I used a yellow recycle folder, we are going to glue the 3 rectangles leaving 3 millimeters of distance.

Aplicamos suficiente pegamento especialmente en los bordes y pegamos. Deben quedar de la siguiente manera:
Apply enough glue especially on the edges and glue. They should look like this:
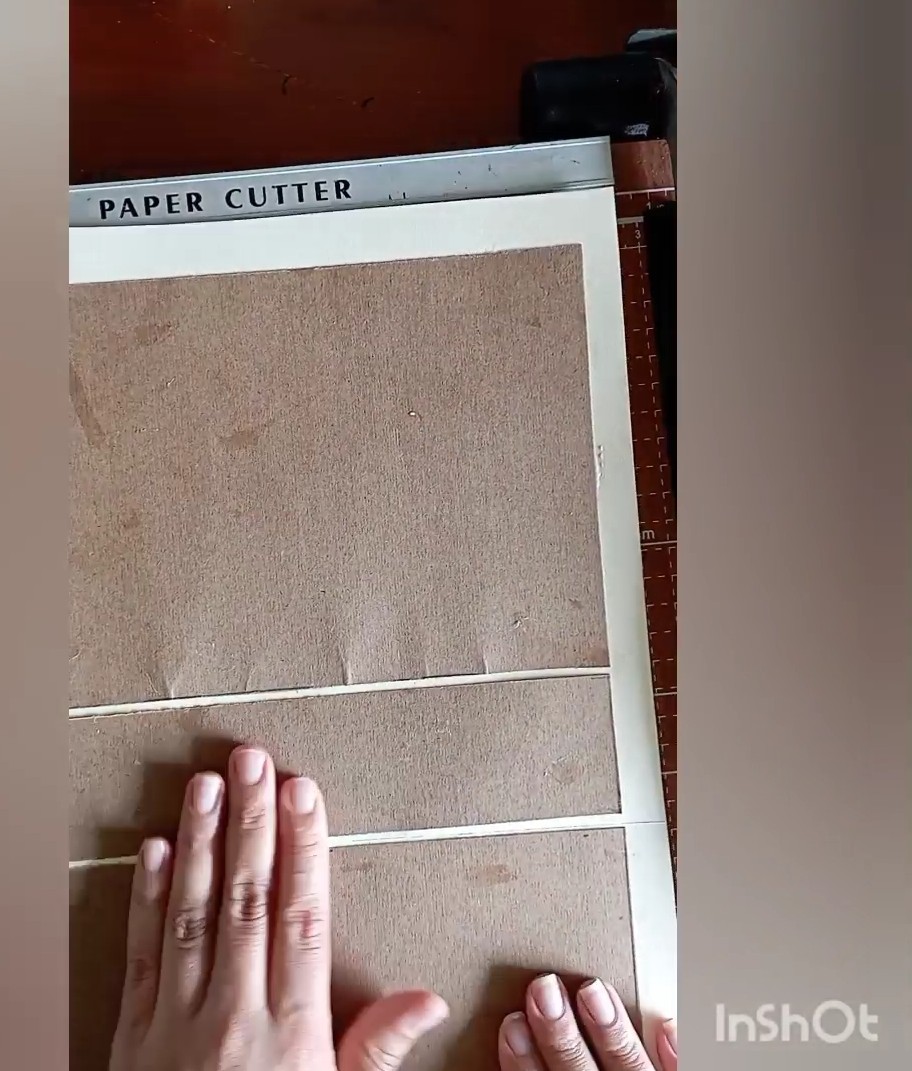
Cortamos el excedente de la carpeta y dejamos un borde de 1 centímetro por cada lado.
Cut the excess of the folder and leave a 1 cm border on each side.
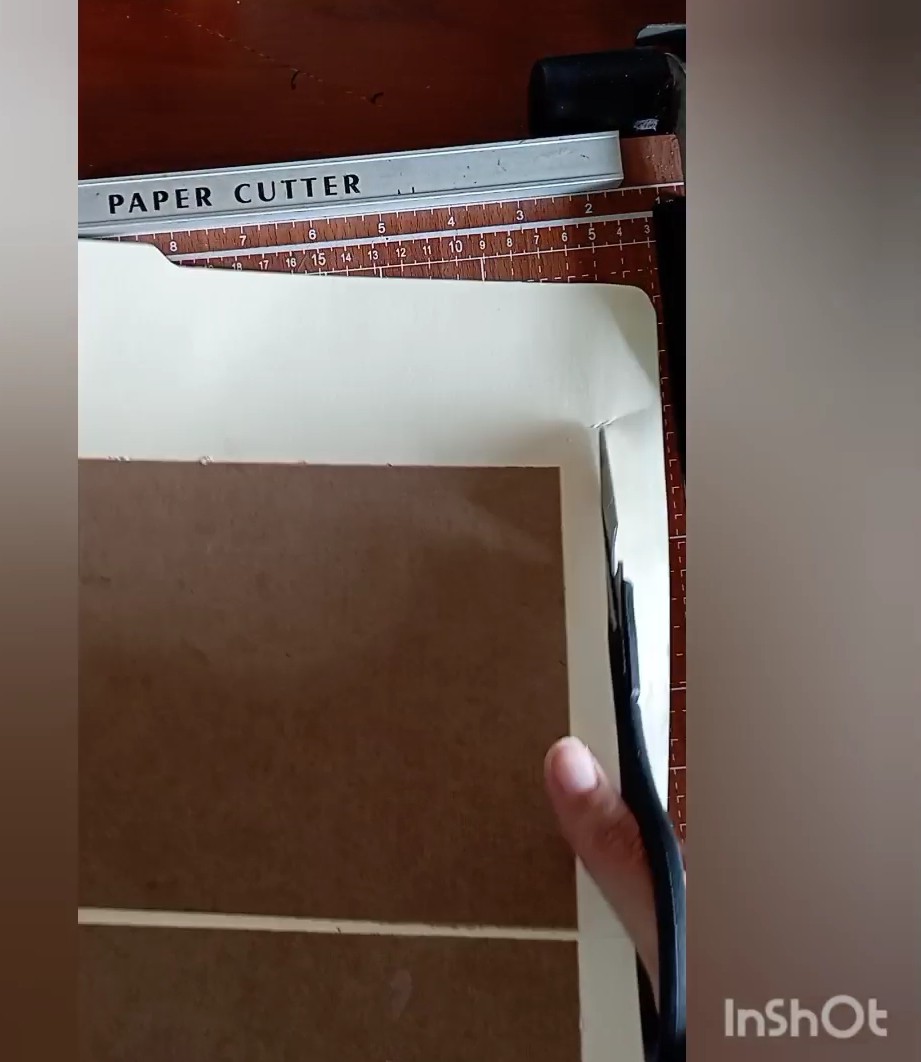
Cortamos las esquinas. Con la tijera cortamos la cartulina retirando un triángulo de cada esquina.
Cut the corners. With the scissors we cut the cardboard removing a triangle from each corner.
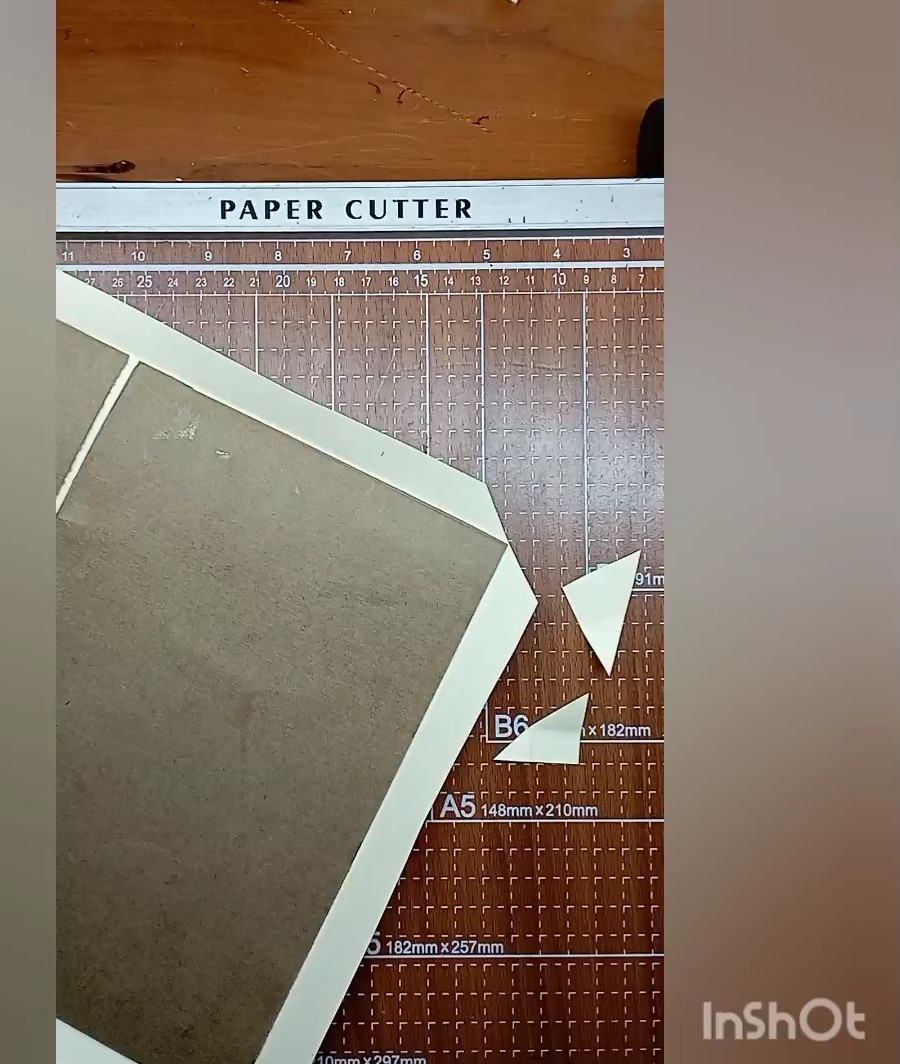
Colocamos pegamento en el borde de la cartulina y pegamos con ayuda de la parte de atrás de la tijera para que no queden pliegues.
Place glue on the edge of the cardboard and glue with the back of the scissors so that there are no creases.
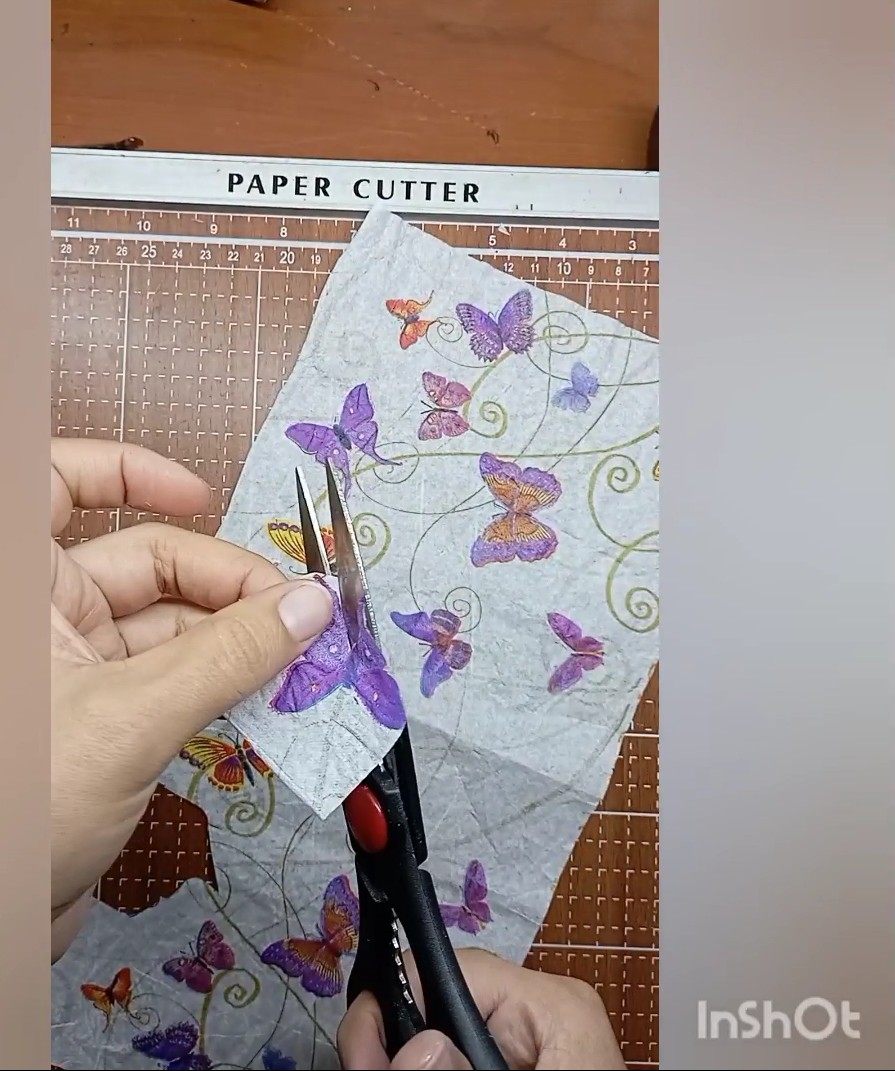
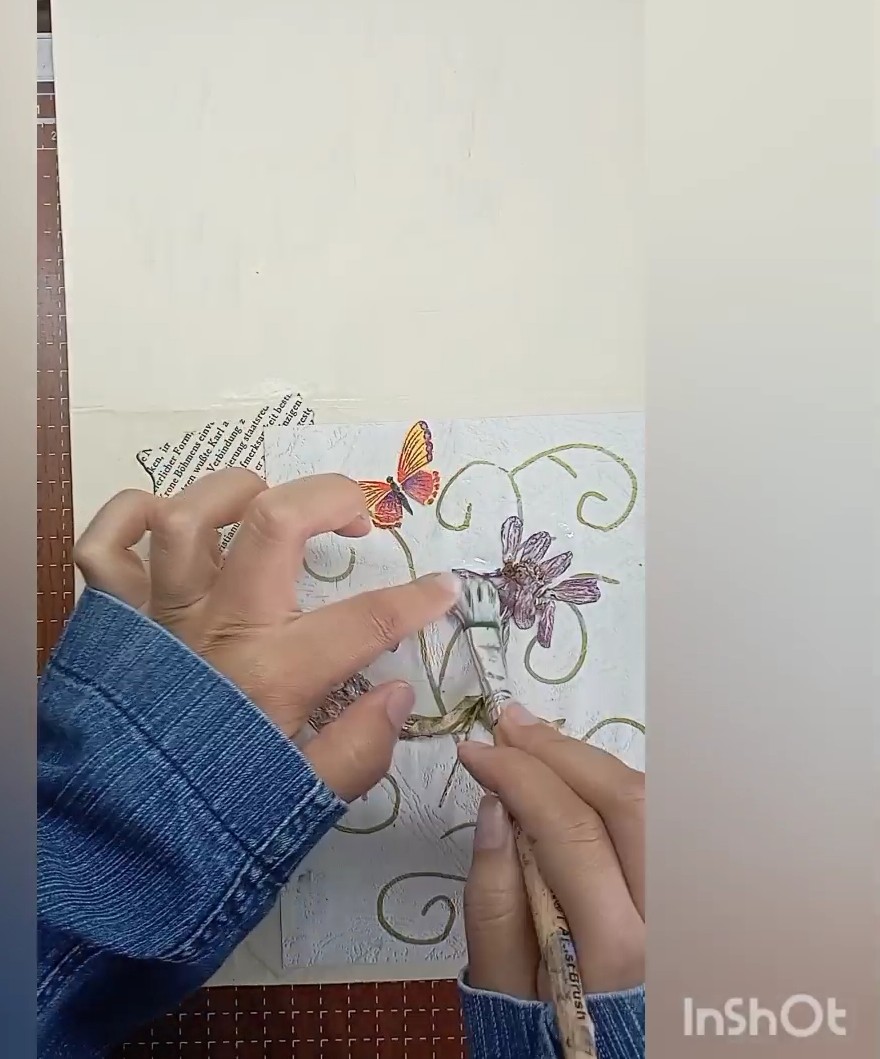
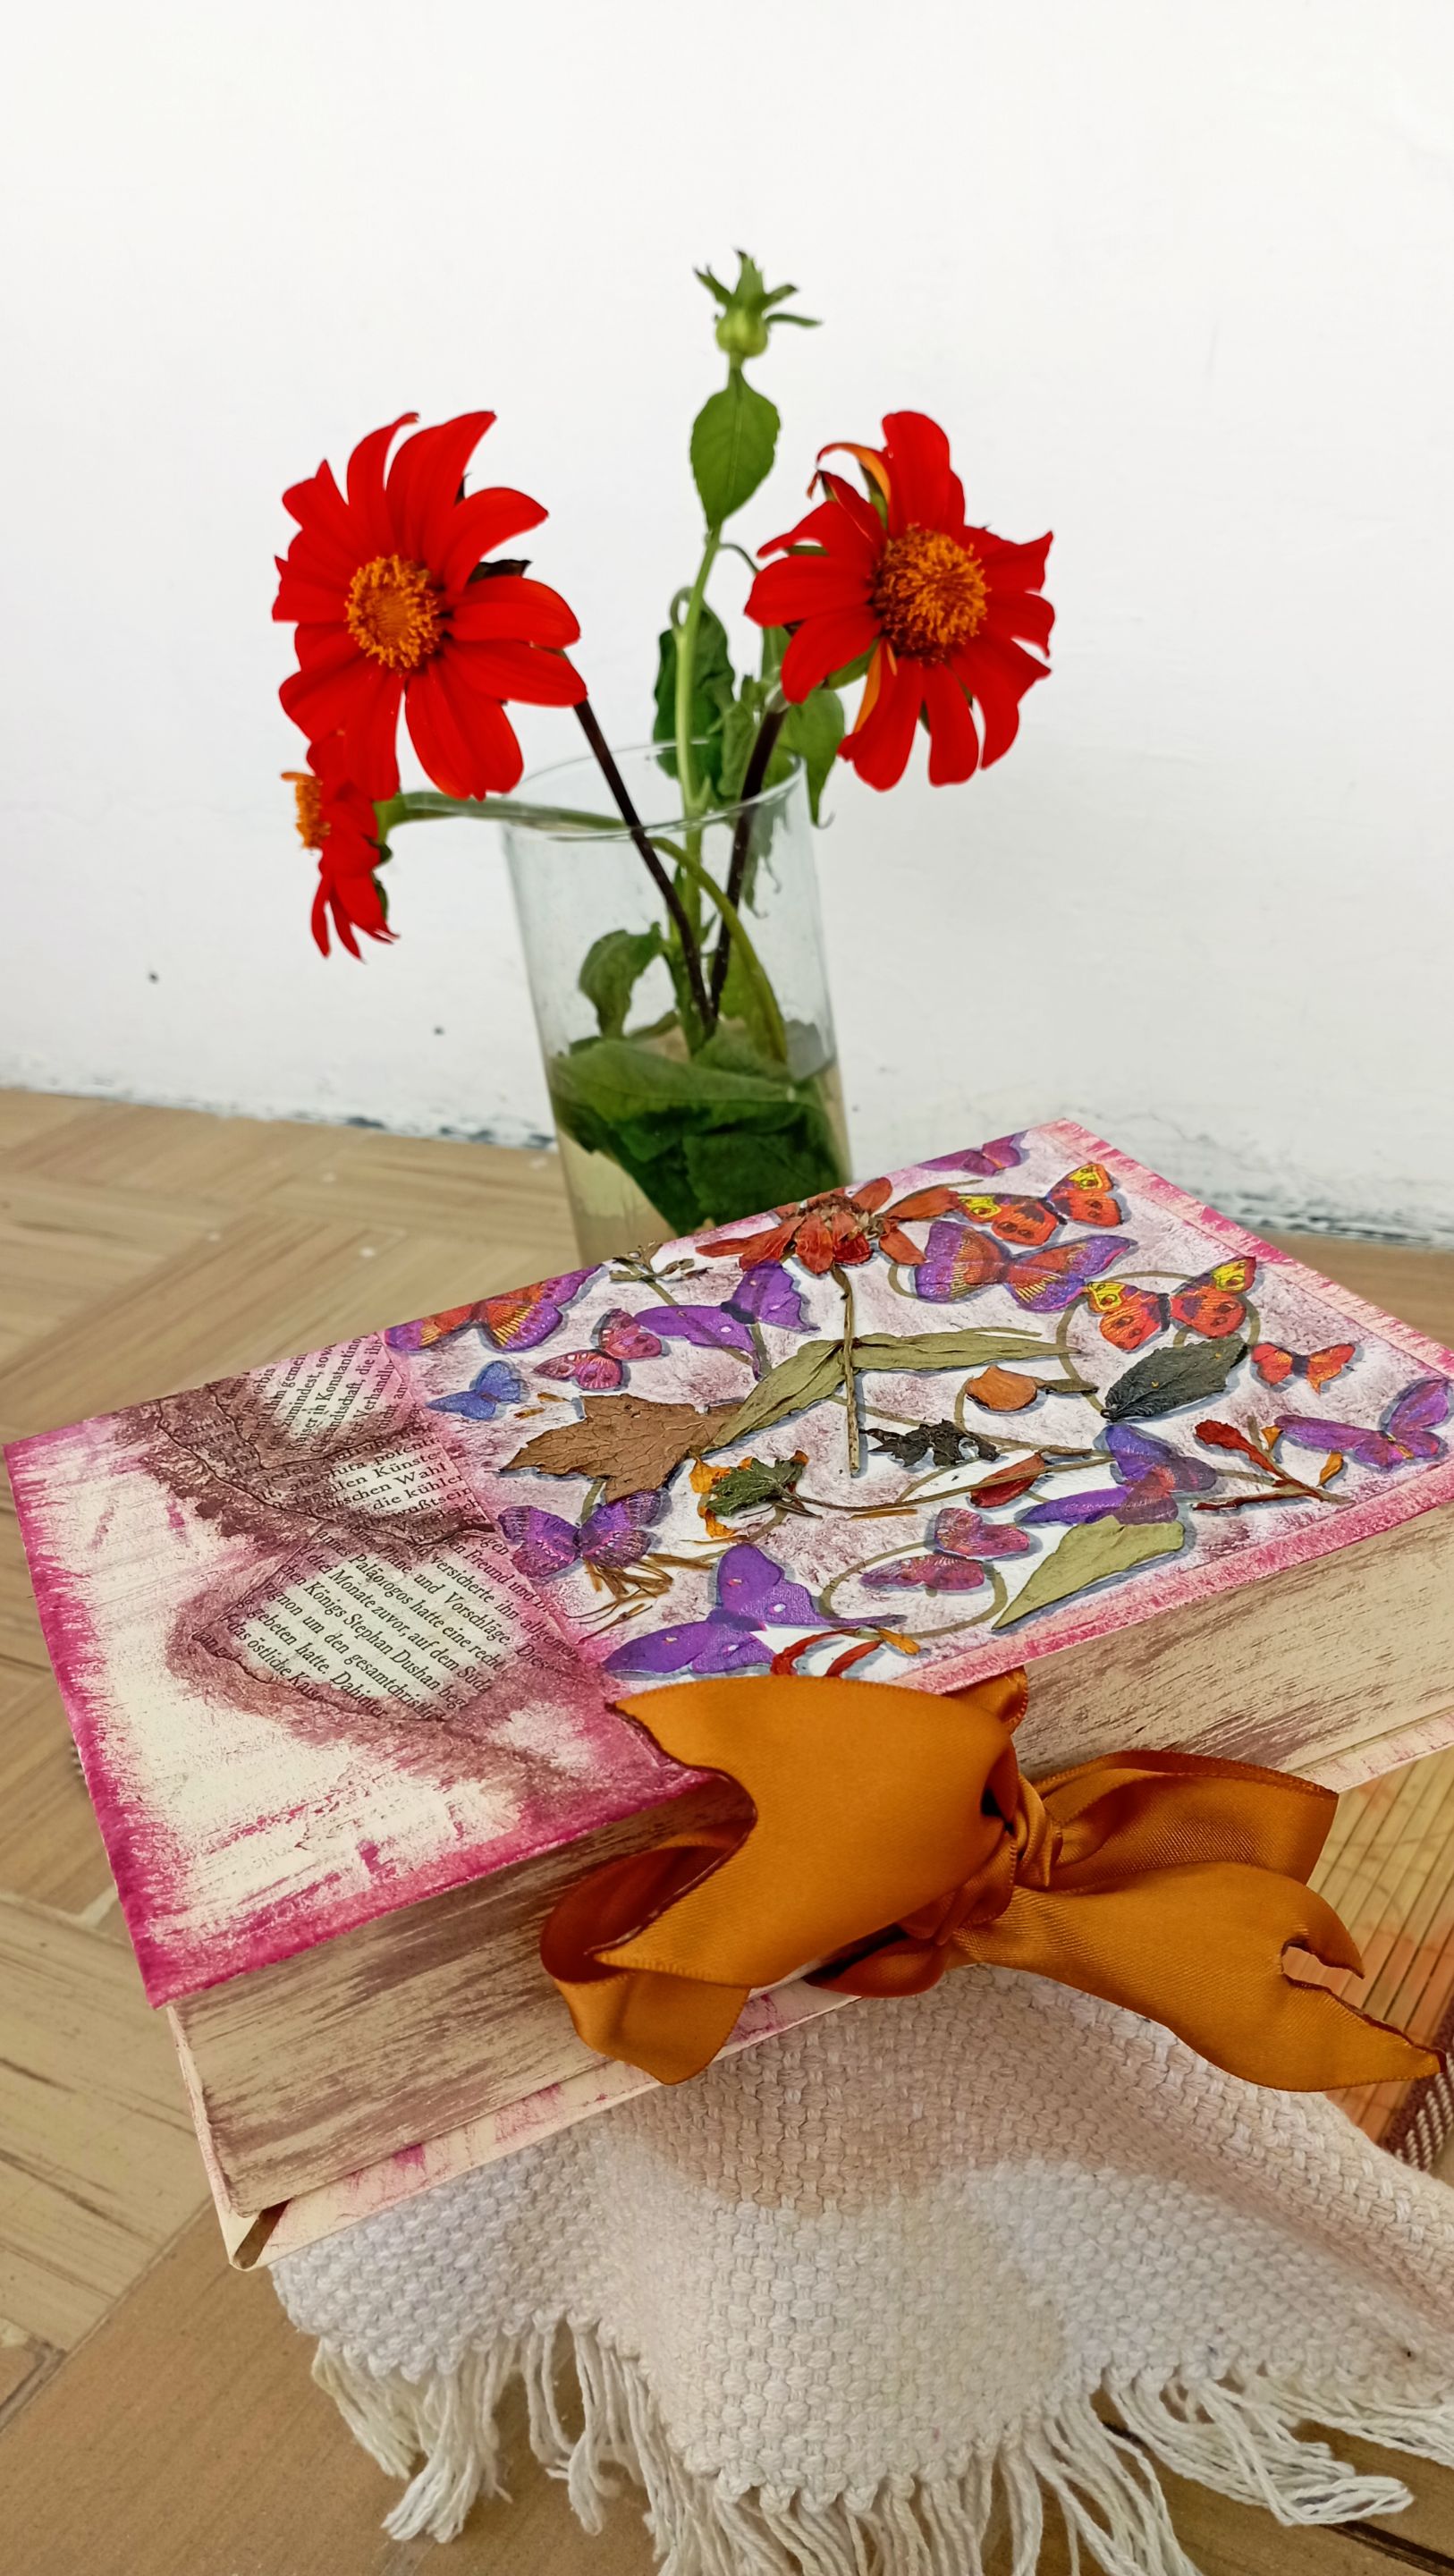
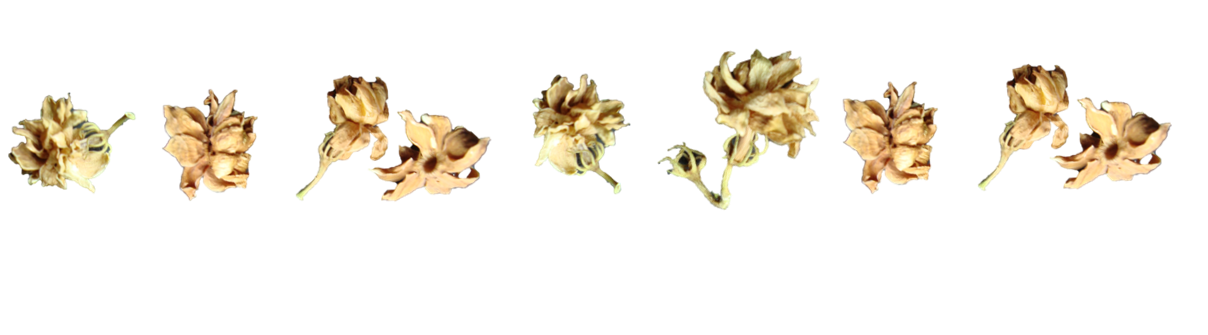
Para decorar la caja tipo libro, vamos a tomar una servilleta. Yo utilicé una con diseño de mariposas, pero tenía unas flores secas y quise colocarlas también. Para utilizar las flores las aplastamos con un rodillo y dejamos que se sequen varios días hasta que tengan una textura tipo papel.
Retiramos las capas blancas de la servilleta y recortamos las mariposas.
To decorate the book box, we are going to take a napkin. I used one with a butterfly design, but I had some dried flowers and wanted to use them as well. To use the flowers we flatten them with a rolling pin and let them dry for several days until they have a paper-like texture.
Remove the white layers from the napkin and cut out the butterflies.
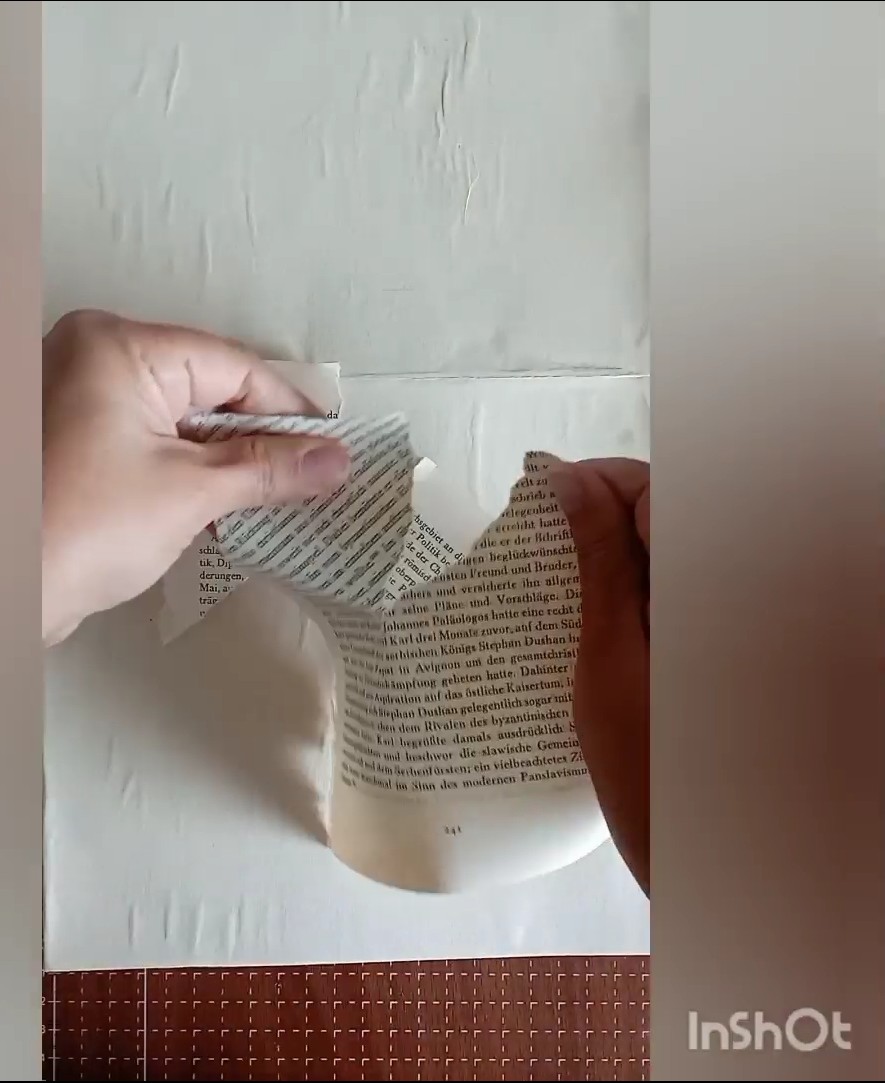
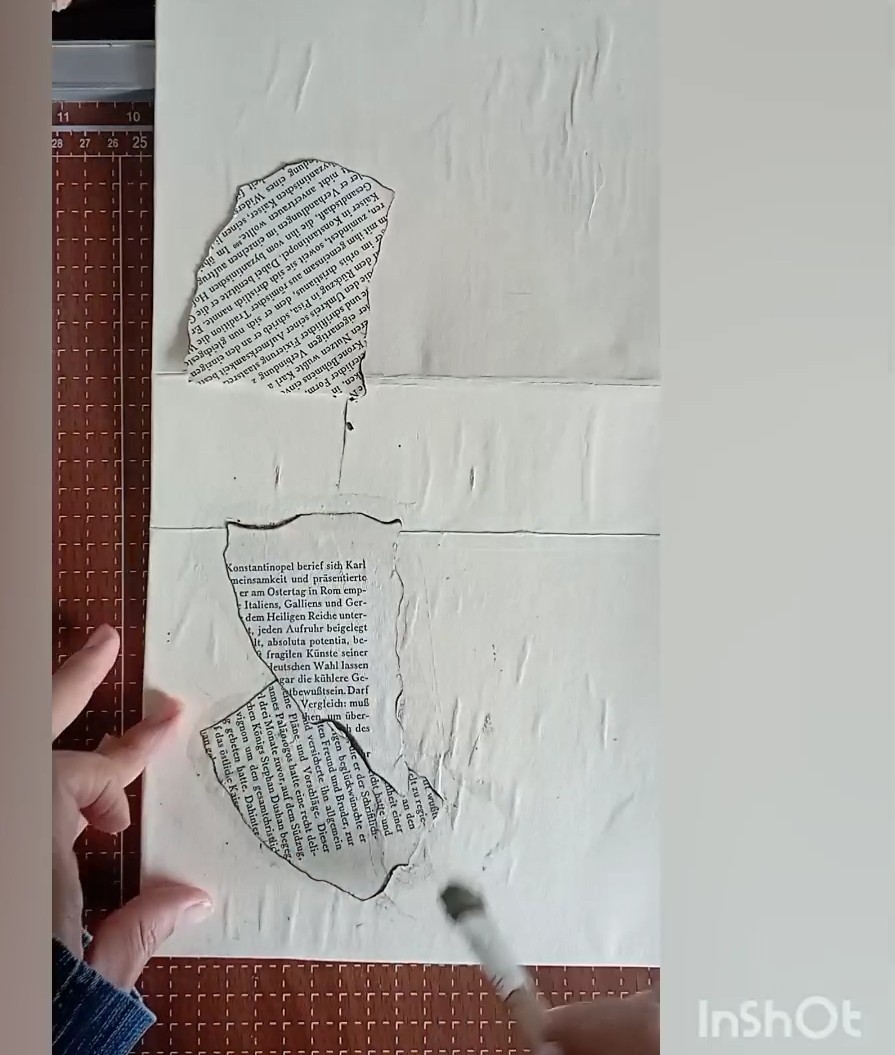
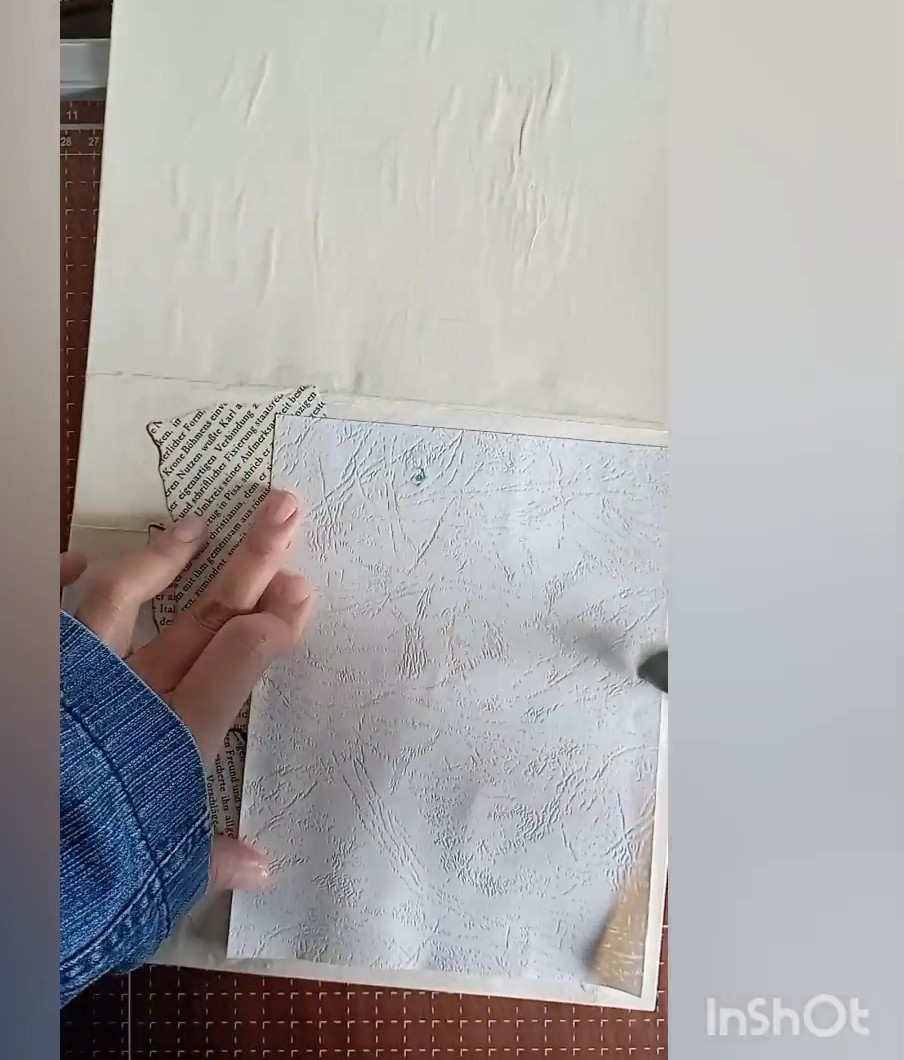
Rasgamos las hojas del libro y con un encendedor, vamos a quemar las puntas. Para acomodar los trozos de hoja quemados al fondo. Pegamos una cartulina texturizada sobre las hojas del libro y esa será el área para pegar las flores y mariposas.
We tear the leaves of the book and with a lighter, we are going to burn the ends. To accommodate the burned pieces of leaf at the bottom. We glue a textured cardboard over the leaves of the book and that will be the area to glue the flowers and butterflies.
 |  |
|---|
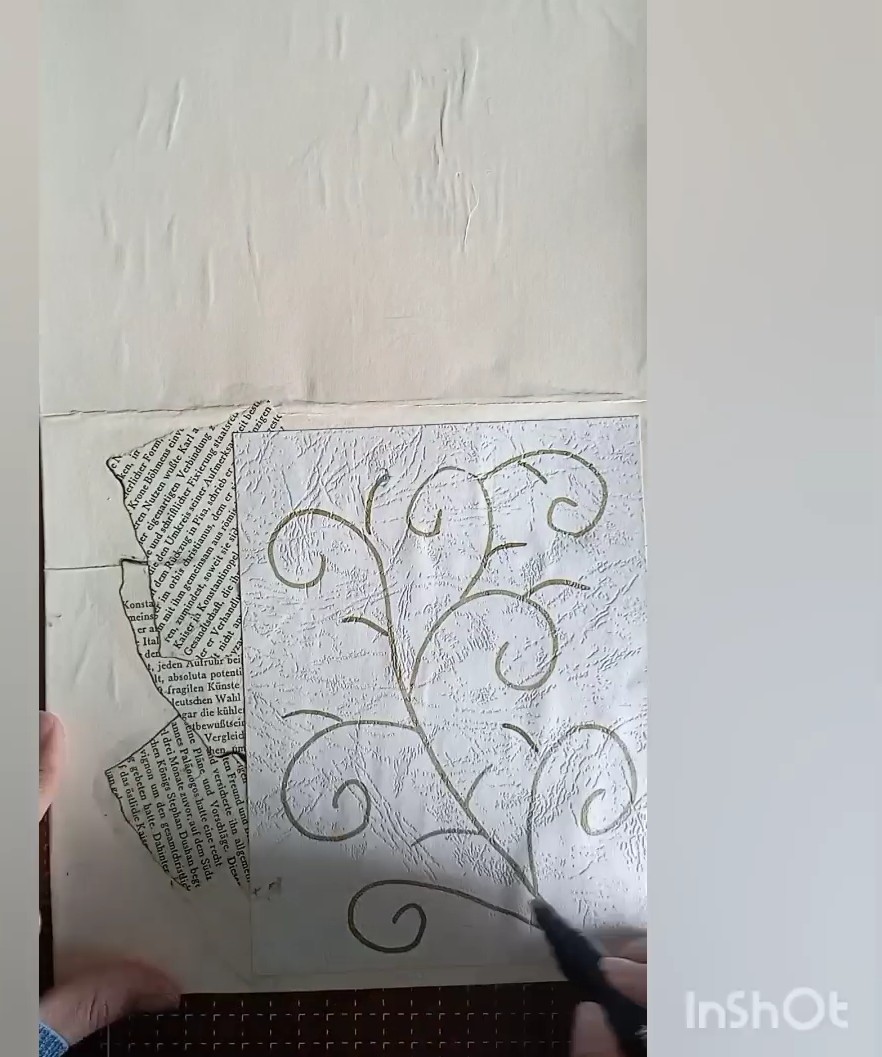
Yo quise seguir el diseño de la servilleta, así que con el marcador dorado hice unos suecos y comencé a pegar las mariposas.
I wanted to follow the napkin design, so with the gold marker I made some swedes and started gluing on the butterflies.
 |  |
|---|
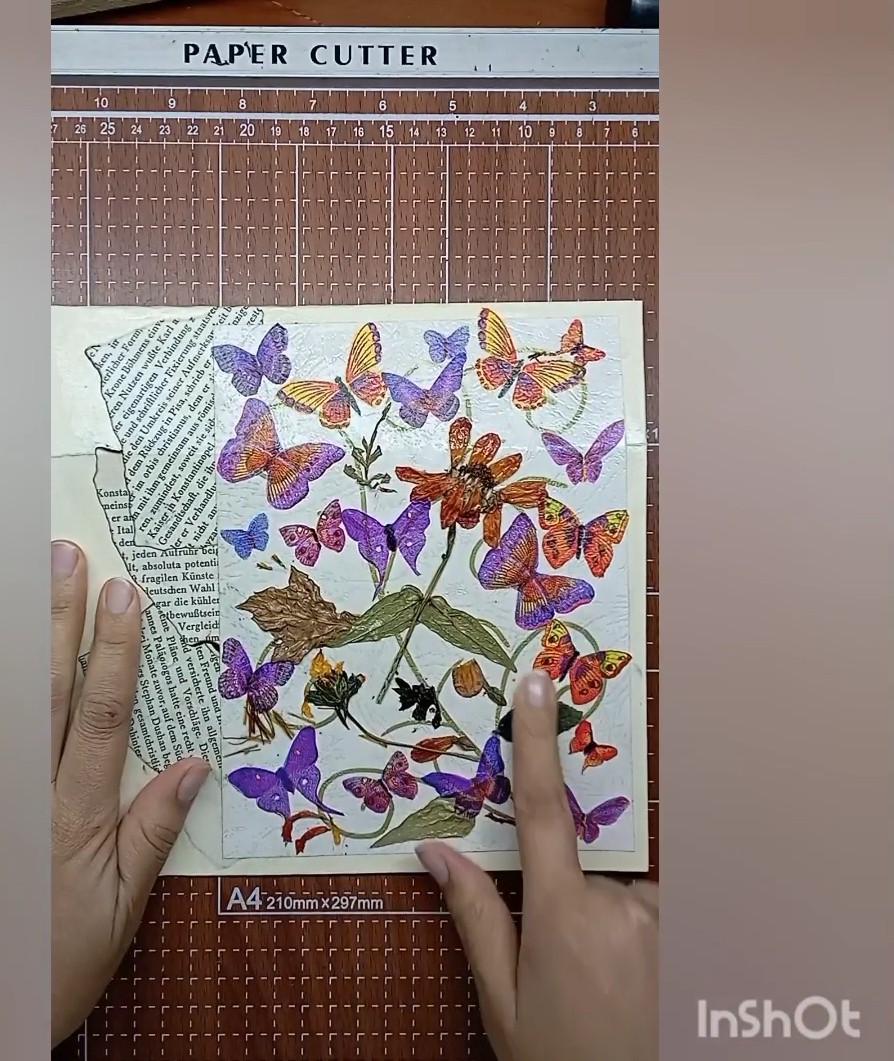
Una vez que terminamos de pegar las mariposas y flores, vamos a dejar secar por 8 horas. Luego con el marcador punta pincel negro, vamos a repasar cada figura para darle sombra. Y con un pincel viejo y la pintura acrílica al seco, vamos a envejecer toda la caja.
Once we finish gluing the butterflies and flowers, we will let them dry for 8 hours. Then with the black brush tip marker, we are going to go over each figure to give it a shadow. And with an old brush and dry acrylic paint, we will age the whole box.
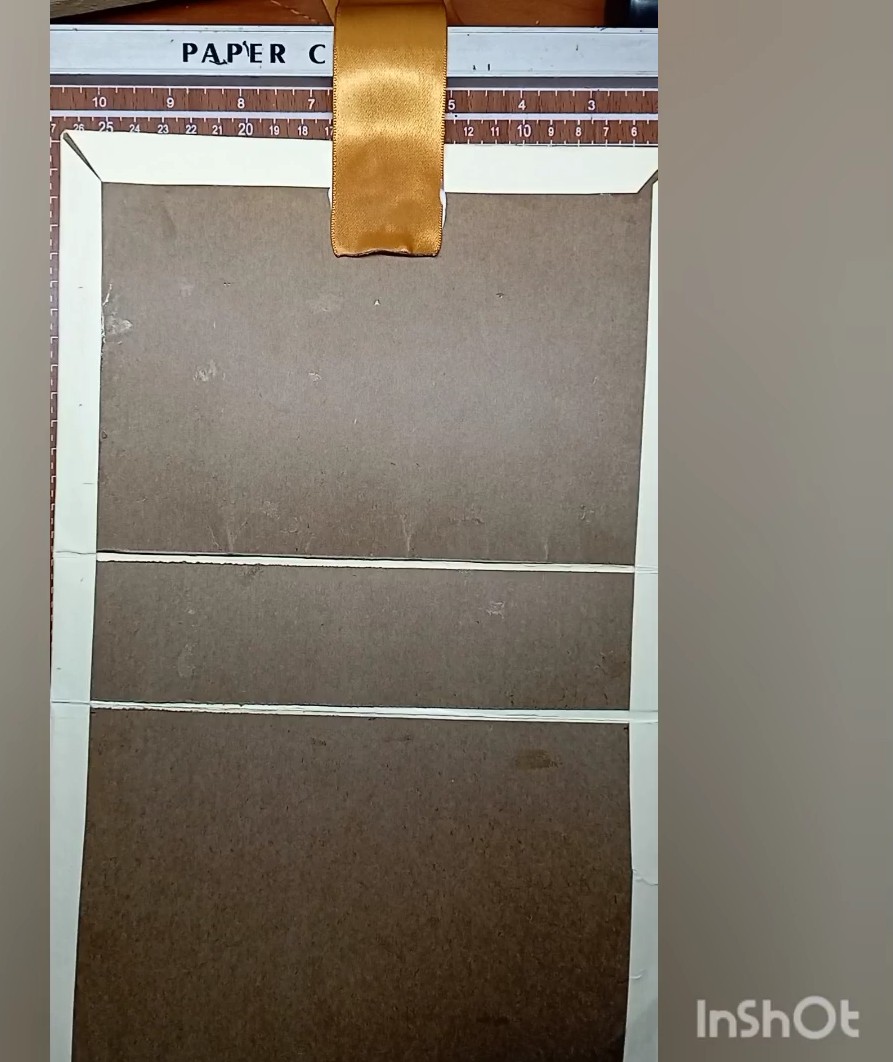
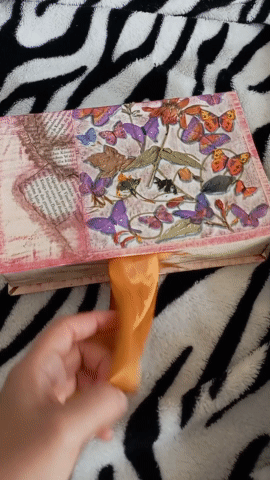
Tomamos la cinta de tela y cortamos a la mitad, es decir en 2 trozos de 25 centímetros, pegamos por la parte interior de la caja para que nos sirvan para cerrar la caja.
We take the fabric ribbon and cut it in half, that is to say in 2 pieces of 25 centimeters, we glue them on the inside of the box so that they serve to close the box.
 |  |
|---|
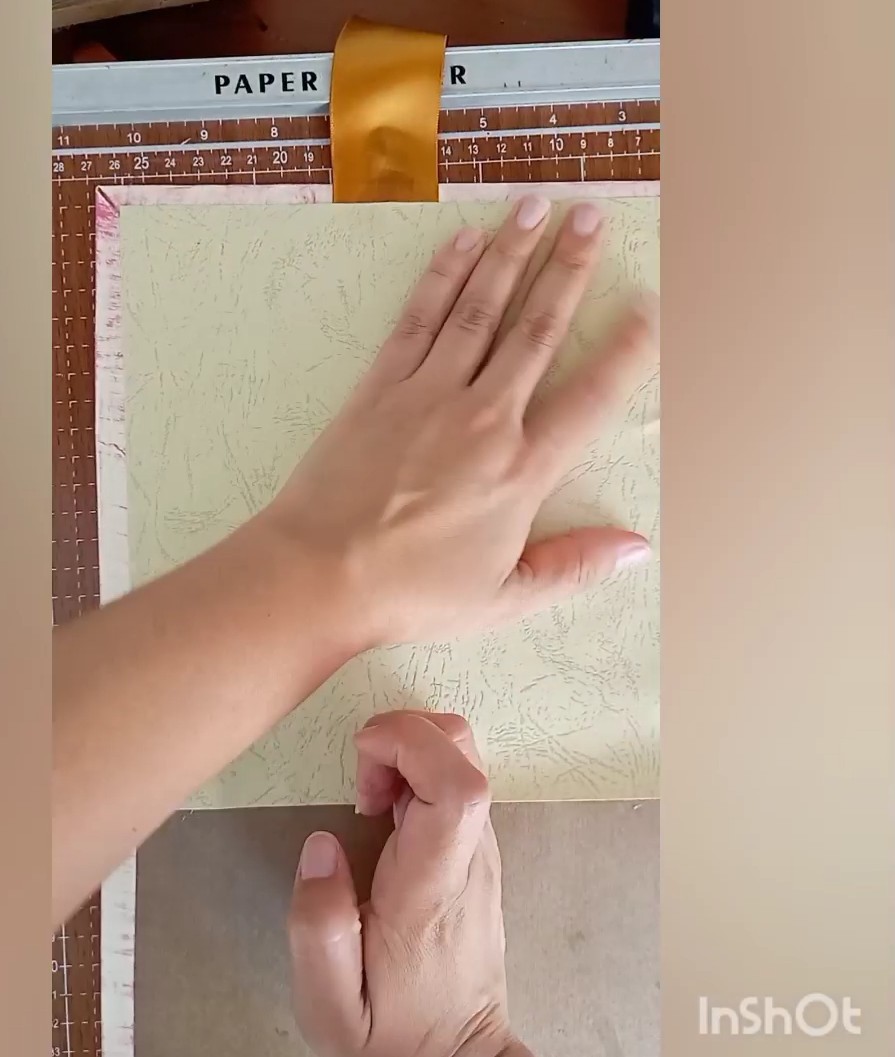
Cubrimos el interior de la caja con una cartulina texturizada. Servirá para tapar la cinta y le dará un mejor acabado tipo libro.
Cover the inside of the box with a textured cardboard. It will serve to cover the ribbon and give it a better book-like finish.
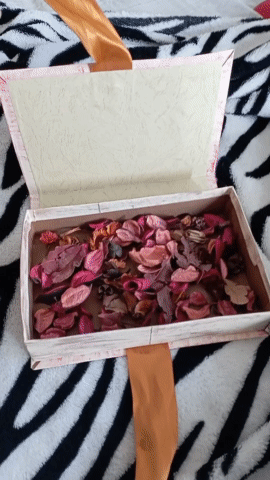
Para la parte inferior de la caja que es donde va el contenido. Vamos a hacer un rectángulo de 14 por 21 centímetros, es decir reducimos 1 centímetro de cada lado para que quede dentro de la carátula de la caja libro. Y necesitamos una pestaña de 5 centímetros de largo por todo el rededor del rectángulo. Para finalizar pegamos esta caja dentro de la tapa que hemos decorado y está listo nuestro trabajo.
For the lower part of the box, which is where the content goes. We are going to make a rectangle of 14 by 21 centimeters, that is, we reduce 1 centimeter on each side to fit inside the cover of the book box. And we need a tab of 5 centimeters long all around the rectangle. Finally, we glue this box inside the cover that we have decorated and our work is ready.
Este es todo el proceso para la elaboración de esta preciosa caja con decoupage de servilletas y flores secas, les invito a ver el video del paso a paso. Espero les guste mi participación y nos vemos en una próxima oportunidad. Saludos!
This is the whole process for the elaboration of this beautiful box with decoupage of napkins and dried flowers, I invite you to watch the step by step video. I hope you like my participation and see you next time. Greetings!

 |  |
|---|
Original content by the author.
Resources: App: Canva / Giphy / Inshot
📷 Redmi 10 Smartphone
Translation done with Deepl.com
✿ All Rights Reserved || © @chacald.dcymt // 2020-2022 ✿
💌 Discord: chacald.dcymt#3549
_
Contenido original del autor.
Recursos: App: Canva / Giphy / Inshot
📷 Redmi 10 Smartphone
Traducido con Deepl.com
✿ Todos los Derechos Reservados || © @chacald.dcymt // 2020-2022 ✿
💌 Discord: chacald.dcymt#3549
Show more
Tags :
Woo!
This creator can upvote comments using 3speak's stake today because they are a top performing creator!
Leave a quality comment relating to their content and you could receive an upvote
worth at least a dollar.
Their limit for today is $0!
Their limit for today is $0!
27 views
a year ago
$
12 views
a year ago
$
32 views
8 months ago
$
30 views
9 months ago
$
7 views
a year ago
$
More Videos
9 views
10 months ago
$
11 views
5 months ago
$
5 views
2 years ago
$

23 views
a month ago
$

4 views
2 years ago
$

14 views
9 months ago
$

3 views
2 years ago
$

40 views
a year ago
$

3 views
a year ago
$
13 views
2 years ago
$

8 views
2 years ago
$
2 views
a year ago
$

7 views
a year ago
$

10 views
a year ago
$

8 views
2 years ago
$

3 views
7 months ago
$

4 views
8 months ago
$
4 views
9 months ago
$
16 views
2 years ago
$
9 views
8 months ago
$

32 views
11 months ago
$

6 views
2 years ago
$
3 views
3 years ago
$

12 views
8 months ago
$

12 views
a year ago
$
Comments:
Reply:
To comment on this video please connect a HIVE account to your profile: Connect HIVE Account