Engagement anniversary gift! (ENG/ITA) Regalo per anniversario di fidanzamento !
17
About :
👉ENG VERSION👈
Hello friends!!
Here is a new work I created, a few days ago my friend Fabio contacted me asking me to create a painting on my way for his engagement anniversary, to give to his girlfriend.
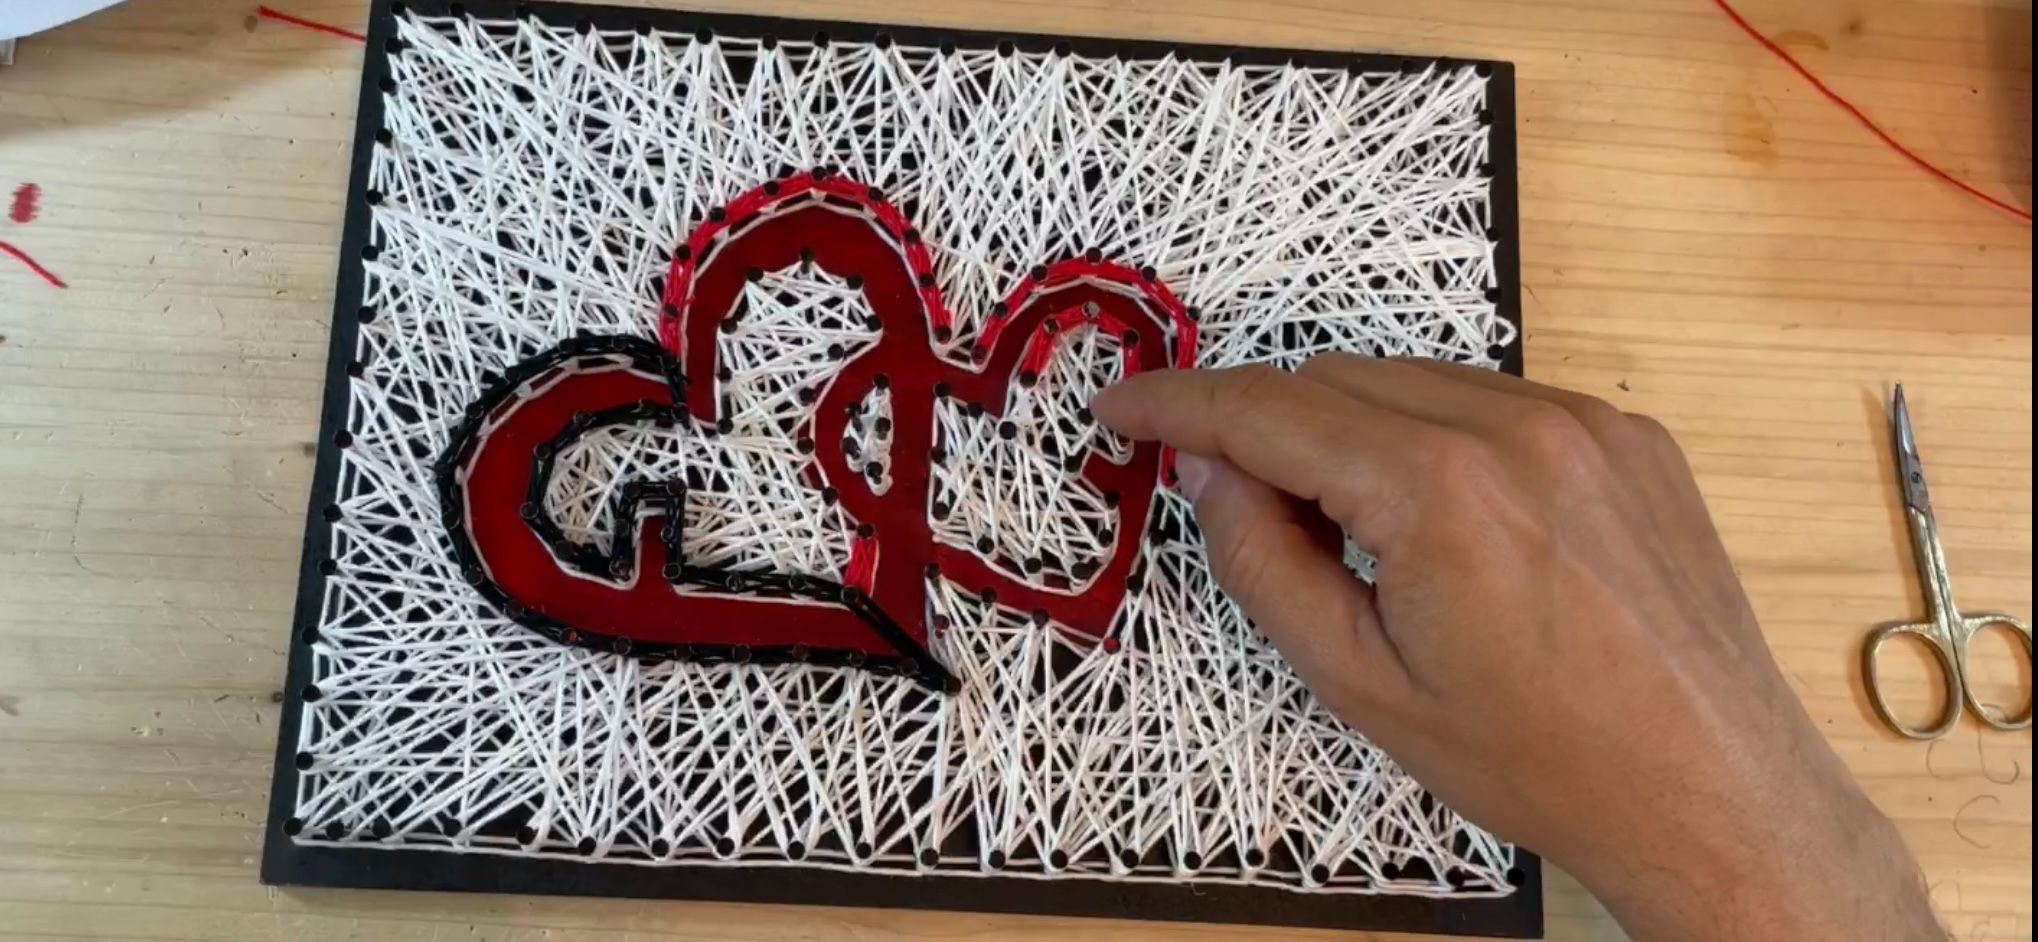
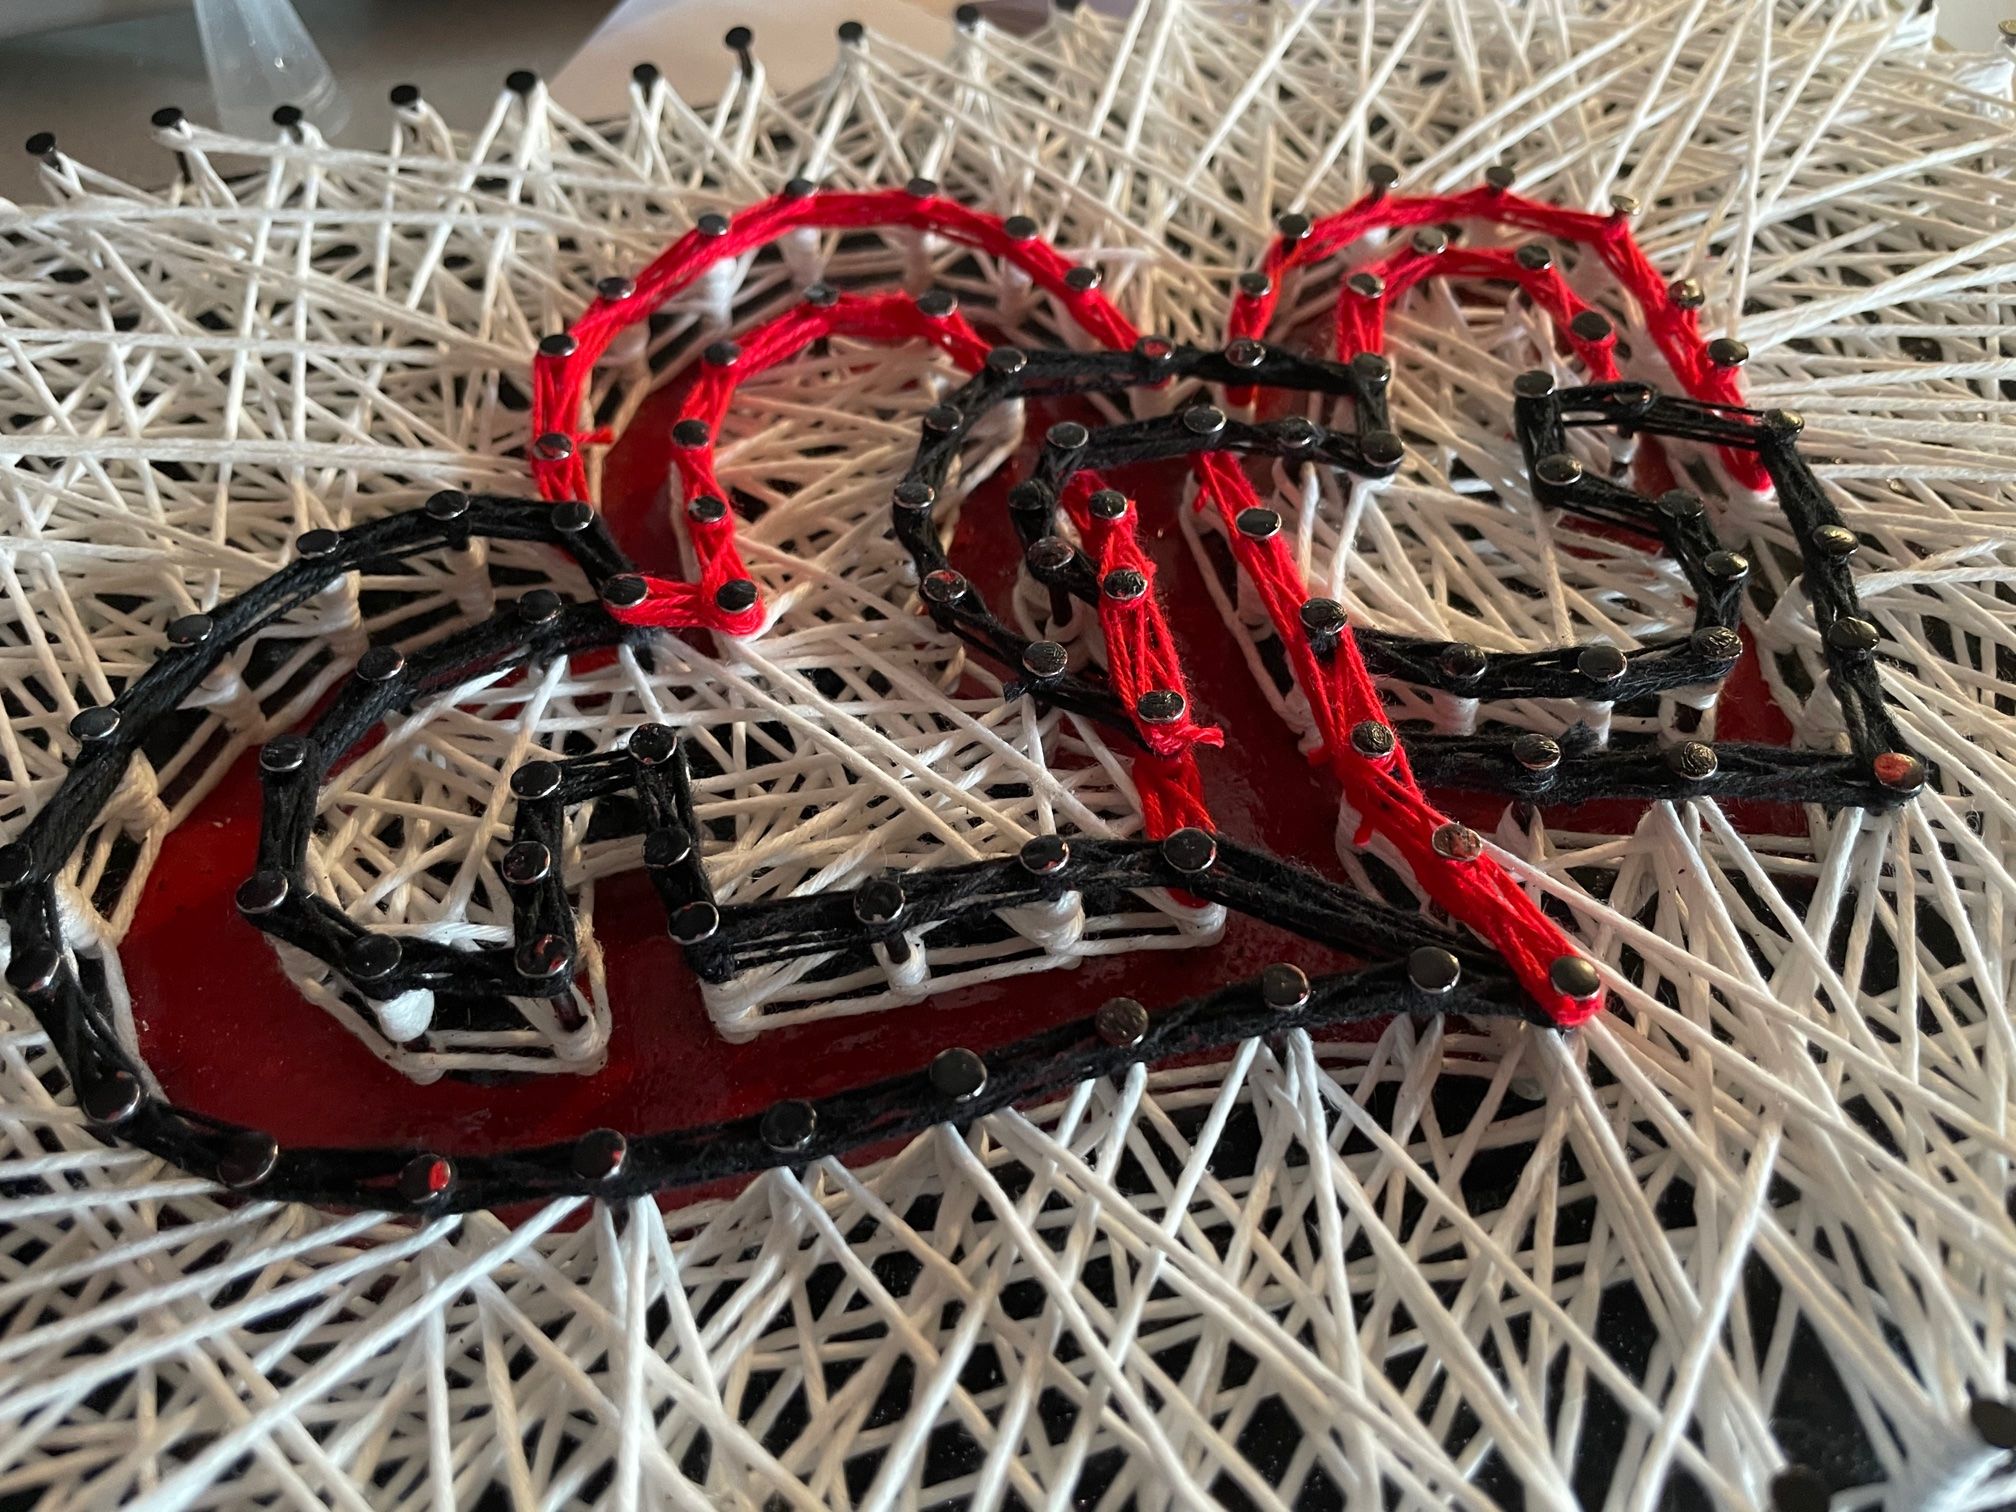
His request was to create two hearts with the initials of their name embedded in an F and a C.
Starting with so many doubts, my works are complicated to create in several layers, I put myself under I consider Fabio a great friend and I worked hard to create something beautiful and, in my opinion, something good has come out!
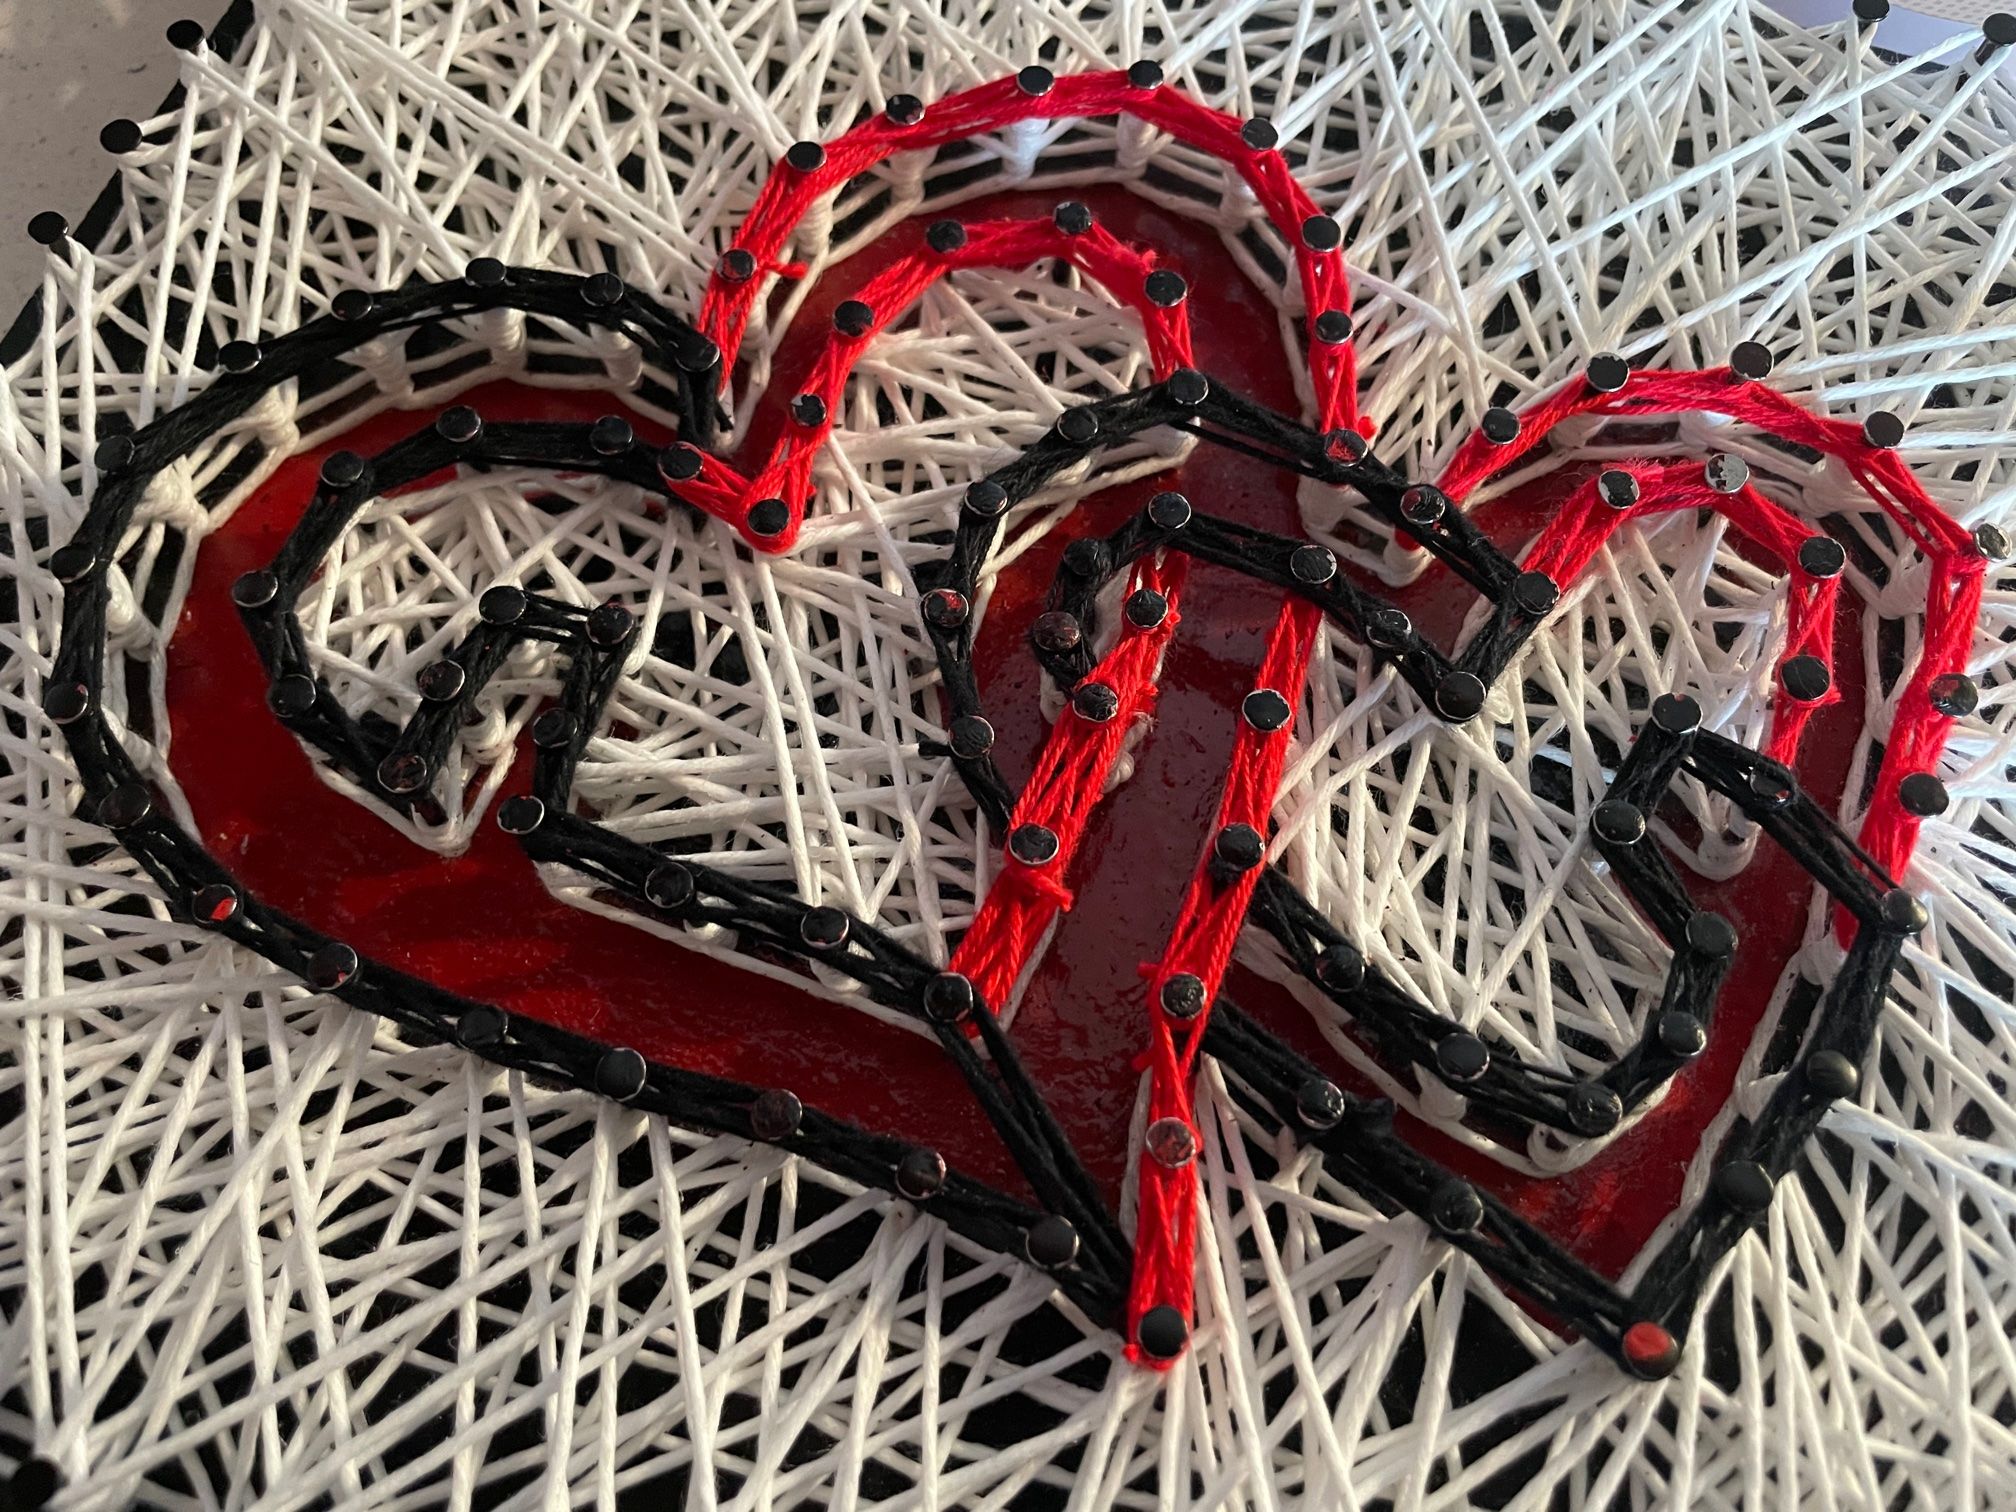
The previously is similar to those already made previously but being able to highlight the letters immediately put me in difficulty than with the help of the string and its colours I think I have reached the goal, I hope that your girlfriend is happy and not leave because of me hahaha.


- Wooden board 29 cm X 22 cm.
- Black paint.
- Red paint.
- White twine.
- Red string.
- Black twine.
- Glossy protective varnish.
- Nails.
STEP 1
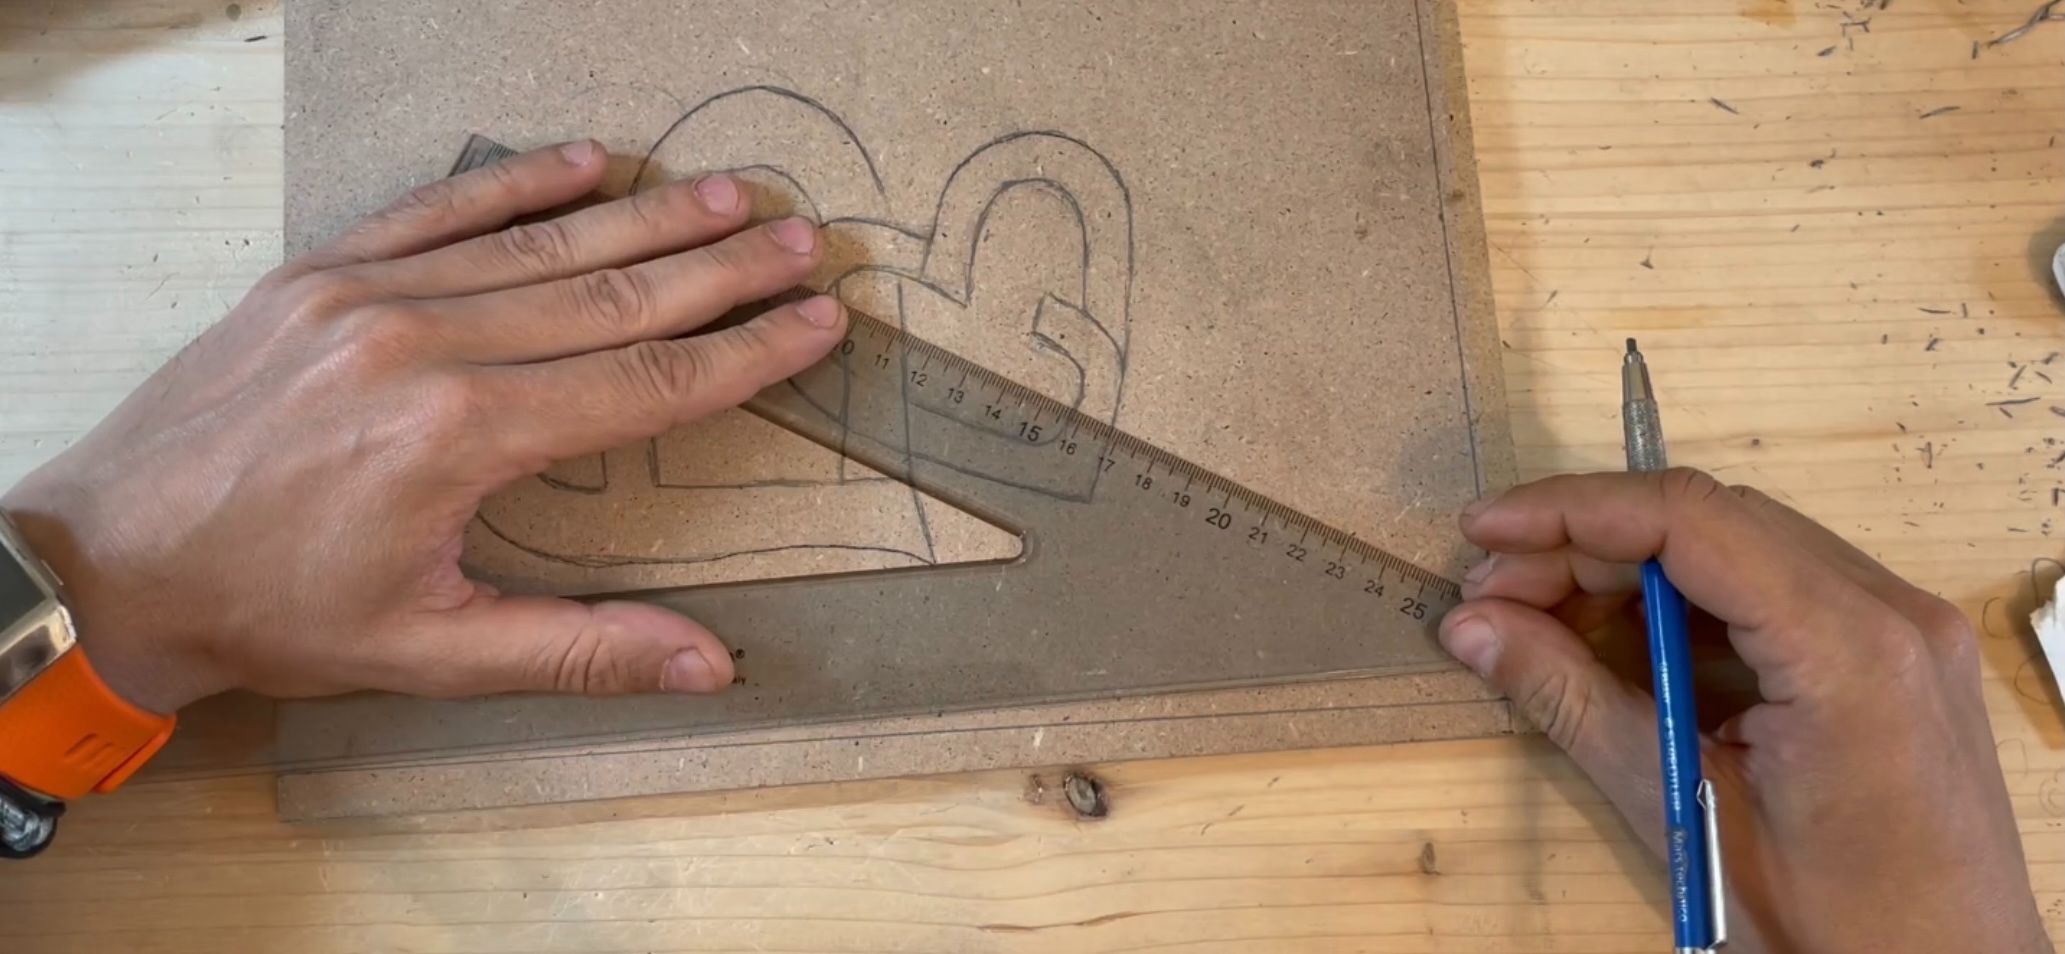
Unlike past works where I had a drawing already done and I just had to trace it into this one, I had to create the drawing from scratch, I prepared a dozen and my friend Fabio then chose this one.

Once I took care of the details, it was enough for me to trace it on the wooden table.
STEP 2
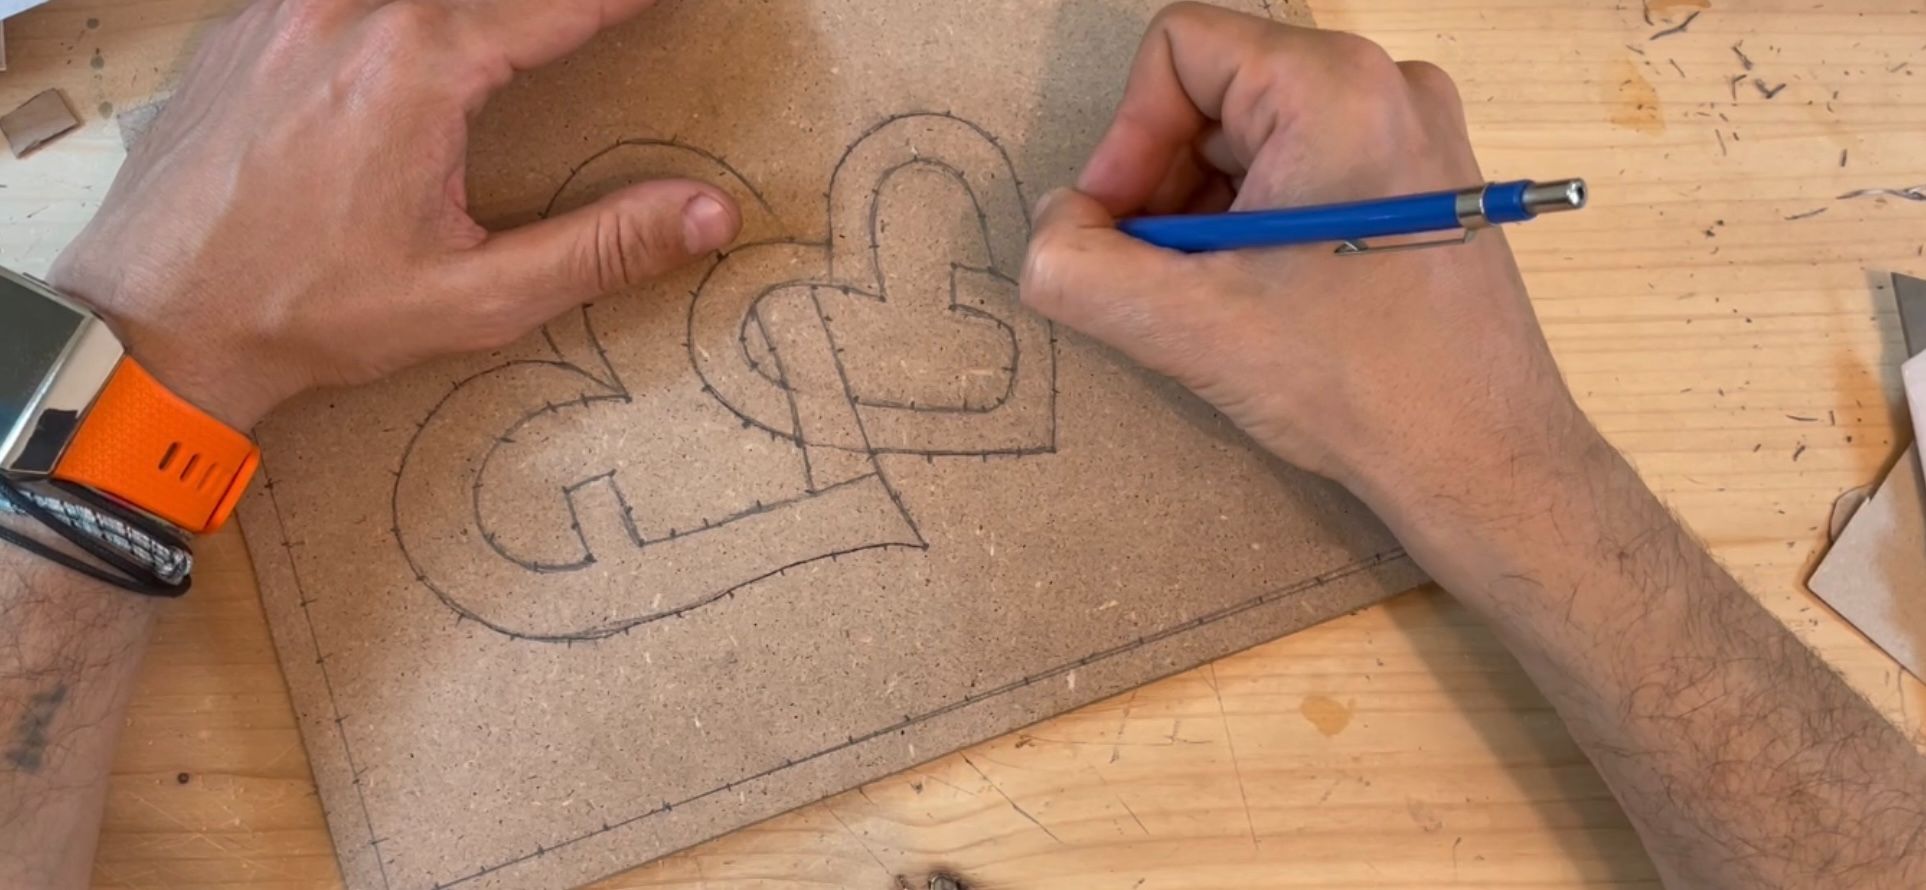
I created a thickness of one cm and I made a point at a distance of one centimetre in the central drawing, this was useful to create an equal distance between all the nails.
While for the frame, made by standing one centimetre from the edge to avoid breaking the wood, I marked the point for the nails 1.5 cm away from each other.
STEP 3
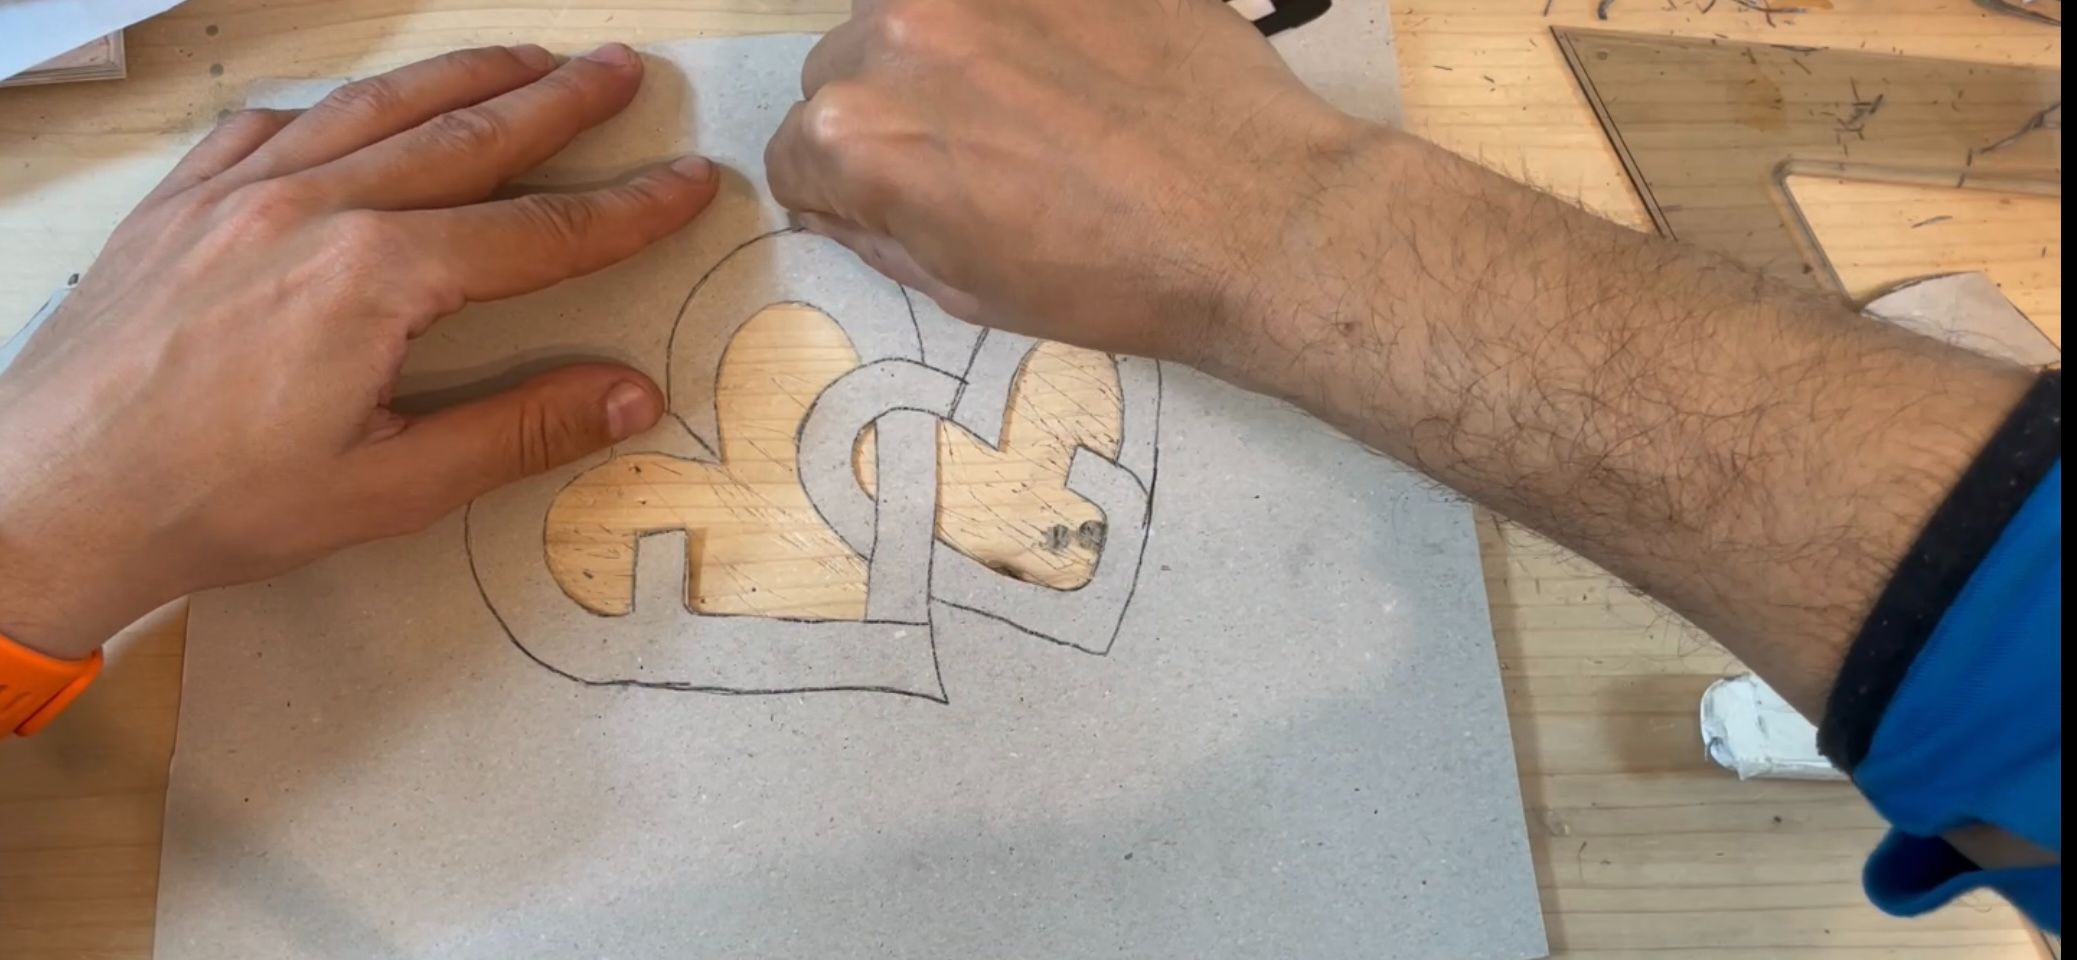
I created a cardboard mask equal to the drawing.
In the beginning, I wanted to make the hearts of two different reds lighter for the darker letter for the rest of the heart, which then failed because the reds chosen were not so different and the difference was not clear.
STEP 4
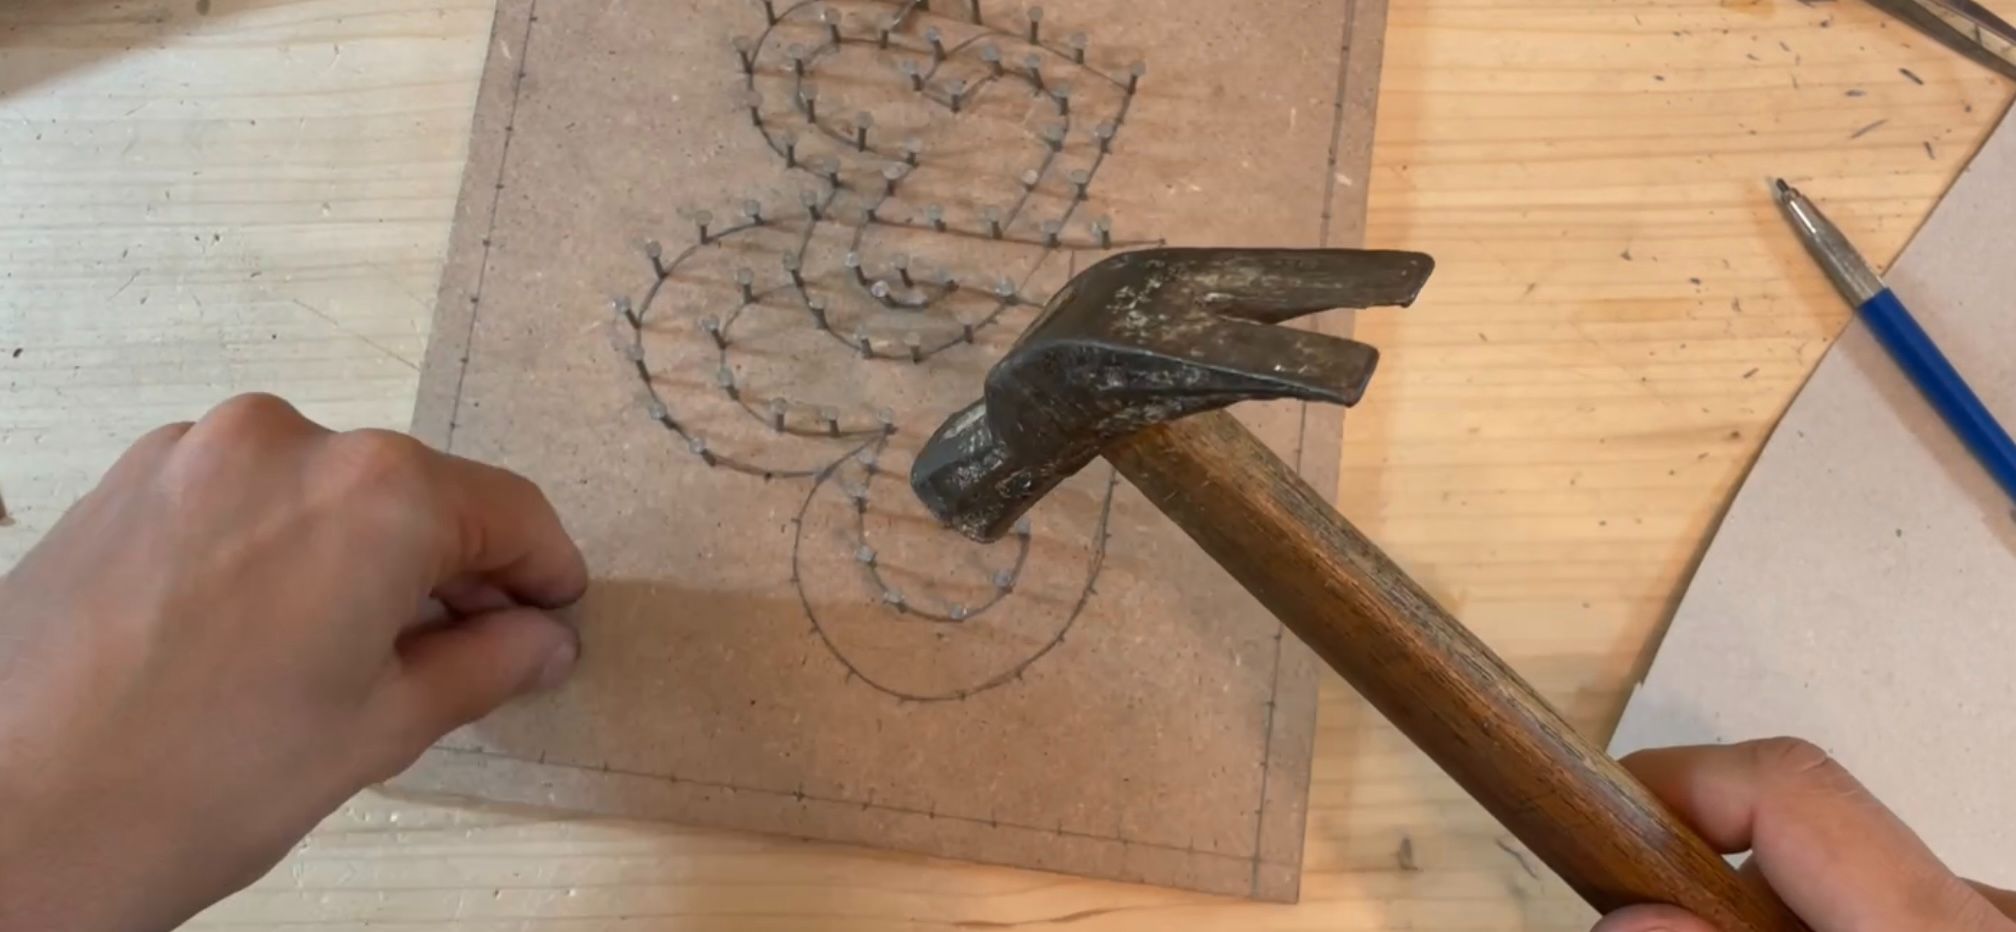
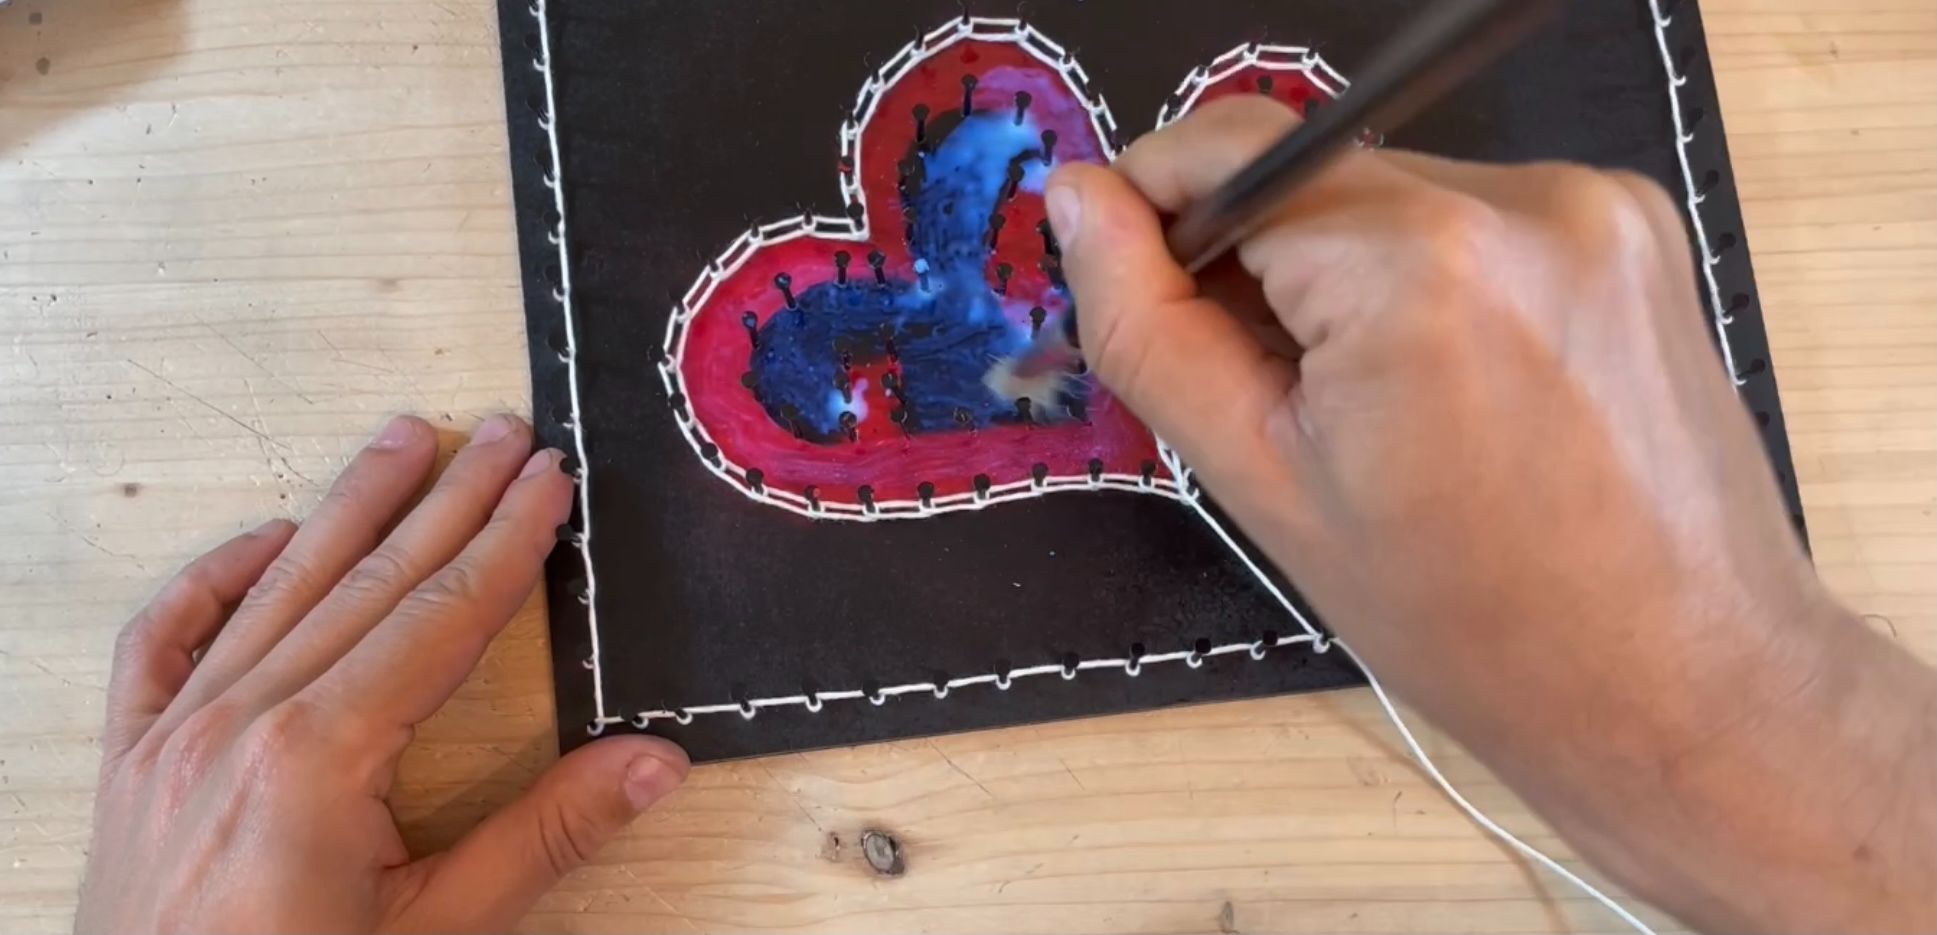
I hammered the nails on the previously drawn points, once finished, with some hammering on the fingers, I went to the open air for the painting.
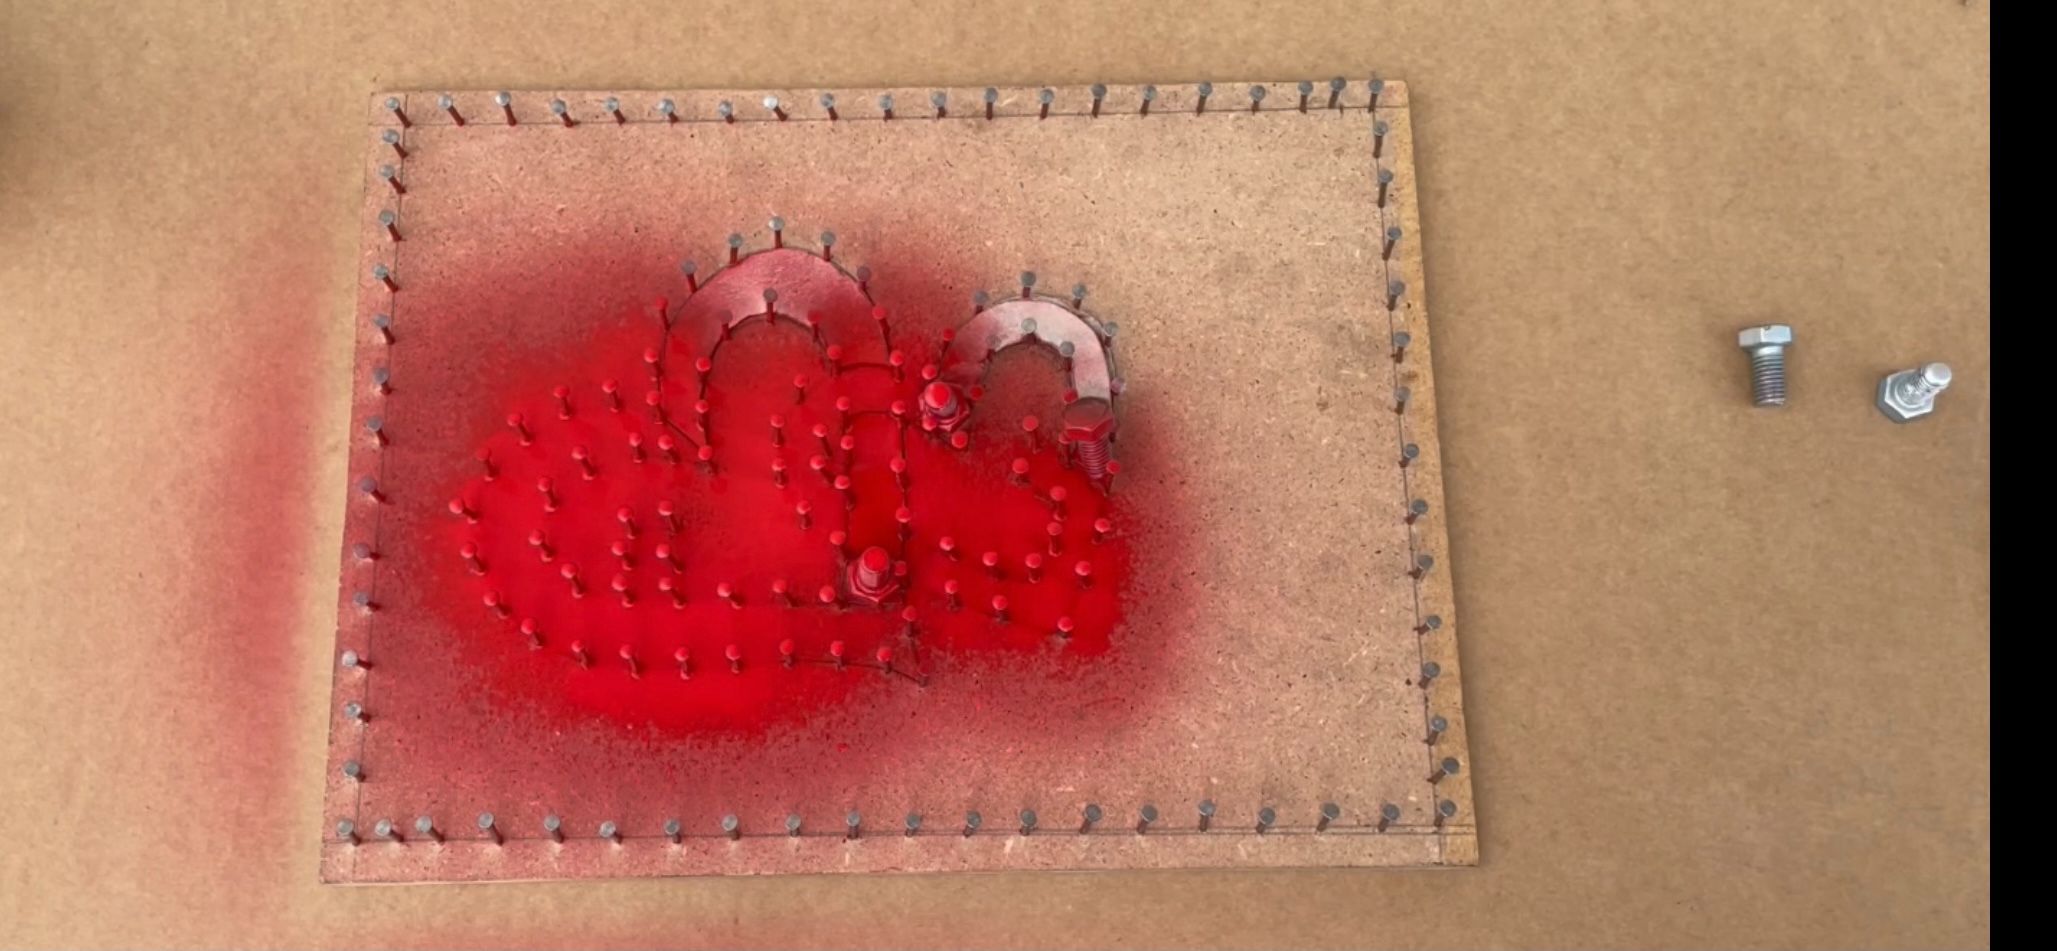
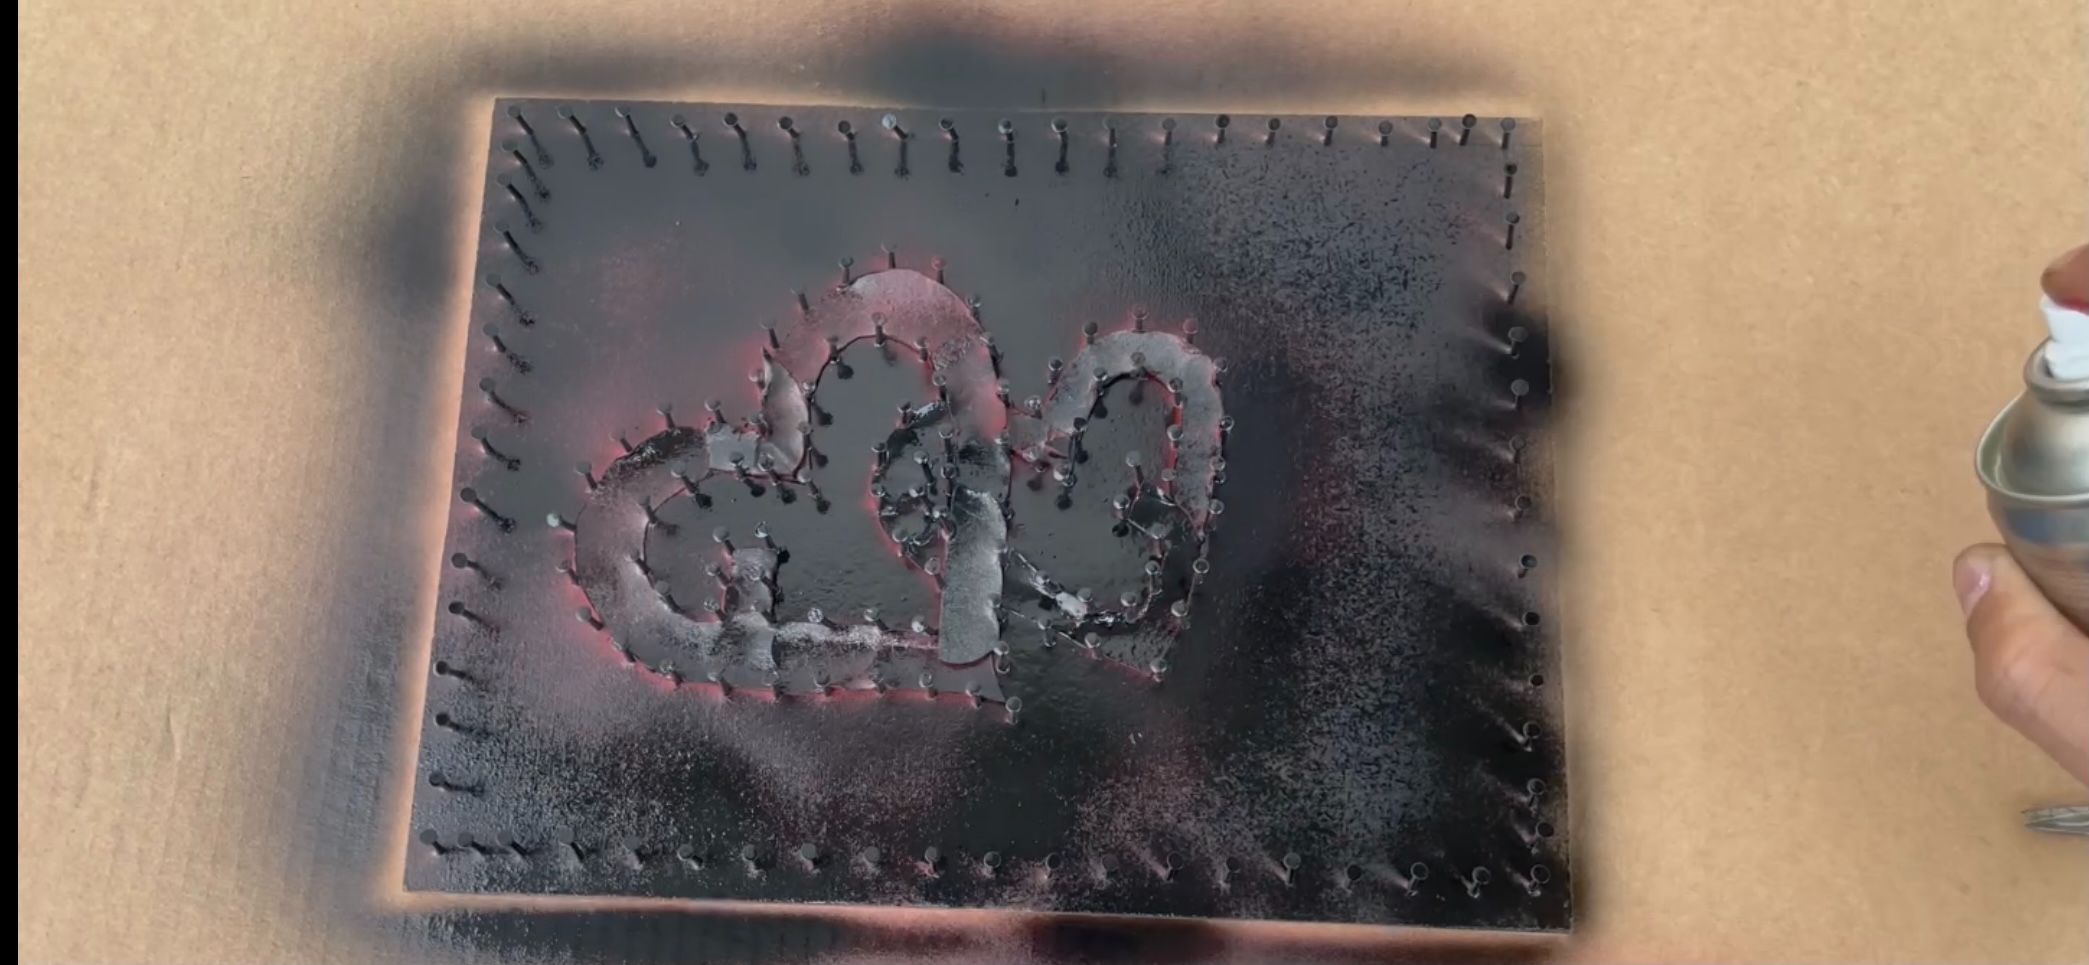
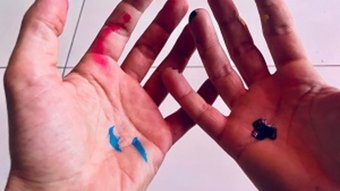
I then coloured the heart red, waited for it to dry and placed the cardboard mask over the hearts and then painted the wooden board black.
STEP 5
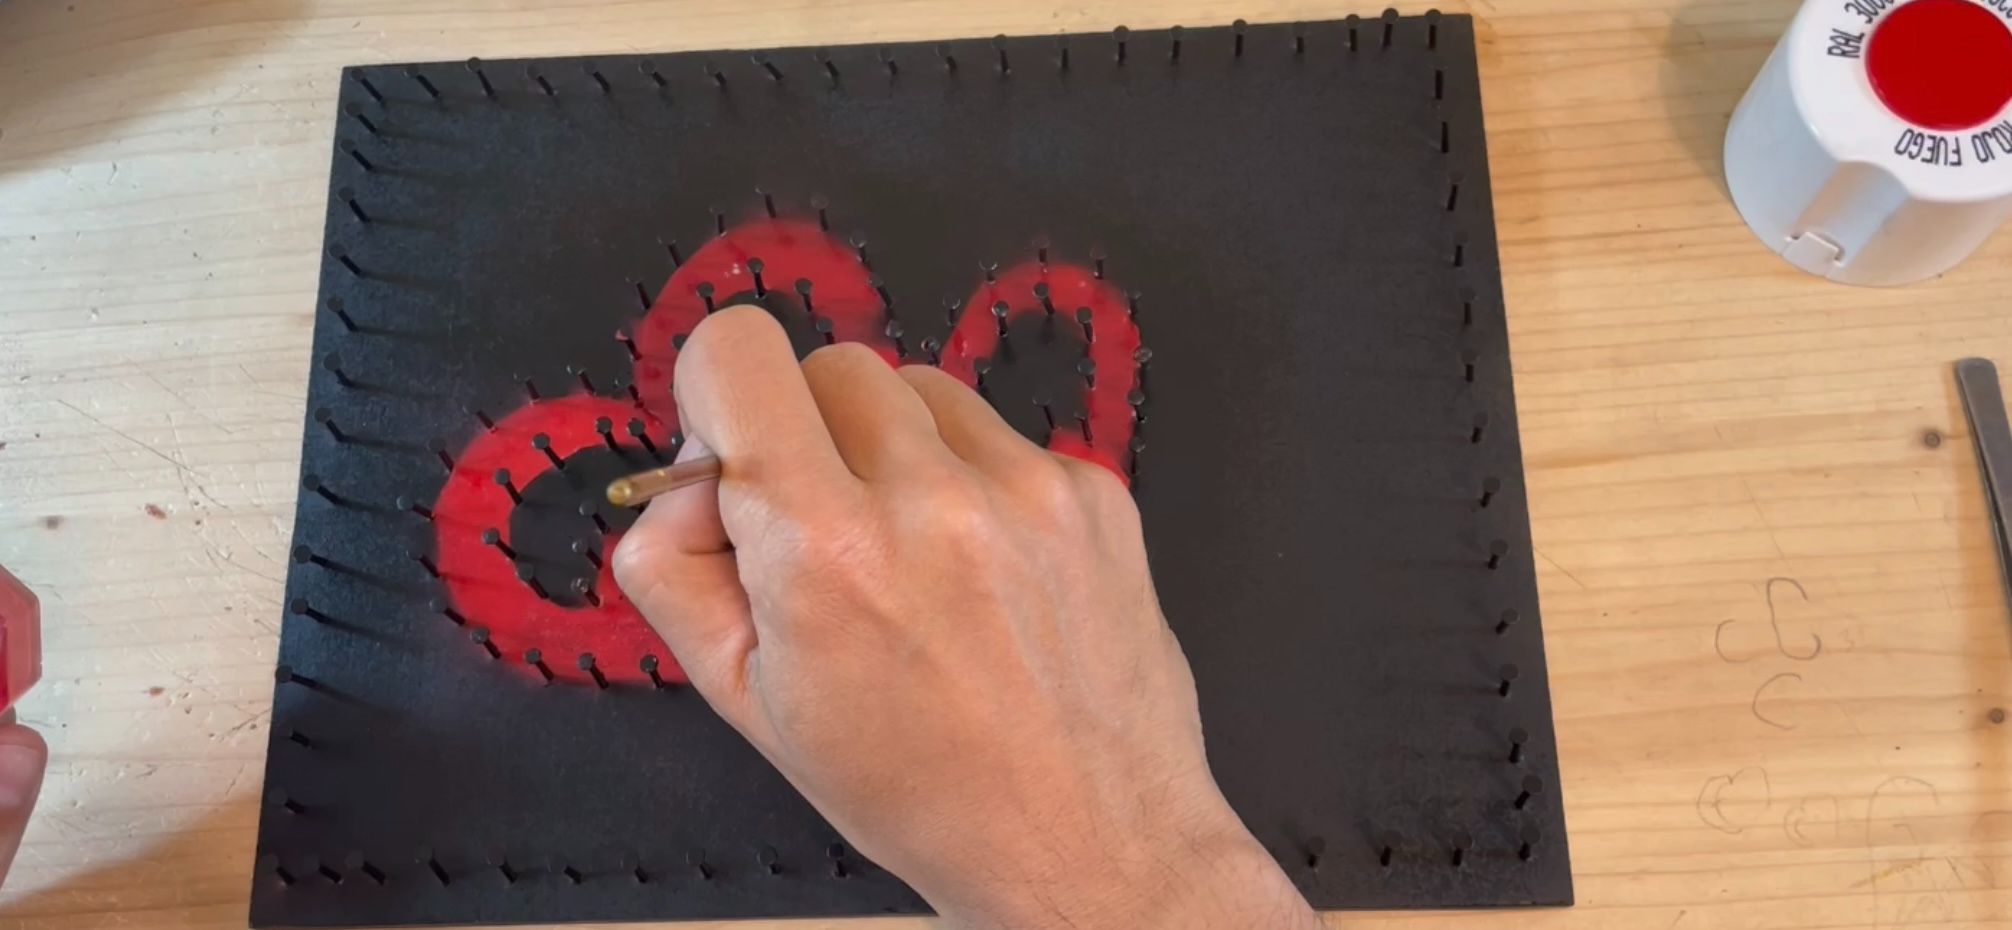
Once the colour had dried, I removed the cardboard mask and did some retouching with a brush and as soon as the colour dried I painted the hearts with the protective glossy varnish, this makes the drawing shiny and waterproof.
STEP 6
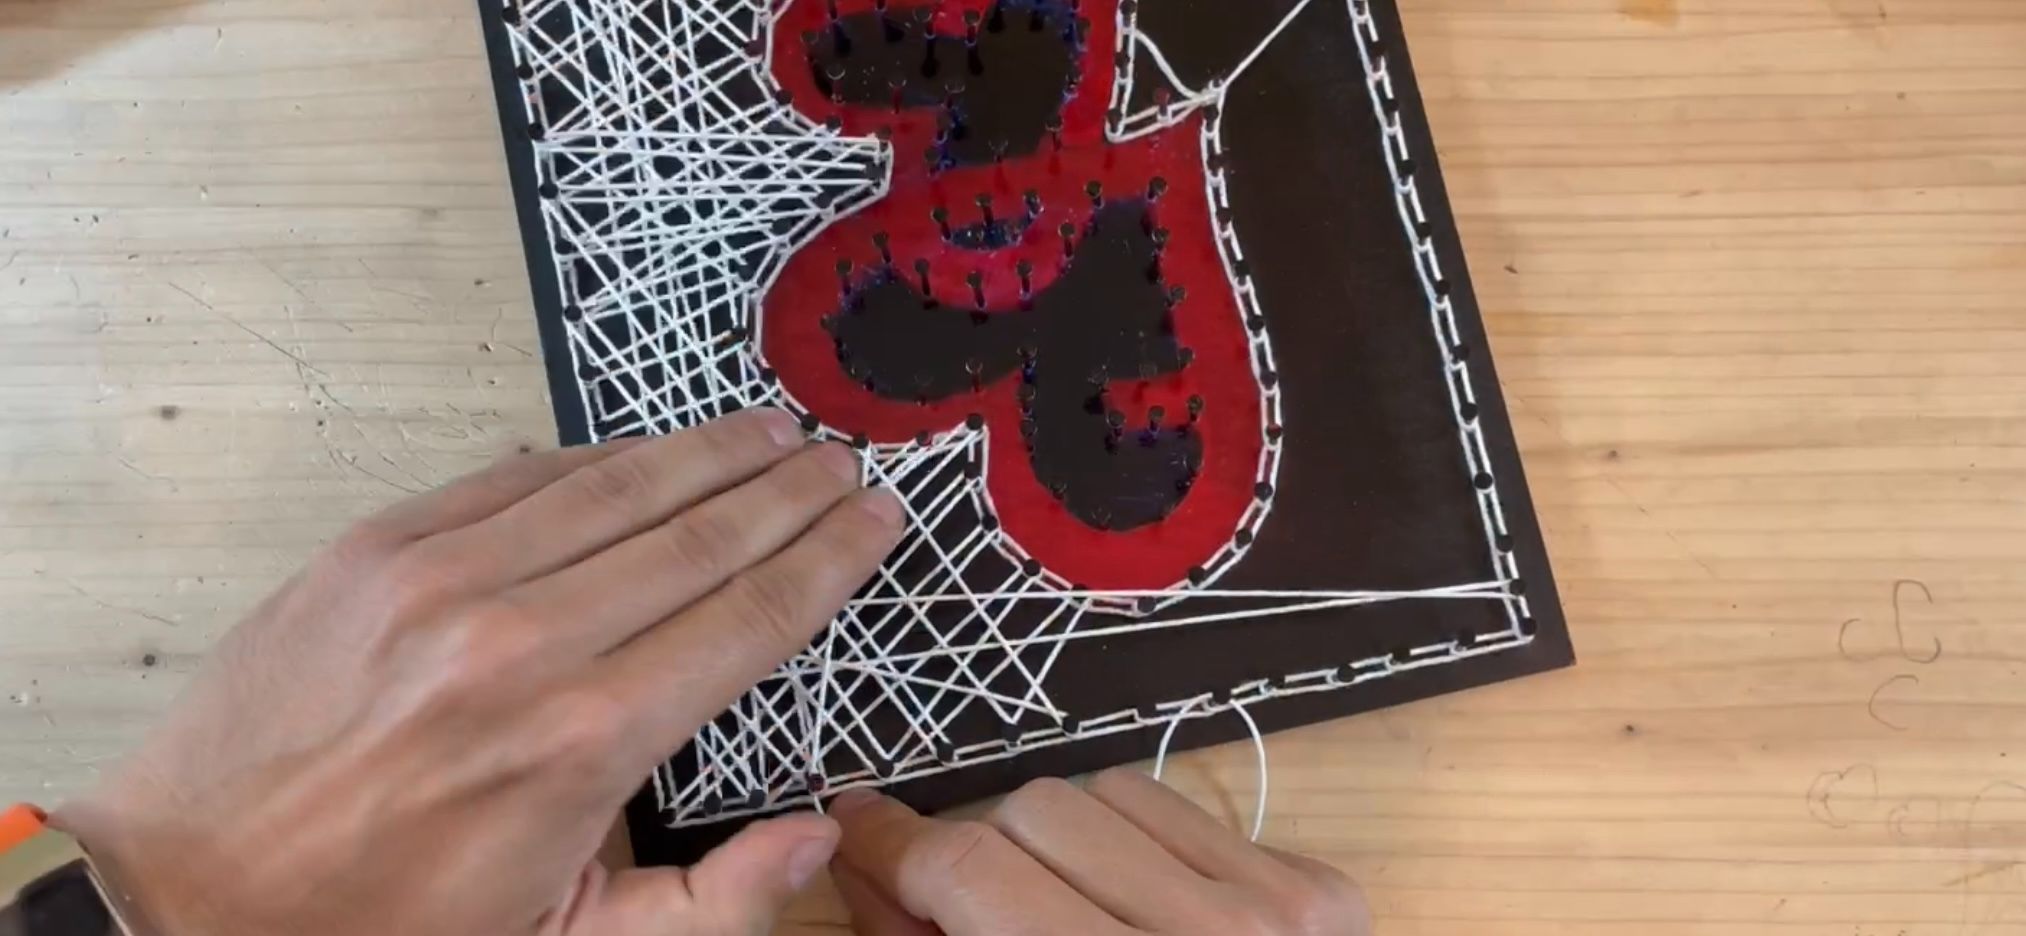
Last step, the twine!
I started with the base of the picture by weaving white twine all over the background.
I then redid the edges of the design with black string to highlight the two letters F and C and red for the rest of the hearts and here is the result!
What do you think?
I am always very self-critical and I believe that with some precautions I could have done better, however, it is all experience for future works.
I still remember my first painting .. Unwatchable hahaha I am much improved but still, I am not satisfied !!!
This was my first painting requested and sold ... in reality I did not want anything but my friend Fabio wanted to reward me with an offer, enthusiastic about the work !!! let's hope his girlfriend is too! :-)
See you for the next picture I have in mind and it will cover the whole HIVE family a little!
greetings to the next!
The full video lasts about 4 hours has been brought to just over 10 minutes by speeding up some parts to x2 up to a maximum of x50 is the fourth made of seven elements.
The images are taken from the Splinterlands game.
Recorded and edited by blumela with iPhone 12, applications used: Perfect Video - Photoleap - Clip2Comics - Tinipiny Camera.
For this logo, I used the free sample music from the copyright-free Perfect Video application.
The photos are taken by the author, the video was made by the author.

👉ITA VERSION👈
Ciao amici!!
Ecco un nuovo lavoro da me create, qualche giorno fa il mio amico Fabio mi ha contattato chiedendomi di realizzare un quadro alla mia maniera per il suo anniversario di fidanzamento, da regalare alla sua ragazza.
La sua richiesta è stata quella di creare due cuori con incastonate le iniziali del loro nome una F e una C.
Partito con tanti dubbi, i miei lavori sono complicati da creare in più strati, mi sono messo sotto considero Fabio un grande amico e mi ci sono impegnato molto per realizzare qualcosa di bello e, secondo me, qualcosa di buono è saltato fuori!
Il precedentemente è simile a quelli già realizzati in precedenza ma riuscire ad evidenziare le lettere subito mi ha messo in difficoltà poi con l'aiuto dello spago e i suoi colori credo di aver raggiunto l'obiettivo, spero che la sua ragazza sia contenta e non si lascino per colpa mia hahaha.
MATERIALE UTILIZZATO
- Tavola di legno 29 cm X 22 cm.
- Vernice nera.
- Vernice rossa.
- Spago bianco.
- Spago rosso.
- Spago nero.
- Verinice protettiva lucida.
- Chiodi.
STEP 1.
A differenza dei lavori passati dove avevo un disegno già fatto e dovevo solo ricalcarlo in questo ho dovuto creare da zero il disegno, ne ho preparati una decina e il mio amico Fabio ha poi scelto questo.
Una volta curato i particolari mi è bastato ricalcarlo sulla tavola di legno.
STEP 2
Ho creato uno spessore di un cm e ho fatto un punto ad un centimetro di distanza nel disegno centrale, questo mi è servito per creare una distanza uguale fra tutti i chiodi.
Mentre per la cornice, fatta stando a un centimetro dal bordo per evitare si rompesse il legno, ho segnato il punto per i chiodi a 1,5 cm di distanza l'uno dall'altro.
STEP 3
Ho creato una maschera di cartone uguale al disegno.
In principio volevo fare i cuori di due rossi differenti più chiaro per la lettera più scuro per il resto del cuore, operazione poi fallita perchè i rossi scelti non erano cosi diversi e non si capiva la differenza.
STEP 4
Ho piantato i chiodi sui punti disegnati precedentemente e una volta finito, con qualche martellata sulle dita, mi sono recato all 'aria aperta per la verniciatura.
Ho quindi colorato il cuore di rosso, ho aspettato che si asciugasse e ho posizionato la maschera di cartone sui cuori per poi verniciare la tavola di legno di nero.
STEP 5
Una volta fatto asciugare il colore ho tolto la maschera in cartone e ho fatto qualche ritocco a pennello e appena il colore si è asciugato ho verniciato i cuori con la vernice protettiva lucida, questa rende il disegno brillante e impermeabile.
STEP 6
Ultimo step, lo spago!
Ho iniziato con la base del quadro tessendo lo spago bianco per tutto lo sfondo.
Ho poi rifatto i bordi del disegno con lo spago nero per evidenziare le due lettere la F e la C e rosso per il resto dei cuori ed ecco il risultato!
Cosa ne pensate?
Io sono sempre molto autocritico e credo che con qualche accorgimento avrei potuto fare di meglio, ma è comunque tutta esperienza per i lavori futuri.
Ricordo ancora il mio primo quadro.. Inguardabile hahaha sono molto migliorato ma ancora non mi accontento!!!
Questo è stato il mio primo quadro richiesto e venduto... in realtà non volevo nulla ma l'amico Fabio ha voluto premiarmi con una offerta, entusiasta del lavoro!!! speriamo lo sia anche la sua ragazza! :-)
Ci vediamo per il prossimo quadro che ho in mente e rihuarderà un pò tutta la famiglia HIVE!
Saluti alla prossima!
Il video integrale dura 4 ore circa è stato portato a poco più di 10 minuti velocizzando alcune parti a x2 fino ad un massimo di x50 è il quarto realizzato di sette elementi.
Le immagini soon prese dal gioco Splinterlands.
Registrato e montato da blumela con Iphone 12, applicazioni utilizzate: Perfect Video - Photoleap - Clip2Comics - Tinipiny Camera.
Per questo logo ho utilizzato la musica campione gratuita dell'applicazione Perfect Video priva di copyright.
Le foto sono scatti dell'autore, il video è stato realizzato dall'autore.
Show more
Tags :
Woo!
This creator can upvote comments using 3speak's stake today because they are a top performing creator!
Leave a quality comment relating to their content and you could receive an upvote
worth at least a dollar.
Their limit for today is $0!
Their limit for today is $0!
9 views
a year ago
$

0 views
4 years ago
$
17 views
3 years ago
$

15 views
3 years ago
$
0 views
4 years ago
$
More Videos

3 views
3 years ago
$

15 views
10 months ago
$
6 views
3 years ago
$
35 views
2 years ago
$

1 views
7 months ago
$

2 views
8 months ago
$

6 views
3 years ago
$
0 views
4 years ago
$

9 views
2 years ago
$
2 views
a year ago
$

10 views
a year ago
$
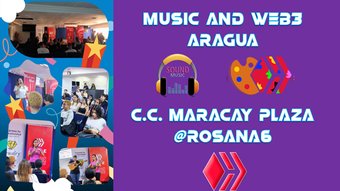
Evento Música y Web3 en el C.C. Maracay Plaza ǀMusic and Web3 Event in Maracay Plaza Mall - @Rosana6
16 views
6 months ago
$

3 views
3 years ago
$

1 views
2 years ago
$

6 views
3 years ago
$

2 views
a year ago
$

1 views
11 months ago
$

13 views
8 months ago
$

10 views
a year ago
$

12 views
a month ago
$

6 views
a year ago
$

34 views
4 years ago
$

3 views
a year ago
$

13 views
a year ago
$

2 views
2 years ago
$
Comments:
Reply:
To comment on this video please connect a HIVE account to your profile: Connect HIVE Account