Cambio de switch eléctrico tipo cuchilla [ENG/ESP]
3
About :
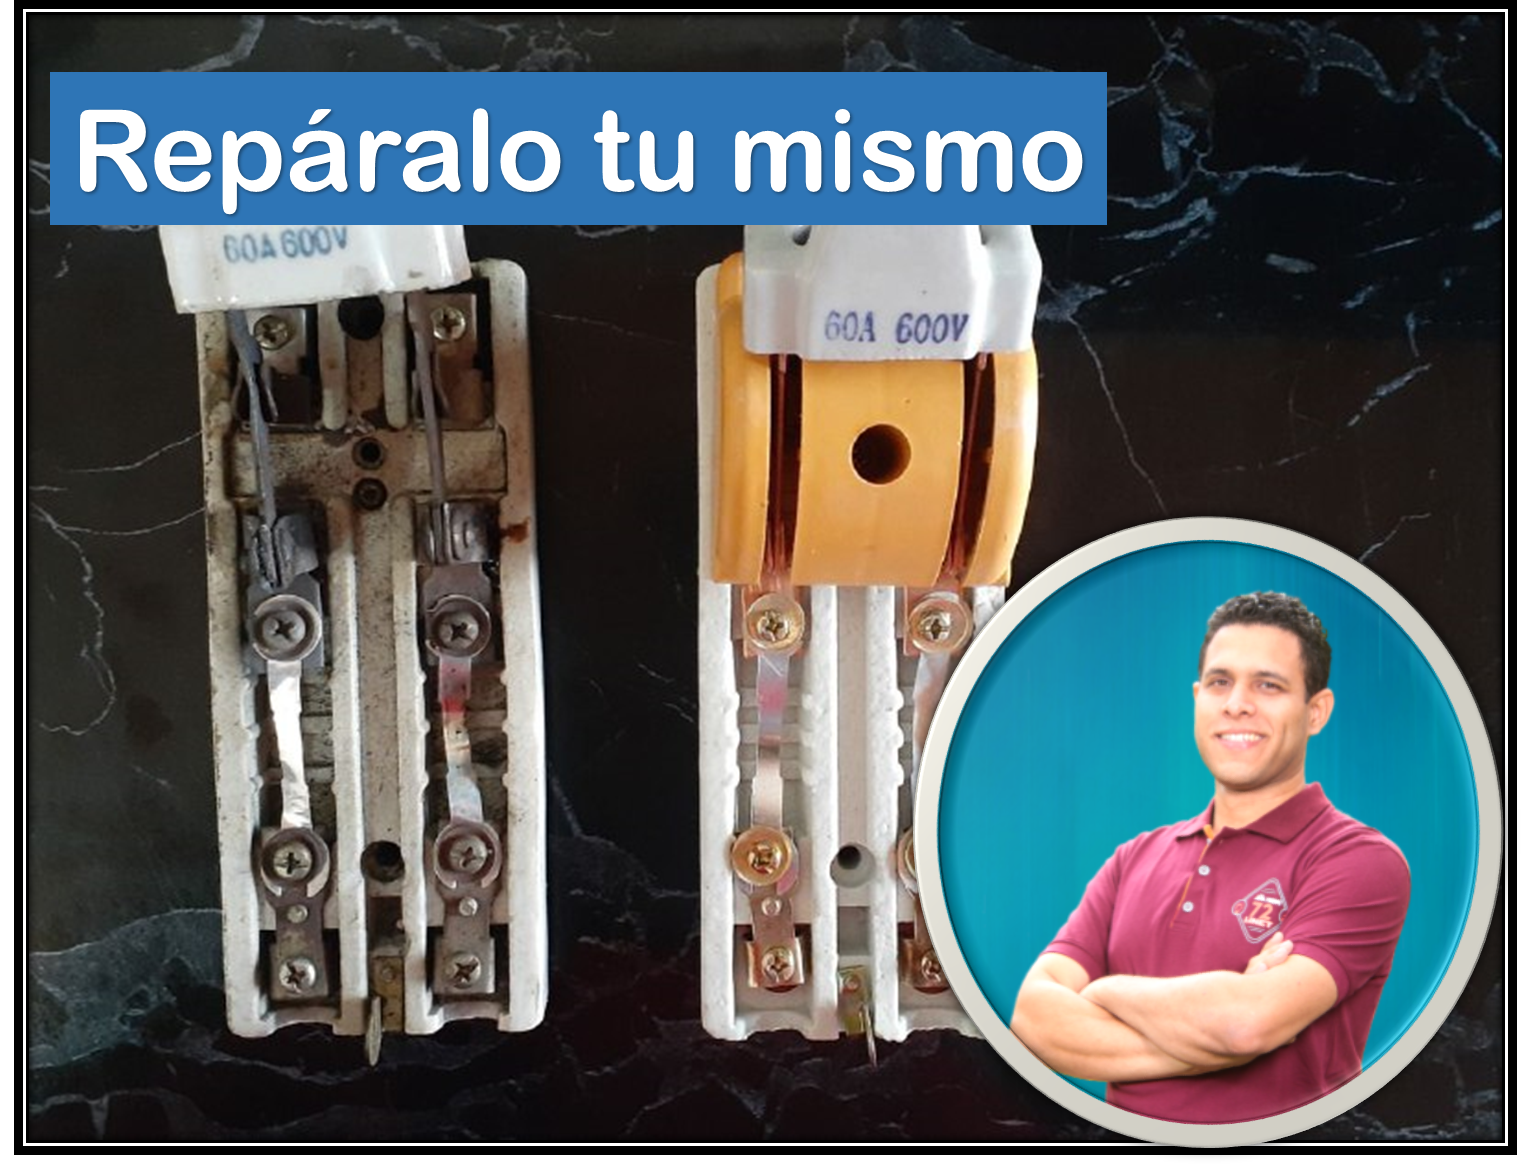
Hola, mi gente! Un gran saludo a toda la comunidad, de HIVE y 3speak. Hoy les traigo un vídeo donde les enseñaré a hacer una reparación eléctrica, en este caso se trata de cambiar o sustituir un switch eléctrico de un tiro un polo, también llamado switch tipo cuchilla.
Hello, my people! A big greeting to all the community, from HIVE and 3speak. Today I bring you a video where I will show you how to make an electrical repair, in this case it is about changing or replacing an electrical switch of a single pole switch, also called blade type switch.
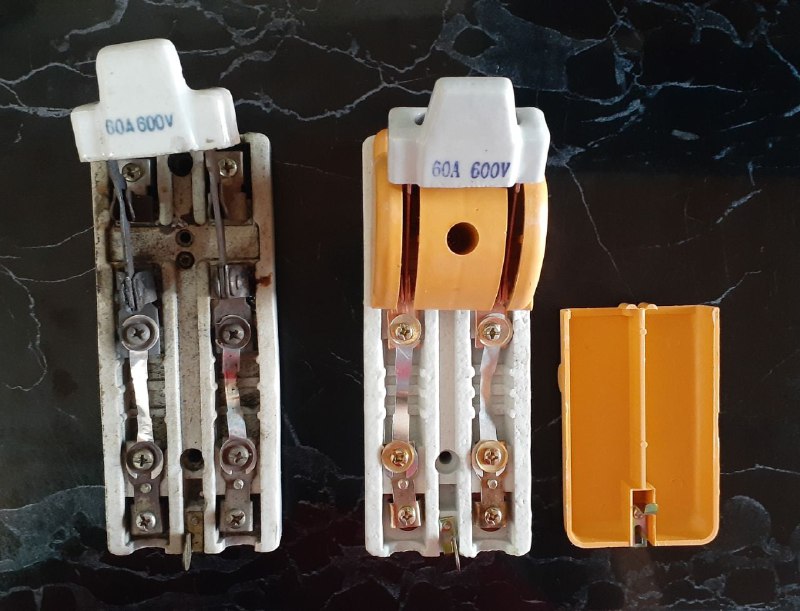
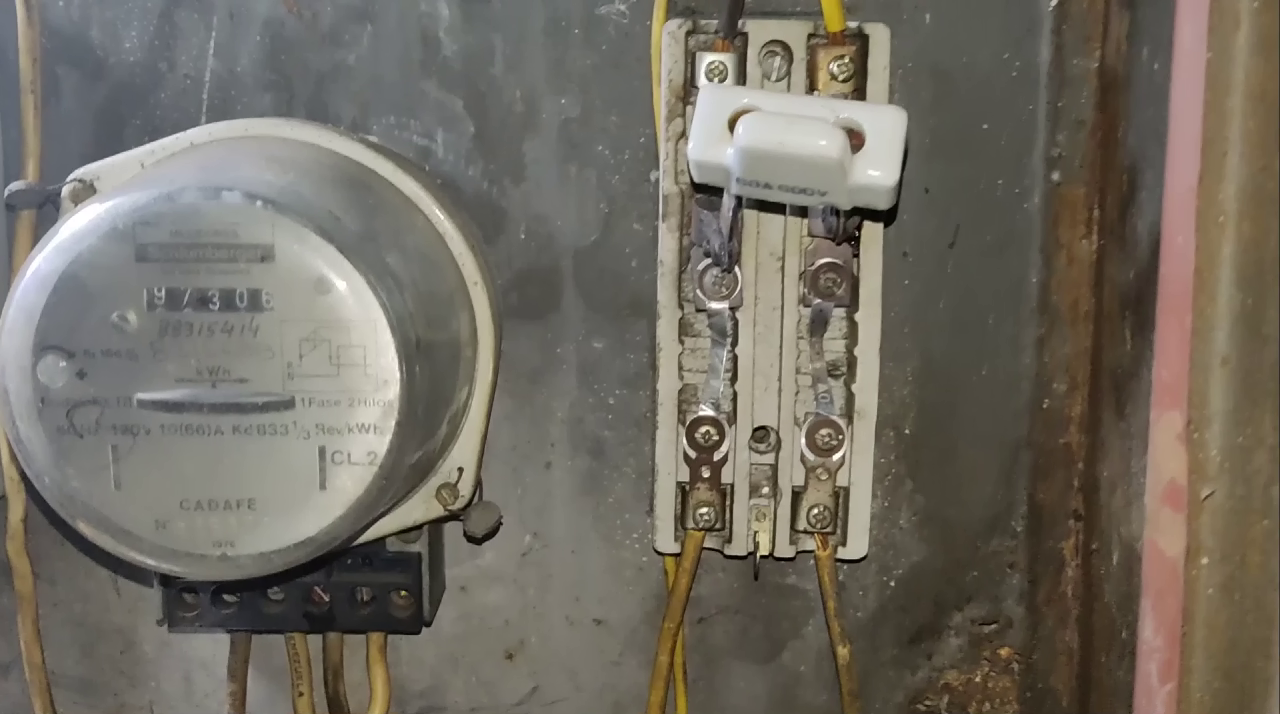
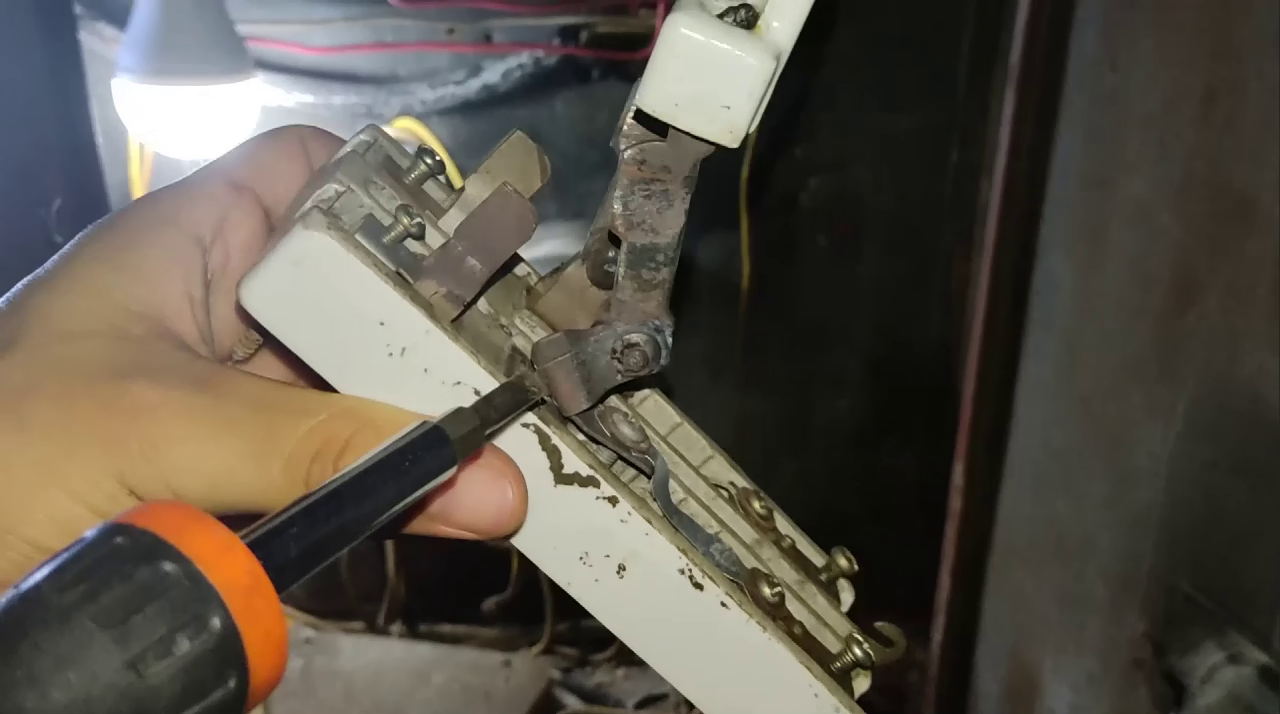
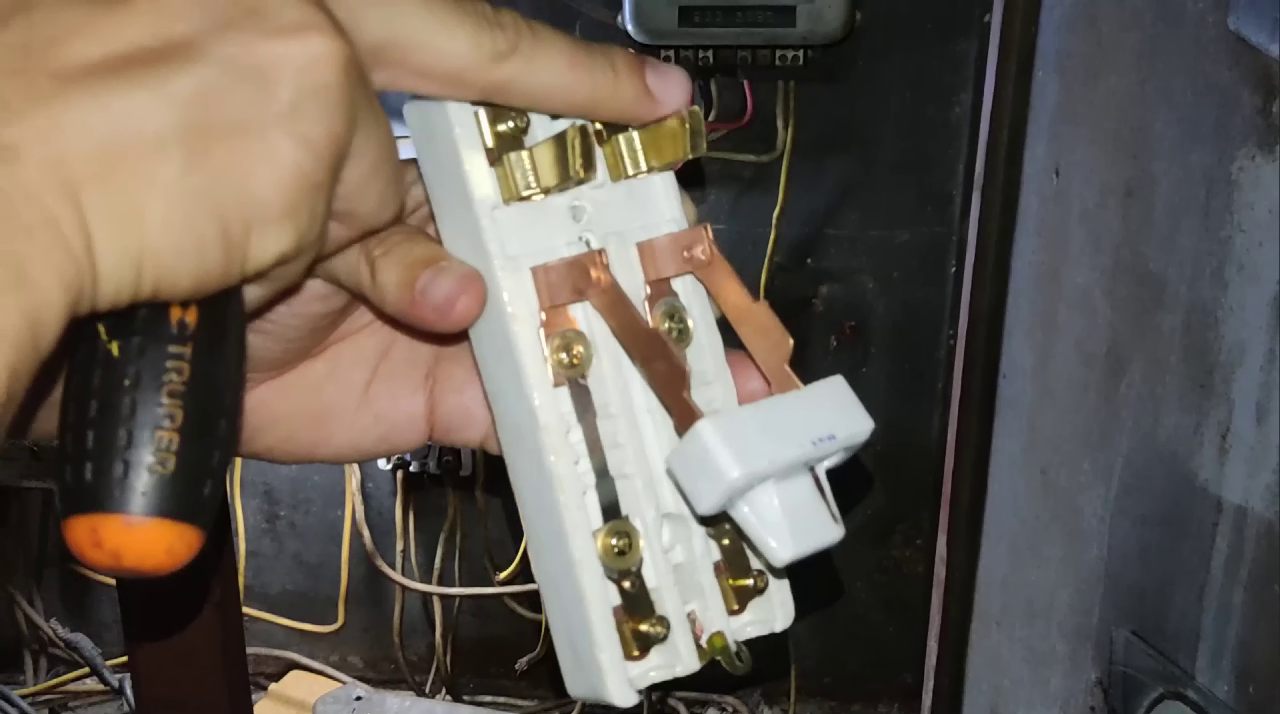
Inicialmente realizaremos una evaluación del estado la cuchilla, así podremos observar el estado en que se encuentra la misma, se ve que ha sufrido sobrecalentamiento y presenta oxido en los bornes superiores e inferiores, también en el sistema mecánico de la cuchilla, incluso se encuentra trabada. Seguidamente procederemos a desinstalar la cuchilla, comenzamos cortando el suministro eléctrico para evitar un accidente, luego con la ayuda un destornillador aflojamos los tornillos de cada borne para retirar los cables y retiramos los cables teniendo cuidado de colocarlos en una posición donde no nos vaya a molestar.
Initially we will make an assessment of the state of the blade, so we can see the state in which it is the same, it is seen that it has suffered overheating and has rust on the upper and lower terminals, also in the mechanical system of the blade, even is locked. Next we will proceed to uninstall the blade, we begin by cutting the electrical supply to avoid an accident, then with the help of a screwdriver we loosen the screws of each terminal to remove the cables and we remove the cables taking care to place them in a position where they will not bother us.
Procedemos ahora a retirar los tornillos que sujetan la cuchilla al armario de conexiones, una vez desmontada, instalaremos el switch nuevo.
We proceed now to remove the screws that hold the blade to the connection cabinet, once disassembled, we will install the new switch.
Procederemos a instalar, comenzaremos con el tornillo de la parte superior para fijar la cuchilla nueva a la caja de conexión y luego continuamos con el segundo tornillo para que quede bien sujeta a la caja de conexión, un procedimiento rápido y sencillo, verificamos que esté bien sujeta y luego procedemos a instalar de nuevo los cables.
We will proceed to install, we will begin with the screw at the top to fix the new blade to the junction box and then continue with the second screw to secure it to the junction box, a quick and simple procedure, we verify that it is well secured and then proceed to reinstall the wires.
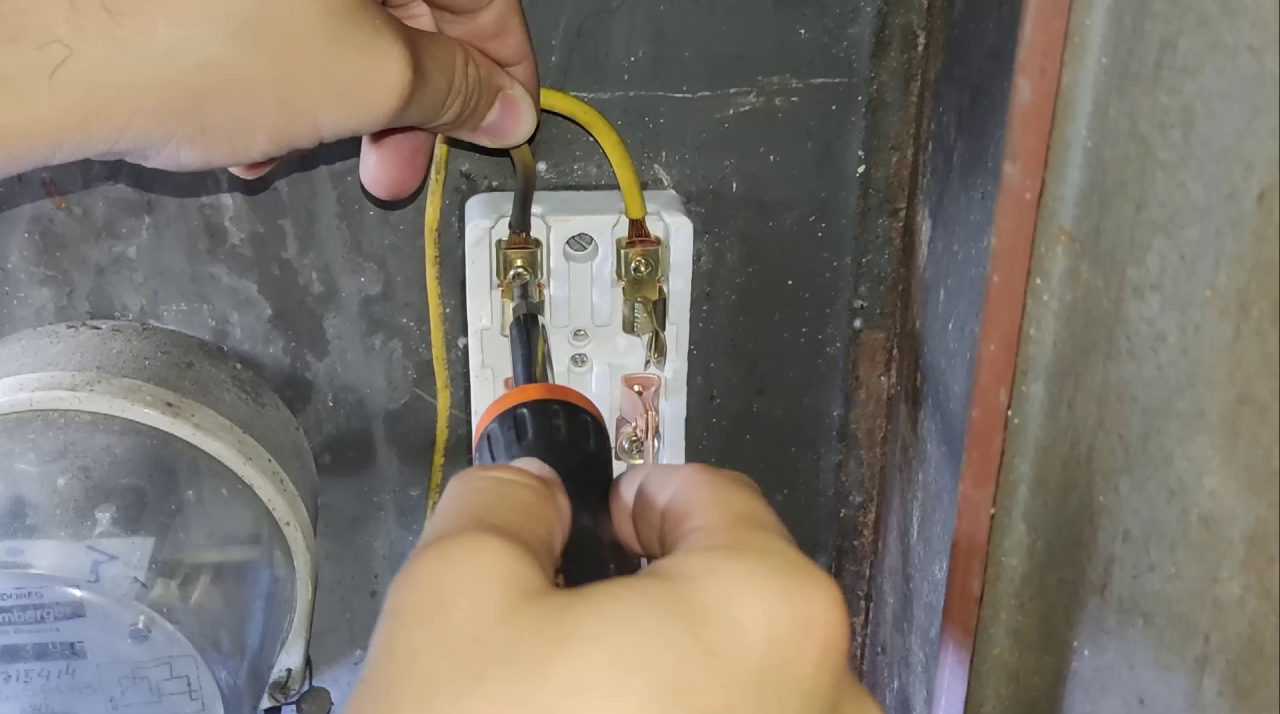
Aflojamos los tornillos de cada borne para poder conectar cable en su lugar, asegurándonos de levantar las lengüetas de cada borne, se colocan los cables en cada borne y se va apretando cada uno respectivamente, se debe apretar bien, para tener un buen contacto y no haya problemas de sobrecalentamiento, verificamos que los cables no se salgan fácilmente. Y eso sería todo.
We loosen the screws of each terminal to be able to connect cable in place, making sure to lift the tabs of each terminal, place the wires in each terminal and tighten each one respectively, you must tighten well, to have a good contact and no problems of overheating, we verify that the wires do not come out easily. And that would be all.

Espero que les haya gustado esta publicación!
##### I hope you liked this publication!
Translated with www.DeepL.com/Translator (free version)

Show more
Tags :
Woo!
This creator can upvote comments using 3speak's stake today because they are a top performing creator!
Leave a quality comment relating to their content and you could receive an upvote
worth at least a dollar.
Their limit for today is $0!
Their limit for today is $0!

14 views
2 years ago
$
10 views
2 years ago
$

[ES/EN]Acompáñame a las increíbles piscinas naturales/Come with me to the incredible natural swimmng
13 views
2 years ago
$

ES/EN ¿Has estado en una mina de carbón? Acompáñame / Have you ever been in a mine? Meet a coal mine
12 views
2 years ago
$

5 views
2 years ago
$
More Videos

1 views
2 years ago
$

16 views
a year ago
$

12 views
2 months ago
$

3 views
2 years ago
$

10 views
2 years ago
$

4 views
2 years ago
$

3 views
a year ago
$

3 views
3 years ago
$

14 views
a year ago
$

44 views
3 years ago
$

23 views
a year ago
$

4 views
3 years ago
$
11 views
a year ago
$

19 views
a year ago
$

12 views
9 months ago
$

24 views
a year ago
$

5 views
8 months ago
$

12 views
2 years ago
$

36 views
2 months ago
$

10 views
a year ago
$

11 views
a year ago
$

9 views
a year ago
$

4 views
3 years ago
$

Comments:
Reply:
To comment on this video please connect a HIVE account to your profile: Connect HIVE Account