Fallout 3 Walkthrough (Modded) Part 133
2
About :
In this episode, I explore the Anascostria Crossing and its surroundings. Some mods restored cut content there.
The full playlist is now available on Youtube and Odysee.
Timestamps below:
- 00:22 - I'm at Rivet City.
- 01:07 - Heading west and towards the super mutant camp.
- 01:49 - Near the water, BoS Initiate torches mirelurks (Broken Steel DLC).
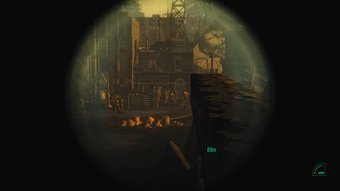
- 02:53 - Entering the super mutant camp.
- 03:14 - I can jump on the edge near the building and continue walking over it.
- 03:35 - I discovered the Mutant Mart, added by the Potomac Steamworks mod. It restores some areas that were cut from the game. Many thanks to TheSpiritOfNewReno for putting that area back into the game.
- 03:50 - The trigger to open the door isn't placed precisely at the front of the door. Aim to the right of the door.
- 03:57 - Guess what? Super mutants.
- 04:32 - A floor safe and a first-aid box.
- 05:48 - Oops! I forgot the companions inside.
- 05:58 - There was a living quarter inside.
- 06:26 - Accessing the terminal on the desk.
- 07:29 - A dead wasteland was near the shelves.
- 07:39 - A find a sewer hole in a room on the left.
- 08:11 - Entering the Potomac Steamworks.
- 08:19 - Surprise! Lots of glowing ones.
- 09:16 - The sewer leads to a new section of the nearby Anacostia Crossing Station.
- 11:05 - That footlocker contains some guns and ammo.
- 11:30 - Door to Anacostia Crossing Security. Some protectrons guard the place.
- 12:05 - There's a unique Slugged Combat Shotgun on the floor near the wall and two filling cabinets.
- 13:29 - Back to Potomac Steamworks.
- 13:41 - That door leads to the outside.
- 14:17 - Back at the start of the tunnel, I turn right. More glowing ones in the utility tunnels.
- 15:33 - Two first aid boxes.
- 15:52 - Through the utility tunnel to the west. Feral Ghoul Reavers in the rooms ahead.
- 16:58 - Lockipicking the door. It's a storage room.
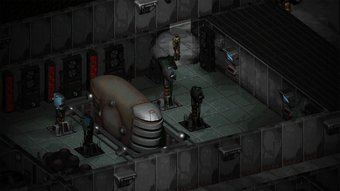
- 18:15 - The generator room. Nothing valuable in there, as far as I could see.
- 20:04 - Leaving the Steamworks through that exit near the security area.
- 21:10 - I'm right at the gates of Anacostia Crossing.
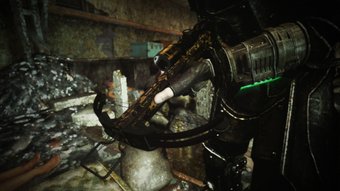
- 21:34 - Raiders inhabit the station. The Drifter Laser Rifle (FWE) is quite effective at killing them.
- 22:15 - That door connects with the Security Room in the Potomac Steamworks.
- 24:52 - On the platform, a Pugilism Illustrated is on a table near the north wall.
- 25:54 - Looting the dead.
- 29:54 - Heading to the other exit.
- 30:26 - Looting the offices and being seen by a raider.
- 32:01 - "Good riddance."
- 32:26 - That gate leads to Seward Square. I finish looting the area first.
- 36:27 - Entering the metro car near the blocked tunnel. On the floor, the Diary Page 4 can be found.
- 38:18 - Checking the next metro car. The Diary Pages 3, 2, and 1 are inside.
- 41:17 - Checking the tunnels on the opposite side.
- 42:46 - Ooops. Walked right into some raiders.
- 43:45 - That door at the end of one of the tunnels connects with the Museum Station
- 44:14 - In the area with raiders, I don't think it's possible to reach the tunnel on the other side of the fences. Check the map.
- 48:12 - One more metro car to look into.
- 49:15 - Leaving through the Seward Square exit.
- 49:44 - I emerge at Seward Sq. Southeast. Super mutants are nearby.
- 51:17 - I enter the nearby Robco Terminals Sales and Services.
- 51:44 - Happy Hour, one of the Drunken Gnomes of The DC Interiors Project, is hidden on the floor between a desk and a tool cabinet. I didn't see it the first time I visited the place.
That is all, folks!
Show more
Tags :
Woo!
This creator can upvote comments using 3speak's stake today because they are a top performing creator!
Leave a quality comment relating to their content and you could receive an upvote
worth at least a dollar.
Their limit for today is $0!
Their limit for today is $0!
1 views
2 years ago
$
2 views
a year ago
$

4 views
2 years ago
$

4 views
a year ago
$

4 views
2 years ago
$
More Videos

19 views
2 years ago
$

2 views
2 years ago
$

1 views
3 years ago
$

1 views
a year ago
$

24 views
a year ago
$

0 views
2 years ago
$

15 views
a year ago
$

0 views
4 years ago
$
5 views
2 years ago
$

4 views
2 years ago
$

14 views
a year ago
$

3 views
a year ago
$

1 views
2 years ago
$

1 views
2 years ago
$

2 views
5 months ago
$

17 views
a year ago
$

4 views
a year ago
$

3 views
2 years ago
$

9 views
a year ago
$

1 views
8 months ago
$
1 views
11 months ago
$

9 views
2 years ago
$

2 views
3 years ago
$
Comments:
Reply:
To comment on this video please connect a HIVE account to your profile: Connect HIVE Account