Suspiros Realizados con Merengue Francés: ¡Todos los trucos! | Sighs Made with French Meringue
13
About :

Hola, hoy paso de nuevo por aqui y ésta vez con una receta perfecta para estas Navidades, unos suspiros realizados con los ingredientes mas básicos que podrías imaginar, debes leer con atención, ya que contaré todos los secretos que lleva esta preparación.
Tambien cabe destacar que añadí un video "SIN EDICIÓN", donde podrás ver en tiempo real como realizo el Merengue Francés y lo coloco boca abajo para probar su dureza, luego aplasto un suspiro ya cocido para que puedan ver su consistencia seca y arenosa. Aunque al no ser un video muy producido, vamos a seguir igualmente realizando nuestro post escrito para que no te pierdas del paso a paso ☺️
Hello, today I am here again and this time with a perfect recipe for this Christmas, some sighs made with the most basic ingredients you could imagine, you must read carefully, since I will tell you all the secrets that this preparation has.
It is also worth noting that I added a "NO EDITING" video, where you can see in real time how I make the French Meringue and place it upside down to test its hardness, then I crush a cooked sigh so you can see its dry and sandy consistency. Although since it is not a very produced video, we are going to continue making our written post anyway so you don't miss the step by step ☺️
Ingredientes | Ingredients

Los ingredientes para los suspiros son bastantes básicos, técnicamente solo necesitamos claras de huevo y azúcar, aunque para tener un mejor resultado, yo haré mi propia azúcar glass y añadiré un poco de ralladura de limón ☺️
- 3 cucharadas de Azúcar común
- 1/2 cucharada de Maizena
- La clara de 1 huevo (30 gr)
- La ralladura de 1 limón
The ingredients for the sighs are quite basic, technically we only need egg whites and sugar, although for a better result, I will make my own powdered sugar and add a little lemon zest ☺️
- 3 tablespoons of common sugar
- 1/2 tablespoon cornstarch
- The white of 1 egg (30 gr)
- Zest of 1 lemon
Paso a paso | Step by Step
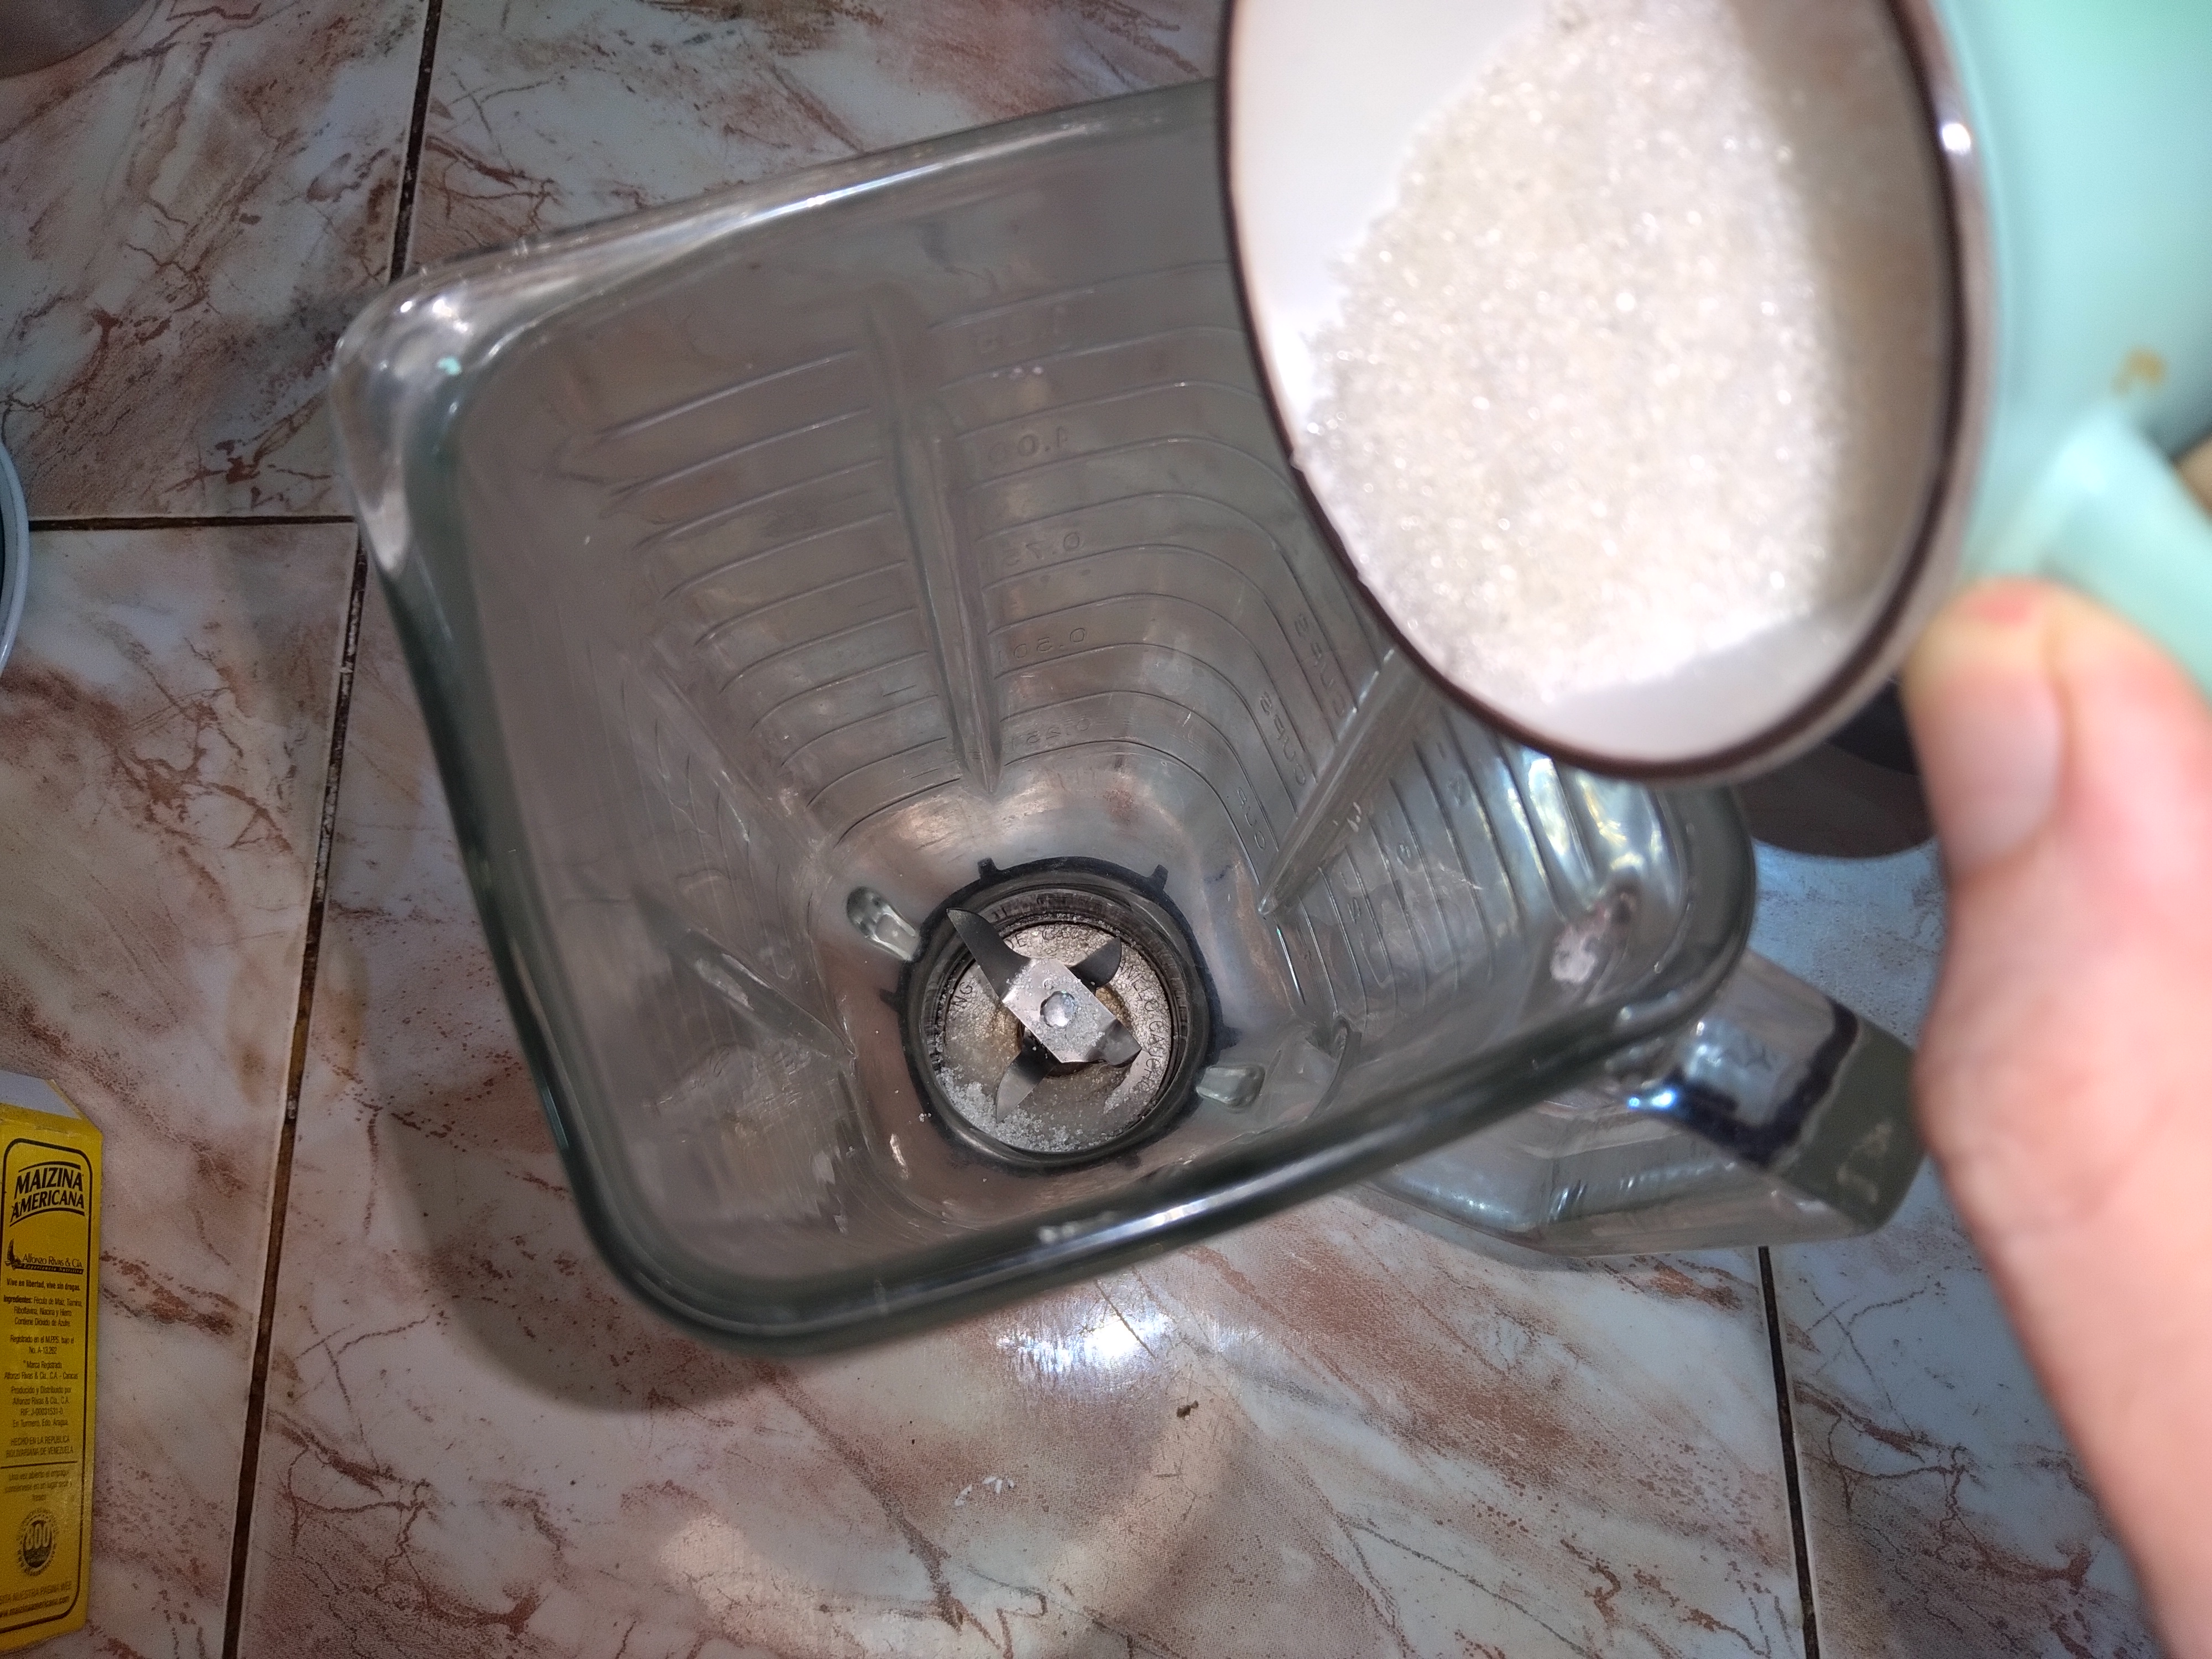


El primer paso es realizar la azúcar glass, para esto simplemente voy a meter en la licuadora el azúcar común y la Maizena (tambien añadí una pizca de sal). Licue a toda velocidad por menos de un minuto y listo ☺️
Nota: luego de licuar debes dejar la licuadora cerrada unos minutos o tendrás una nube de polvo blanco en toda tu cocina.
The first step is to make the icing sugar, for this I am simply going to put the common sugar and cornstarch in the blender (I also added a pinch of salt). Blend at full speed for less than a minute and voila ☺️
Note: after blending you must leave the blender closed for a few minutes or you will have a cloud of white powder all over your kitchen.

Aqui deberás ver el video, porque realmente no conseguí una forma de mostrarte con imágenes el proceso detallado de como realizar el merengue. Solo puedo decirte que el proceso tarda 5 minutos ☺️
Here you should see the video, because I really couldn't find a way to show you with images the detailed process of how to make the meringue. I can only tell you that the process takes 5 minutes ☺️


Si ya viste el video, habras notado algo curioso y es que utilicé solo la mitad de la velocidad de la batidora para realizar el merengue y si, es la forma correcta, si utilizas una velocidad alta crearás burbujas muy grandes y efectivamente obtendrás un punto de nieve mas rapido, pero menos consistente, es decir, hay mas posibilidades de que se caiga transcurrido cierto tiempo.
If you have already seen the video, you will have noticed something curious and that is that I used only half the speed of the mixer to make the meringue and yes, it is the correct way, if you use a high speed you will create very large bubbles and effectively you will get a point of snow faster, but less consistent, that is, there is more chance that it will fall after a certain time.


La temperatura del horno es algo importante, aunque a decir verdad yo no voy a aplicar lo que diré a continuación..
El horno debe estar al mínimo, literalmente el mínimo (-100° C). Si es posible colocamos algo que deje la puerta semi abierta, la idea es deshidratar lentamente el merengue. Lógicamente yo no lo voy a hacer, porque eso conlleva 3 horas y bueno.. el gas no lo regalan 😂
The temperature of the oven is something important, although to tell the truth I am not going to apply what I will say next.
The oven should be on minimum, literally minimum (-100° C). If it is possible we place something that leaves the door semi-open, the idea is to slowly dehydrate the meringue. Logically I'm not going to do it, because that takes 3 hours and well... gas is not given away 😂

En mi caso, luego de 45 minutos de horno, saqué estos hermosos y agrietados suspiros del horno. Se agrietan porque la humedad logra generar cierta cantidad de vapor que rompe la capa superficial para salir al exterior.
Tambien es común que estos suspiros queden con un hueco en su interior, tambien producto de la temperatura y del vapor generado en su interior.
In my case, after 45 minutes in the oven, I took these beautiful cracked sighs out of the oven. They crack because the humidity manages to generate a certain amount of steam that breaks the superficial layer to go outside.
It is also common for these sighs to have a hole inside, also a product of the temperature and the steam generated inside.
Extra
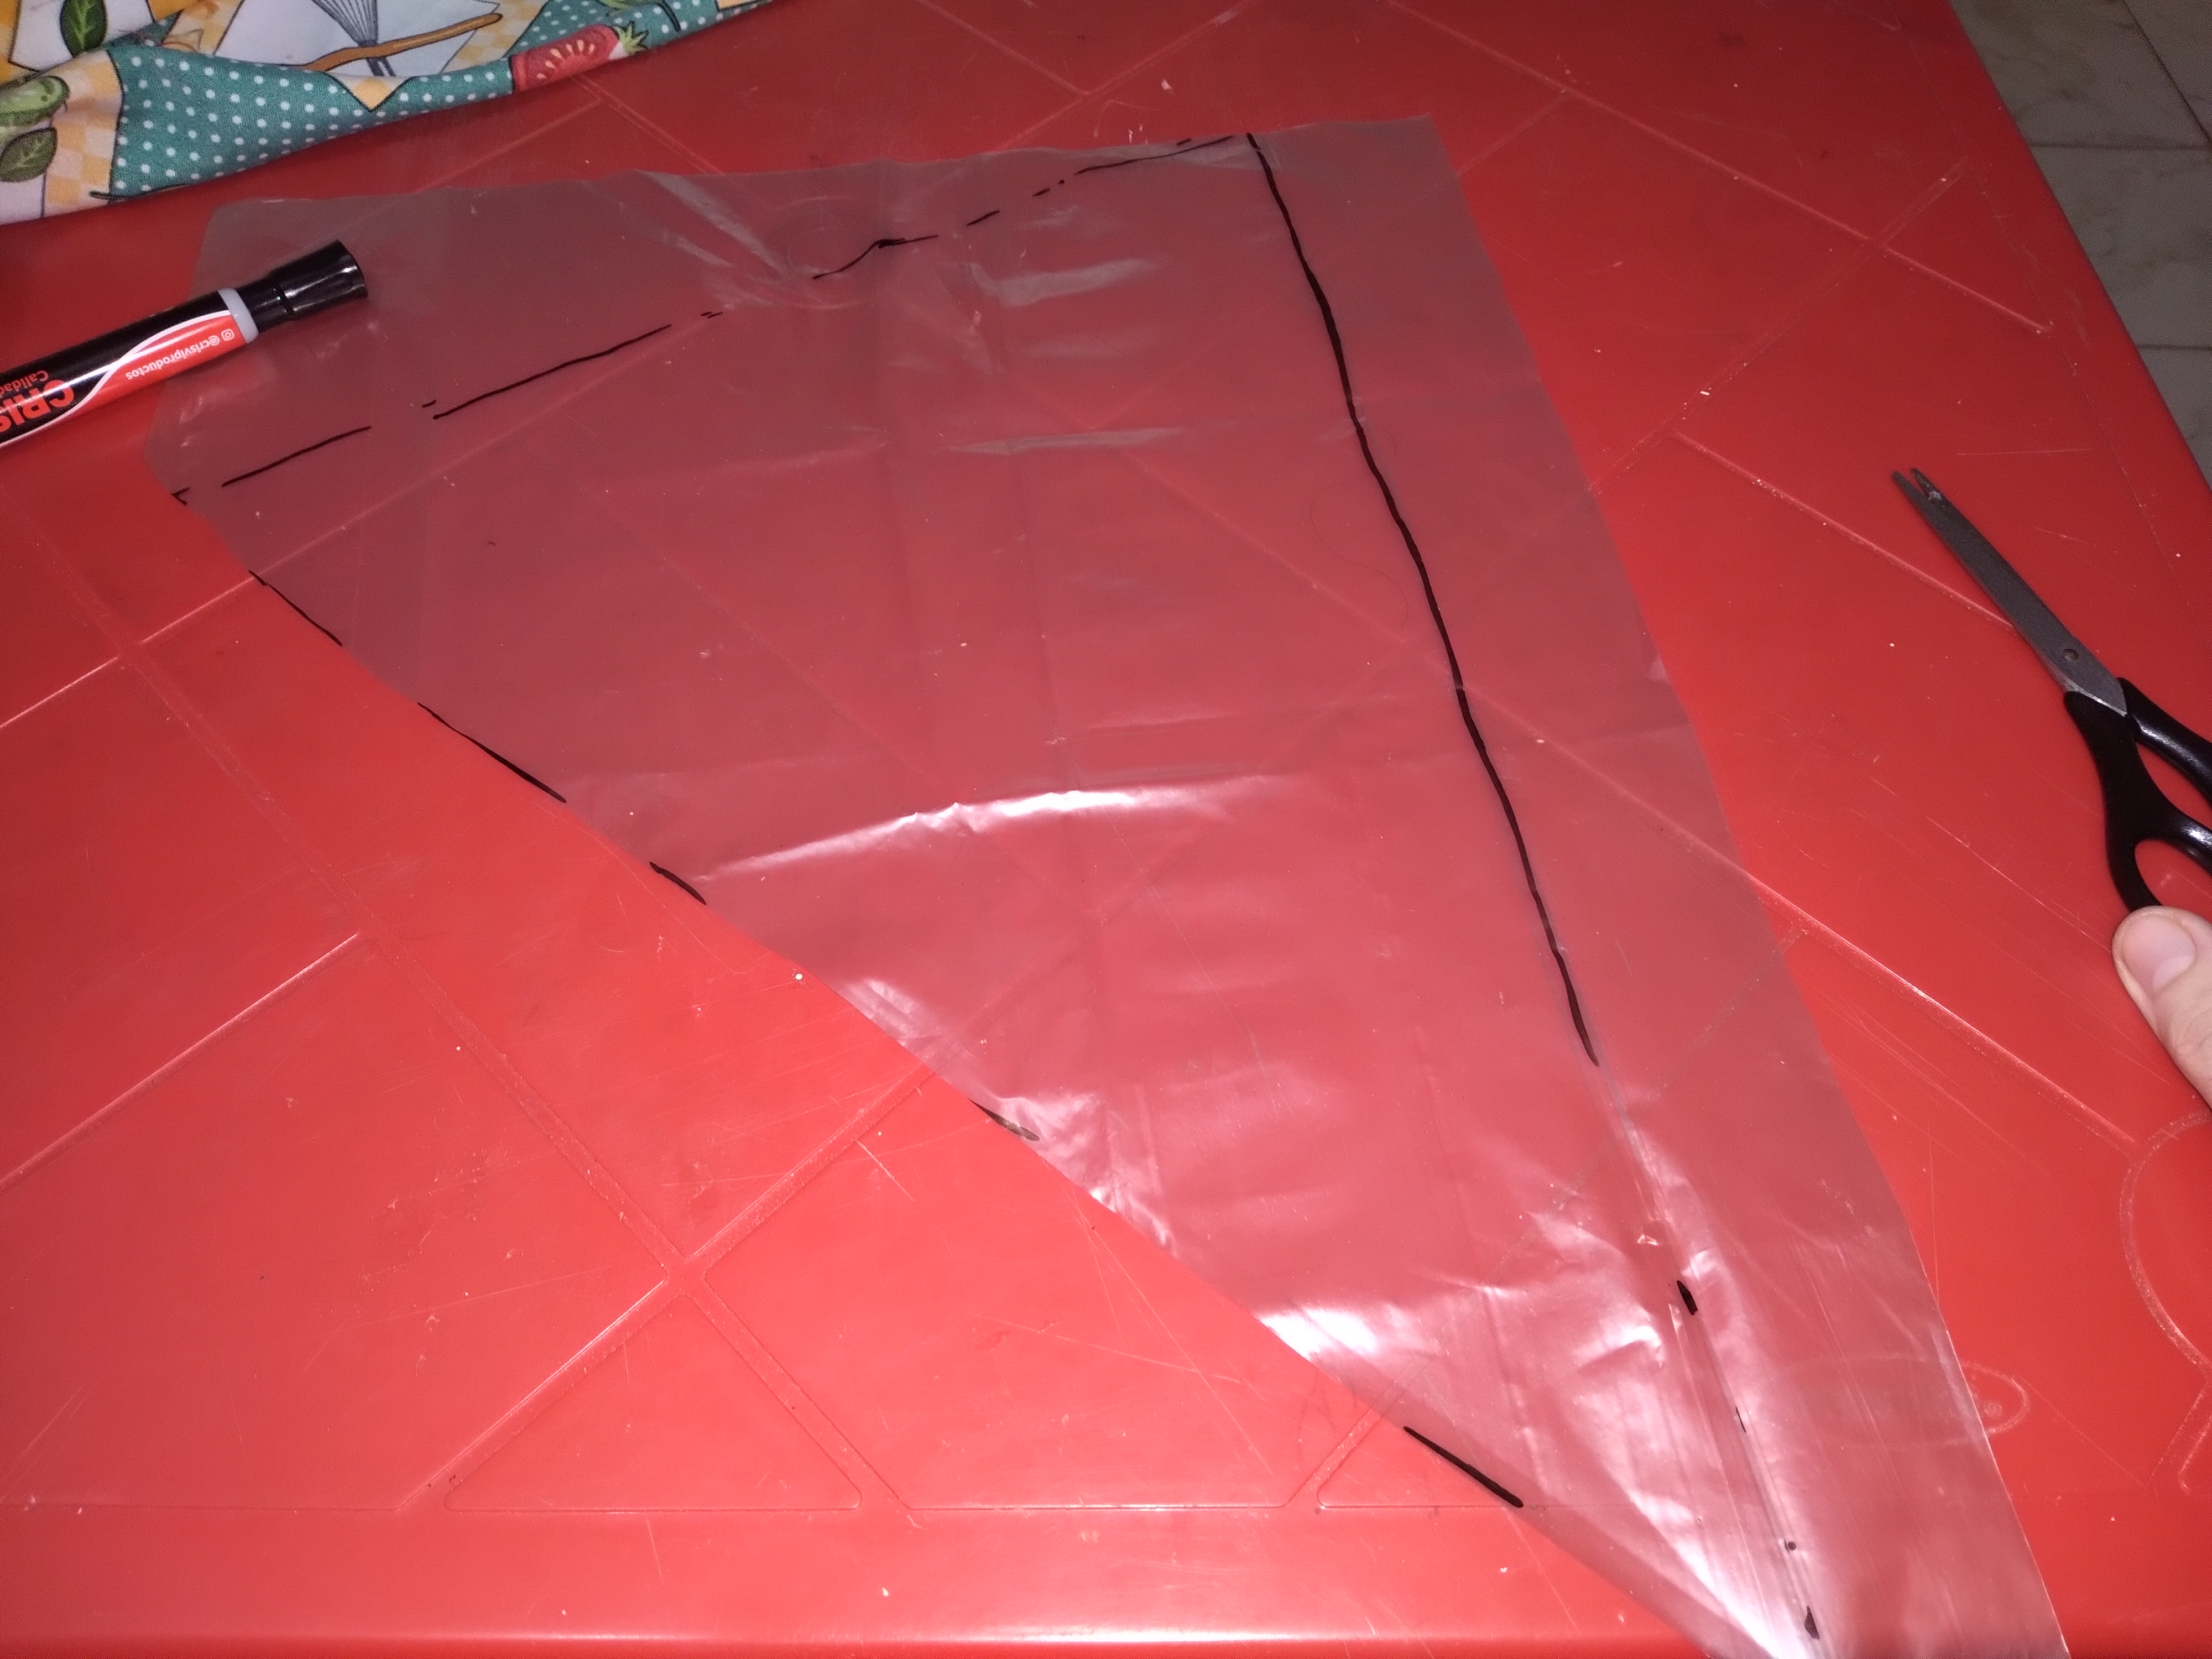


La manga pastelera utilizada para este post fué realizada en casa, corté plástico de una bolsa de envios y lo sellé utilizando la selladora de mi madre.
Si tu no tienes una selladora, tambien puedes utilizar una plancha de ropa, aunque lógicamente tendrás que tener mas cuidado, te recomiendo empezar utilizando la temperatura mas baja e ir subiendo la temperatura si el plástico lo requiere.
The pastry bag used for this post was made at home, I cut plastic from a shipping bag and sealed it using my mother's sealer.
If you do not have a sealer, you can also use a clothes iron, although logically you will have to be more careful, I recommend you start using the lowest temperature and increase the temperature if the plastic requires it.
Show more
Tags :
Woo!
This creator can upvote comments using 3speak's stake today because they are a top performing creator!
Leave a quality comment relating to their content and you could receive an upvote
worth at least a dollar.
Their limit for today is $0!
Their limit for today is $0!
12 views
11 months ago
$
12 views
a year ago
$

52 views
11 months ago
$

15 views
11 months ago
$

8 views
10 months ago
$
More Videos

17 views
2 years ago
$

48 views
a year ago
$

31 views
3 years ago
$

1 views
2 years ago
$

3 views
8 months ago
$

12 views
2 years ago
$

6 views
2 years ago
$

54 views
4 weeks ago
$

4 views
2 years ago
$

11 views
a year ago
$

19 views
11 months ago
$

18 views
a year ago
$

13 views
a year ago
$

13 views
a year ago
$

16 views
8 months ago
$

7 views
a year ago
$

7 views
a year ago
$

16 views
a year ago
$

35 views
a year ago
$

8 views
3 weeks ago
$

Detrás de cámara y tutorial - Grabando Voces editadas usando Vsts/efectos - Proceso MIDI - @nahupuku
5 views
2 years ago
$

26 views
a year ago
$
Comments:
Reply:
To comment on this video please connect a HIVE account to your profile: Connect HIVE Account