Magic of DTF printing on clothes
1
About :
The digital textile printing industry has seen rapid growth since the last decade as more & more users shift towards the digitalization of textile printing. The use of digital printers allows one to inculcate ease, simplicity, fabric performance, consistency, and most importantly an enormous variety of colors in textiles thus making the whole process reliable & cost-effective overall. There are several processes that come under the umbrella of printing on textiles digitally. In this article, we will be mainly discussing the DTF printing process (Direct to Film Printing) process.
What is DTF Printing?
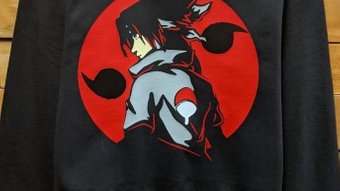
The DTF process is as simple in its working as its name suggests – Print on a film and directly transfer onto fabric. The most prominent factor that makes this process worthy of use across a larger number of people is the freedom to choose almost any fabric. Be it polyester, cotton, silk or synthetic fibres like rayon or terrycot, the DTF printing process will definitely work its magic on them.
Step 1 – Print on Film
Instead of regular paper, insert the PET film in the printer trays. First print the entire image in white on the PET film. After this, using the appropriate color settings the in printer, print the required image on the white image layer. The important point to remember is that the print on the film must be a mirror-image of the actual image that needs to appear on the fabric.
Step 2 – Powdering
This step is the application of hot-melt powder on the film that has the printed image on it. The powder is applied uniformly when the print is wet and the excess powder needs to be removed carefully. The important thing is to ensure that the powder is evenly spread all over the printed surface on the film. One very common way to ensure this is to hold the film at its short edges such that its long edges are parallel to floor (landscape orientation) and pour the powder in the middle of the film from top to bottom such that it forms an approximately 1 inch thick heap in the centre from the top to the bottom. Pick up the film together with the powder and slightly bend it inwards such that it forms a slight U with the concave surface facing oneself. Now rock this film from left to right very lightly such that the powder will slowly and evenly spread all across the surface of the film. Alternately, one can use automated shakers available for commercial setups.
Step 3 – Melting the powder
As in the name, the powder is melted in this step. This can be done in various ways. The most common way is to put the film with the printed image and the applied powder in the Curing Oven and heat. If the curing oven is unavailable, place the film inside the heat press and bringing the top of the press very close to the film but not touching it. There should be around 4 to 7 mm gap between the film and heat press top plate. One can use a metal wire to fasten the press top such that it does not totally close over the film and leaves a necessary gap. For best results, it is highly recommended to go by the manufacturer specification for powder melting. Depending upon the powder and equipment, the heating is generally done for 2 to 5 minutes with the temperature around 160 to 170 degree Celsius.
Step 4 – Pre-pressing
The step involves pre-pressing of the fabric prior to transfer of image by the film. The fabric is kept in the heat press and pressurized under heat for about 2 to 5 seconds. This is done to flatten the fabric and also ensure de-humidification of the fabric. The pre-pressing helps in proper transfer of the image from the film on to the fabric.
Step 5 – Transfer
This is the heart of the DTF printing process. The PET film with the image and the melted powder is placed on the pre-pressed fabric in the heat press for a strong adhesion between the film and the fabric. This process is also called ‘curing’. The curing is done at a temperature range of 160 to 170 degree Celsius for approximately 15 to 20secomds. The film is now firmly attached to the fabric.
Step 6 – Cold Peel
It is important that the fabric and the now attached film on it cool down to room temperature before one pulls the film off. Since the hot-melt has a nature similar to amides, as it cools down, it acts as a binder that hold the colored pigment in the inks in firm adhesion with fibres of the fabric. Once the film is cooled, it must be peeled off the fabric, leaving the required design printed in ink over the fabric.
Step 7 – Post-pressing
This is an optional step but is very highly recommended for best results and high performance parameters like wash and rub fastness. In this step, the final fabric with the transferred design is pressed in the heat press for around 10 to 15 seconds.
text or more information here:
splashjet-ink.com/dtf-printing-process/
Show more
Tags :
Woo!
This creator can upvote comments using 3speak's stake today because they are a top performing creator!
Leave a quality comment relating to their content and you could receive an upvote
worth at least a dollar.
Their limit for today is $0!
Their limit for today is $0!

5 views
2 years ago
$

5 views
3 years ago
$
4 views
3 years ago
$

6 views
2 years ago
$
3 views
3 years ago
$
More Videos

17 views
3 years ago
$

0 views
8 months ago
$

12 views
a year ago
$

1 views
3 months ago
$

17 views
2 years ago
$

0 views
6 months ago
$

48 views
4 years ago
$

0 views
6 months ago
$

0 views
a month ago
$

3 views
2 years ago
$

23 views
2 years ago
$

11 views
2 years ago
$

14 views
3 years ago
$

11 views
2 years ago
$
5 views
a year ago
$

8 views
3 years ago
$

0 views
6 months ago
$

1 views
8 months ago
$

5 views
a year ago
$

3 views
2 years ago
$

0 views
3 years ago
$

0 views
4 months ago
$
Comments:
Reply:
To comment on this video please connect a HIVE account to your profile: Connect HIVE Account