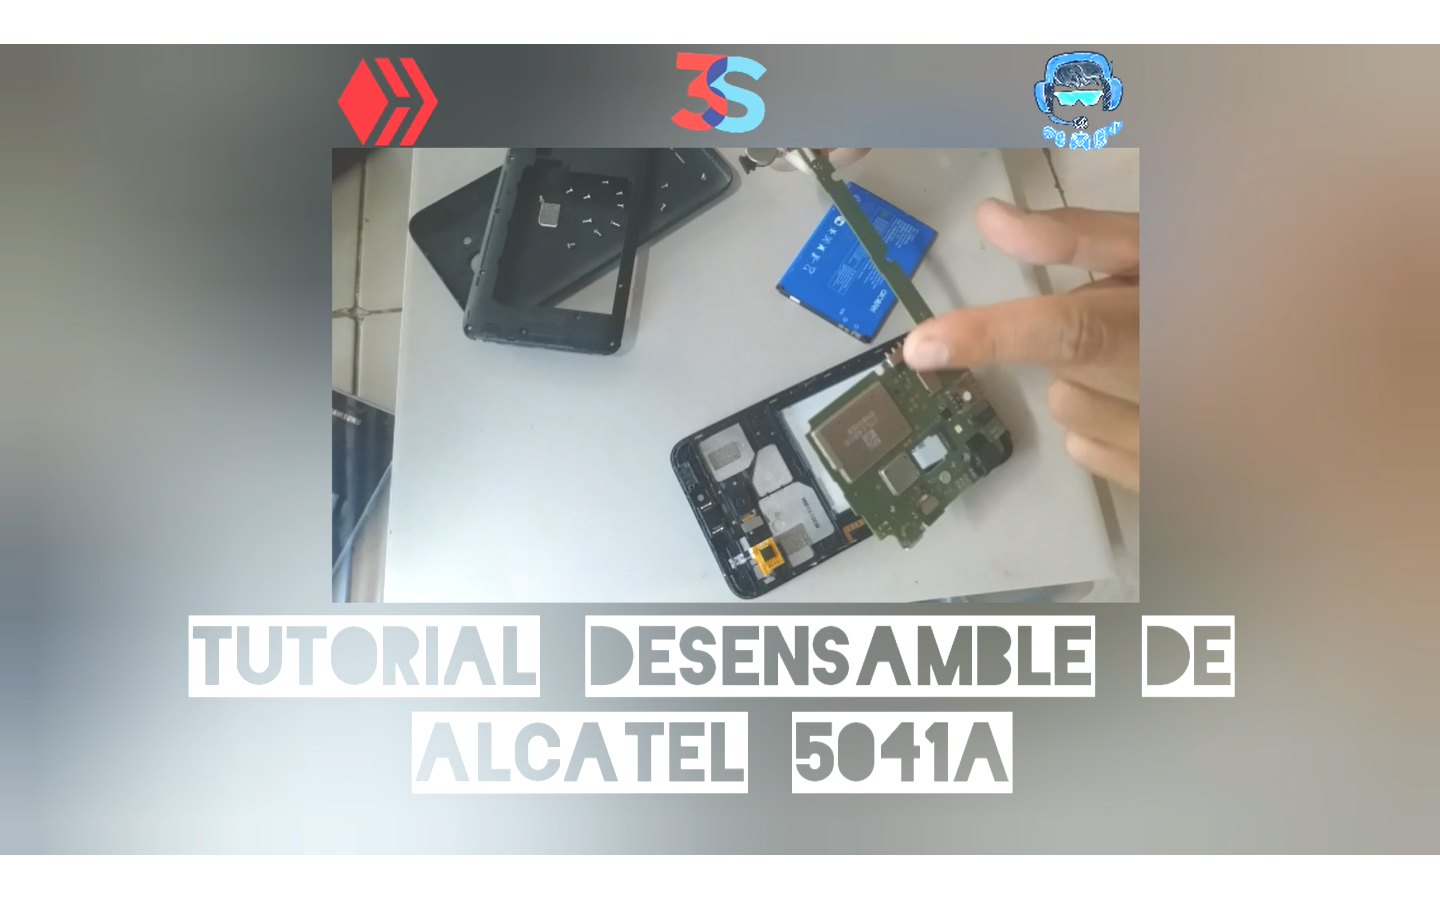
Tutorial disassembly of alcatel 5041a / Tutorial desensamble de alcatel 5041a
3
About :
| content sources | |
|---|---|
| - Translation of the text: | https://www.deepl.com |
| - Separator taken from: | Here |
| - Photo and video: | Picsart pro. YouCut. Samsung Galaxy j6 plus. |
| - Source and authorship of content: | @josuerr29 |
| - Creation of gift: | https://www.canva.com. |
| - Video intro by @josuerr29 | app YouCut. |
| - Music of the video Without copyright: | soundcloud |
| Logo 1 | Design by https://studio.3espeak.tv |
| Logo 2 | Design by https://hive.blog |
| Logo 3 | Design of the geek zone meal |
| Equipment used for the video example | Motorola e7 Plus |
| Samsung j6 + | Recording equipment |
| Setup for recording | Tripod for can-i820 |
English
Hi guys from geek zone how are you? How are you doing I'm josuerr29 and I bring in this week other important content.
In my workshop has come a team that the customer has brought because it has problems with the charging pin, when I go to check not even disarm it and just look at the charging pin, at first glance I realized that the customer had given very hard to the charging pin and had sunk all the plastic port and this port carries inside plastic all the tracks that conduct electricity because he introduced and removed it with rudeness then the charging pin damage it.
I spoke to the customer and asked him what happened and he told me that he had indeed done it that way so I proceeded to disassemble it to perform a complete inspection and check that it was the only thing that was wrong.
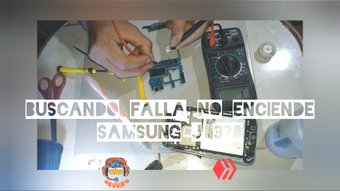
I then started with the disassembly, all you need to do this is an iron fluted screwdriver, and a steel screwdriver, you also need some plastic paddles to get the bezel off, and also some tweezers so you can get all the screen Flex and mica Flex off without having damaged anything.
You also need some anti-static wrist strap or anti-static gloves, I used the wrist strap here in my country the gloves have not sold them yet. I recommend that you also use a blue microphone table that also carries antistatic is a bit rubbery and spongy so that if you are going to place the phone with the screen or mica down does not damage the screen of the equipment, it also carries sections which can be distributed by cameras, screws, sensors, and things you can go away from the phone all to do a single job.
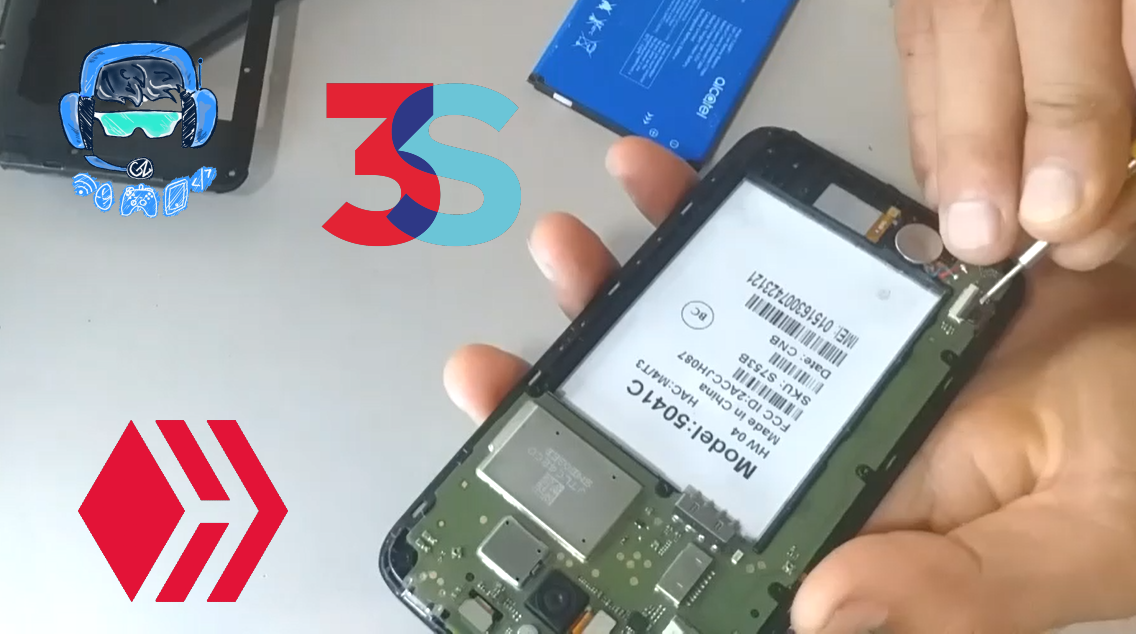
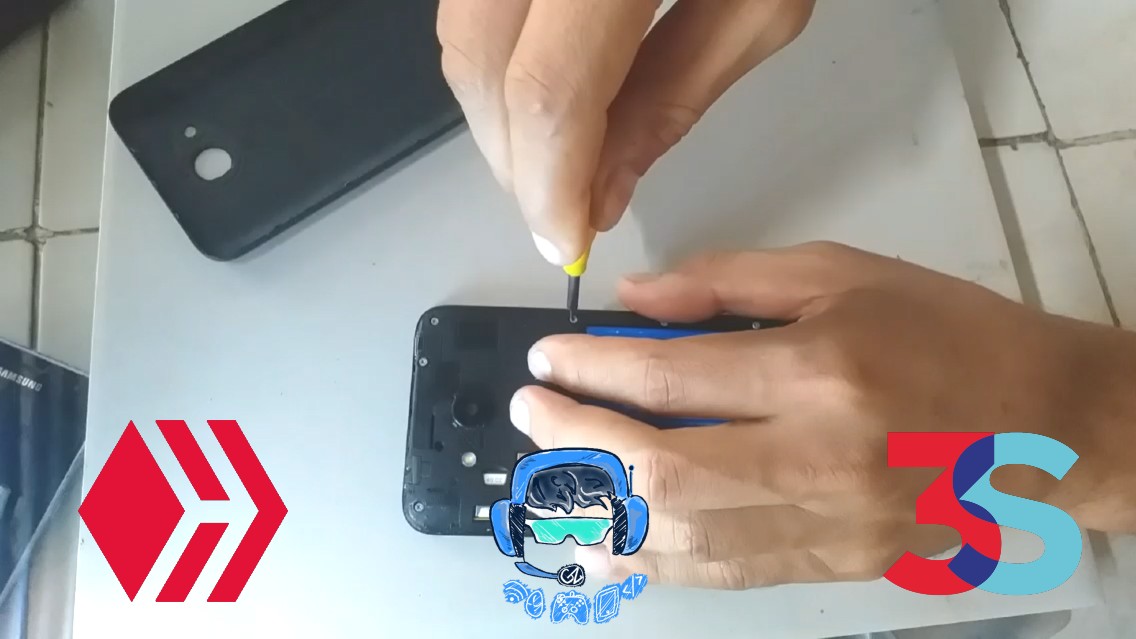
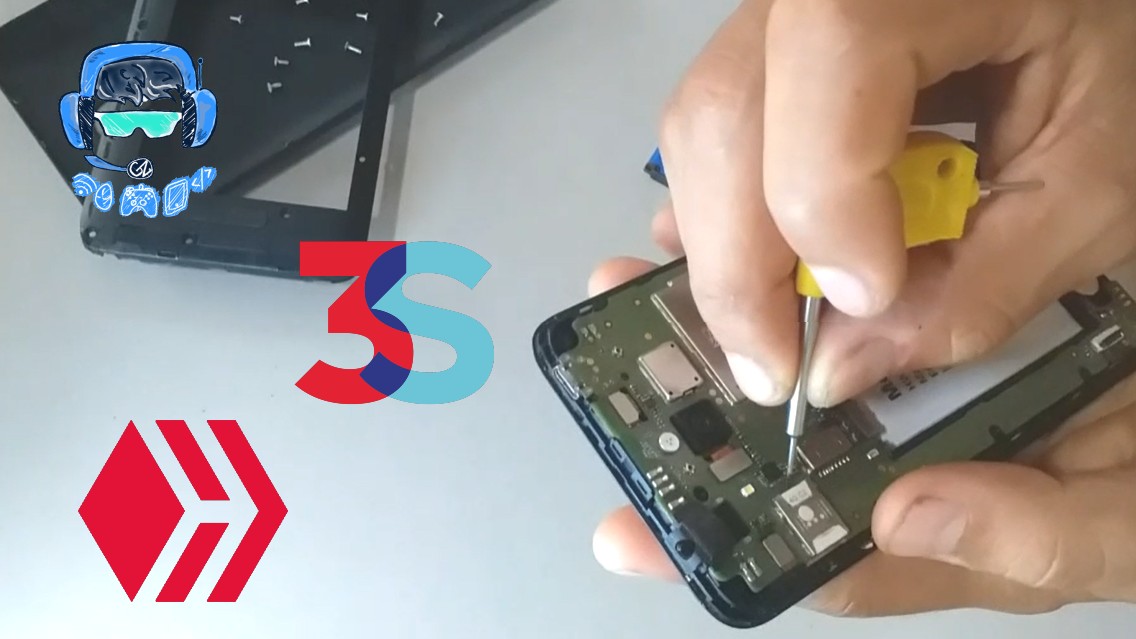
To do this all you have to do very carefully is to begin to lift the back cover of the device and then remove the SIM from the device this to avoid damaging it with any sudden movement, then proceed with the steel fluted screwdriver to begin to loosen each screw very carefully then normally with a screwdriver iron begin to remove them all one by one.
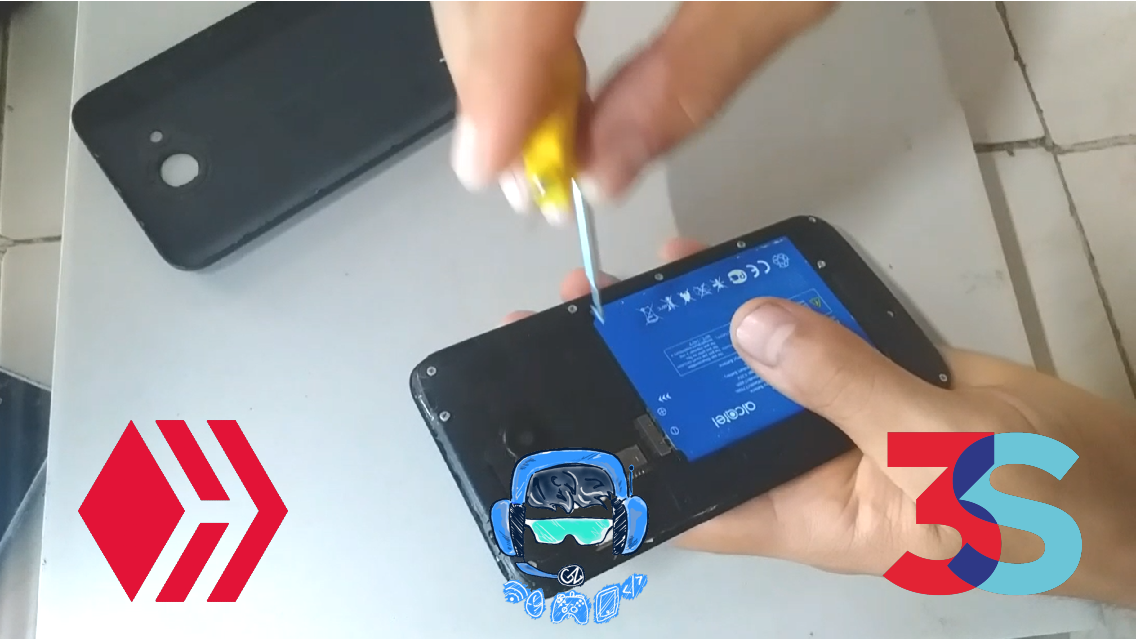
When I finished my job of removing all the screws with a pliers and very carefully I begin to pull them without damaging any thread of each screw are approximately 12 to 14 screws that carries this equipment.
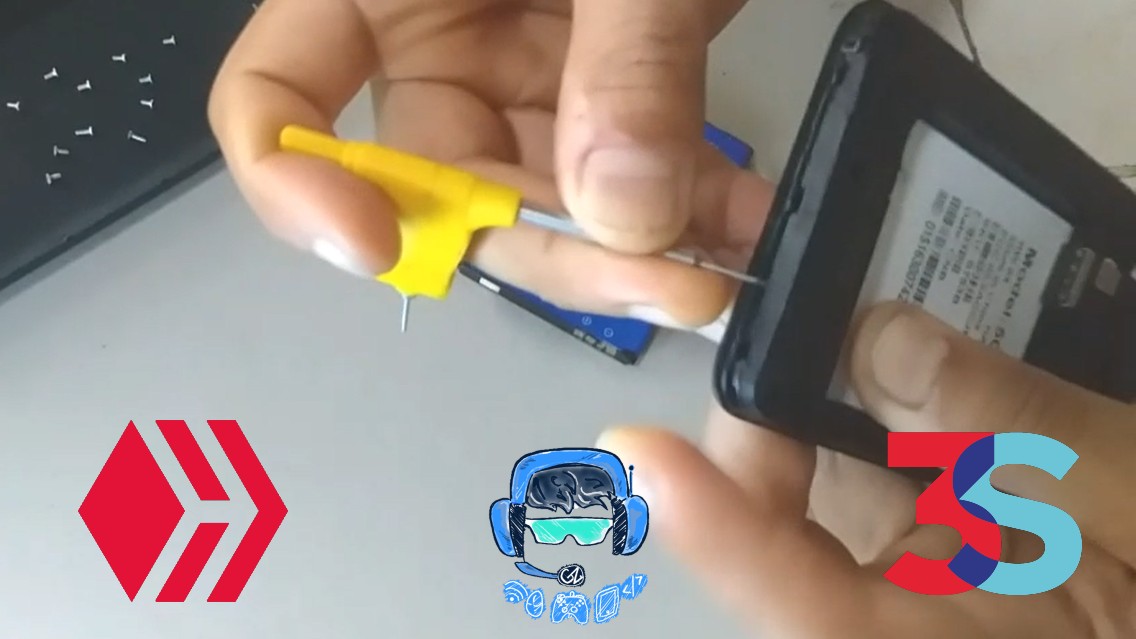
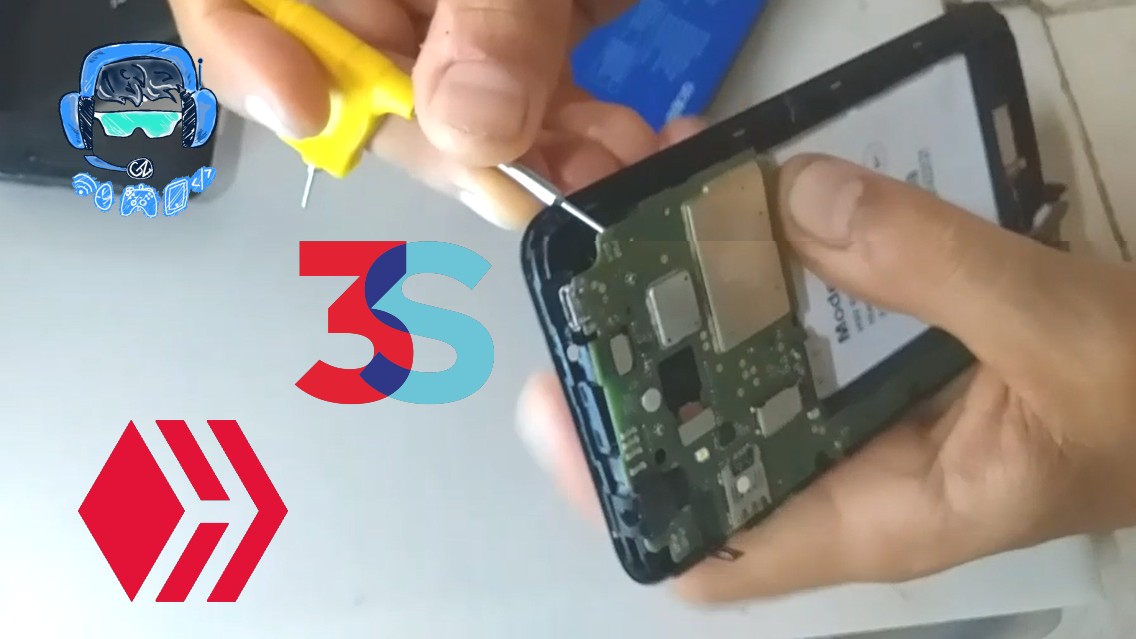
After removing all the screws we have to locate on the side of the equipment the bezel Find some small holes through which we can put our plastic spatula and just do little pressure, if we do not do it there we can break, damage, mark the bezel, however if you do it through these holes will be very easy to lift the bezel just do a little pressure and you can move the entire bezel out.
After this it will be very easy and very practical to remove the rest of the bezel, but we need patience. This is the part where we will need more patience since all that comes to lift are very delicate implements.
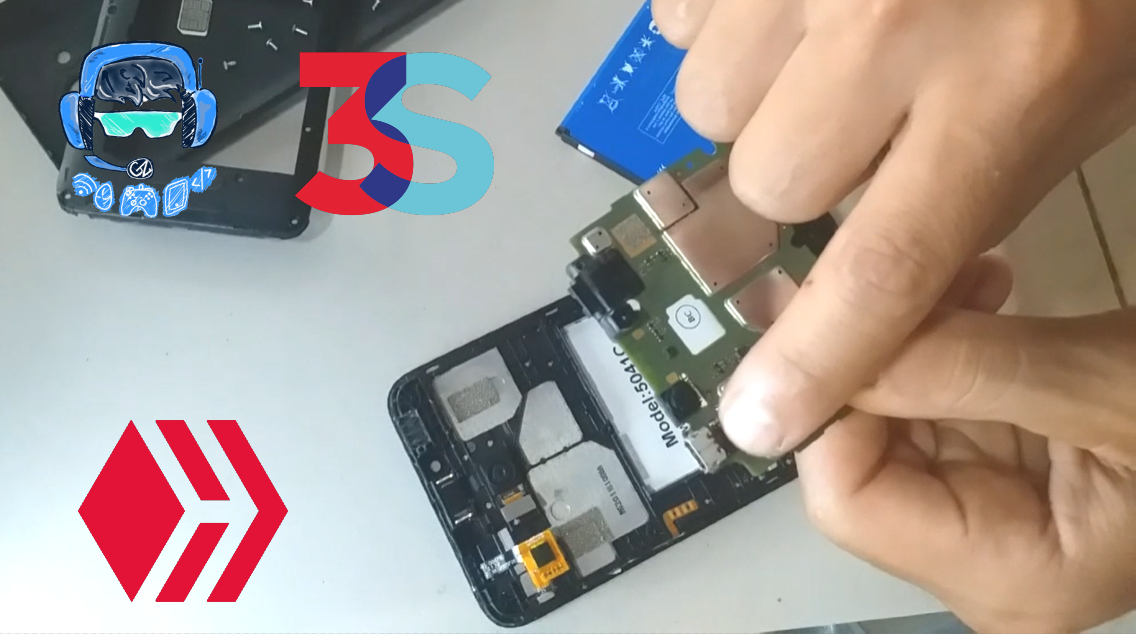
With a tweezers we will begin to remove very gently each Flex of the team that goes to the plate, Flex screen, Flex touch, Flex cameras, with great care not to damage the Flex of the power buttons, when we manage to disconnect all this simply begin to lift each hook that is in the housing of the team that does not leave the plate out this simply make a kind of lever.
When you do it presses the plate out and it will come out easily this will make that it has already seated the plate what is what we need to review, after disassembling the plate simply touches to do all the analysis that you must do visual, and technical to proceed with the conclusion and then repair of the equipment.
Thanks for watching the video
Español
Hola muchachos de geek zone cómo están Cómo les va soy josuerr29 y traigo en esta semana otros contenido importante.
A mi taller ha llegado un equipo que el cliente ha traído porque tiene problemas con el pin de carga, cuando lo voy a revisar ni siquiera lo desarme y solamente observe el pin de carga, a simple vista me di cuenta que el cliente le había dado muy duro al pin de carga y había hundido todo el plástico del puerto y este Puerto lleva dentro de plástico todas las pistas que conducen electricidad Gracias a que lo introdujo y lo sacó con rudeza Entonces el pin de carga lo daño.
Hablé con el cliente le pregunté lo sucedido y me dijo que efectivamente lo había hecho así entonces procedí a desarmarlo para realizar la inspección completa y revisar que sea lo único que estuviera malo.
Entonces comencé con el desarme, lo único que se necesita para hacer esto es un destornillador de estría de hierro, y otro de acero, también se necesitan alguna paletas de plástico para sacar el bisel, y además algunas pinzas para poder sacar todos los Flex de pantalla y Flex de mica sin que haya dañado nada.
También se necesita alguna pulsera antiestática o guantes antiestática, yo utilice la pulsera aquí en mi país los guantes no los han vendido todavía. Recomiendo que también se utilice una mesa de micrófono azul que conlleva consigo también antiestática es un poco gomosa y esponjosa con el fin de que si vas a colocar el teléfono con la pantalla o mica hacia abajo no daña la pantalla del equipo, está también lleva consigo apartados los cuales puedes distribuir por cámaras, tornillos, sensores, y cosas que puedes ir apartando del teléfono todo para realizar un solo trabajo.
Para realizar esto lo único que debes hacer con mucho cuidado es comenzar a levantar la tapa trasera del equipo y luego sacar el SIM del equipo esto para no dañarlo con algún movimiento brusco, luego de haberlo hecho procedes con el destornillador de estría de acero a comenzar a aflojar cada tornillo con mucho cuidado luego normalmente con un destornillador de hierro comienzas a sacarlos todos unos por uno.
Cuándo terminó de realizar mi trabajo de sacar todos los tornillos con una pinza y con mucho cuidado comienzo a halarlos sin que dañe ninguna rosca de cada tornillo son aproximadamente 12 a 14 tornillos que lleva este equipo.
Luego de sacar todos los tornillos tenemos que localizar por la parte lateral del equipo el bisel Buscar algunos pequeños orificios por los cuales podemos meter nuestra espátula plástica y simplemente hacer poca presión, si no lo hacemos por allí podremos romper, dañar, marcar el bisel, sin embargo si lo haces por estos orificios será muy fácil levantar el bisel simplemente haces un poquito de presión y ya podrá desplazarse todo el bisel hacia afuera.
Ya después de esto será muy fácil y muy práctico sacar lo demás sin embargo necesitamos paciencia. Esta es la parte donde necesitaremos más paciencia ya que todo lo que viene por levantar son implementaos muy delicados.
Con una pinza comenzaremos a sacar muy suavemente cada Flex del equipo que va hacia la placa, Flex de pantalla, Flex de táctil, Flex de cámaras, con mucho cuidado de no dañar el Flex de los botones de encendido, cuando logremos desconectar todo esto simplemente comenzaremos a levantar cada gancho que hay en la carcasa del equipo que no Deja que salga la placa esto simplemente hacen una especie de palanca.
Cuando lo hagas presiona la placa hacia afuera y saldrá con facilidad esto hará que ya haya sentado la placa qué es lo que necesitamos revisar, después de desmontar la placa simplemente toca hacer todo el análisis que debes hacer visual, y técnico para proceder con la conclusión y luego reparación del equipo
Gracias por ver el vídeo
| fuentes del contenido | |
|---|---|
| - Traducción del texto: | https://www.deepl.com |
| - Separador tomado de: | Aqui |
| - Foto y video: | Picsart pro. YouCut. Samsung Galaxy j6 plus. |
| - Fuentem autoría del contenido: | @josuerr29 |
| - Creación de gift: | https://www.canva.com. |
| - Intro del video realizada por @josuerr29: | app YouCut. |
| - Musica del video Sin derecho de autor: | soundcloud |
| Logo 1 | Diseño de https://studio.3espeak.tv |
| logo 2 | Diseño de https://hive.blog |
| Logo 3 | Diseño de la cominida de geek zone |
| Equipo usado para el ejemplo del vídeo | Motorola e7 Plus |
| Equipo de grabacion | Samsung j6 + |
| Setup de grabacion | Tripode para camaras can-i820 |


Show more
Tags :
Woo!
This creator can upvote comments using 3speak's stake today because they are a top performing creator!
Leave a quality comment relating to their content and you could receive an upvote
worth at least a dollar.
Their limit for today is $0!
Their limit for today is $0!

9 views
a year ago
$

5 views
a year ago
$
1 views
a year ago
$

15 views
a year ago
$

3 views
a year ago
$
More Videos

14 views
a year ago
$

4 views
a year ago
$

11 views
a year ago
$

66 views
11 months ago
$

4 views
3 years ago
$

14 views
8 months ago
$

16 views
a year ago
$

0 views
2 years ago
$

7 views
2 years ago
$

1 views
2 years ago
$

4 views
2 years ago
$

4 views
2 years ago
$

4 views
10 months ago
$

2 views
5 months ago
$

17 views
a year ago
$

30 views
9 months ago
$

20 views
a year ago
$

17 views
a year ago
$

10 views
a year ago
$

59 views
10 months ago
$

13 views
a year ago
$

16 views
a year ago
$

2 views
2 years ago
$

2 views
a year ago
$

0 views
6 months ago
$
Comments:
Reply:
To comment on this video please connect a HIVE account to your profile: Connect HIVE Account