Corazón de origami, un bello detalle de papel (Español/ingles)
18
About :
Un saludo amoroso para todos mis amigos de Hive, estamos a mitad de semana y siento que han sido unos días maravillosos, hoy deseo compartir con ustedes otra figura de mi gran pasión, el origami. Es la primera vez que publico en esta comunidad, pero estoy segura que estaré haciéndolo más seguido. Quería compartir desde hace mucho sobre el bello arte de doblado de papel, pero quería tomarme mi tiempo para hacer los posts de manera que se entendieran bien cada dobles.
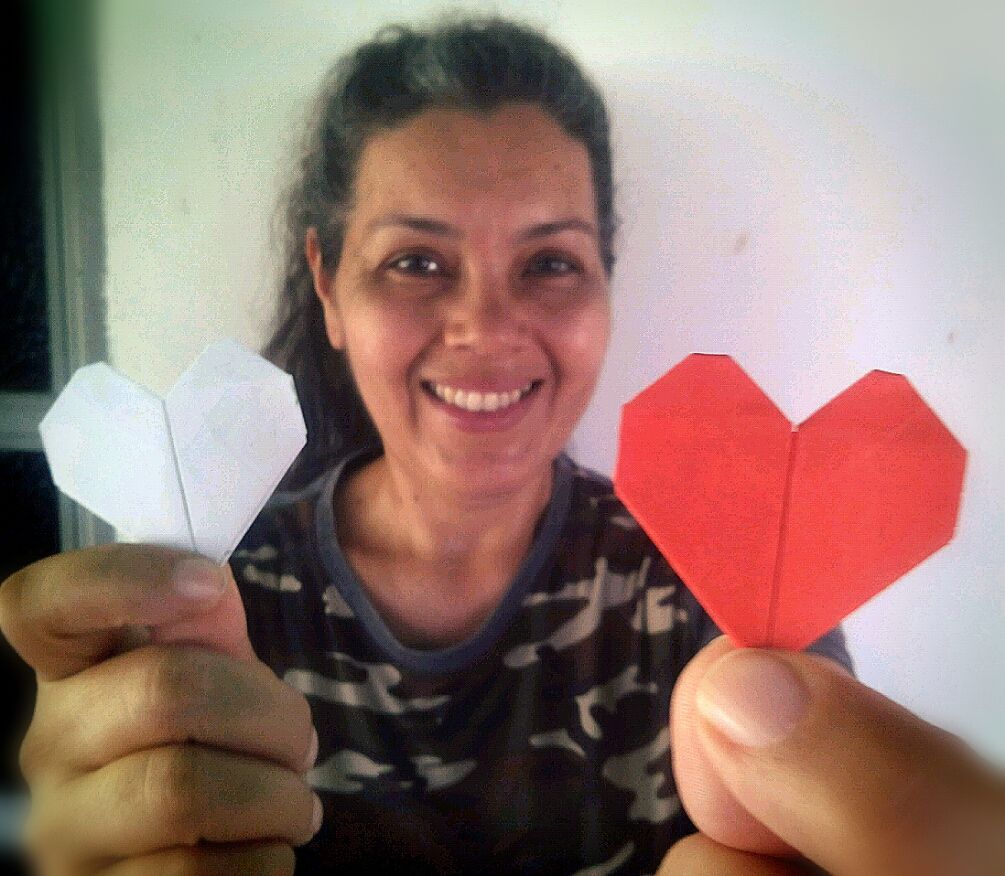
Como lo he dicho en otras ocasiones, el origami trae beneficios maravillosos para nuestra mente y cuerpo, además de eso trae consigo una enorme satisfacción al momento de tener en nuestras manos los bellos resultados que podemos obtener doblando papel. Esta vez realizaremos el corazón, esta figura es una muestra de ellos, sencilla y hermosa, perfecta para usarla como tarjetas o para decorar, estoy segura que disfrutarán mucho realizándola.
Como siempre dejo a continuación las recomendaciones básicas para empezar:
-Manos y mesa limpias. (El papel se ensucia con facilidad, no queremos dañar el trabajo)
-Nada de comida o líquidos cerca del área de trabajo (El palpe se daña cuando tiene contacto con el agua)
-Buena luz (para el cuido de la vista)
-Espalda derecha (para el cuido de la postura)
Esta es una de las muchas figuras que en el origami inician con un cuadrado perfecto.
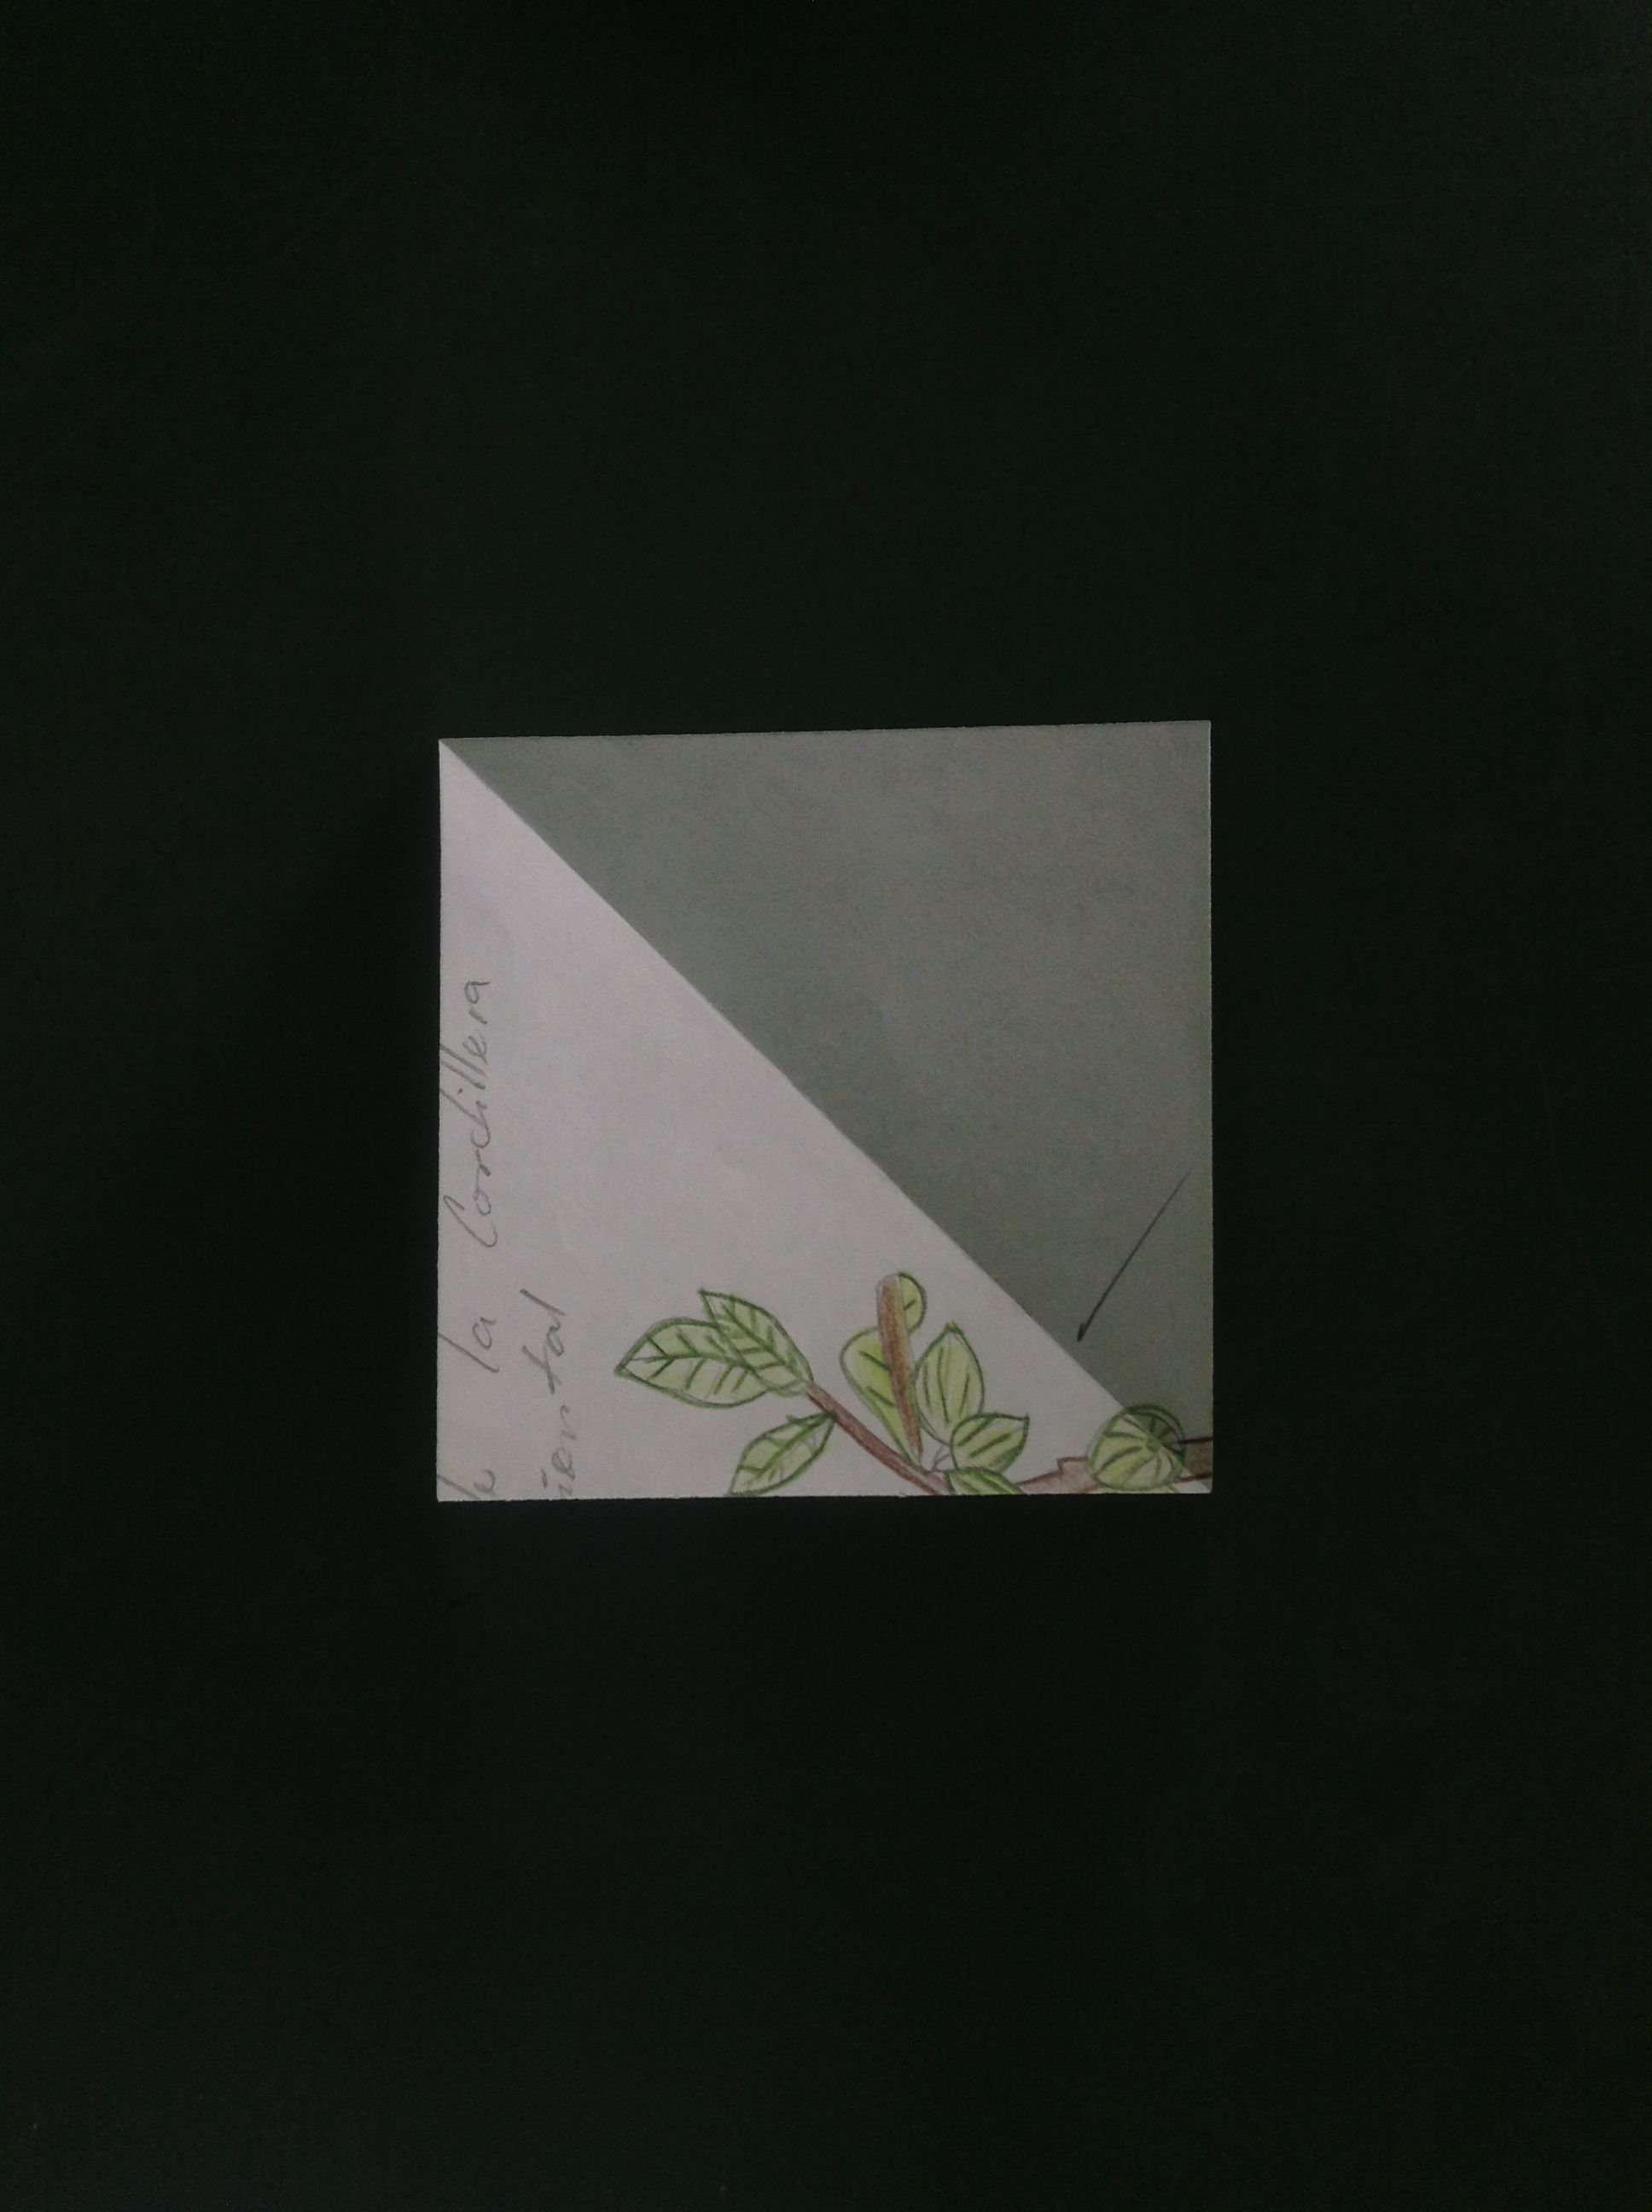
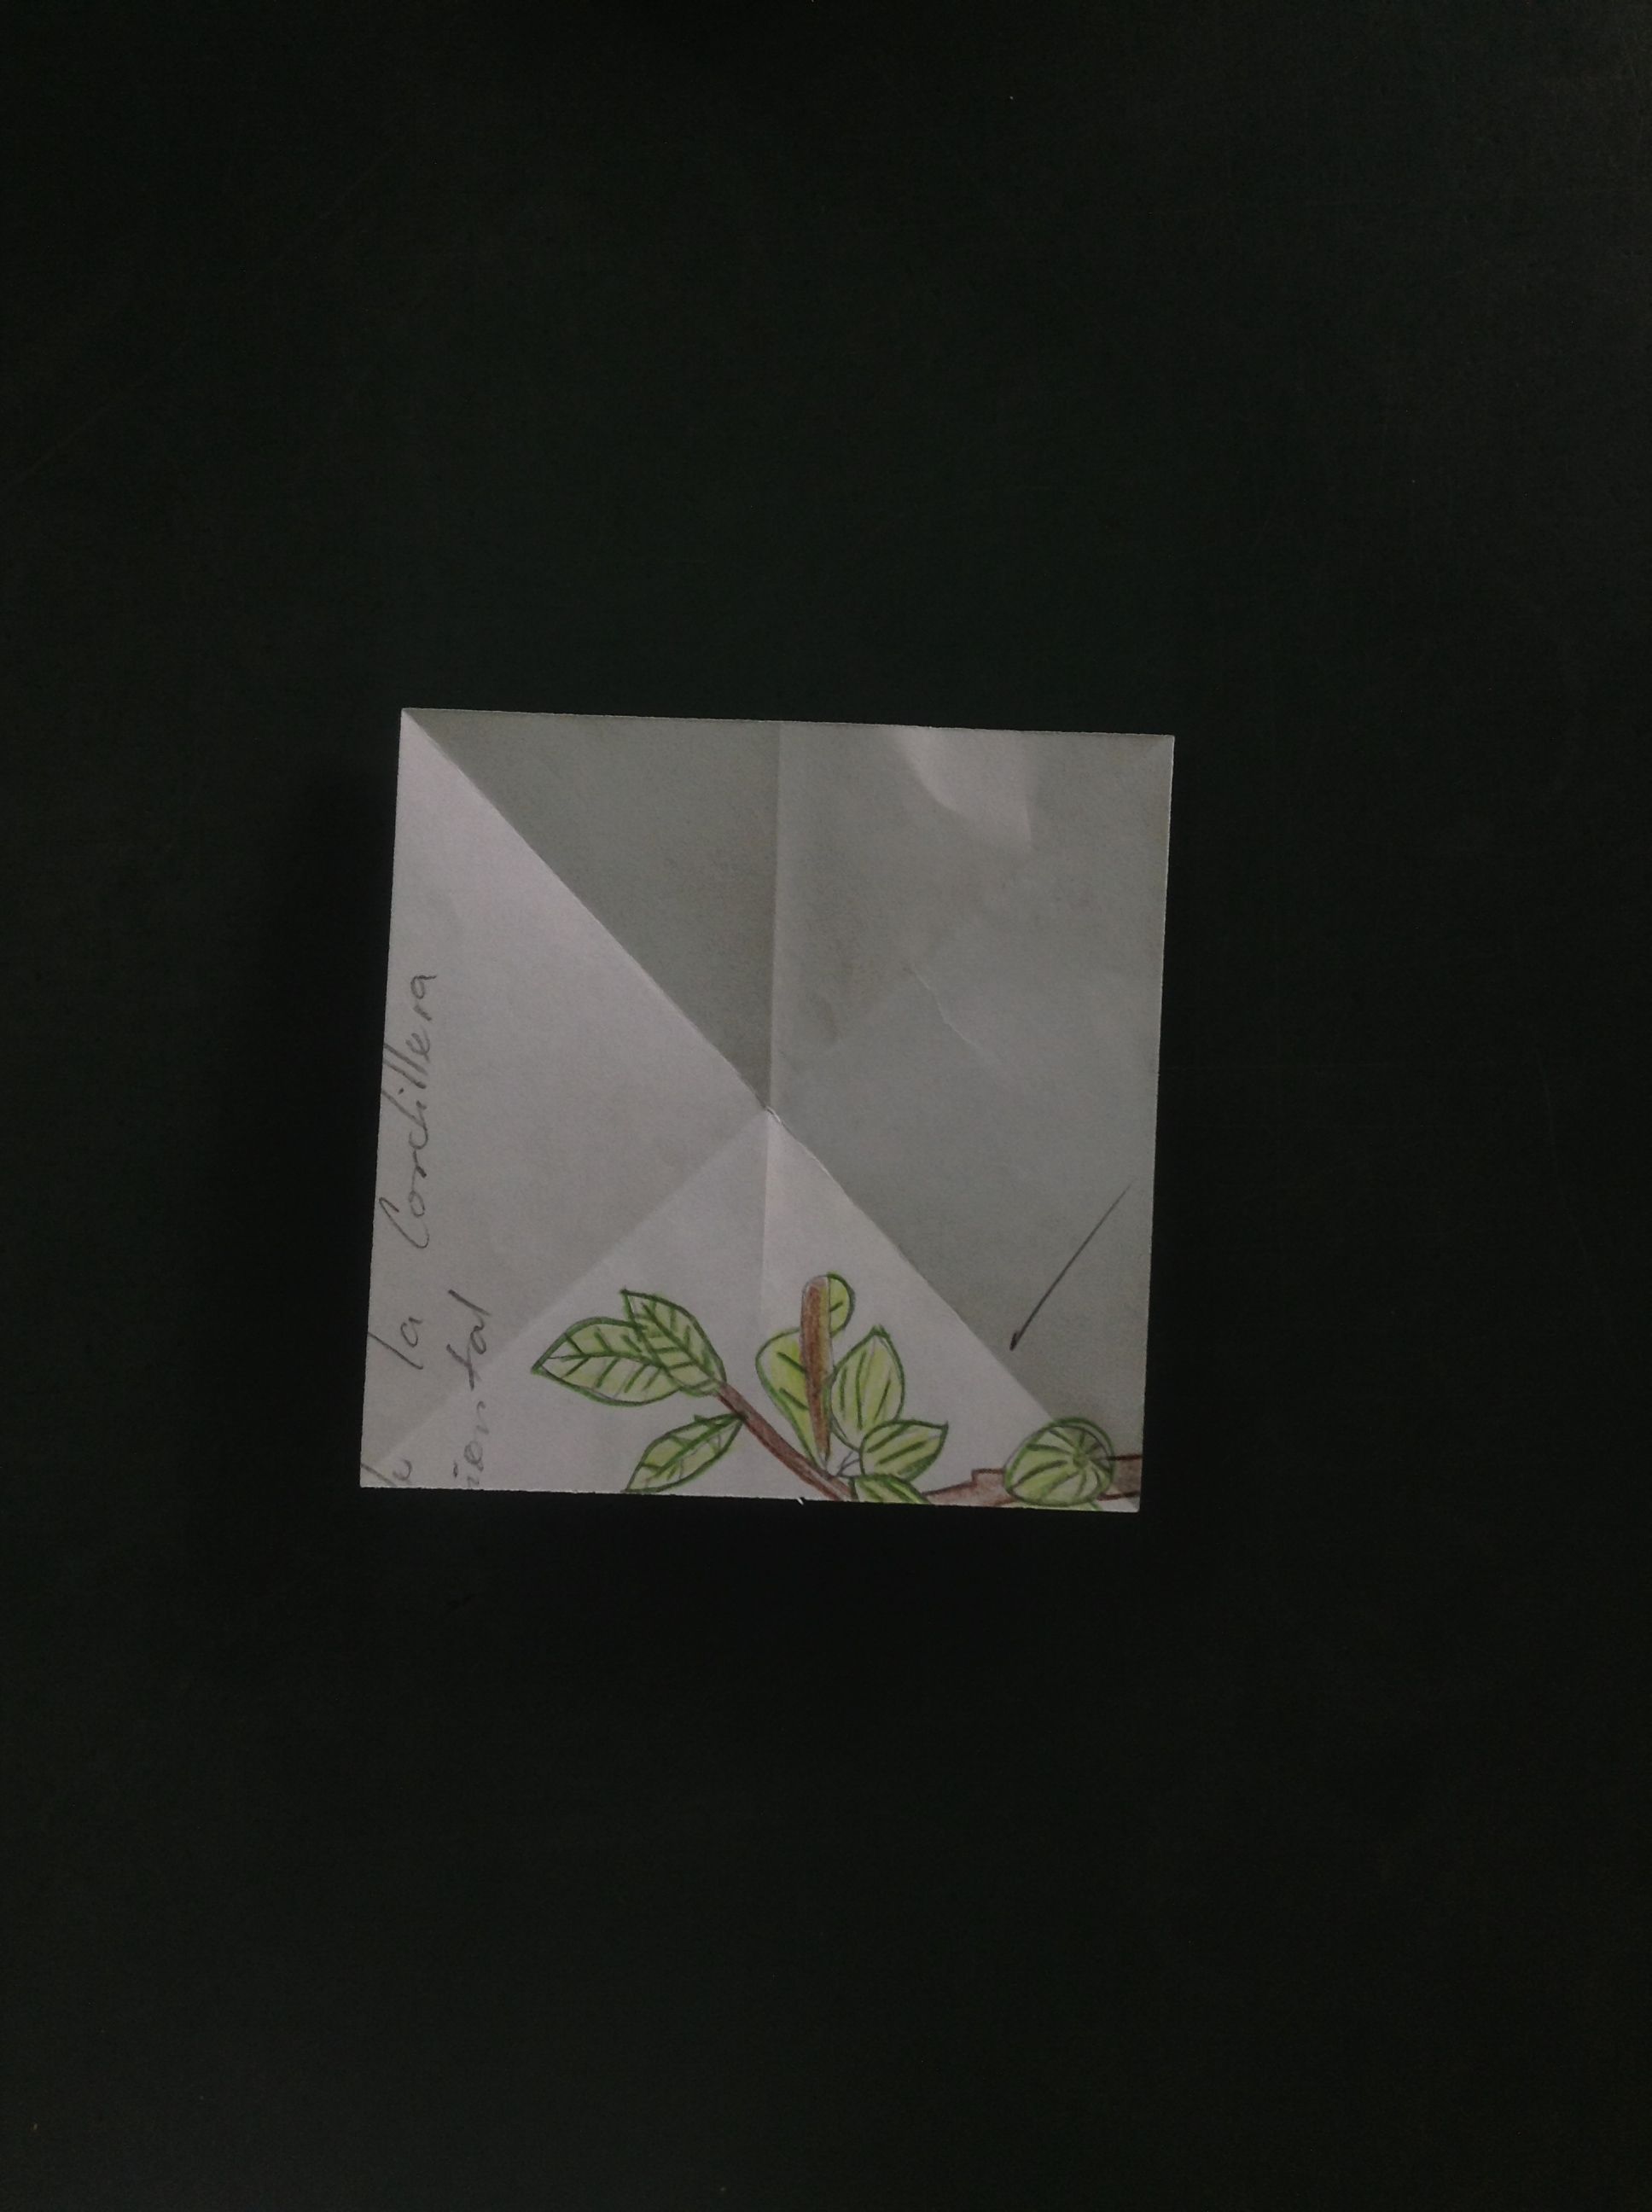
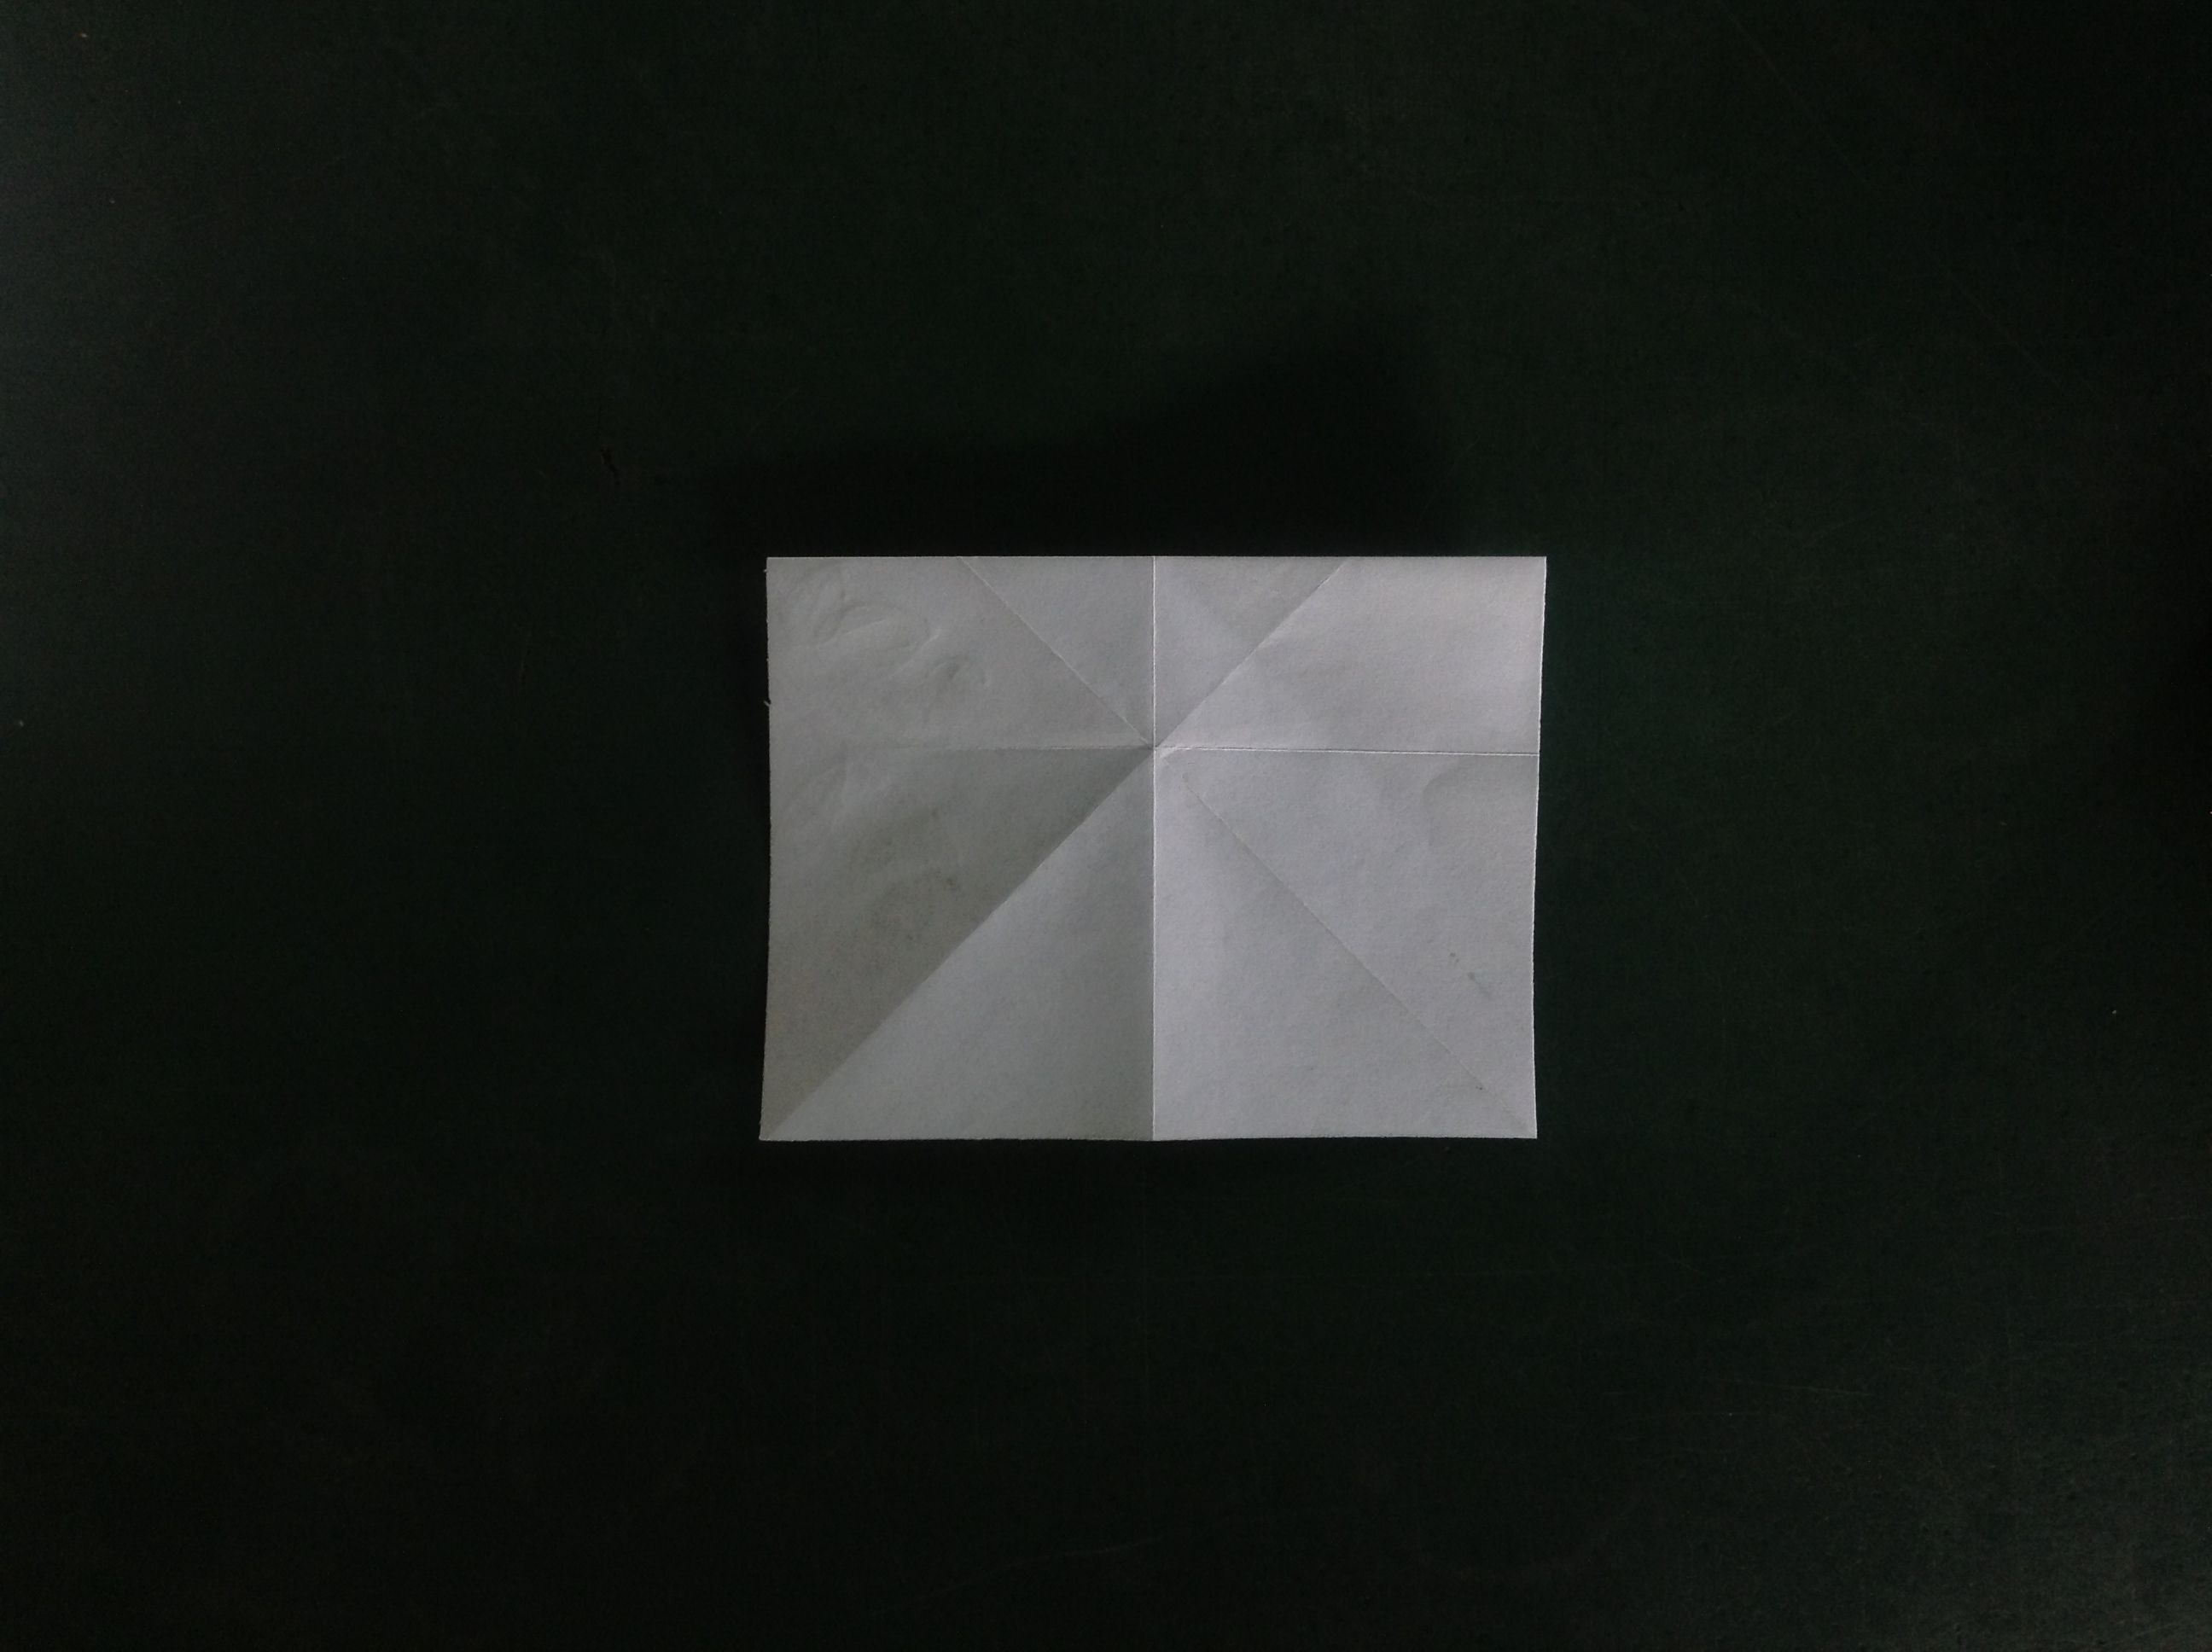
Normalmente para realizar el cuadrado perfecto tengo que marcar la línea diagonal que se aprecia en la foto. Si tu cuadrado no la tiene puedes obtenerla uniendo la punta superior izquierda con la punta inferior derecha, formarás un triángulo, ábrelo nuevamente para tener el cuadrado con la línea diagonal. Harás lo mismo con el otro lado, es decir, unirás la punta superior derecha con la inferior izquierda, procurando un triángulo, ábrelo y tendrás un cuadrado con una X marcada.
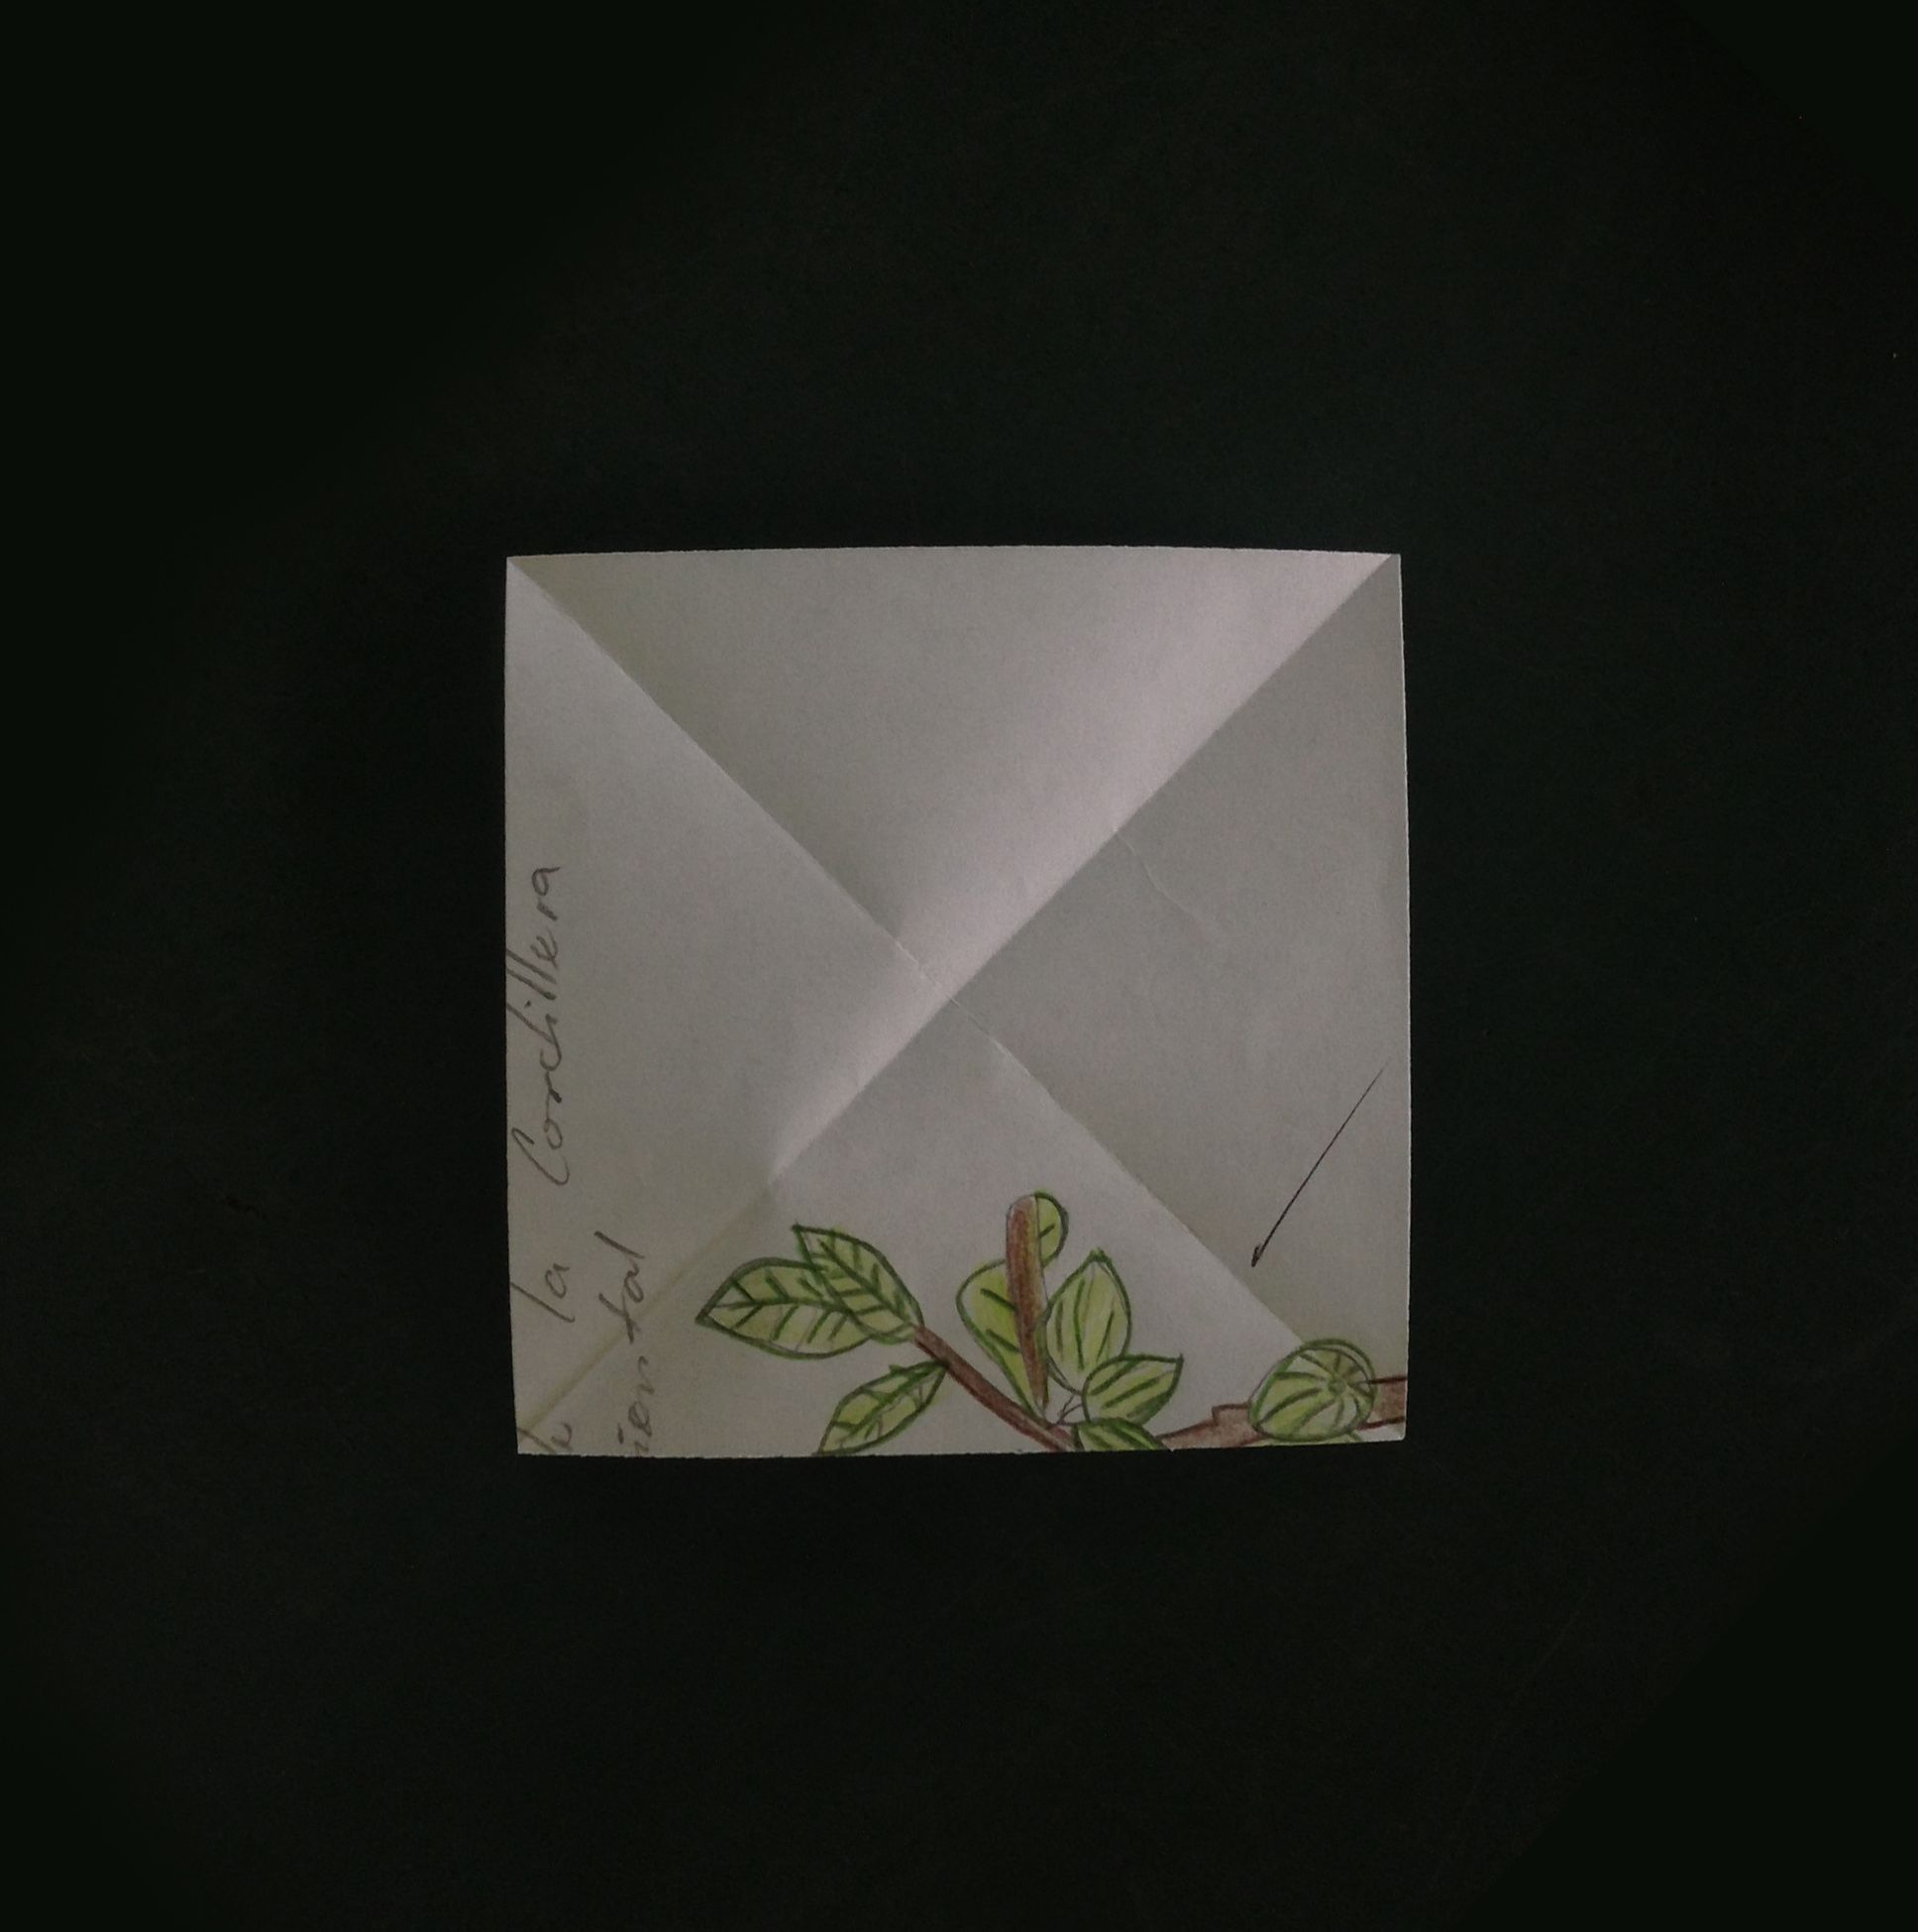
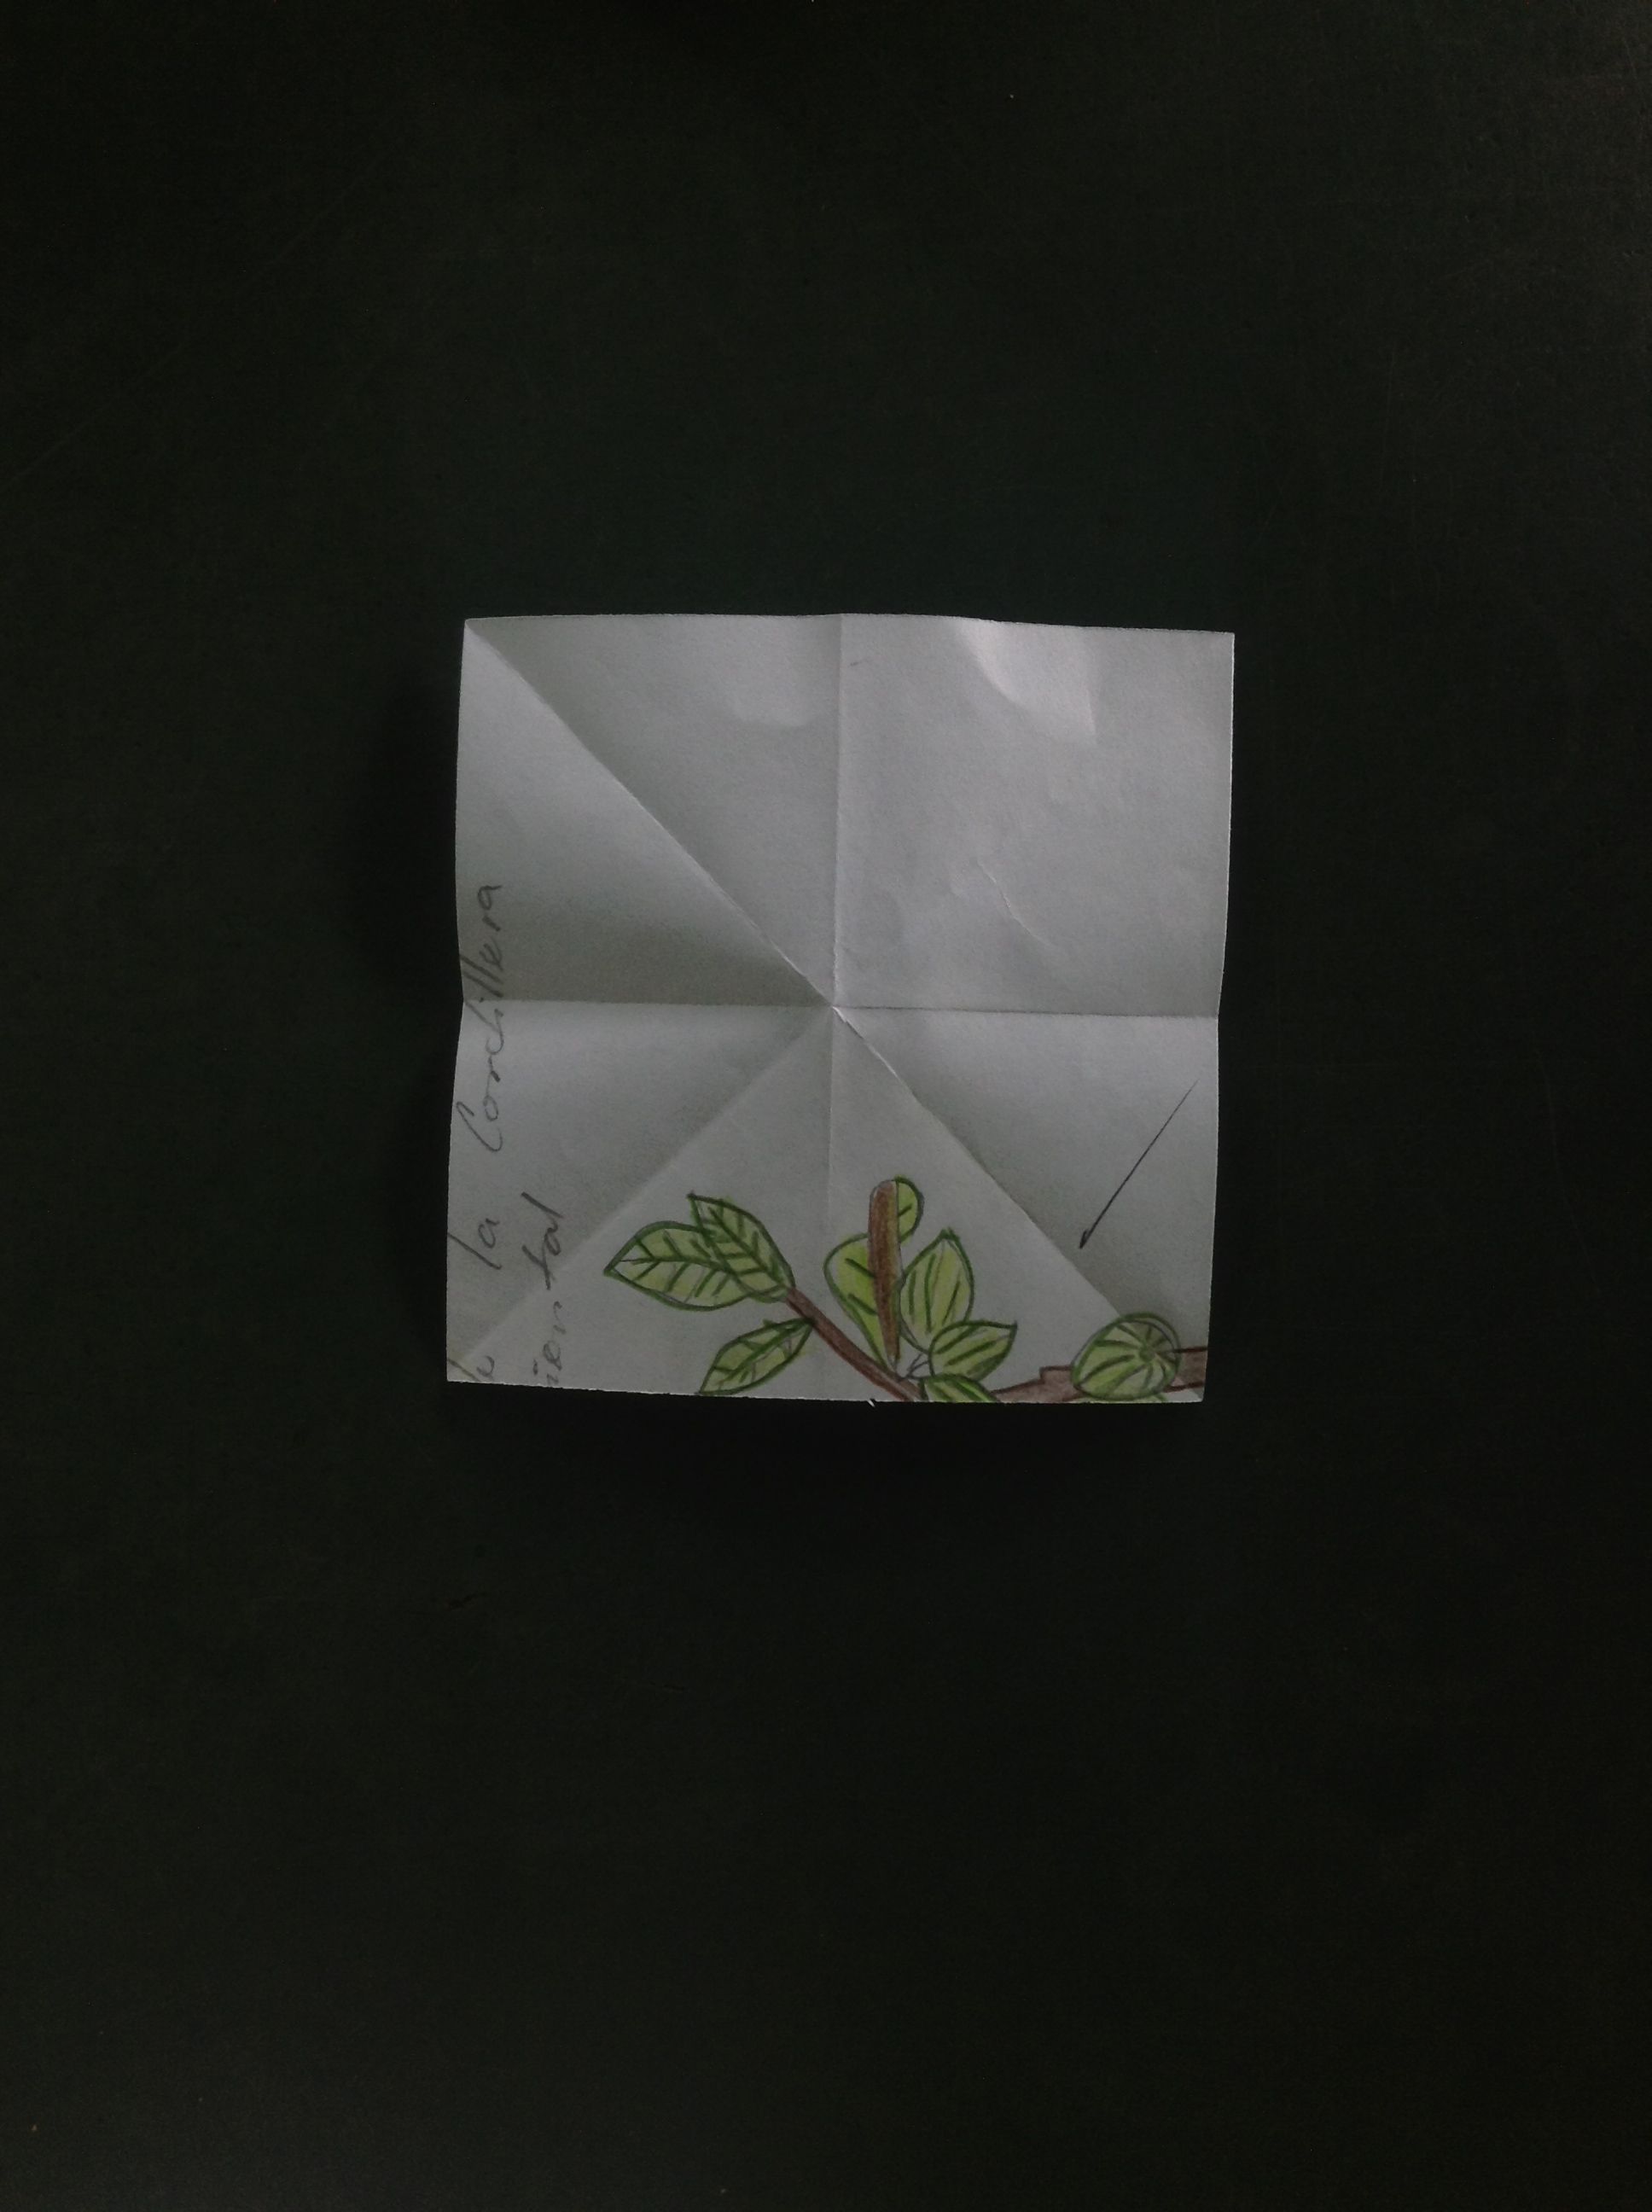
Ahora une las dos puntas superiores con las inferiores, tendrás un rectángulo, ábrelo nuevamente, una nueva línea horizontal se habrá marcado en tu cuadrado. En seguida dobla las dos puntas del lado derecho con las dos del lado izquierdo, tendrás un rectángulo vertical, ábrelo. Todos estos dobleces tienen como objetico marcar un asterisco en el cuadrado perfecto, serán las líneas guías que te permitirán hacer la figura del corazón.
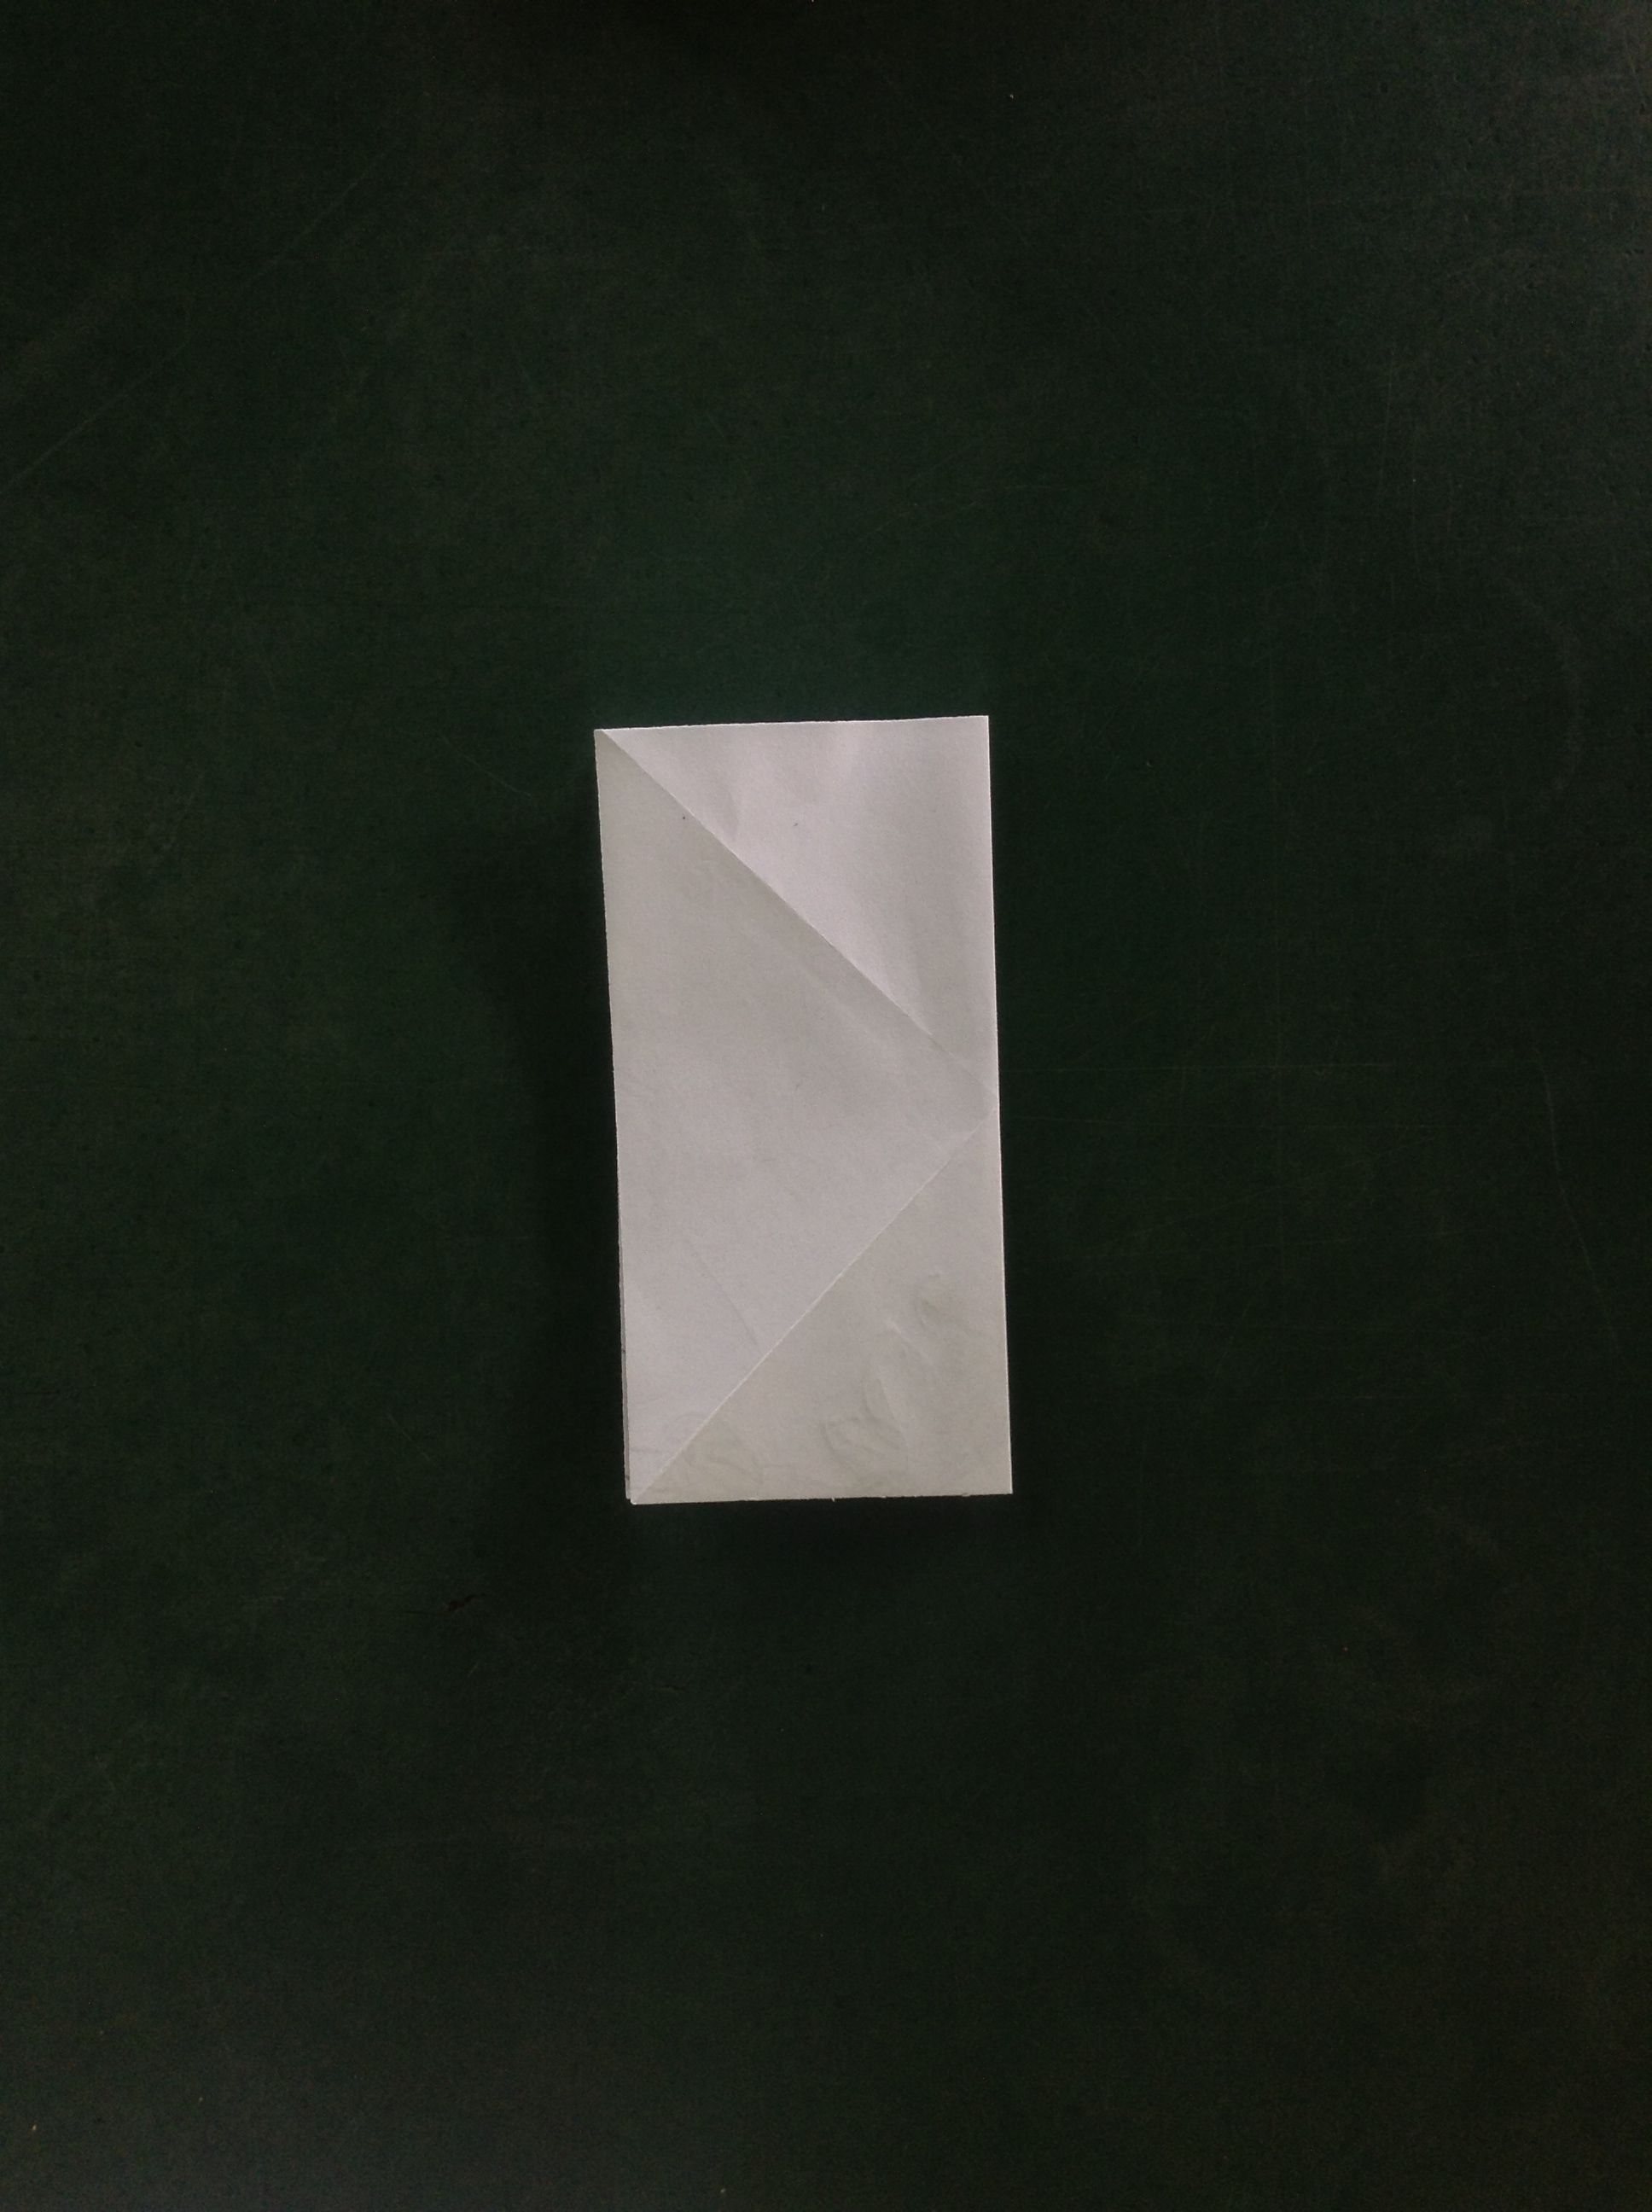
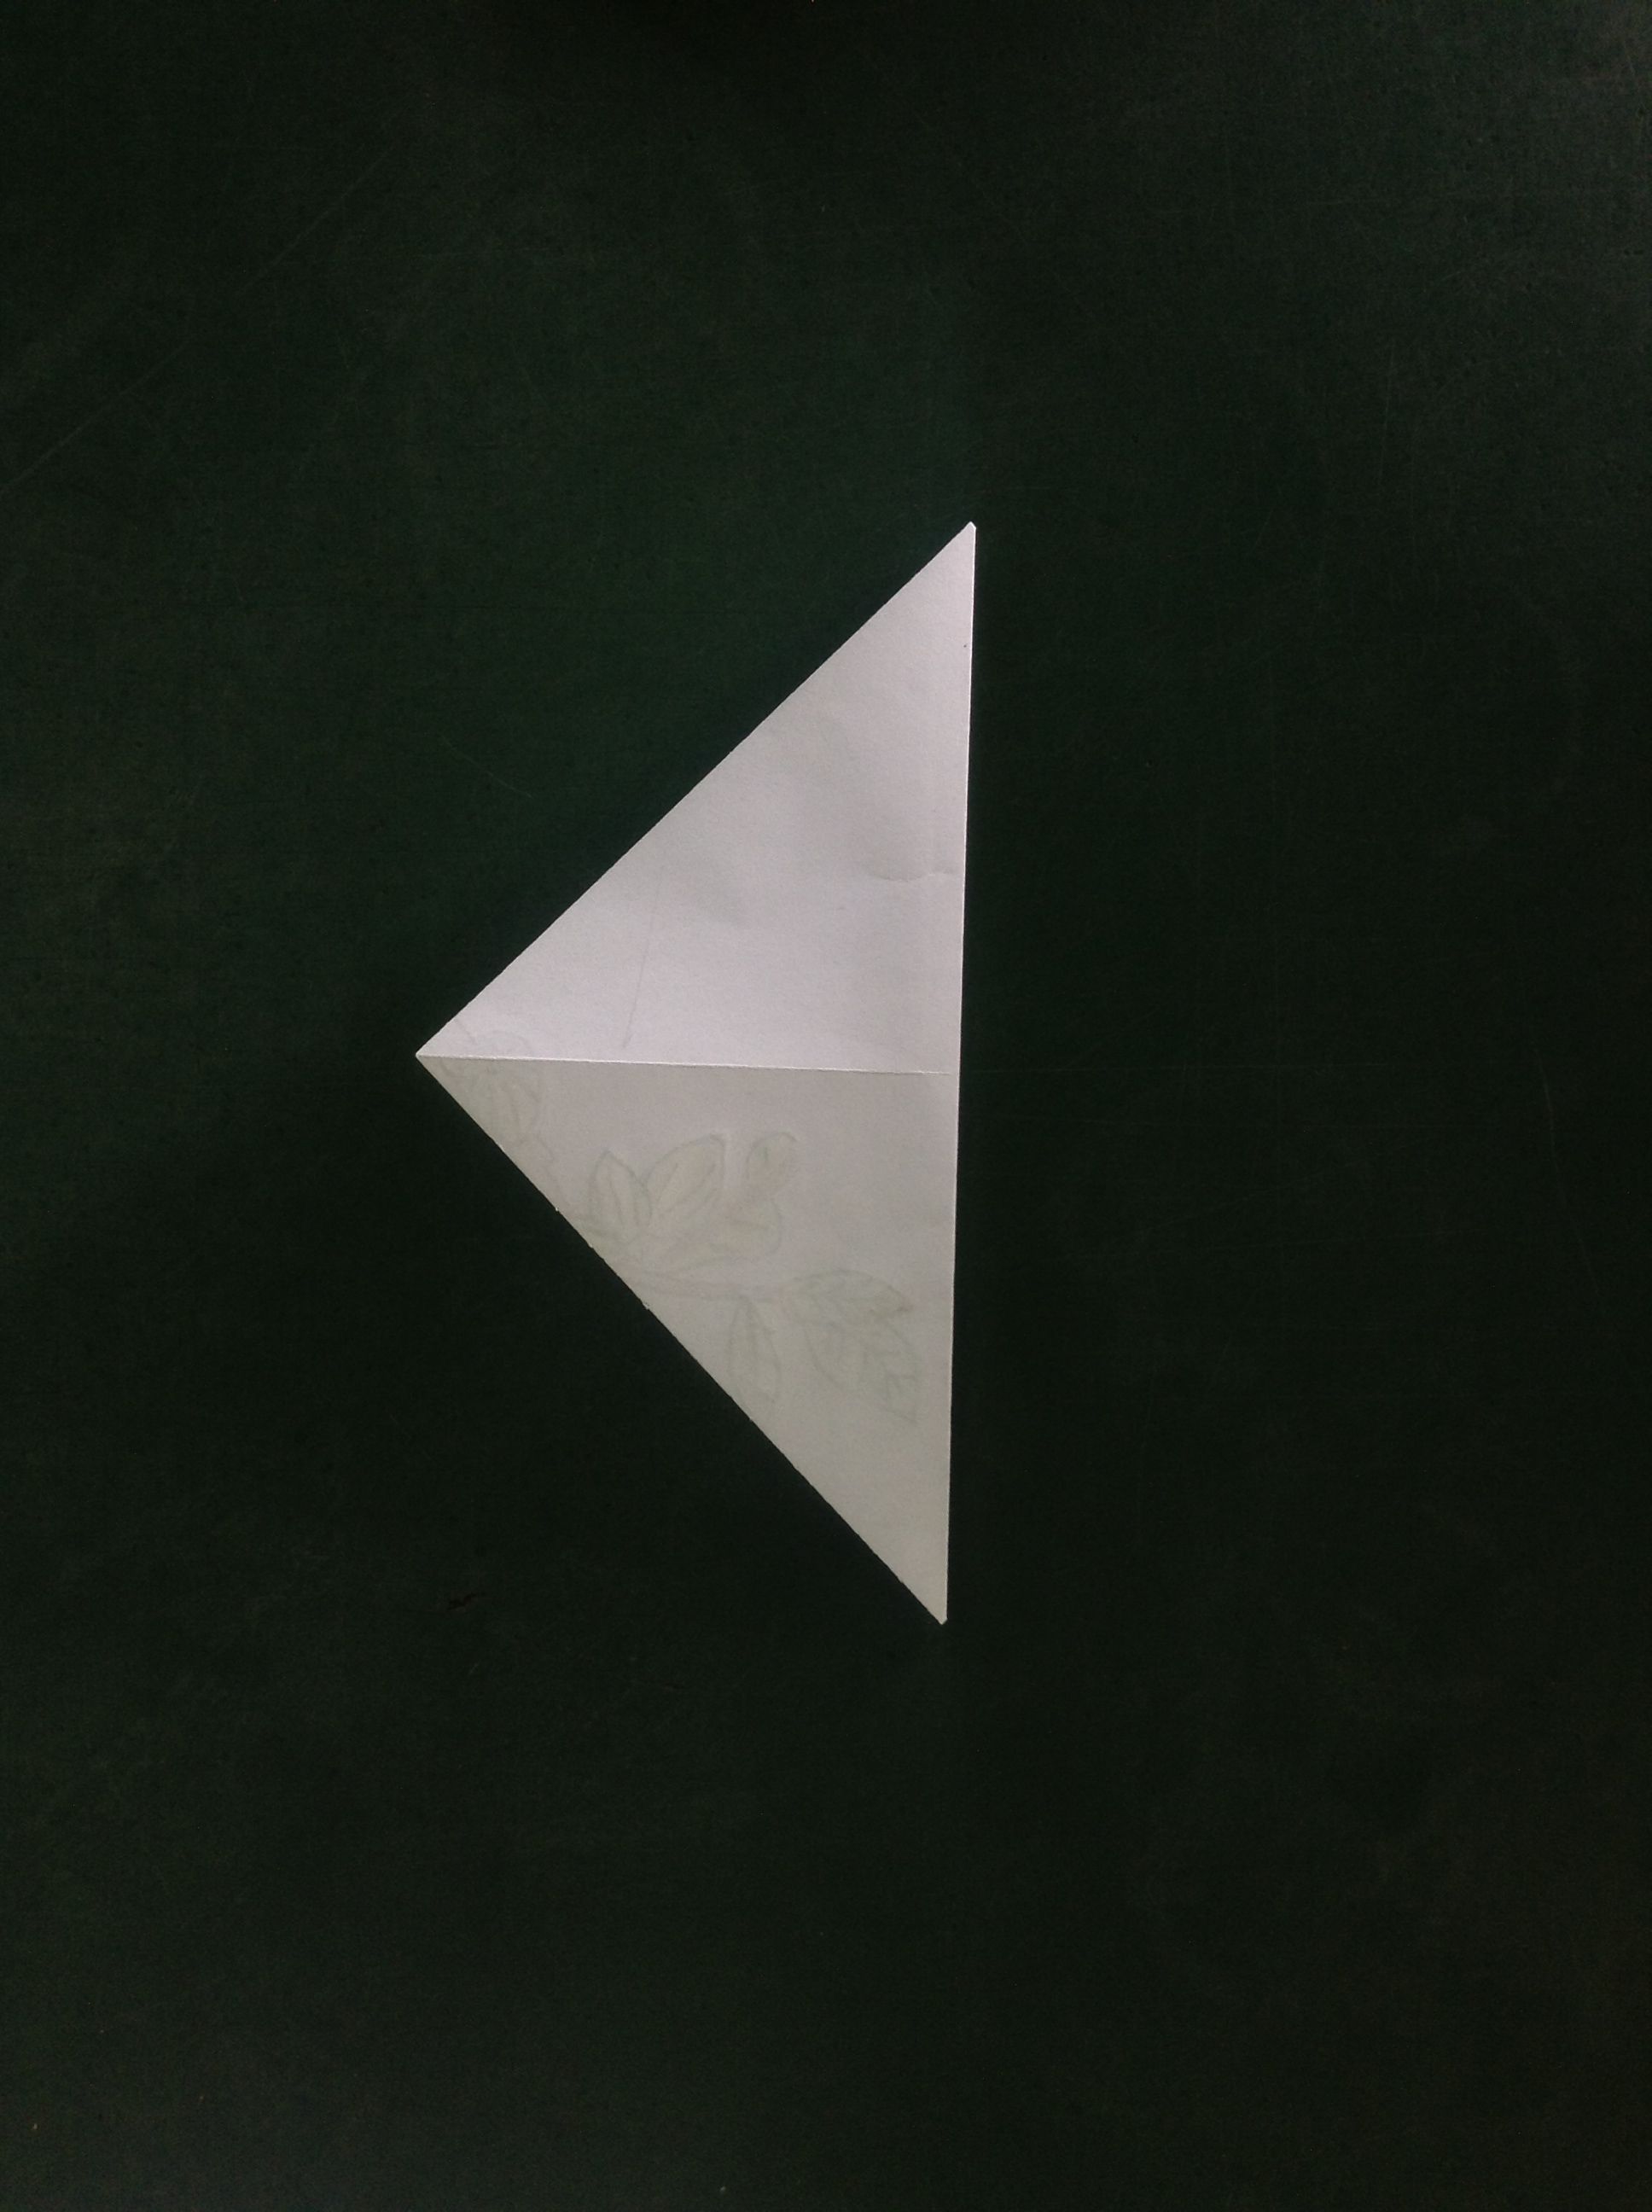
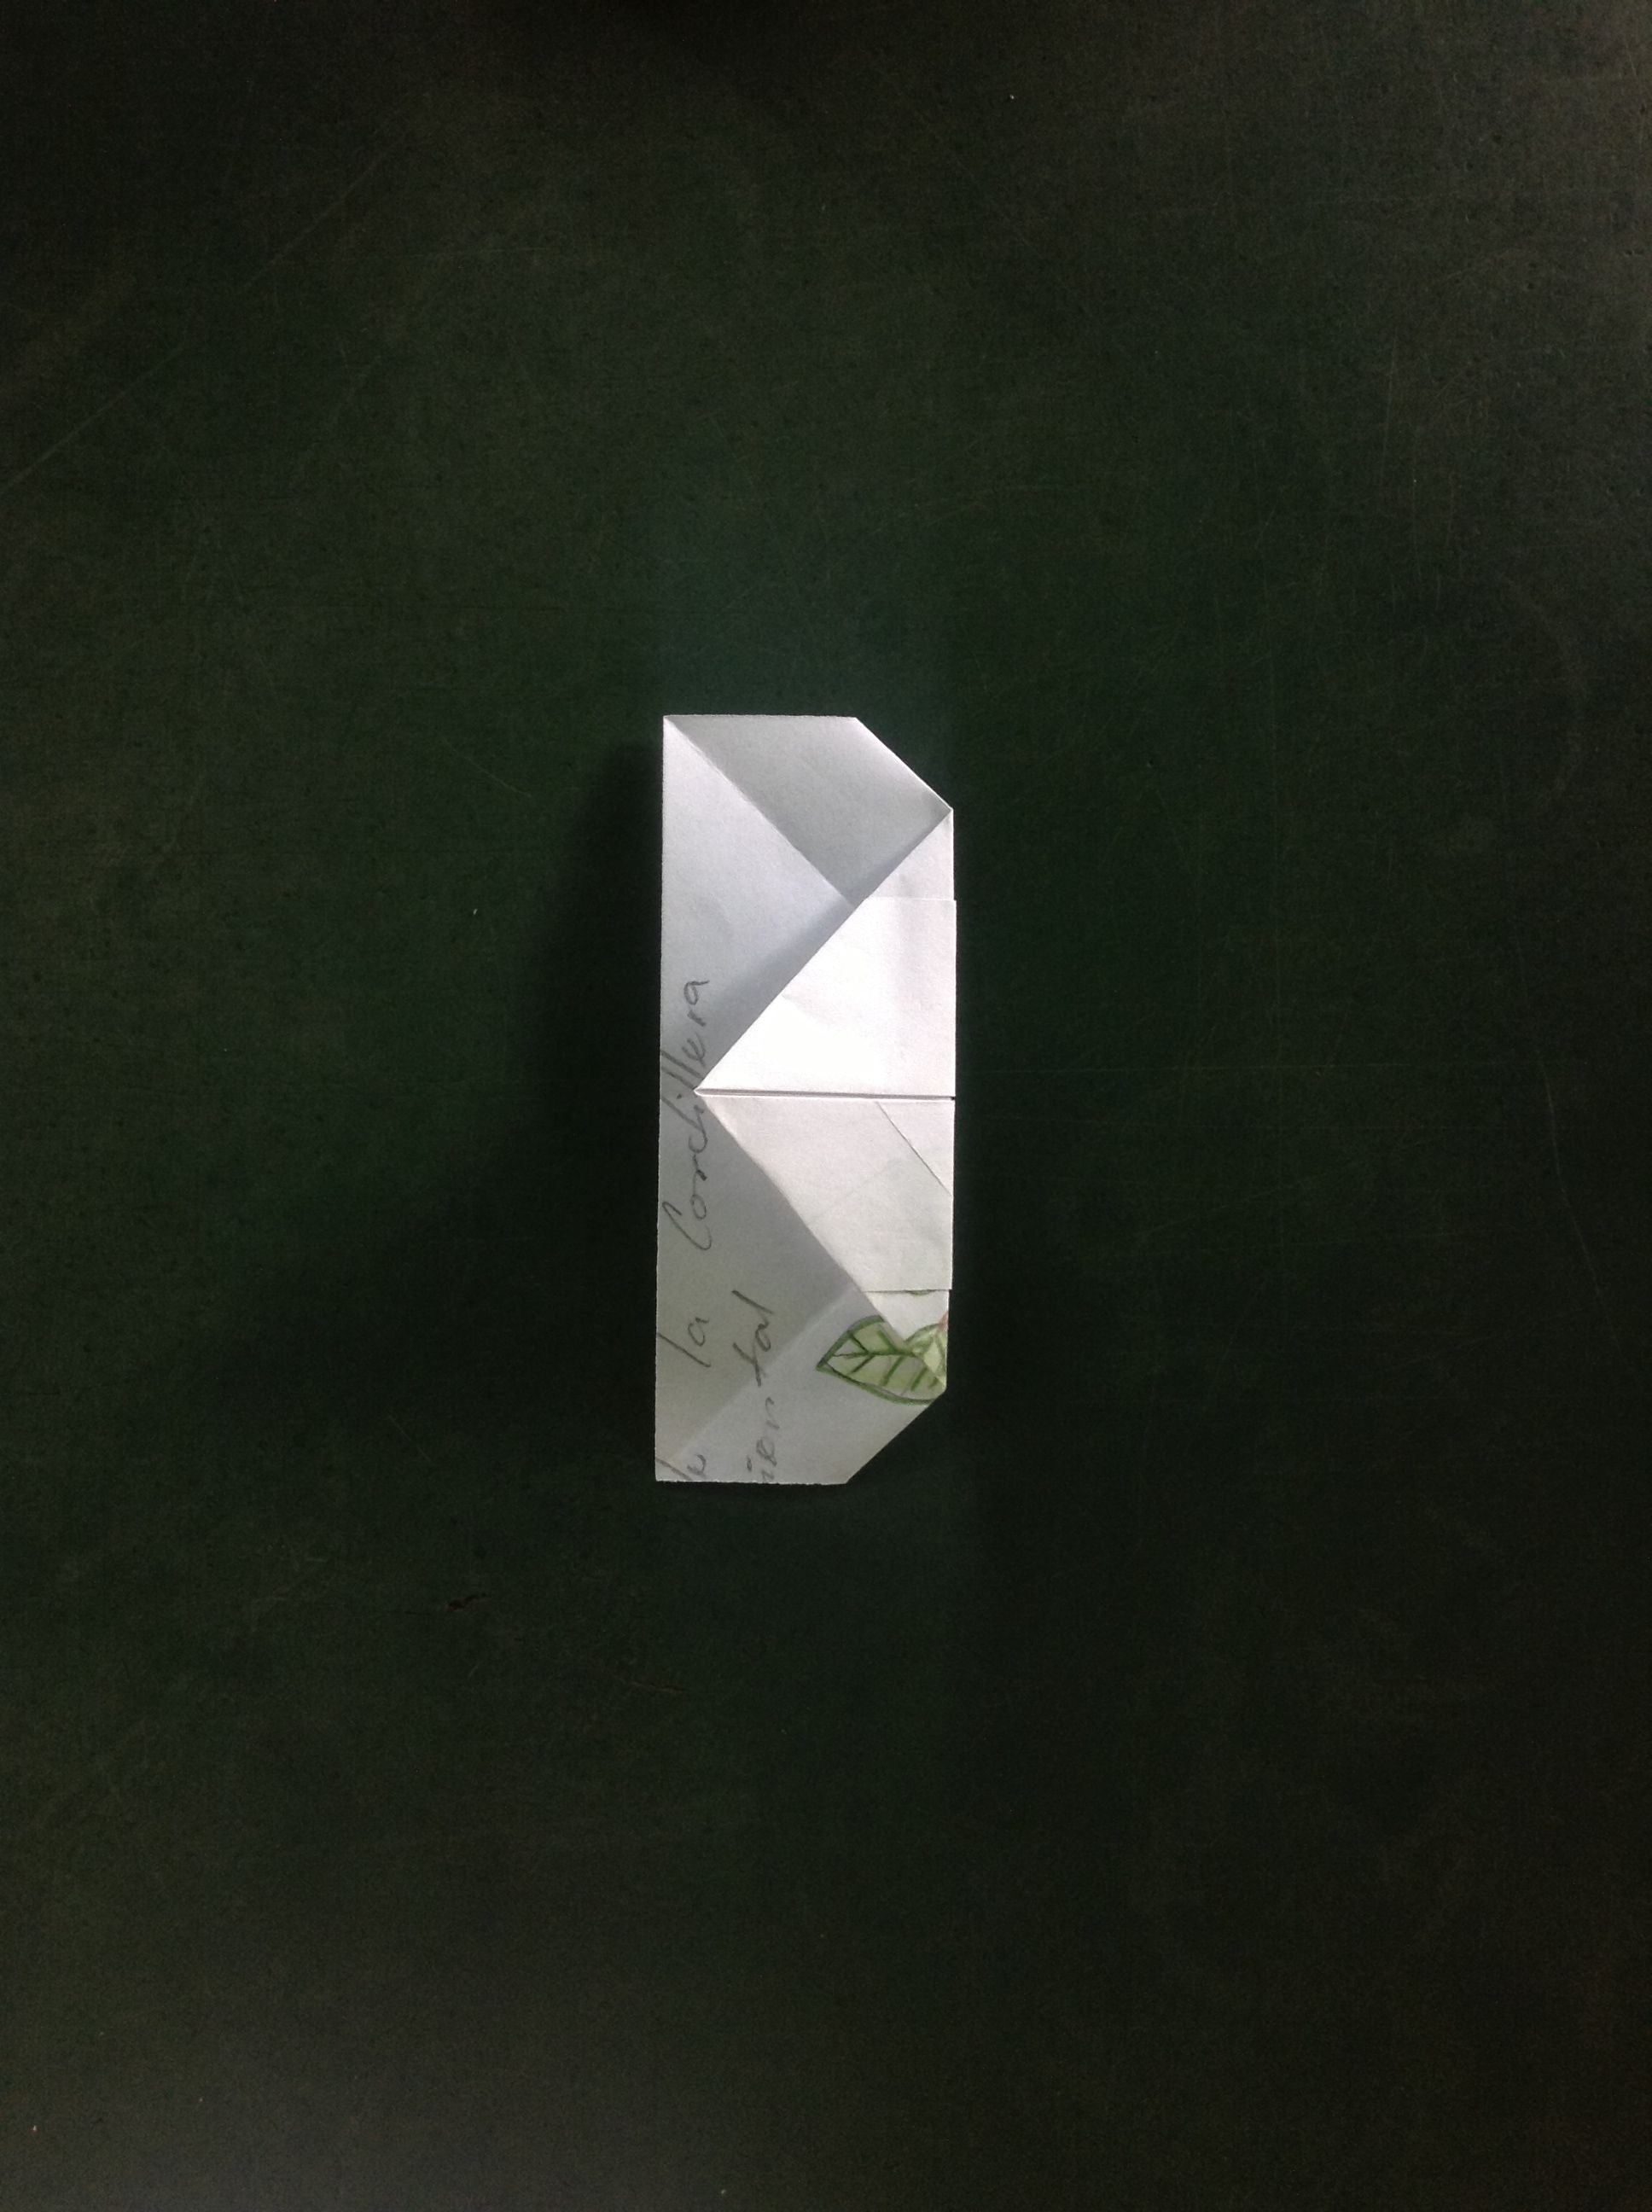
Teniendo marcado el asterisco, dobla las dos puntas superiores hasta la línea central horizontal. Voltea la figura, lleva la punta superior derecha hasta la línea central vertical, obtendrás un triángulo. Realiza el mismo doblez con la punta superior izquierda, tendrás dos triángulos y un rectángulo en la parte inferior.
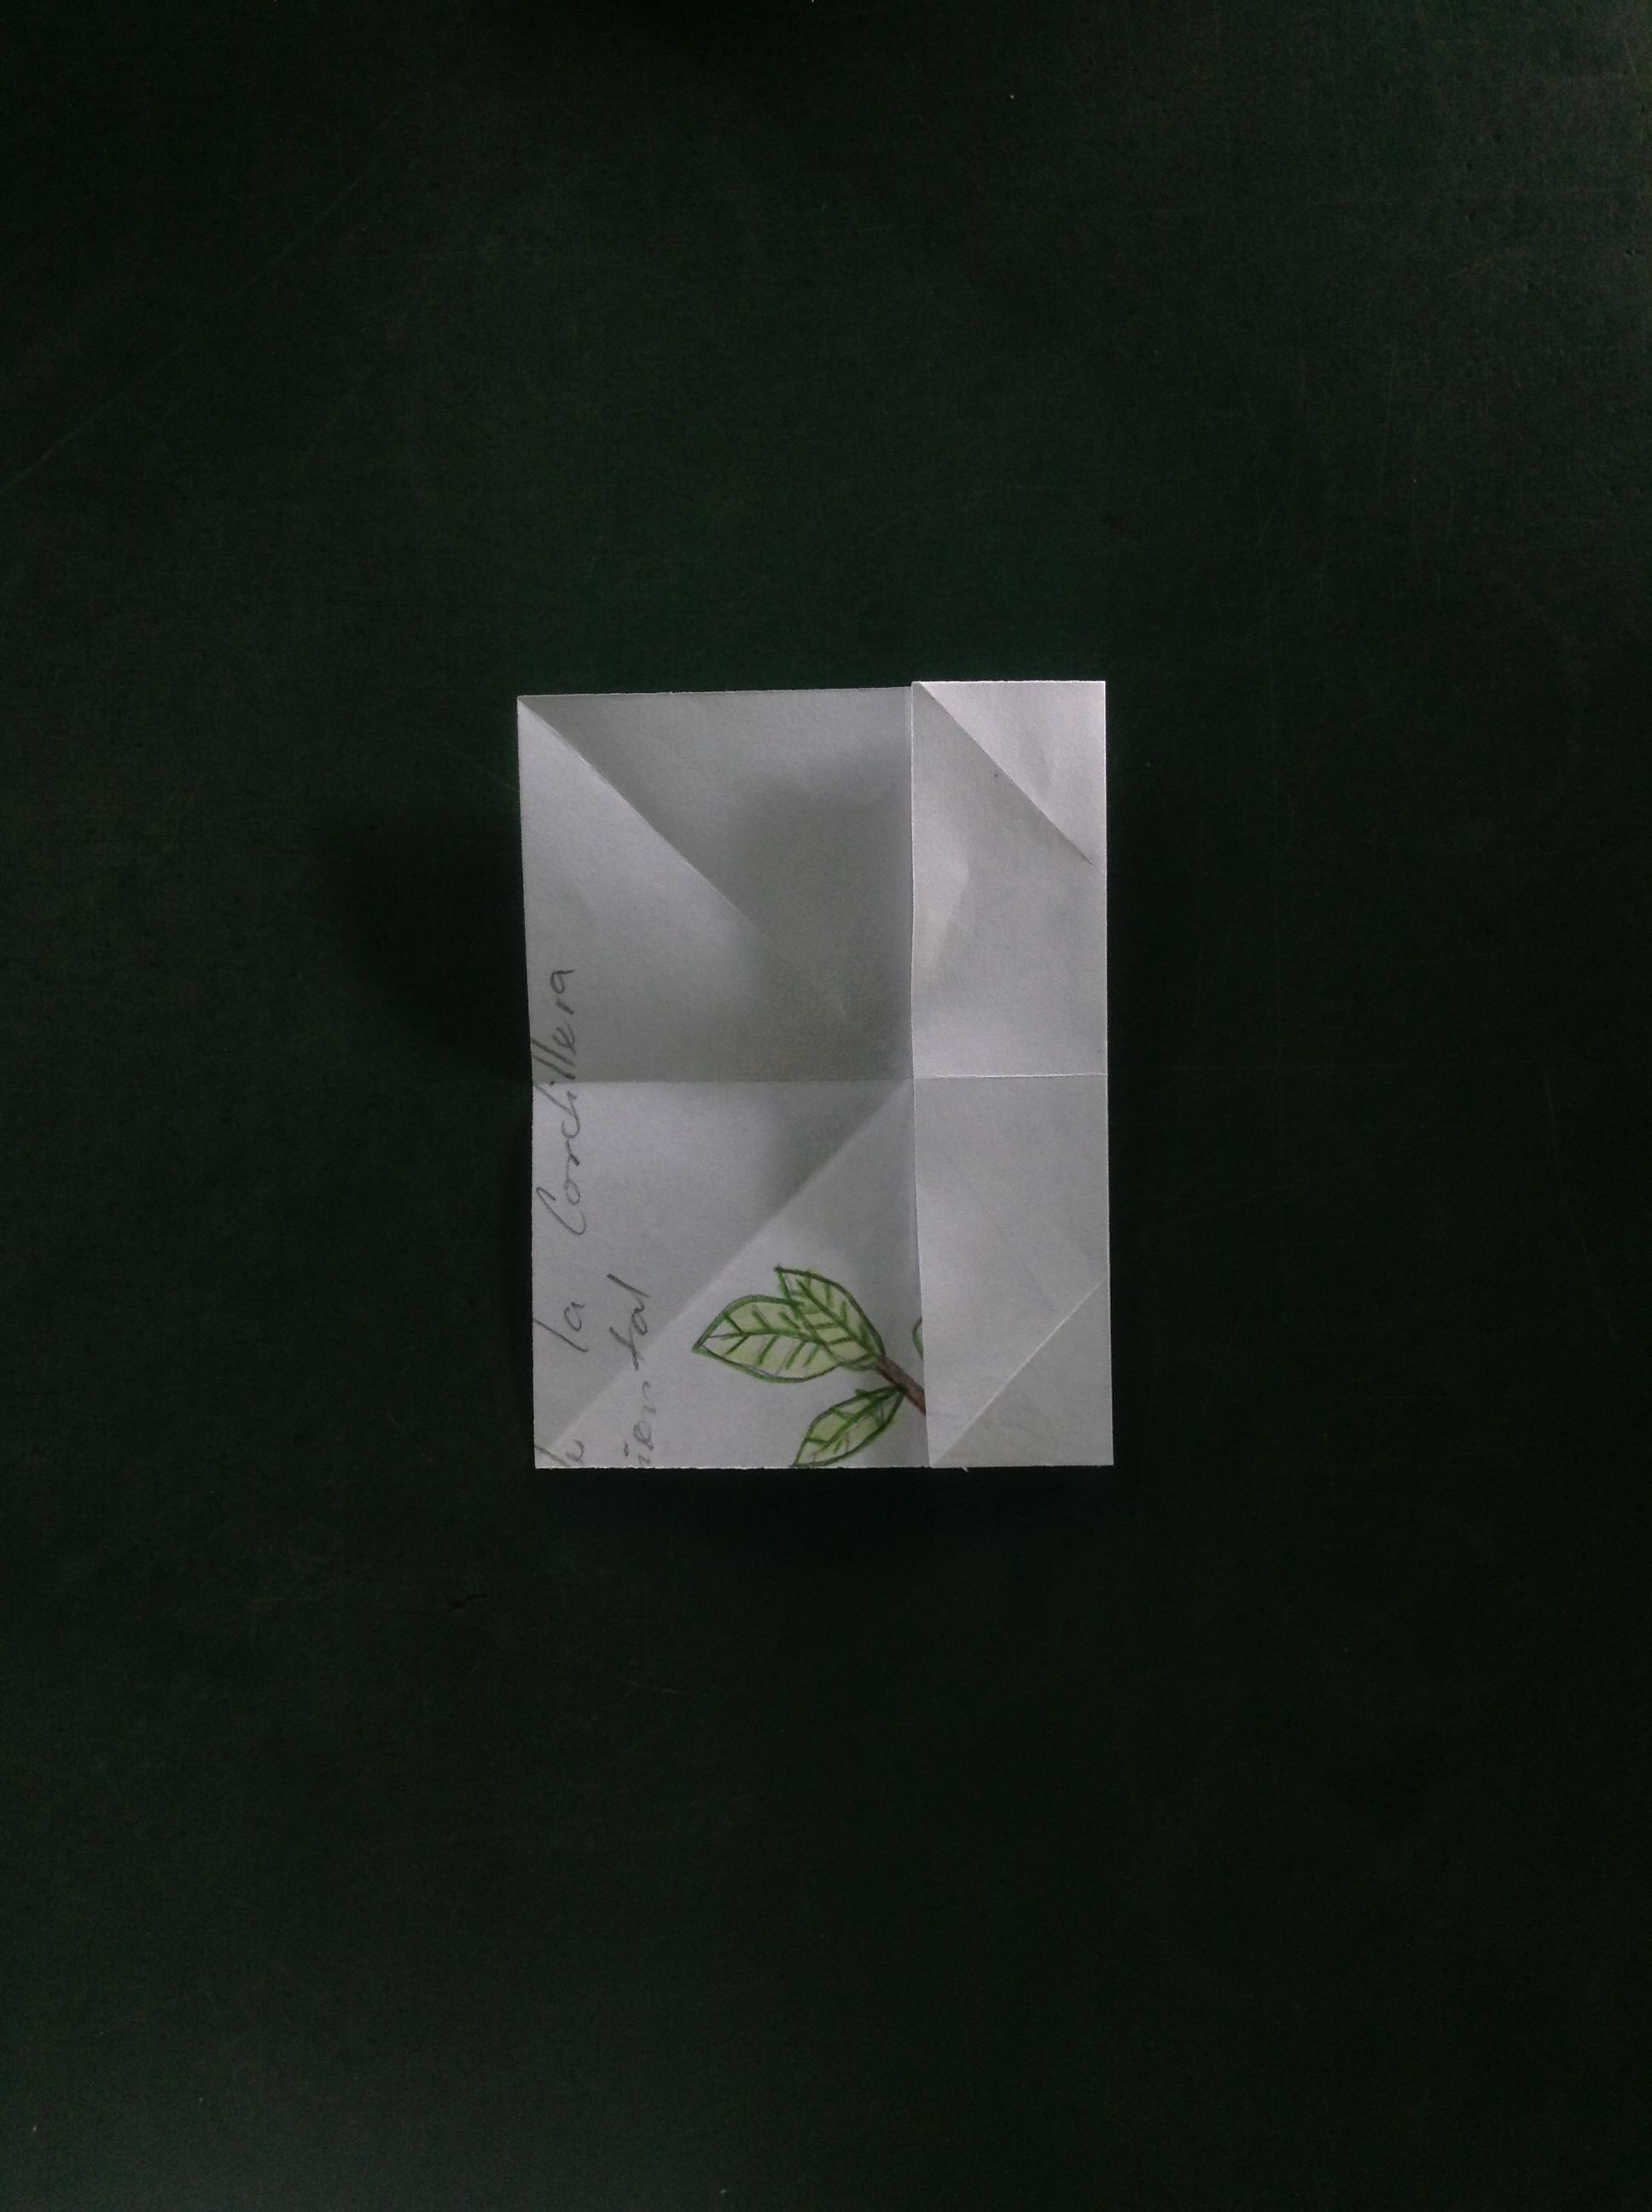

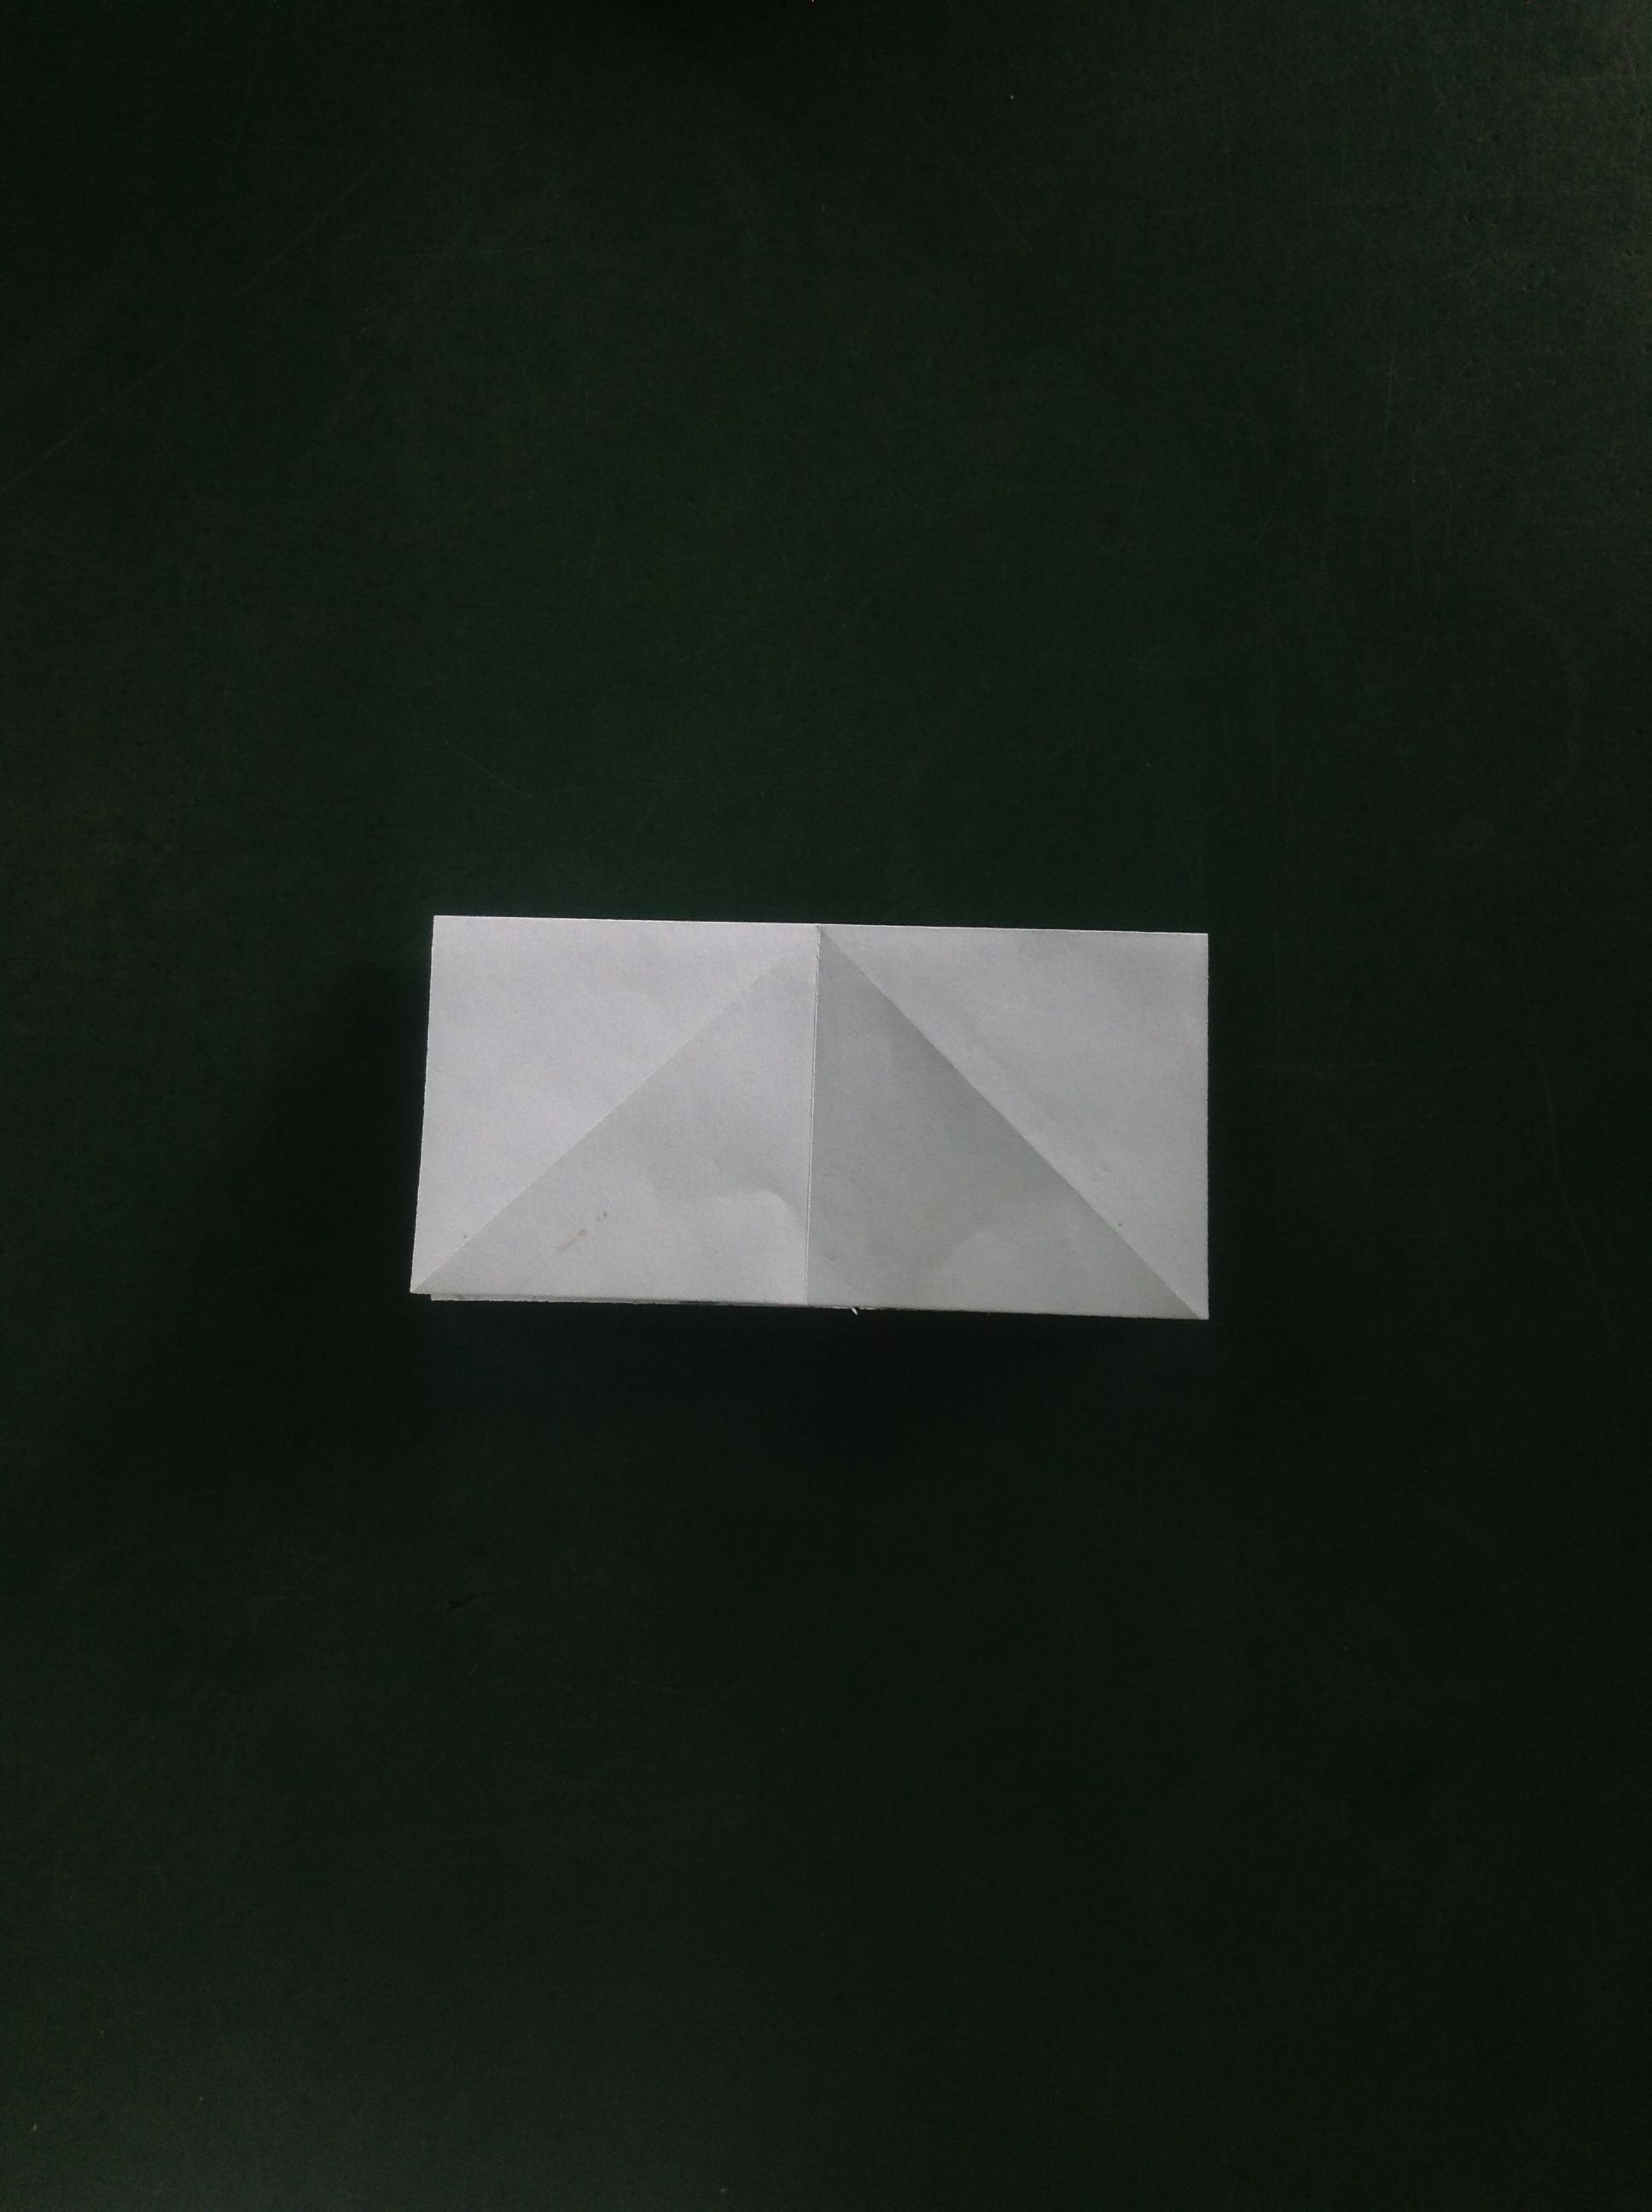
Voltea nuevamente la figura, la punta de flecha que apunta hacia arriba, dóblala hasta el borde de abajo, guiándote con la línea central.
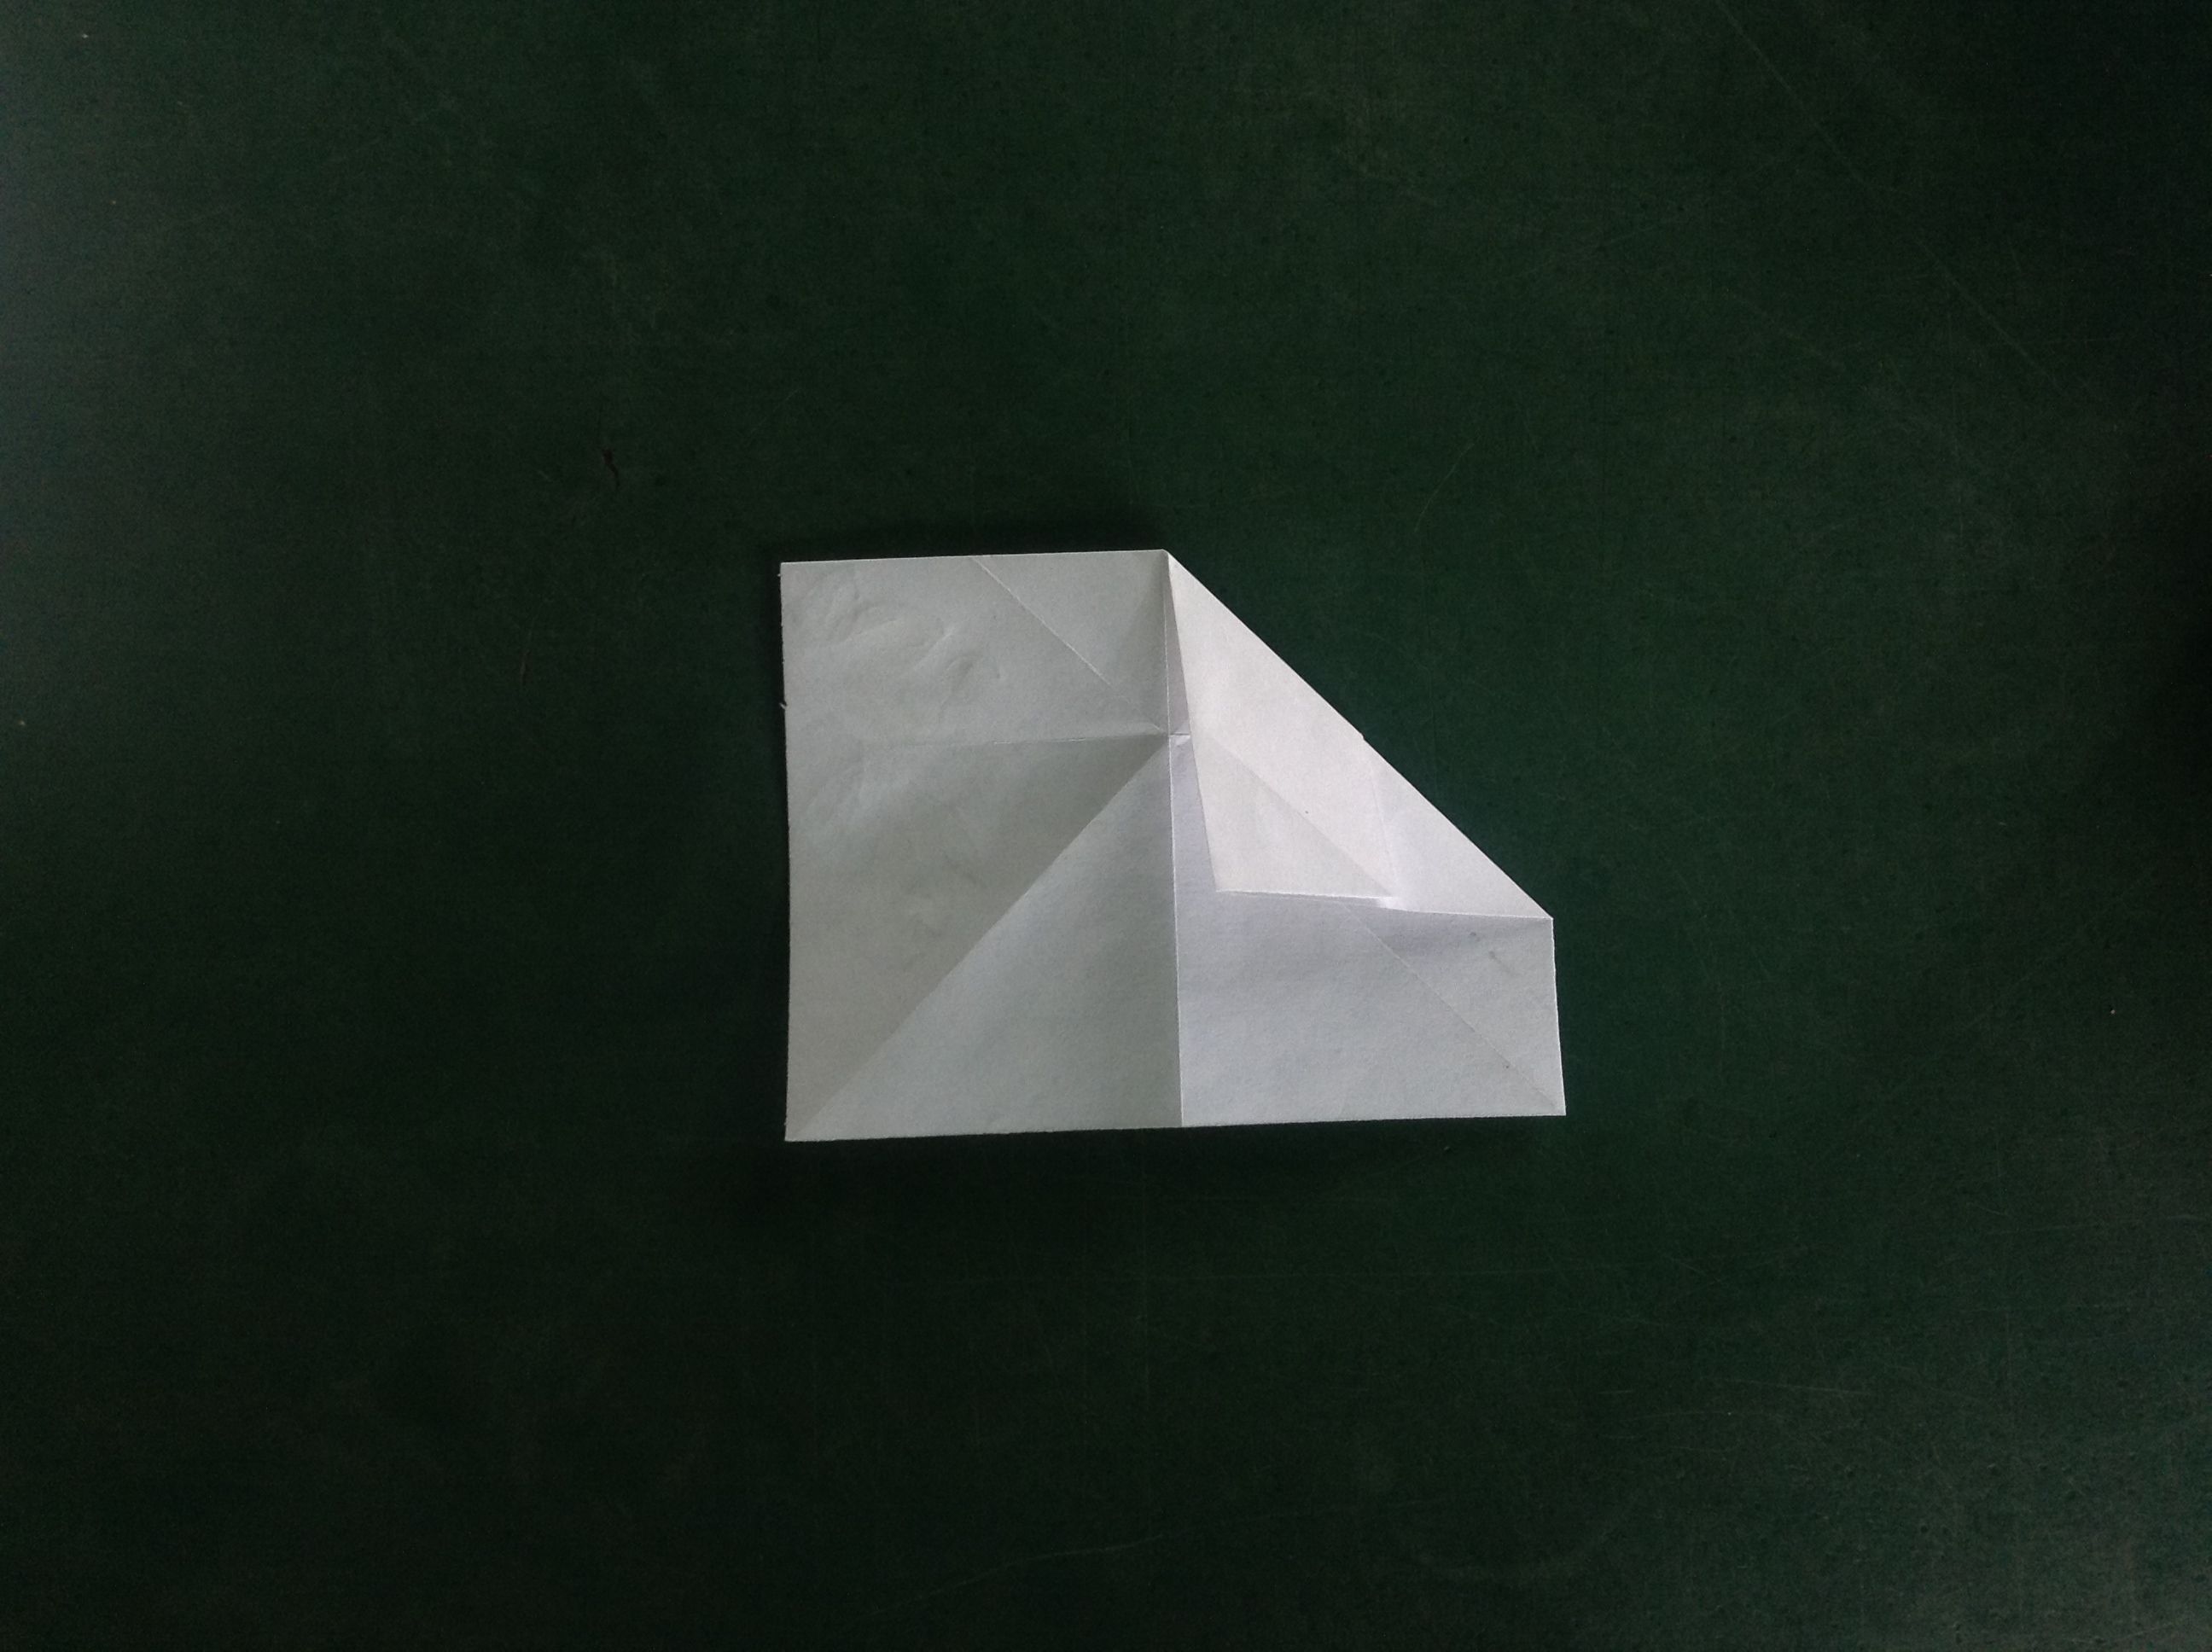
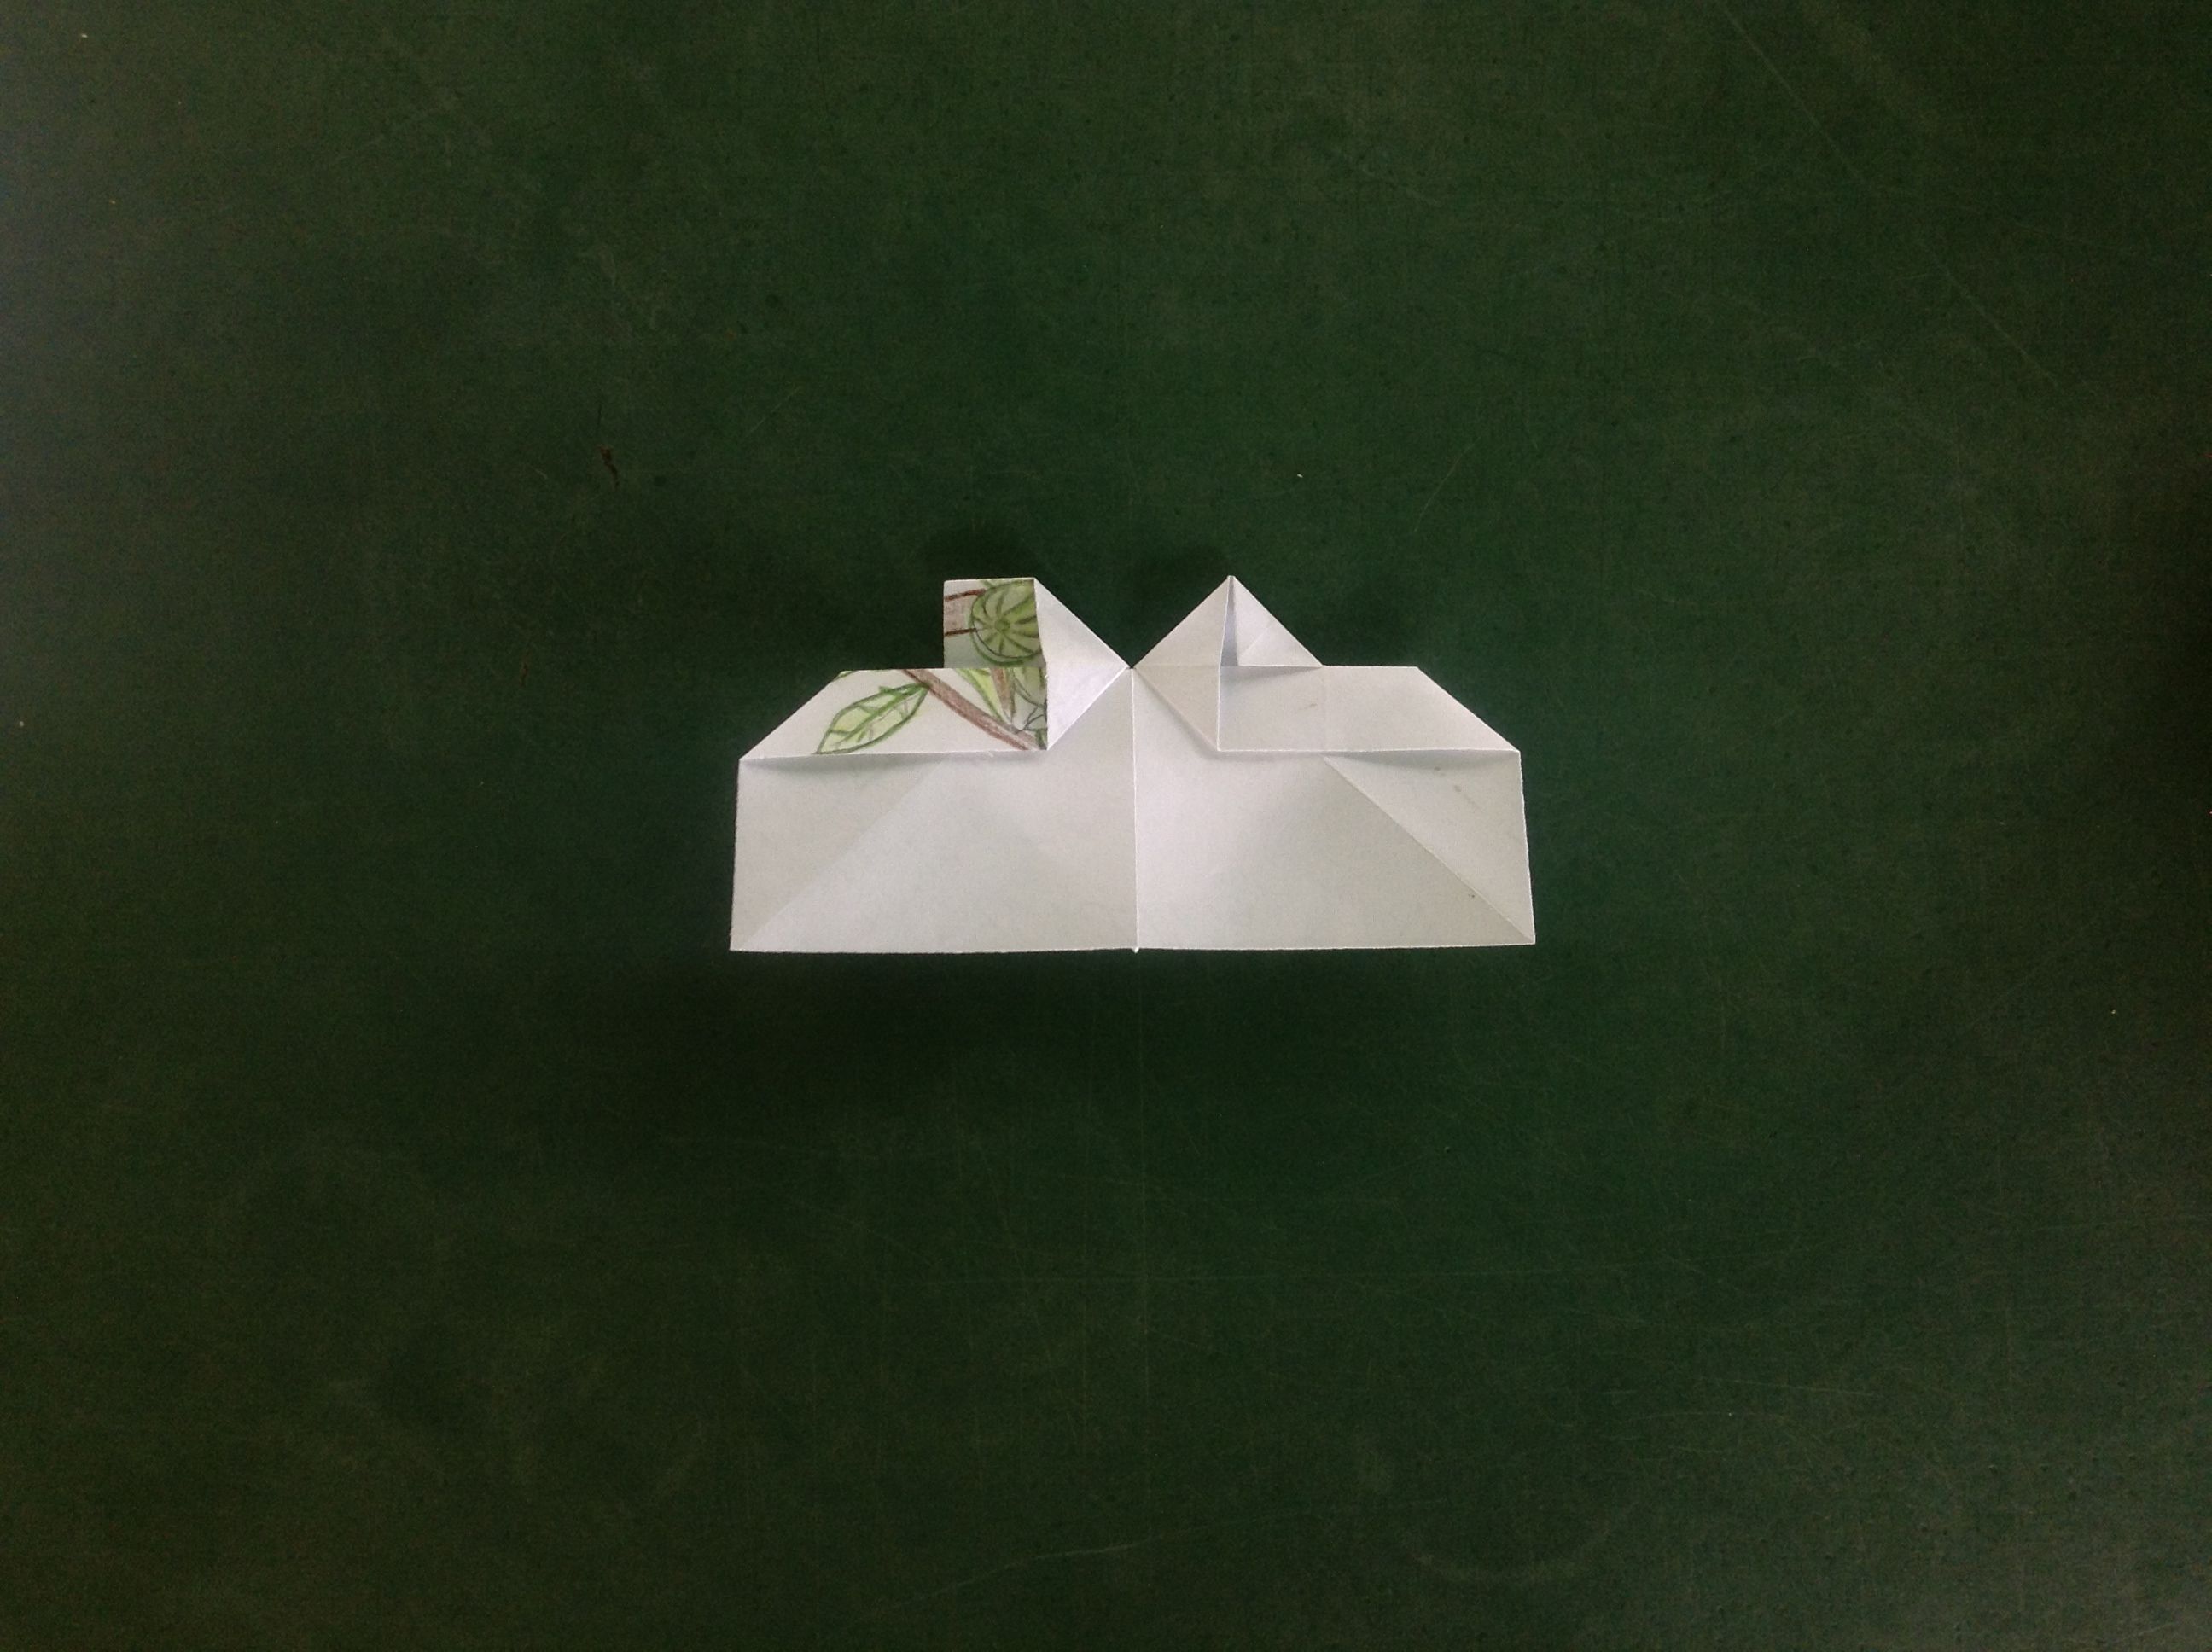
Voltea la figura, te encontrarás con dos pequeños rectángulos en la parte superior, introduce tu dedo índice en el derecho y ábralo tal como lo indican las fotos. Deberás hacer lo mismo con el izquierdo.

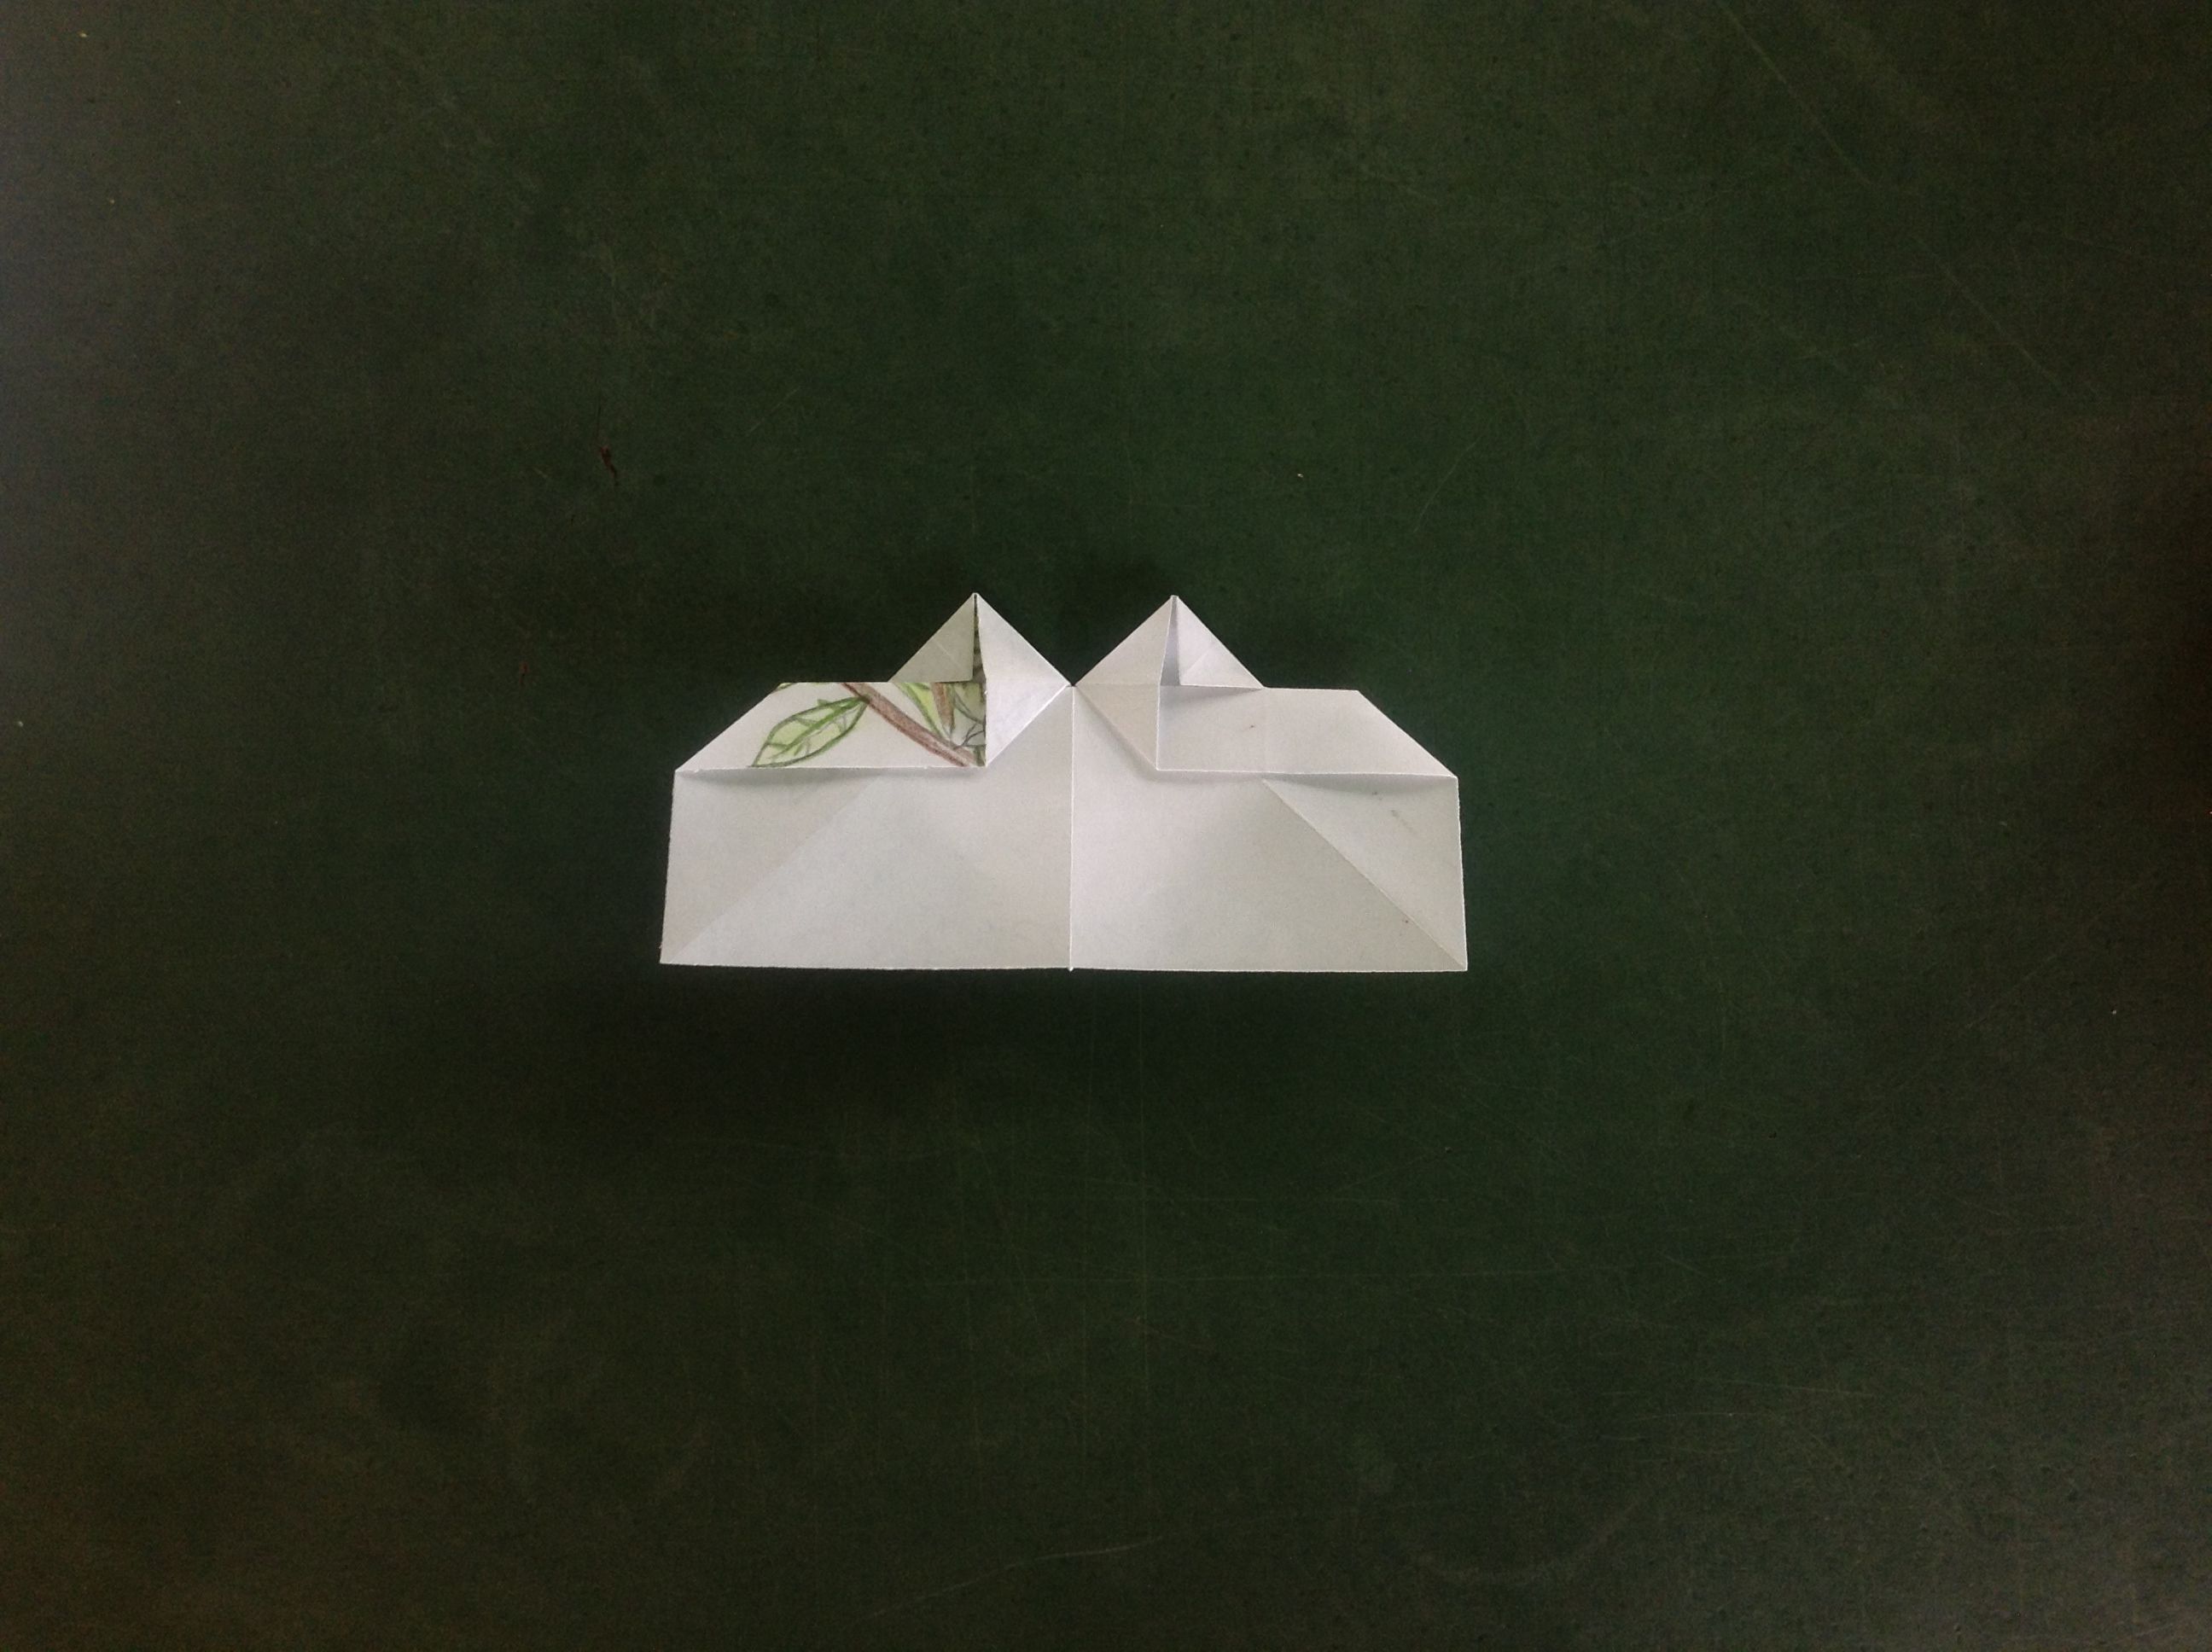
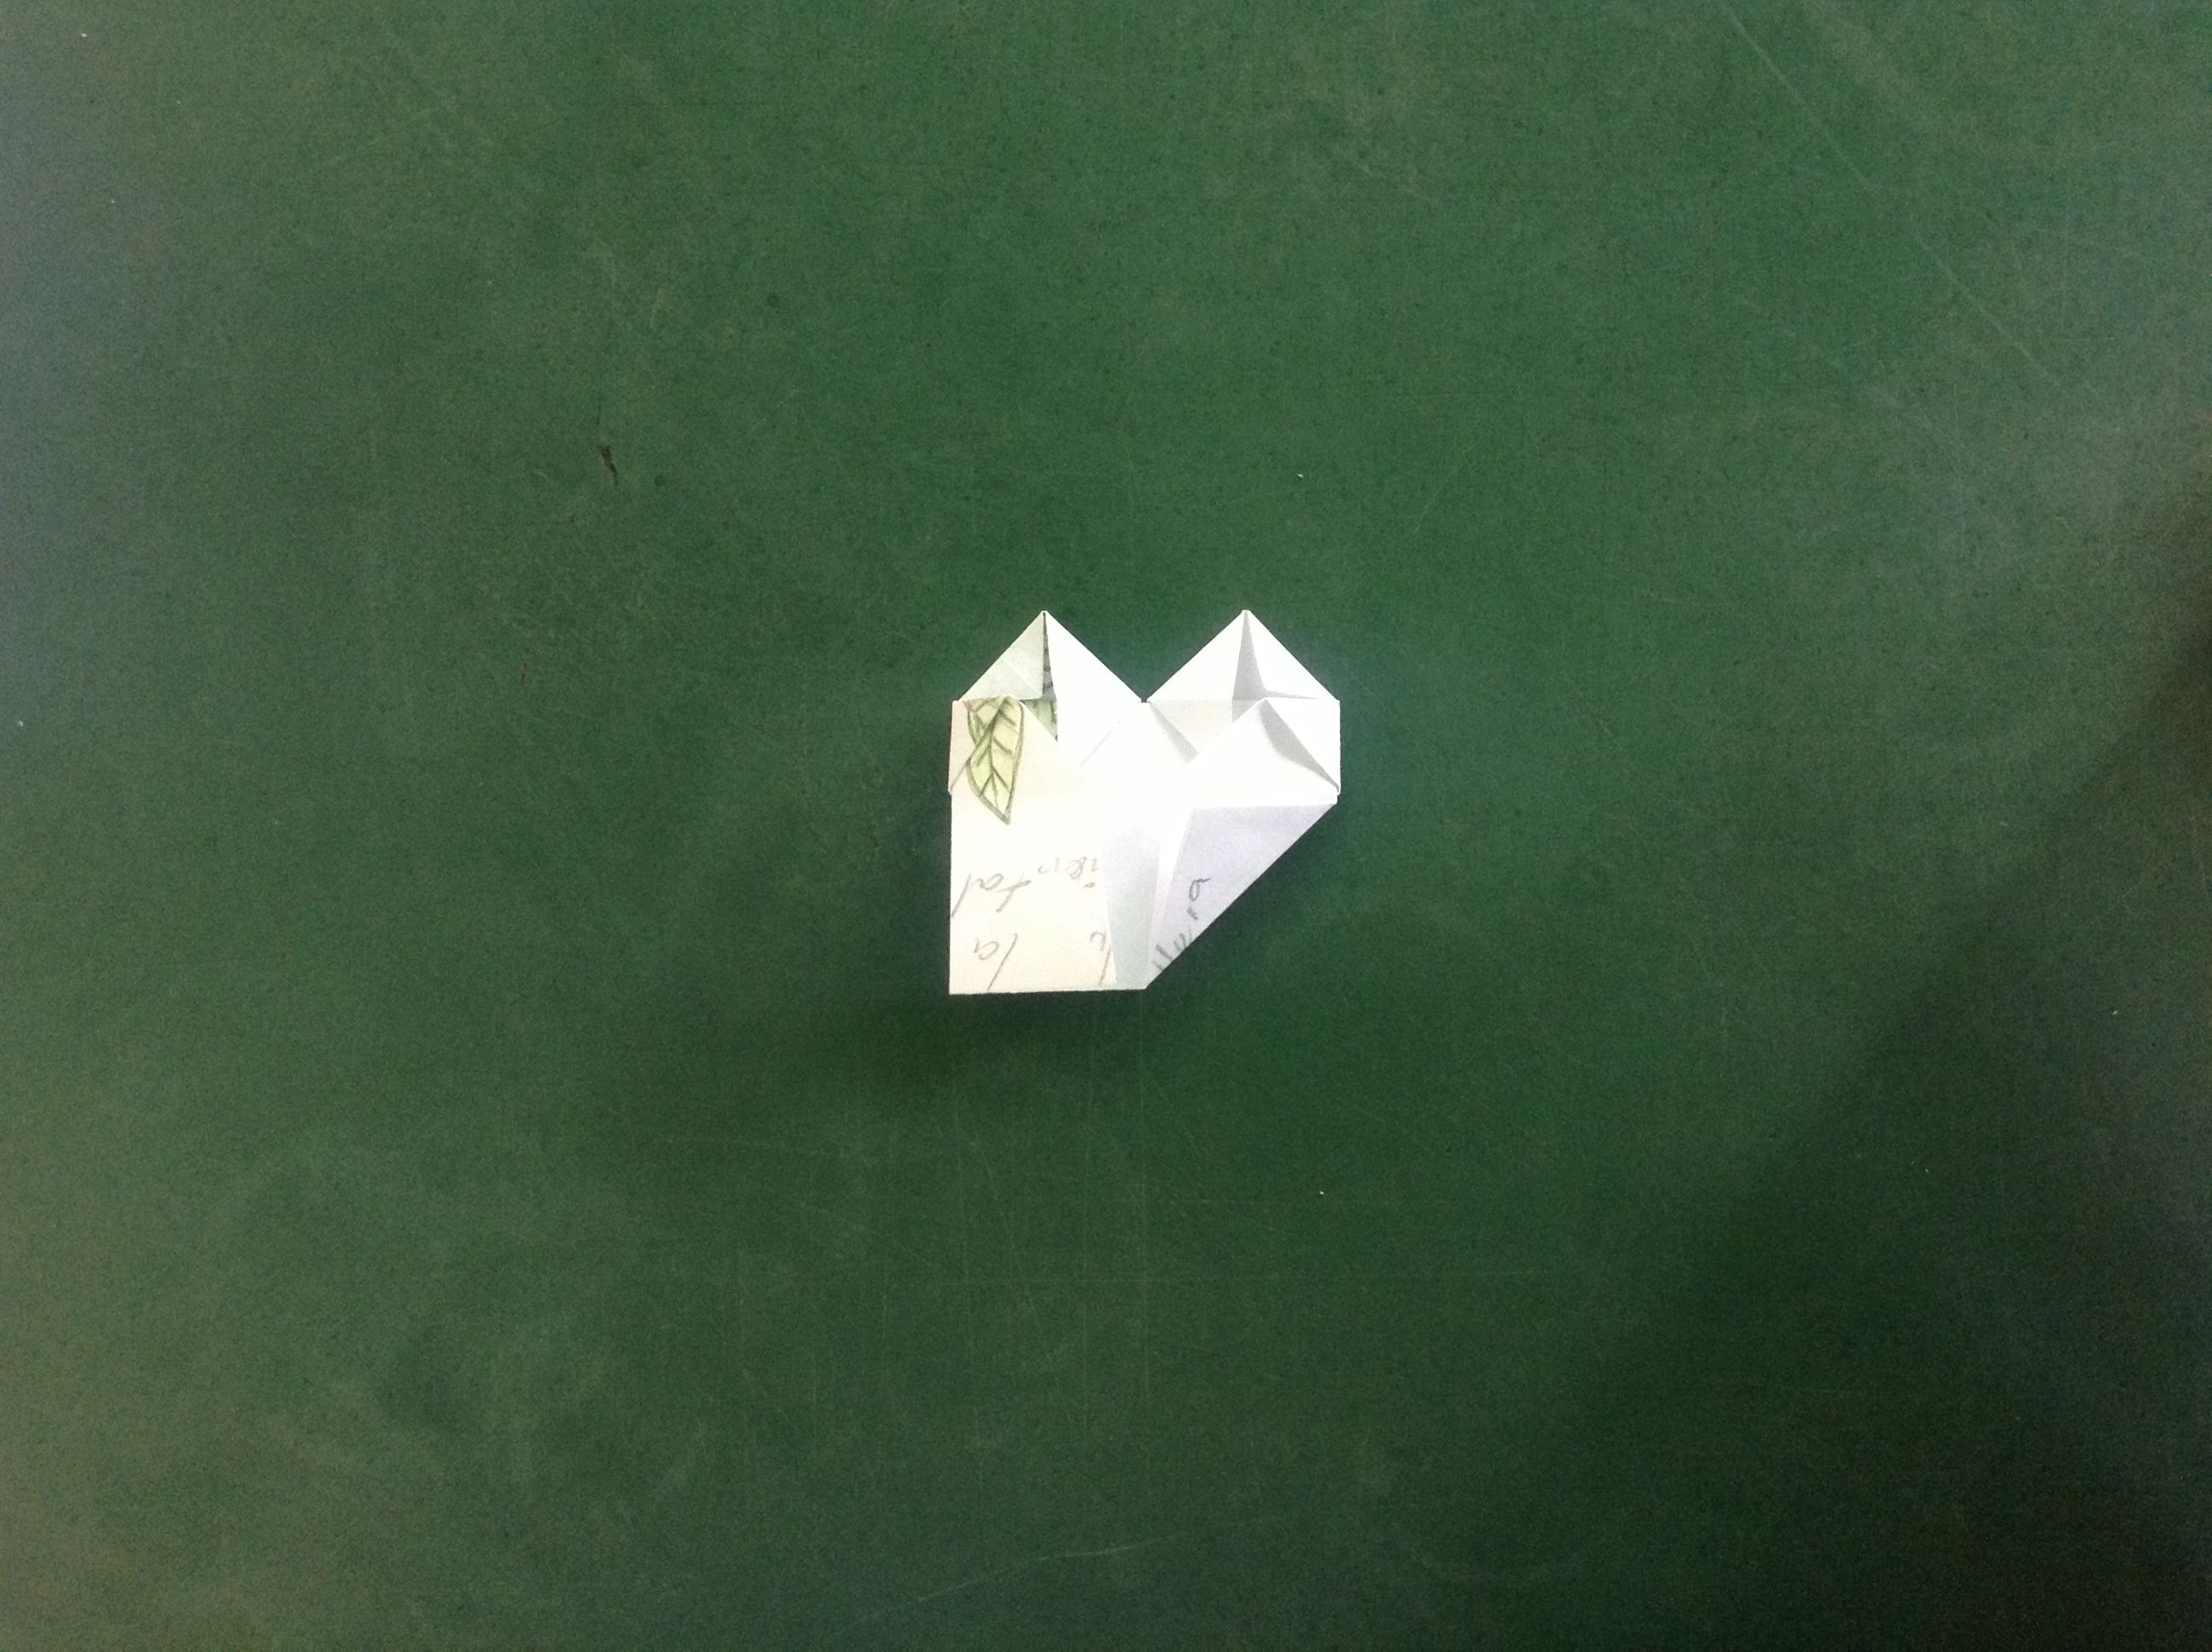
En la parte superior, sobresalen dos cuadrados pequeños que se formaron con tus últimos dobles. Dóblalo diagonal para obtener otro pequeño triángulo. Hazlo con los dos lados, guíate por la foto.
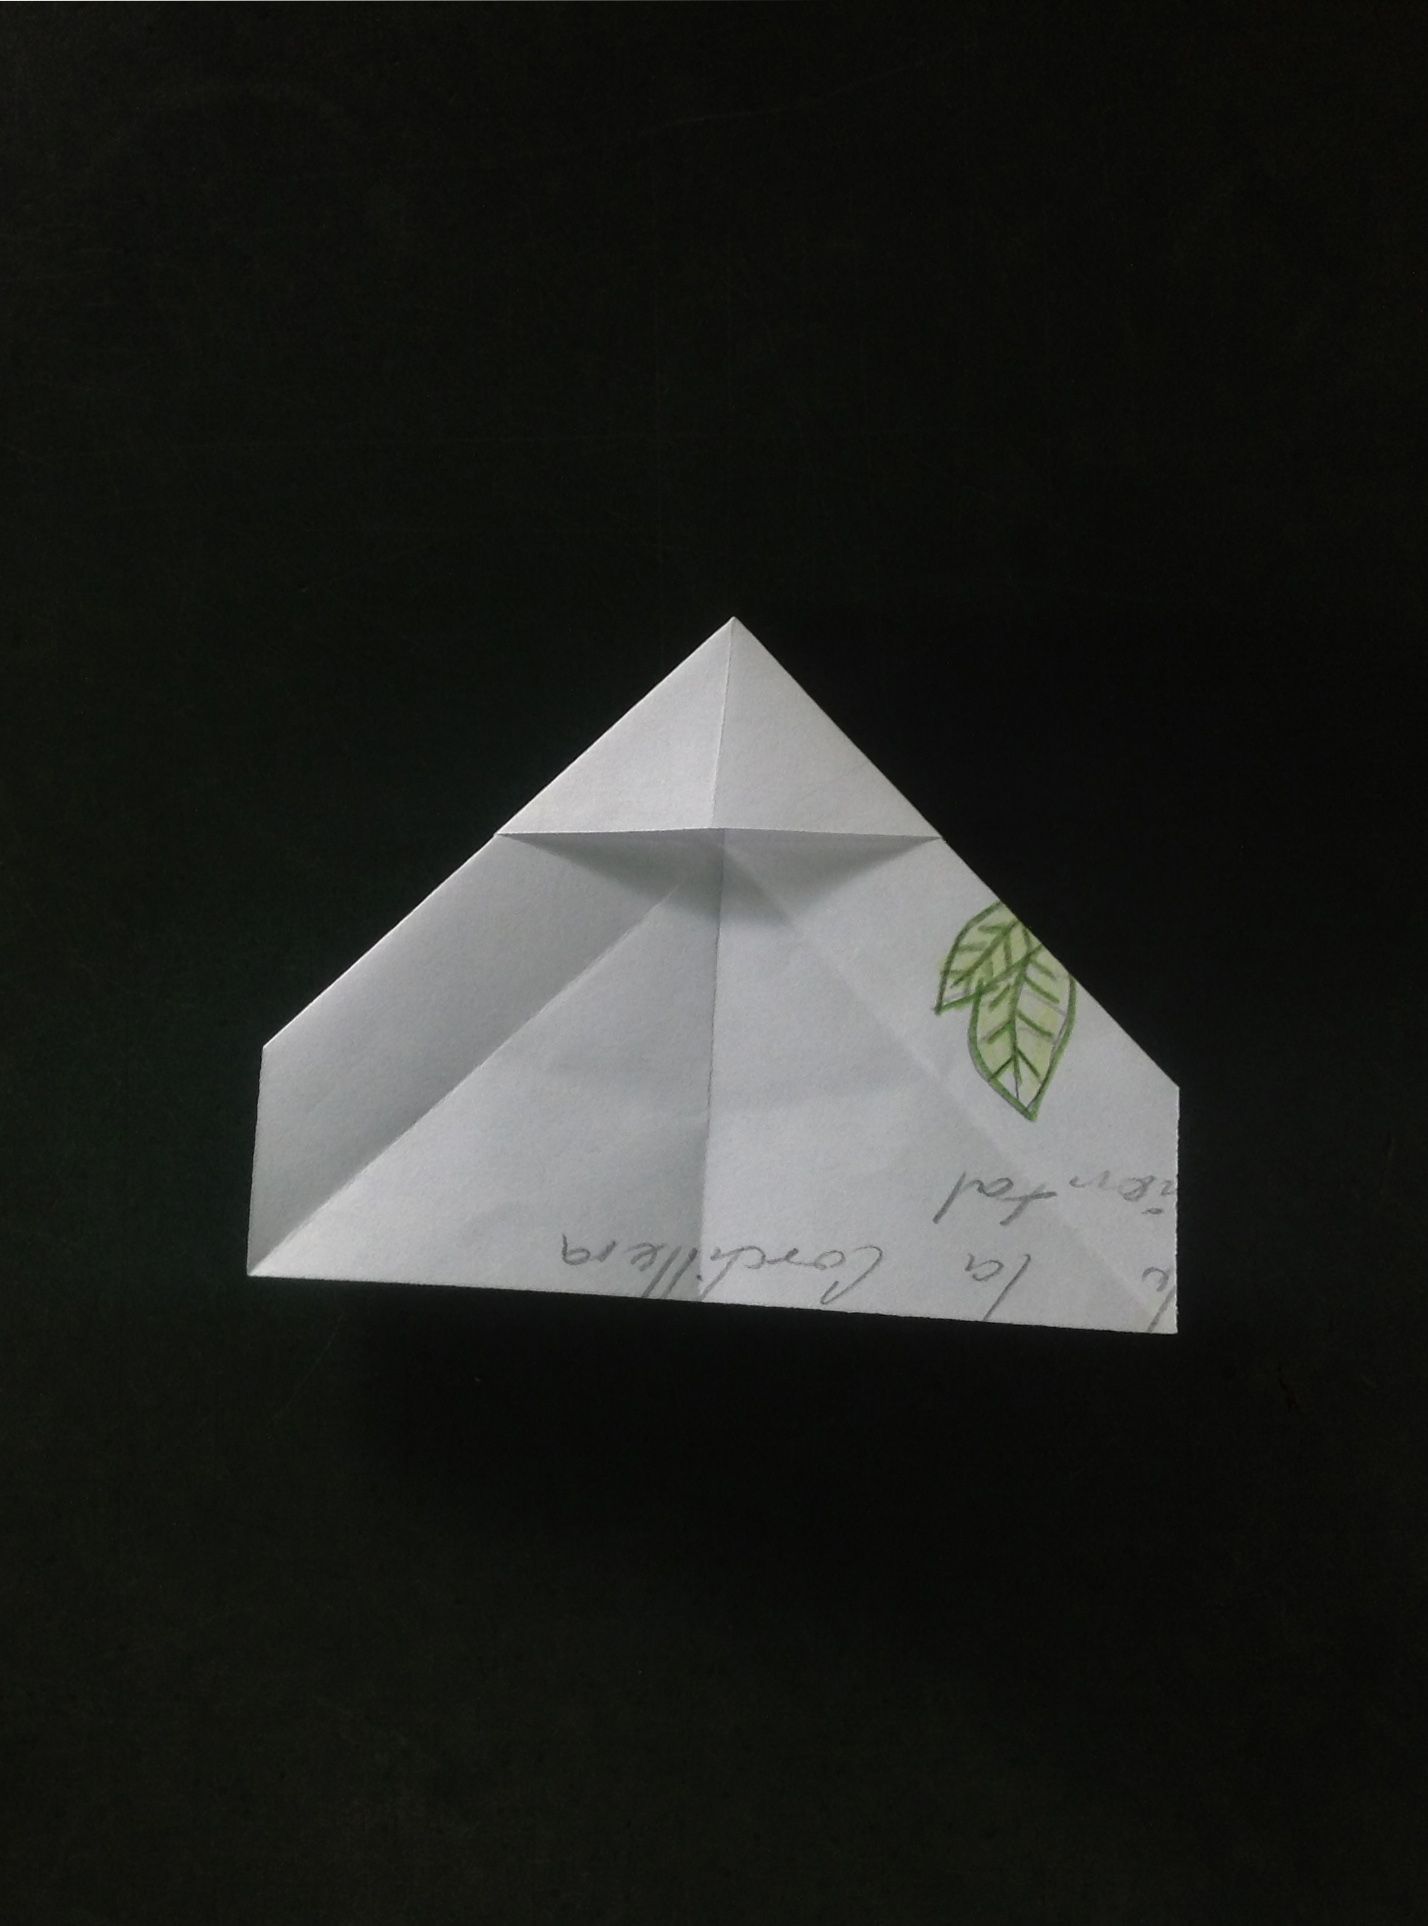
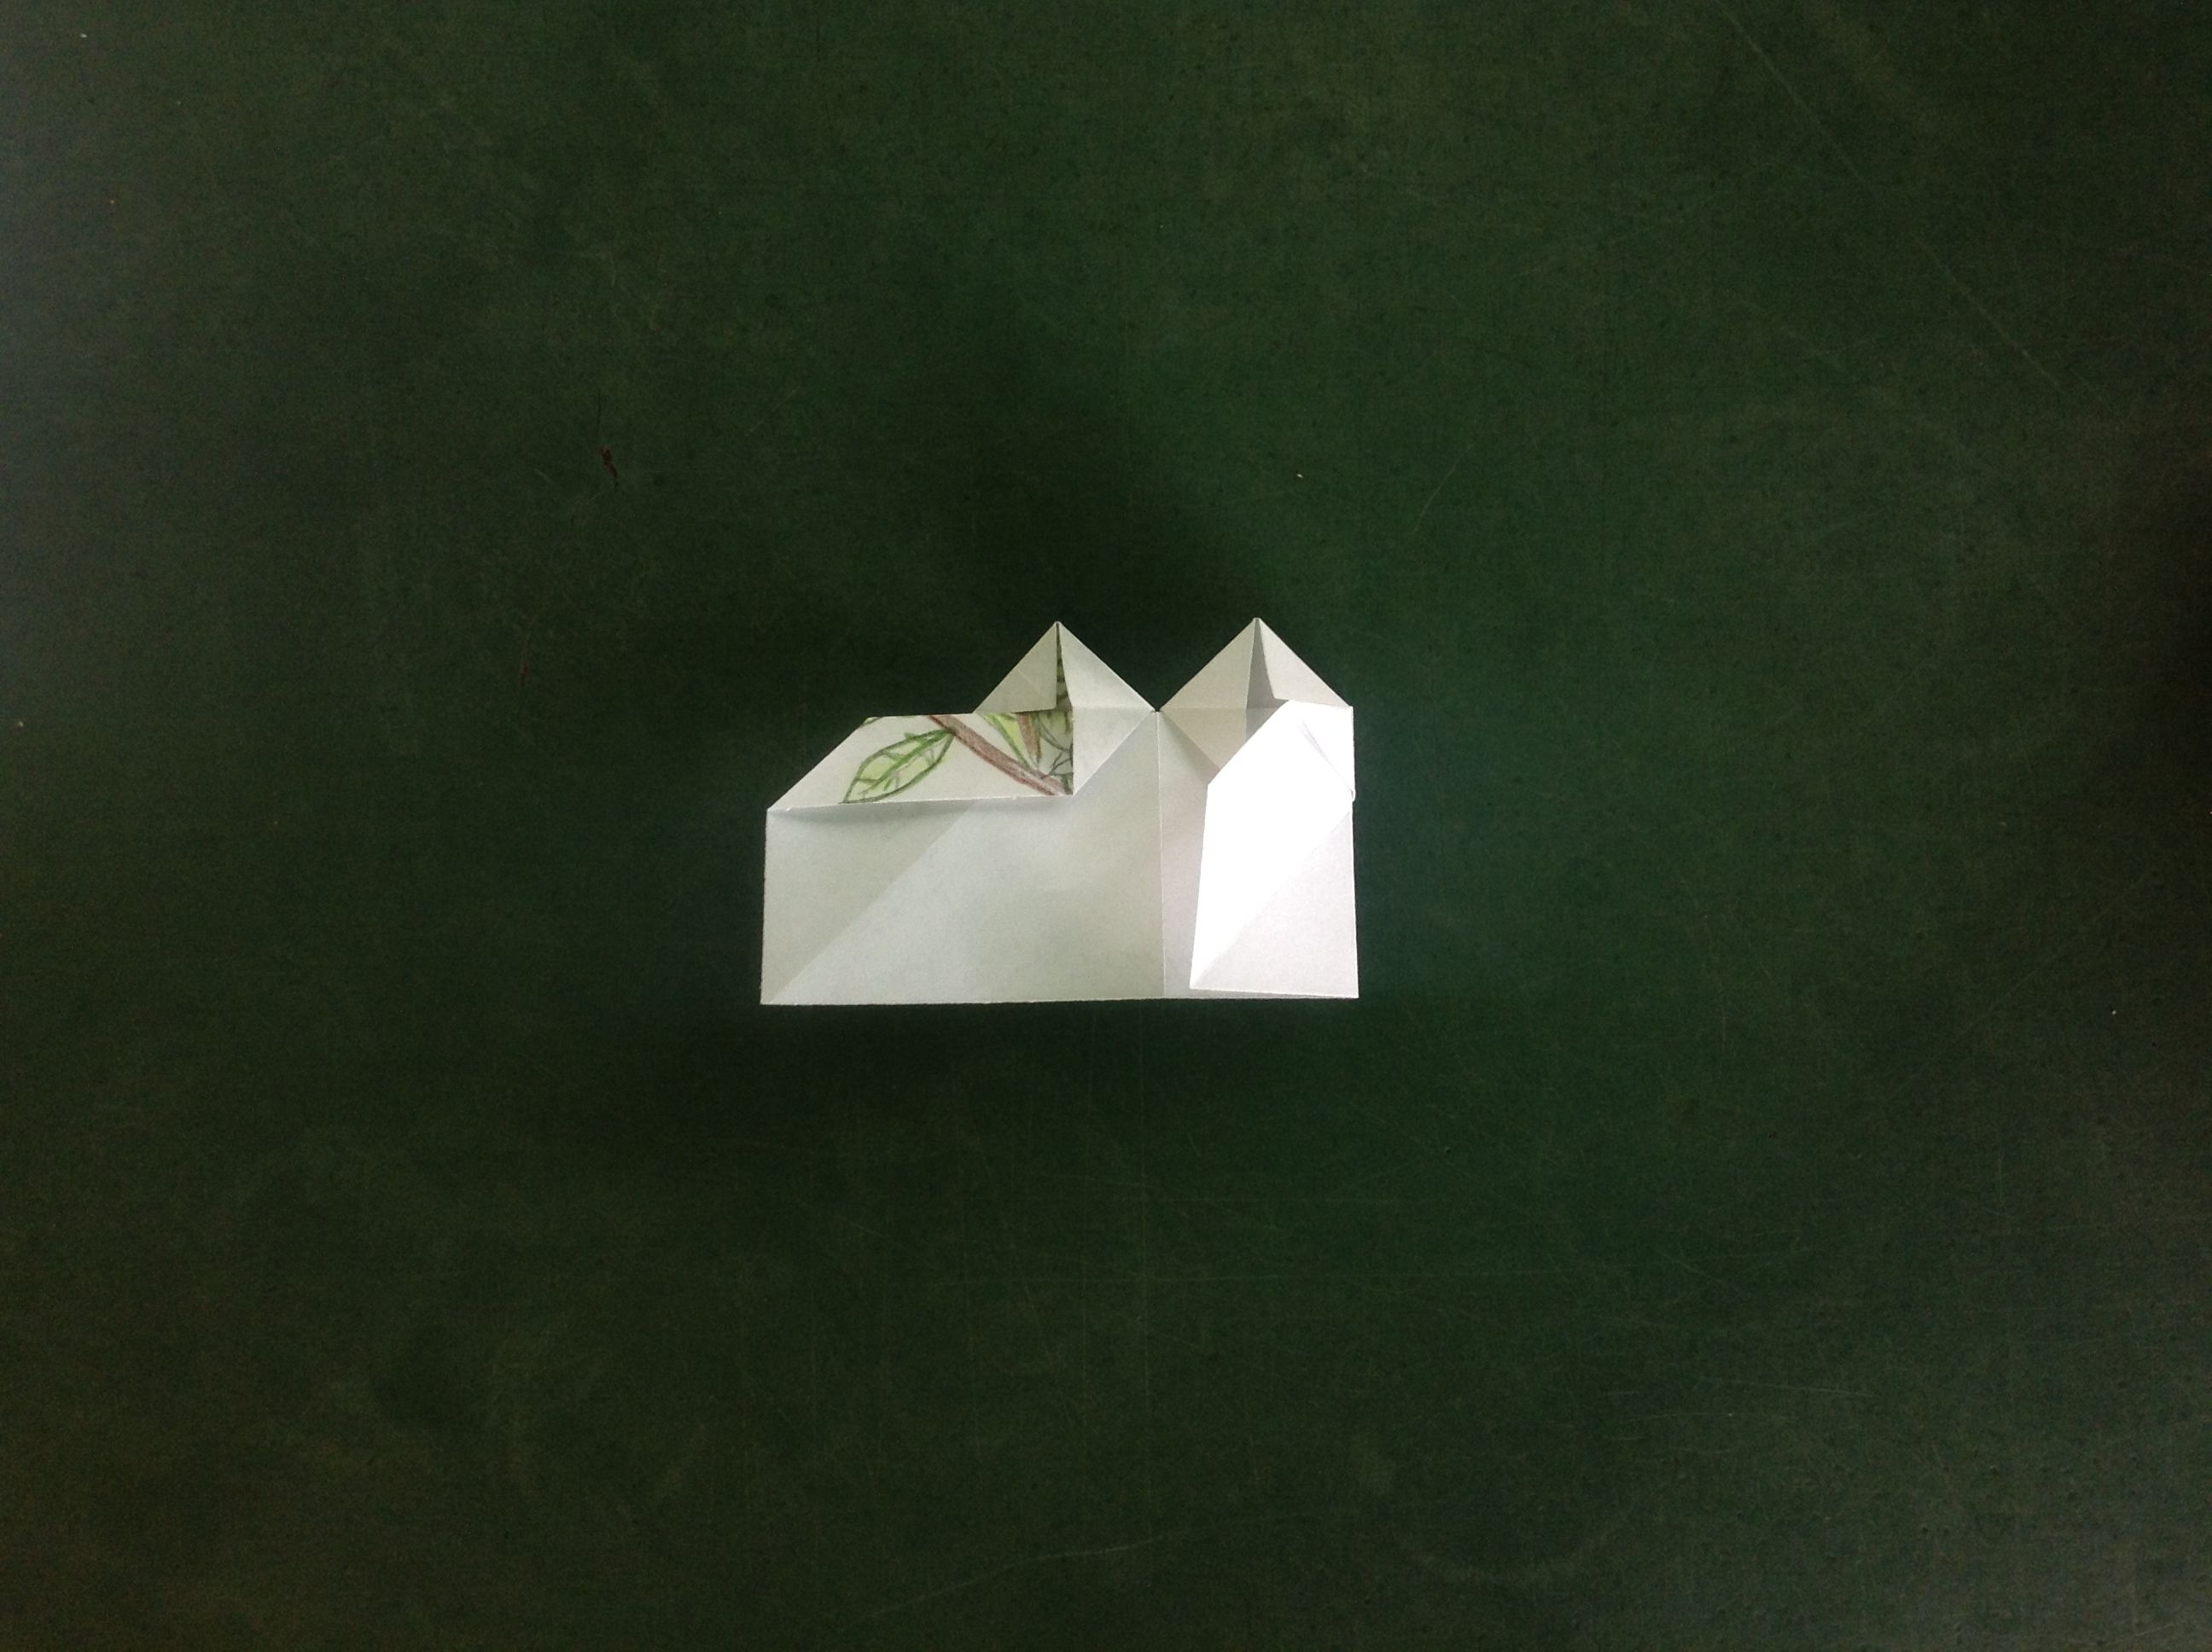
Ahora lleva el borde derecho a la línea del centro, haz lo mismo con el izquierdo. Enseguida dobla la punta inferior derecha diagonal hasta la línea central, de igual manera con la izquierda inferior.
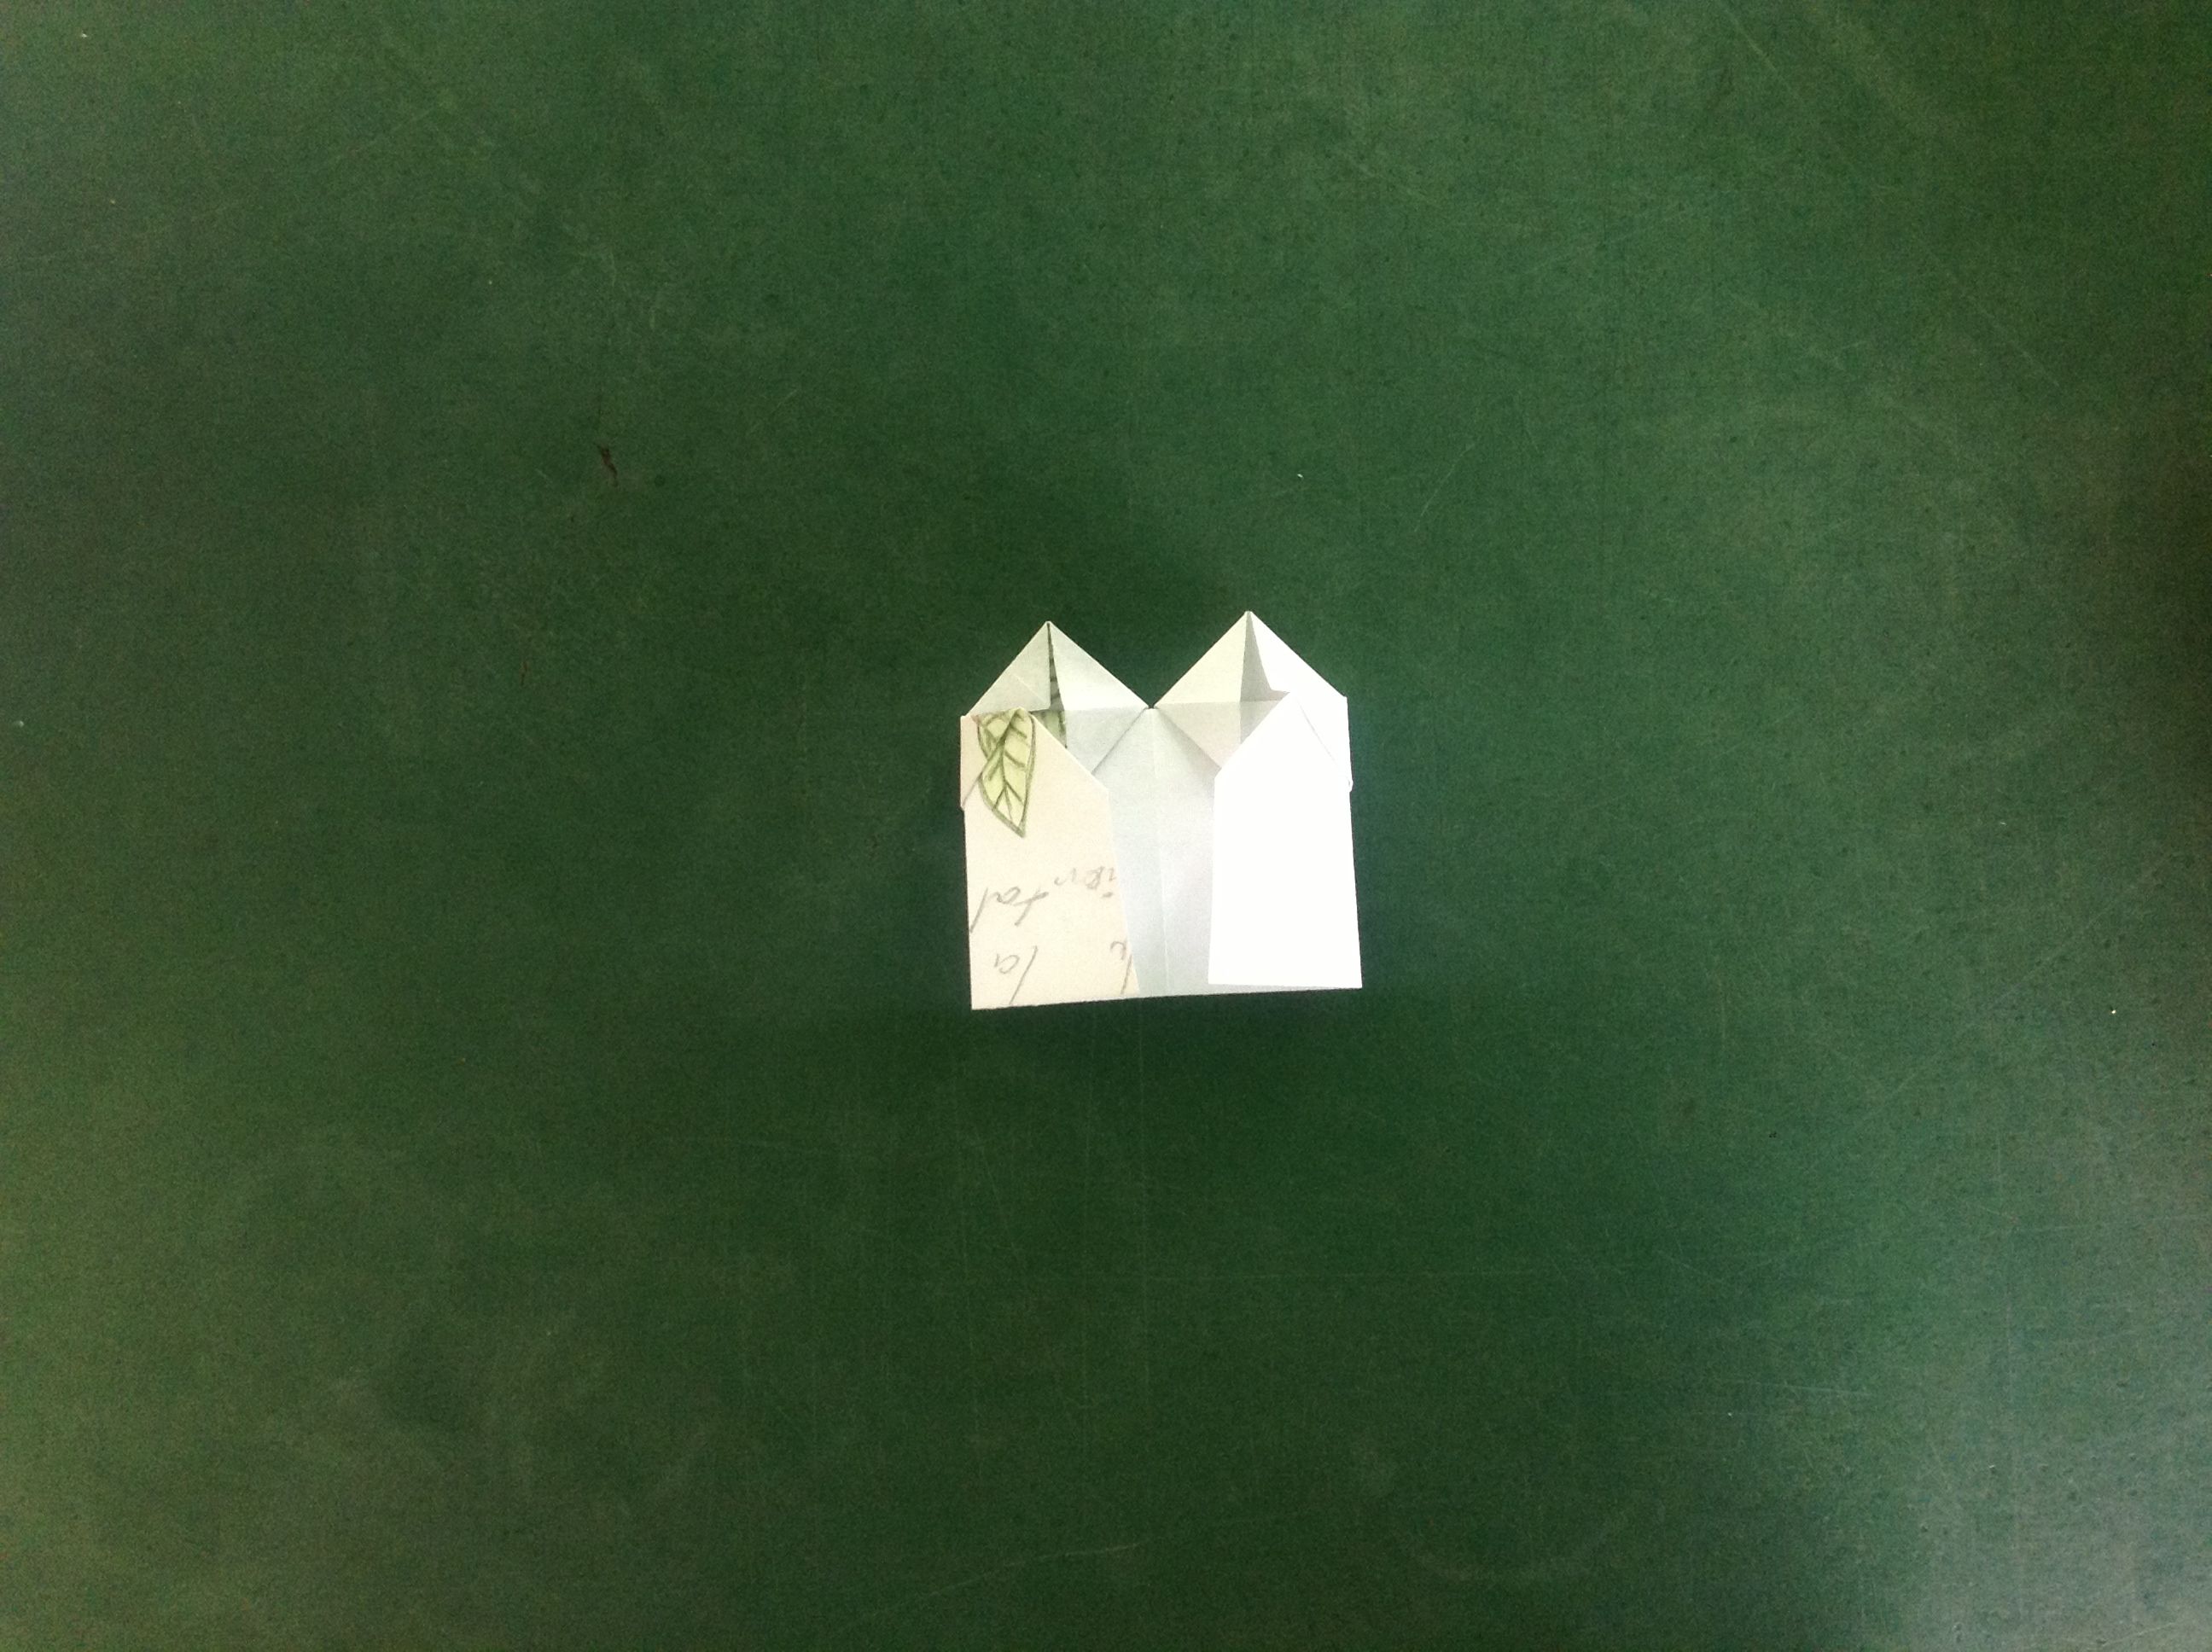
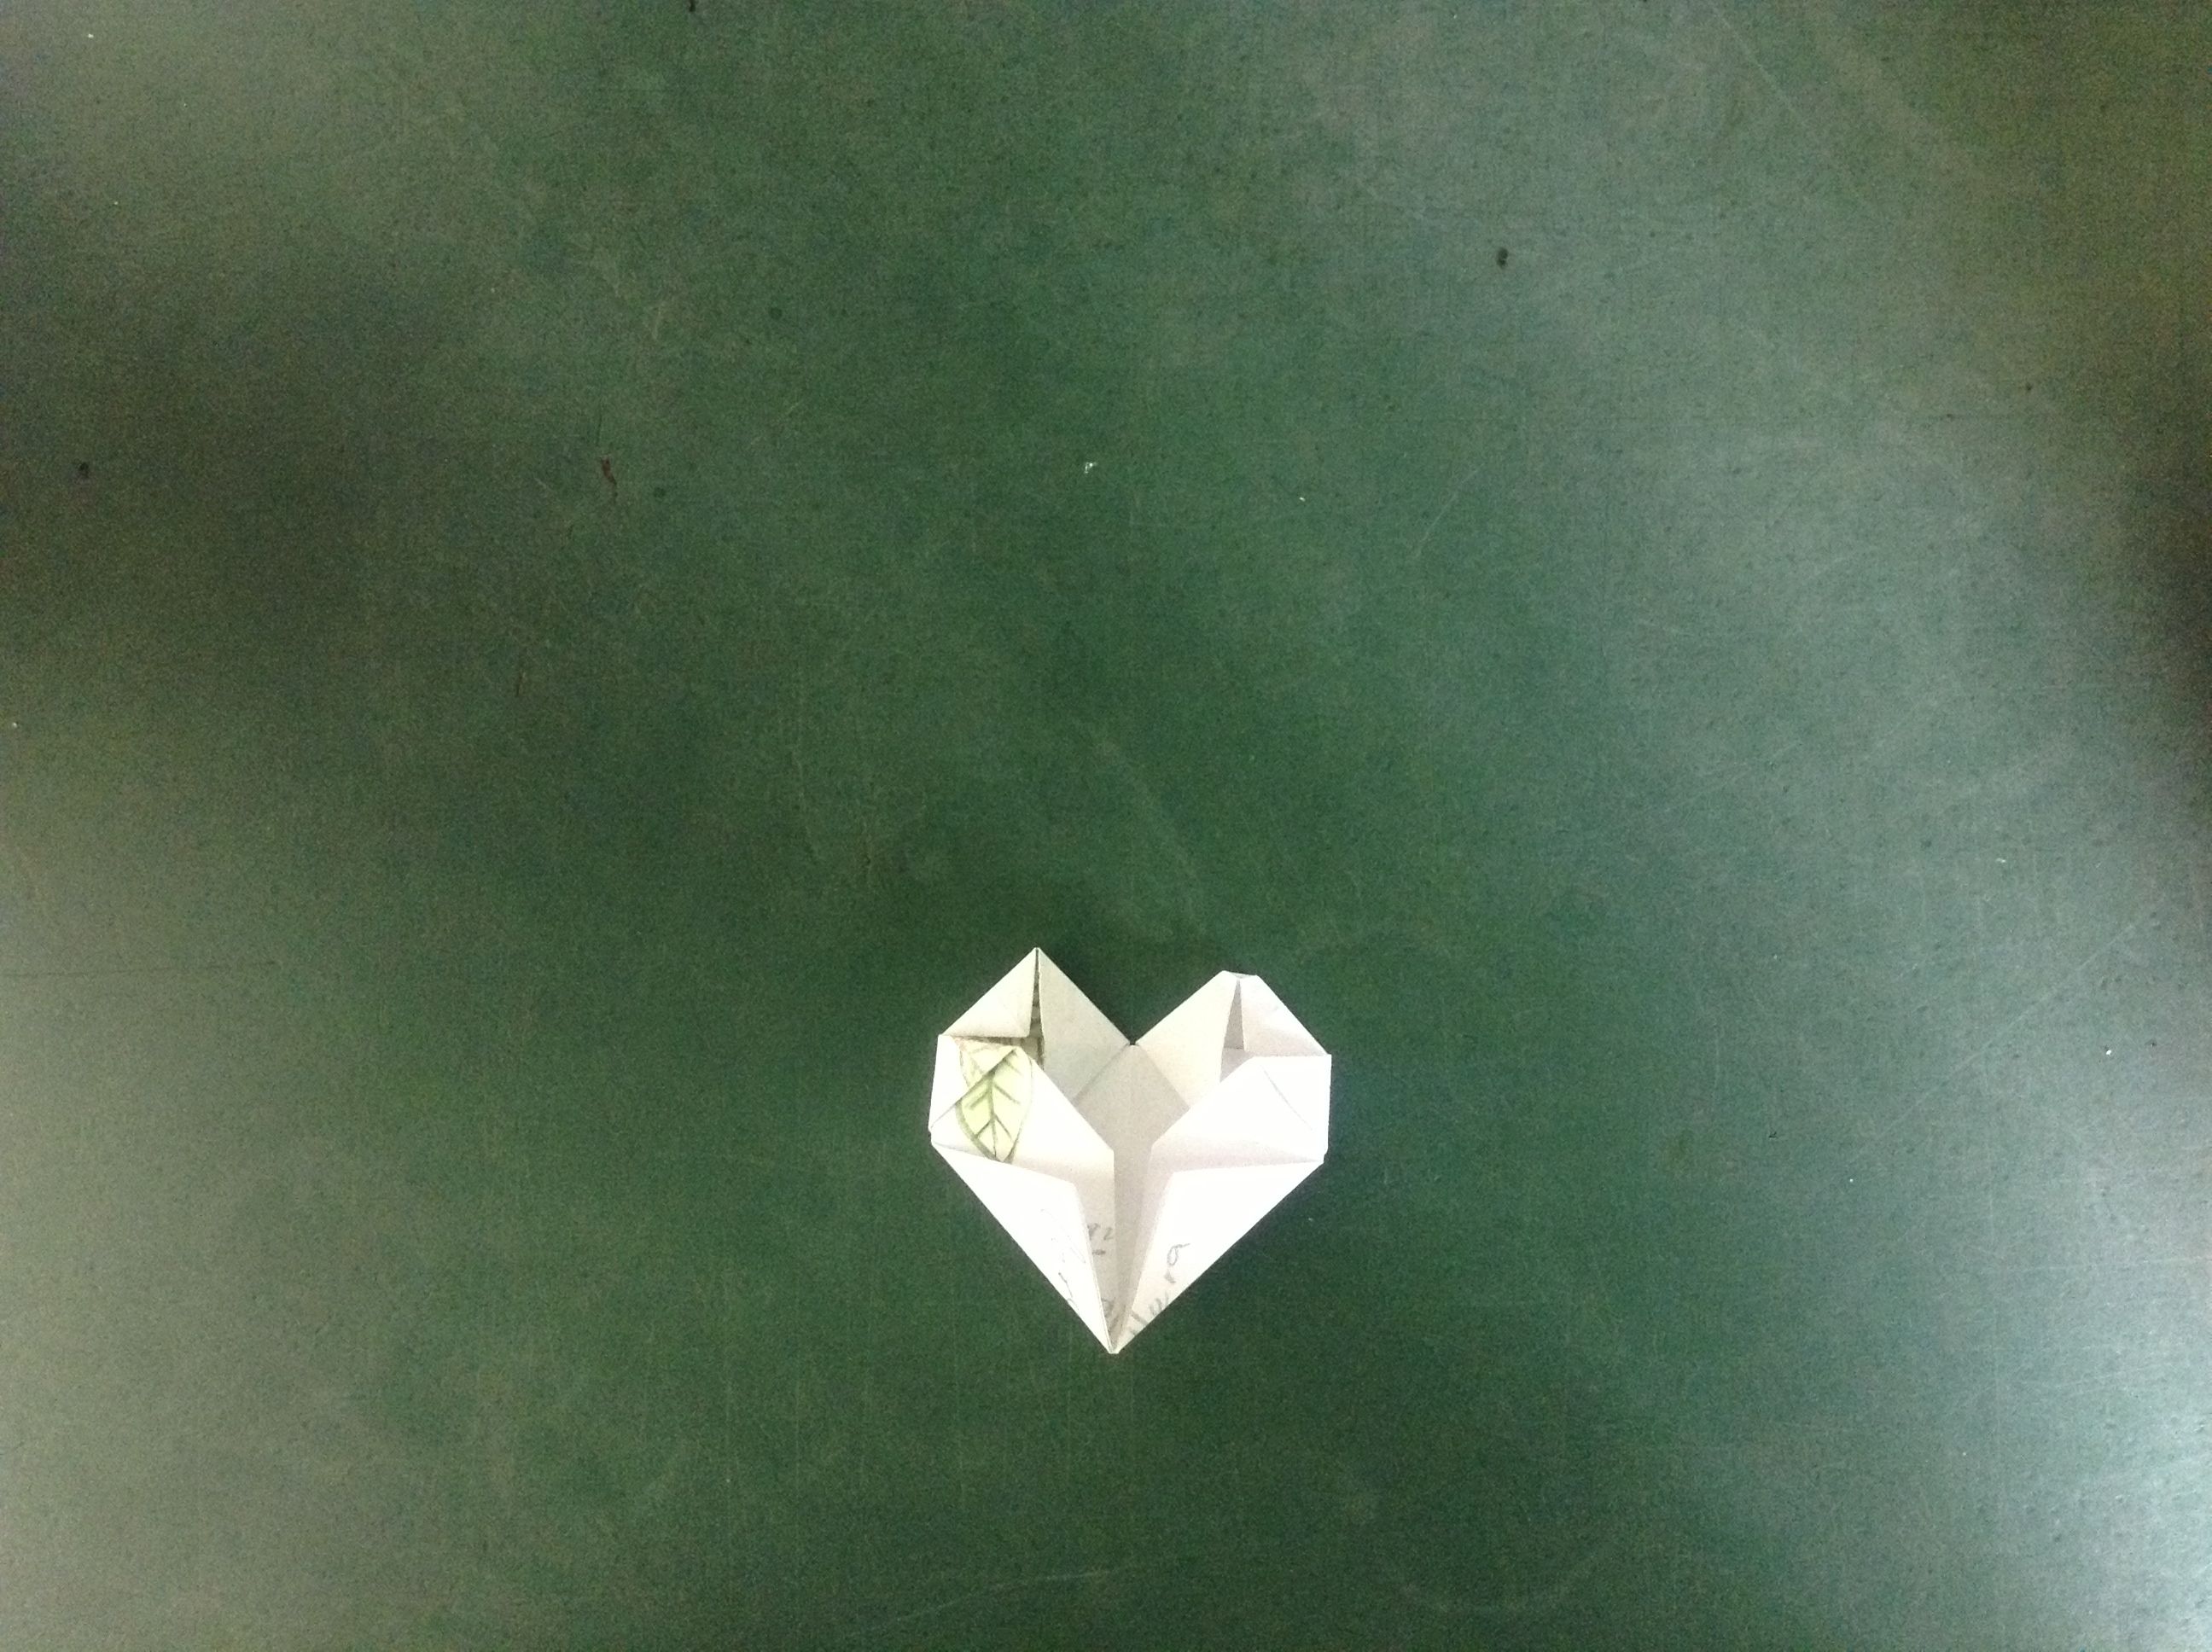
Ya casi tiene el corazón, solo queda doblar las dos puntitas de arriba, para que queden un poco más redondas, es un paso muy sutil.

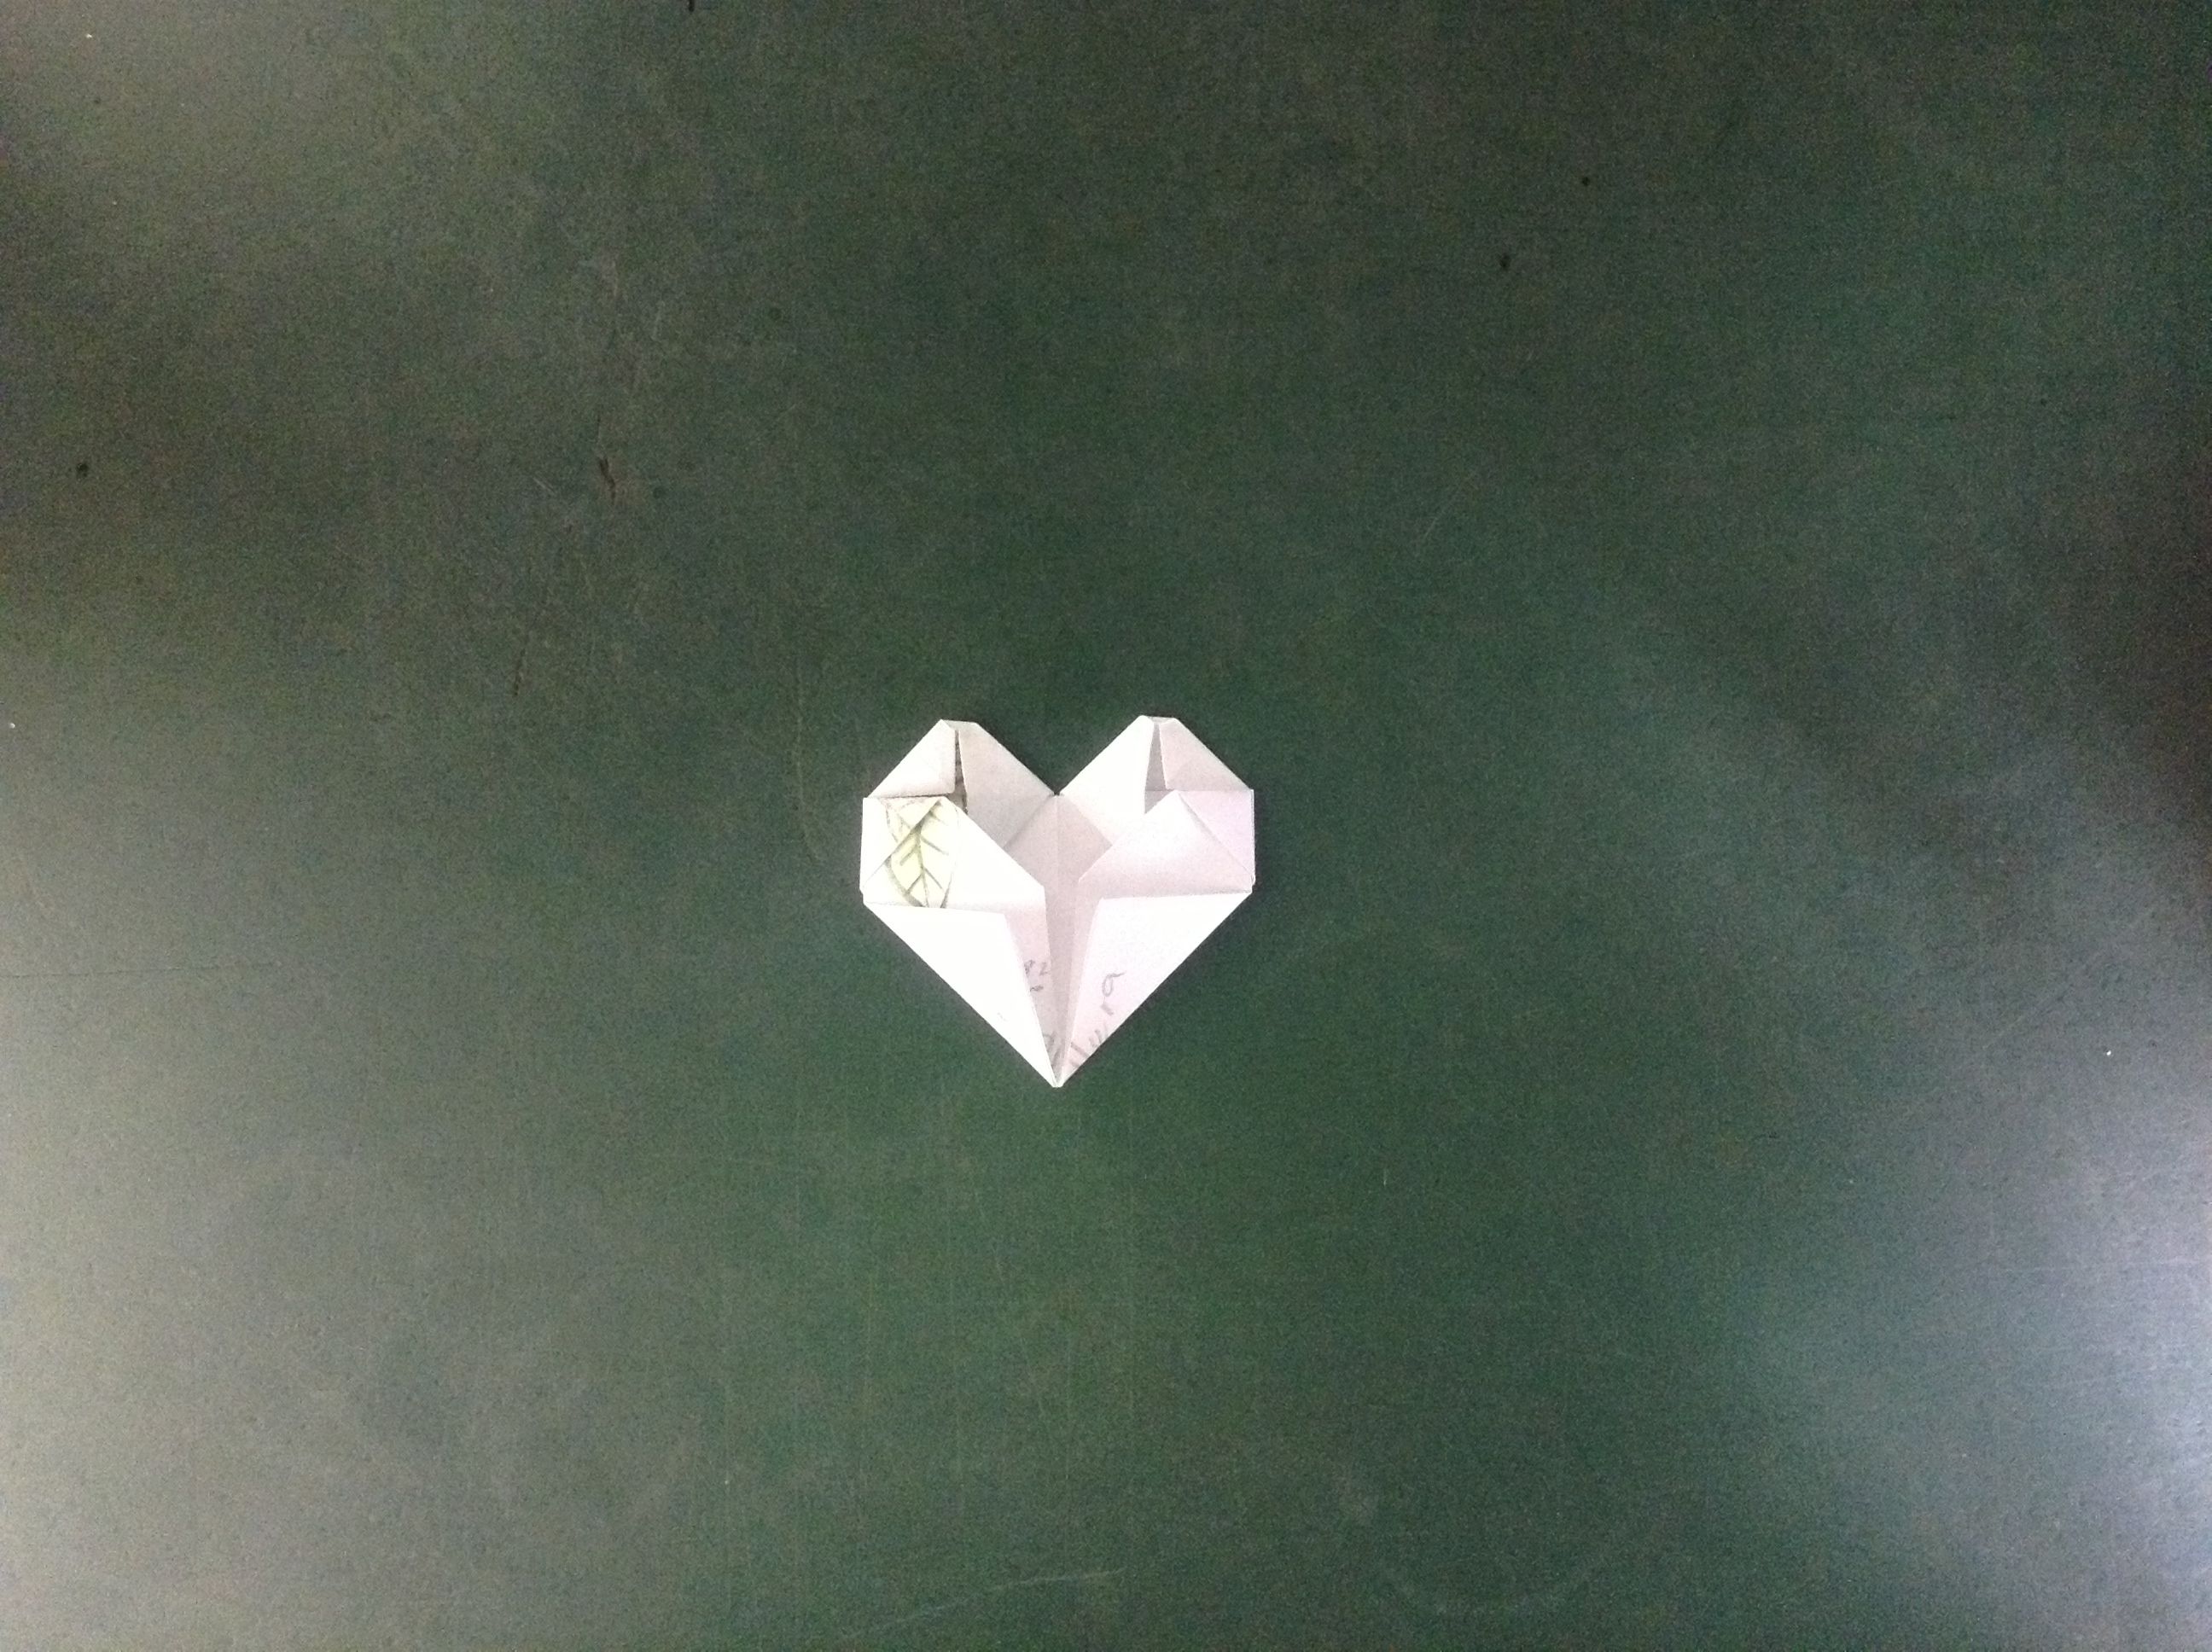
Dale la vuelta, ya está listo el corazón.

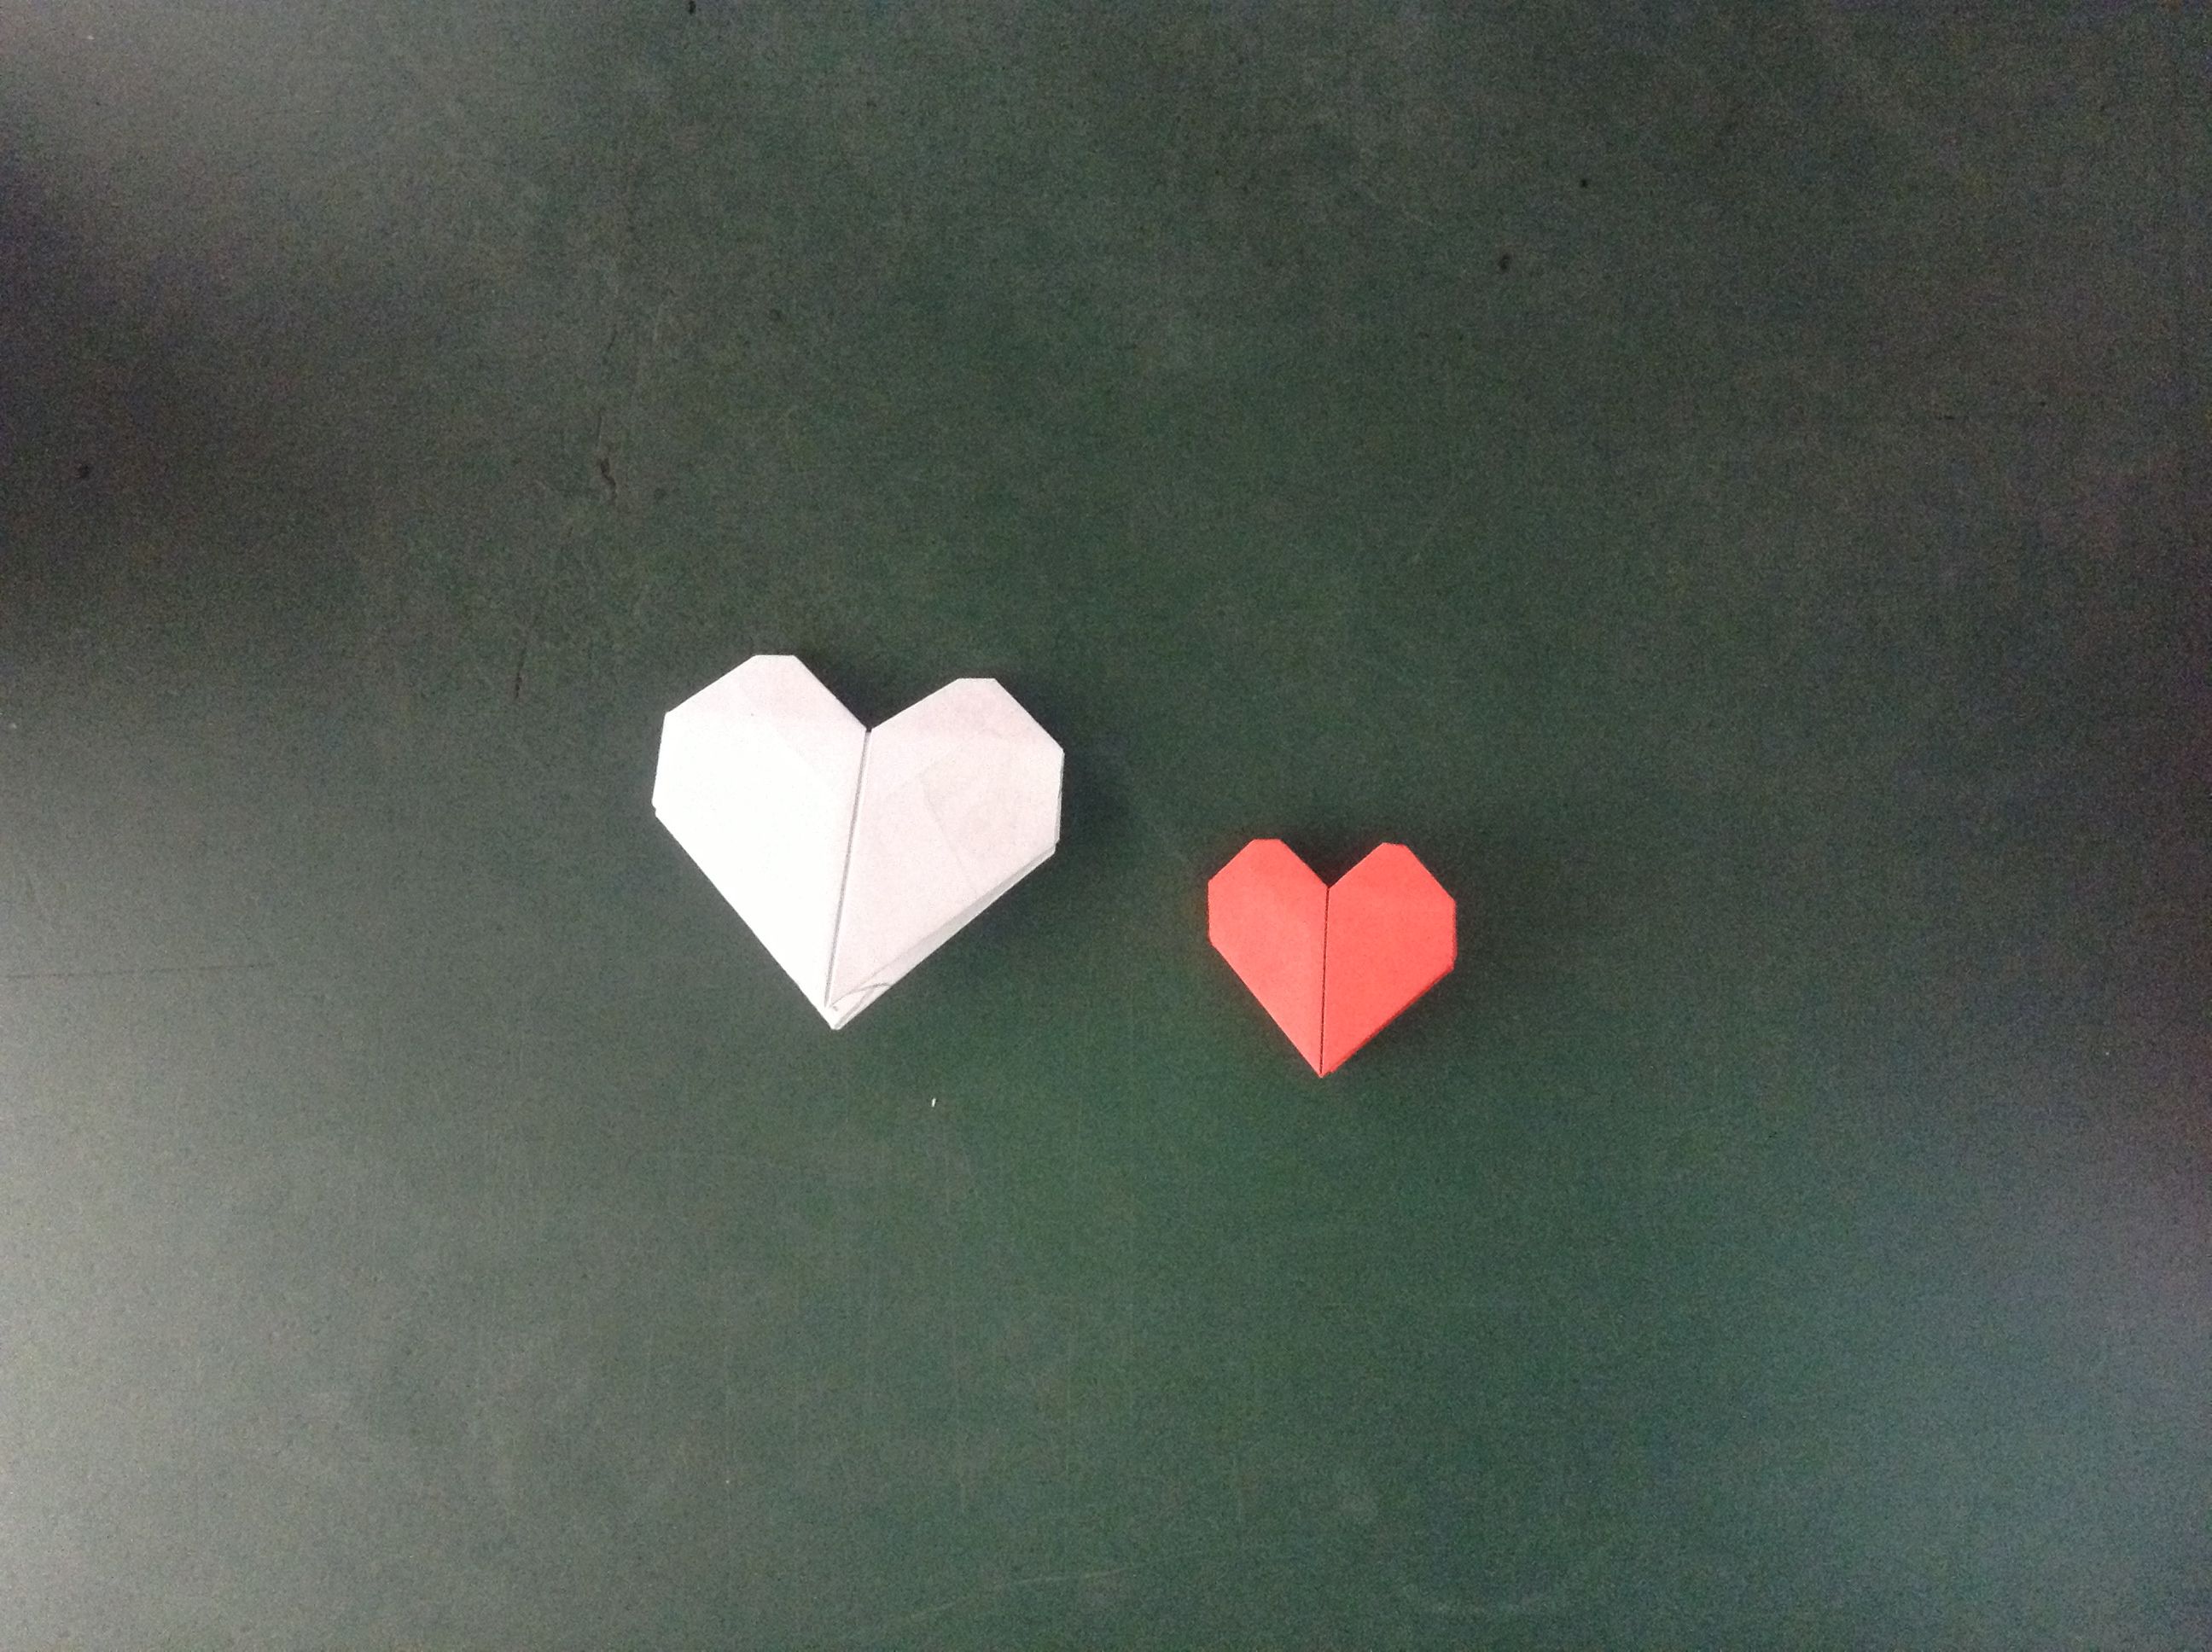
Espero te haya servido este paso a paso, igual te dejo el vídeo para que lo consultes y tengas mejores resultados. Esta es una figura hermosa, estoy convencida de que será muy útil para muchas cosas creativas. Hasta la próxima.
Contenido original del autor.
Recursos: Tableta ZTE E10Q
Fotos propias
Traducido con Deepl.com
Todos los derechos reservados || @jetta.amaya// 2022
Origami heart, a beautiful paper detail (Spanish/English)
A loving greeting to all my Hive friends, we are in the middle of the week and I feel it has been a wonderful few days, today I want to share with you another figure of my great passion, origami. It is the first time I post in this community, but I am sure I will be doing it more often. I wanted to share for a long time about the beautiful art of paper folding, but I wanted to take my time to make the posts in a way that each fold is well understood.
As I have said in other occasions, origami brings wonderful benefits for our mind and body, besides that it brings a huge satisfaction at the moment of having in our hands the beautiful results that we can get by folding paper. This time we will make the heart, this figure is a sample of them, simple and beautiful, perfect to use as cards or to decorate, I'm sure you will enjoy a lot making it.
As always I leave below the basic recommendations to get started:
-Clean hands and table (paper gets dirty easily, we don't want to damage the work).
-No food or liquids near the work area (The palpe gets damaged when in contact with water).
-Good light (for eye care)
-Straight back (for posture care)
This is one of the many figures in origami that start with a perfect square.
Normally to make the perfect square I have to mark the diagonal line that you can see in the photo. If your square doesn't have it you can get it by joining the top left point with the bottom right point, you will form a triangle, open it again to have the square with the diagonal line. You will do the same with the other side, that is, join the upper right point with the lower left point, making a triangle, open it and you will have a square with an X marked.
Now join the two upper points with the lower ones, you will have a rectangle, open it again, a new horizontal line will have been marked on your square. Next fold the two points on the right side with the two points on the left side, you will have a vertical rectangle, open it. All these folds are intended to mark an asterisk on the perfect square, they will be the guide lines that will allow you to make the figure of the heart.
Having marked the asterisk, fold the top two points to the horizontal center line. Turn the figure over, bring the upper right tip to the vertical center line, you will get a triangle. Make the same fold with the upper left tip, you will have two triangles and a rectangle at the bottom.
Flip the figure again, the arrowhead pointing up, bend it to the bottom edge, guiding yourself with the center line.
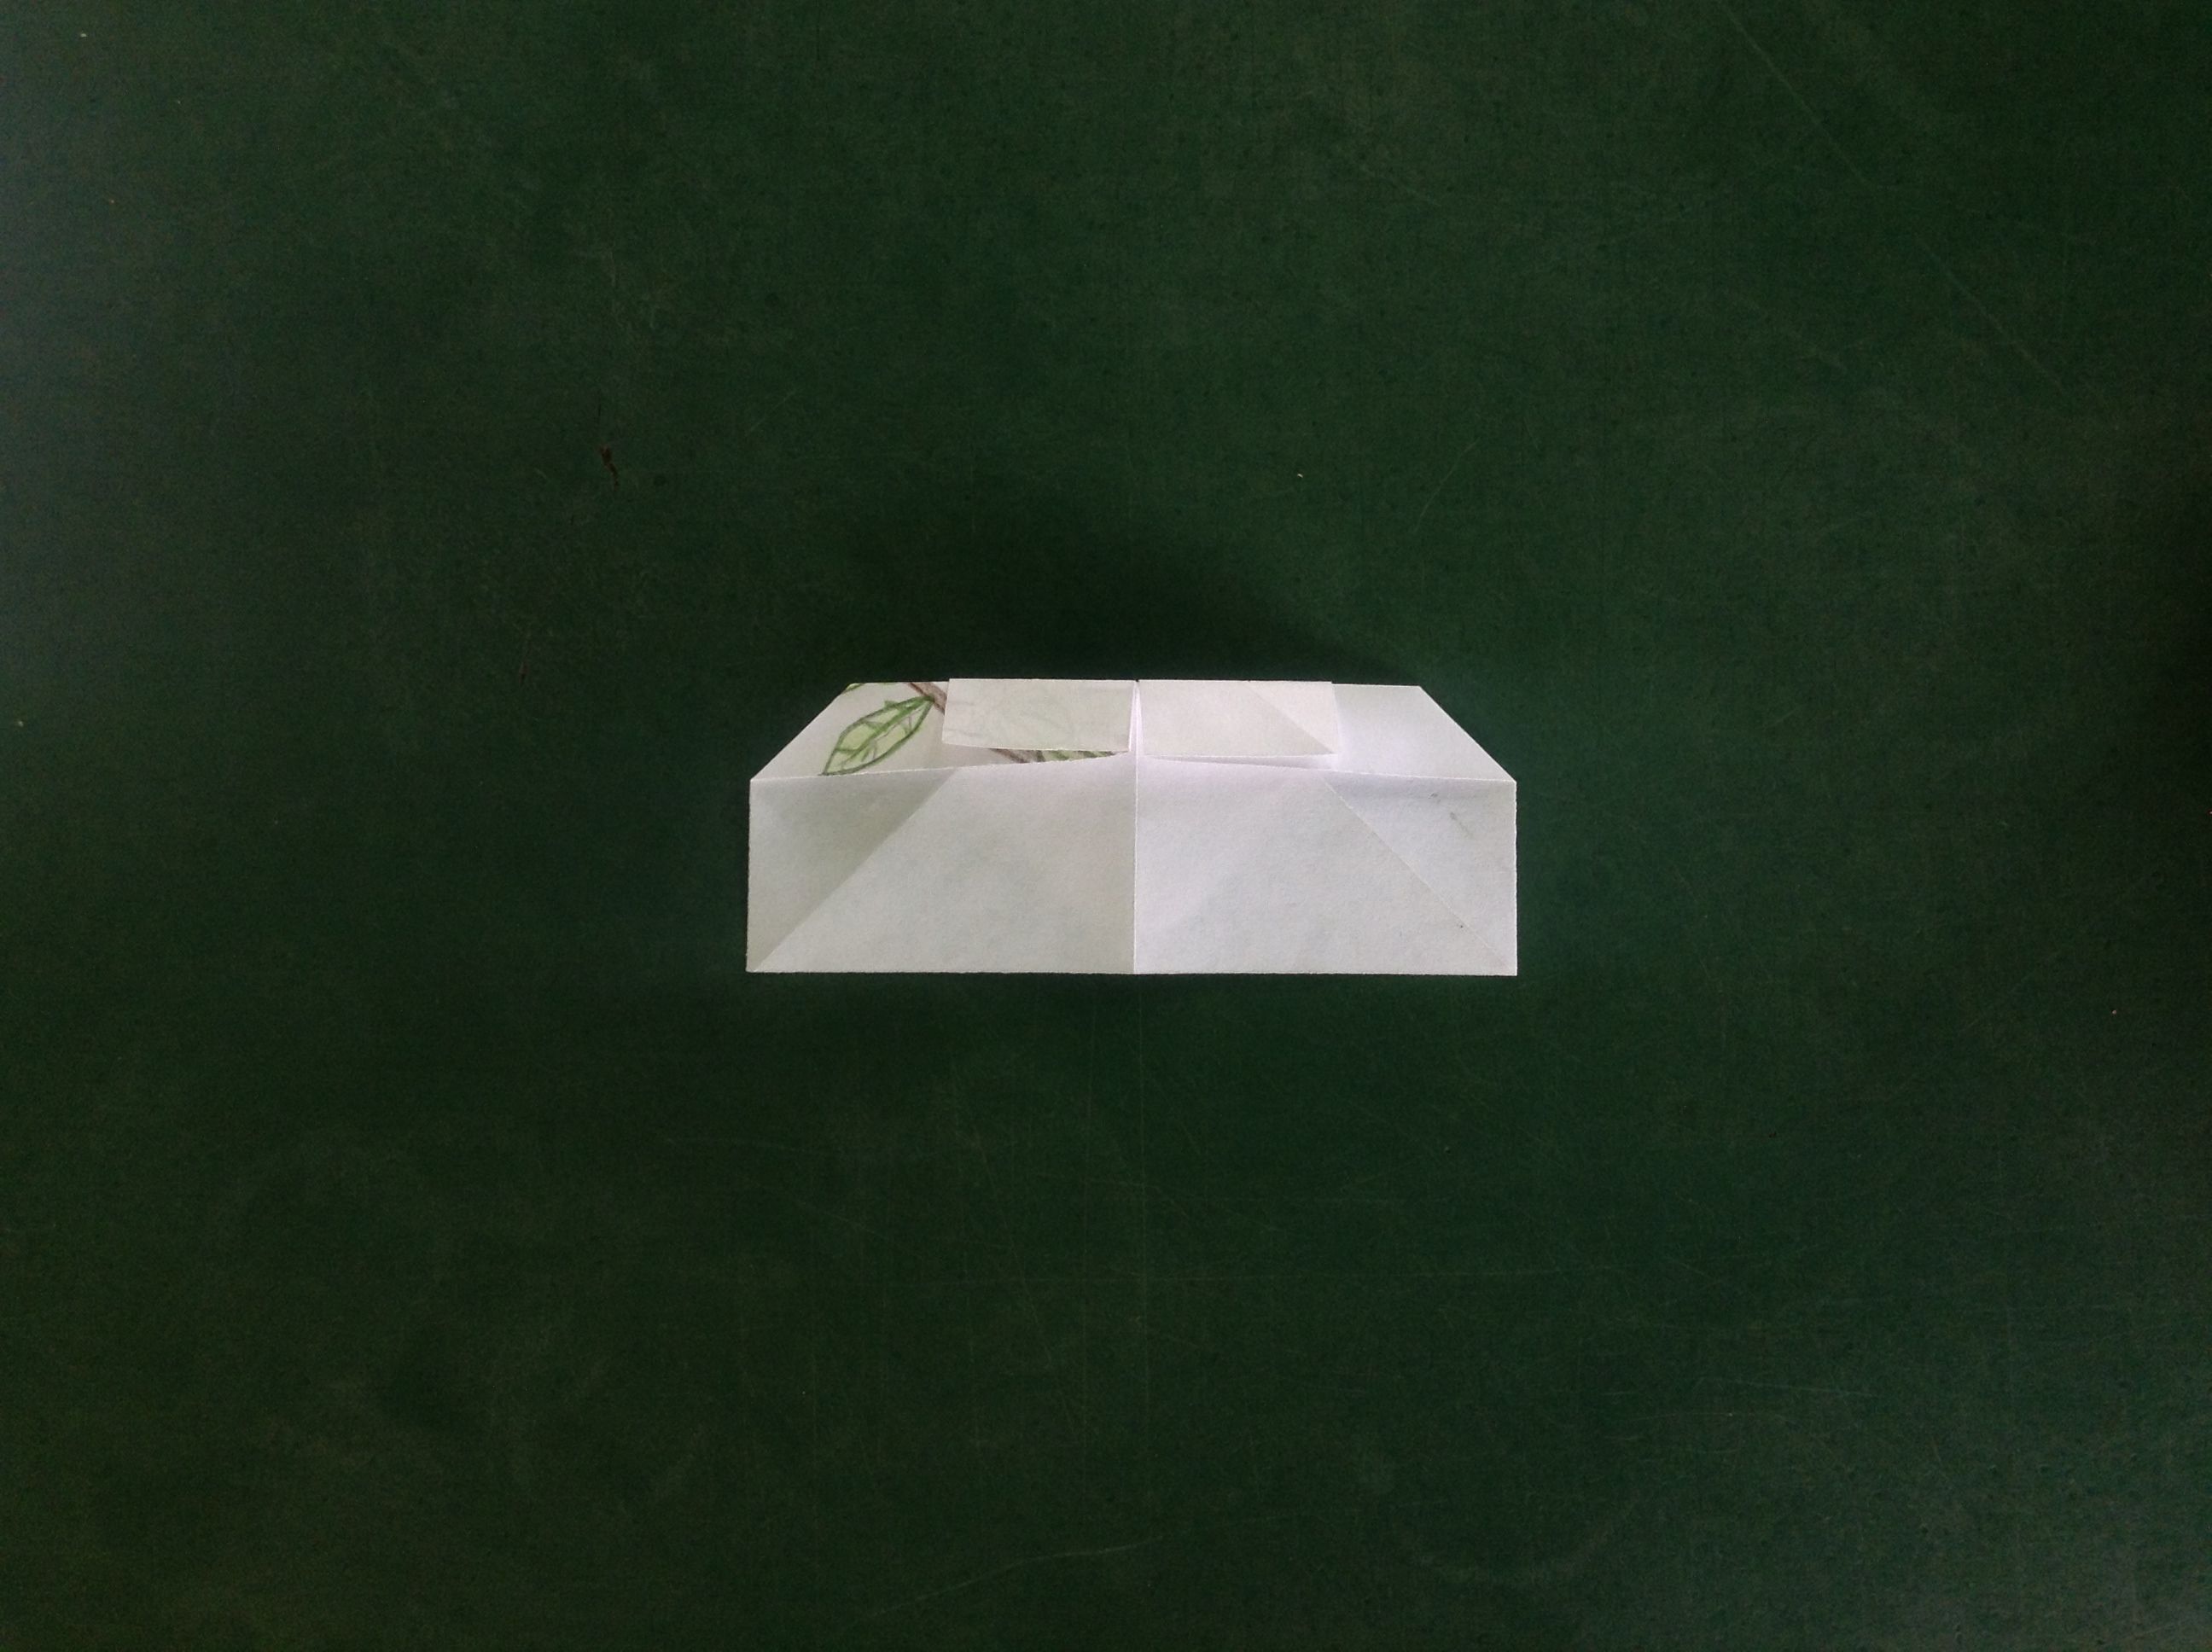
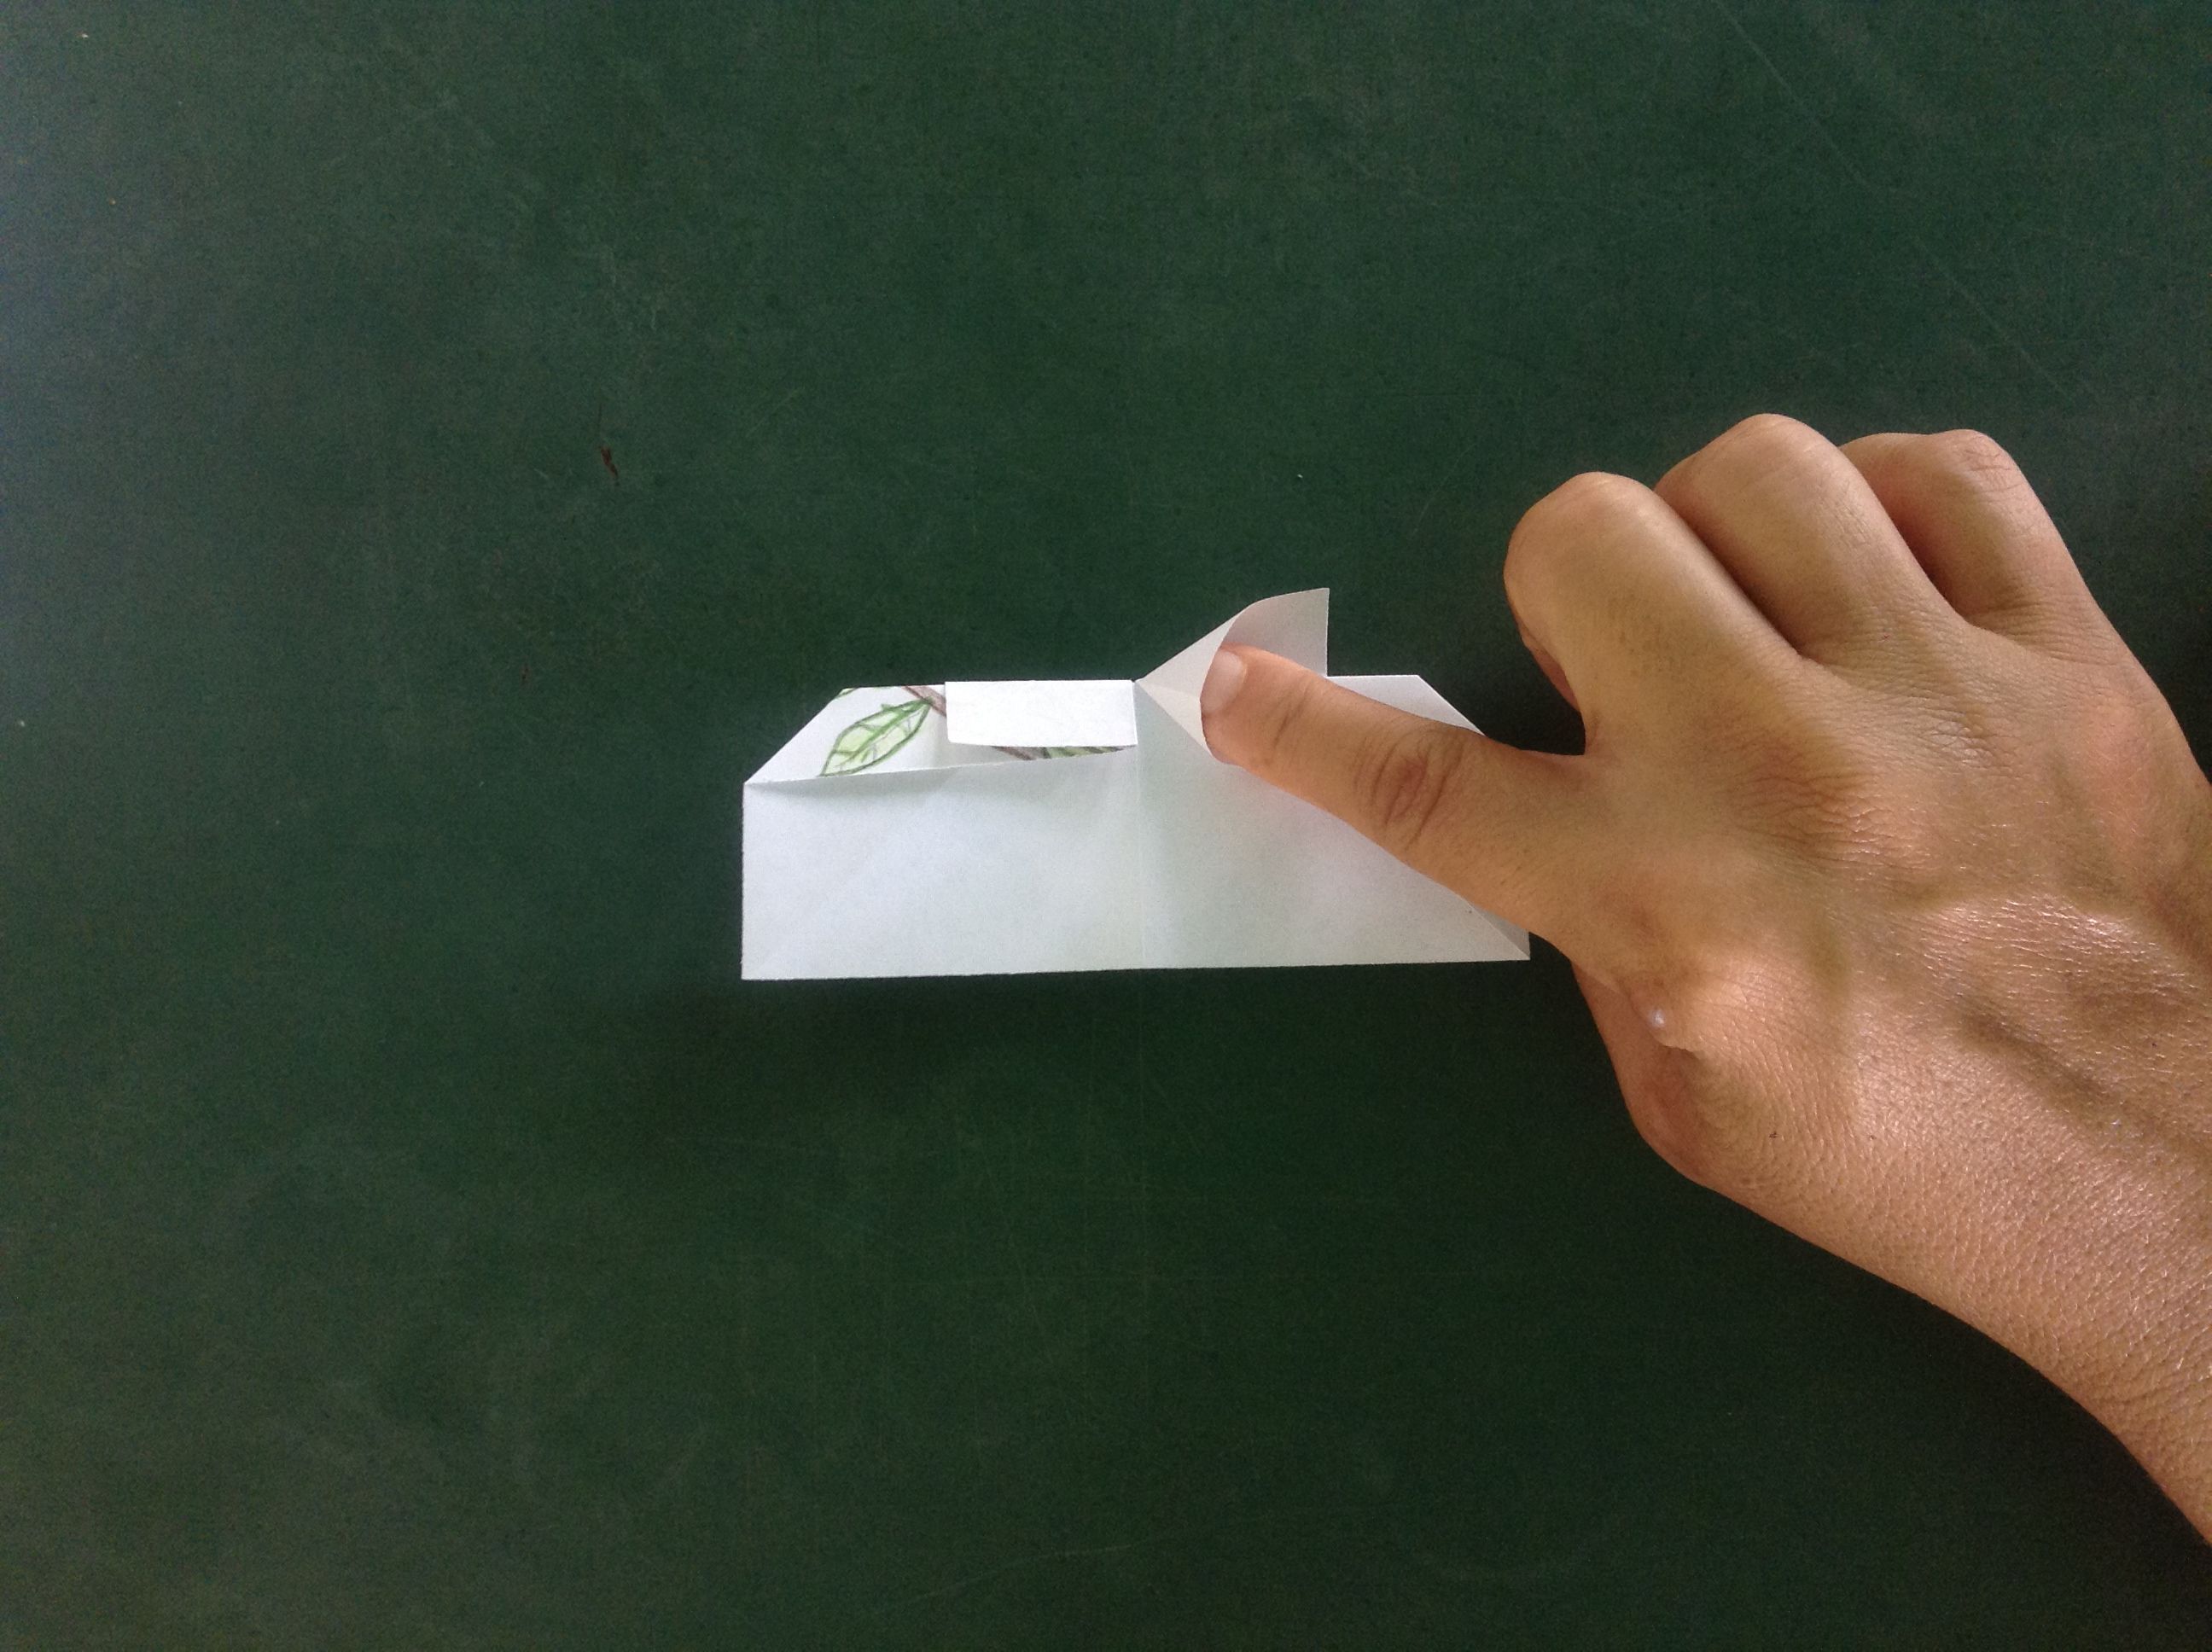
Turn the figure over, you will find two small rectangles at the top, insert your index finger in the right one and open it as shown in the pictures. You will have to do the same with the left one.
At the top, two small squares protrude that were formed with your last doubles. Fold it diagonally to get another small triangle. Do this with both sides, be guided by the picture.
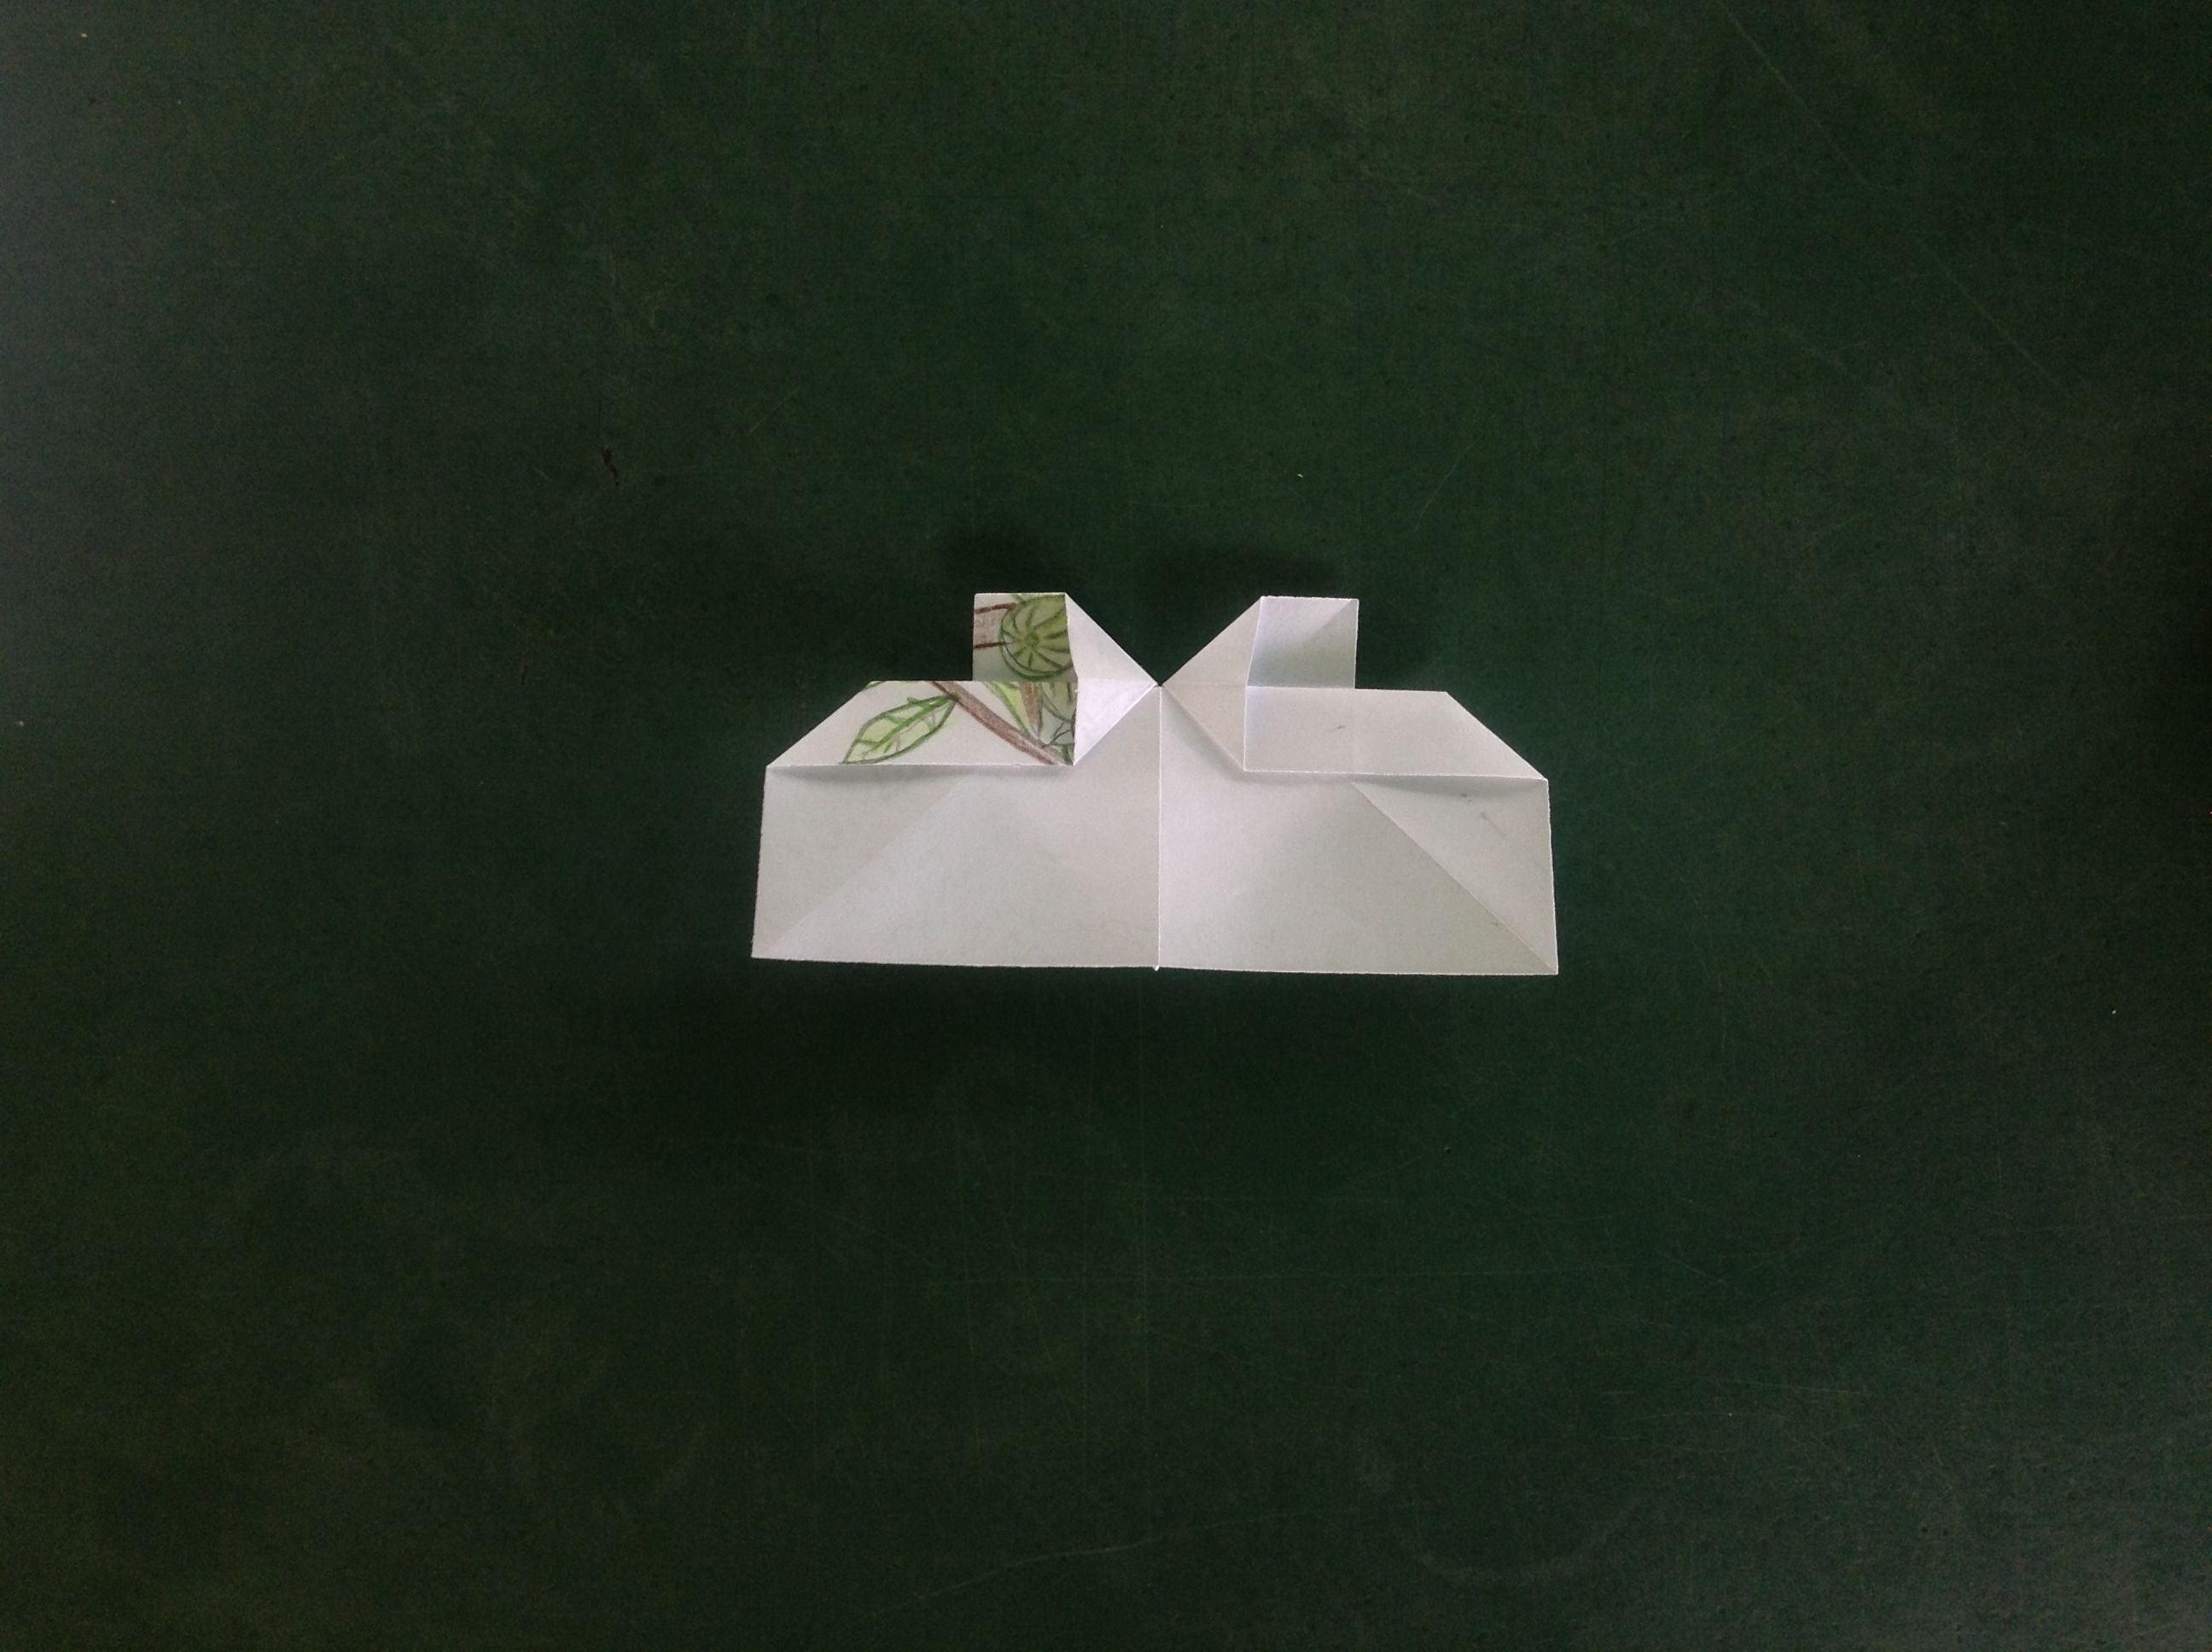
Now bring the right edge to the center line, do the same with the left. Next fold the bottom right tip diagonally to the center line, likewise with the bottom left.
You almost have the heart, just fold the top two points, so that they are a little more rounded, it is a very subtle step.
Turn it over, the heart is ready.
I hope this step by step has helped you, I still leave the video for you to consult and have better results. This is a beautiful figure, I am convinced that it will be very useful for many creative things. See you next time.
Original content by the author.
Resources: Tablet ZTE E10Q
Own photos
Translated with Deepl.com
All Rights Reserved || @jetta.amaya// 2022
Show more
Tags :
Woo!
This creator can upvote comments using 3speak's stake today because they are a top performing creator!
Leave a quality comment relating to their content and you could receive an upvote
worth at least a dollar.
Their limit for today is $0!
Their limit for today is $0!

37 views
a year ago
$

12 views
4 months ago
$

9 views
2 months ago
$

2 views
5 days ago
$

20 views
a year ago
$
More Videos

0 views
8 months ago
$

3 views
4 years ago
$

7 views
3 years ago
$

7 views
a year ago
$

3 views
2 years ago
$

4 views
2 years ago
$

1 views
a month ago
$

13 views
11 months ago
$

0 views
a year ago
$

18 views
3 years ago
$

4 views
a year ago
$

1 views
2 years ago
$

7 views
7 months ago
$

4 views
2 years ago
$

8 views
4 years ago
$

5 views
2 years ago
$

1 views
6 months ago
$

49 views
2 years ago
$

5 views
3 years ago
$

4 views
6 months ago
$

13 views
a year ago
$

6 views
2 weeks ago
$

4 views
2 years ago
$
Comments:
Reply:
To comment on this video please connect a HIVE account to your profile: Connect HIVE Account