Grabando Pantalla desde PowerPoint [Esp/Eng ]
10
About :
Nada como descubrir algo nuevo cada día, quizás para algunos esto no sea nuevo, pero para otros si, en mi caso, estoy probando hacer cosas nuevas, desarrollar aún más mis habilidades y destrezas en el mundo del diseño y arte videovisual, el mundo de la tecnología avanza a pasos agigantados, y uno se siente atrasado, debemos ir evolucionando con ello.
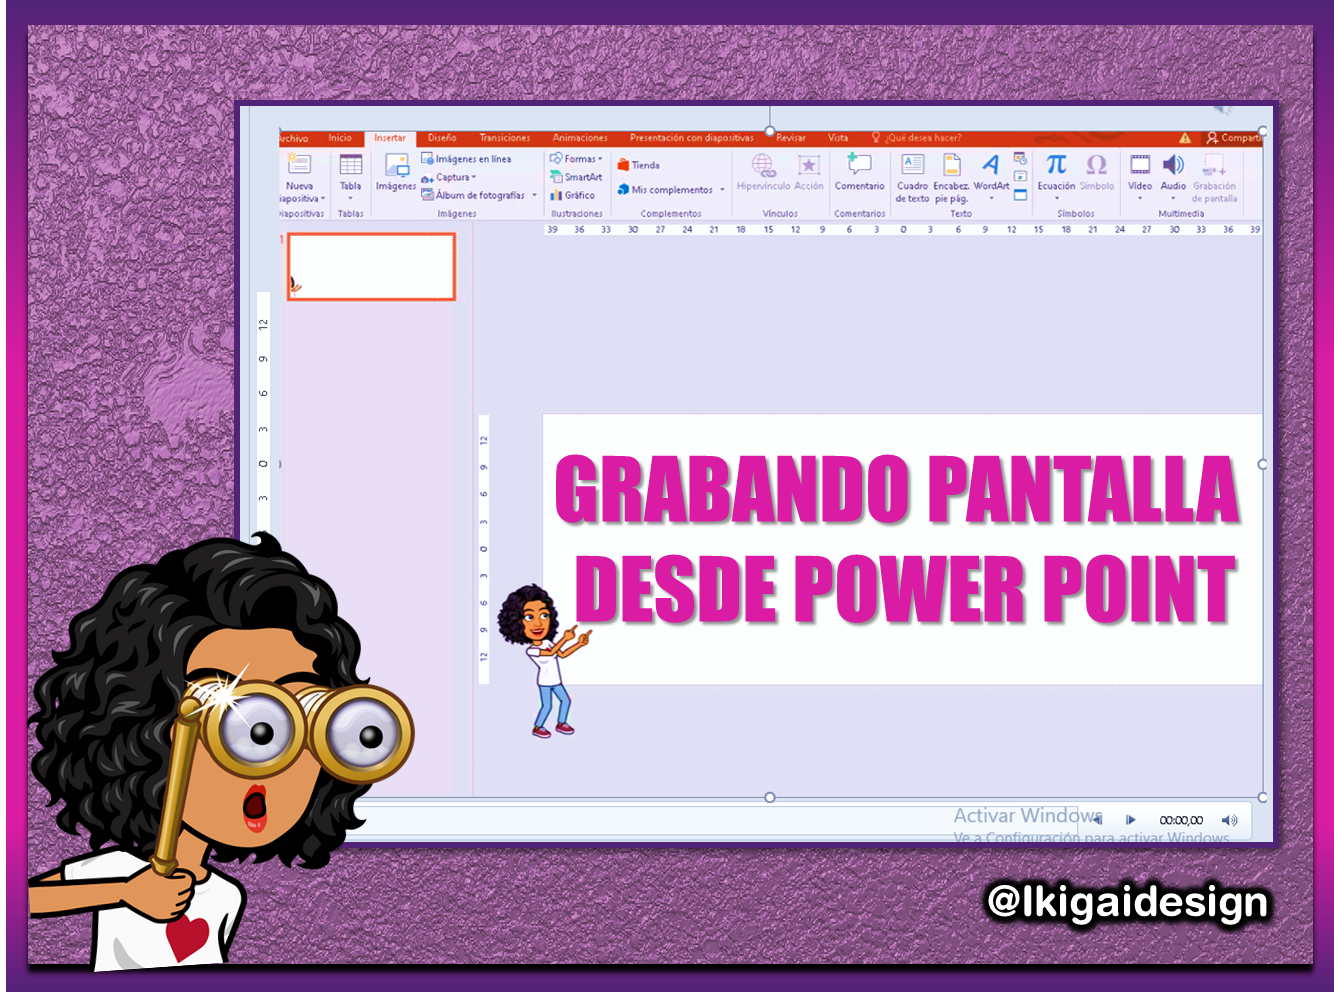
Hola amigos de Geek Zone, nuevamente me encuentro por aquí, y en esta oportunidad les comparto un video que hice, esto es algo que quizás como dije muchos conocen, pero otros no, existen muchos programas, aplicaciones que nos permite crear y editar nuestros videos, pero se olvidan de las viejas herramientas, o mejor dicho de las primeras conformada por el paquete de Office, entre ellos el famoso PowerPoint.
Este programa es muy utilizado más que todo para crear diapositivas para las presentaciones, recuerdo cuando lo empecé a usar, donde realice mis diapositivas para mi tesis, fue todo un proceso, nunca lo había hecho, pero me toco aprender a manejarlo y hacerlo por mi cuenta.
Pero como todo, este programa ha ido evolucionando, con nuevas funciones, mejoras y muchas actualizaciones, entre ellos la creación de videos y grabación de pantalla, sabían que tiene la opción de grabar nuestra pantalla y convertirlo en video.
Si amigos, así como lo leen, con este programa también podemos grabar nuestra pantalla y hacer videos, claro no será algo moderno, tiene su proceso, si les contara todo lo que pase para poder mostrarles este video, pero como dicen por allí, el que persevera vence, para ser mi primer intento, no quedo tan mal, para el próximo será mejor.

Desde hace un tiempo que quiero actualizar mi banner, y como estoy experimentando hacer videos tutoriales, que mejor forma que diseñar un banner con este programa, sin duda el mismo cuenta con muchas herramientas, y nos permite no solo crear videos o diapositivas, también podemos realizar nuestros diseños de banner o flyer, etiquetas, en fin, de todo un poco.
Es por ello, que aproveche de hacer este banner, algo sencillo, empezando desde cero, desde las medidas, colocar unas cuantas imágenes y darle un poco de forma, como les menciones en este programa podemos hacer de todo, el mismo nos permite insertar tantas imágenes queramos, darle sombra las letras, e incluso forma a las imágenes.

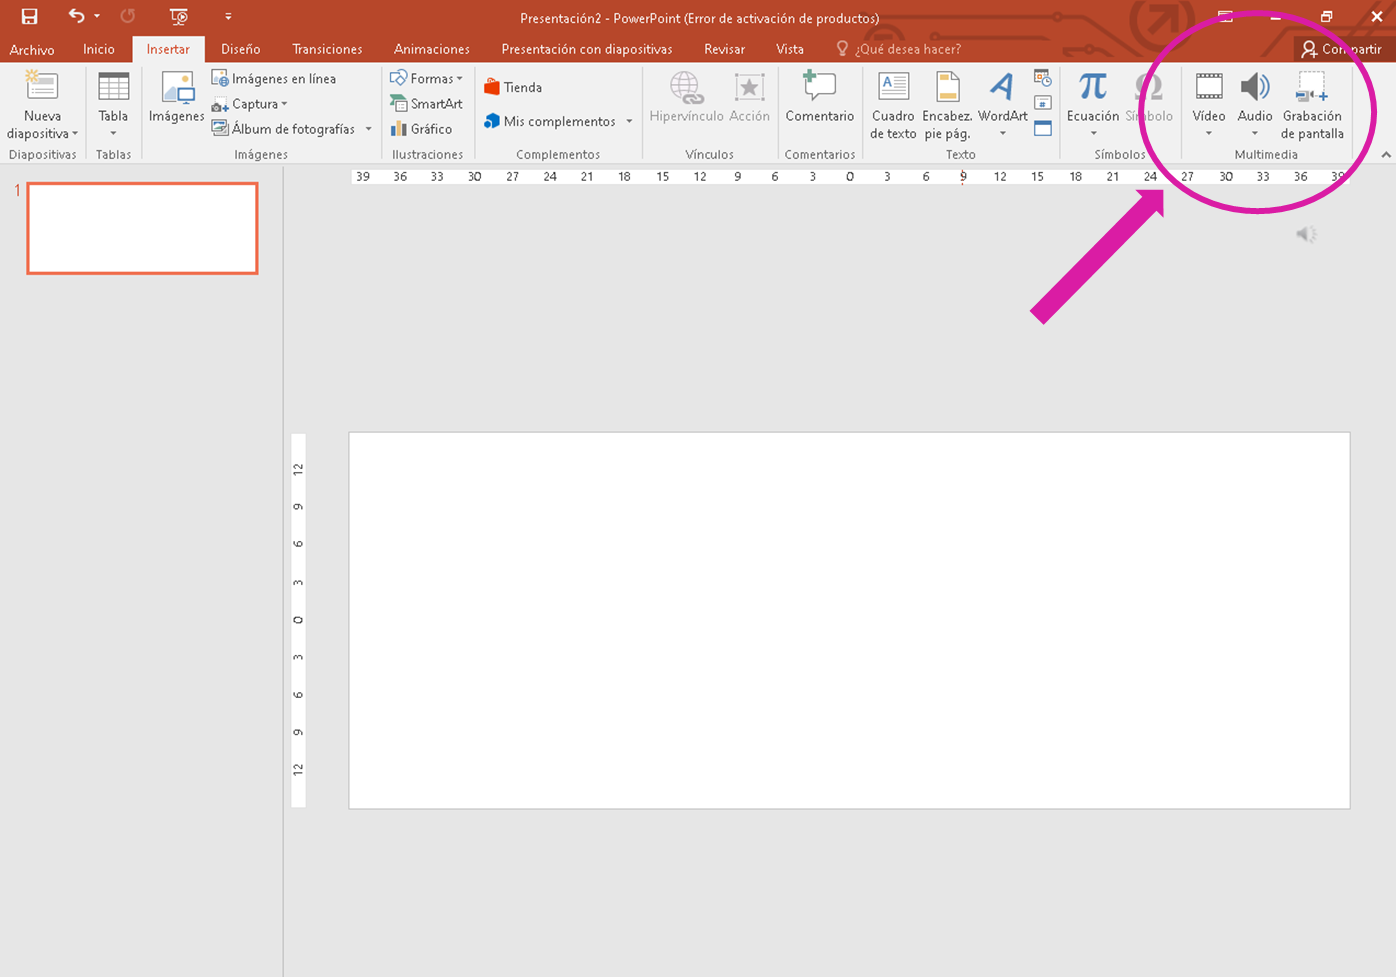
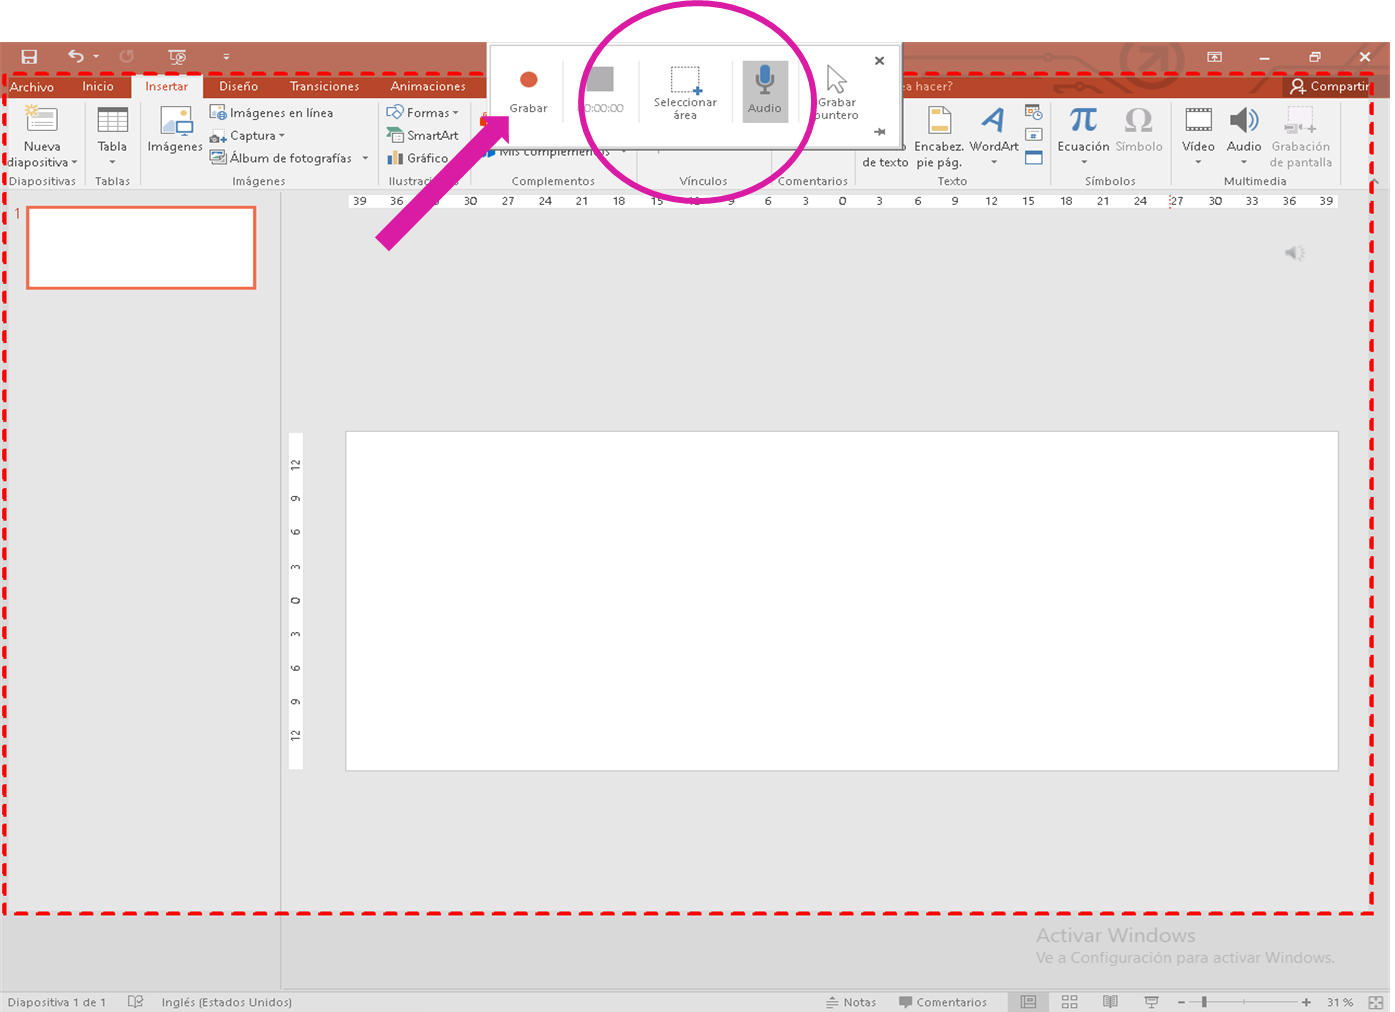
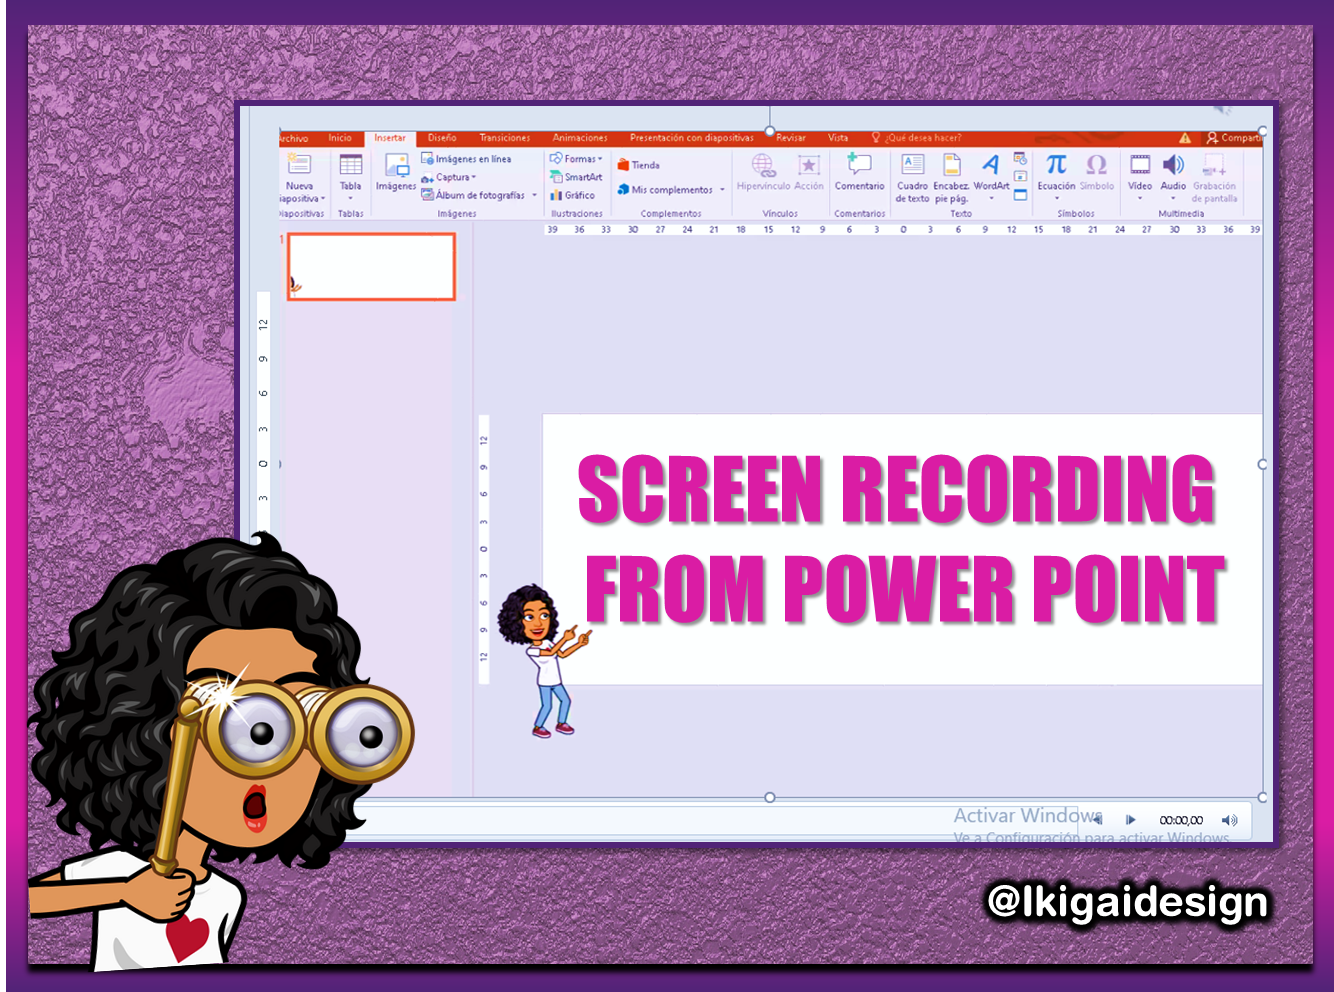
Pues bien, lo primero que haremos será hacer los ajustes para grabar y hacer nuestro video, como pueden ver en la imagen, en la parte de insertar nos sale la opción de grabar pantalla, al pulsar allí, nos refleja otra pequeña recuadro, donde nos da la opción de seleccionar el área que queremos grabar, una vez seleccionada nuestra área, y luego procedemos a darle clic en grabar.
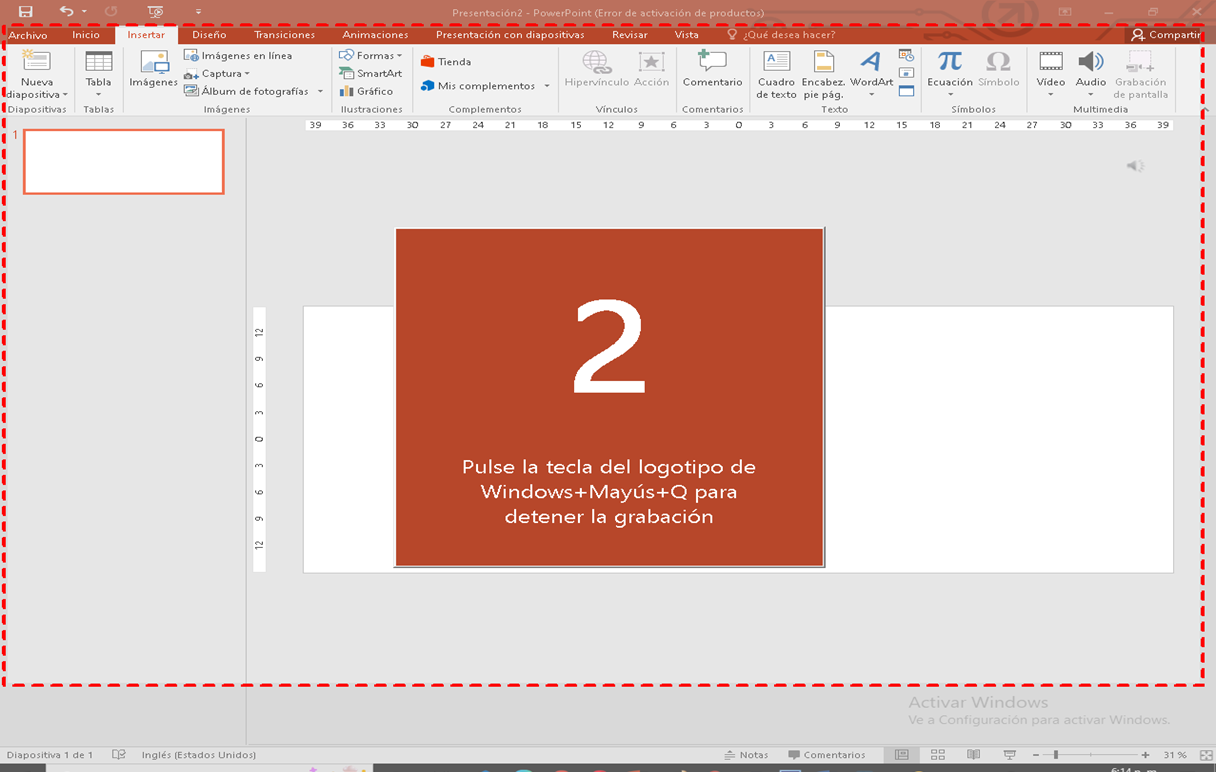
Al darle clic en grabar, nos reflejará esta otra imagen, como conteo para empezar la grabación, con esto solo nos toca ir a nuestro programa y empezar hacer nuestro trabajo, para convertirlo en video.
Con esto, mis queridos amigos, tenemos otra opción para grabar la pantalla, no está de más tener varias opciones, y si ustedes no lo sabían, bueno, ahora lo saben, y si es lo contrario, ya lo usaban, porque no lo compartieron antes jejeje 😀, no mentira, los felicito, son diestros en esto💪.
Como pueden ver en el video, hice un banner algo sencillo y simple, cuestión de creatividad de cada quien, hacerlo a su gusto, yo por mi parte seguiré buscando mejorarlo y hacer algo más llamativo, por supuesto se los estaré enseñando.
Mi objetivo con esto, era mostrarles esta forma de grabar desde su pantalla, sobre todo aquellos que realizan videos tutoriales o porque no, para quienes juegan también, no sé si se pueda, es cuestión de intentarlo, no creen.🤔

Esto es todo amigos, los leo en los comentarios, que les pareció, ya sabían de esta opción de PowerPoint, lo usan, que les parece😀 😀
Nota: sé que tiene algunos detalles, pero la práctica hace al maestro, para la próxima, será mejor.💪💪

Nothing like discovering something new every day, maybe for some this is not new, but for others yes, in my case, I am trying to do new things, to develop even more my skills and abilities in the world of design and video art, the world of technology is advancing by leaps and bounds, and one feels behind, we must evolve with it.

Hello friends of Geek Zone, again I am here, and this time I share with you a video I made, this is something that perhaps as I said many know, but others do not, there are many programs, applications that allow us to create and edit our videos, but forget the old tools, or rather the first conformed by the Office package, including the famous PowerPoint.
This program is widely used more than anything else to create slides for presentations, I remember when I started using it, where I made my slides for my thesis, it was quite a process, I had never done it before, but I had to learn to handle it and do it on my own.
But like everything, this program has been evolving, with new features, improvements and many updates, including the creation of videos and screen recording, did you know that it has the option to record our screen and convert it into video.
Yes friends, as you read, with this program we can also record our screen and make videos, of course it will not be something modern, it has its process, if I told you everything that happened to show you this video, but as they say, he who perseveres overcomes, for my first attempt, it was not so bad, for the next one it will be better.

For some time I want to update my banner, and as I'm experimenting making video tutorials, what better way than to design a banner with this program, no doubt it has many tools, and allows us not only to create videos or slides, we can also make our banner or flyer designs, labels, in short, a little bit of everything.
That is why I took the opportunity to make this banner, something simple, starting from scratch, from the measures, place a few images and give it a little shape, as I mentioned in this program we can do everything, it allows us to insert as many images as we want, shade the letters, and even shape the images.

Well, the first thing we will do is to make the settings to record and make our video, as you can see in the image, in the insert part we get the option to record screen, when we click there, it reflects us another small box, where it gives us the option to select the area we want to record, once selected our area, and then proceed to click on record.


When you click on record, it will reflect this other image, as a countdown to start recording, with this we just have to go to our program and start doing our work, to convert it into video.

With this, my dear friends, we have another option to record the screen, it does not hurt to have several options, and if you did not know it, well, now you know it, and if it is the opposite, you already used it, because you did not share it before hehehe 😀, no lie, I congratulate you, you are skilled in this💪.
As you can see in the video, I made a simple and simple banner, it's a matter of creativity of each one, make it as you like, I for my part will continue looking to improve it and make something more striking, of course I will be showing it to you.
My goal with this, was to show you this way of recording from your screen, especially those who make video tutorials or why not, for those who also play games, I do not know if you can, it's a matter of trying, do not you think?.🤔

That's all folks, I'll read you in the comments, what did you think, did you know about this PowerPoint option, do you use it, what do you think?😀 😀
Resources used for the creation of this post:
Cover and Banner edited with PowerPoint
Music free: videvo music1 / music2 / music3
Picture: source1
Video edited with Filmora
Bitmoji app
Tags :
Their limit for today is $0!












Comments:
Reply:
To comment on this video please connect a HIVE account to your profile: Connect HIVE Account