Tips to build a beautiful piñata || Tutorial [EsP-Eng]
10
About :
¡Saludos a todos los a
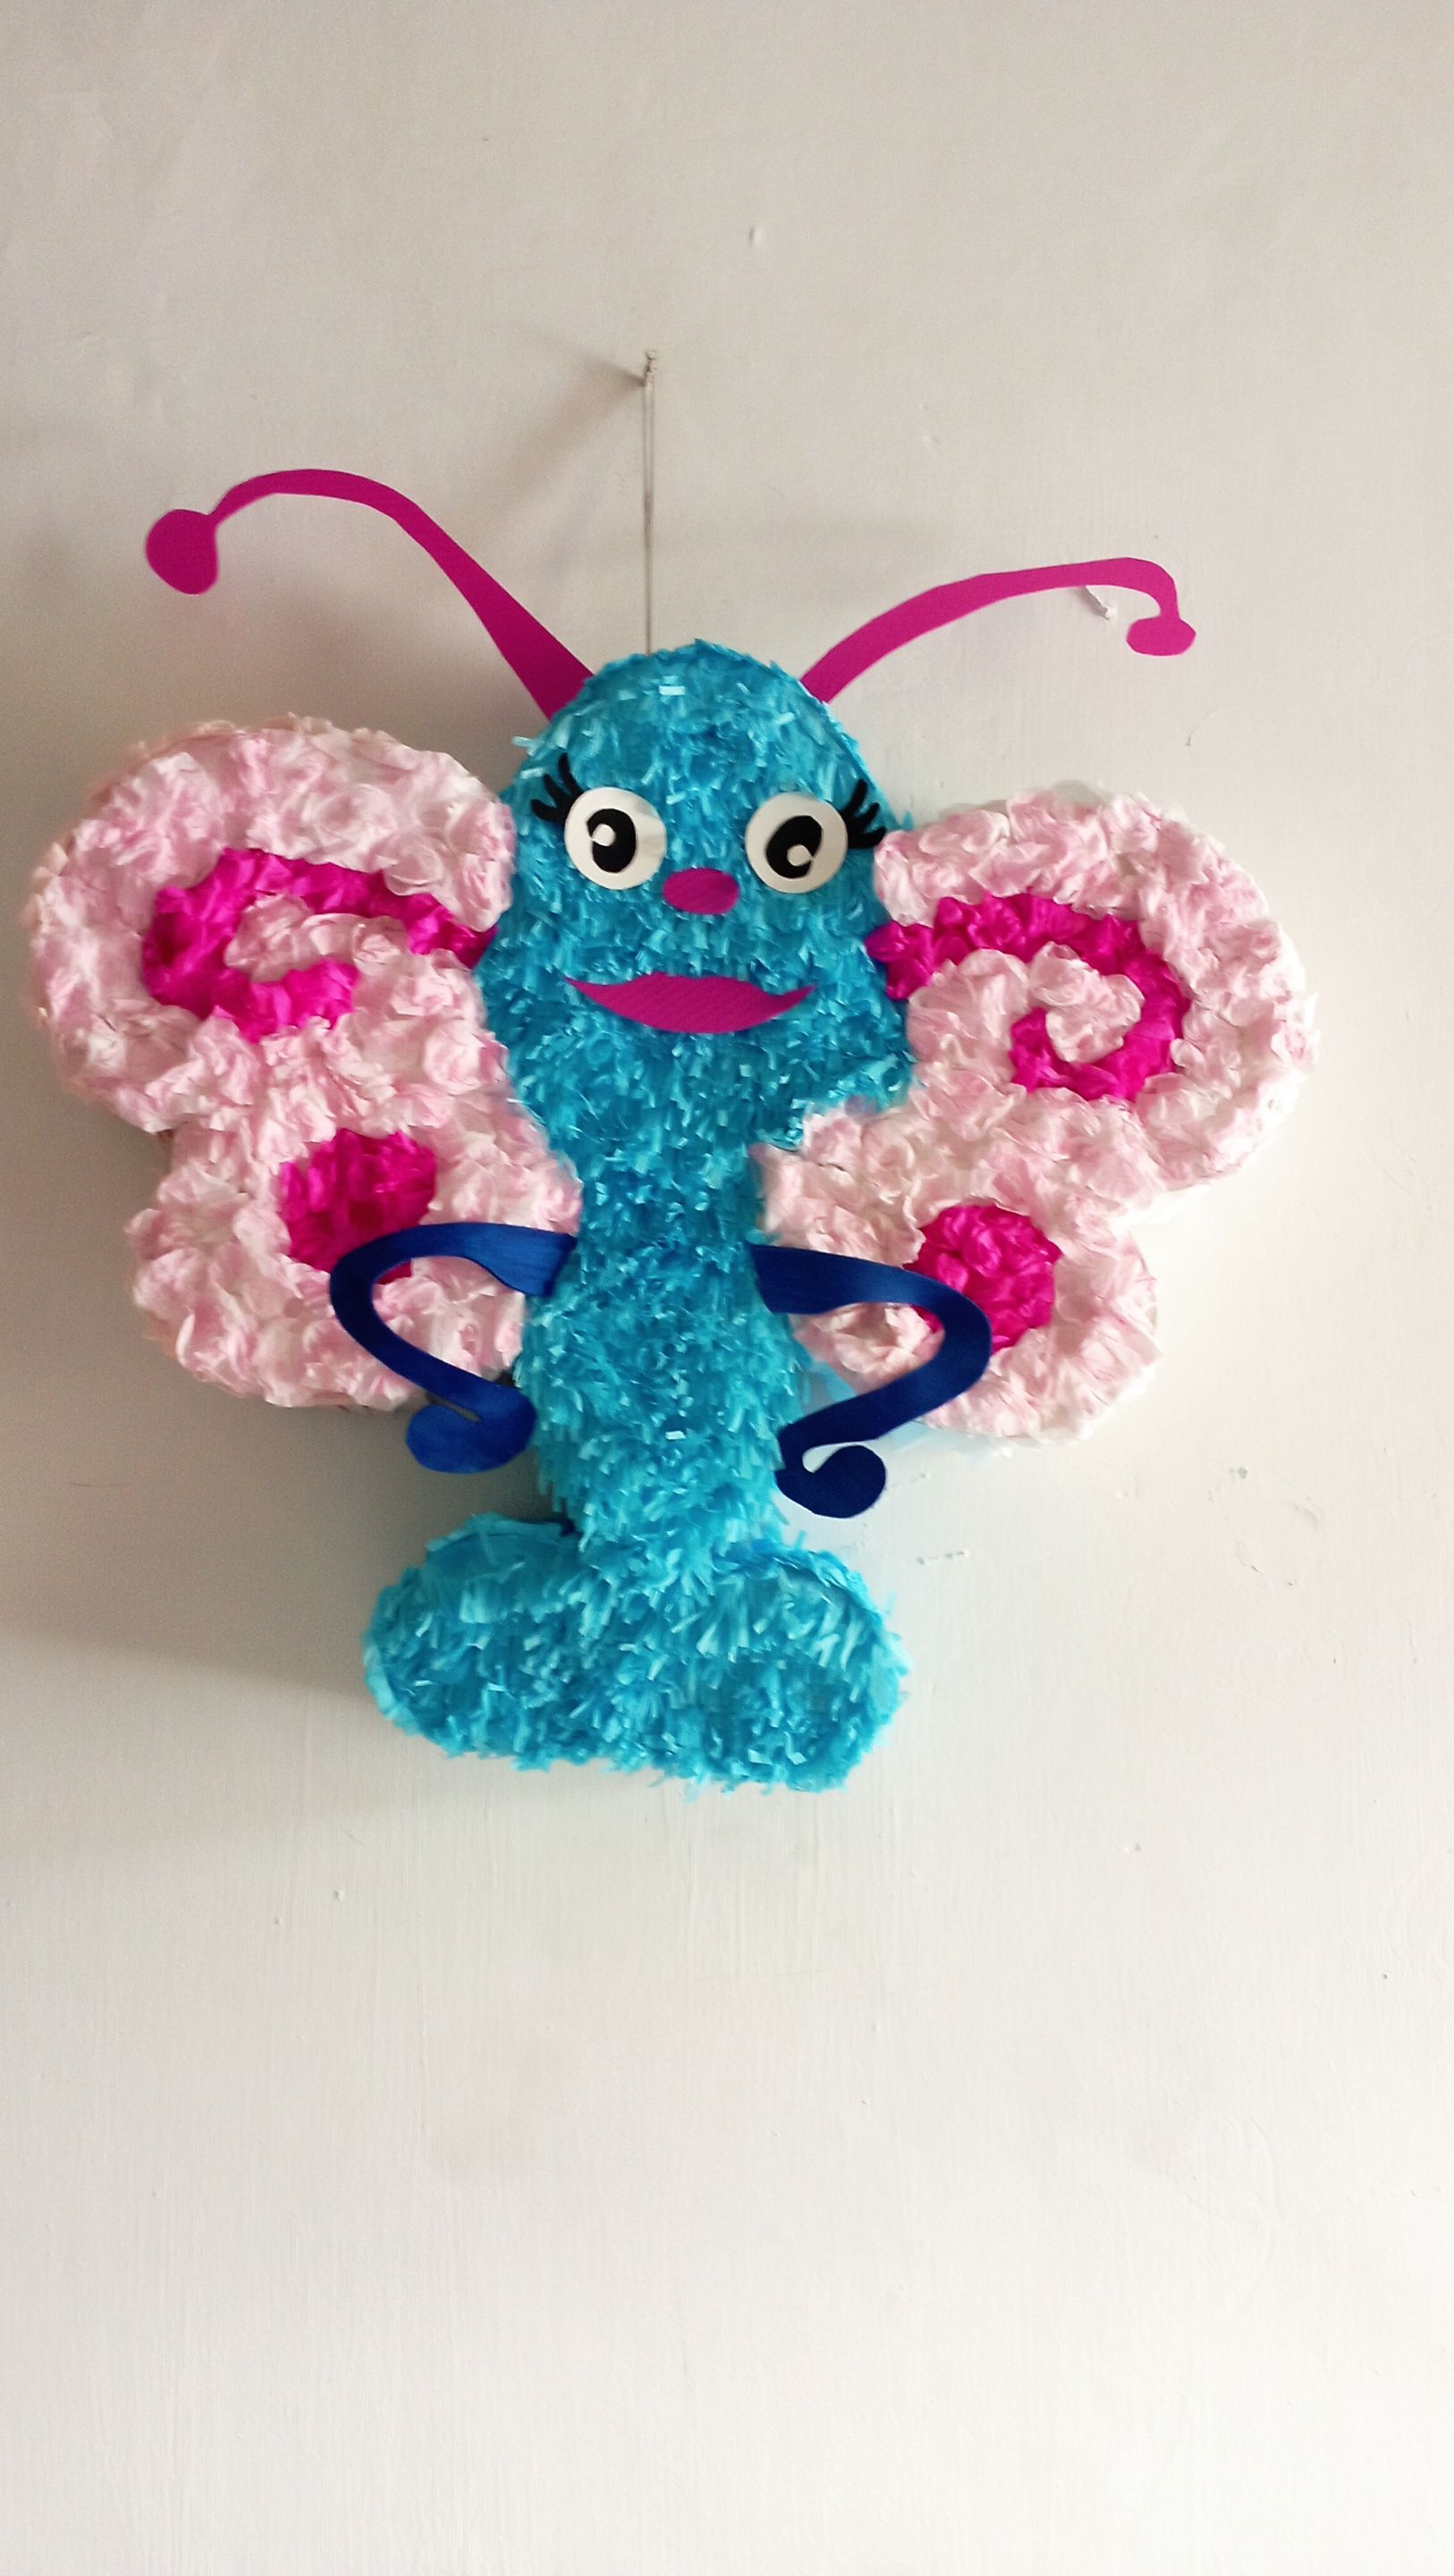
antes de las artes manuales! Hoy me gustaría compartir algunos tips para armar una bella piñata. He realizado una pequeña piñata de "la mariposa Titi" para mi hija cumplió 2 años y trabajar esta técnica me gustó mucho. Acompáñenme y les enseño.
Greetings to all a
before the arts and crafts! Today I would like to share some tips to put together a beautiful piñata. I have made a small piñata of "the butterfly Titi" for my daughter turned 2 years old and working this technique I really liked. Join me and I'll show you how.
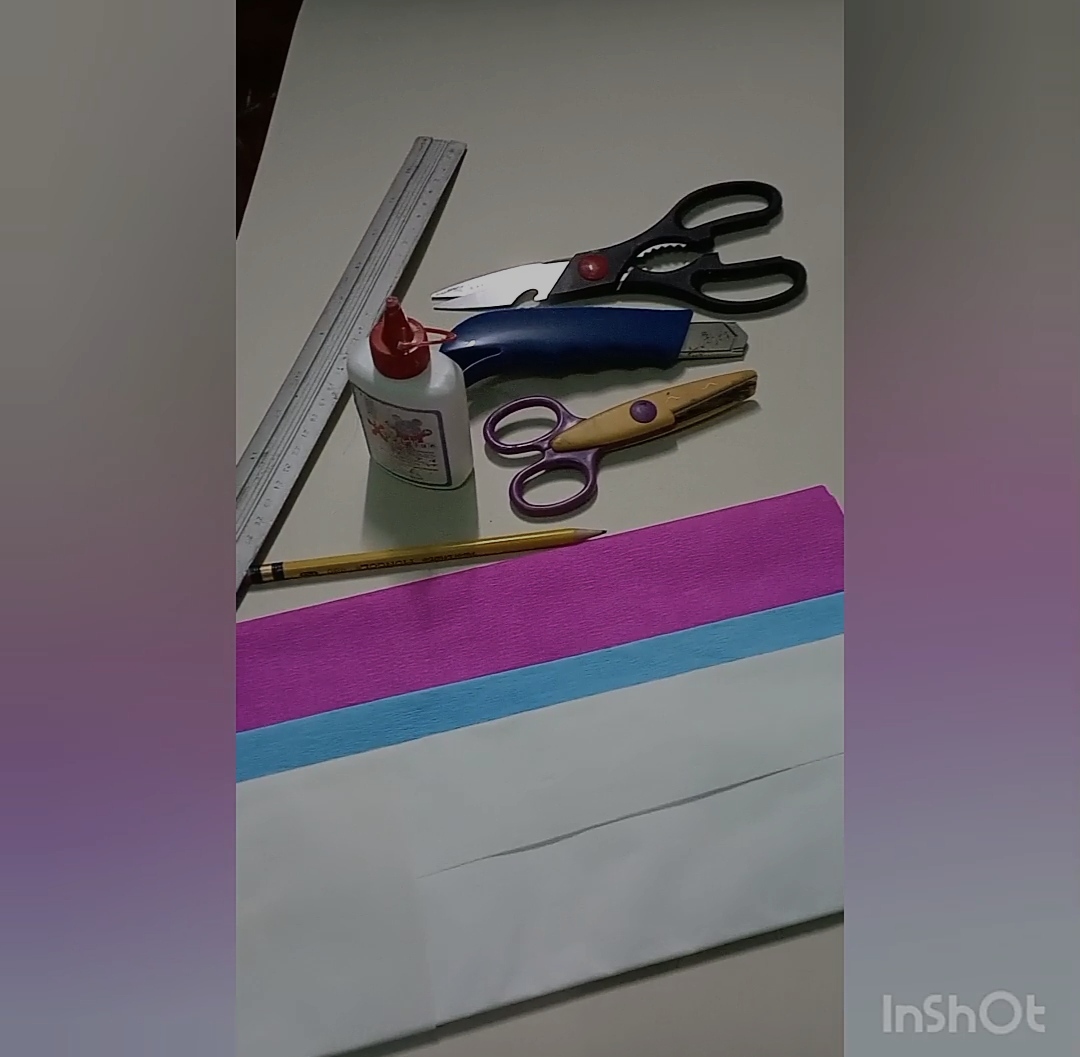
Los materiales para realizar una piñata son: cartón sulfatado (eso le dará resistencia y hará más divertido el momento de romperla), papel crepé de colores, pegamento blanco, tijera, cutter, 50 centímetros de cordón.
The materials to make a piñata are: greaseproof cardboard (this will give it strength and make it more fun to break it), colored crepe paper, white glue, scissors, cutter, 50 centimeters of string.
Tips para armar la piñata
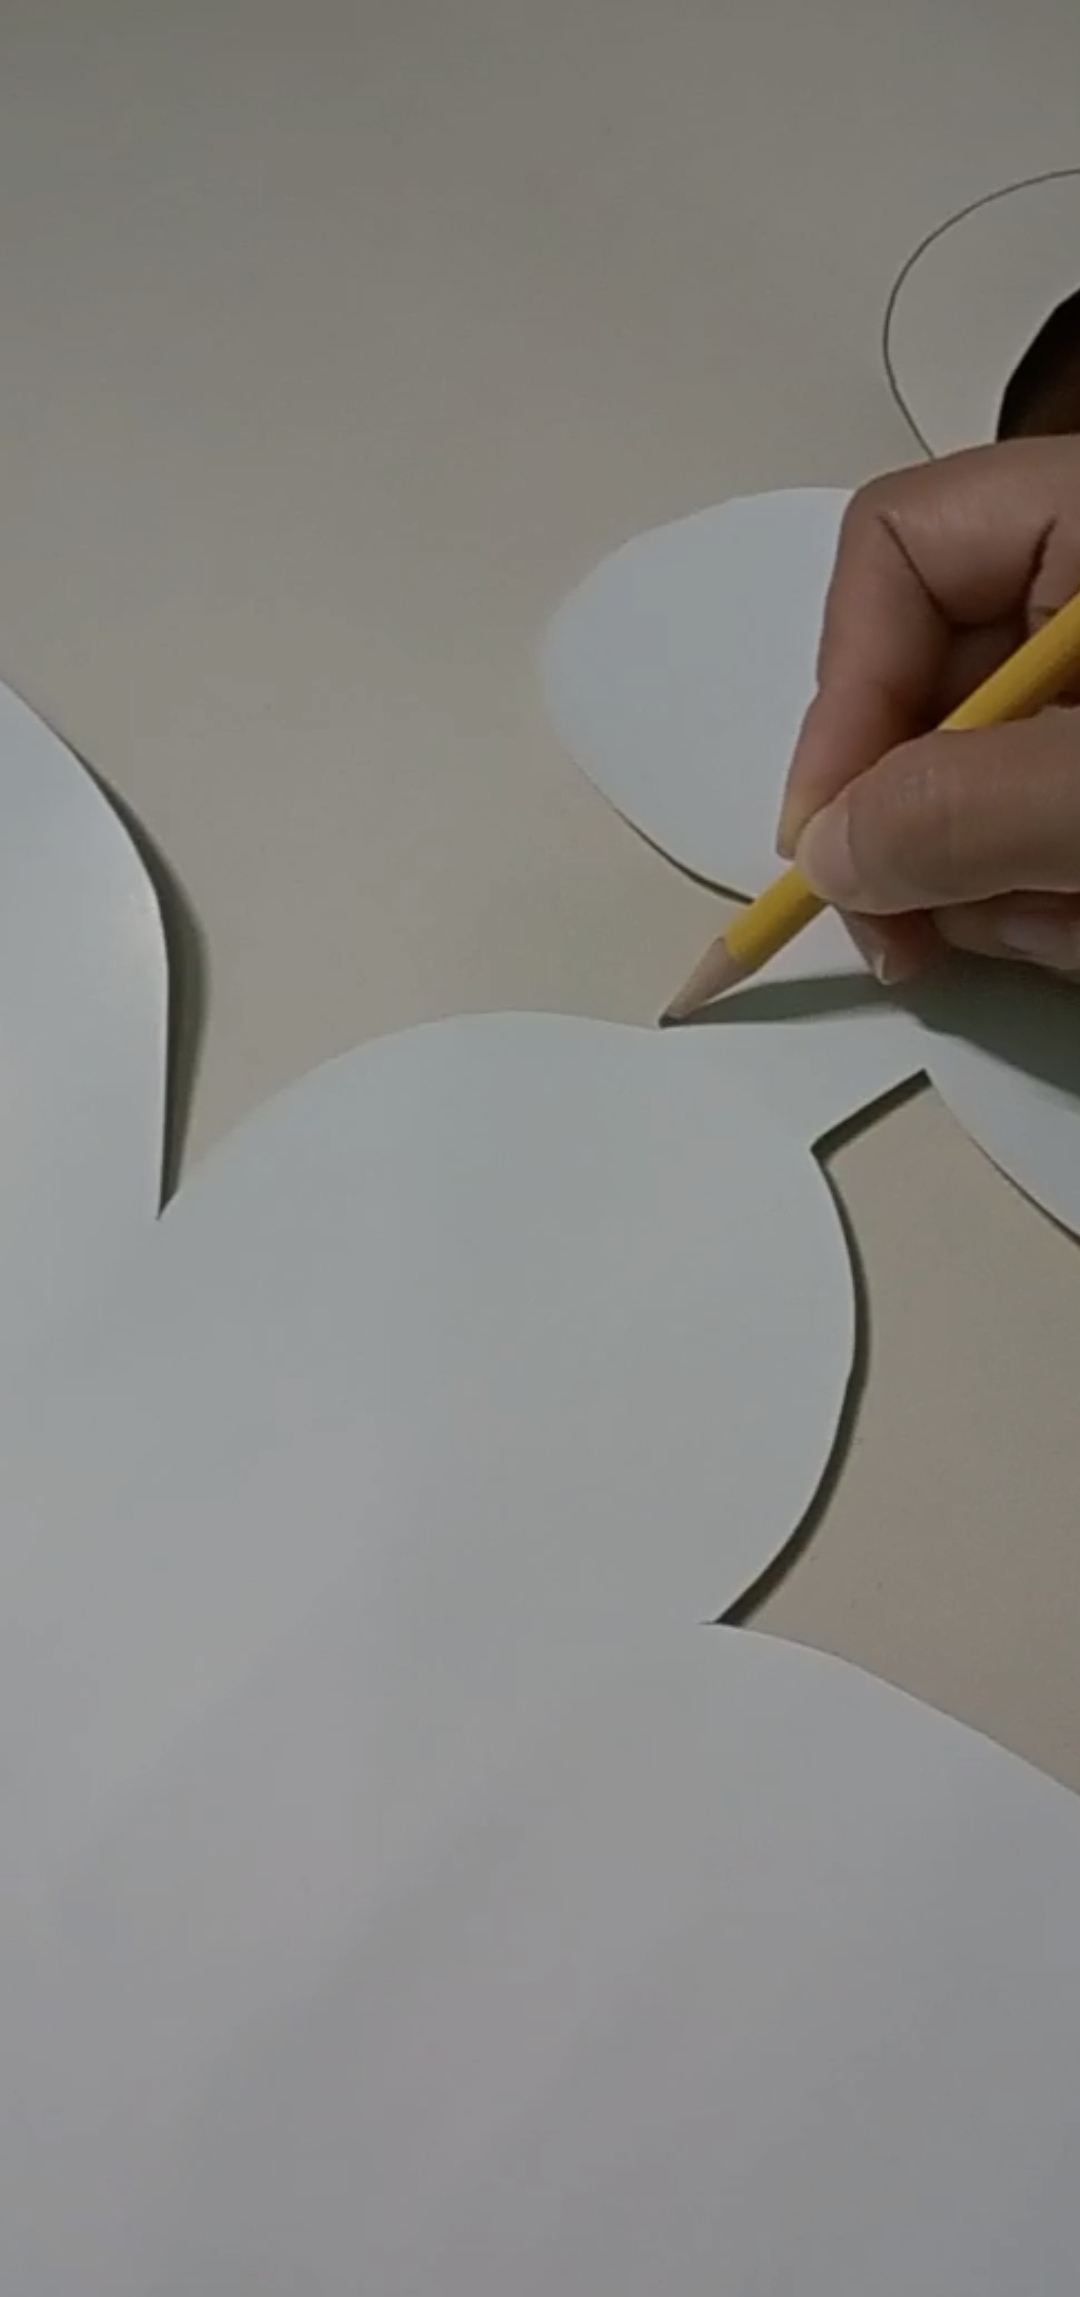
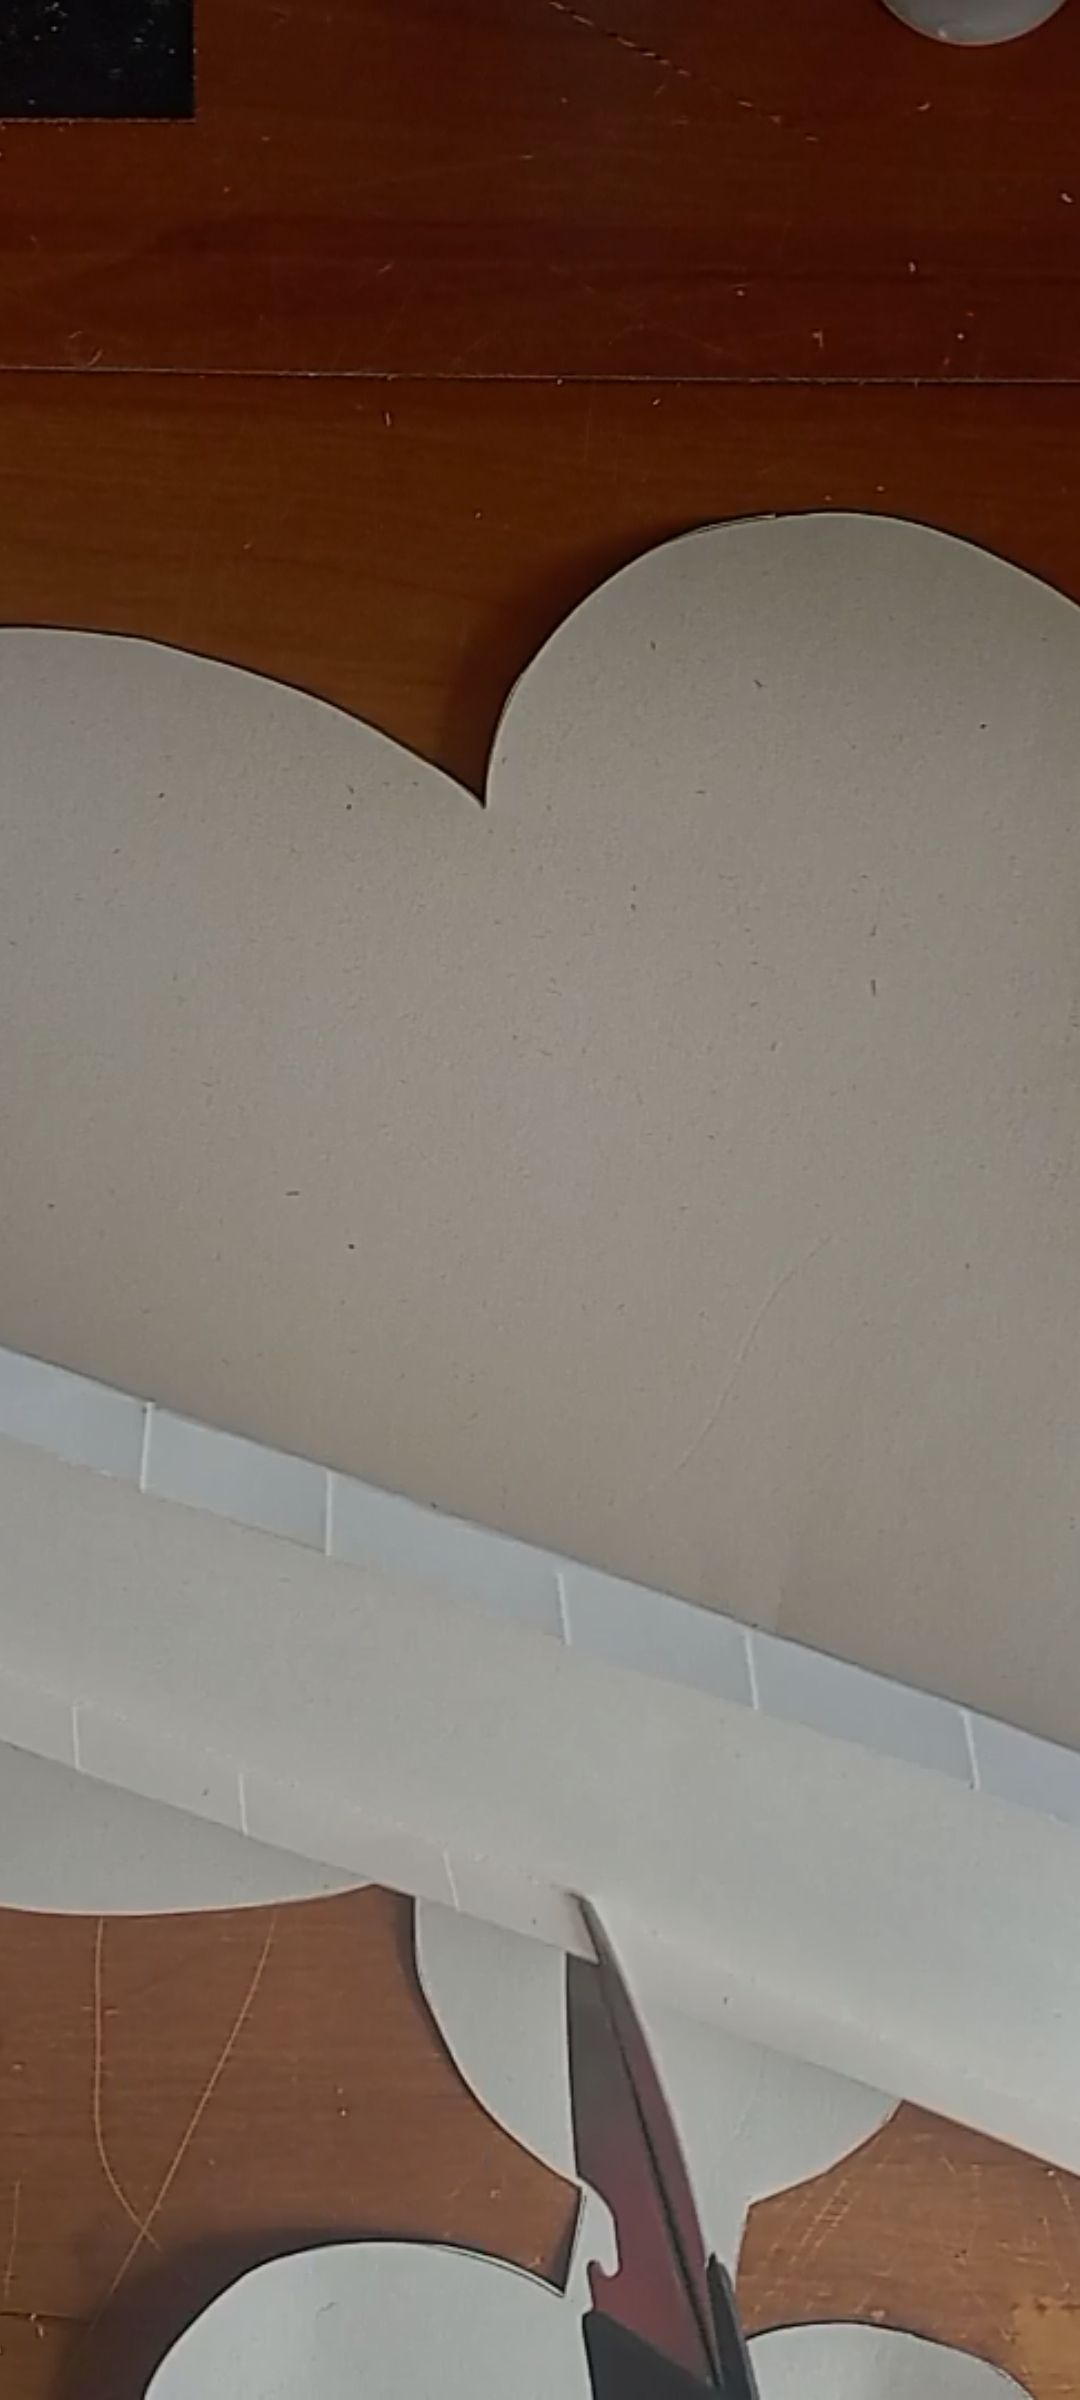
✅ Hacemos el dibujo en el cartón y recortamos. Esta técnica es de una piñata entamborada por lo que debemos hacer la figura plana 2 veces.
Tips to assemble the piñata
We make the drawing on the cardboard and cut it out. This technique is for a piñata with a twisted piñata, so we must make the flat figure 2 times.
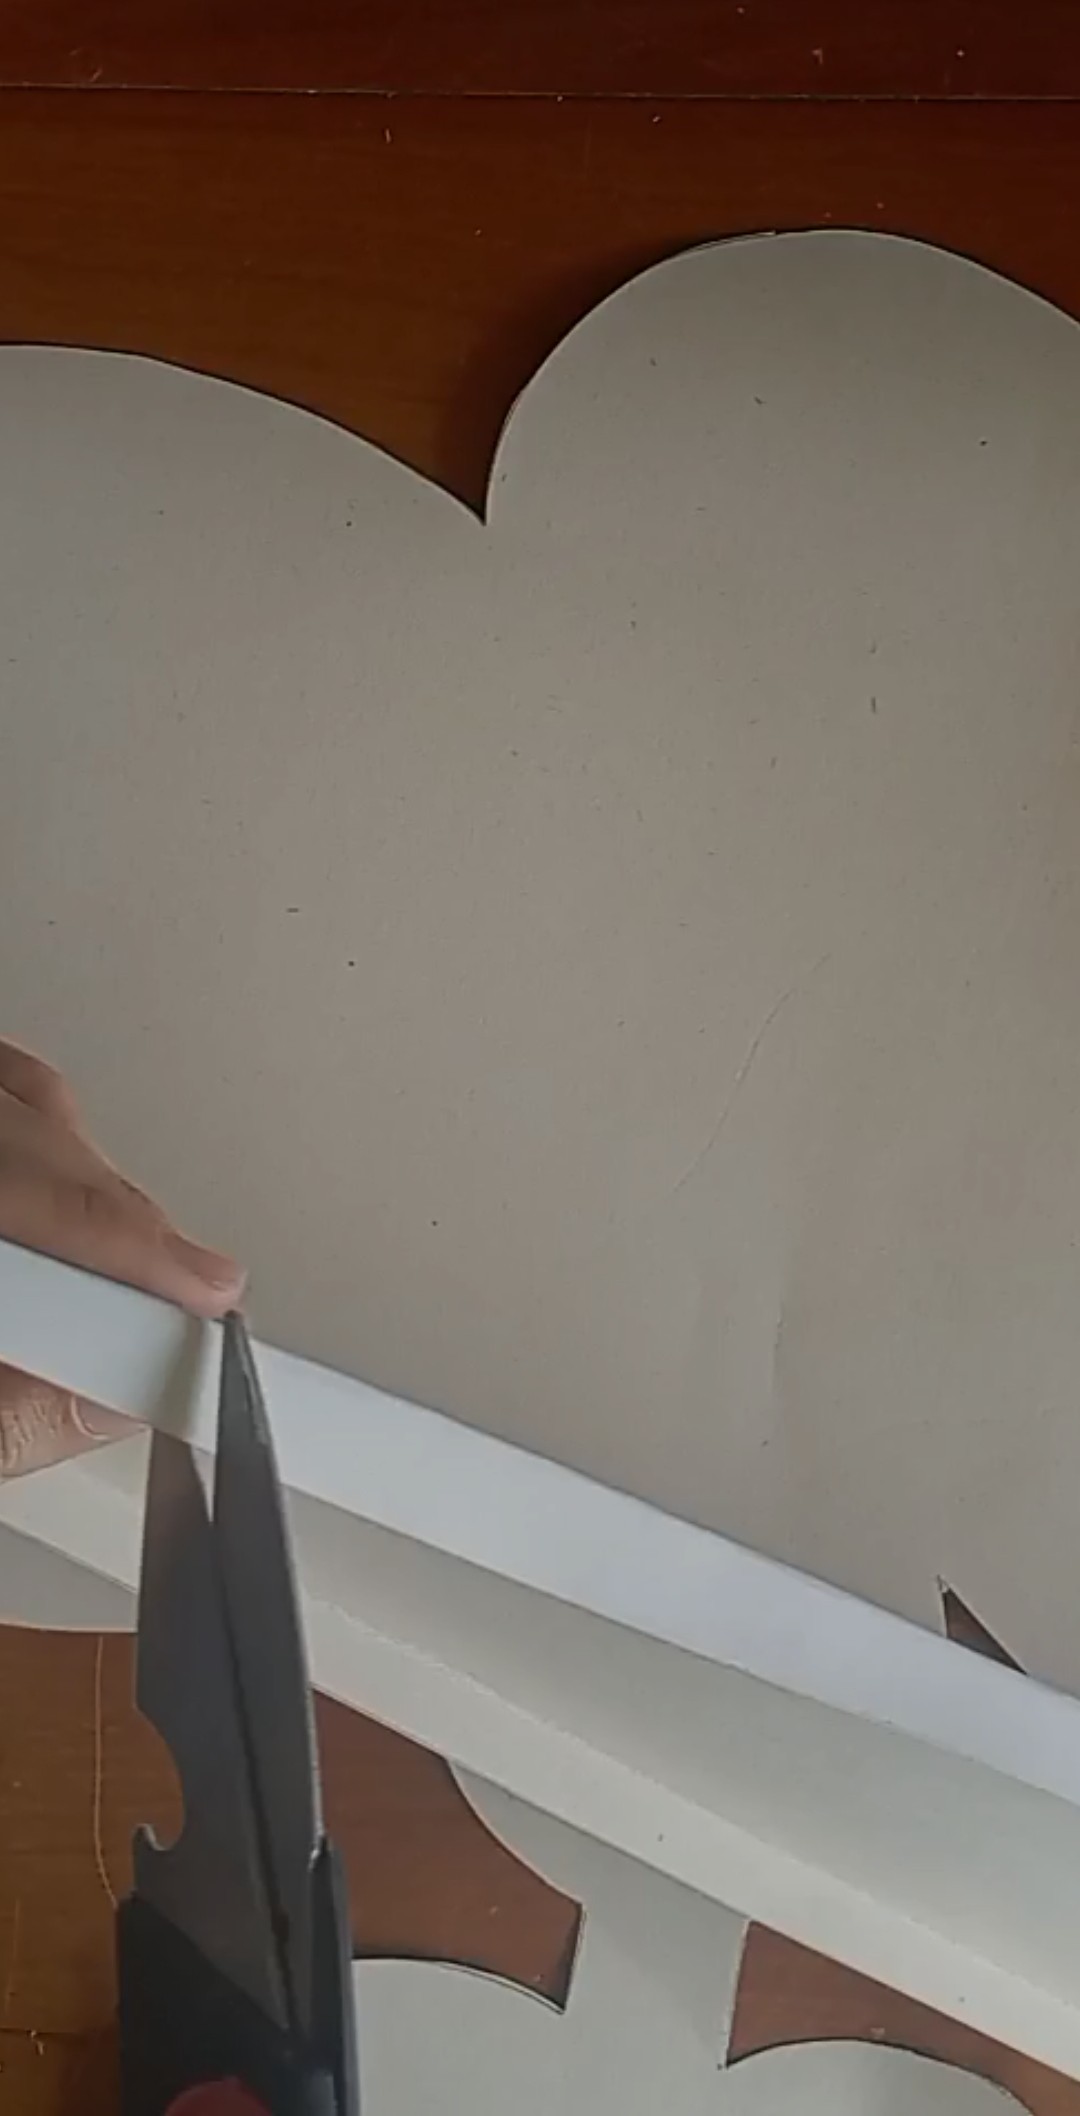
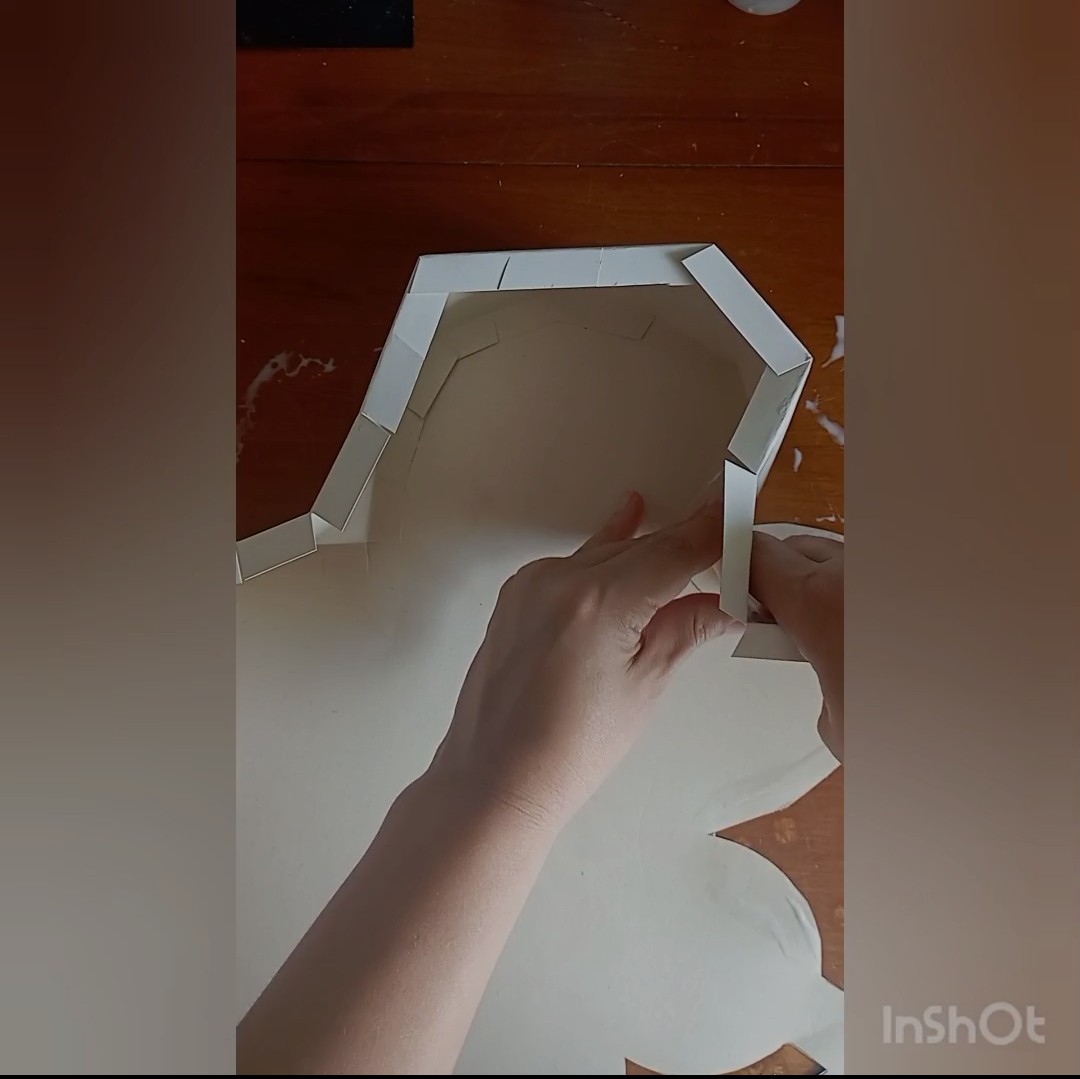
✅ Cortamos una tira de cartón de 7 centímetros y doblamos 1 centímetro de cada lado y hacemos cortes por toda la franja para hacer unas pestañas donde vamos a pegar cada una de las caras de la piñata.
✅We cut a 7 cm strip of cardboard and fold 1 cm on each side and make cuts all along the strip to make tabs where we are going to glue each of the faces of the piñata.
 |  |
|---|
✅ Pegamos cada cara de la piñata a un lado de la franja y debe quedar de esta manera:
✅Glue each side of the piñata to one side of the strip and it should look like this:
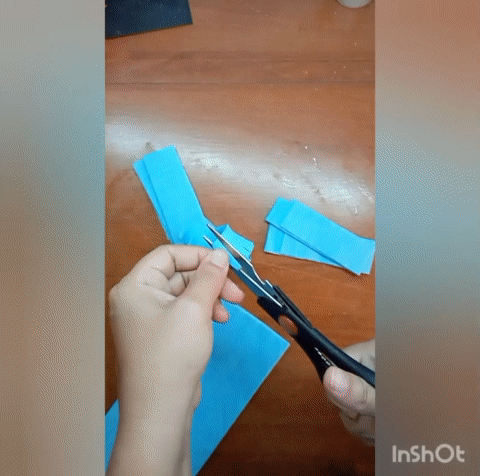
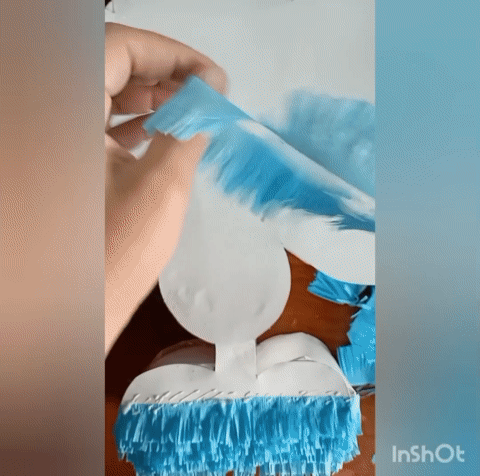
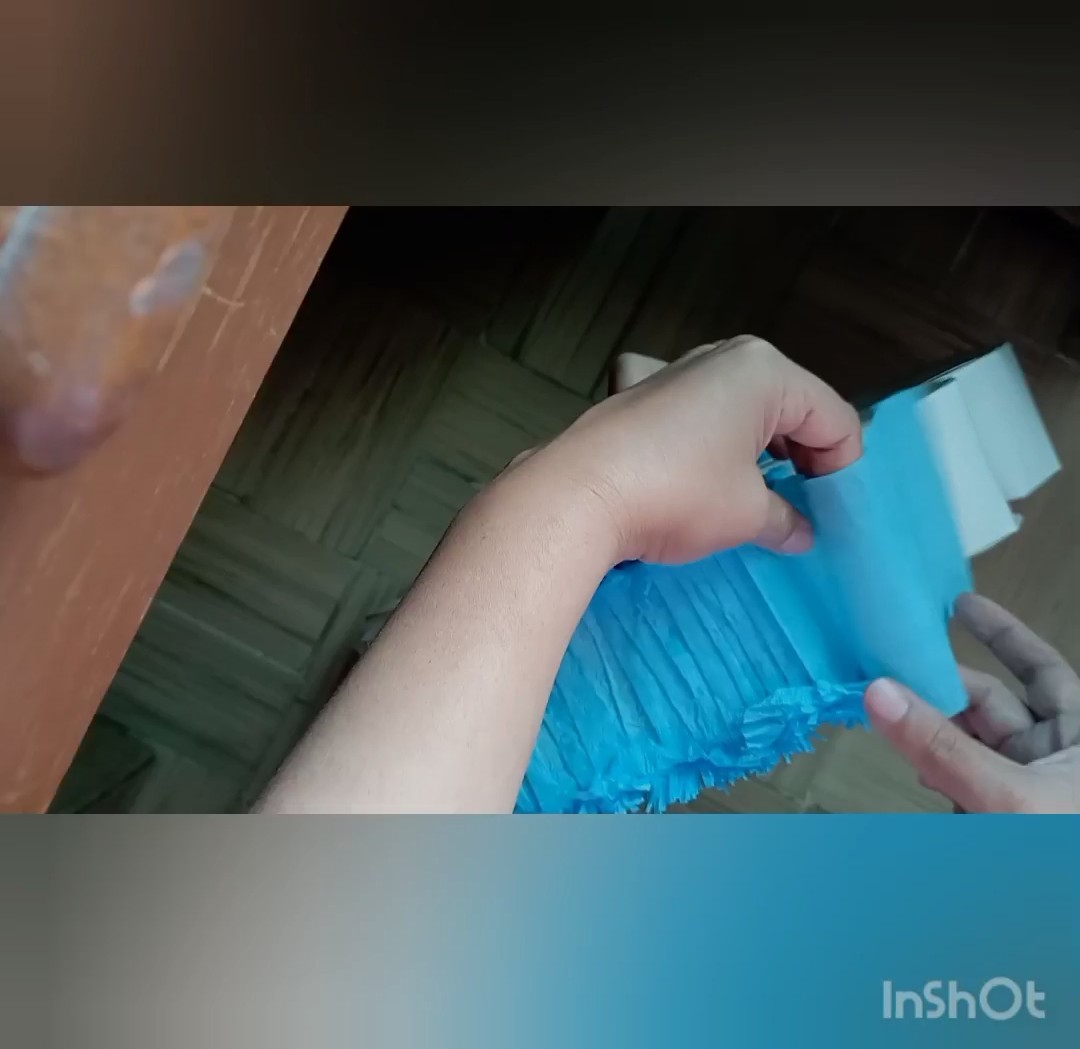
✅ Cortamos el papel crepé en pequeñas franjas y luego hacemos cortes para que queden flecos.
✅ We cut the crepe paper into small strips and then make cuts to make bangs.
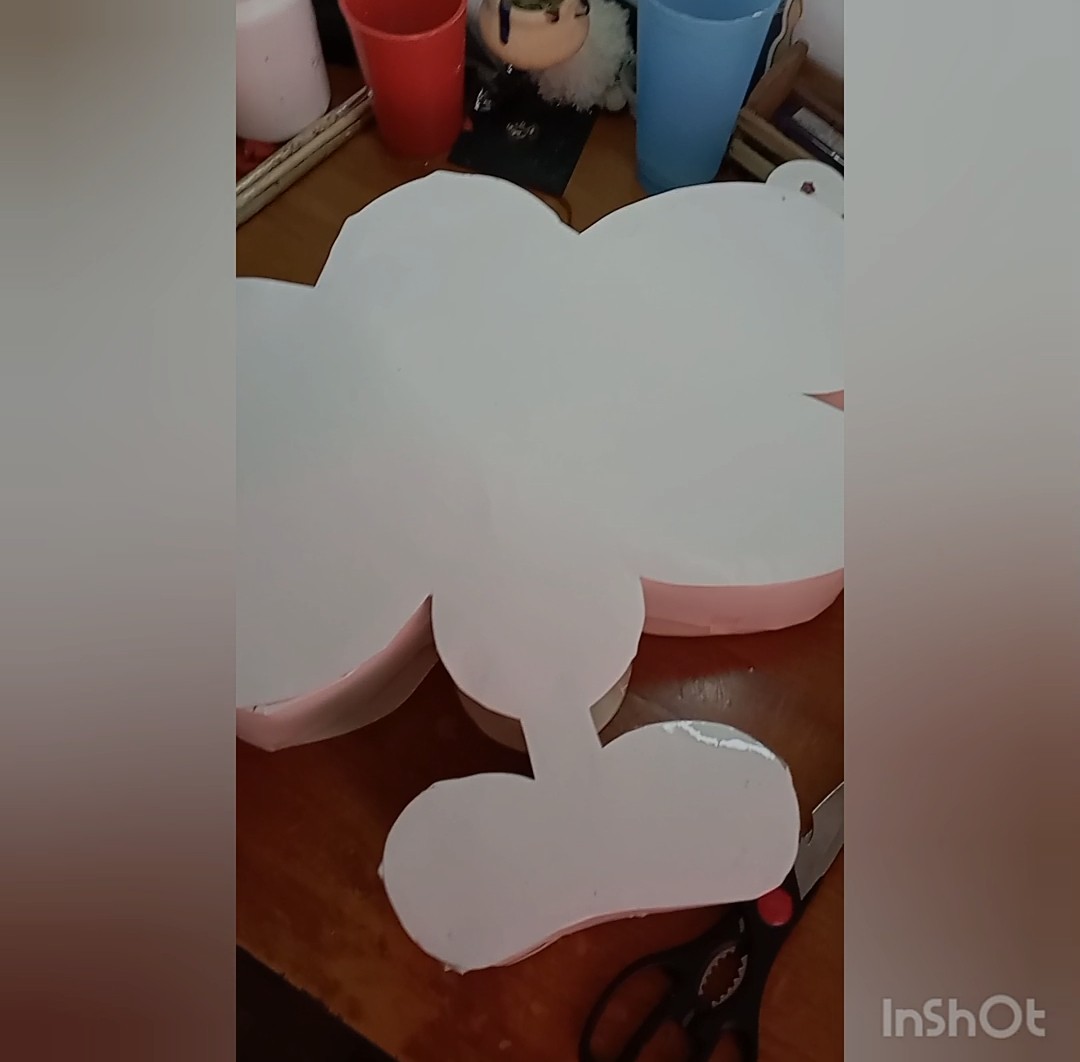
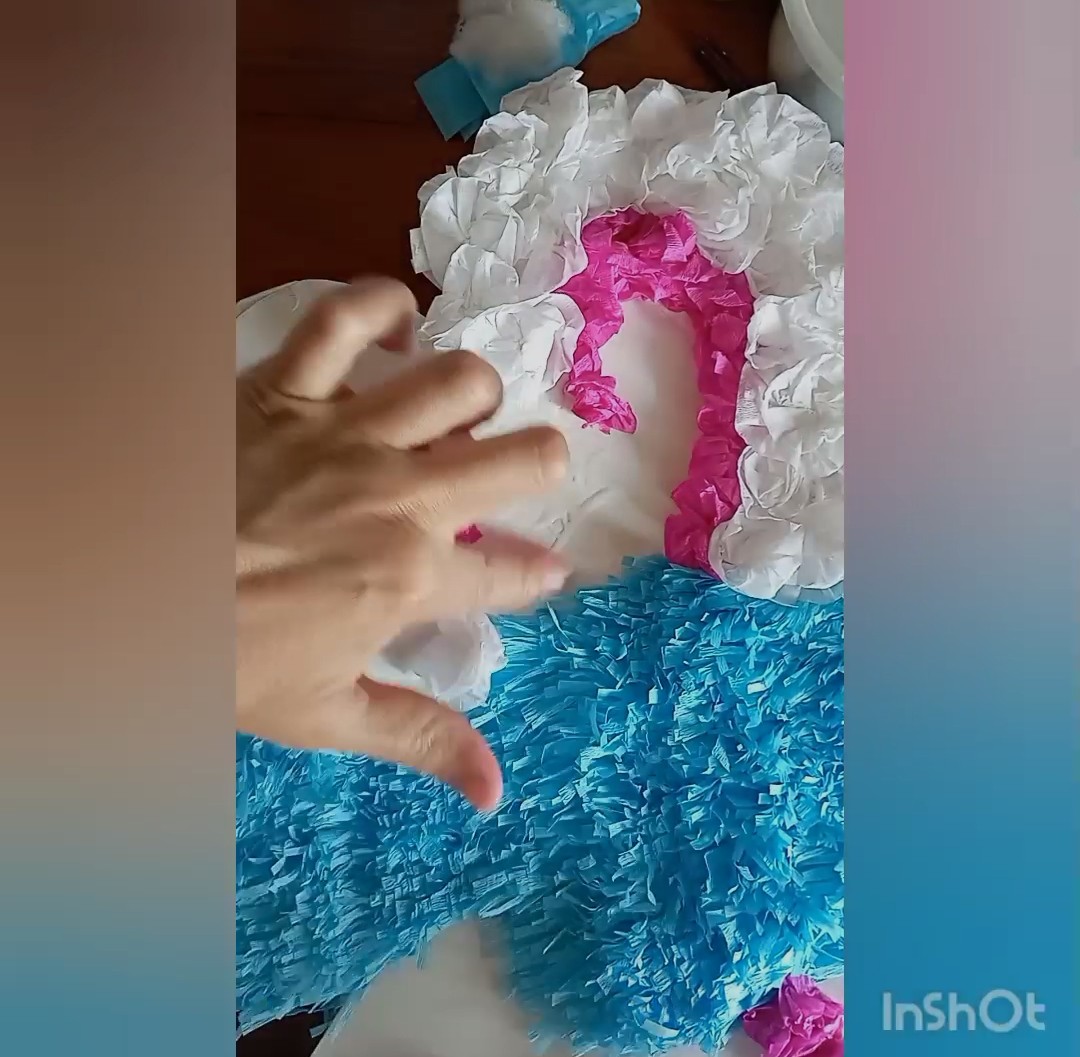
✅ Pegamos una capa sobre otra de abajo hacia arriba para que quede todo el espacio cubierto. Aquí es donde seleccionamos el color del dibujo y pegamos las franjas del color que corresponde.
✅ Paste one layer on top of the other from the bottom to the top so that all the space is covered. Here is where we select the color of the drawing and paste the stripes of the corresponding color.
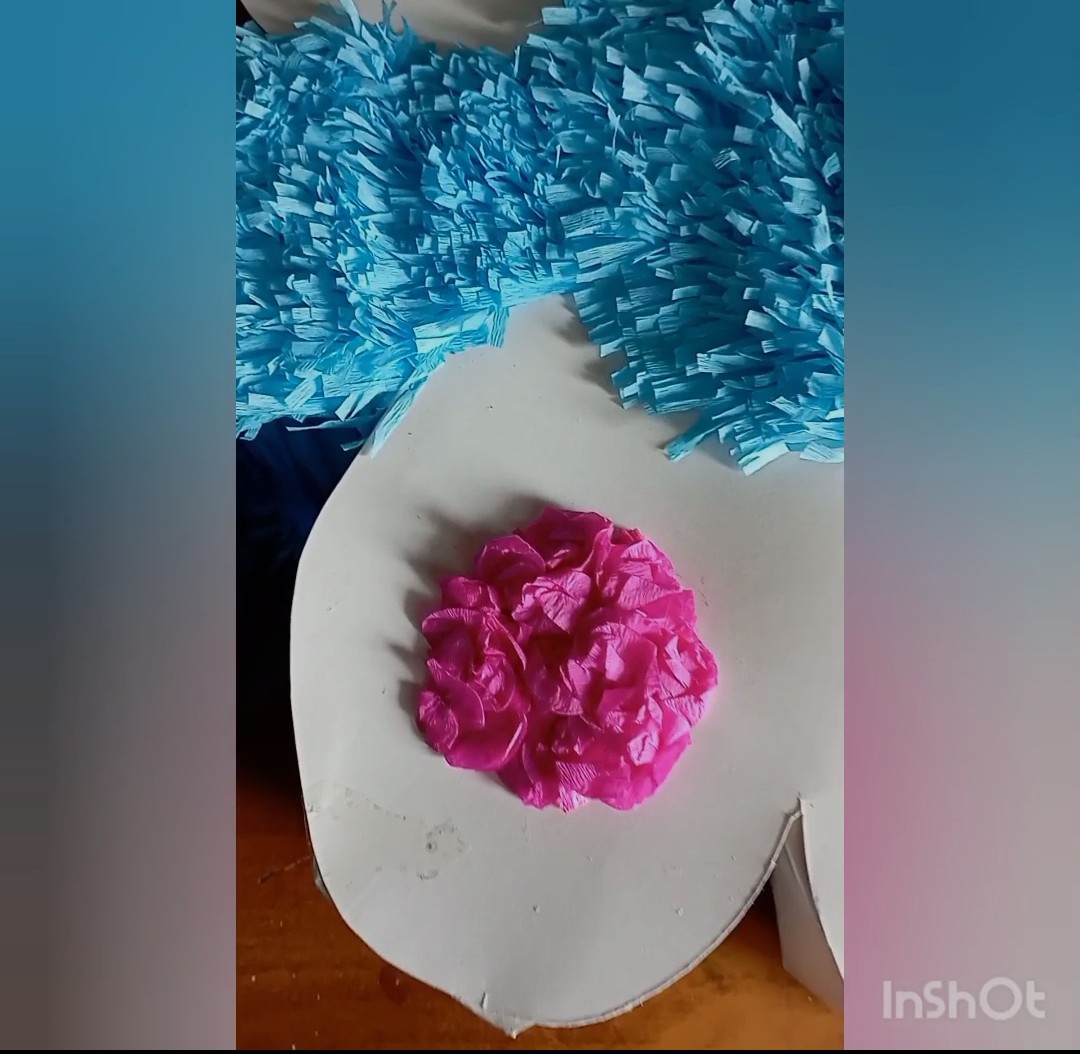
✅ También podemos hacer pequeñas flores y pegarlas juntas para que no queden espacios vacíos. Yo utilicé esta técnica par alas alas de la mariposa.
✅ Paste one layer on top of the other from the bottom to the top so that all the space is covered. Here is where we select the color of the drawing and paste the stripes of the corresponding color.
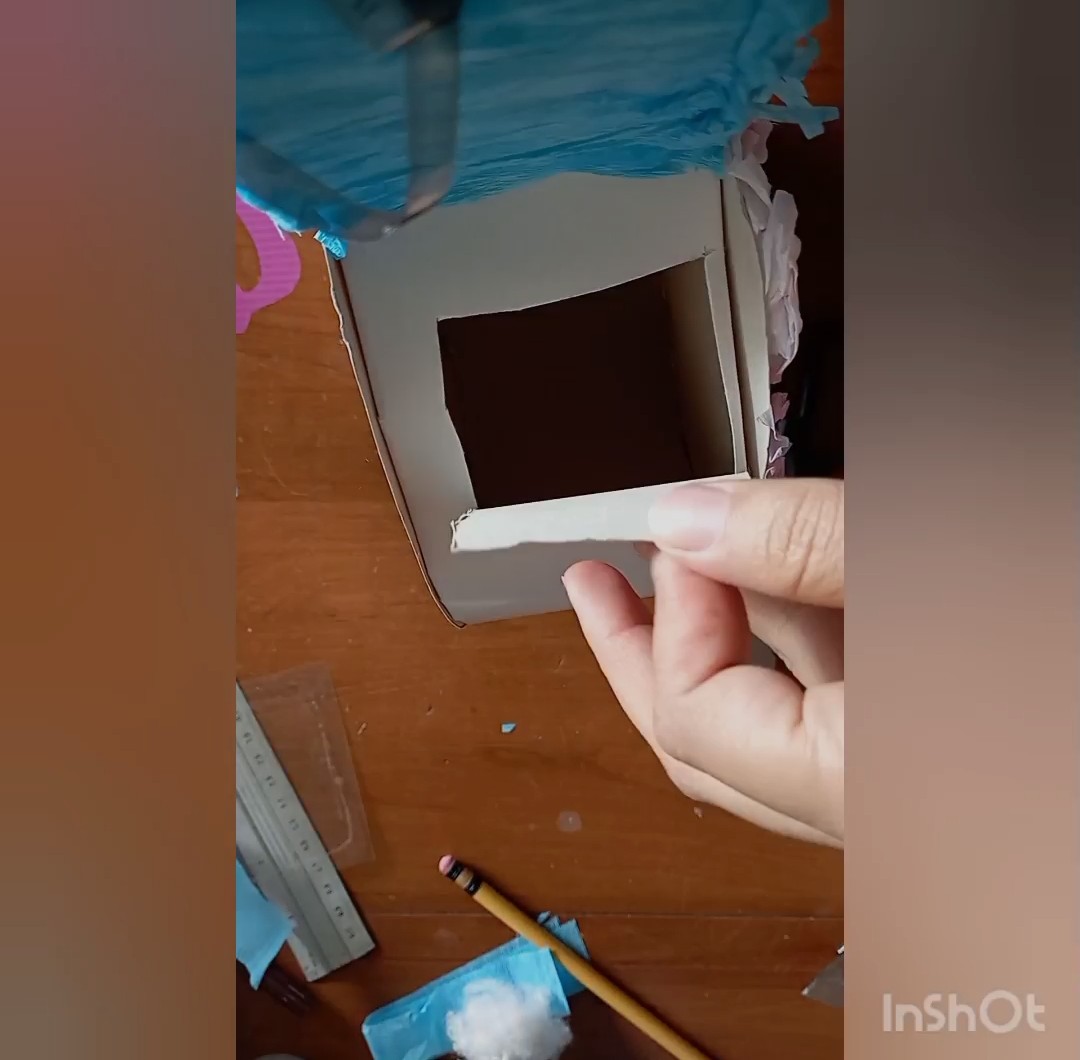
✅ Para introducir el relleno de la piñata, abrimos un orificio en uno de sus costados, y tapamos con el papel de los borde.
✅ To insert the filling of the piñata, open a hole in one of its sides, and cover it with the paper of the edges.
✅ Para los bordes podemos hacer un acordeón de papel y pegarlo según en color que corresponda.
✅ To insert the filling of the piñata, open a hole in one of its sides, and cover it with the paper of the edges.
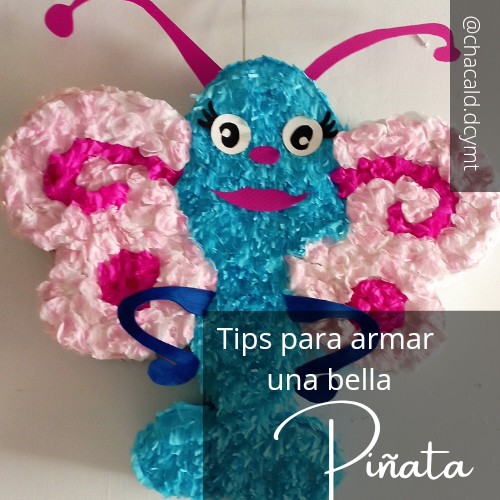
Con estos tips podemos armar cualquier figura y cualquier diseño de piñata que queremos. Aquí les muestro la piñata para mi hija de la mariposa Titi. Espero les sean de utilidad estos tips, les invito a ver el video del proceso de elaboración y nos vemos en una próxima oportunidad.
With these tips we can make any figure and any piñata design we want. Here I show you the piñata for my daughter of the butterfly Titi. I hope you find these tips useful, I invite you to watch the video of the elaboration process and I'll see you next time.
Original content by the author.
Resources: App: Canva / Giphy / Inshot
📷 Redmi 10 Smartphone
Translation done with Deepl.com
✿ All Rights Reserved || © @chacald.dcymt // 2020-2022 ✿
💌 Discord: chacald.dcymt#3549
_
Contenido original del autor.
Recursos: App: Canva / Giphy / Inshot
📷 Redmi 10 Smartphone
Traducido con Deepl.com
✿ Todos los Derechos Reservados || © @chacald.dcymt // 2020-2022 ✿
💌 Discord: chacald.dcymt#3549
Show more
Tags :
Woo!
This creator can upvote comments using 3speak's stake today because they are a top performing creator!
Leave a quality comment relating to their content and you could receive an upvote
worth at least a dollar.
Their limit for today is $0!
Their limit for today is $0!

37 views
7 months ago
$

51 views
a year ago
$
43 views
10 months ago
$
23 views
a year ago
$

39 views
2 years ago
$
More Videos

21 views
11 months ago
$

2 views
a year ago
$
27 views
2 years ago
$

3 views
4 years ago
$
3 views
a year ago
$

3 views
8 months ago
$
56 views
a year ago
$

1 views
2 years ago
$

10 views
a year ago
$
9 views
2 years ago
$

24 views
a year ago
$

6 views
2 years ago
$
13 views
a year ago
$
59 views
3 years ago
$
14 views
6 months ago
$

6 views
2 years ago
$
2 views
a year ago
$
10 views
a month ago
$

42 views
3 years ago
$

0 views
4 months ago
$

3 views
8 months ago
$

8 views
3 years ago
$
12 views
a month ago
$

16 views
2 years ago
$
Comments:
Reply:
To comment on this video please connect a HIVE account to your profile: Connect HIVE Account