Árbol de deseos / Tutorial
48
About :
¡Saludos a todos los amantes de las artes manuales! Se acerca navidad, mi época favorita del año y para darle la bienvenida vamos a hacer un árbol de deseos**. Acompáñenme en este paso a paso.
Para la realización de este proyecto, aplicaremos la técnica del cartonaje que consiste en tomar una pieza de cartón para cubrirla con otro material, en este caso será papel de reciclaje y pegamento para simular piezas de madera.
Greetings to all handmade craft lovers! Christmas is coming, my favorite time of the year and to welcome it we are going to make a wish tree. Join me in this step by step.
For the realization of this project, we will apply the cardboard technique that consists of taking a piece of cardboard to cover it with another material, in this case it will be recycled paper and glue to simulate pieces of wood.

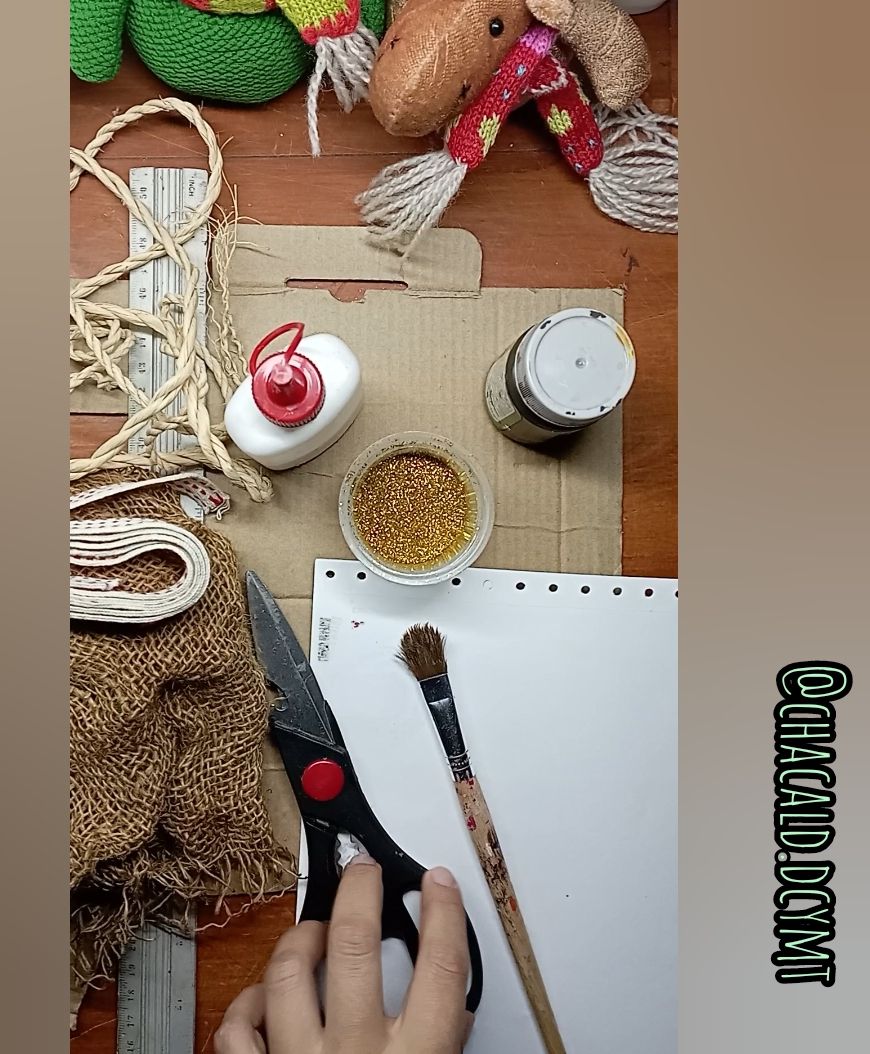
Cartón
Pegamento escolar
Tijera
Marcadores
Perforador
Hojas blancas
Escarcha
Pincel viejo
Pinturas acrílicas
Tela de yute, cinta y cuerda
DIY Wishing Tree
Maretials:
Cardboard
School glue
Scissors
Markers
Hole punch
White sheets
Frosting
Old paintbrush
Acrylic paints
Jute cloth, ribbon and string

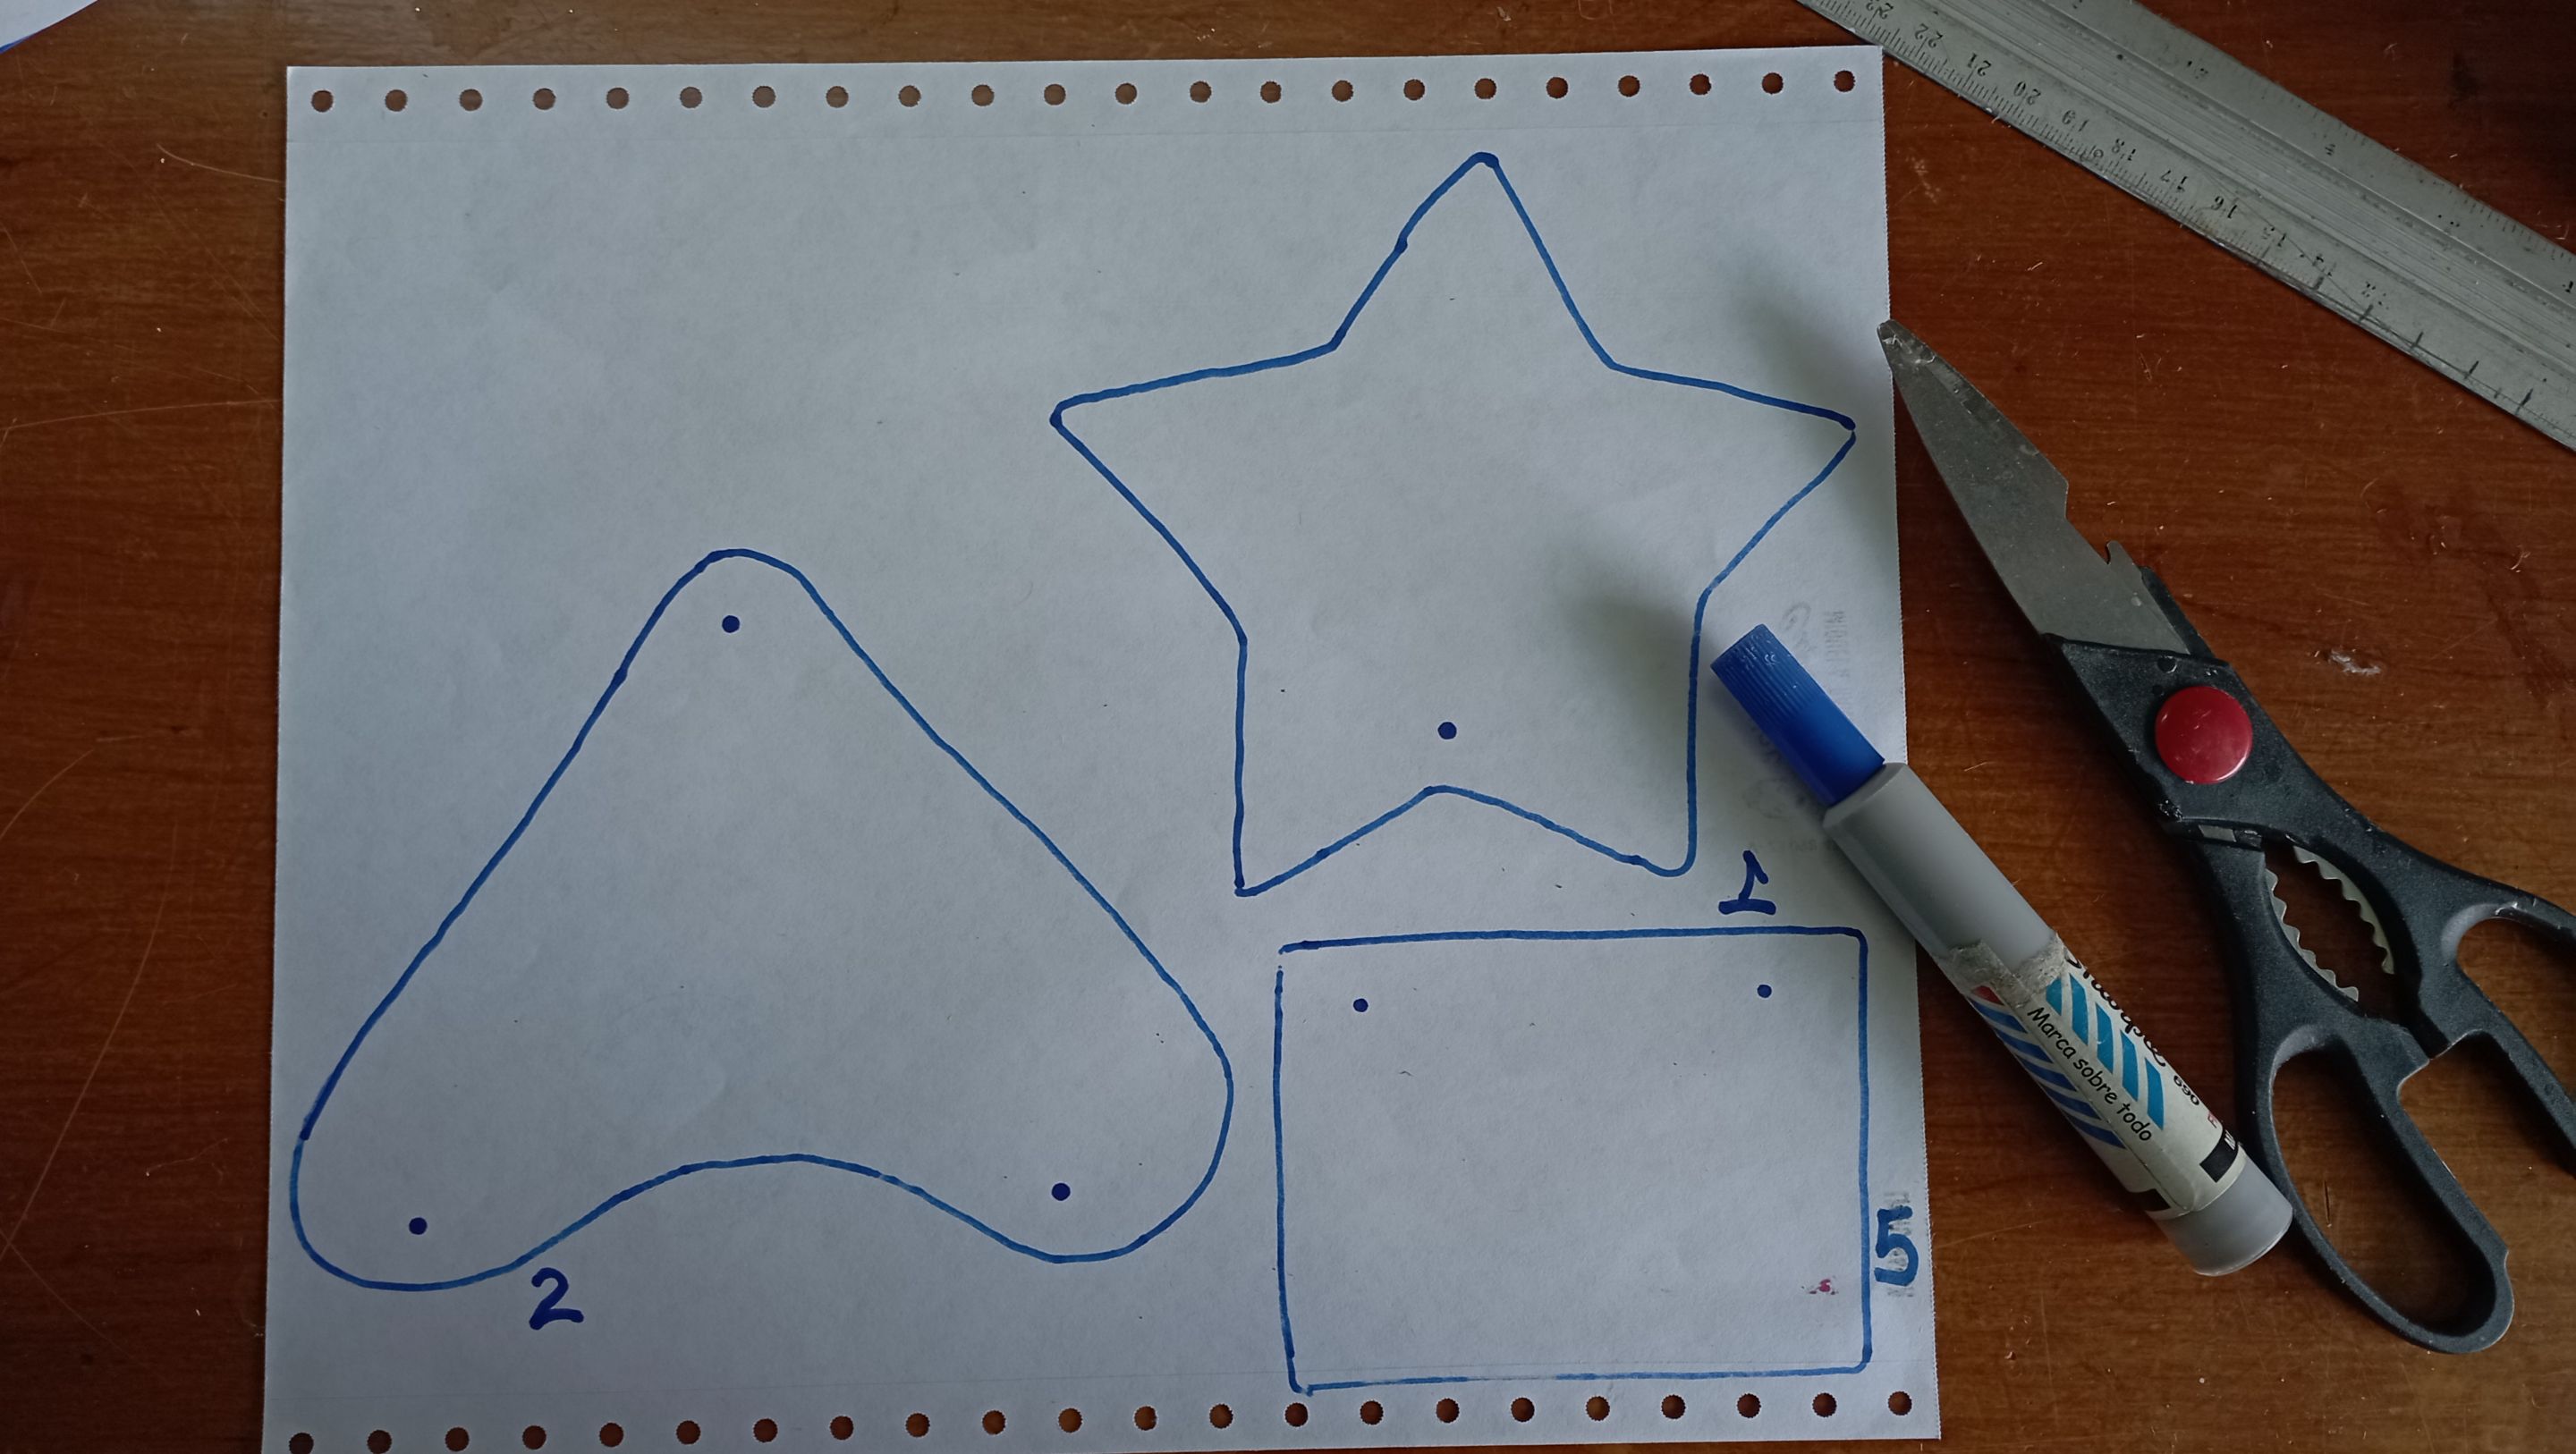
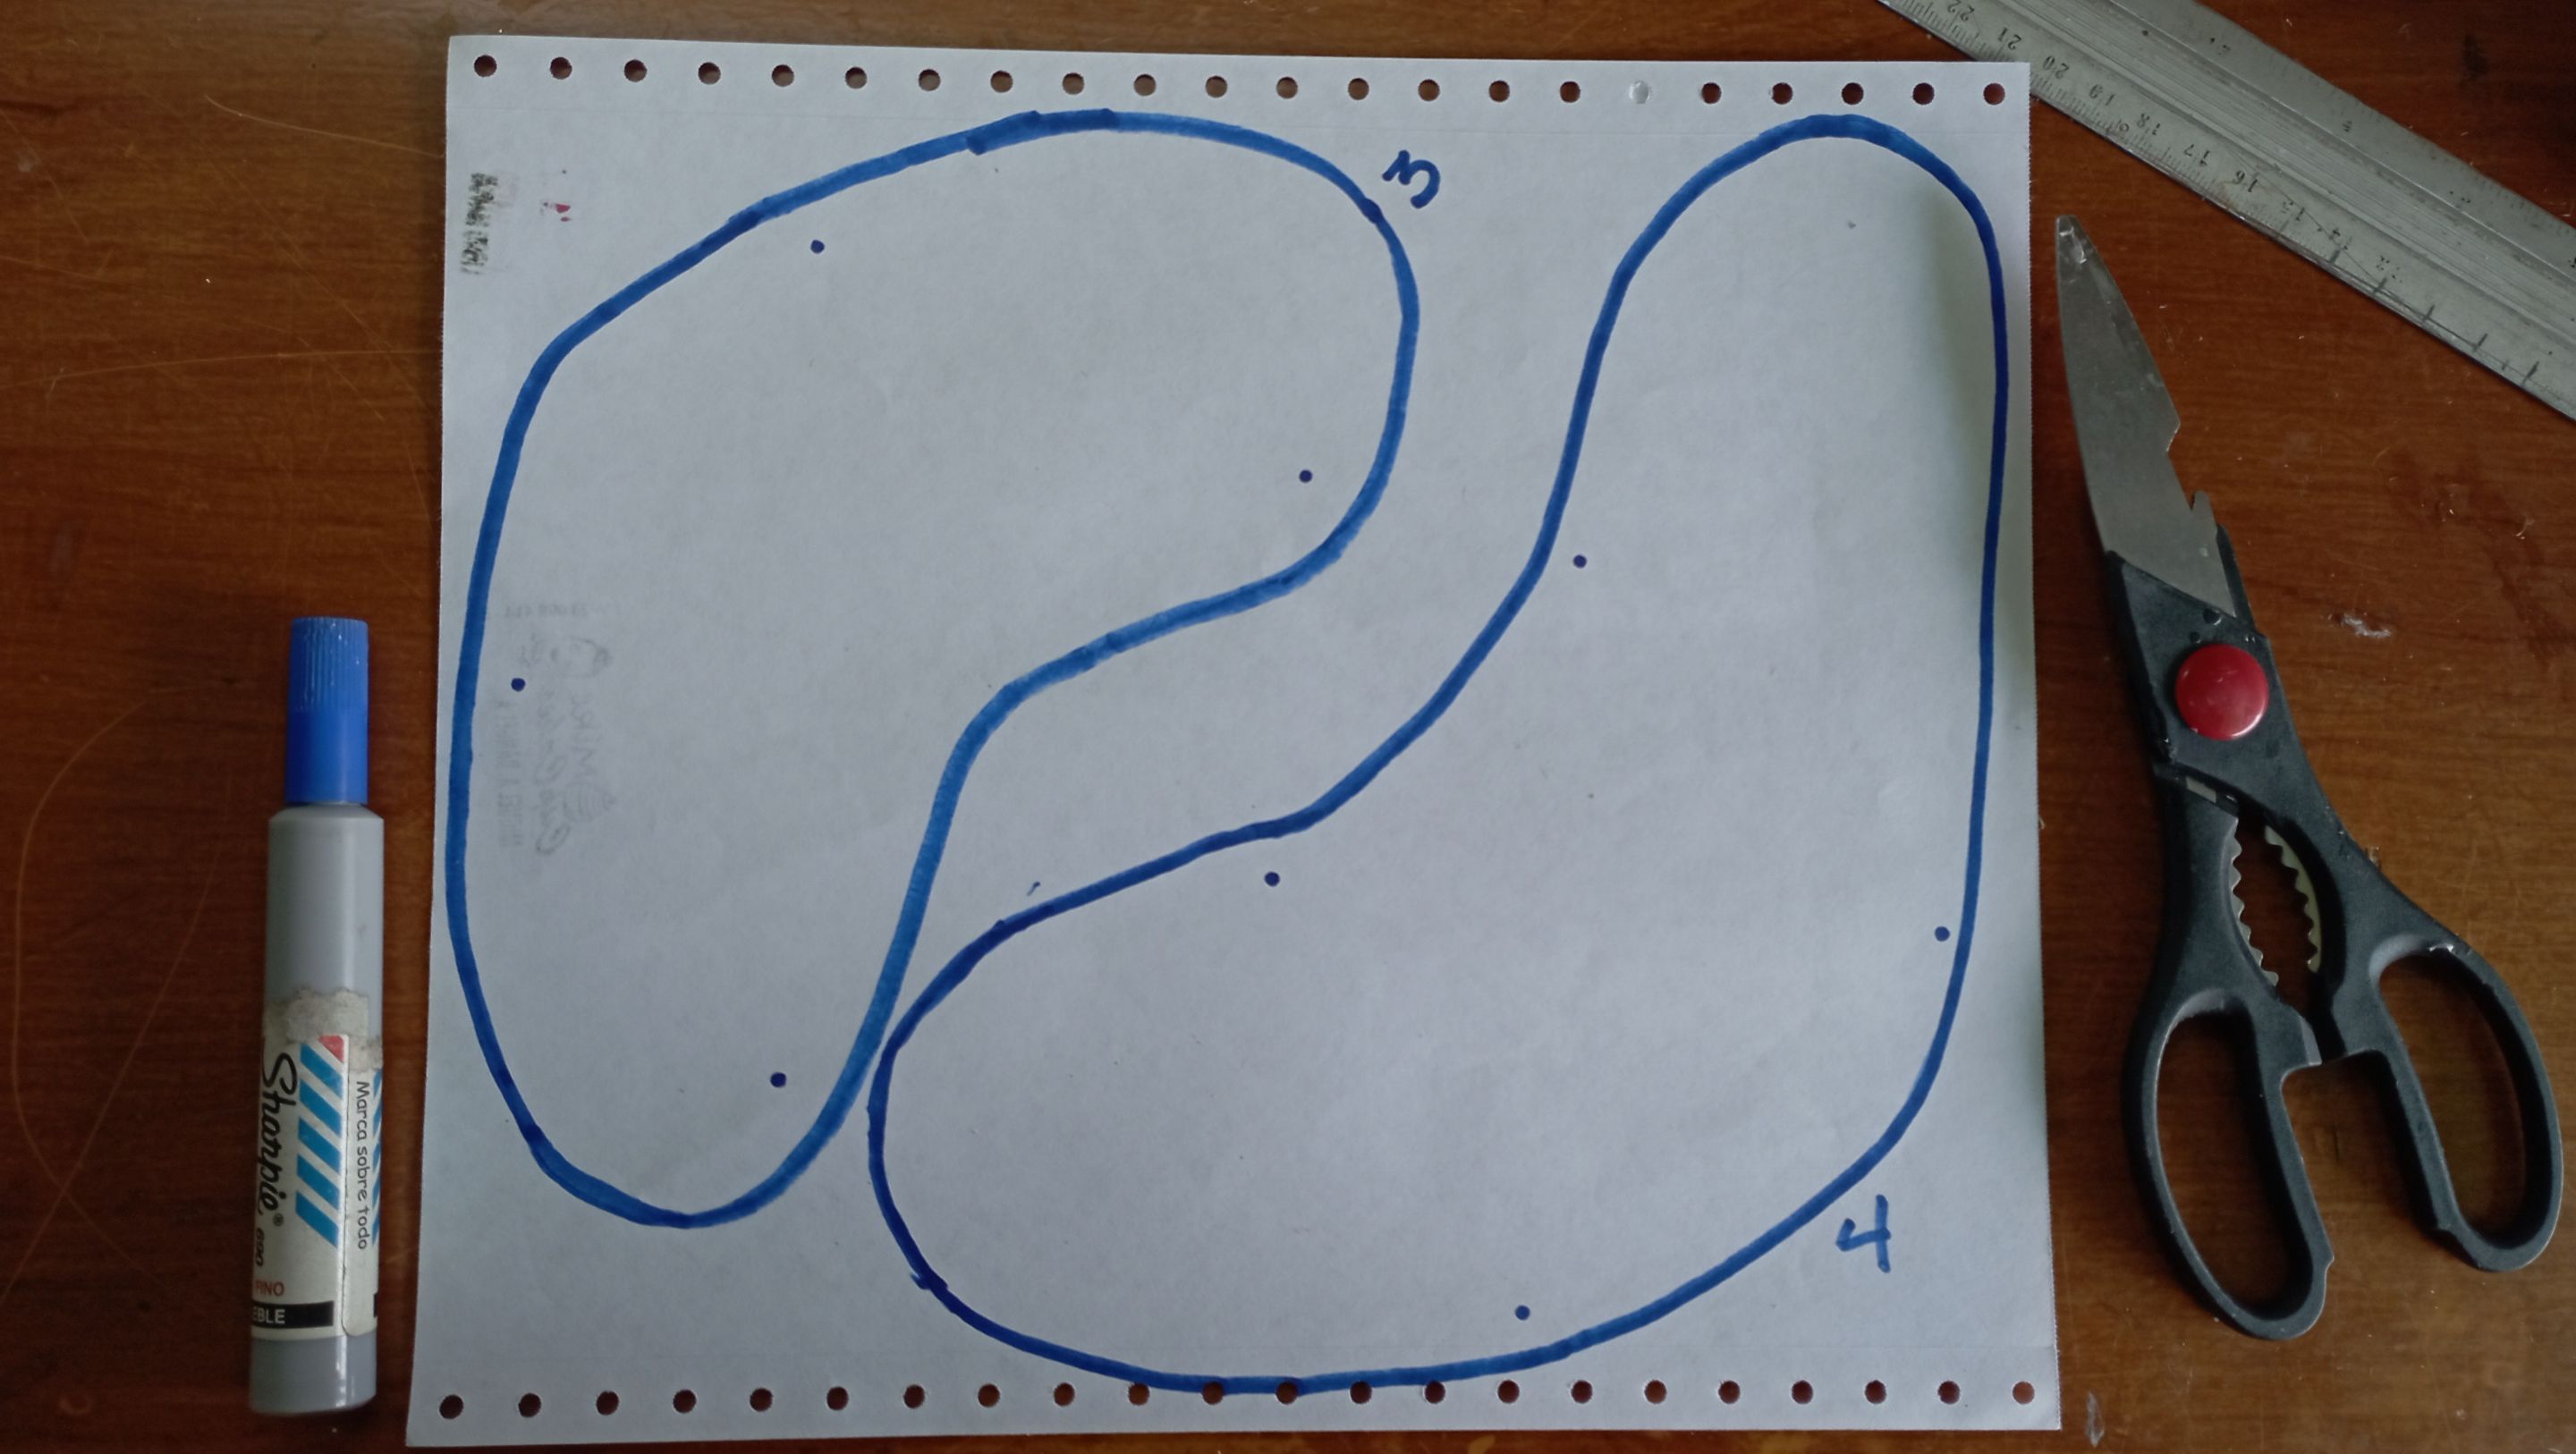
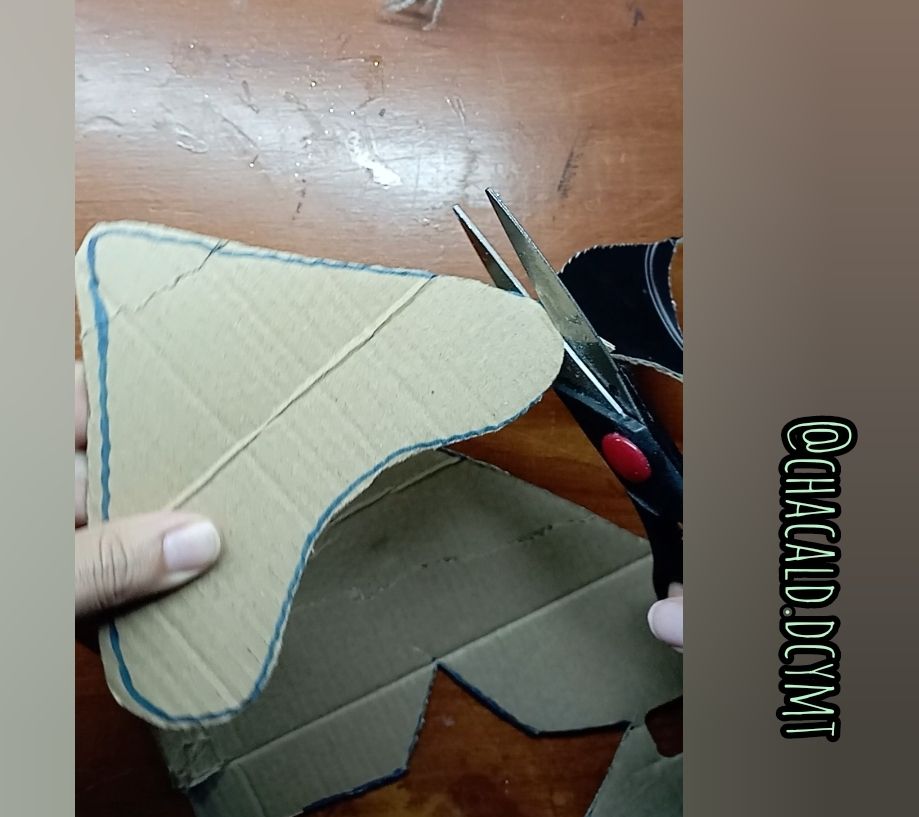
-Una vez que tenemos los materiales, vamos a iniciar haciendo los moldes en una hoja de papel. Necesitamos 5 piezas separadas: la estrella, la copa del árbol y 2 partes una más grande que la otra y el tronco.
Elaboration process:
-Once we have the materials, we will start by making the molds on a sheet of paper. We need 5 separate pieces: the star, the top of the tree and 2 parts one bigger than the other and the trunk.
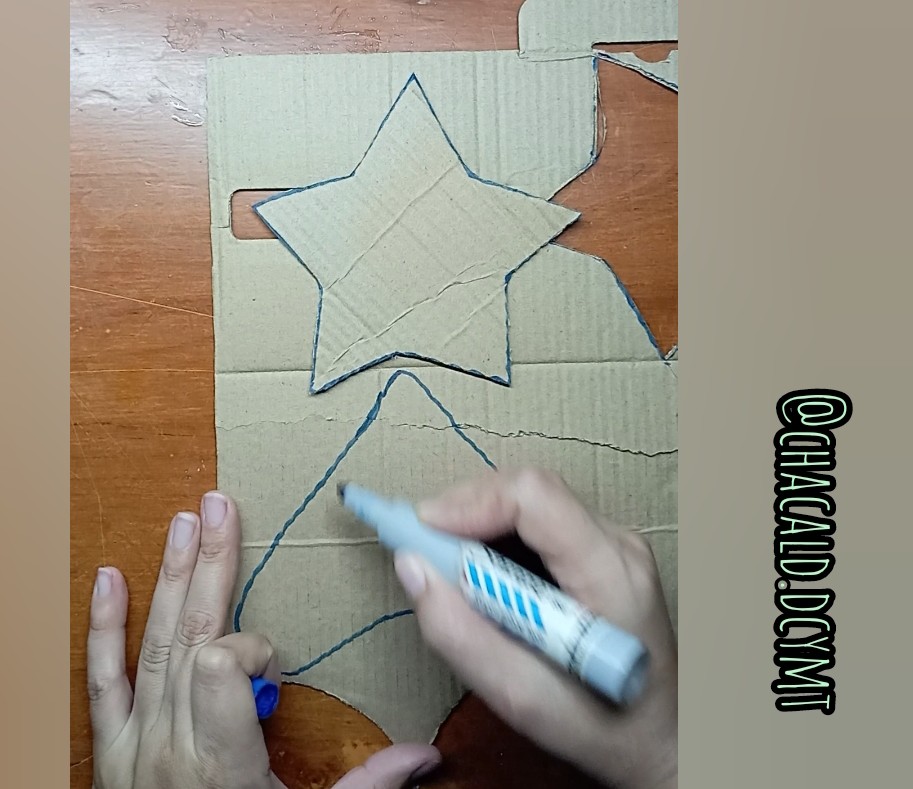
-Transferimos los moldes al cartón y recortamos.
-We transfer the molds to cardboard and cut them out.
 |  |
|---|
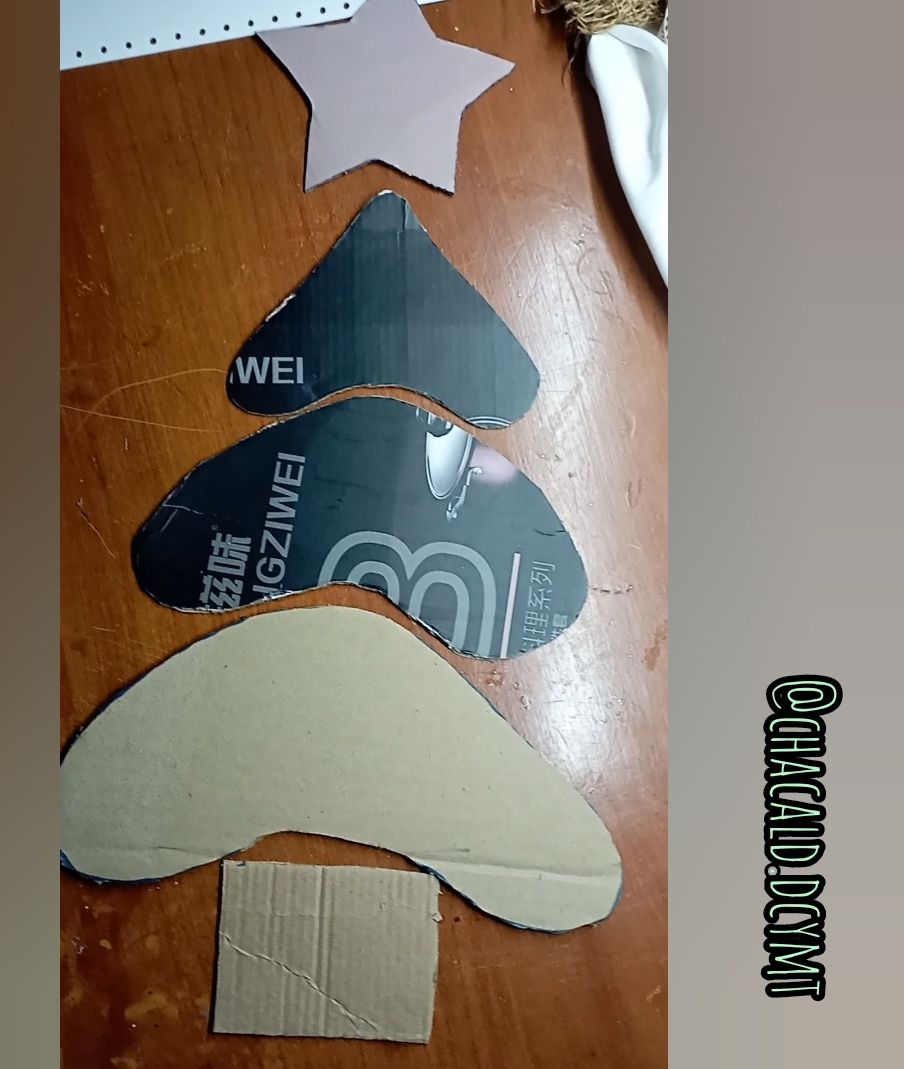
Nos deben quedar las siguientes piezas:
We should be left with the following pieces:
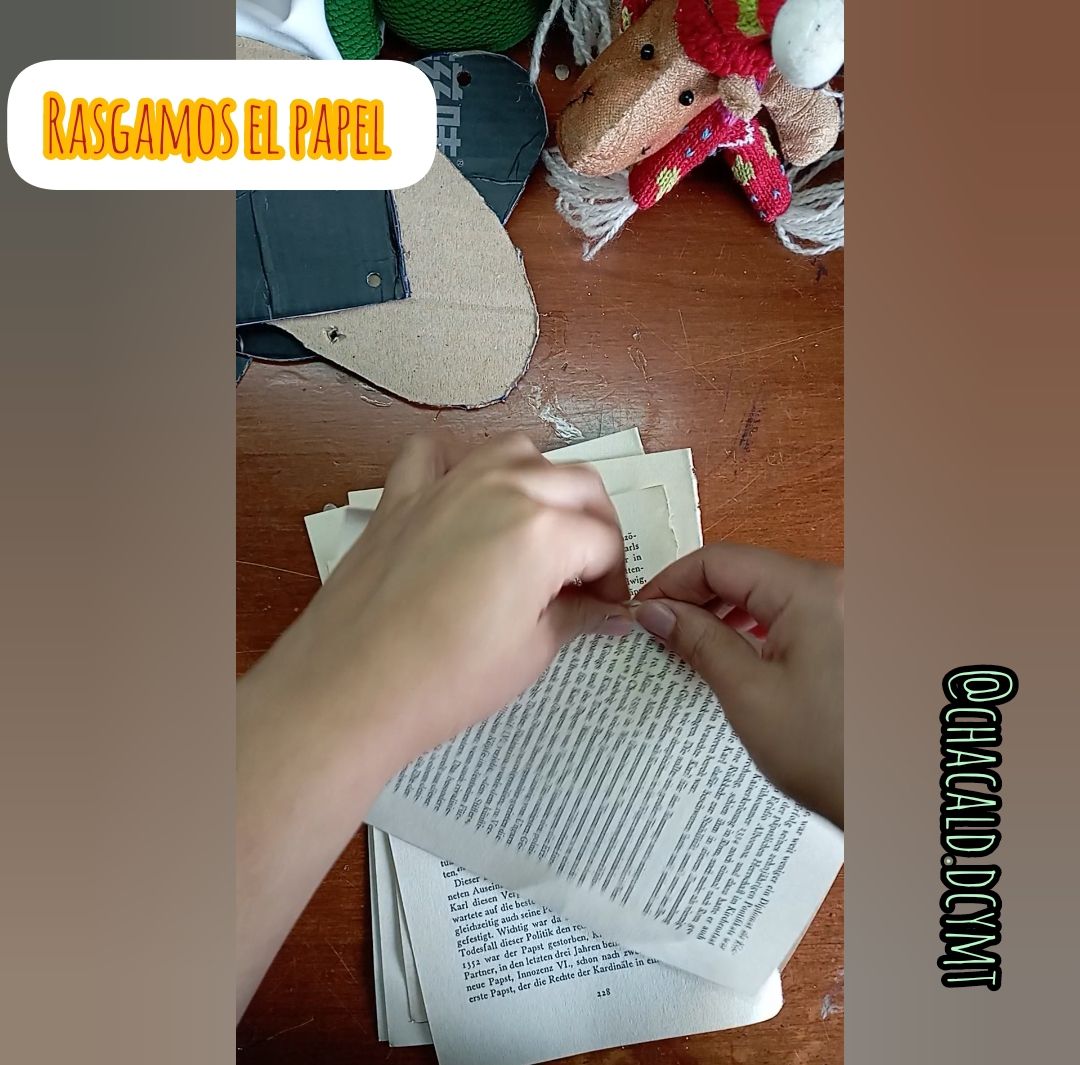
-Rasgamos el papel en cuadros. Tratamos que queden del mismo tamaño para que al sobre ponerlos se vea parejo.
-We cut the paper into squares. We try to make them the same size so that when we overlap them they look even.
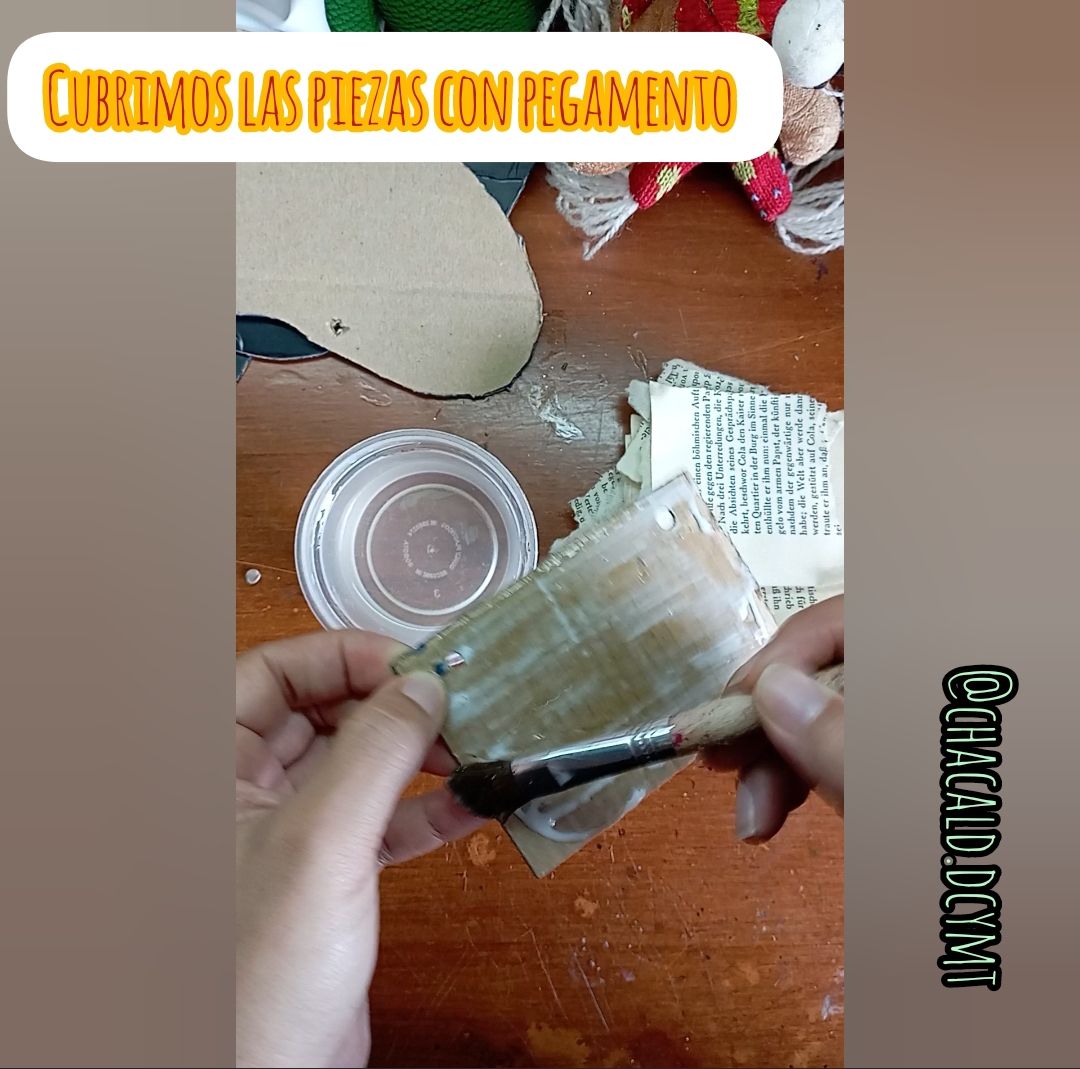
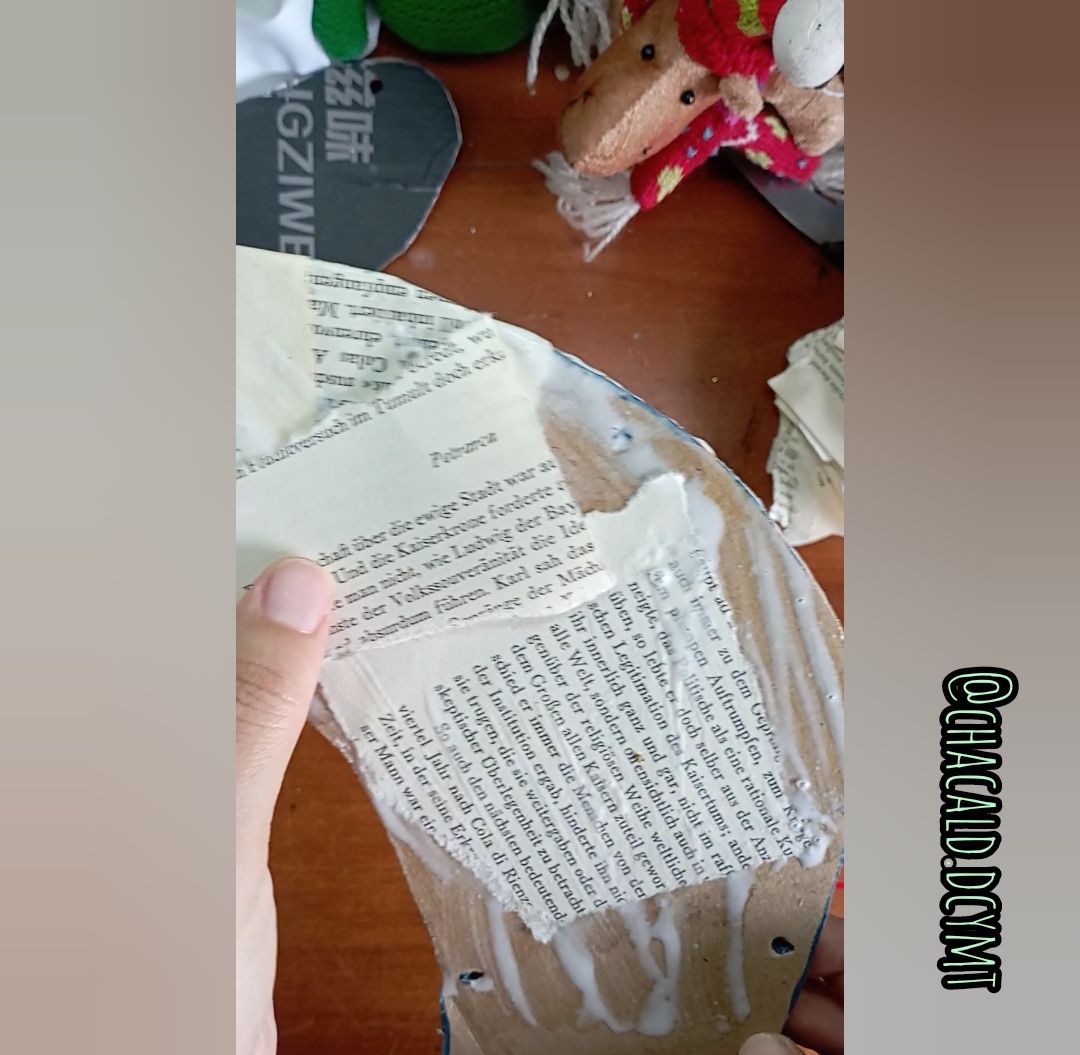
-Colocamos pegamento sobre cada pieza, incluyendo los bordes para que el papel se pegue bien. Podemos ayudar a correr el pegamento con un poco de agua.
-We put glue on each piece, including the edges so that the paper sticks well. We can help the glue to run with a little water.
-Cubrimos muy bien cada pieza con el papel tratando de cubrir los bordes. Hacemos presión con los dedos y así evitamos que queden burbujas de aire.
-We cover each piece very well with the paper, trying to cover the edges. We make pressure with our fingers to avoid air bubbles.
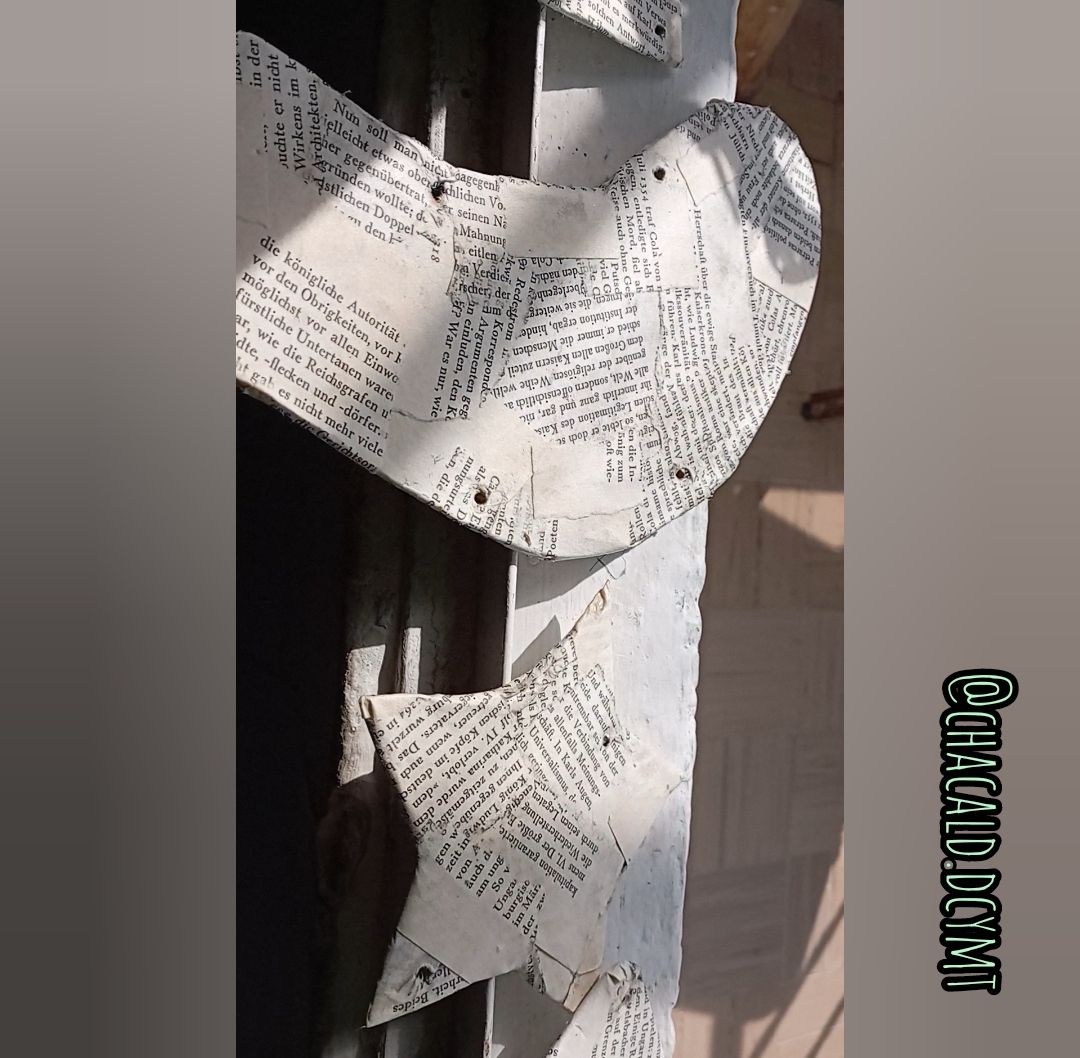
-Dejamos secar, si es posible al sol para que quede bien solido. Es posible que en 4 horas las piezas estén secas, pero depende del tamaño delas piezas y del grosor del papel. Sabemos que estan secas cuando se endurecen totalmente.
-Let dry, if possible in the sun to make it solid. It is possible that in 4 hours the pieces are dry, but it depends on the size of the pieces and the thickness of the paper. We know they are dry when they harden completely.
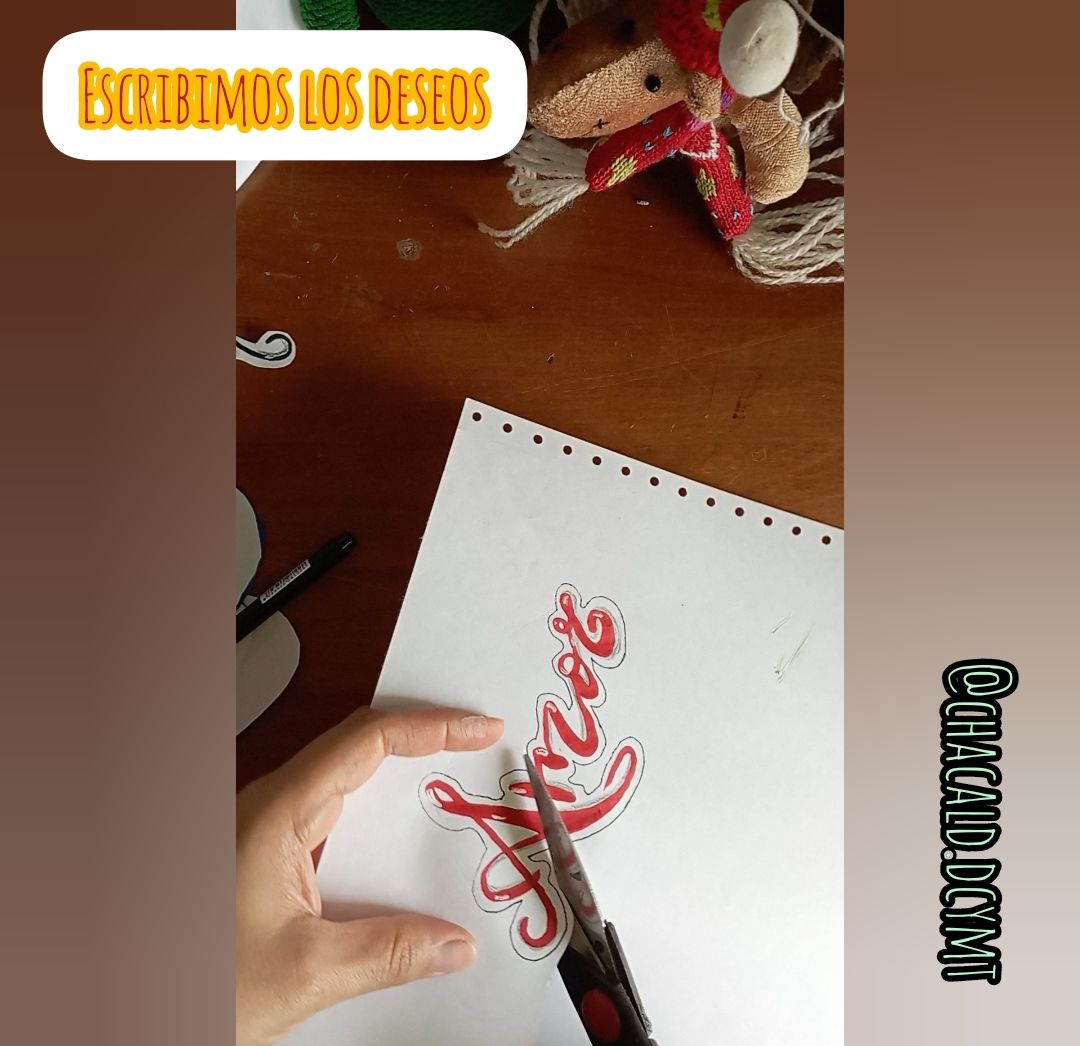
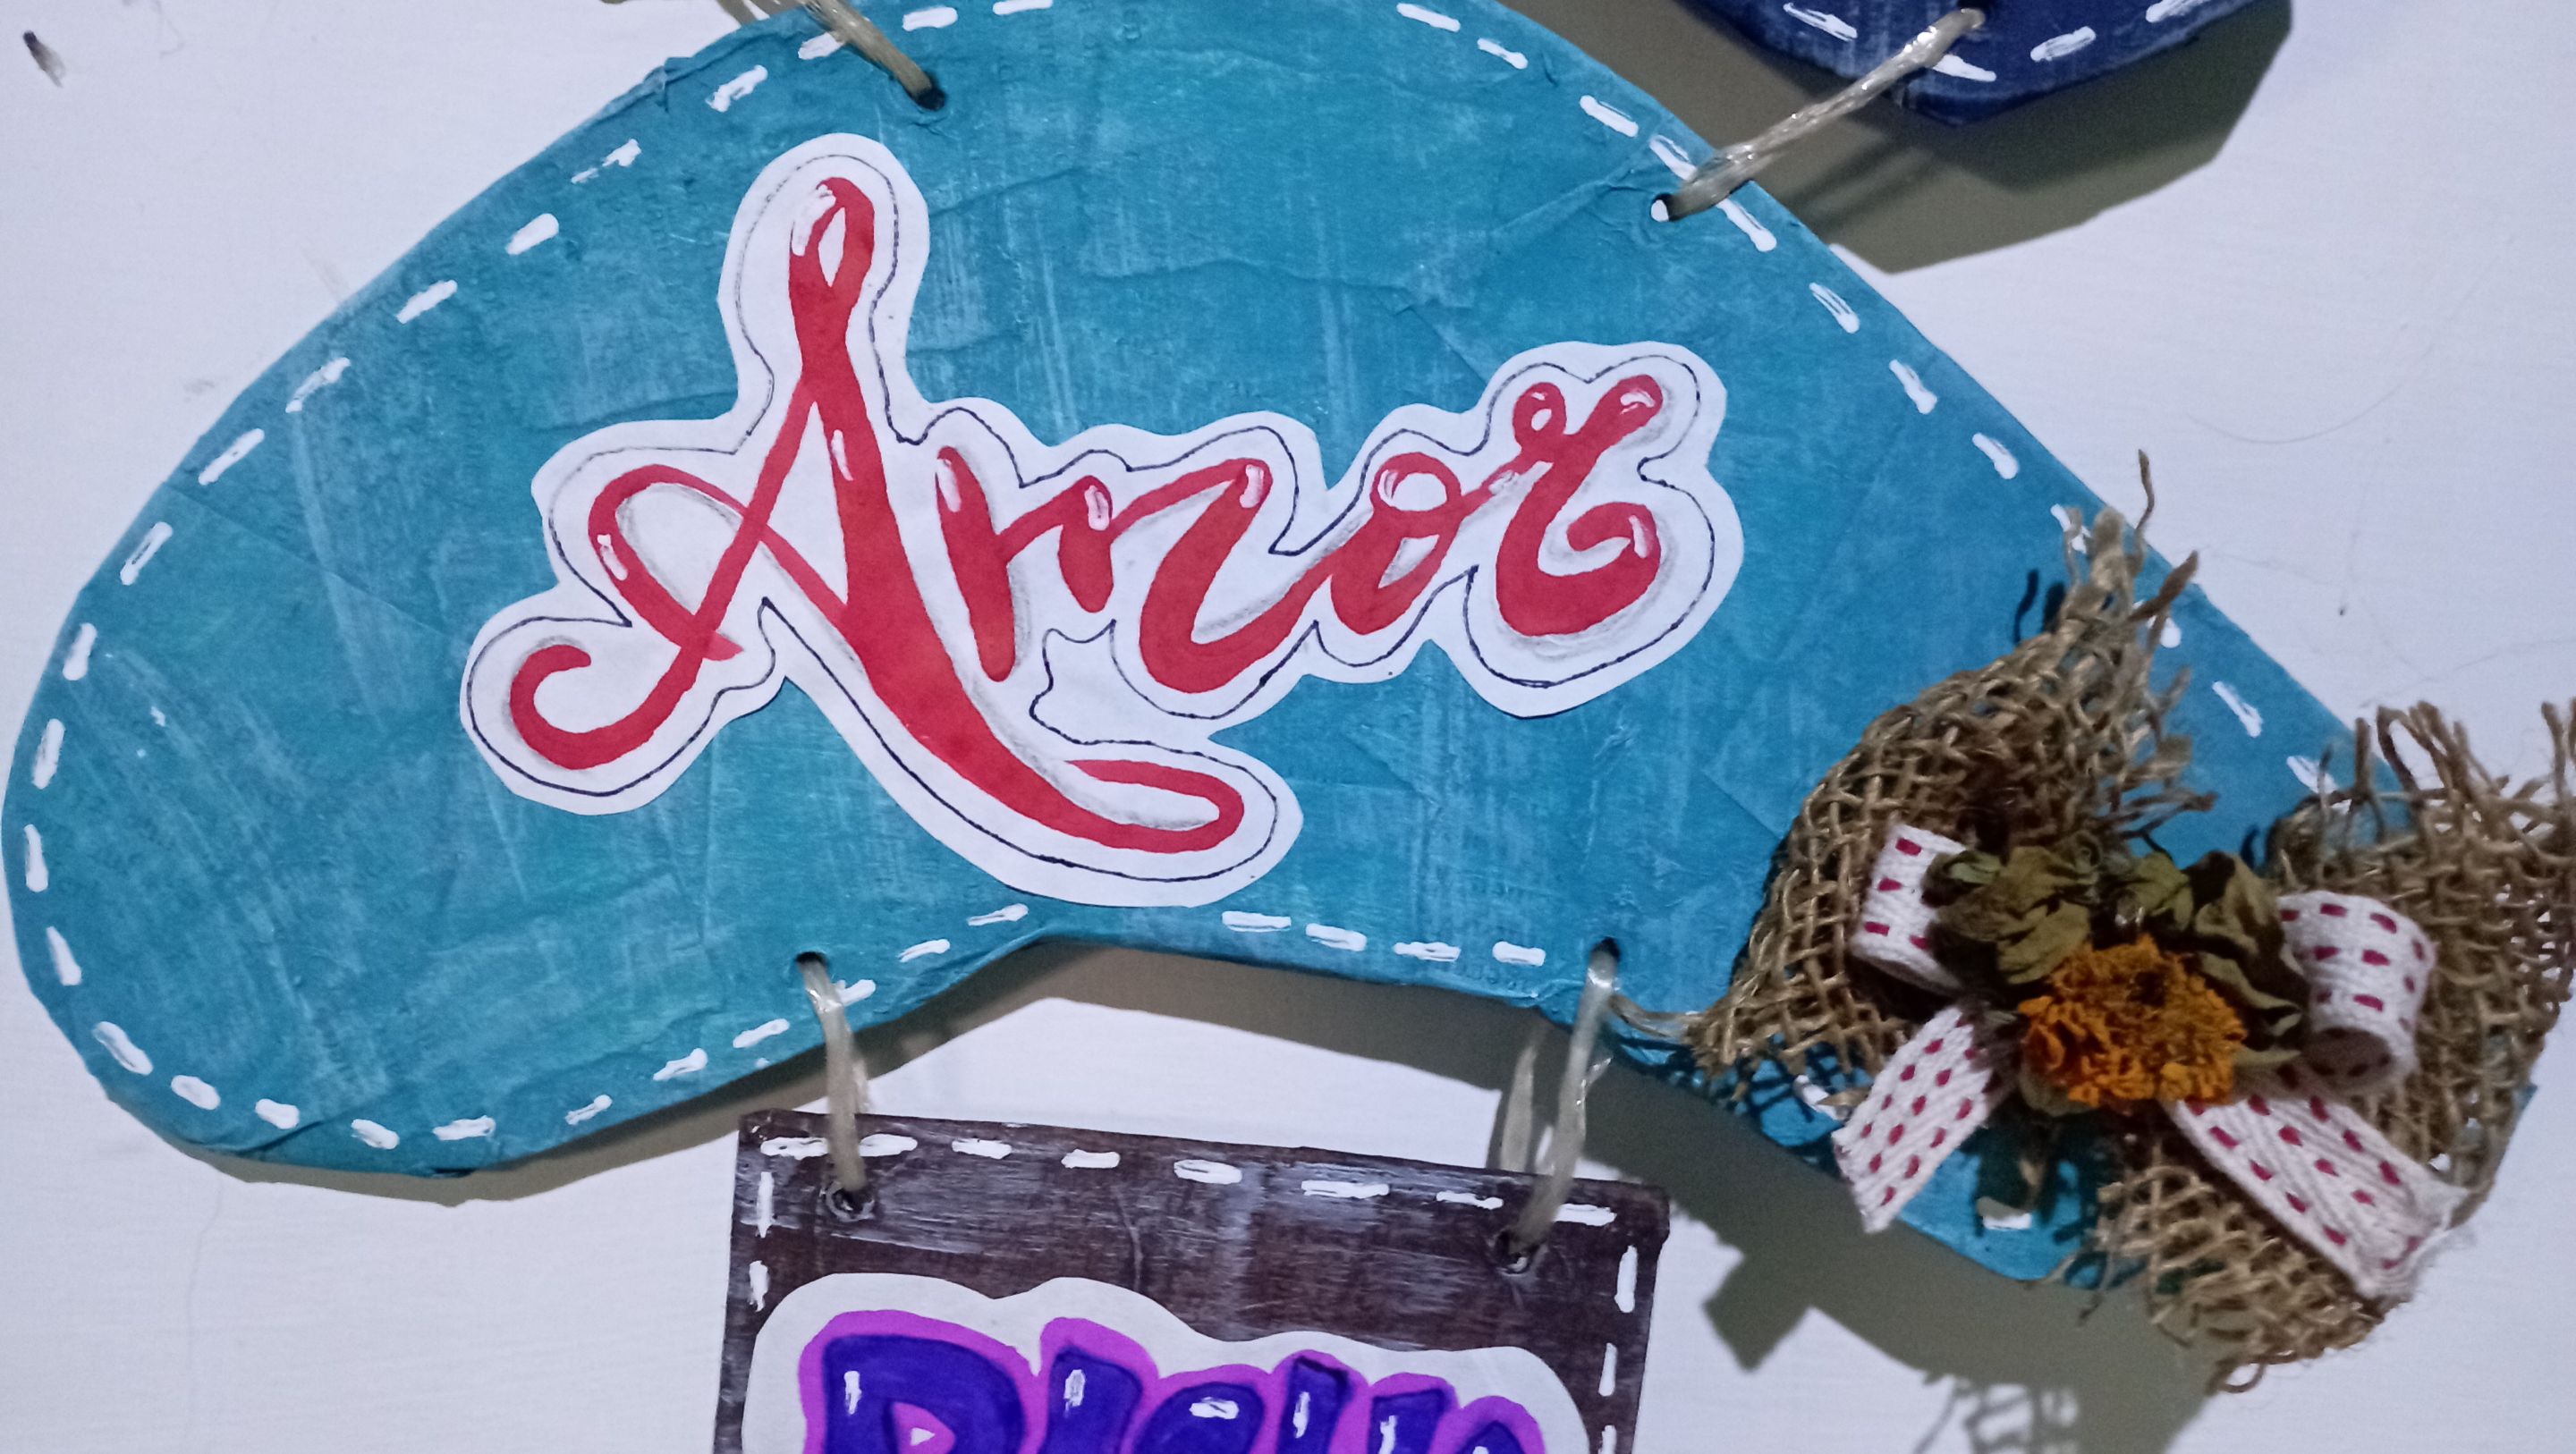
-Mientras que secan las piezas, vamos a escribir los deseos en una hoja blanca y recortamos. Escribimos un deseo por cada pieza del árbol. Podemos utilizar los marcadores de diferentes colores para que sea más llamativo el árbol.
-While the pieces are drying, we will write the wishes on a white sheet of paper and cut them out. We write one wish for each piece of the tree. We can use the markers of different colors to make the tree more eye-catching.
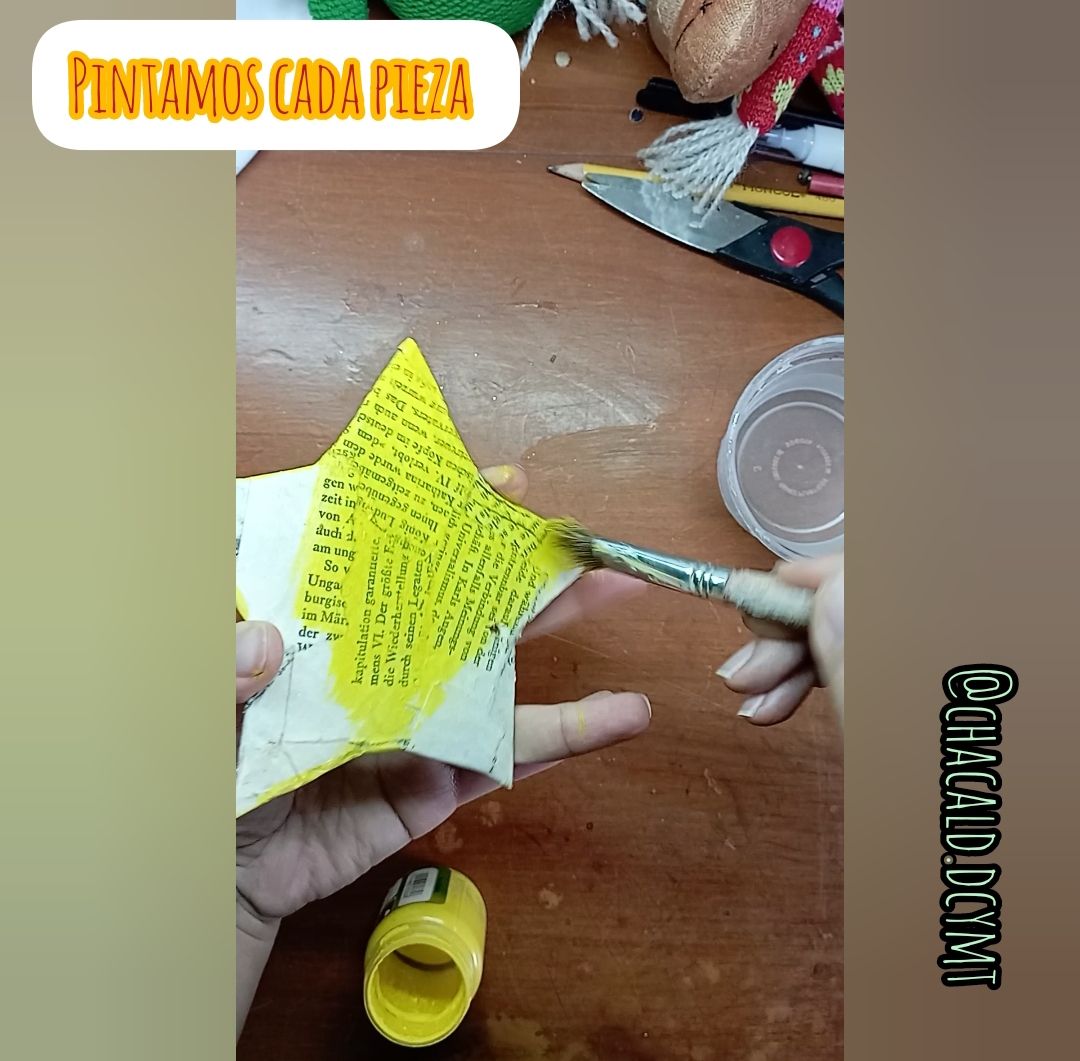
-Una vez secas las piezas vamos a pintar. Debemos pintar ambos lados, tanto el frente como el reverso deben quedar bien cubiertos de pintura. Podemos dar varias capas si vemos que es necesario.
-Once the pieces are dry we are going to paint. We must paint both sides, both the front and back should be well covered with paint. We can give several coats if we see that it is necessary.
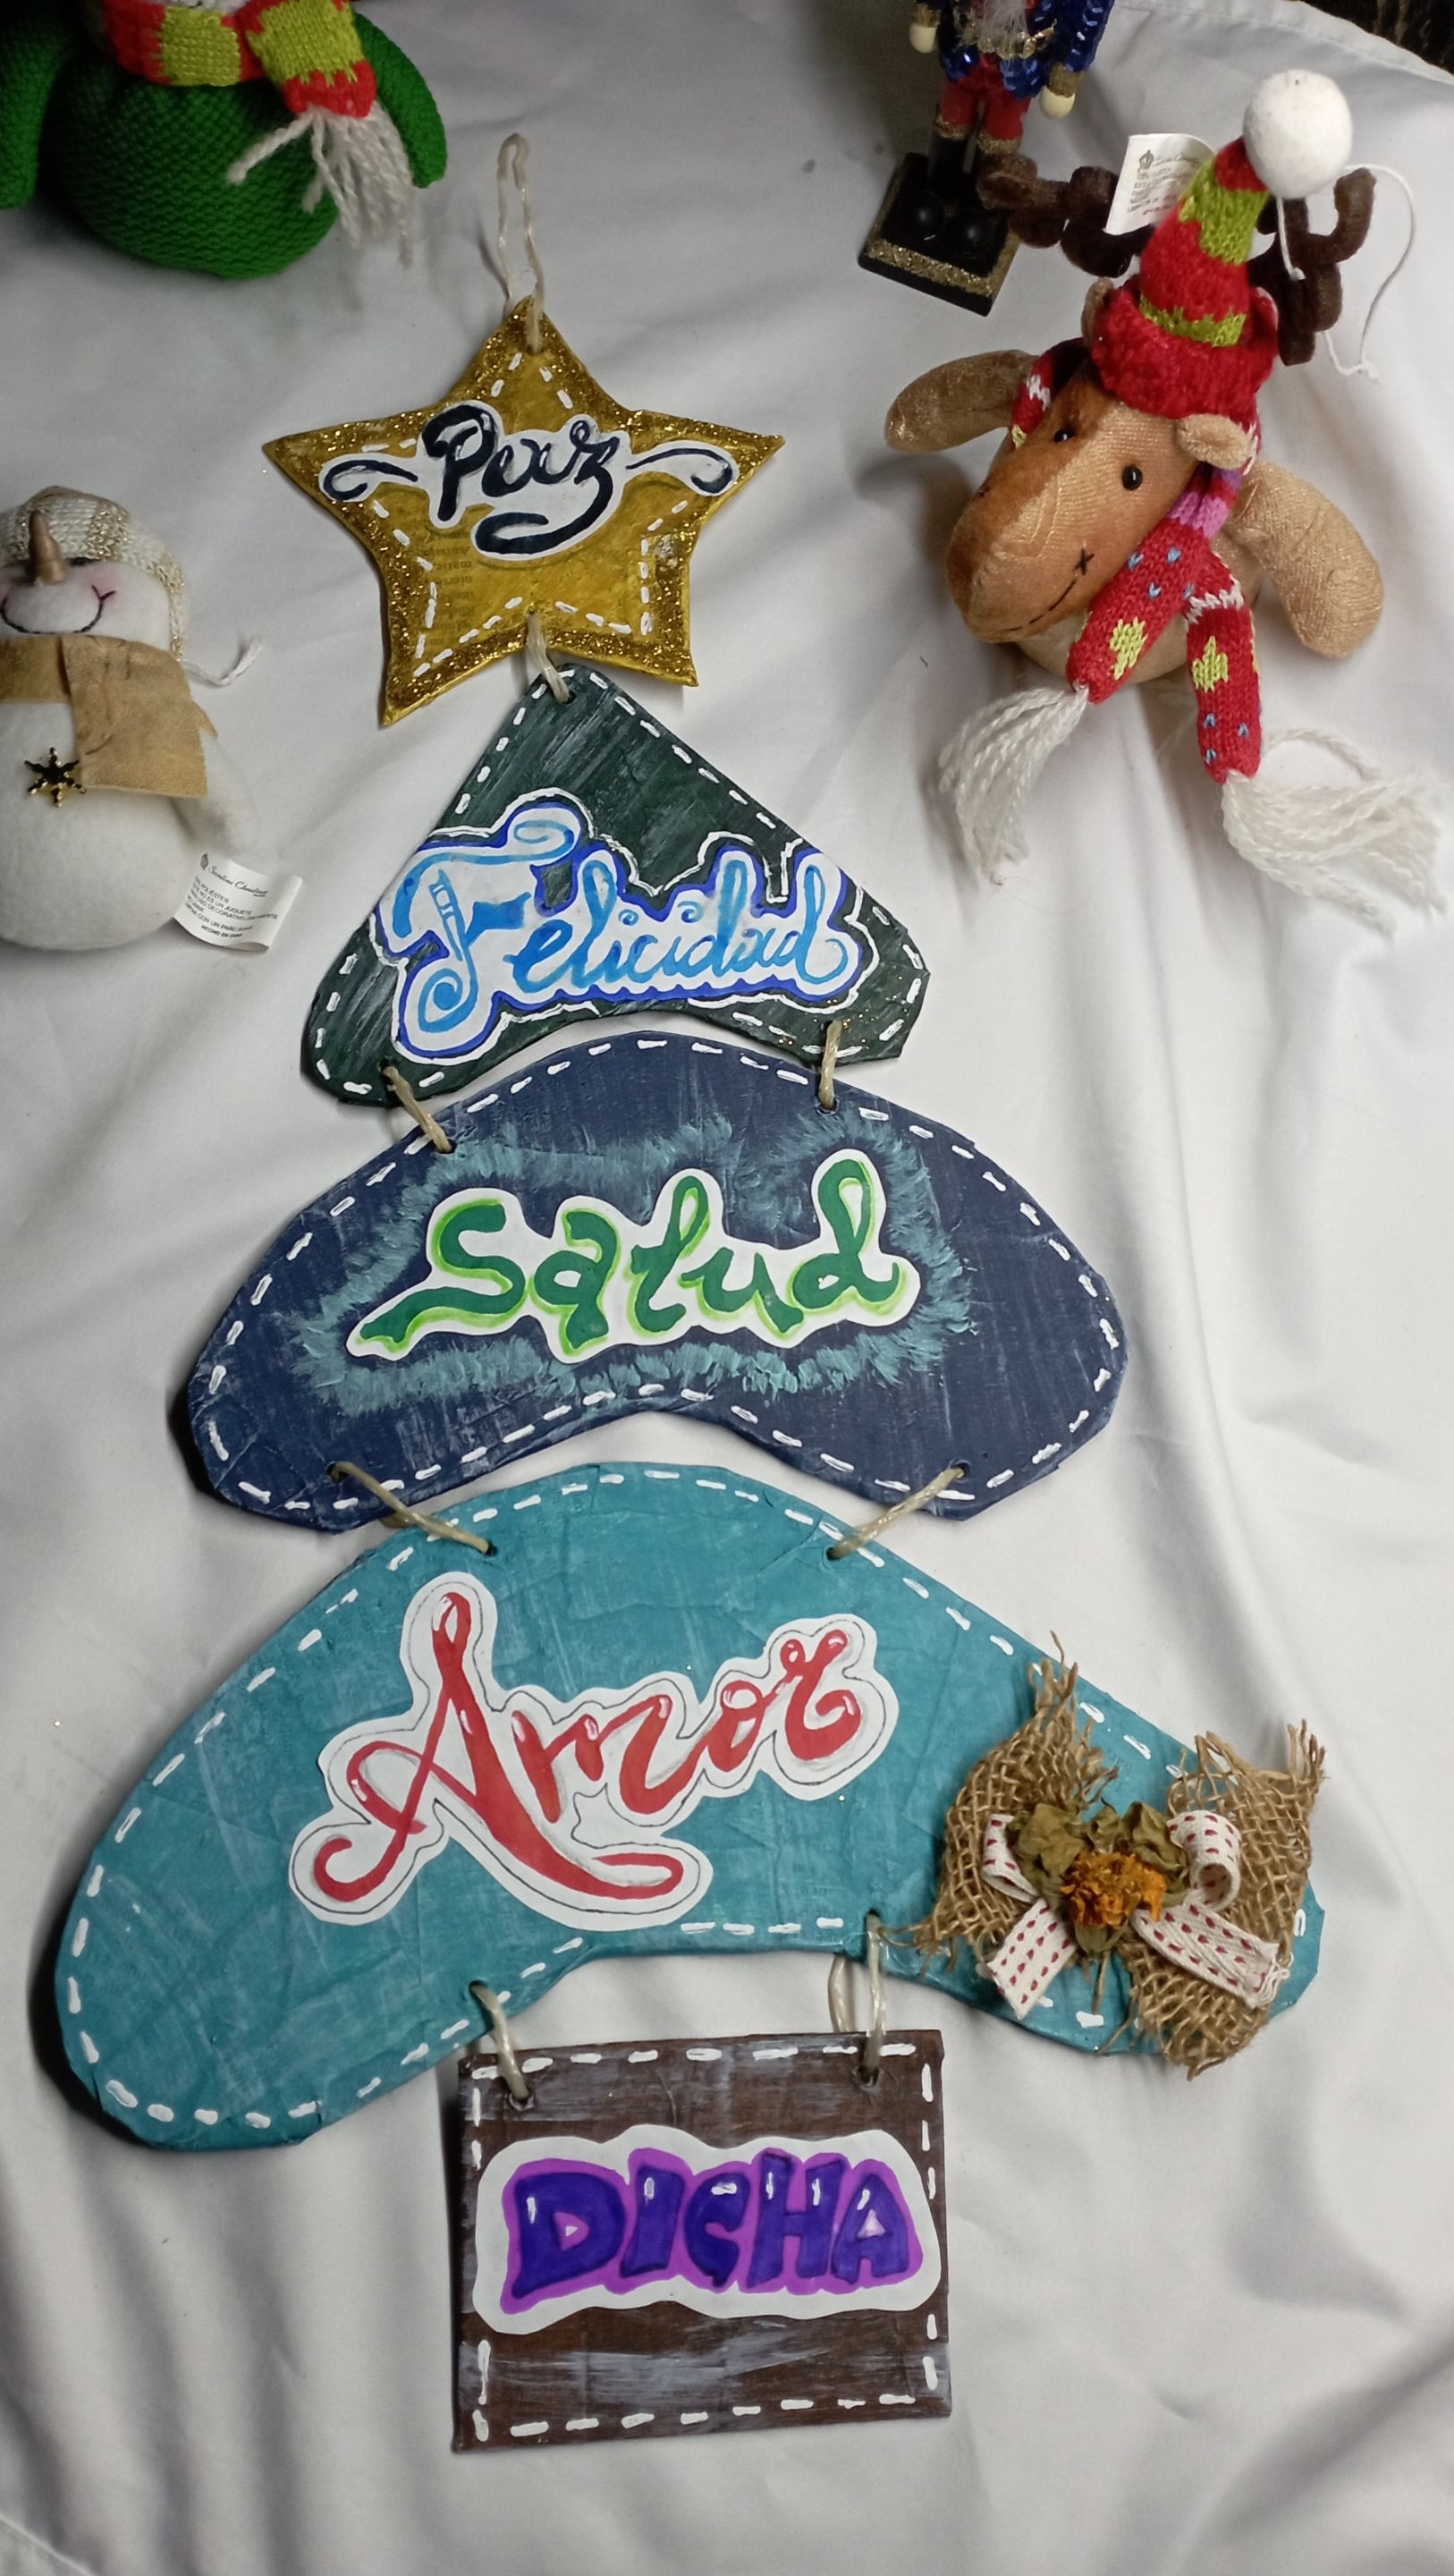
-Decoramos cada pieza con un borde, podemos agregar un lazo con la tela de yute y la cinta. Podemos colocar escarcha dorada a la estrella.
-Y terminamos uniendo las piezas con un trozo de cuerda.
-We decorate each piece with a border, we can add a bow with the jute fabric and ribbon. We can put gold frosting on the star.
-And we finish by joining the pieces with a piece of string.
Y así queda nuestro árbol de deseos** listo para
nuestro ambiente navideño. Este trabajo es muy fácil de realizar, económico, podemos usar los materiales que tengamos a la mano y vamos a reciclar el cartón y el papel. Les invito a ver el video para tener más claro cada paso.
And that's our wishing tree ready for our Christmas
our christmas environment. This work is very easy to do, economical, we can use the materials we have at hand and we will recycle cardboard and paper. I invite you to watch the video to have a better understanding of each step.
Espero que les guste esta idea navideña y que se anime a realizarla. Gracias por visitar mi publicación. Nos vemos en una próxima oportunidad.
I hope you like this Christmas idea and that you are encouraged to make it. Thanks for visiting my publication. See you next time.

Taller Bricolaje DC
Colección navideña 2022
Contenido original del autor.
Recursos: App: Canva / Giphy / Inshot
📷 Redmi 10 Smartphone
Traducido con Deepl.com
✿ Todos los Derechos Reservados || © @chacald.dcymt // 2020-2022 ✿
💌 Discord: chacald.dcymt#3549
_
Bricolaje DC Workshop
Christmas Collection 2022
Original content by the author.
Resources: App: Canva / Giphy / Inshot
📷 Redmi 10 Smartphone
Translation done with Deepl.com
✿ All Rights Reserved || © @chacald.dcymt // 2020-2022 ✿
💌 Discord: chacald.dcymt#3549
Show more
Tags :
Woo!
This creator can upvote comments using 3speak's stake today because they are a top performing creator!
Leave a quality comment relating to their content and you could receive an upvote
worth at least a dollar.
Their limit for today is $0!
Their limit for today is $0!

17 views
a year ago
$

32 views
4 weeks ago
$

51 views
a year ago
$

43 views
10 months ago
$
23 views
a year ago
$
More Videos

17 views
a year ago
$

9 views
3 years ago
$

9 views
2 years ago
$

4 views
3 years ago
$

7 views
a year ago
$

3 views
3 years ago
$

5 views
2 years ago
$

2 views
3 years ago
$

20 views
a year ago
$

14 views
3 years ago
$

12 views
6 months ago
$

21 views
8 months ago
$

18 views
a year ago
$

26 views
a year ago
$

3 views
a year ago
$

4 views
a year ago
$

6 views
3 months ago
$

27 views
4 months ago
$

11 views
6 months ago
$

27 views
3 years ago
$

8 views
3 years ago
$

10 views
a year ago
$
Comments:
Reply:
To comment on this video please connect a HIVE account to your profile: Connect HIVE Account