Moon Lamp made of with recyclable materials. [Eng-Esp]
6
About :
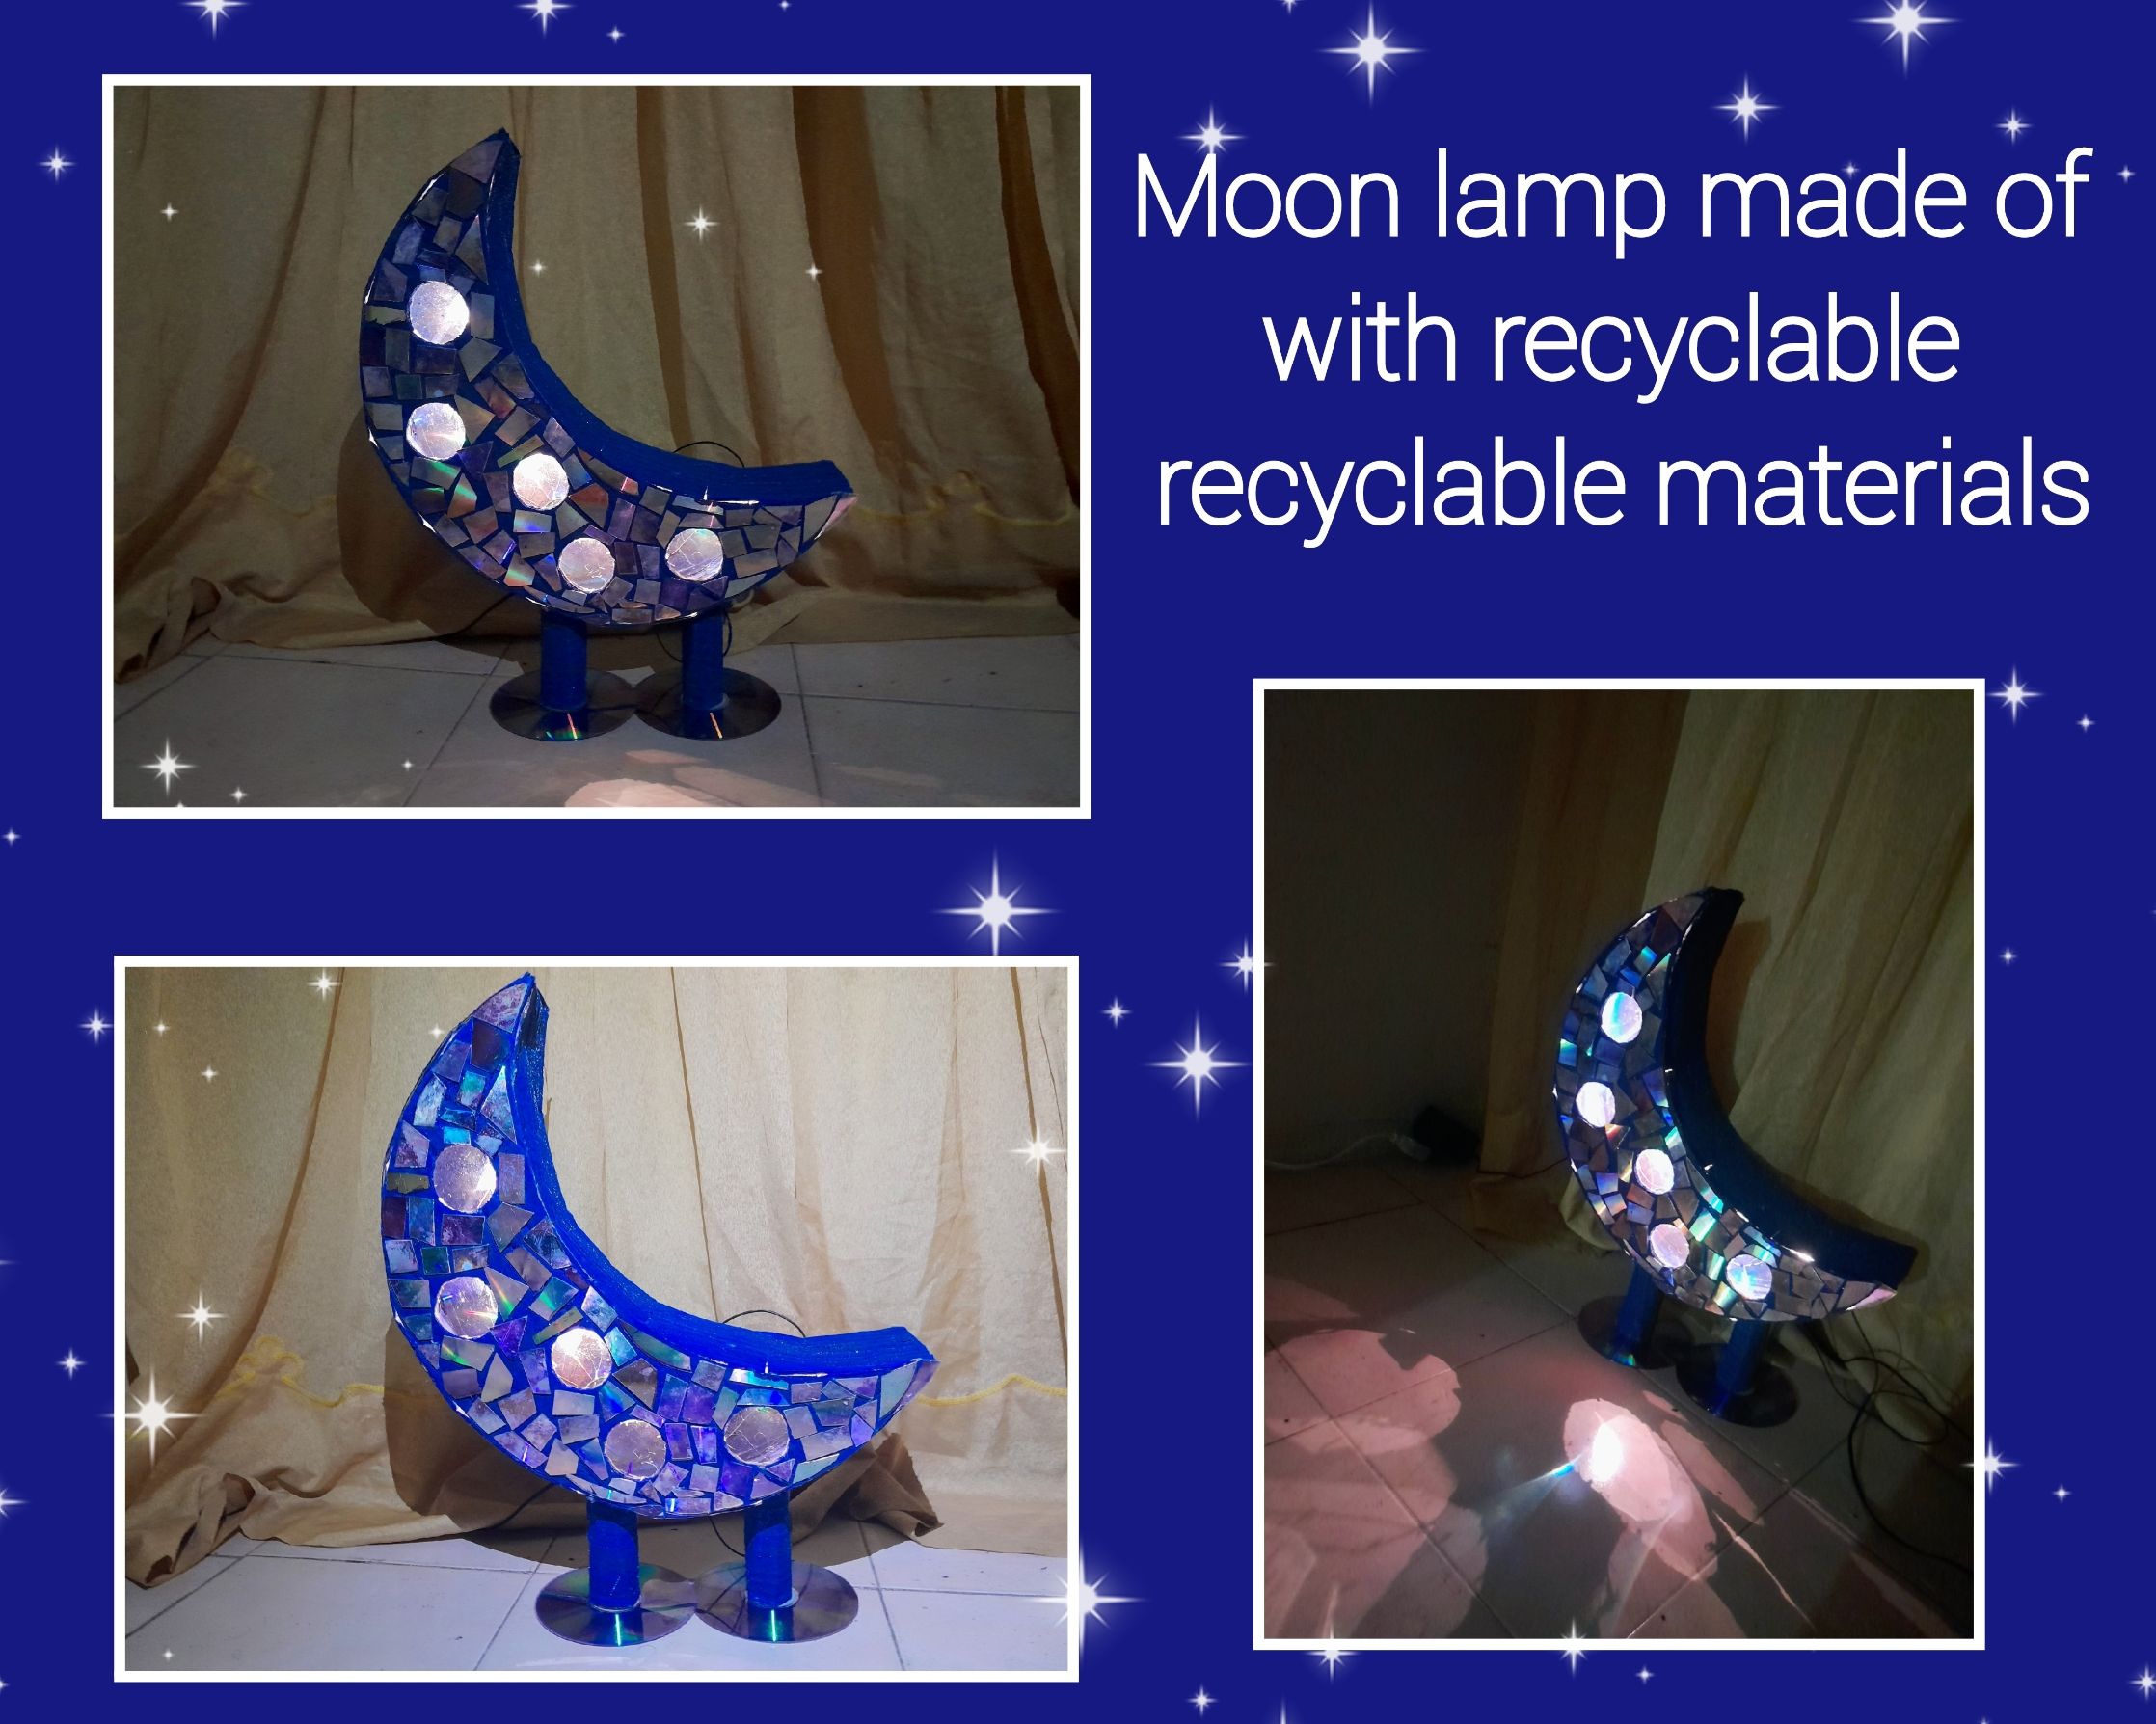
Hello friends of DIYHub💖 a greeting to all who make life in this beautiful creative space, today I want to share with you my participation in the monthly contest, with the theme Moon, so today I bring you a tutorial and a small video to develop A moon lamp with recyclable materials🌙🌙🌟. I must admit that this is the second time I make a video for the platform, I hope you like it, it was a challenge to summarize everything in a 90 seconds video, but I did it, here I also leave the step by step to make this nice lamp.
Hola amigos de DIYHub💖 un saludo para todos los que hacen vida en este lindo espacio creativo, hoy quiero compartir con ustedes mi participación en el concurso mensual, con la temática Luna, por eso hoy les traigo un tutorial y un pequeño video para elaborar una Lámpara de luna con materiales reciclables 🌙🌙🌟. Debo admitir que es la segunda vez que hago un video para la plataforma, espero sea de su agrado, fue un reto resumir todo en un video de 90 segundos, pero lo logré, acá también dejo el paso a paso para elaborar esta linda lámpara.
Materials| Materiales.
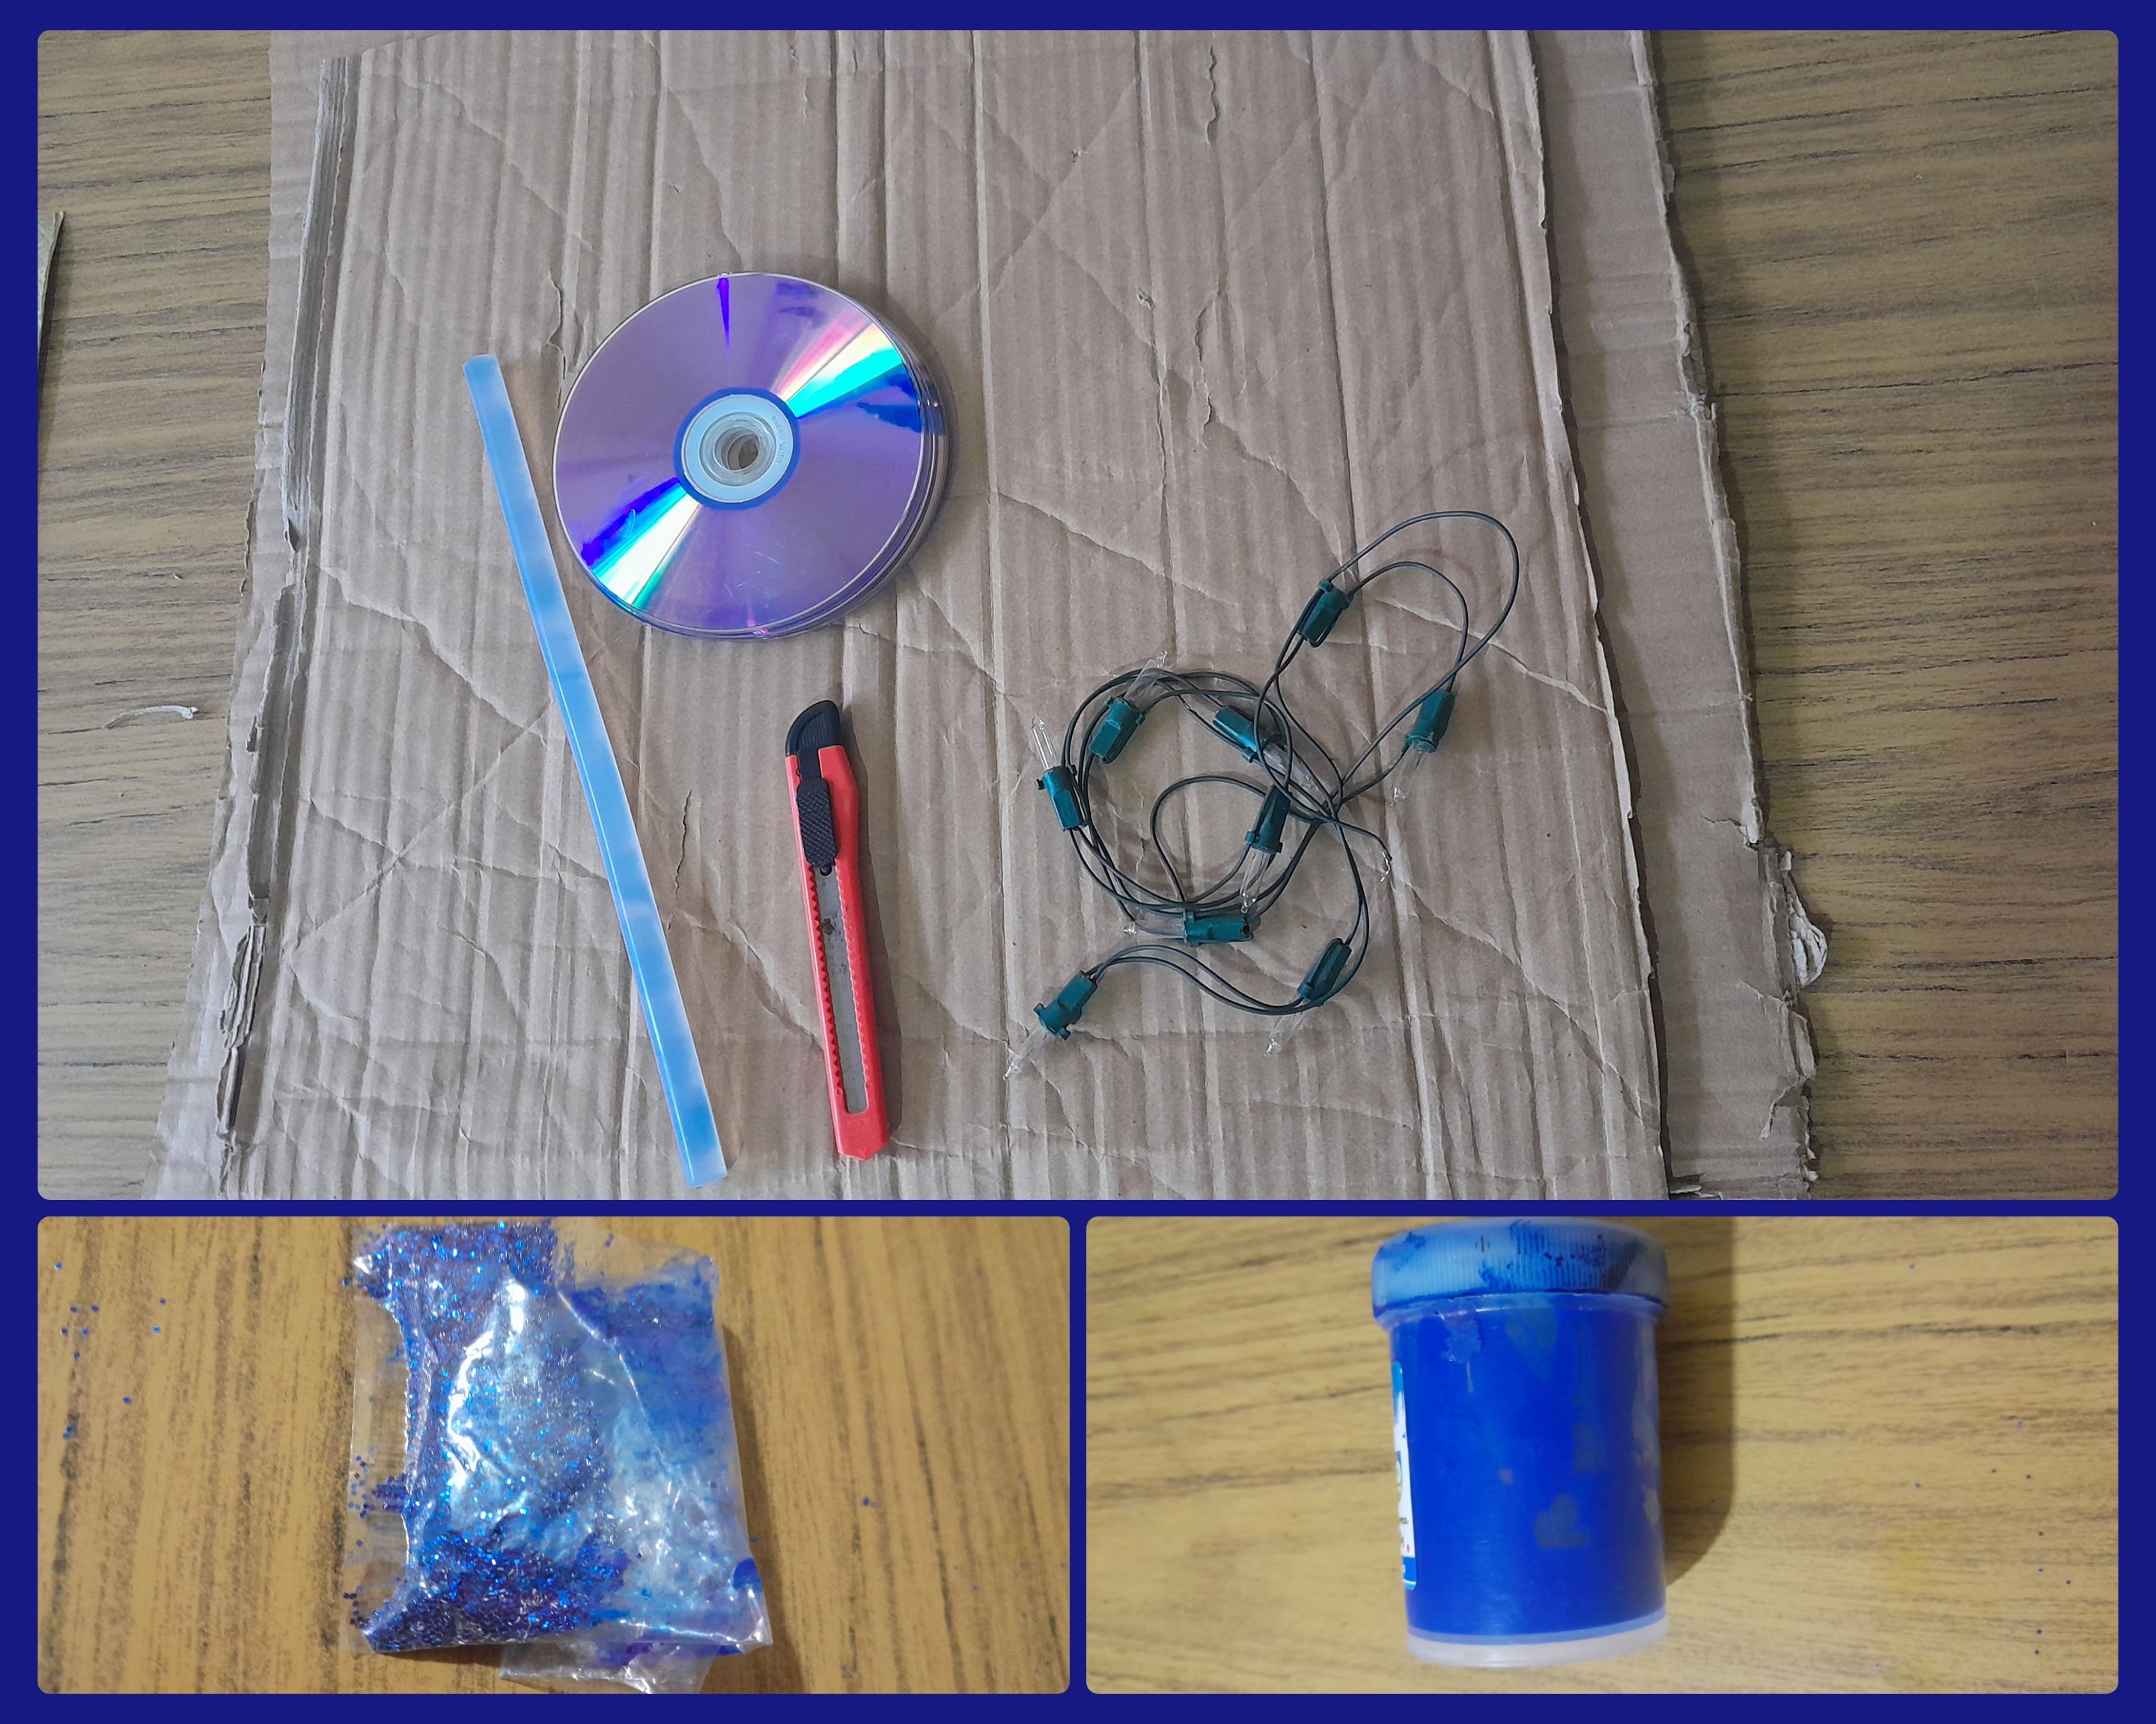
For this elaboration we will need the following materials :
60x60 cardboard sheet.
Ten recycled CDs.
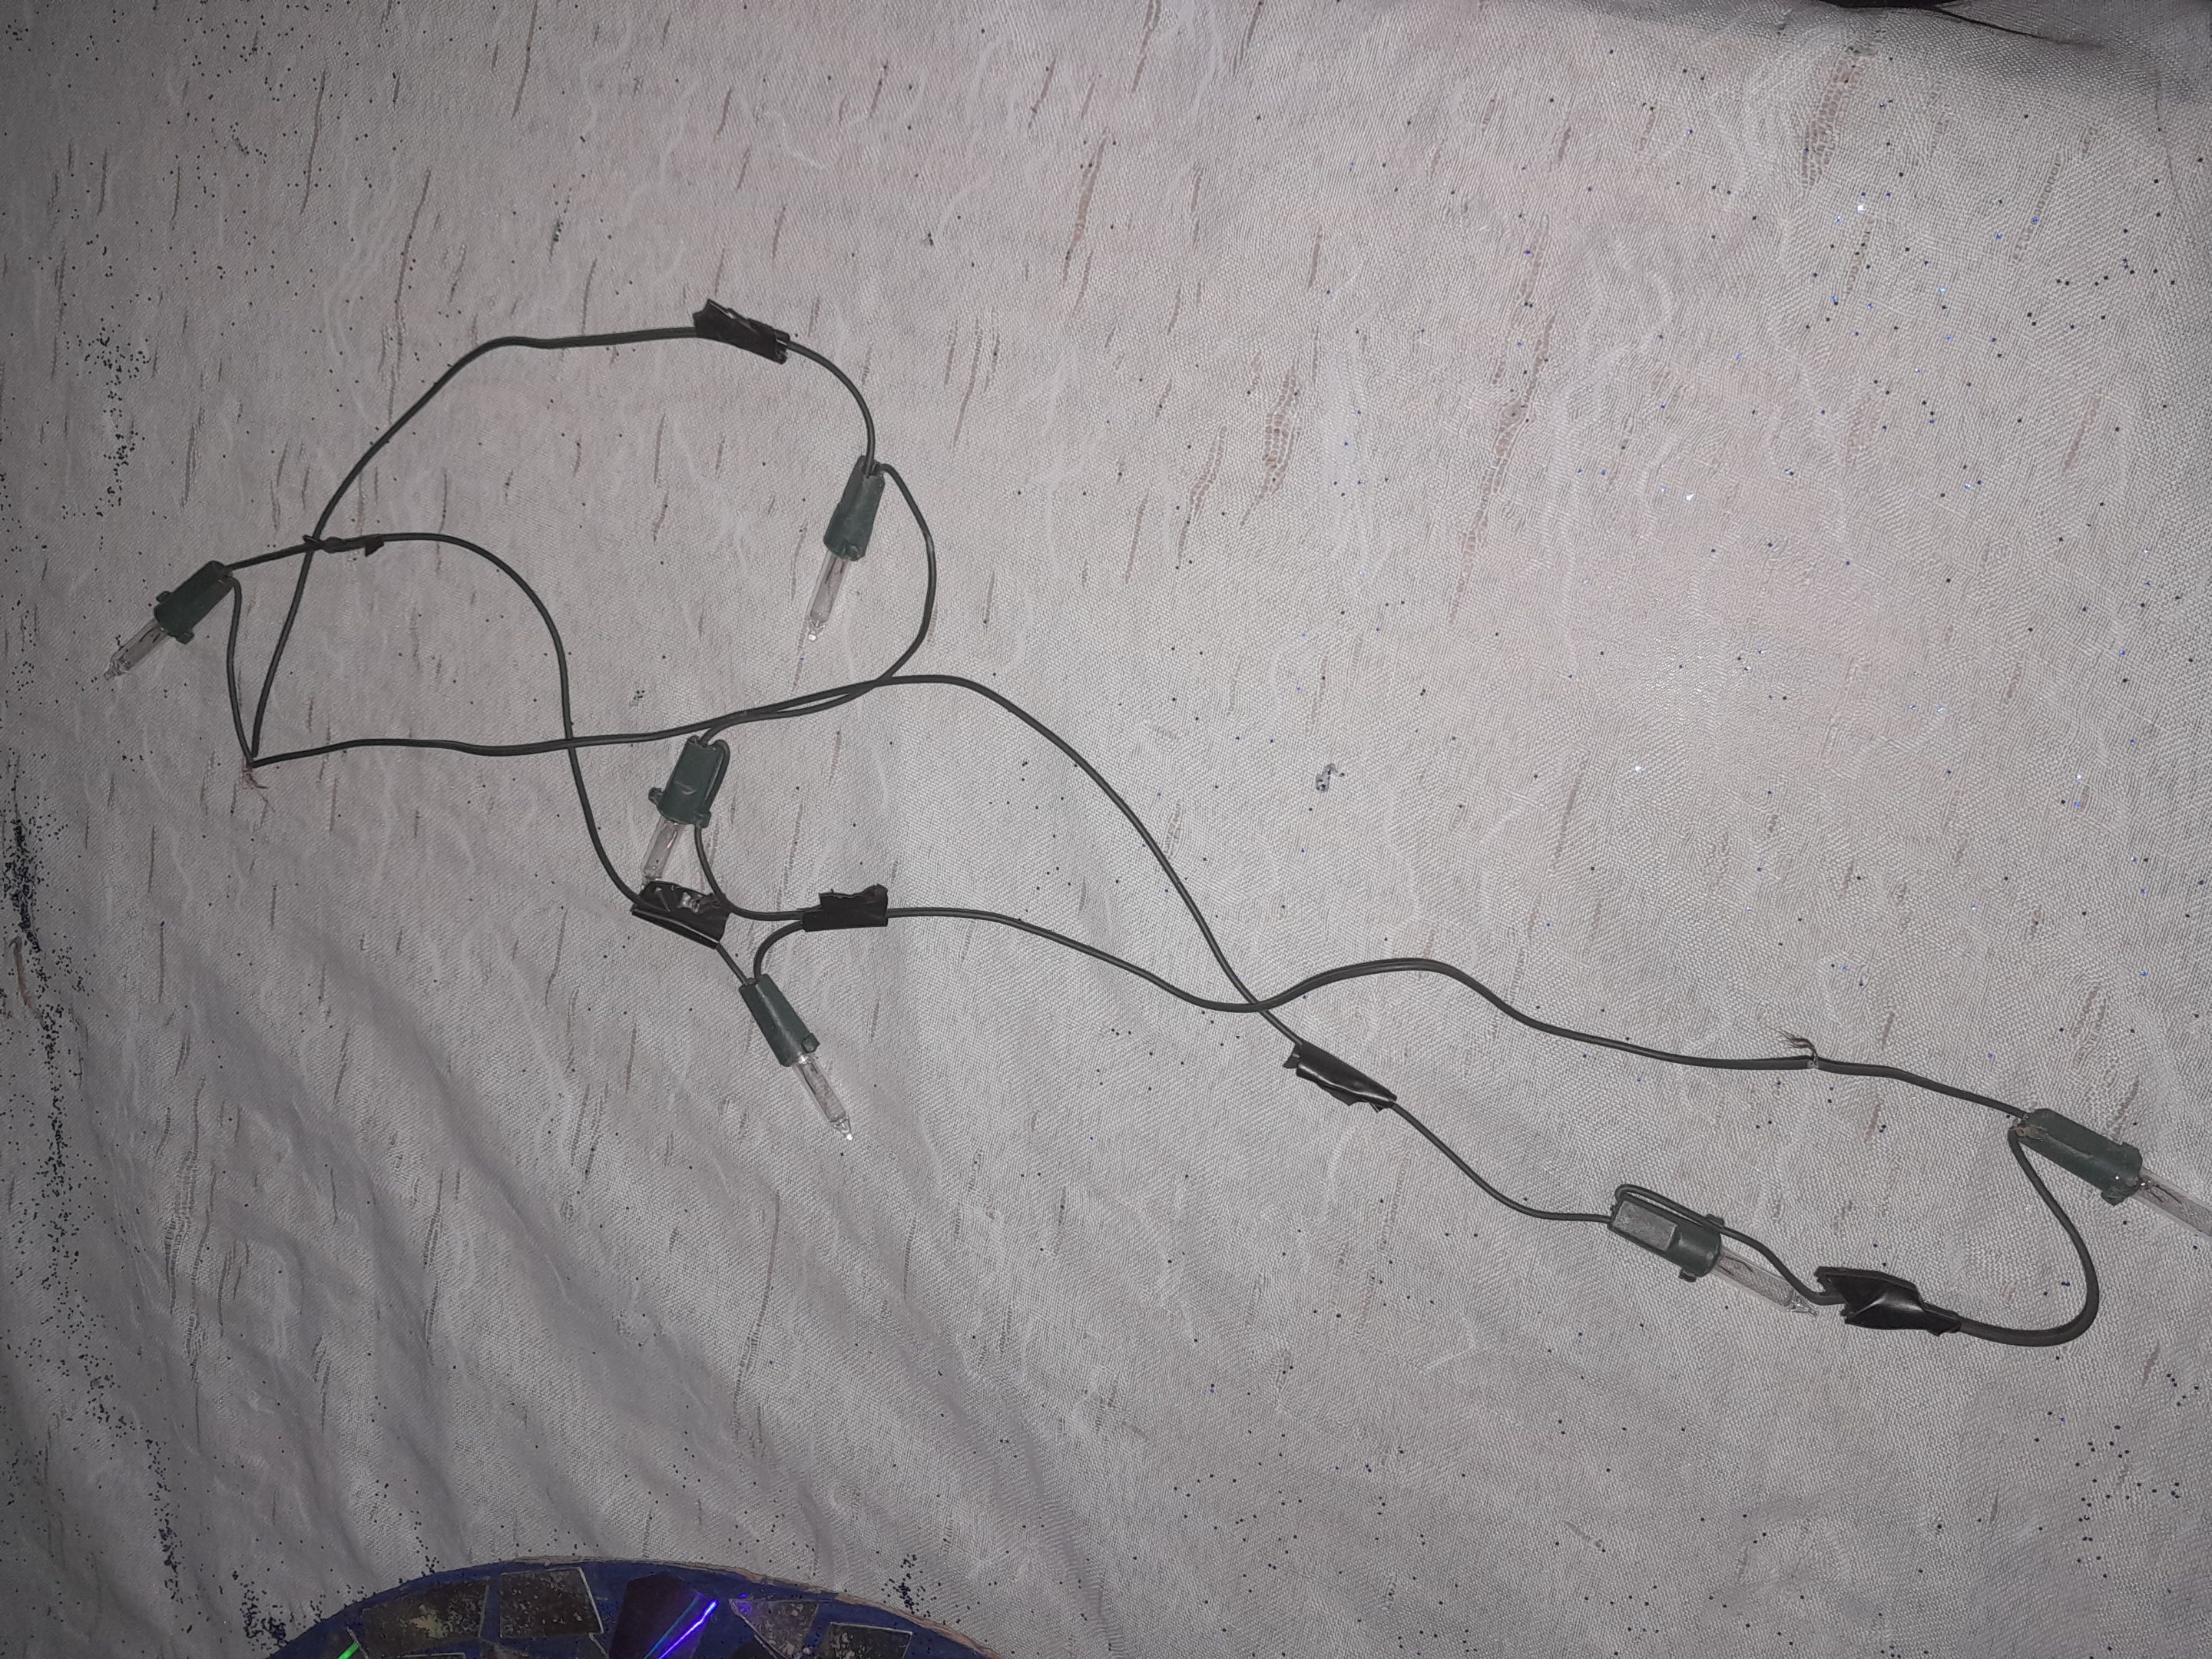
Lights.
Navy blue cold paint.
Silicon bar.
Navy blue frosting.
Scissors.
Cutter.
Para esta elaboración necesitaremos los siguientes materiales:
Pliego de cartón de 60x60.
Diez CDs reciclado.
Luces.
Pintura al frío azul marino.
Barra de Silicon.
Escarcha Azul marino.
Tijera.
Cúter.
Most of the materials are recycled, including the lights, which I repaired from some old Christmas lights, from there I rescued some bulbs that still worked, here I have a large collection of CDs that have already fulfilled their useful life and now I give them a new use in my manuals.
La mayoría de los materiales son reciclados, incluyendo las luces, que repare de unas viejas luces navideñas, de ahí rescate algunos bombillos que aún funcionaban, acá tengo una larga colección de CDs que ya cumplieron con su vida útil y ahora les doy un nuevo uso en mis manuales.
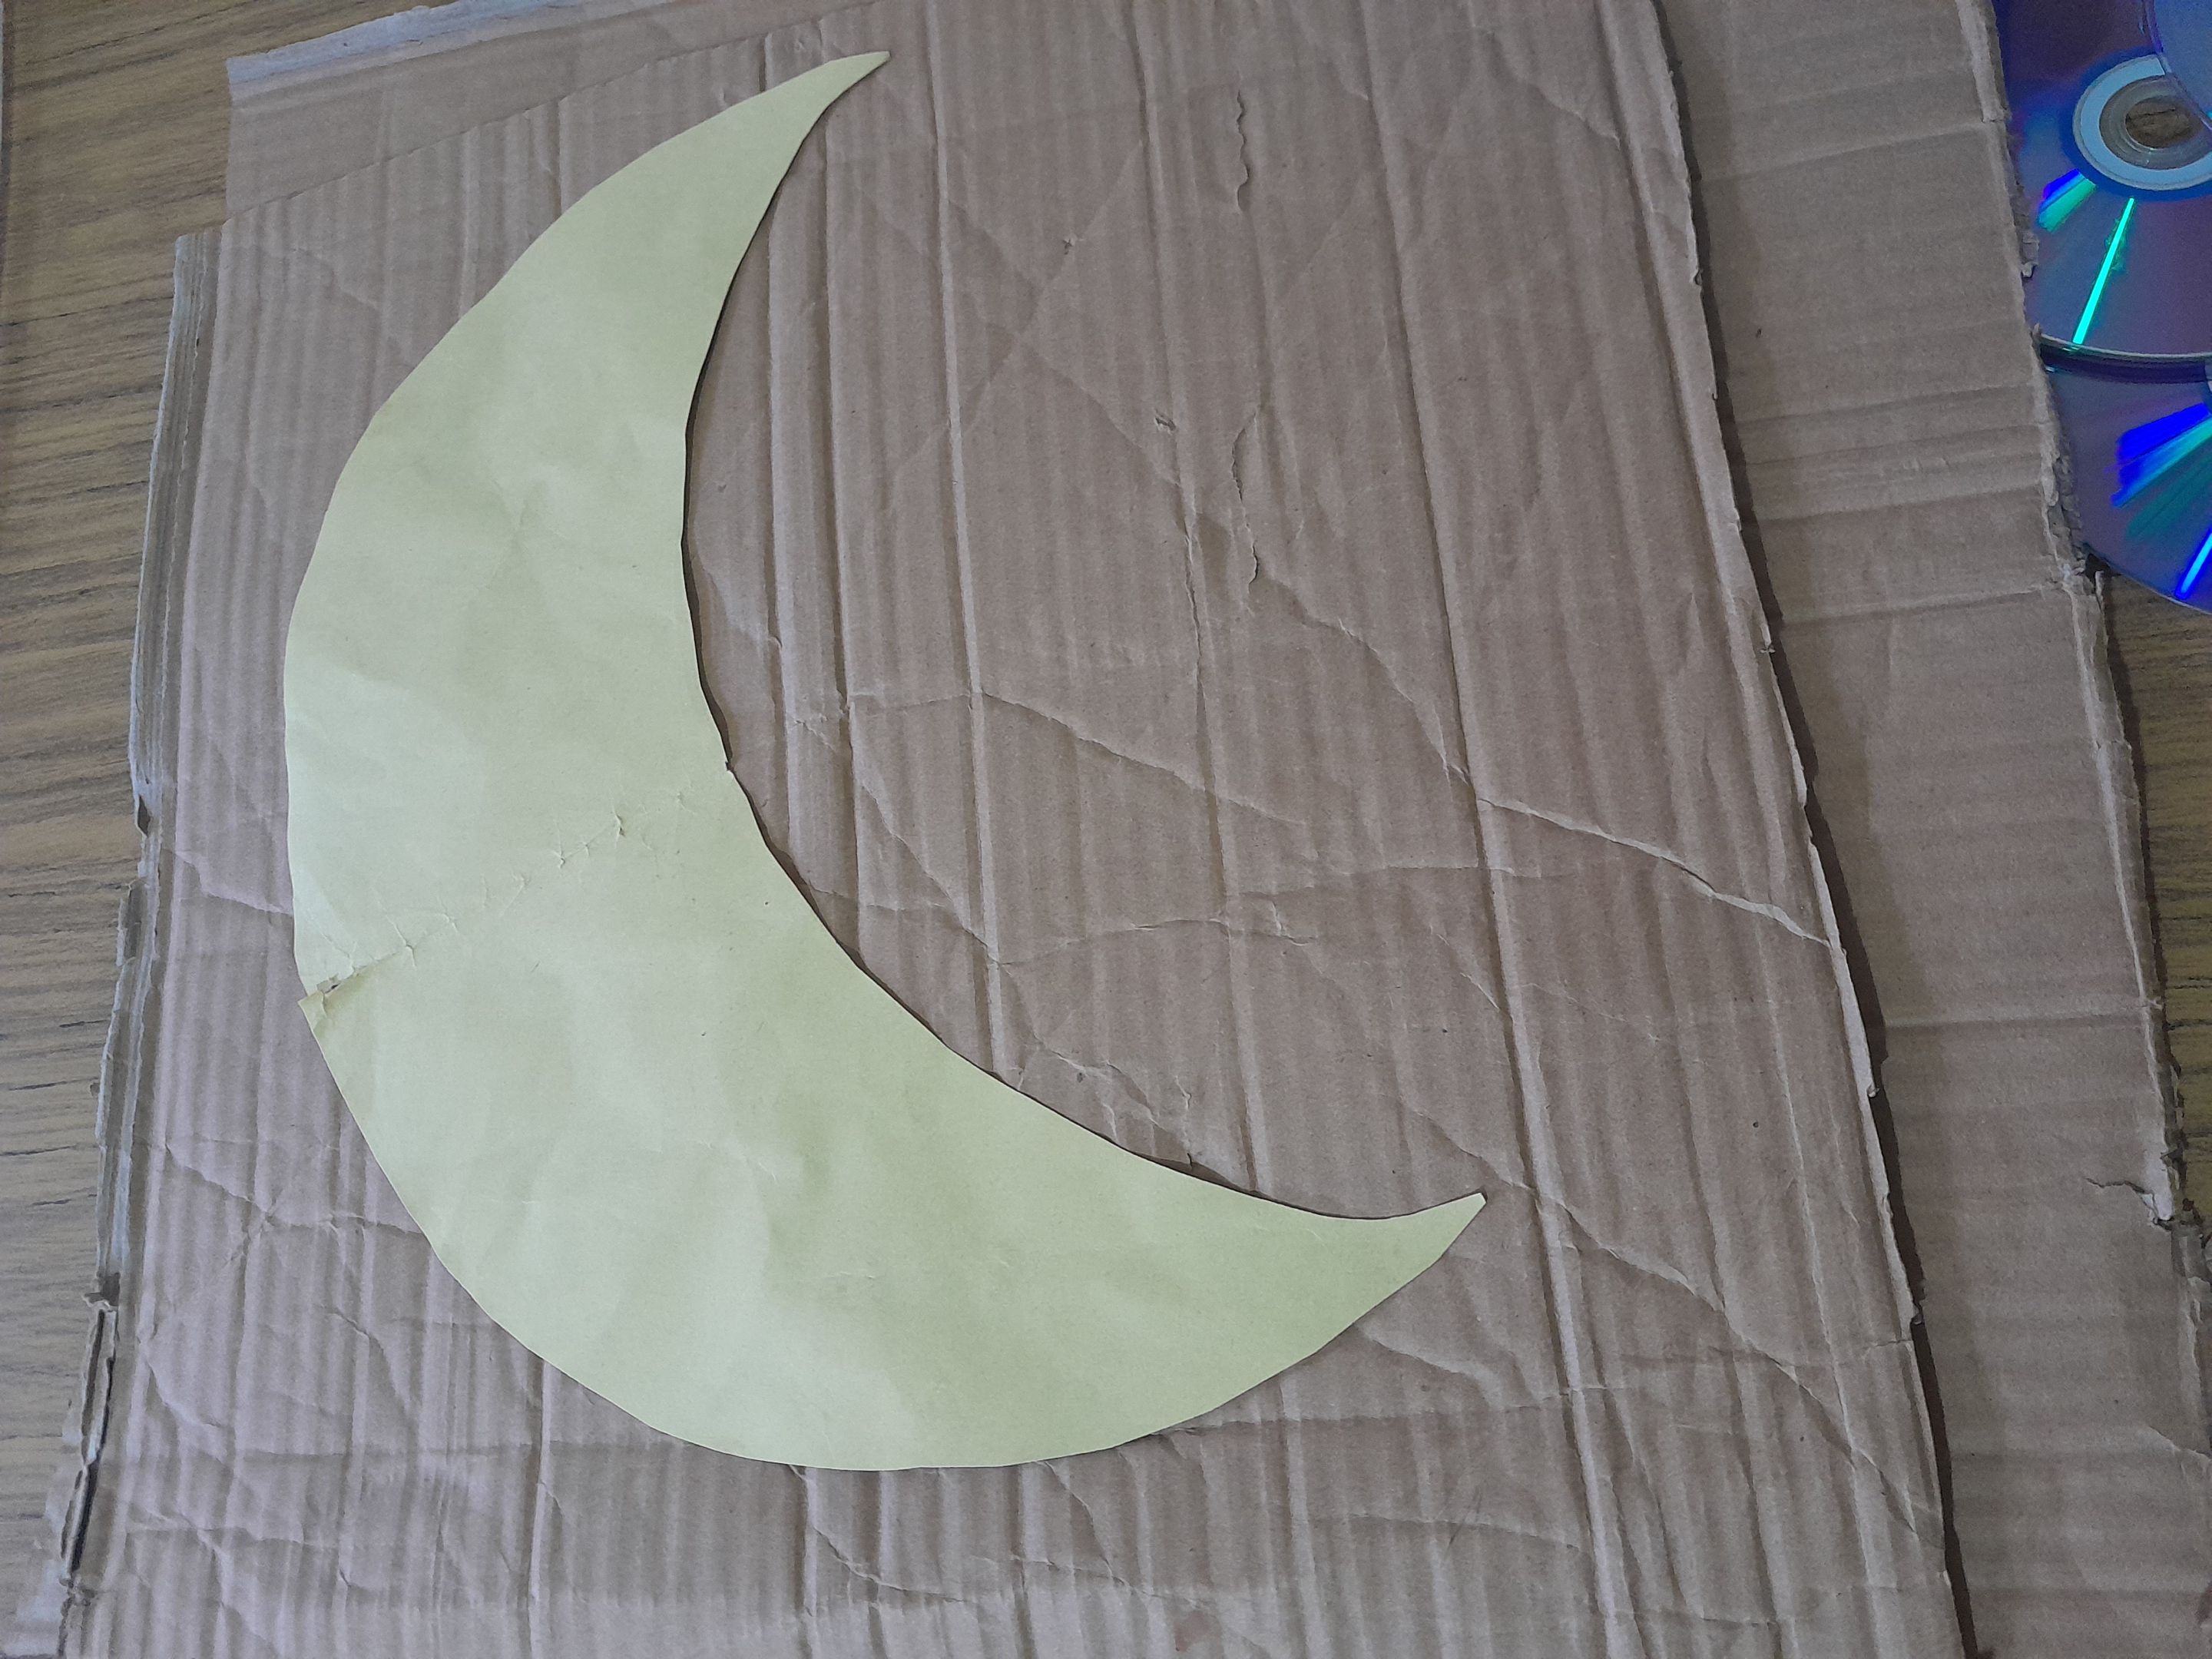
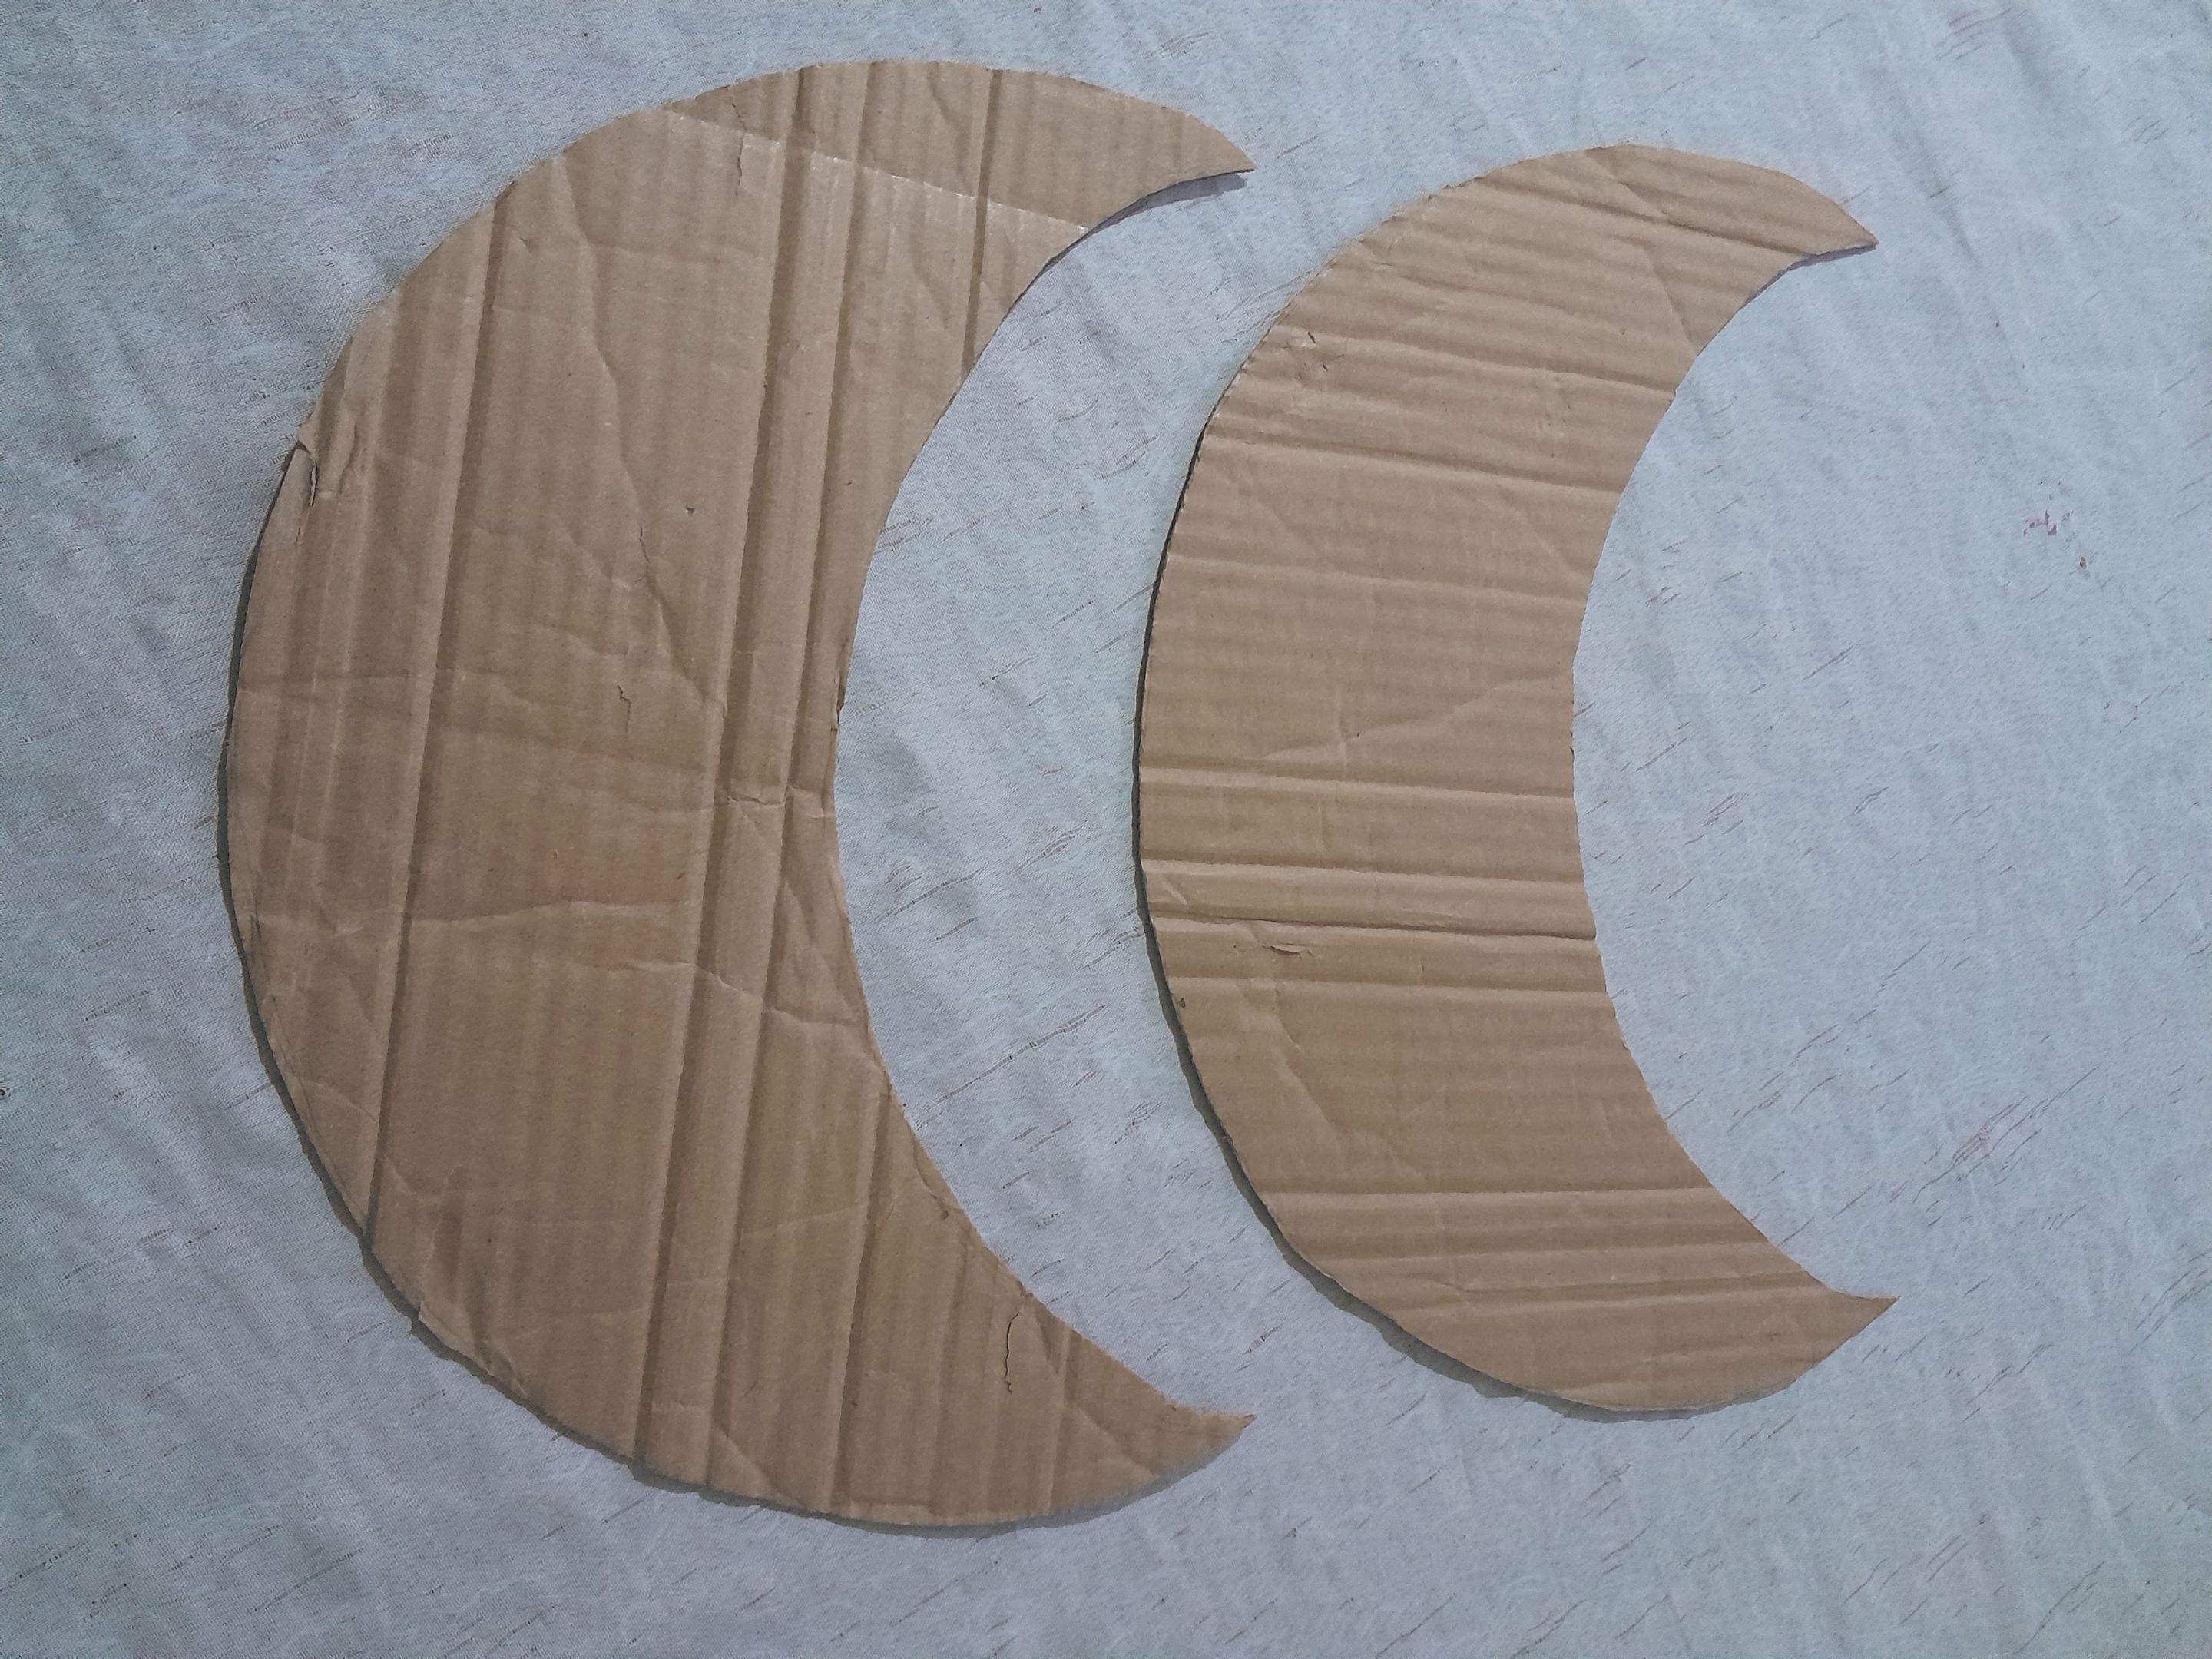
Step 1| Paso 1
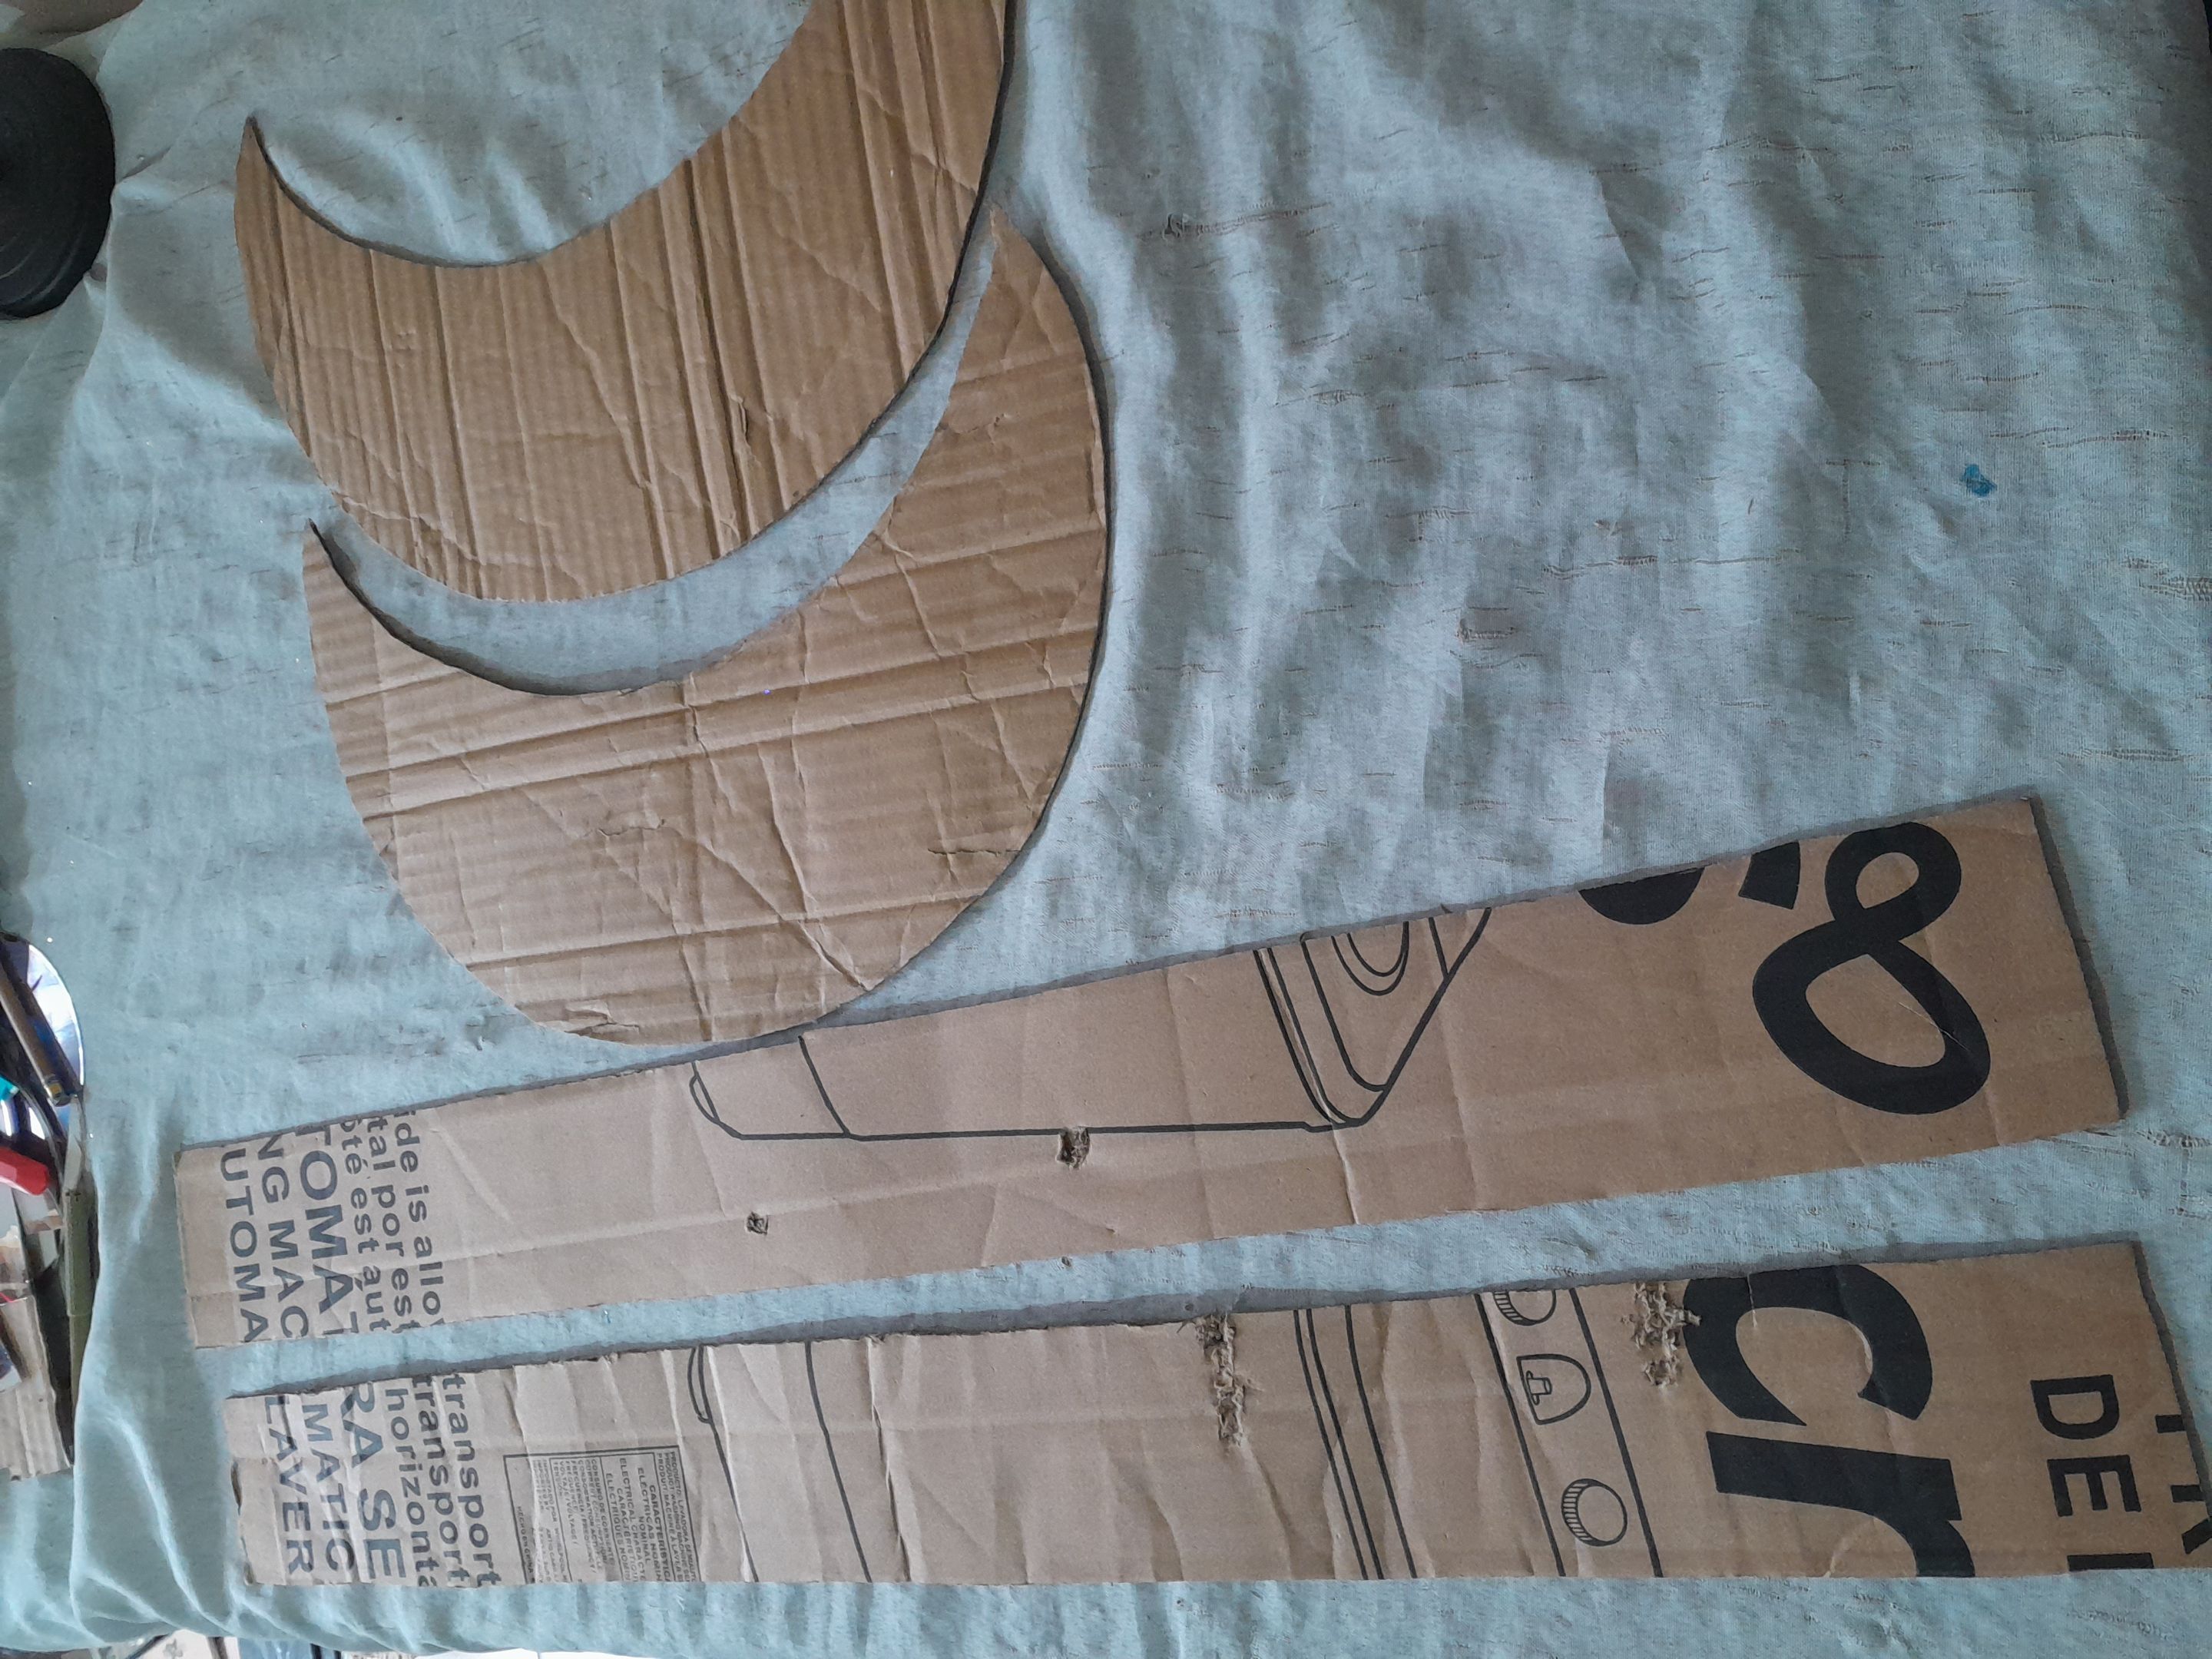
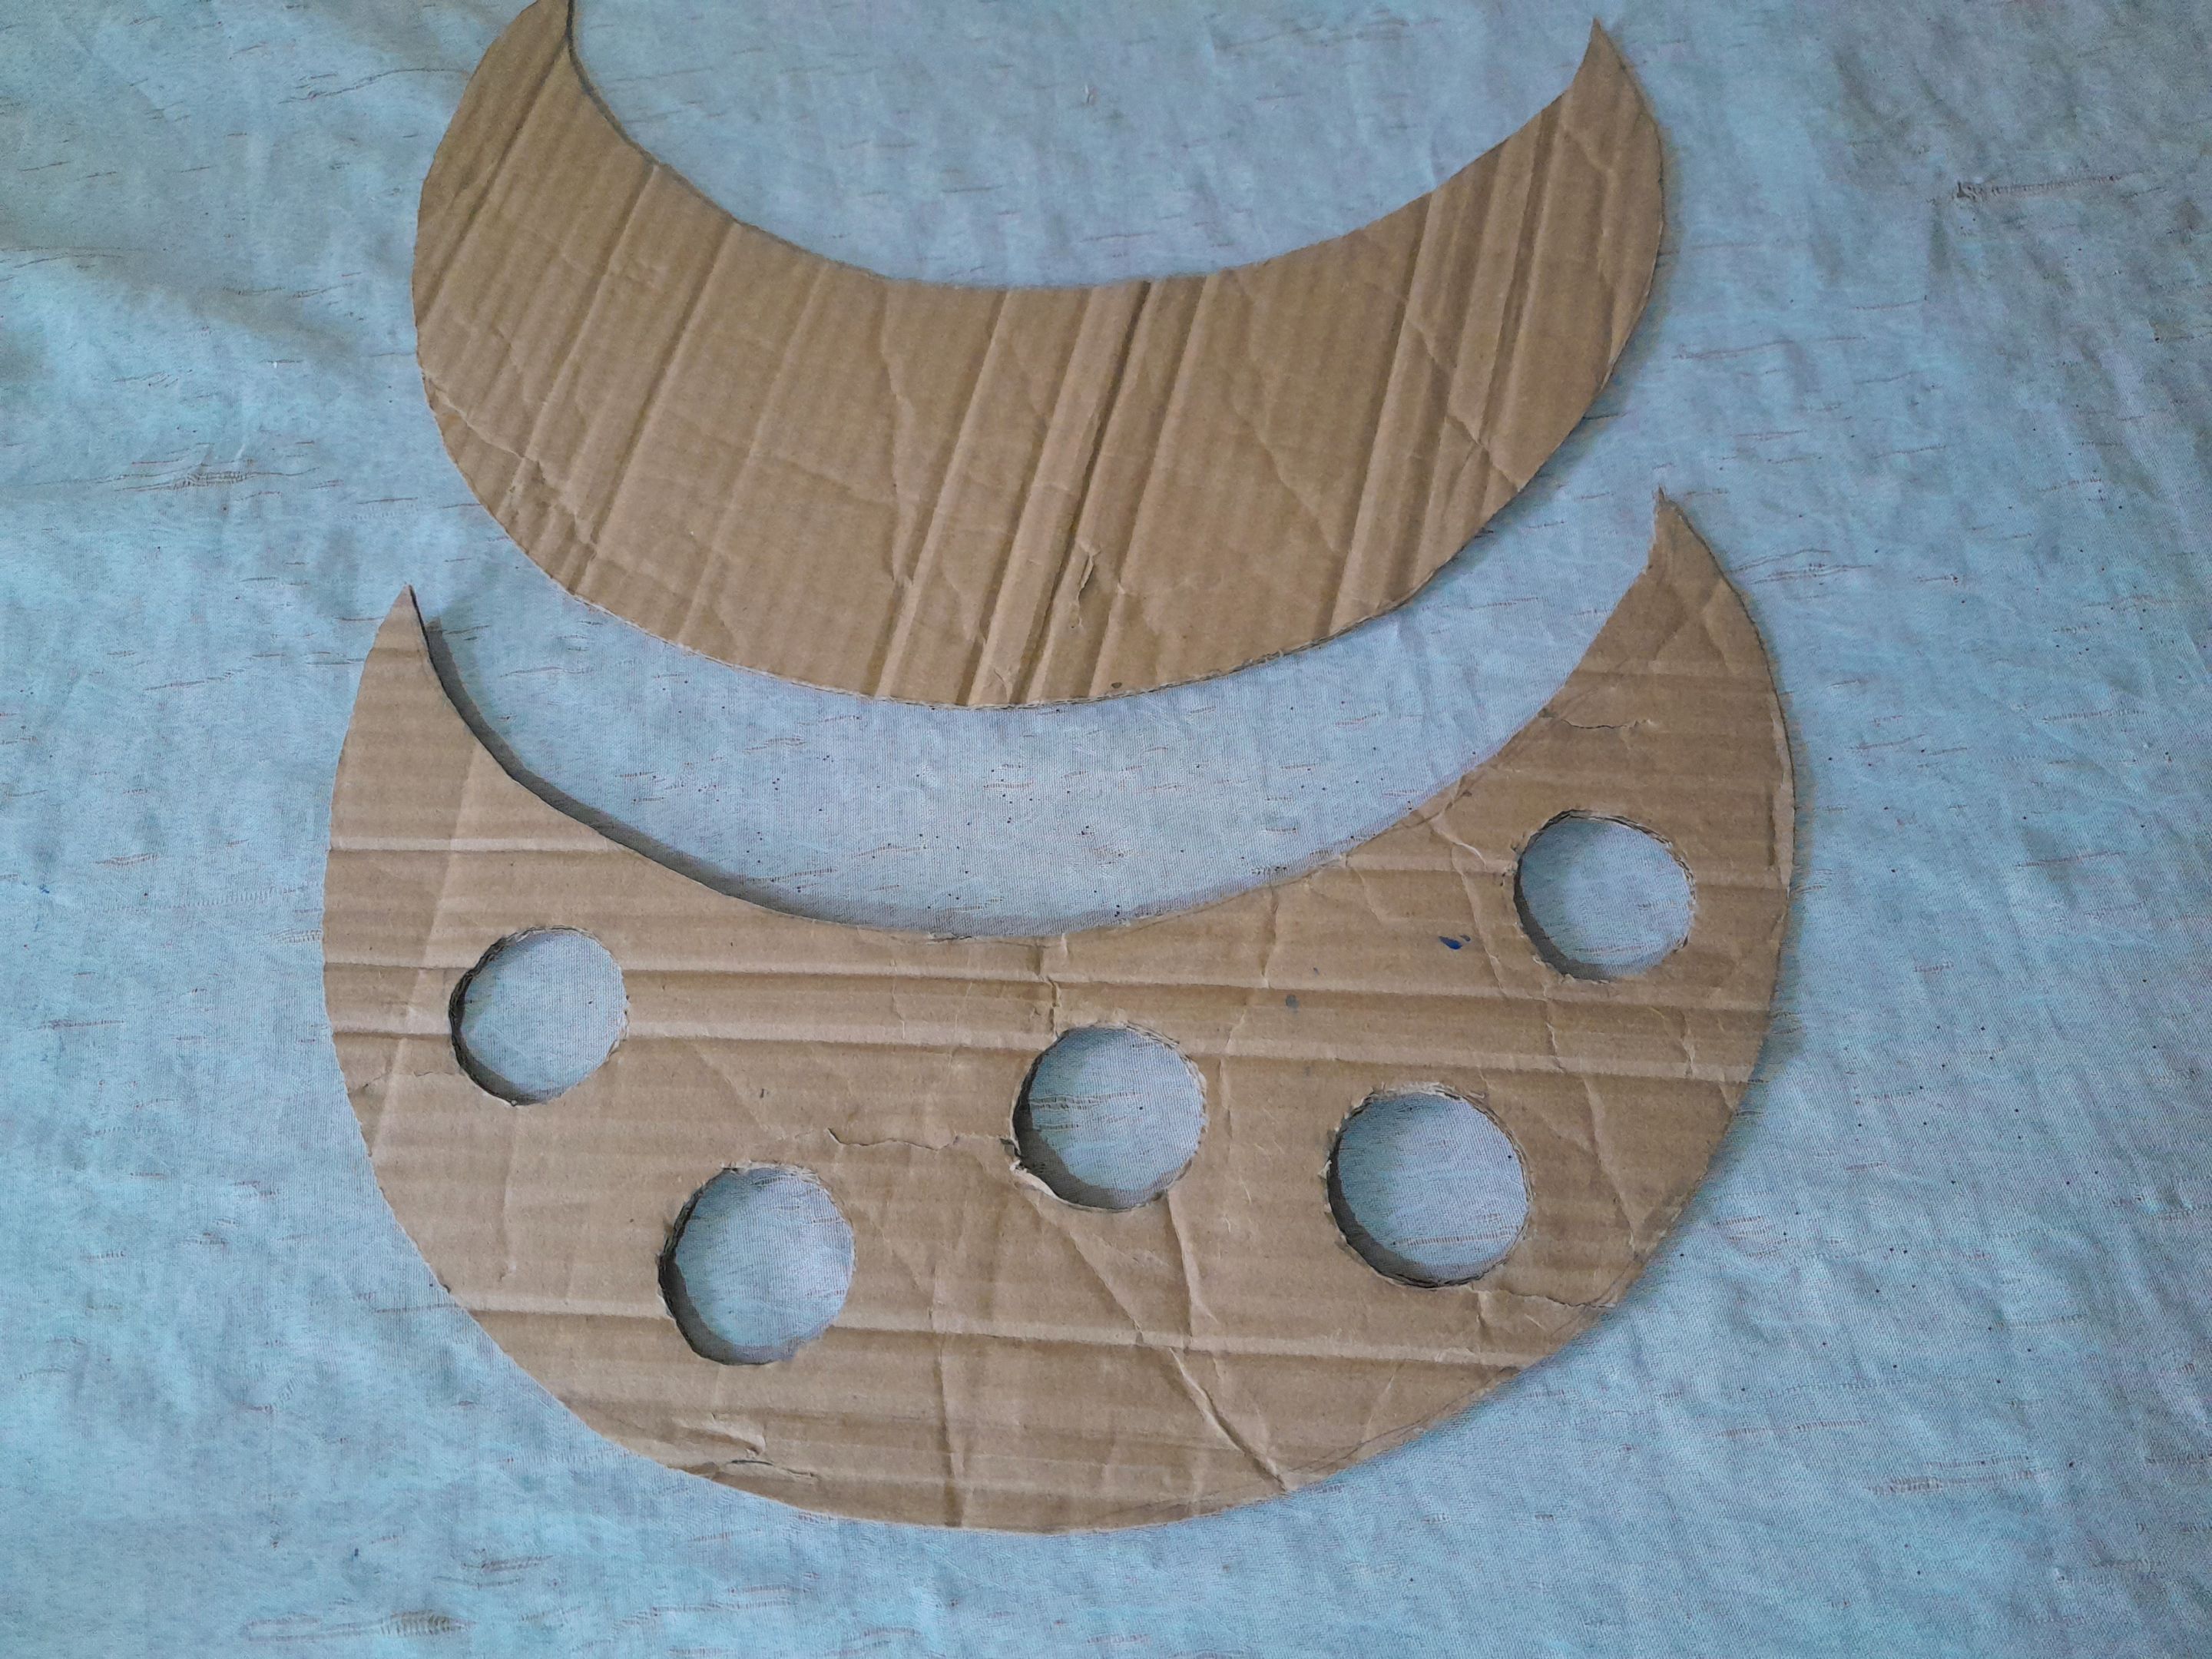
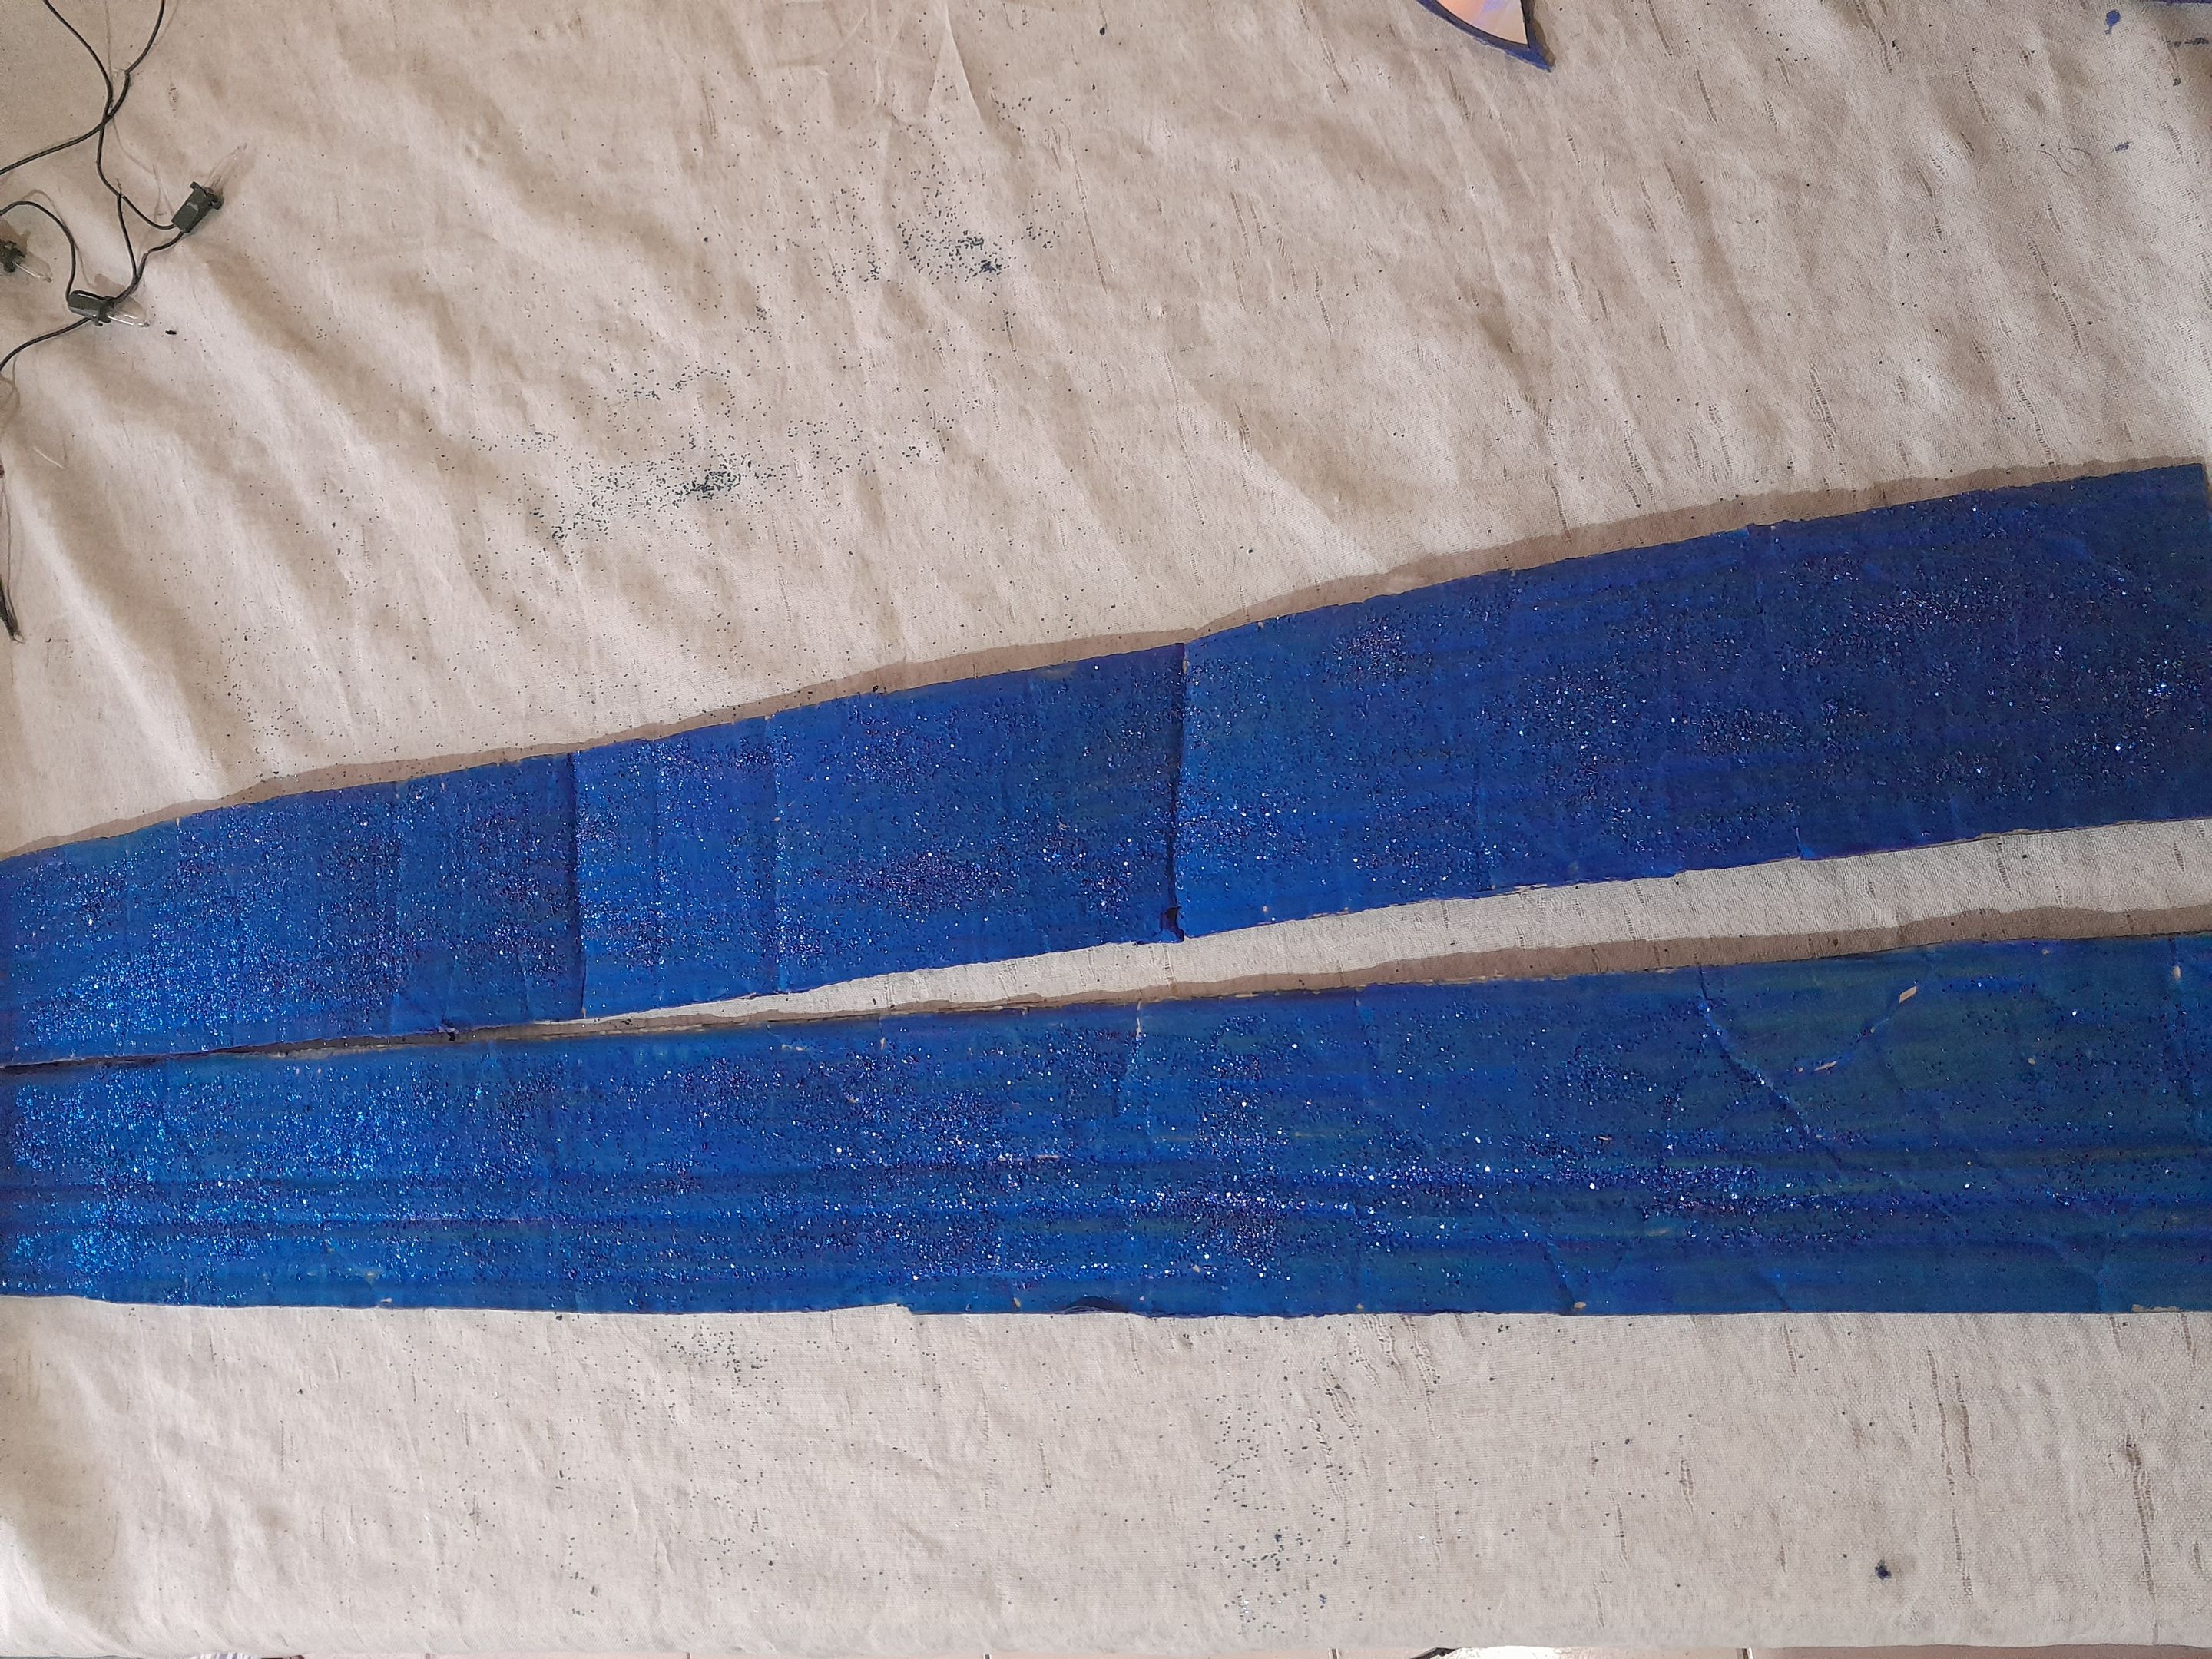
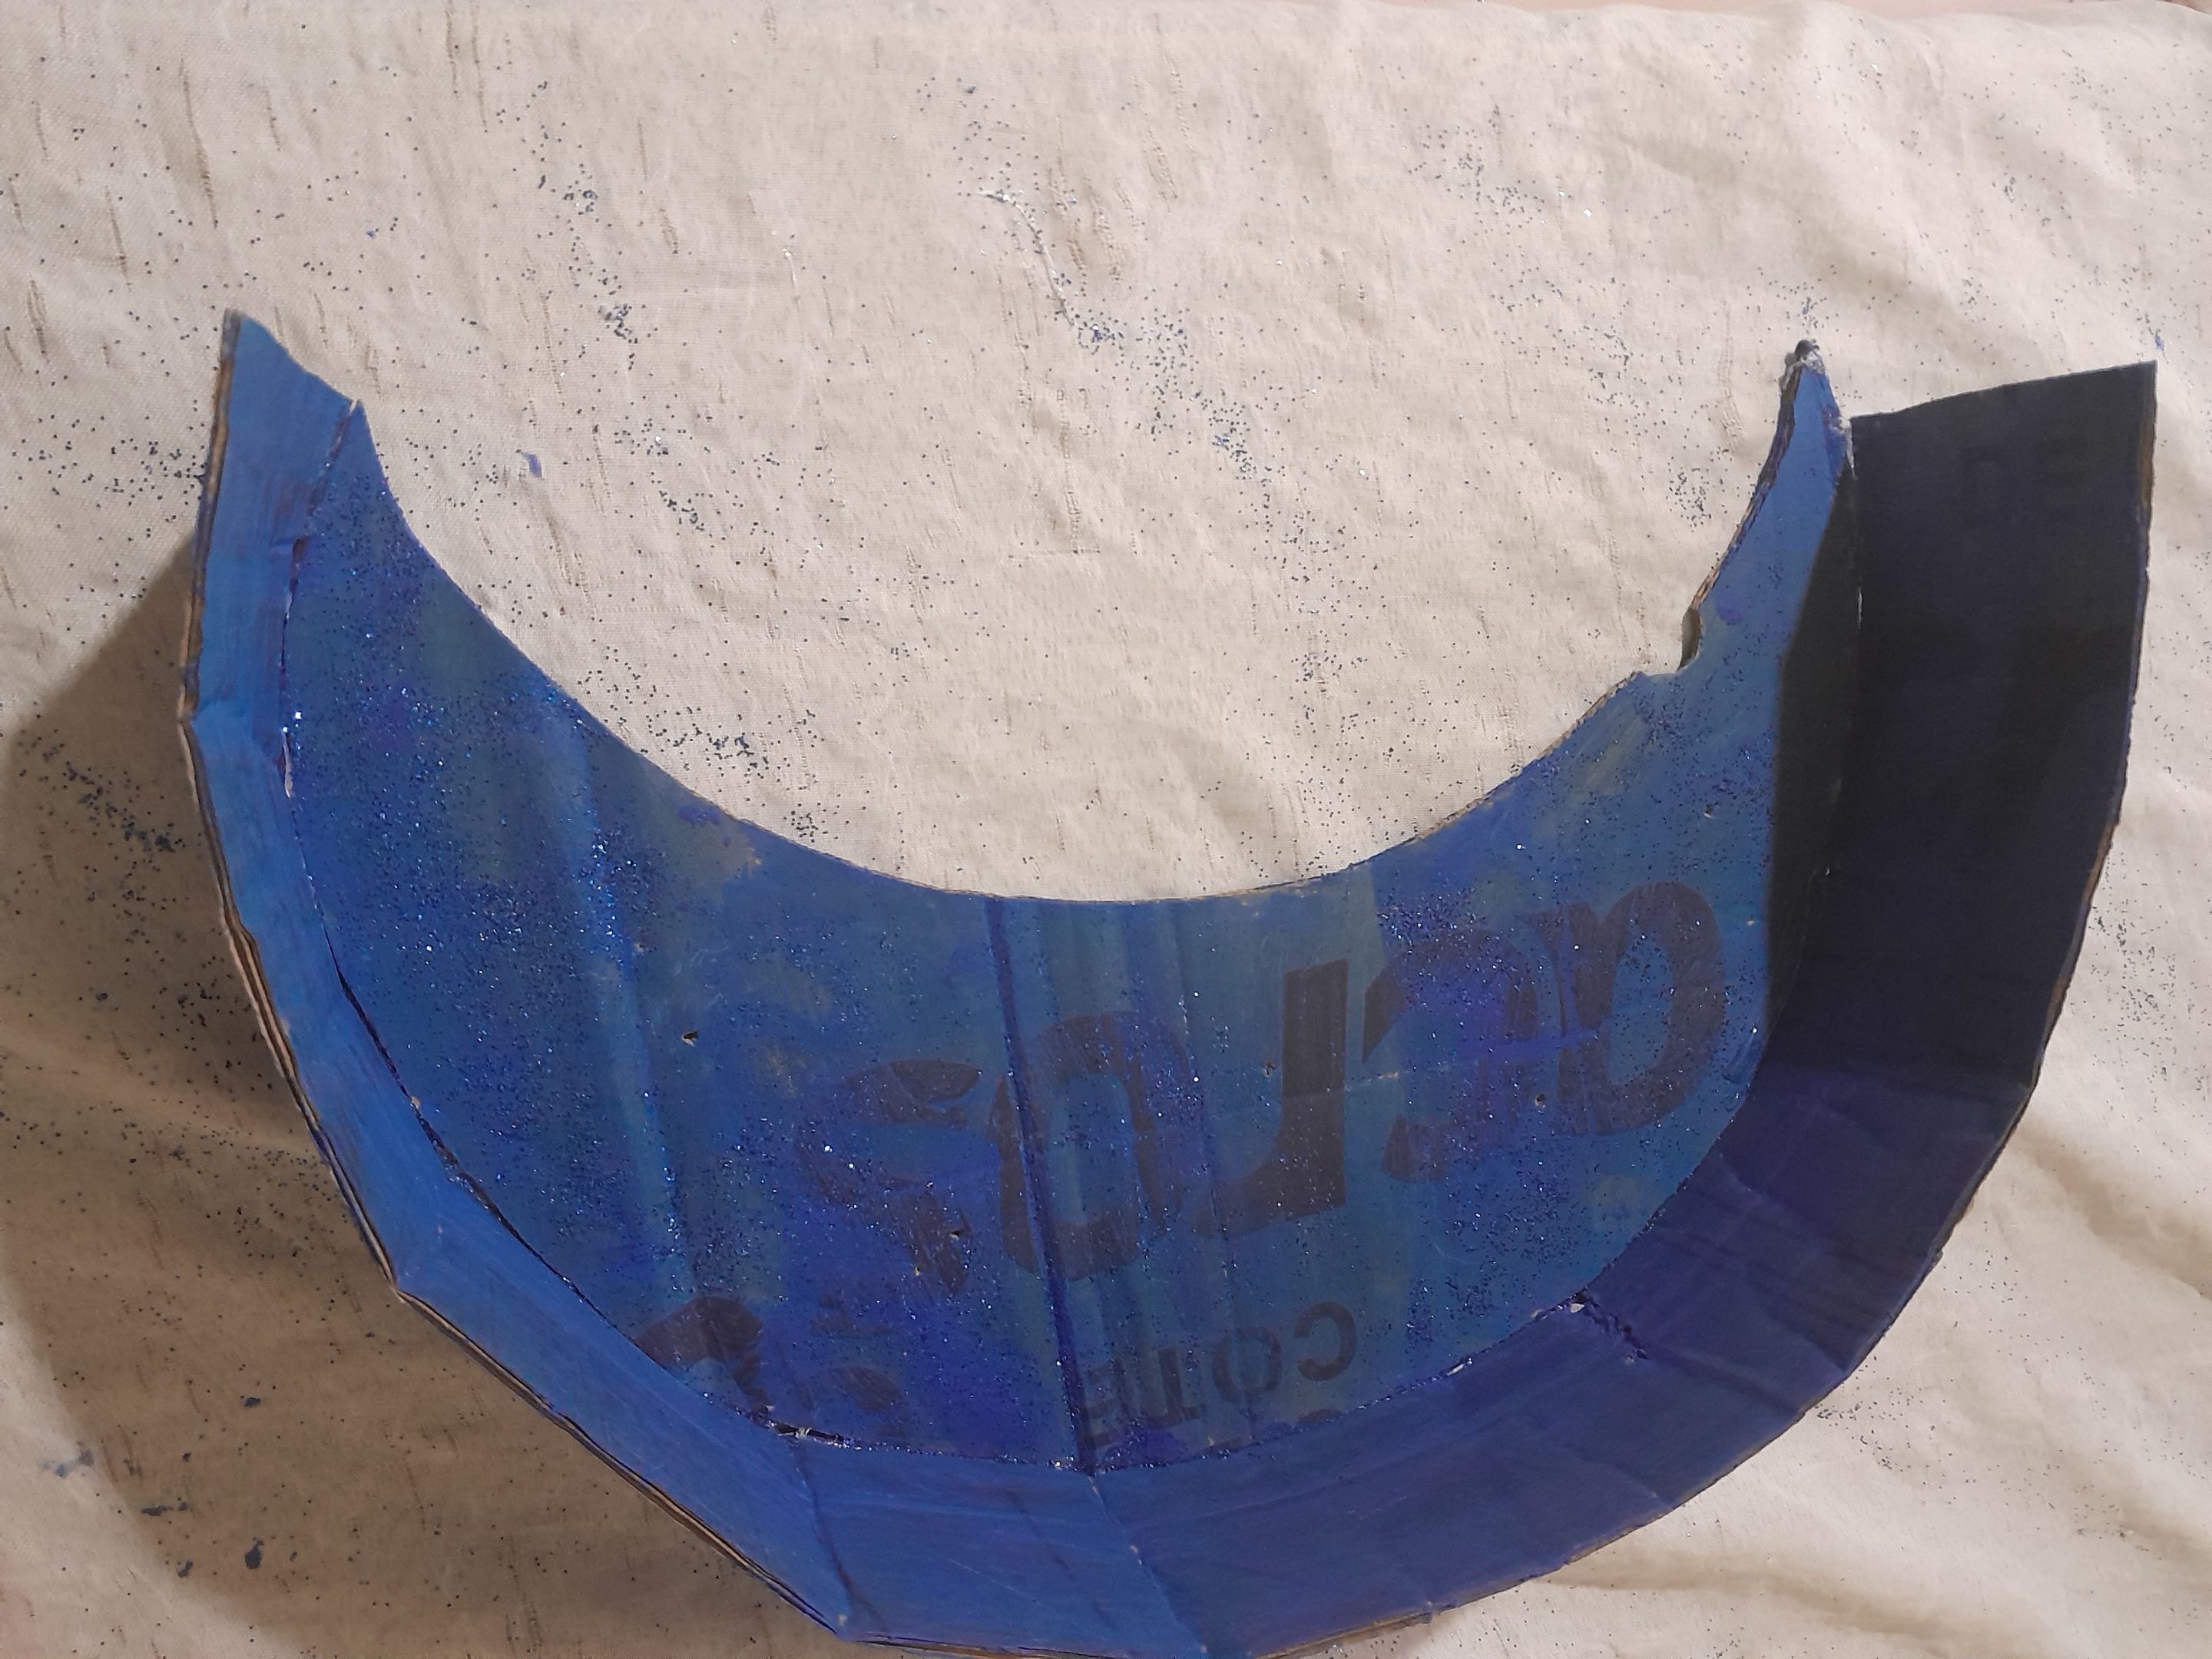
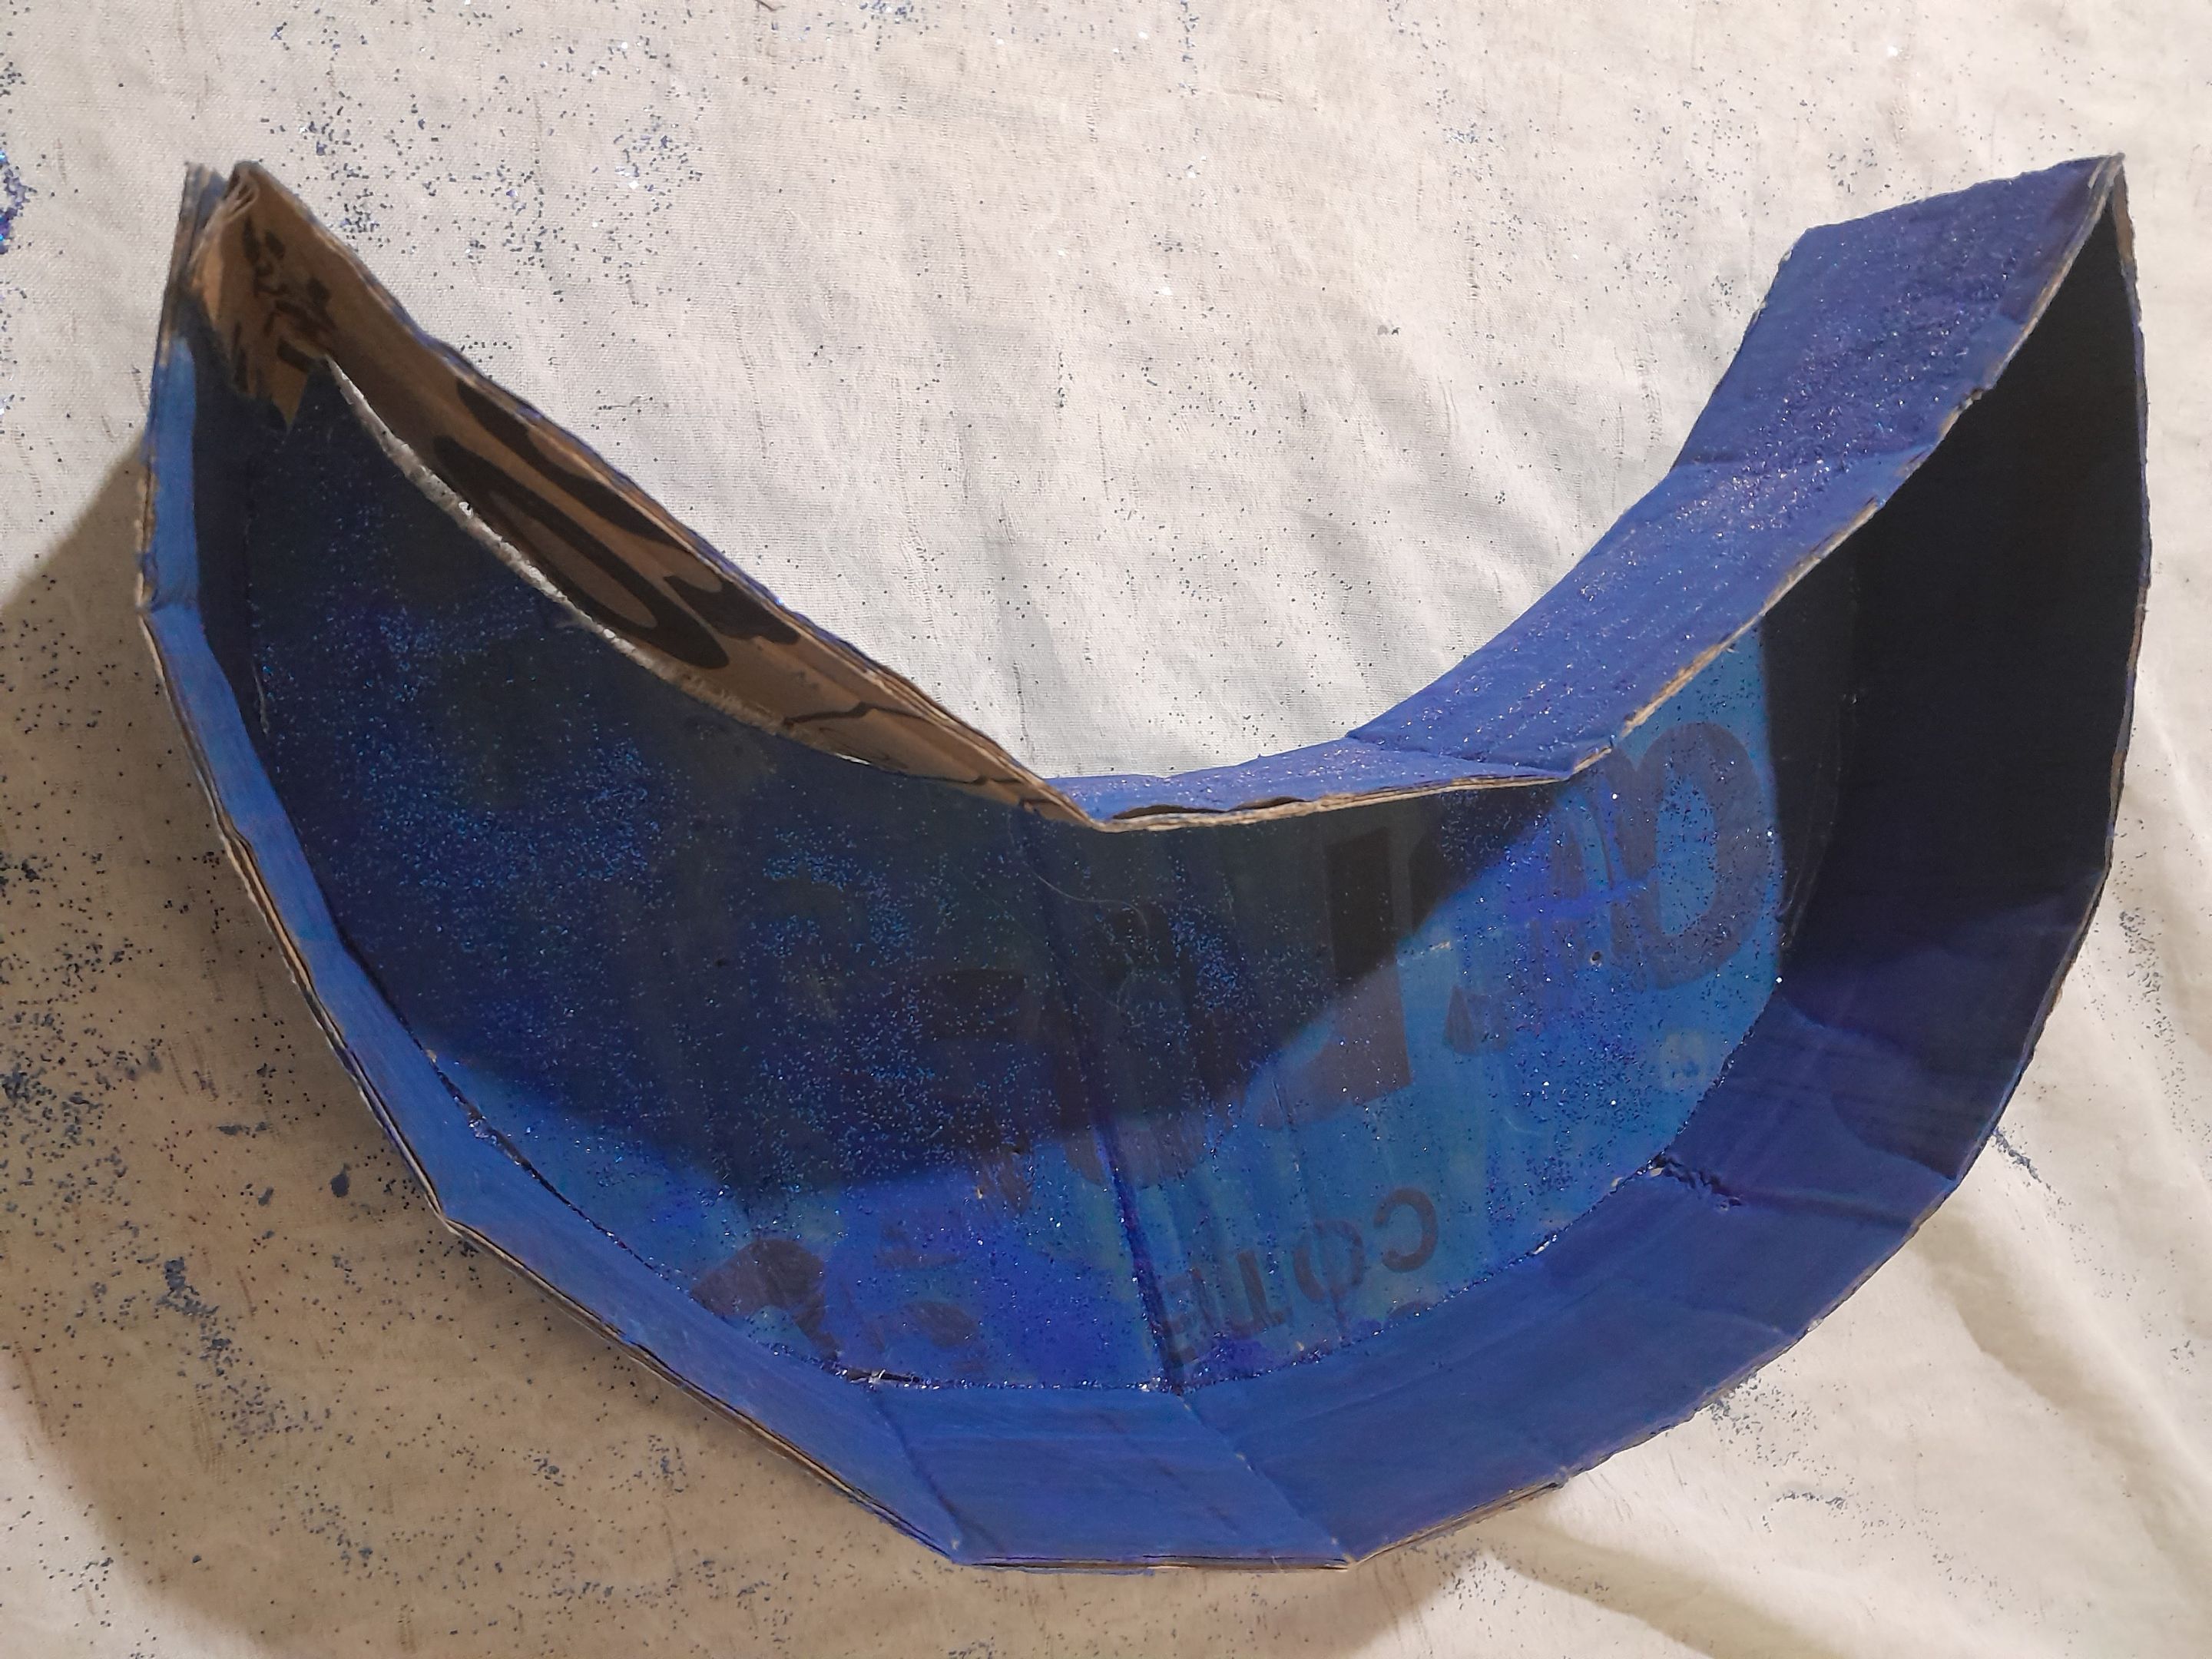
We begin by drawing the pattern to make the moon, its size is 48 cm long and 18 cm wide. We pass the pattern for the cardboard, we make two sides of the moon. We also cut a strip of cardboard 60 cm long and 10 cm wide, which will be the sides of the lamp.
Comenzamos sacando el patrón para realizar la luna, su medida es de 48 cm de largo y 18 de ancho. Pasamos el patrón para el cartón, hacemos dos caras de luna. También cortamos una tira de cartón de 60 cm de largo y 10 cm de ancho, que será los laterales de la lámpara.
Step 2| Paso 2
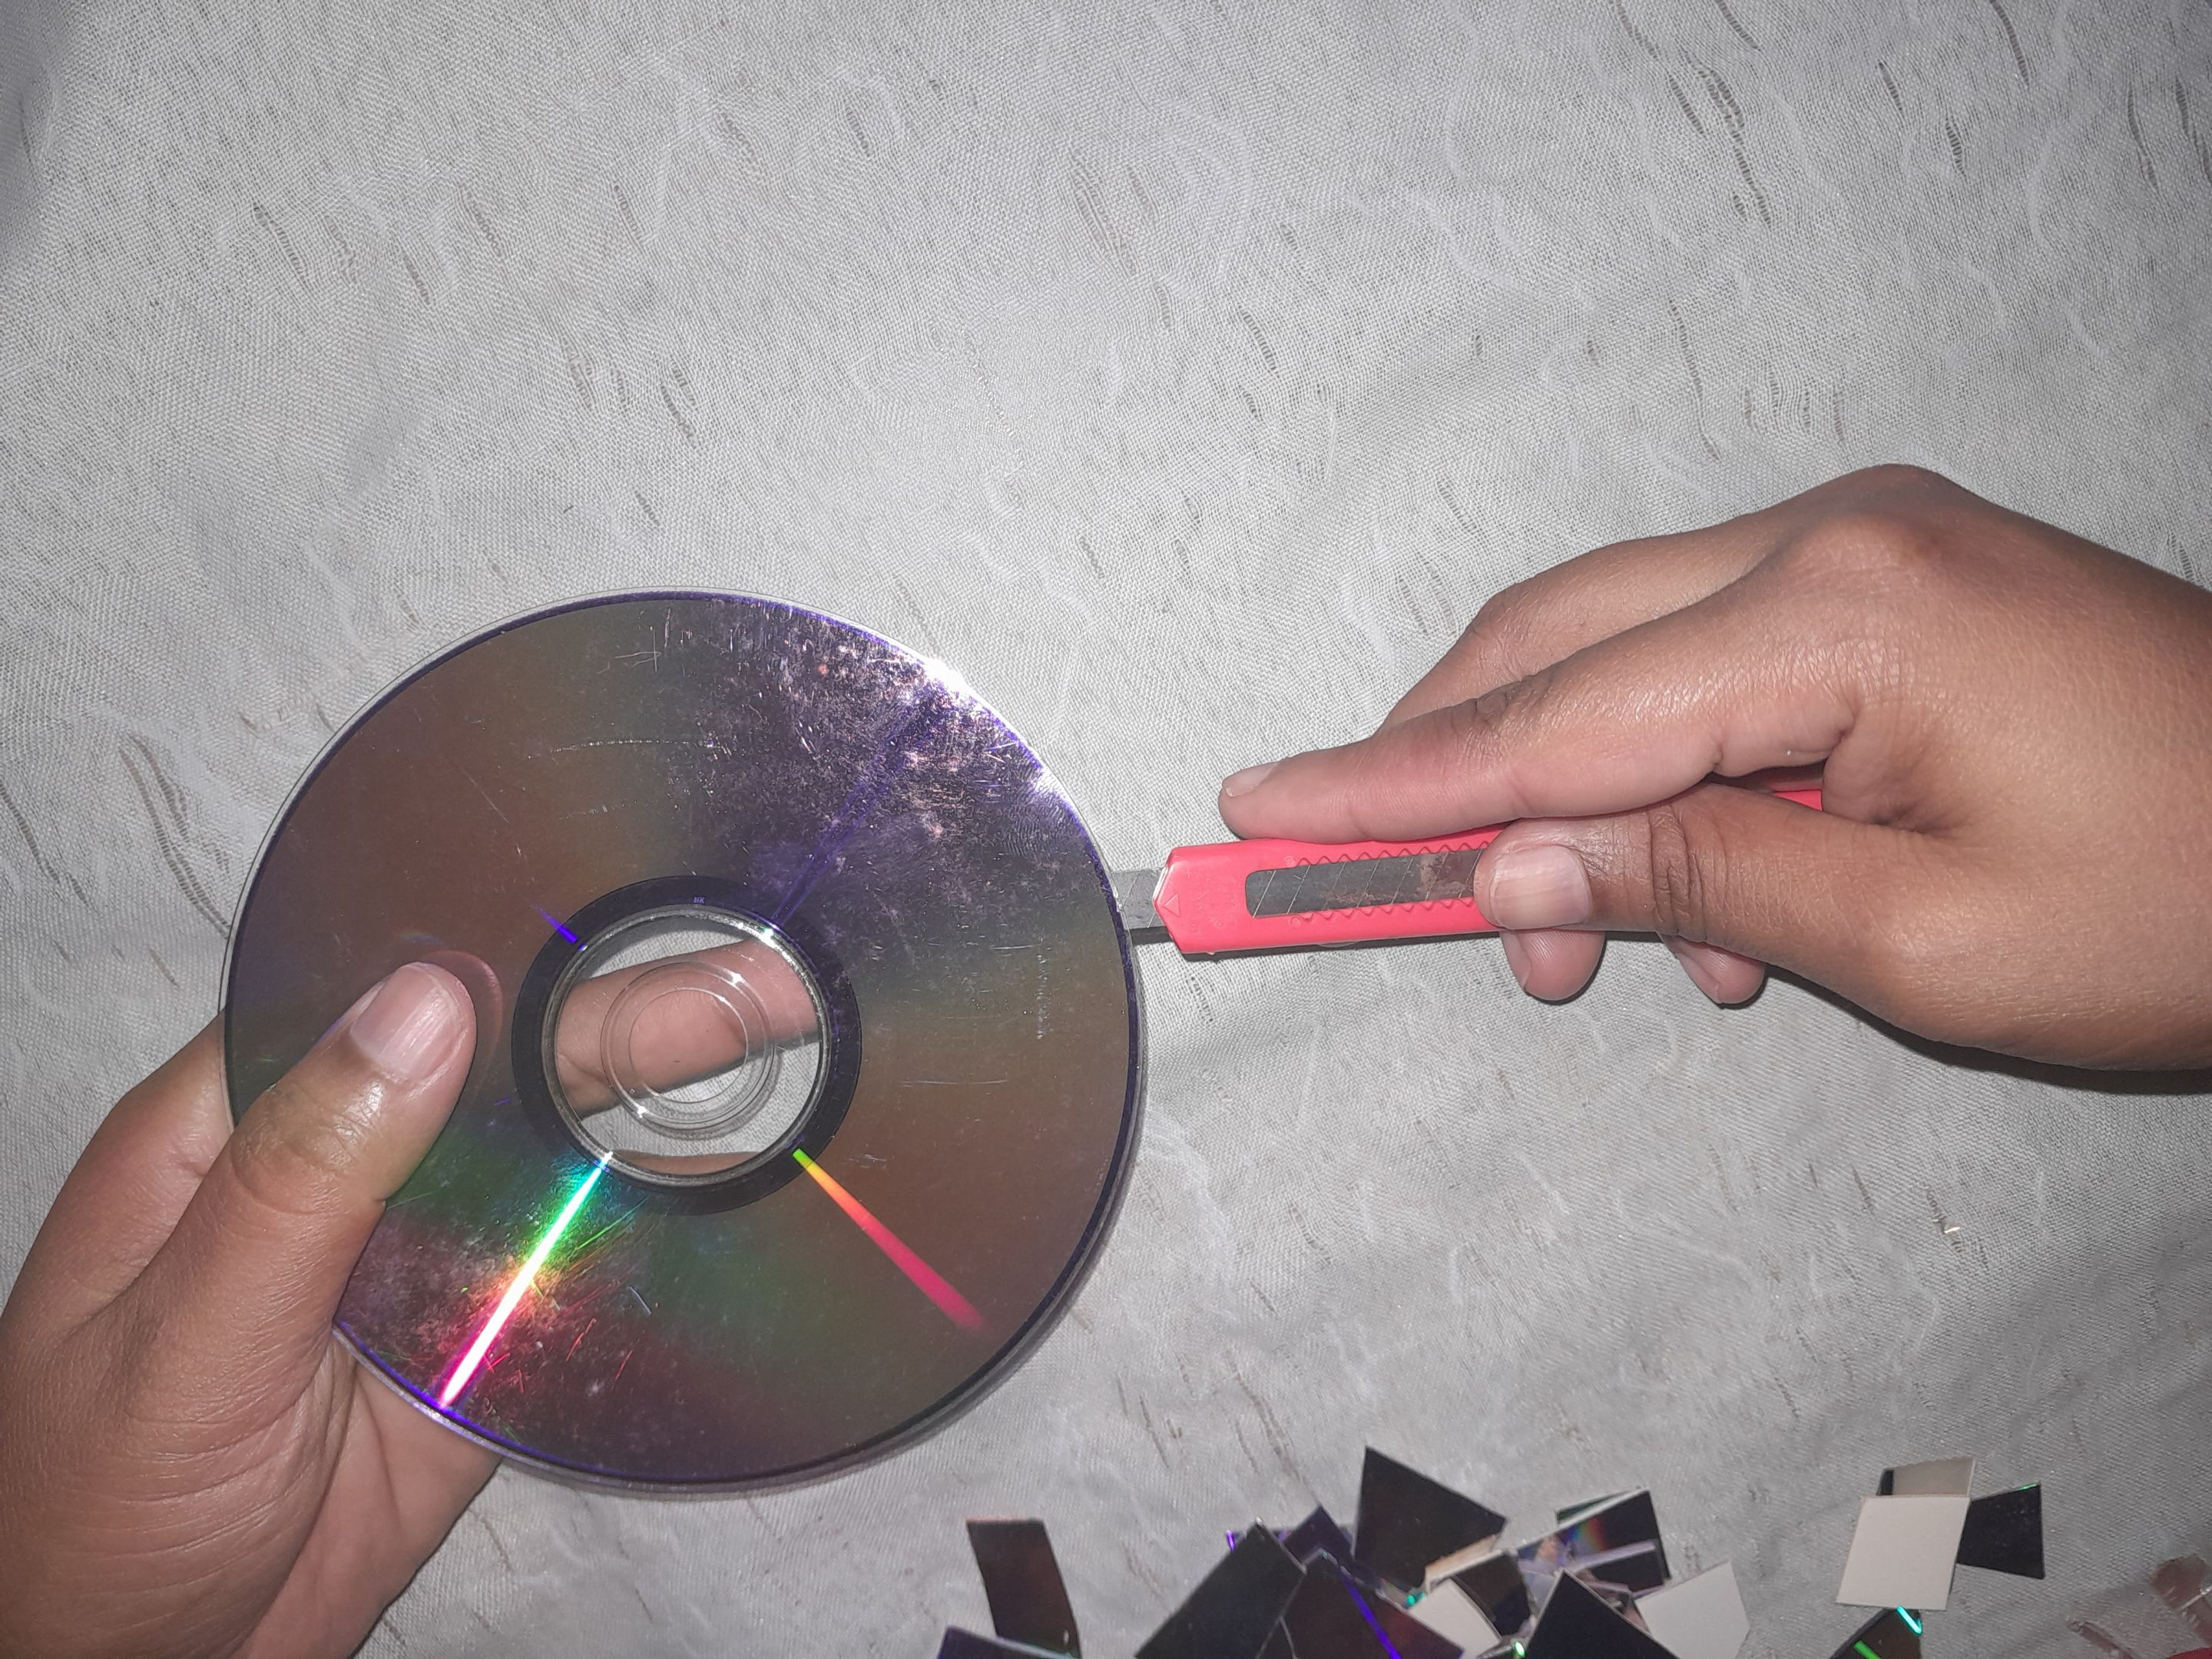
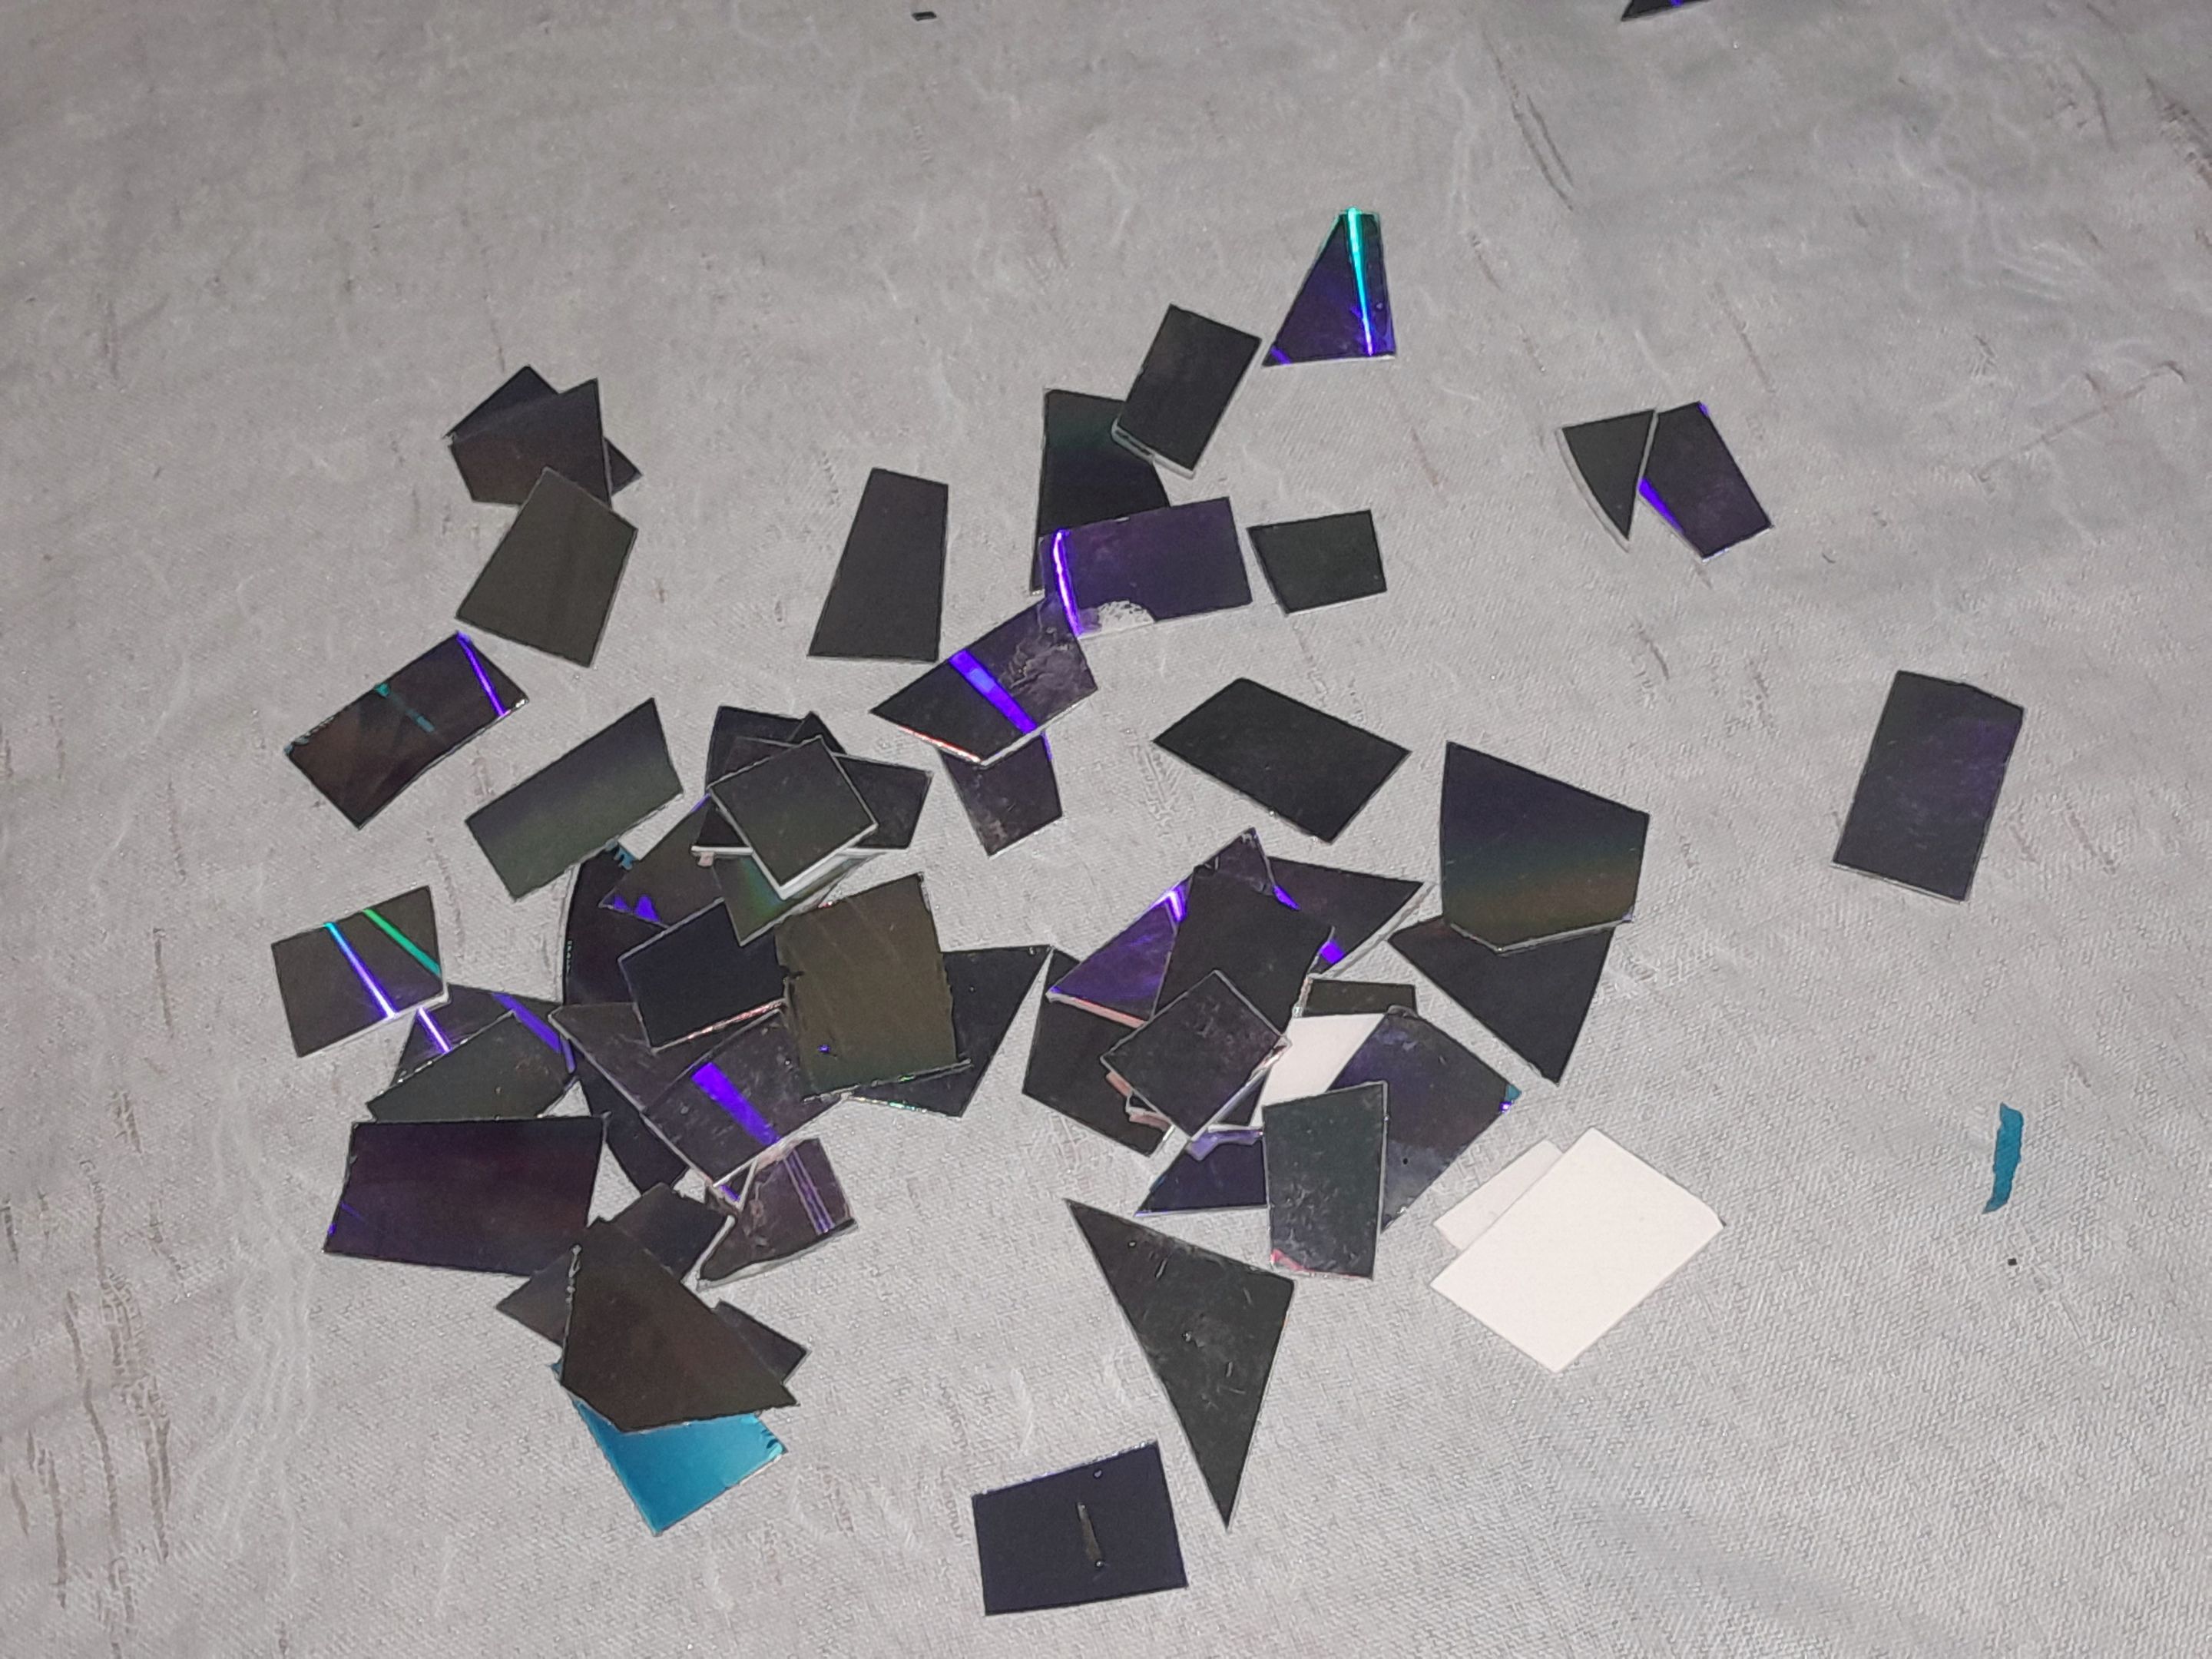
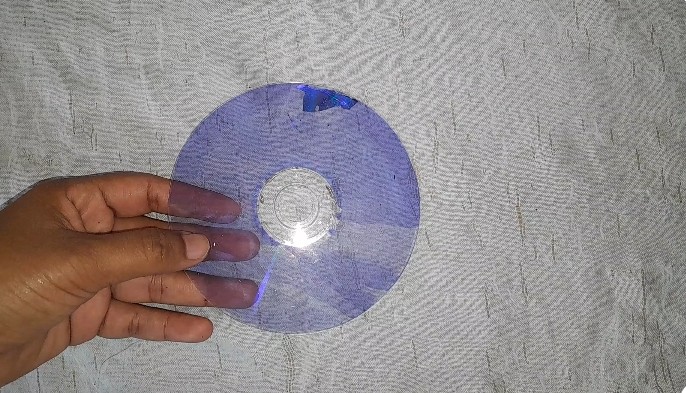
With the help of the cutter we are going to divide the film CD, we are going to cut the shiny part in small mosaics, the other part we will reserve it, since we are going to use it later.
Con ayuda del cúter vamos a dividir el CD de la película, vamos a cortar la parte con brillo en pequeños mosaicos, la otra parte la reservaremos, ya que la vamos a utilizar más adelante.
Step 3| Paso 3
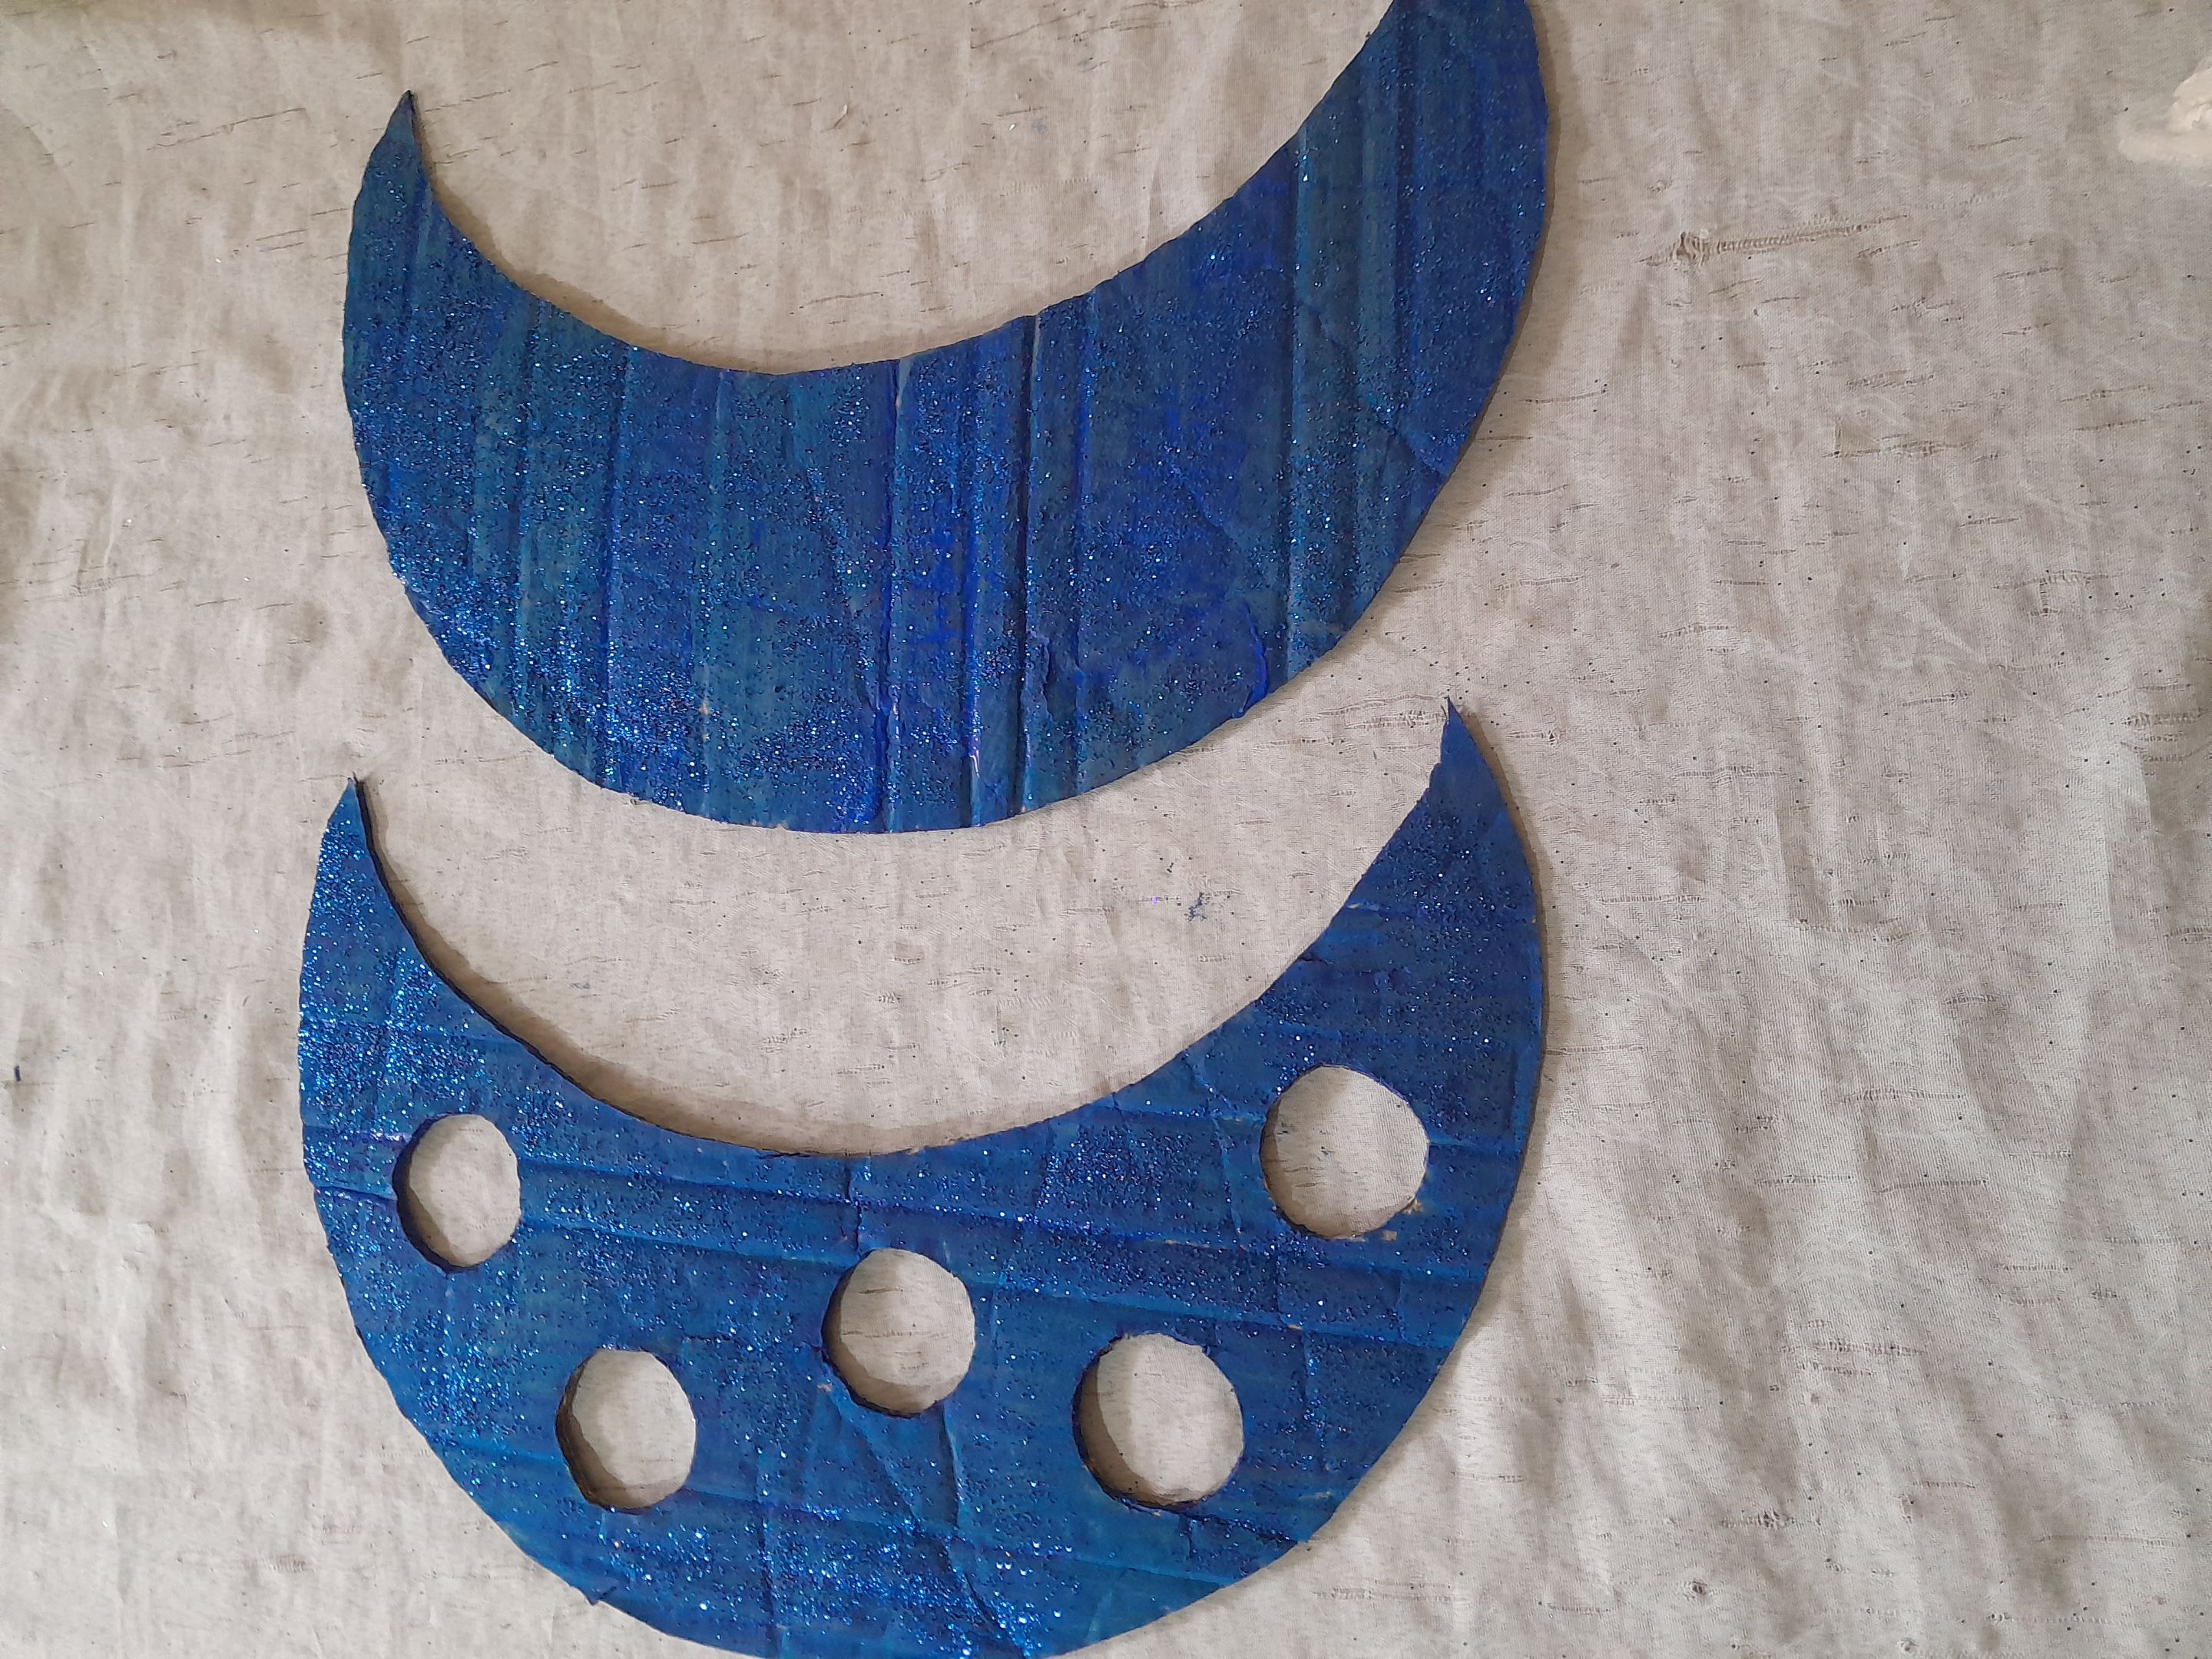
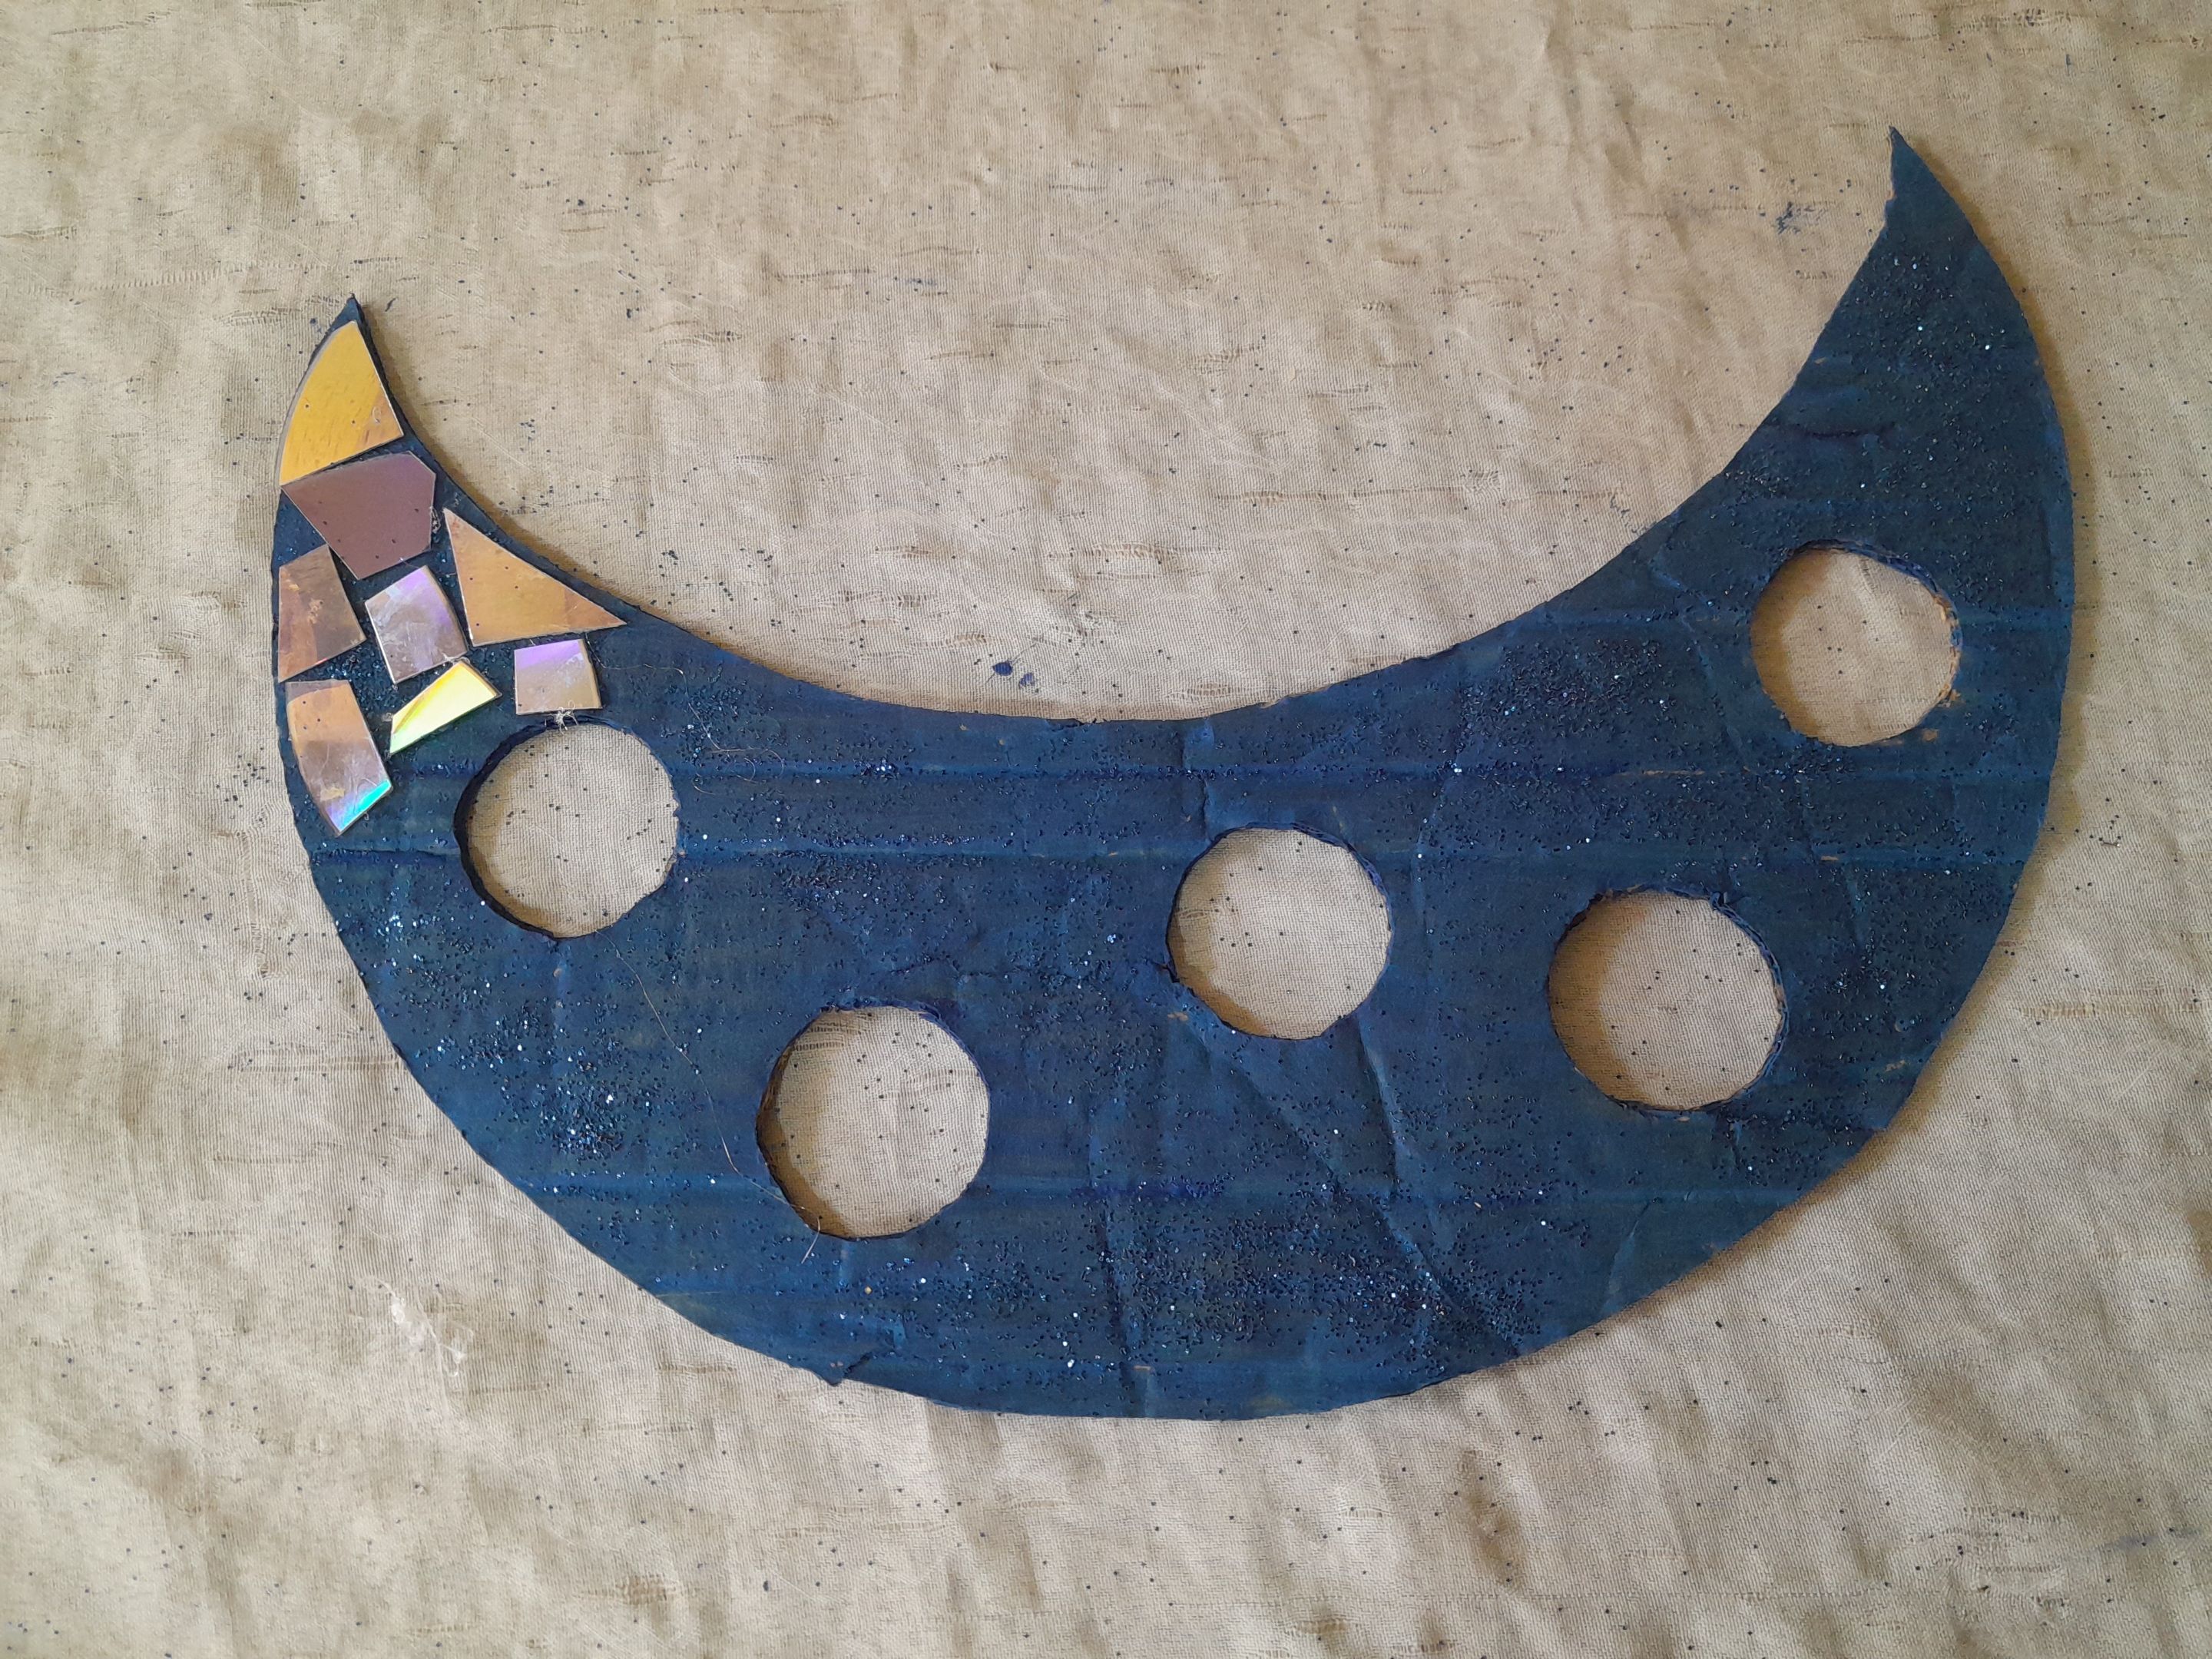
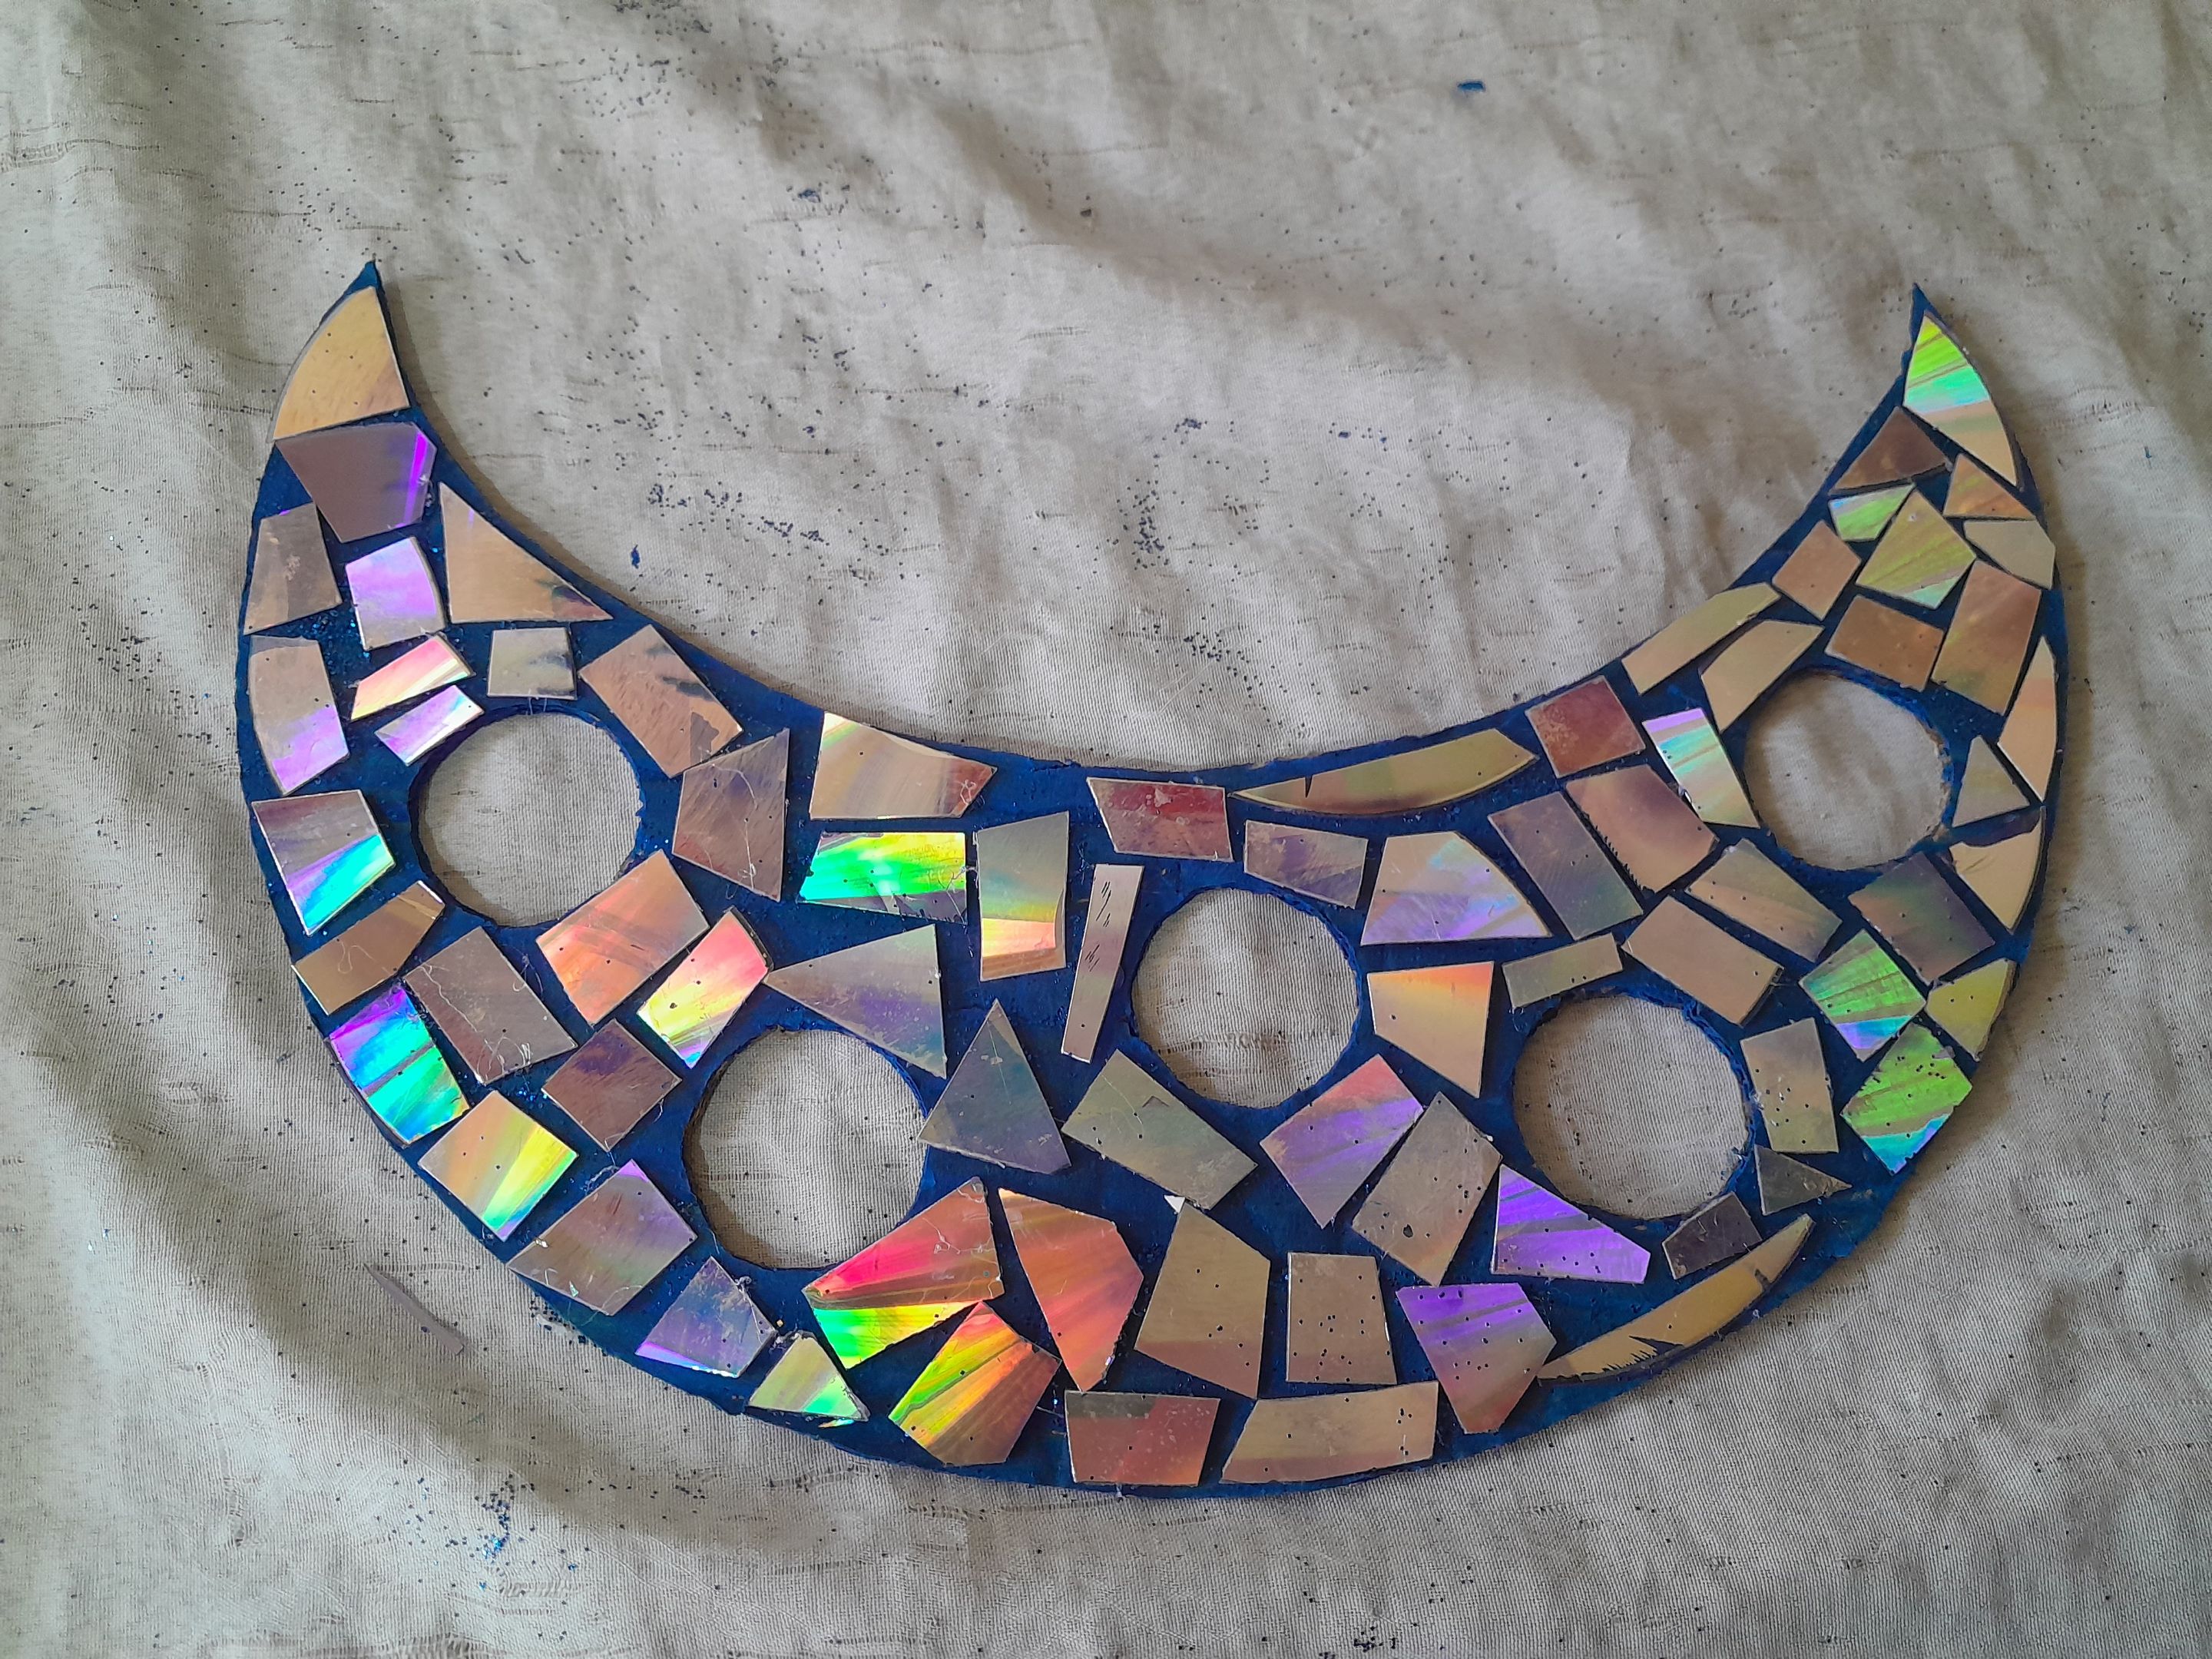
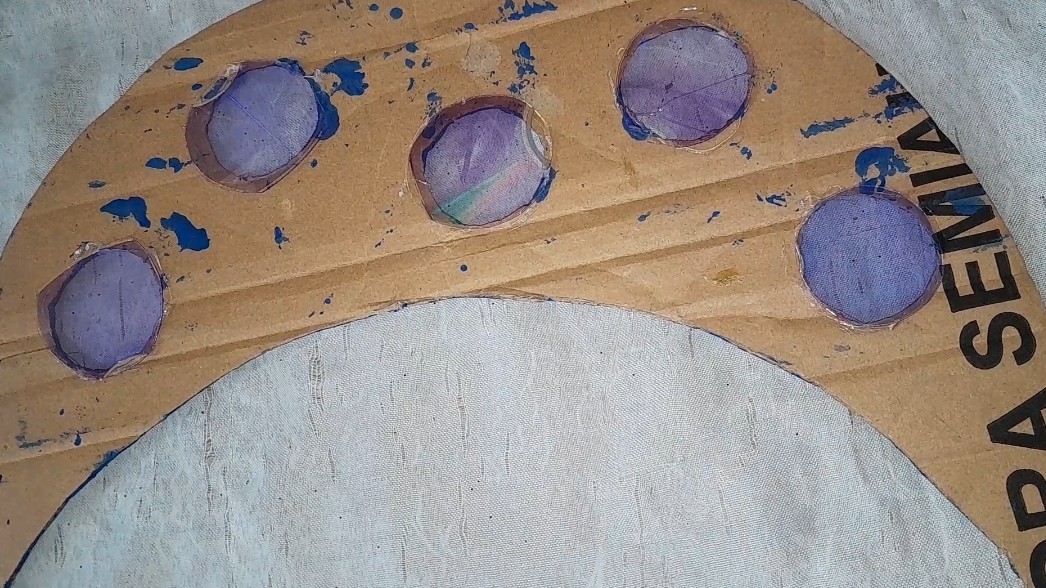
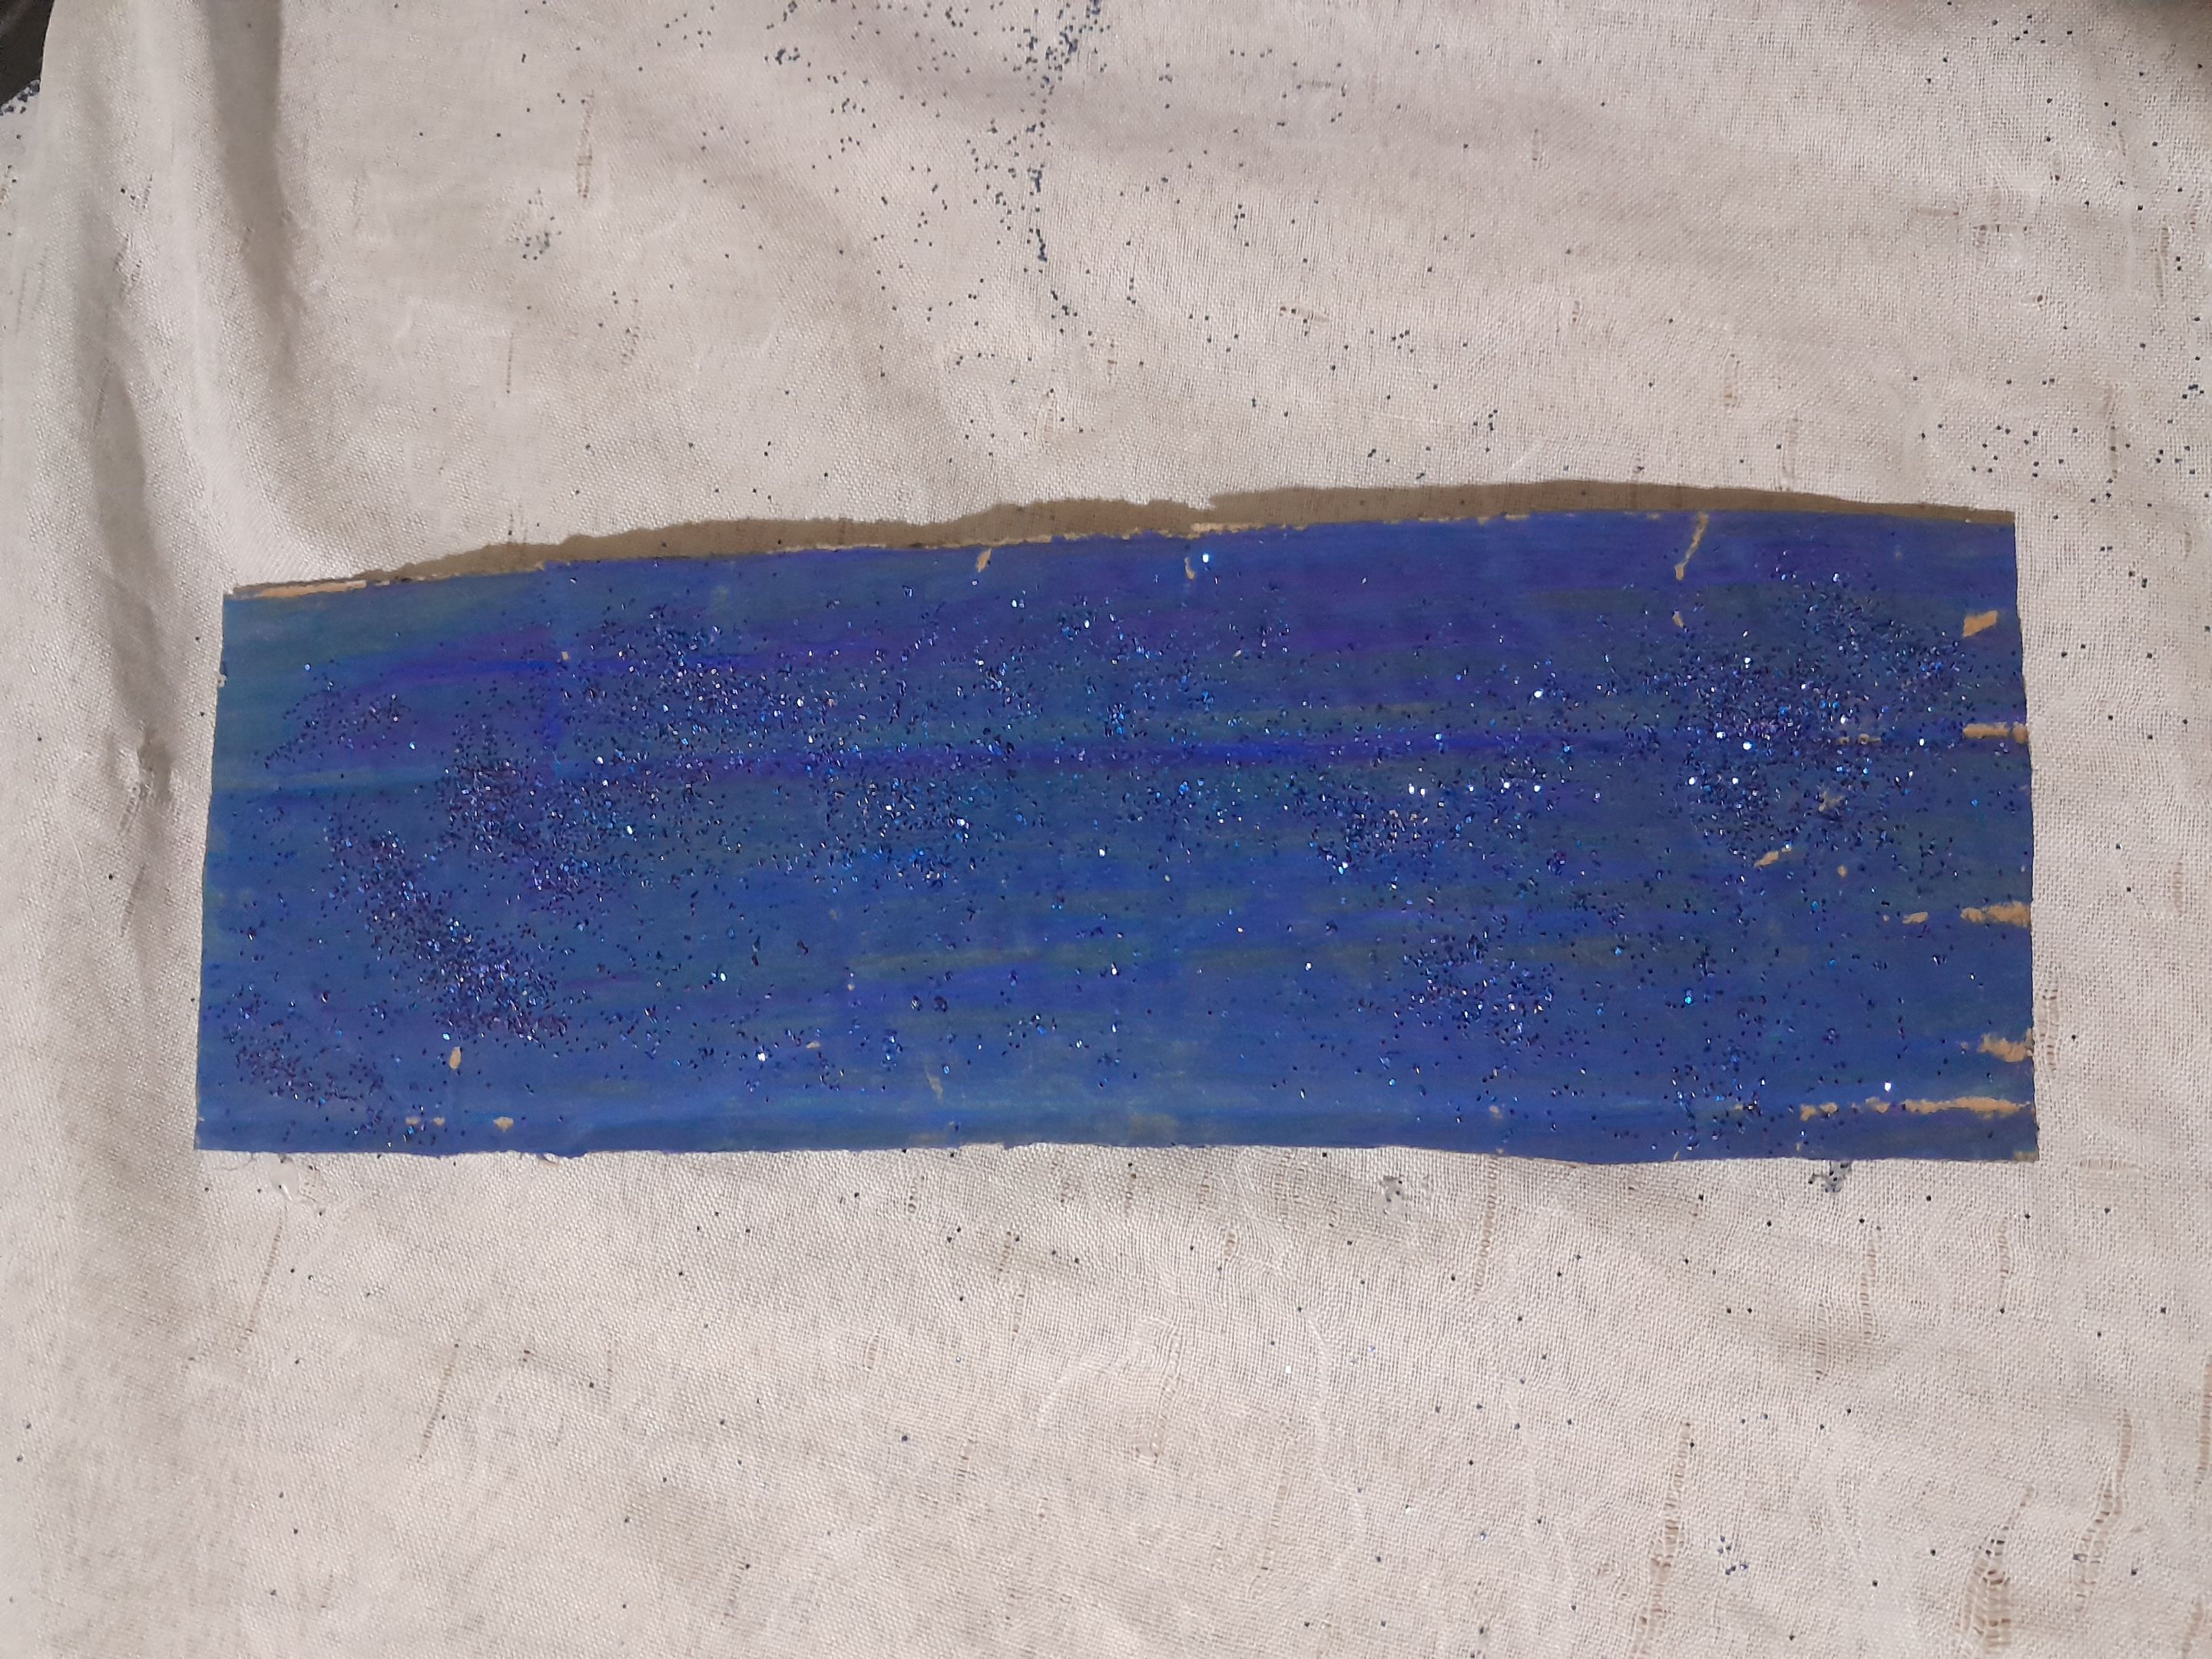
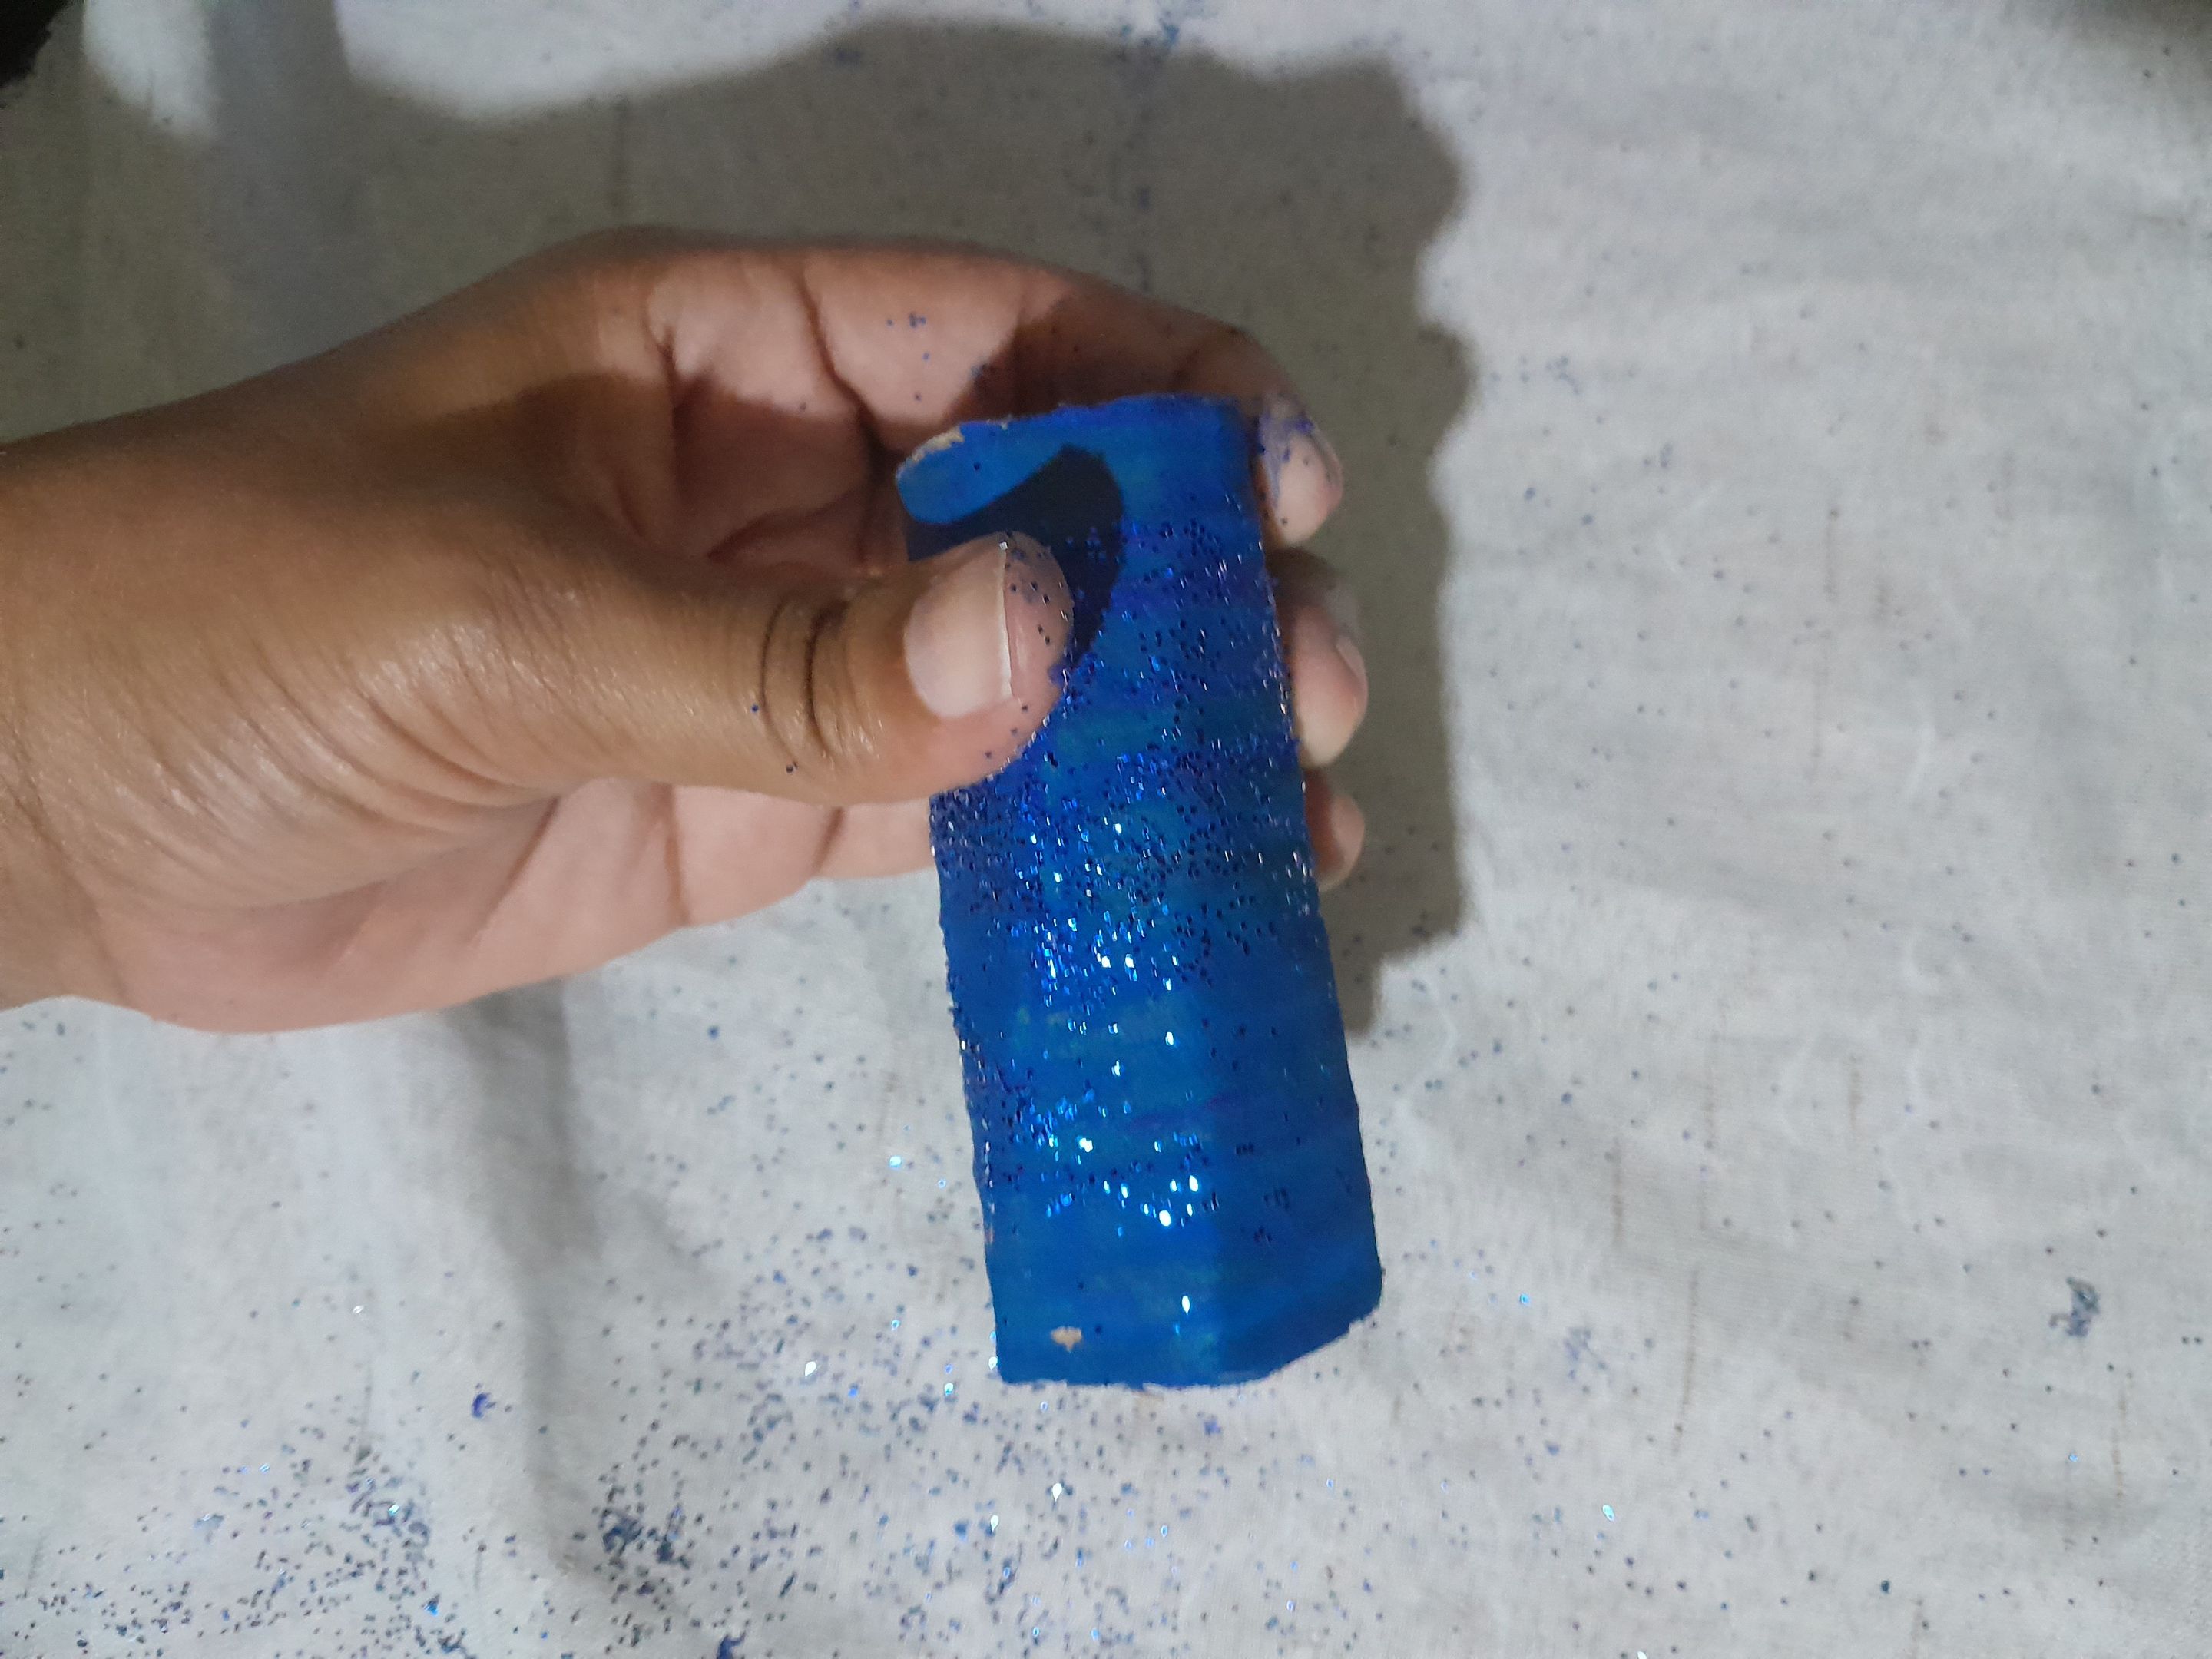
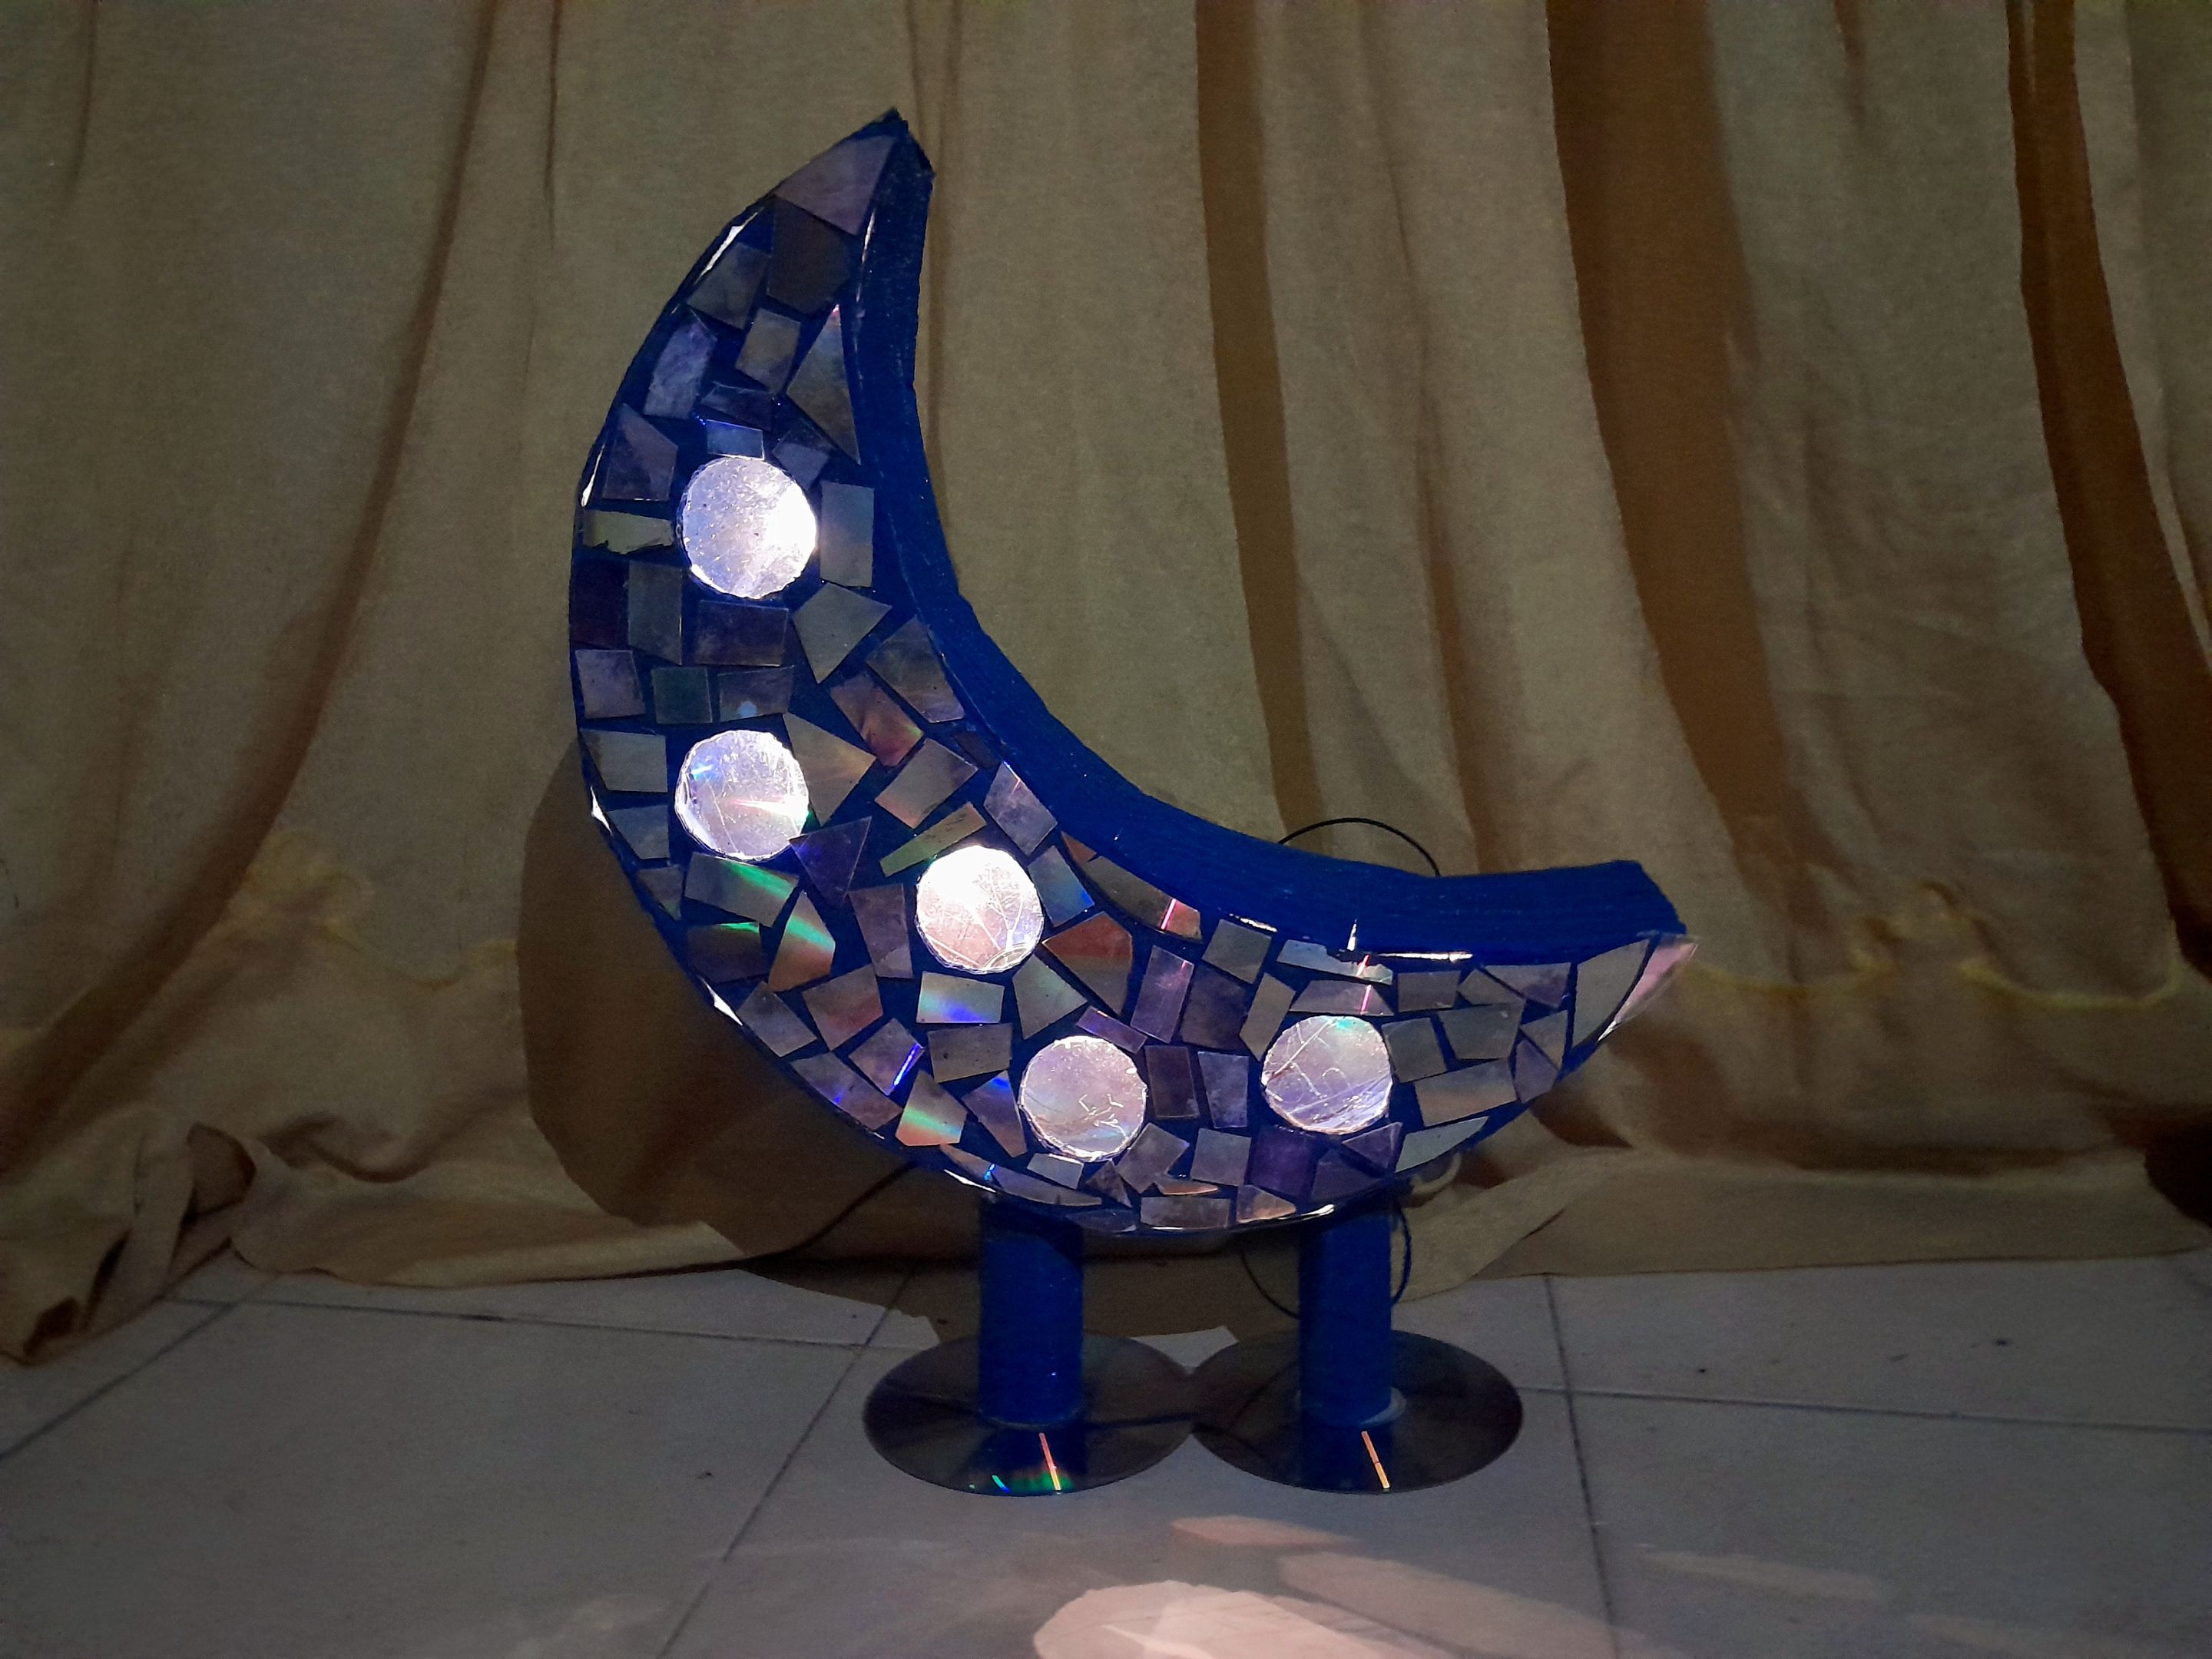
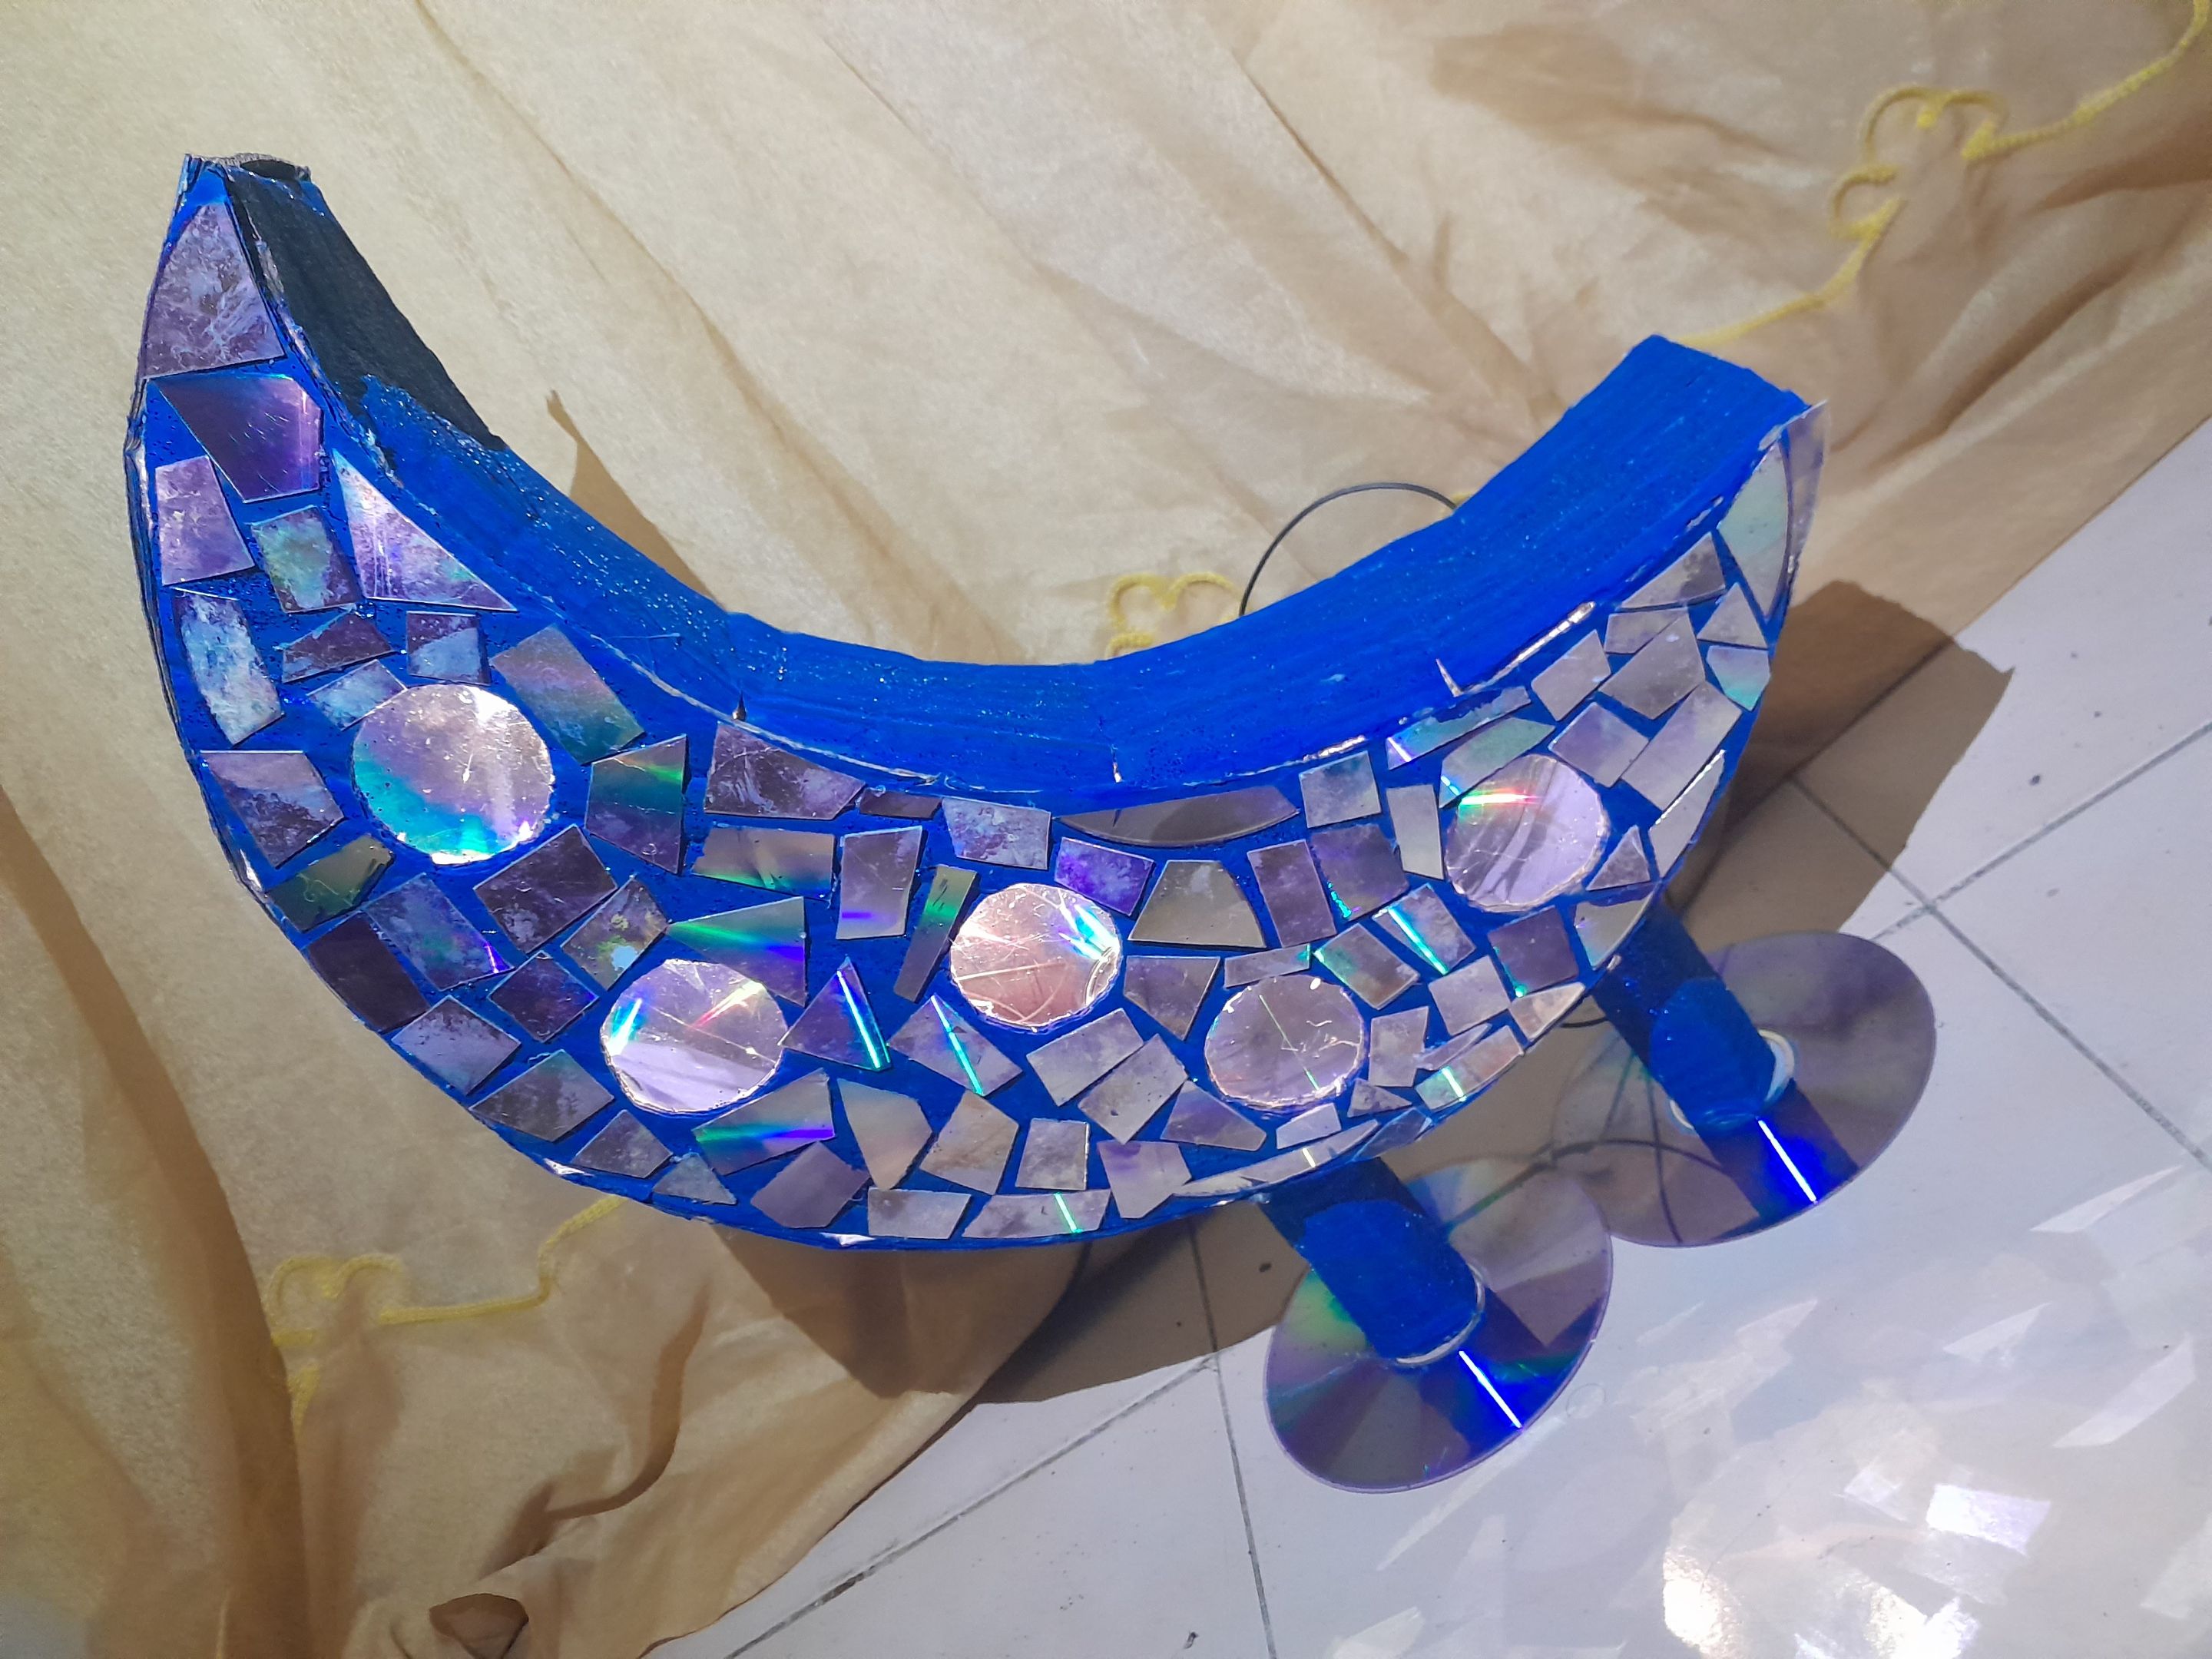
To one of the faces of the moon I make five circles of 4.5 x 4.5 cmm simulating the natural circles of the moon, then I paint both faces and the strips with the blue paint, before it dries I sprinkle the frost, I let dry once it is dry the part that will go to the front, I begin to glue the pieces of CDs so that it looks like a mosaic.
A una de las caras de la luna le hago cinco círculos de 4.5 x 4.5 cmm simulando los círculos naturales de la luna, luego pinto ambas caras y las tiras con la pintura azul, antes que seque roció las escarchas, dejo secar una vez que esta seca la parte que irá al frente, comienzo a pegar los retazo de CDs de manera que parezca un mosaico.
Step 4| Paso 4
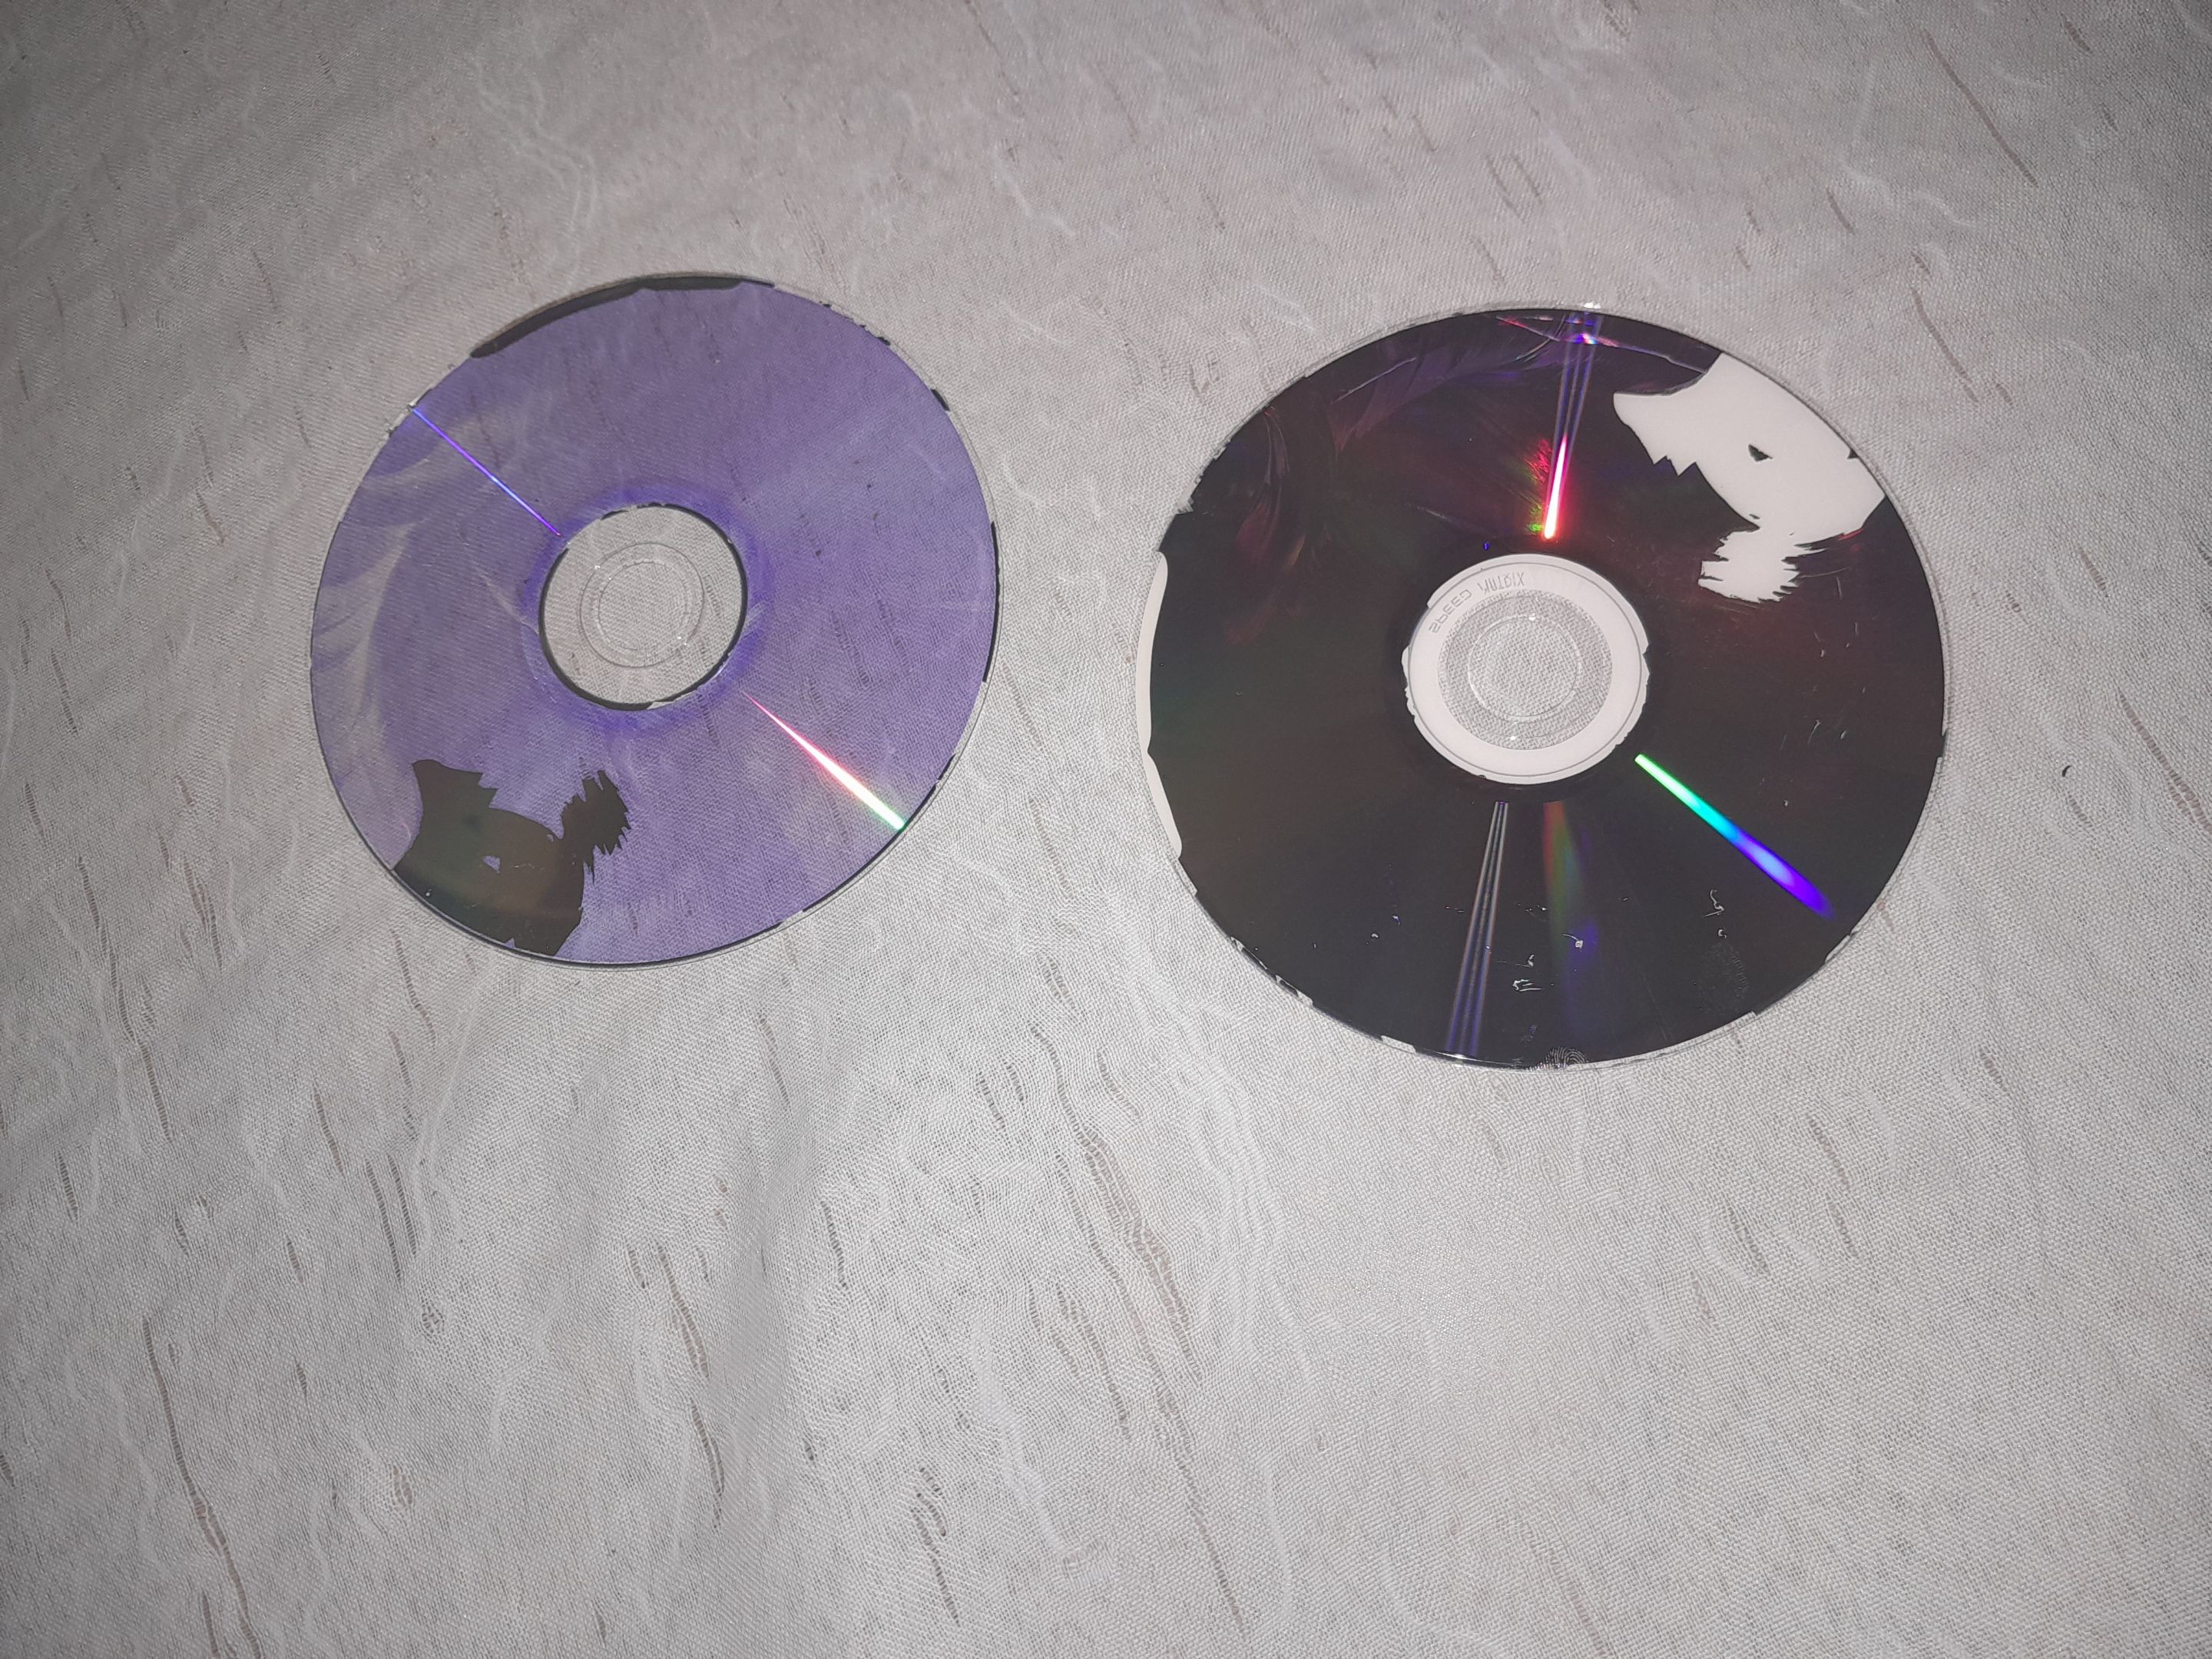
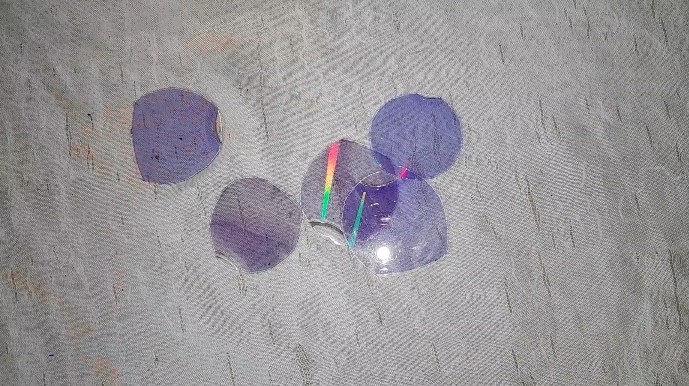
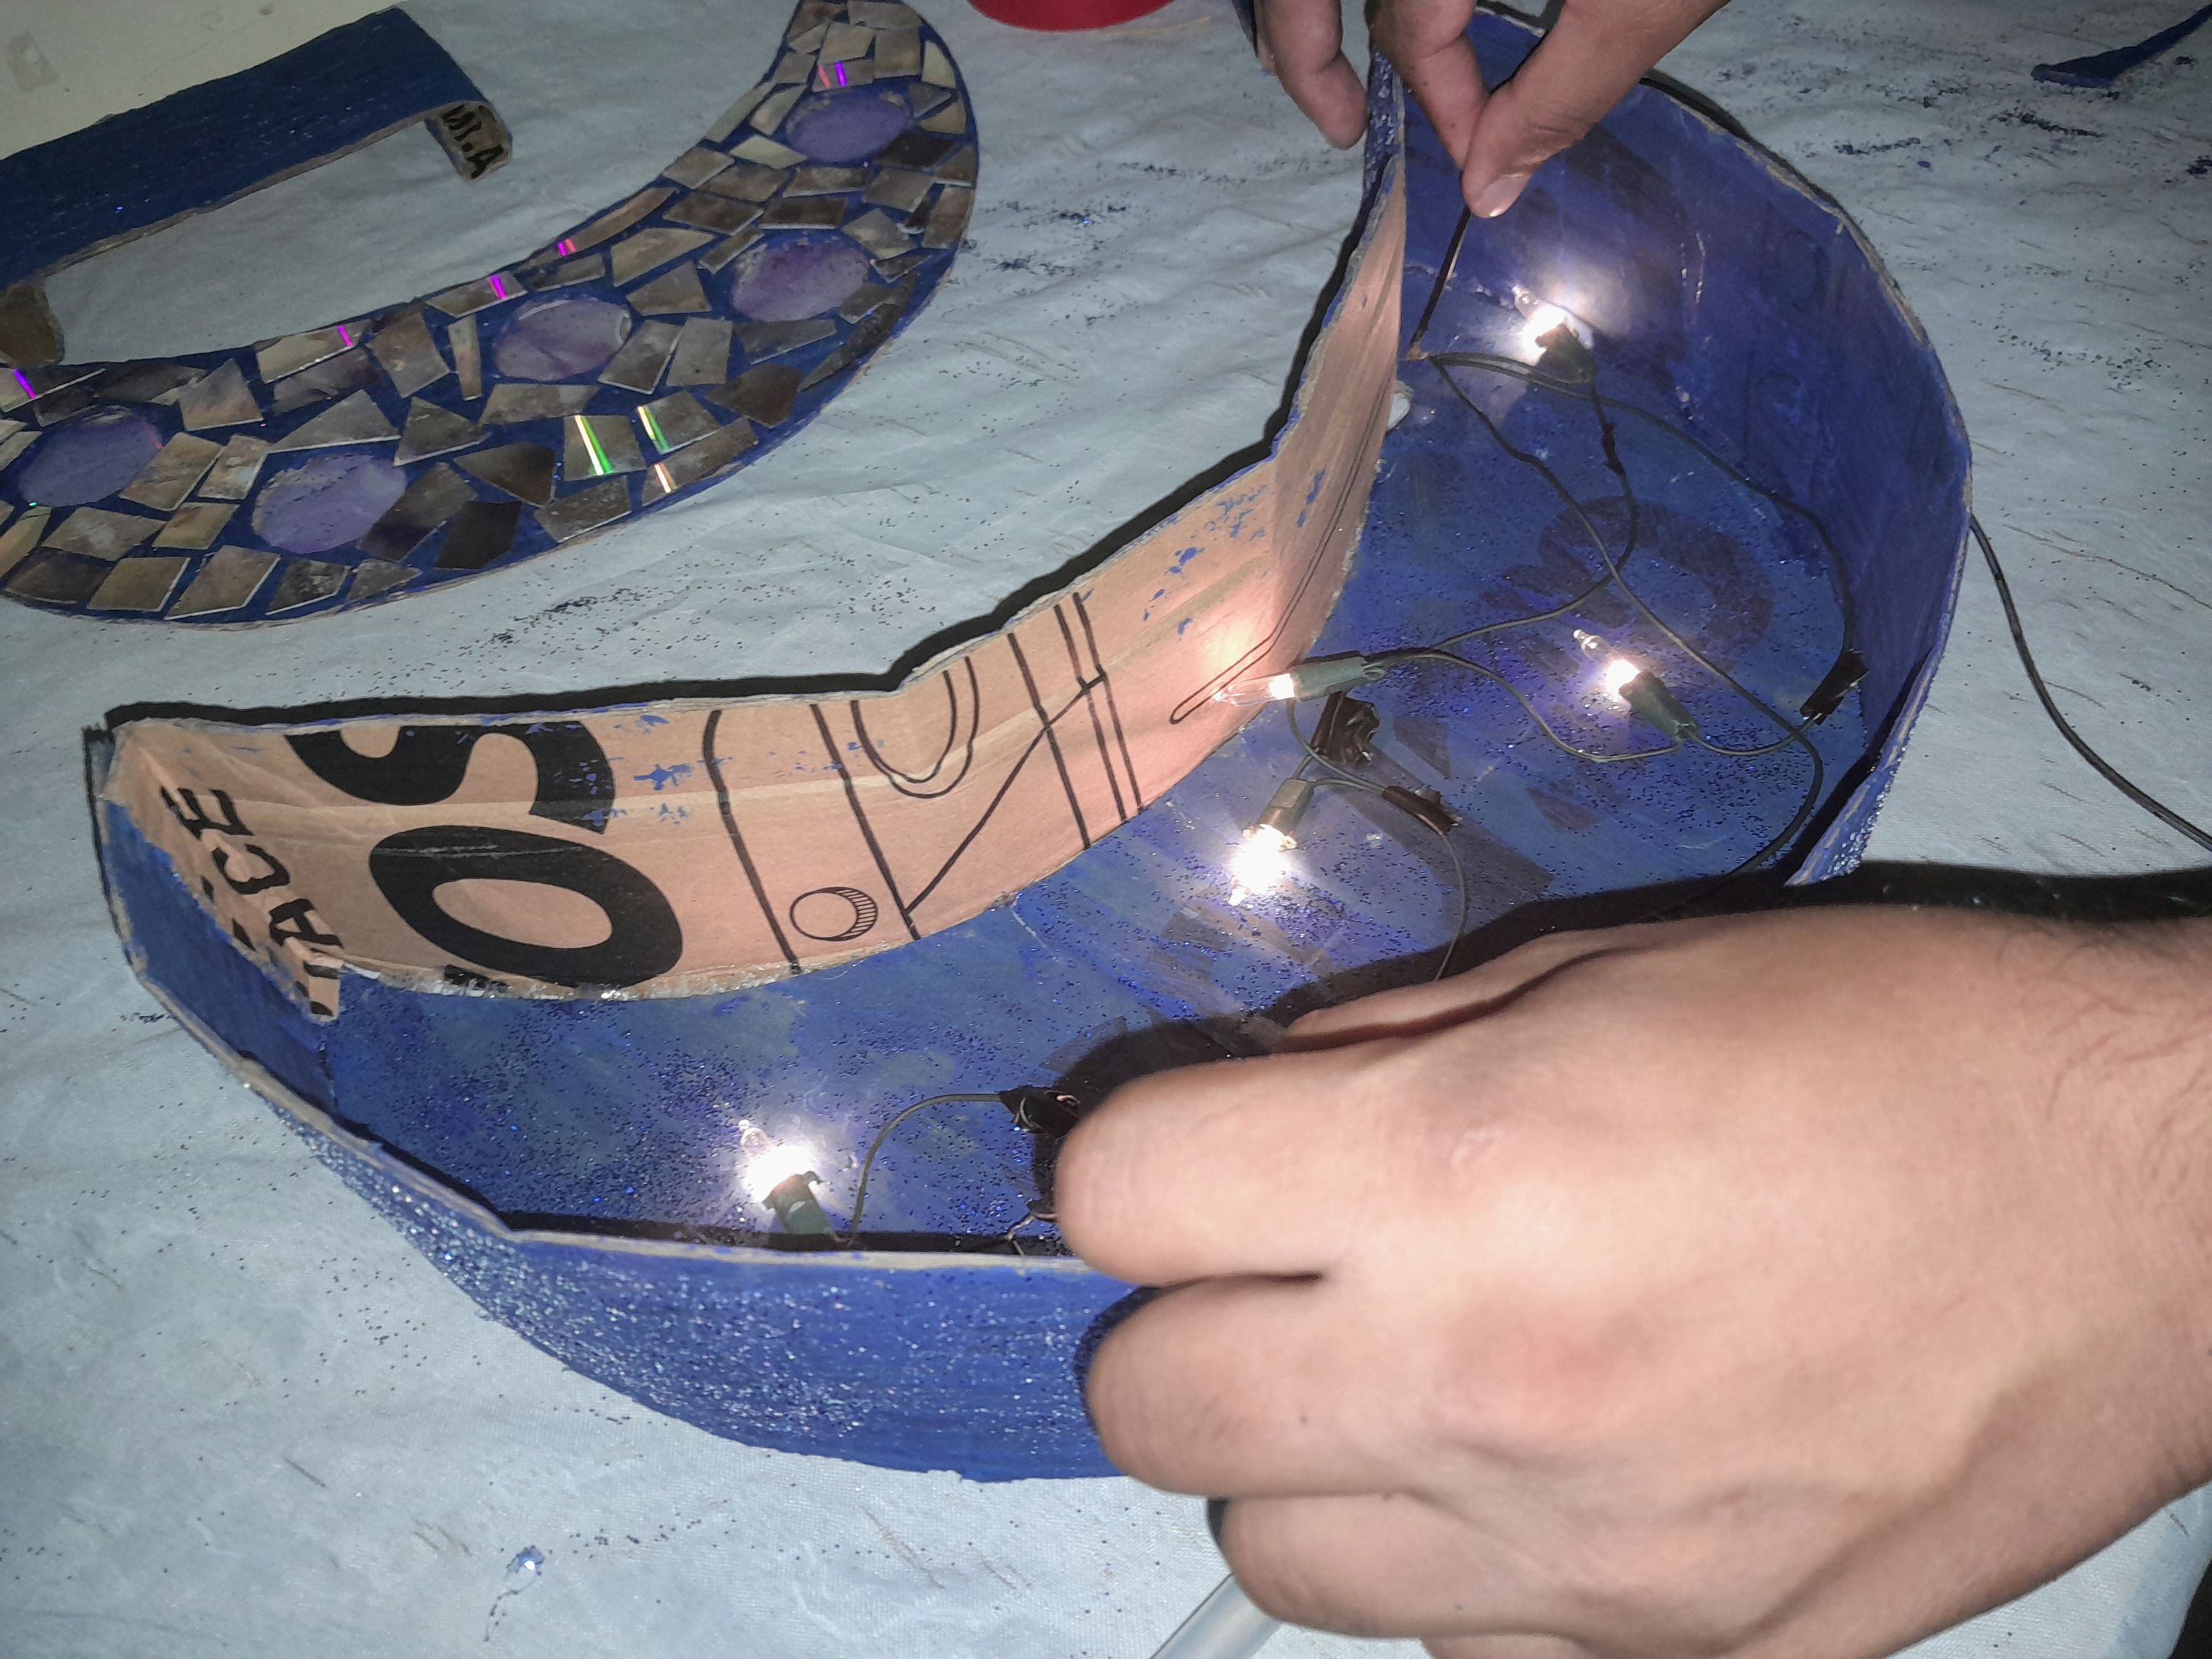
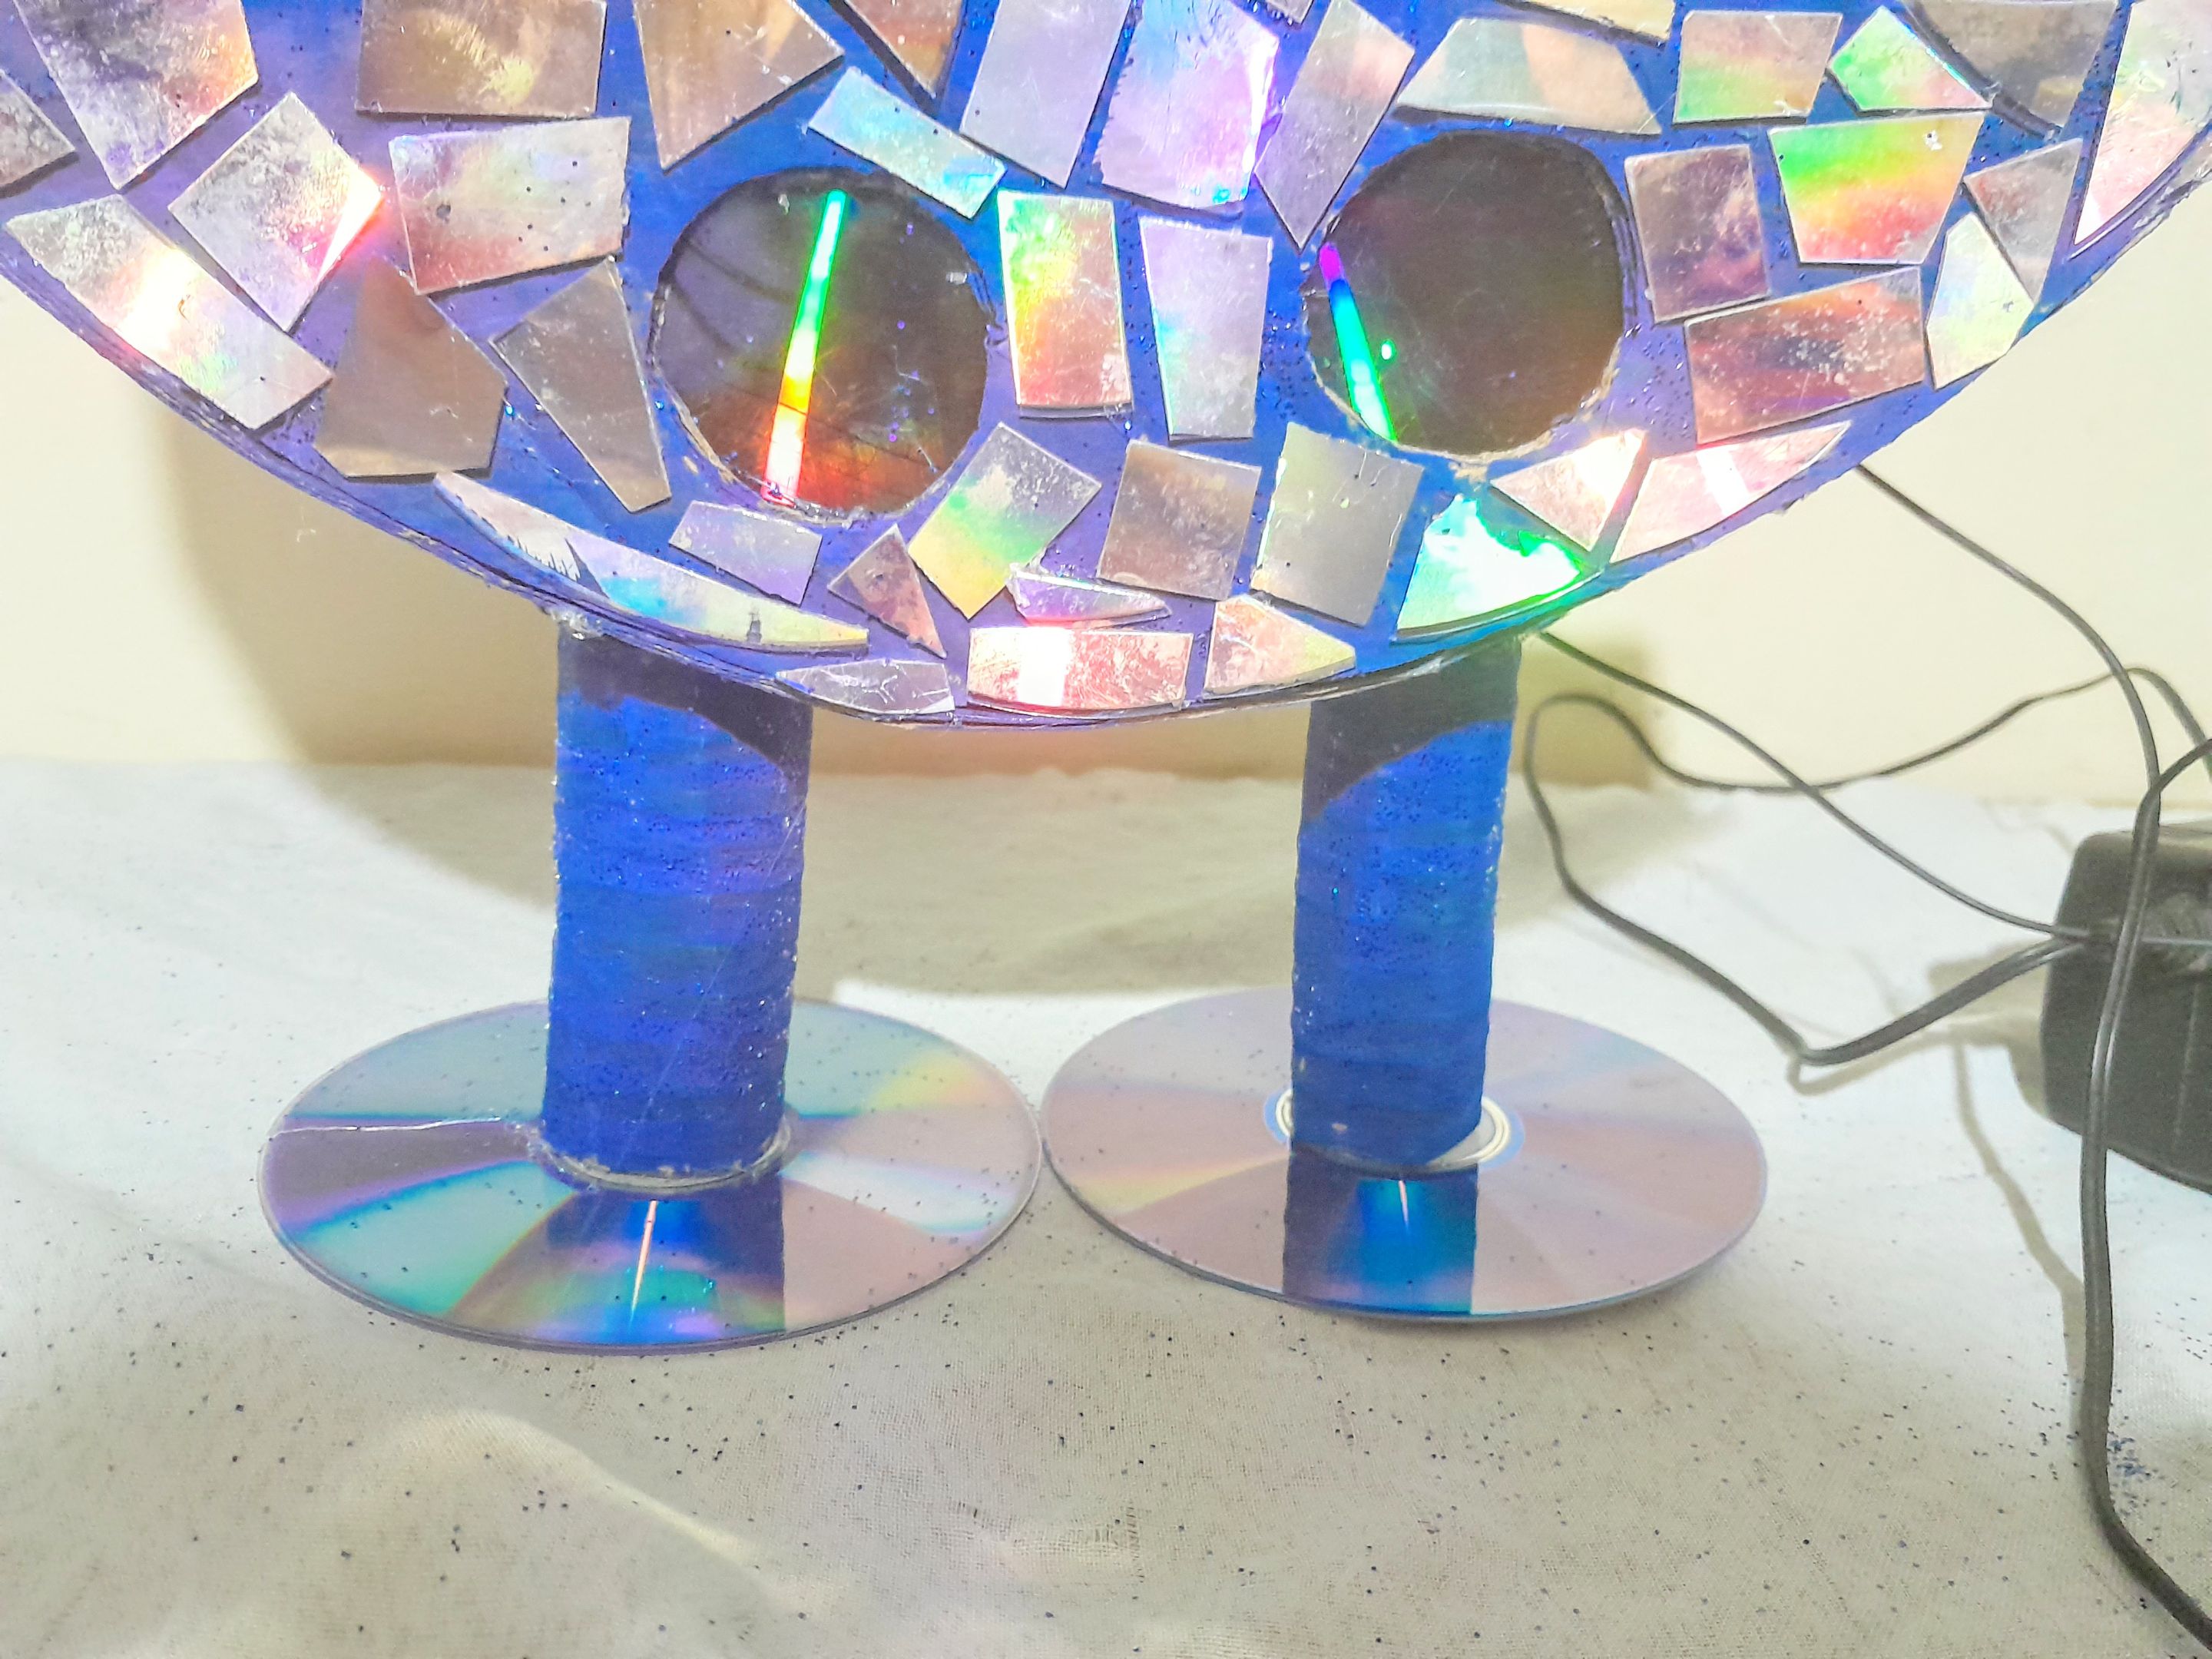
It is time to use the other part of our CD, we will make circles of 5x5 cm, cut and glue on the bottom, the circles that I made the moon.
Es hora deusar la otra parte de nuestro CD, vamos hacer círculos de 5x5 cm, cortamos y pegamos en la parte de abajo, los círculos que le hice a la luna.
Step 5| Paso 5
Now we are going to glue the sides, by the burner of the strip I add silicone and I glue little by little the bottom part, it will be like a small drawer, we place the lights and glue the bottom, then we glue the front part of the moon.
Ahora vamos a pegar los laterales, por la hornilla de la tira agrego silicon y voy pegando poco a poco la parte de abajo, nos quedará como un pequeño cajón, ubicamos las luces y pegamos al fondo, luego pegamos la parte del frente de la luna.
Step 6 | Paso 6
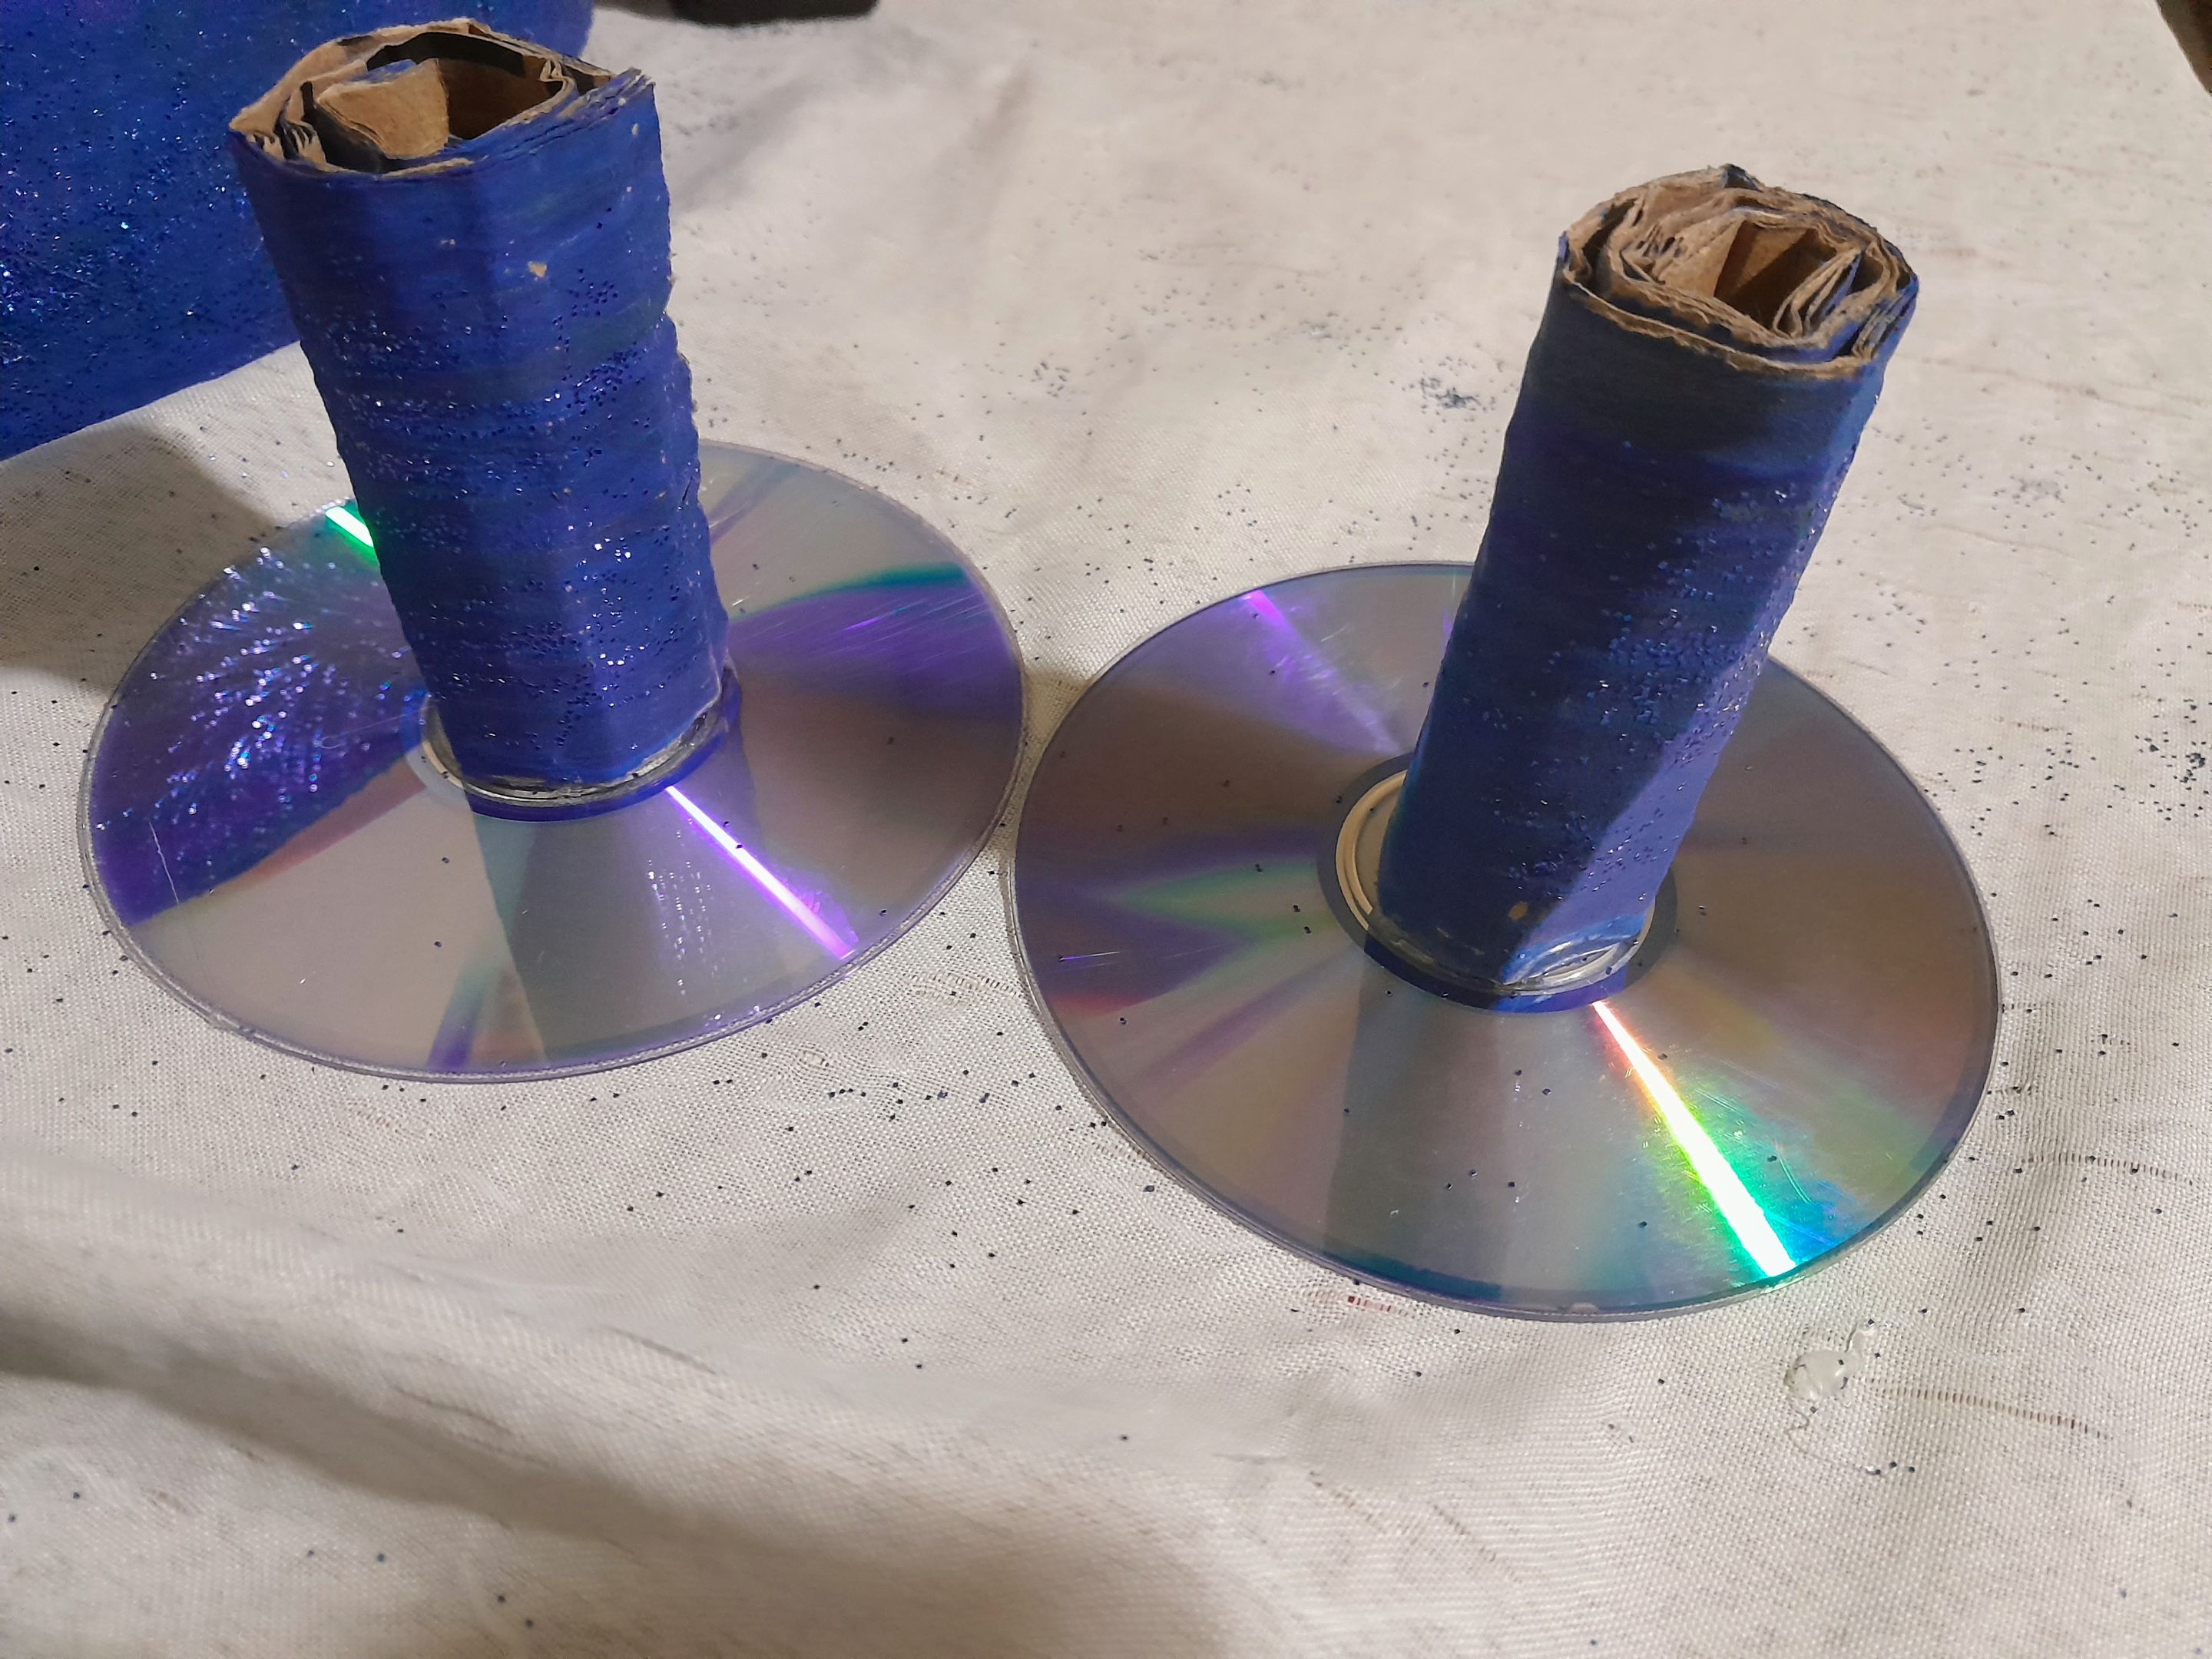
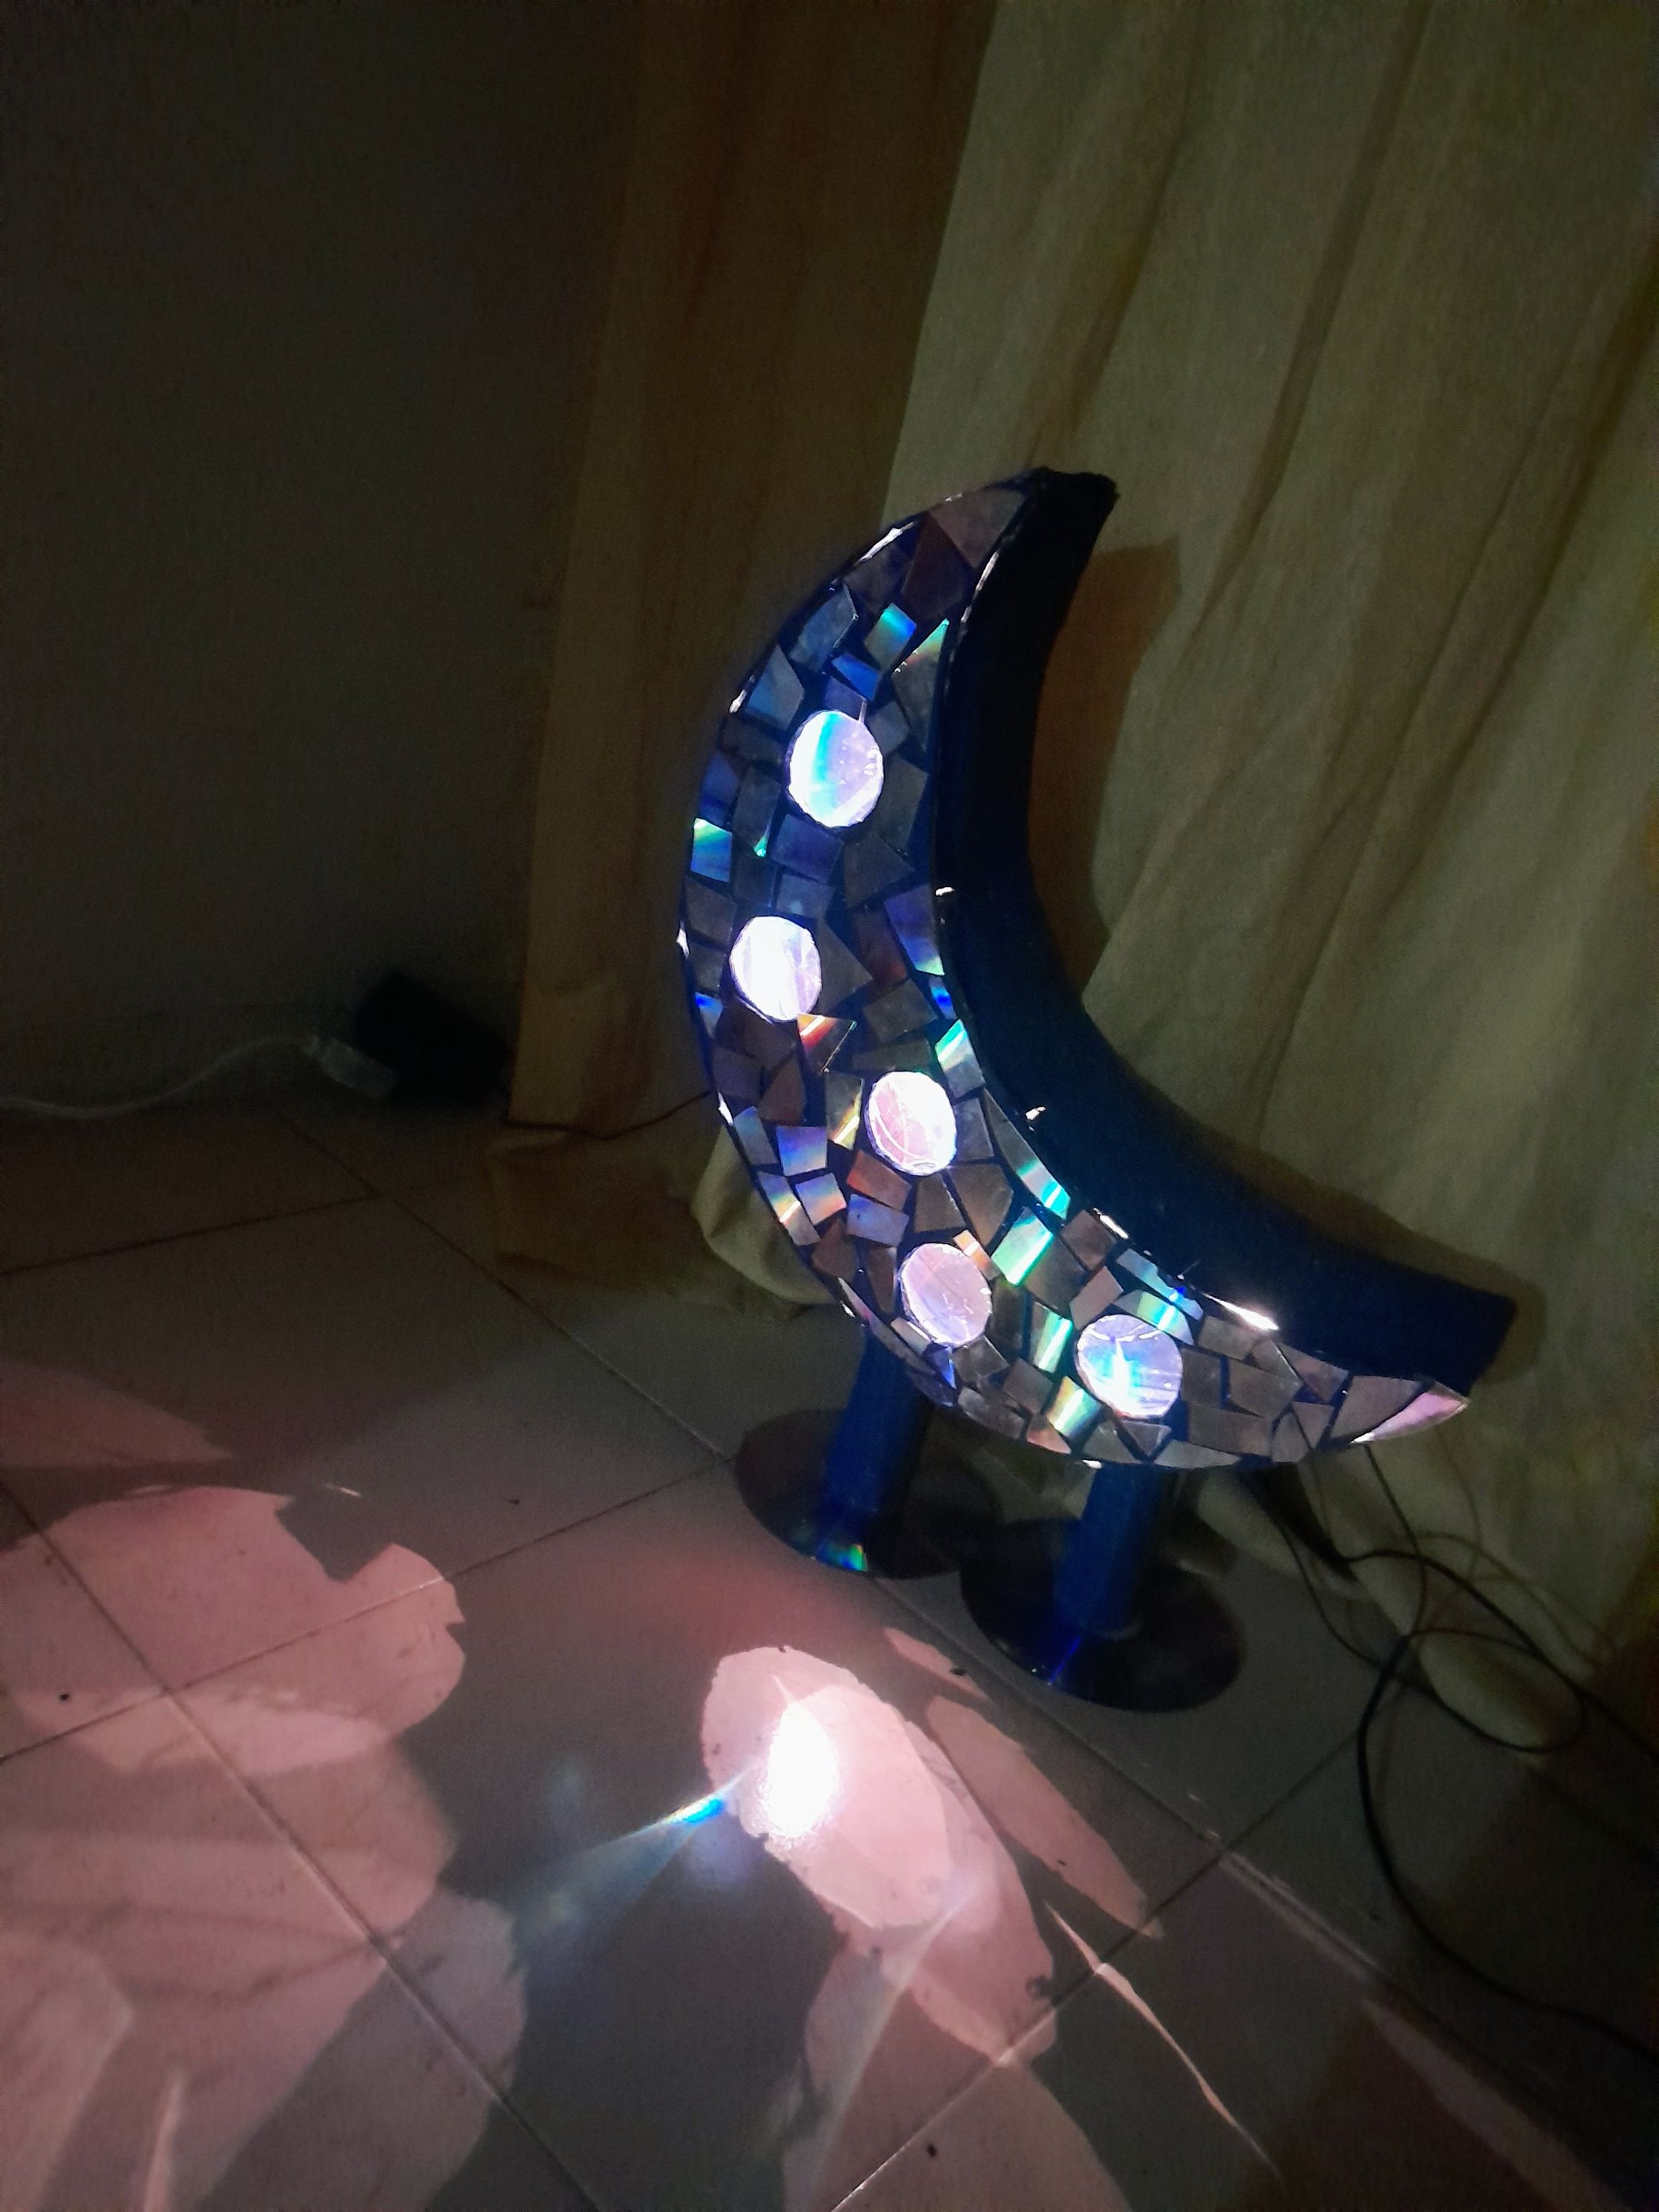
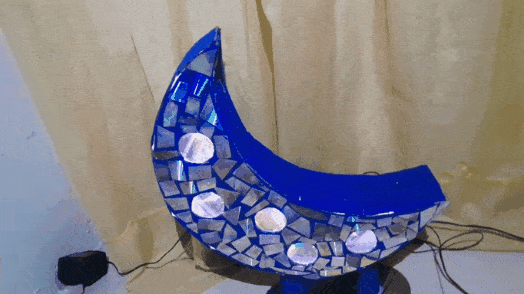
Now we make a rectangle of 20 cm long by 10 cm wide, paint and add frosting, once it is dry we will go rolling as shown in the image and video, glue at the end of rolling and then glue to the center of the CD, we make two bases and glue to the lamp.
I hope you liked it, I loved it and my little ones loved it, because it reflects not only the circles, but also the small pieces of CD, it makes a nice contrast of colors.
Ahora hacemos un rectángulo de 20 cm de largo por 10 cm de ancho, pintamos y agregamos escarchas, una vez este seco vamos a ir enrollando como se muestra en la imagen y el video, pegamos al finalizar de enrollar y luego pegamos al centro del CD, hacemos dos bases y pegamos al la lámpara.
Espero les haya gustado, a mí me encantó y mis pequeños la adoraron, ya que se refleja no solo los círculos, sino también los pequeños pedazos de CD, hace un lindo contraste de colores.
Final presentation

Thank you very much for this nice space, I hope you liked my elaboration today, best wishes, see you soon, greetings ☺️.
Muchas gracias por este lindo espacio, espero les haya gustado mi elaboración de hoy, mis mejores deseos, nos vemos pronto, saludos ☺️.
🌙🌙🌙🌙🌙🌙🌙🌙🌙🌙🌙🌙🌙🌙🌙🌙🌙🌙🌙🌙
Own photos and video taken with my Samsung A13 phone, 50 mp. Cover editing with Picsart, collage in Gridart. Video editing in CapCut, Lazy Sunday Music.
Exclusive content for hive.
Translation --->deepl
Fotos y video propios tomadas con mi teléfono Samsung A13, 50 mp. Edición de portada con Picsart, collage en Gridart. Edicion de video en CapCut, Musica Lazy Sunday.
Contenido exclusivo para hive.
Traducción--->deepl
🌙🌙🌙🌙🌙🌙🌙🌙🌙🌙🌙🌙🌙🌙🌙🌙🌙🌙🌙🌙
Show more
Tags :
Woo!
This creator can upvote comments using 3speak's stake today because they are a top performing creator!
Leave a quality comment relating to their content and you could receive an upvote
worth at least a dollar.
Their limit for today is $0!
Their limit for today is $0!
17 views
2 years ago
$
More Videos

21 views
a year ago
$
17 views
a year ago
$
14 views
a year ago
$
5 views
2 years ago
$
7 views
4 years ago
$

4 views
3 years ago
$
8 views
3 years ago
$

15 views
10 months ago
$
3 views
2 years ago
$
12 views
2 years ago
$
2 views
2 years ago
$

5 views
2 years ago
$
5 views
a year ago
$

7 views
a year ago
$
13 views
3 years ago
$
8 views
2 years ago
$

7 views
4 years ago
$
8 views
a year ago
$

3 views
a year ago
$

10 views
4 years ago
$

7 views
a year ago
$

3 views
3 years ago
$

6 views
3 weeks ago
$
Comments:
Reply:
To comment on this video please connect a HIVE account to your profile: Connect HIVE Account