BackYard Cannabis Farming 2020 - Episode 2: Constructing an In-Ground Garden & Final Transplants - 3 Day Project
8
About :
Today's episode is also my first #3Speak video! I am stoked to be using this new platform and look forward to many more uploads (including the rest of this series). I will do a proper introduction video for 3Speak soon, but could not wait any longer to publish episode 2.
Setting up an in ground garden this season required way more effort and man hours than simply growing in pots as I have done in years past. This project took three FULL days of work and a whole bunch of materials including a rental.
Step one was to mow the grass. This also came with the task of digging up a fire pit that was directly in the way of the selected grow space. After these two chores were completed, I was then able to move onto the tilling. I first attempted to use a rototiller a friend let me borrow, but I quickly realized it would not get the job done as it looked more like a weed-whacker than anything, and when I took it to the ground it could not even penetrate the grass layer.
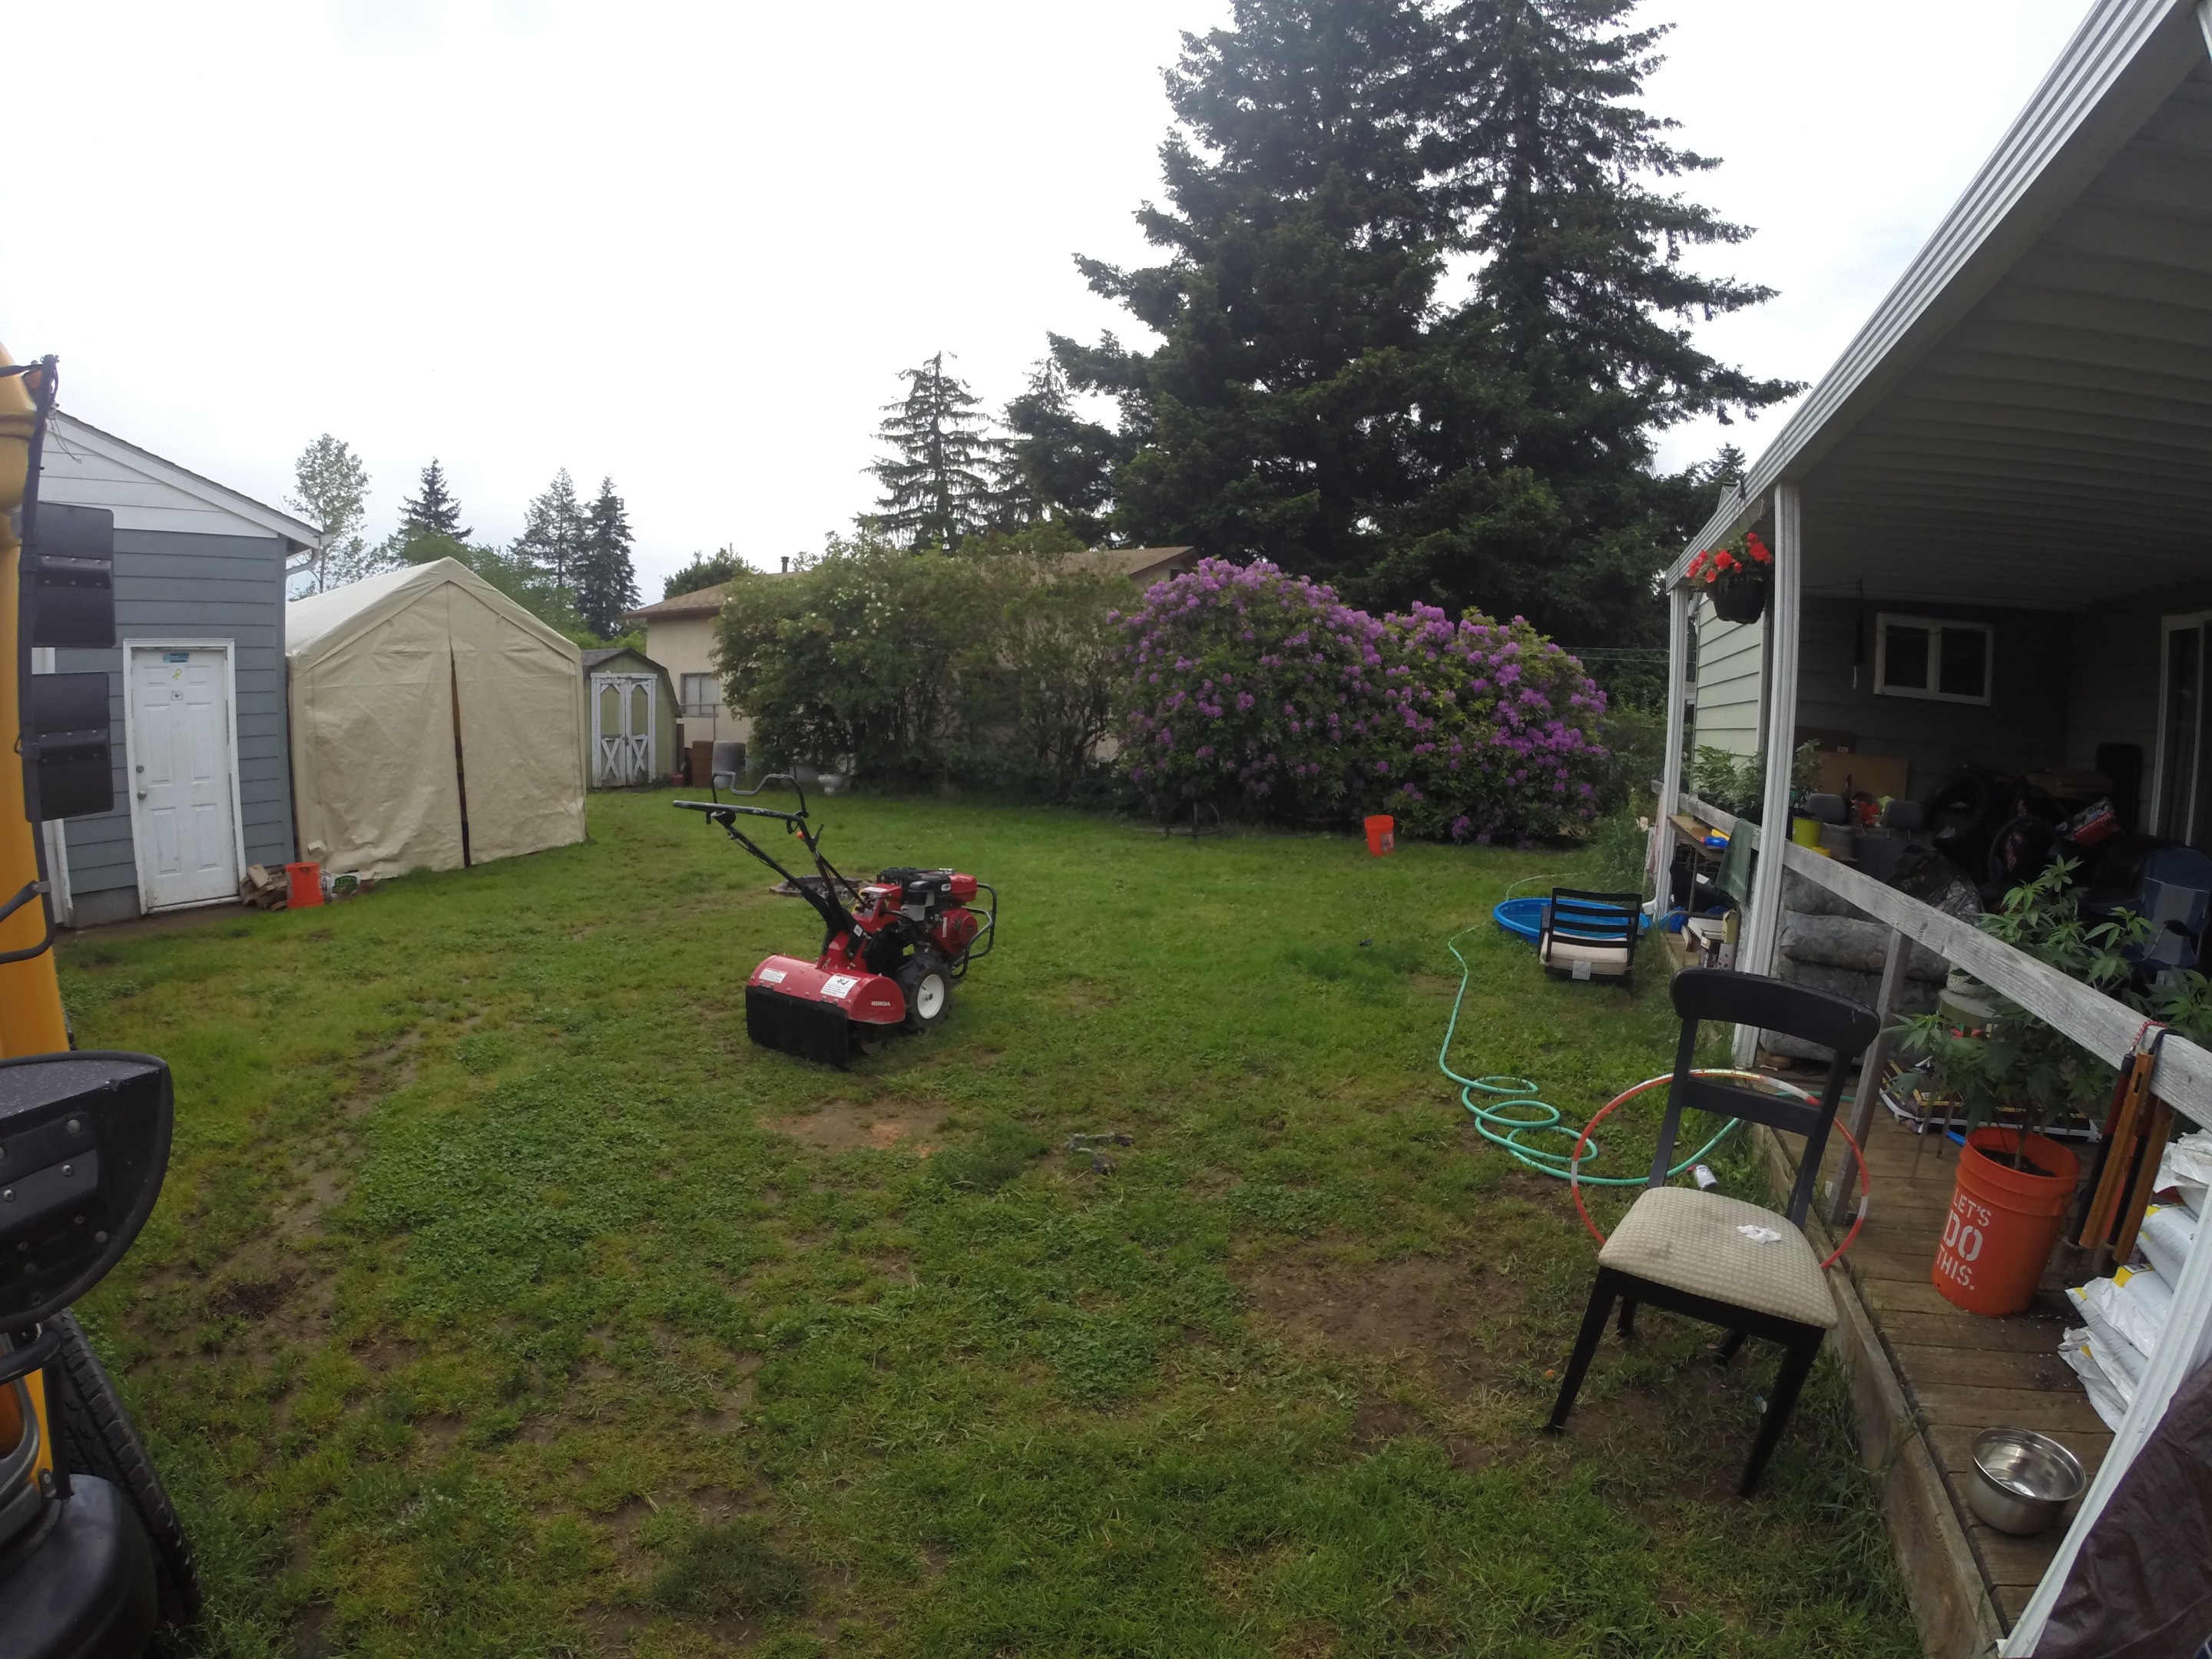
I decided to rent a commercial grade rototiller for about $130 - best decision I could have made. That thing dug far into the dirt and got the job done right. I then executed my plan of tilling twice - once to unearth the layer of grass away from the fertile soil, and a second time to mix and till in the amendments after removing all the grass chunks and roots upon completion of the first round of tilling. Picking out all the chunks of grass sod and root clumps was a painstakingly long, tedious, and backbreaking process, and was by far the most difficult step in this process.
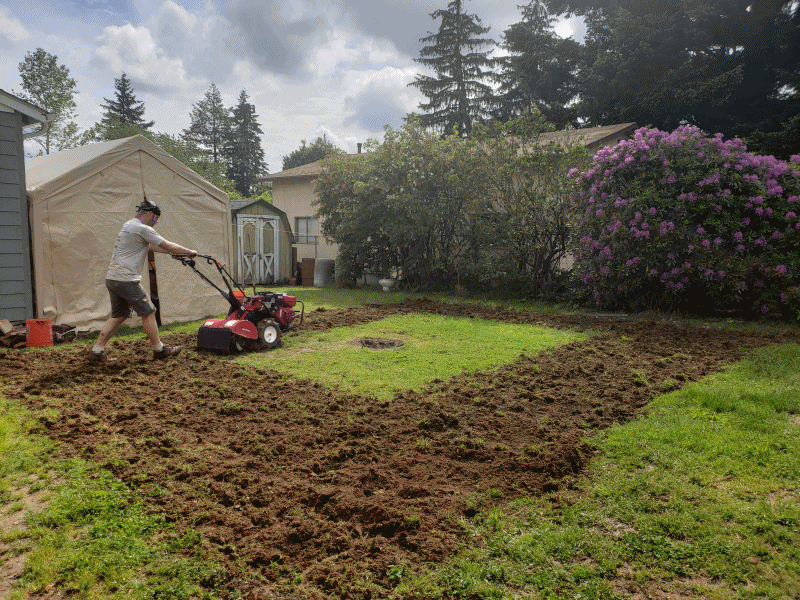
I was surprised at how soft and clay rich the soil was once it was tilled properly. Ideal growing soil to start with, and now it was also primed for supplementation. I threw down around 20 bags of composted steer manure, a few bags of worm castings, 1/2 a bag of lime sulfur, 2/3 of a big bag of Nectar for the Gods organic fertilizer, 2 bags of leaf and woods debris compost, and about 15 Happy Frog top soil that has a myriad of other organic and natural amendments such as bat guano (you can view the full top soil ingredient list here from season 2). I decided not to go with any commercially mixed by the yard soil this season as I no longer want sand in my mixes.
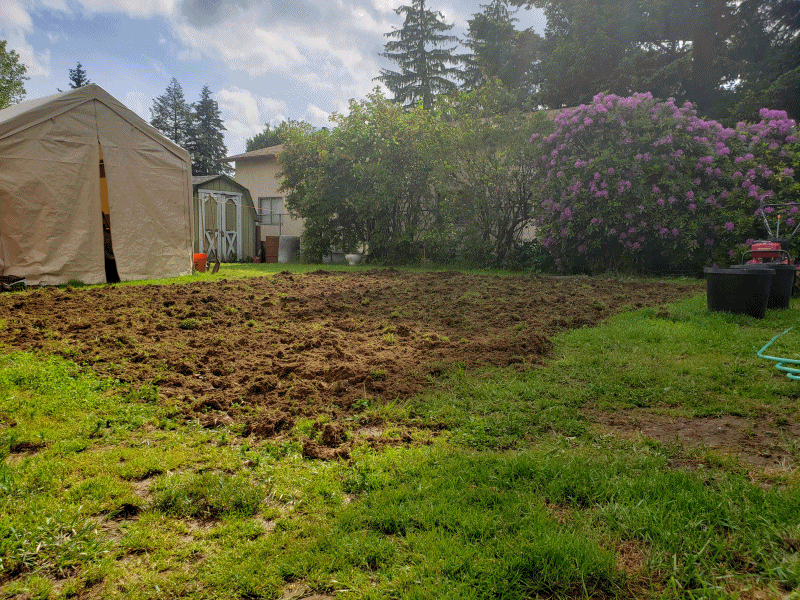
After laying down all my amendments evenly across the pre-tilled grow area, I proceeding with commencing the second round of tilling to mix in all the ingredients and stir them more below the surface. The only downside was how many rocks were present in the till area. It wasn't the worst I had ever seen, and I feel I was also able to remove a good 70+% of them when we were hand detailing the soil.

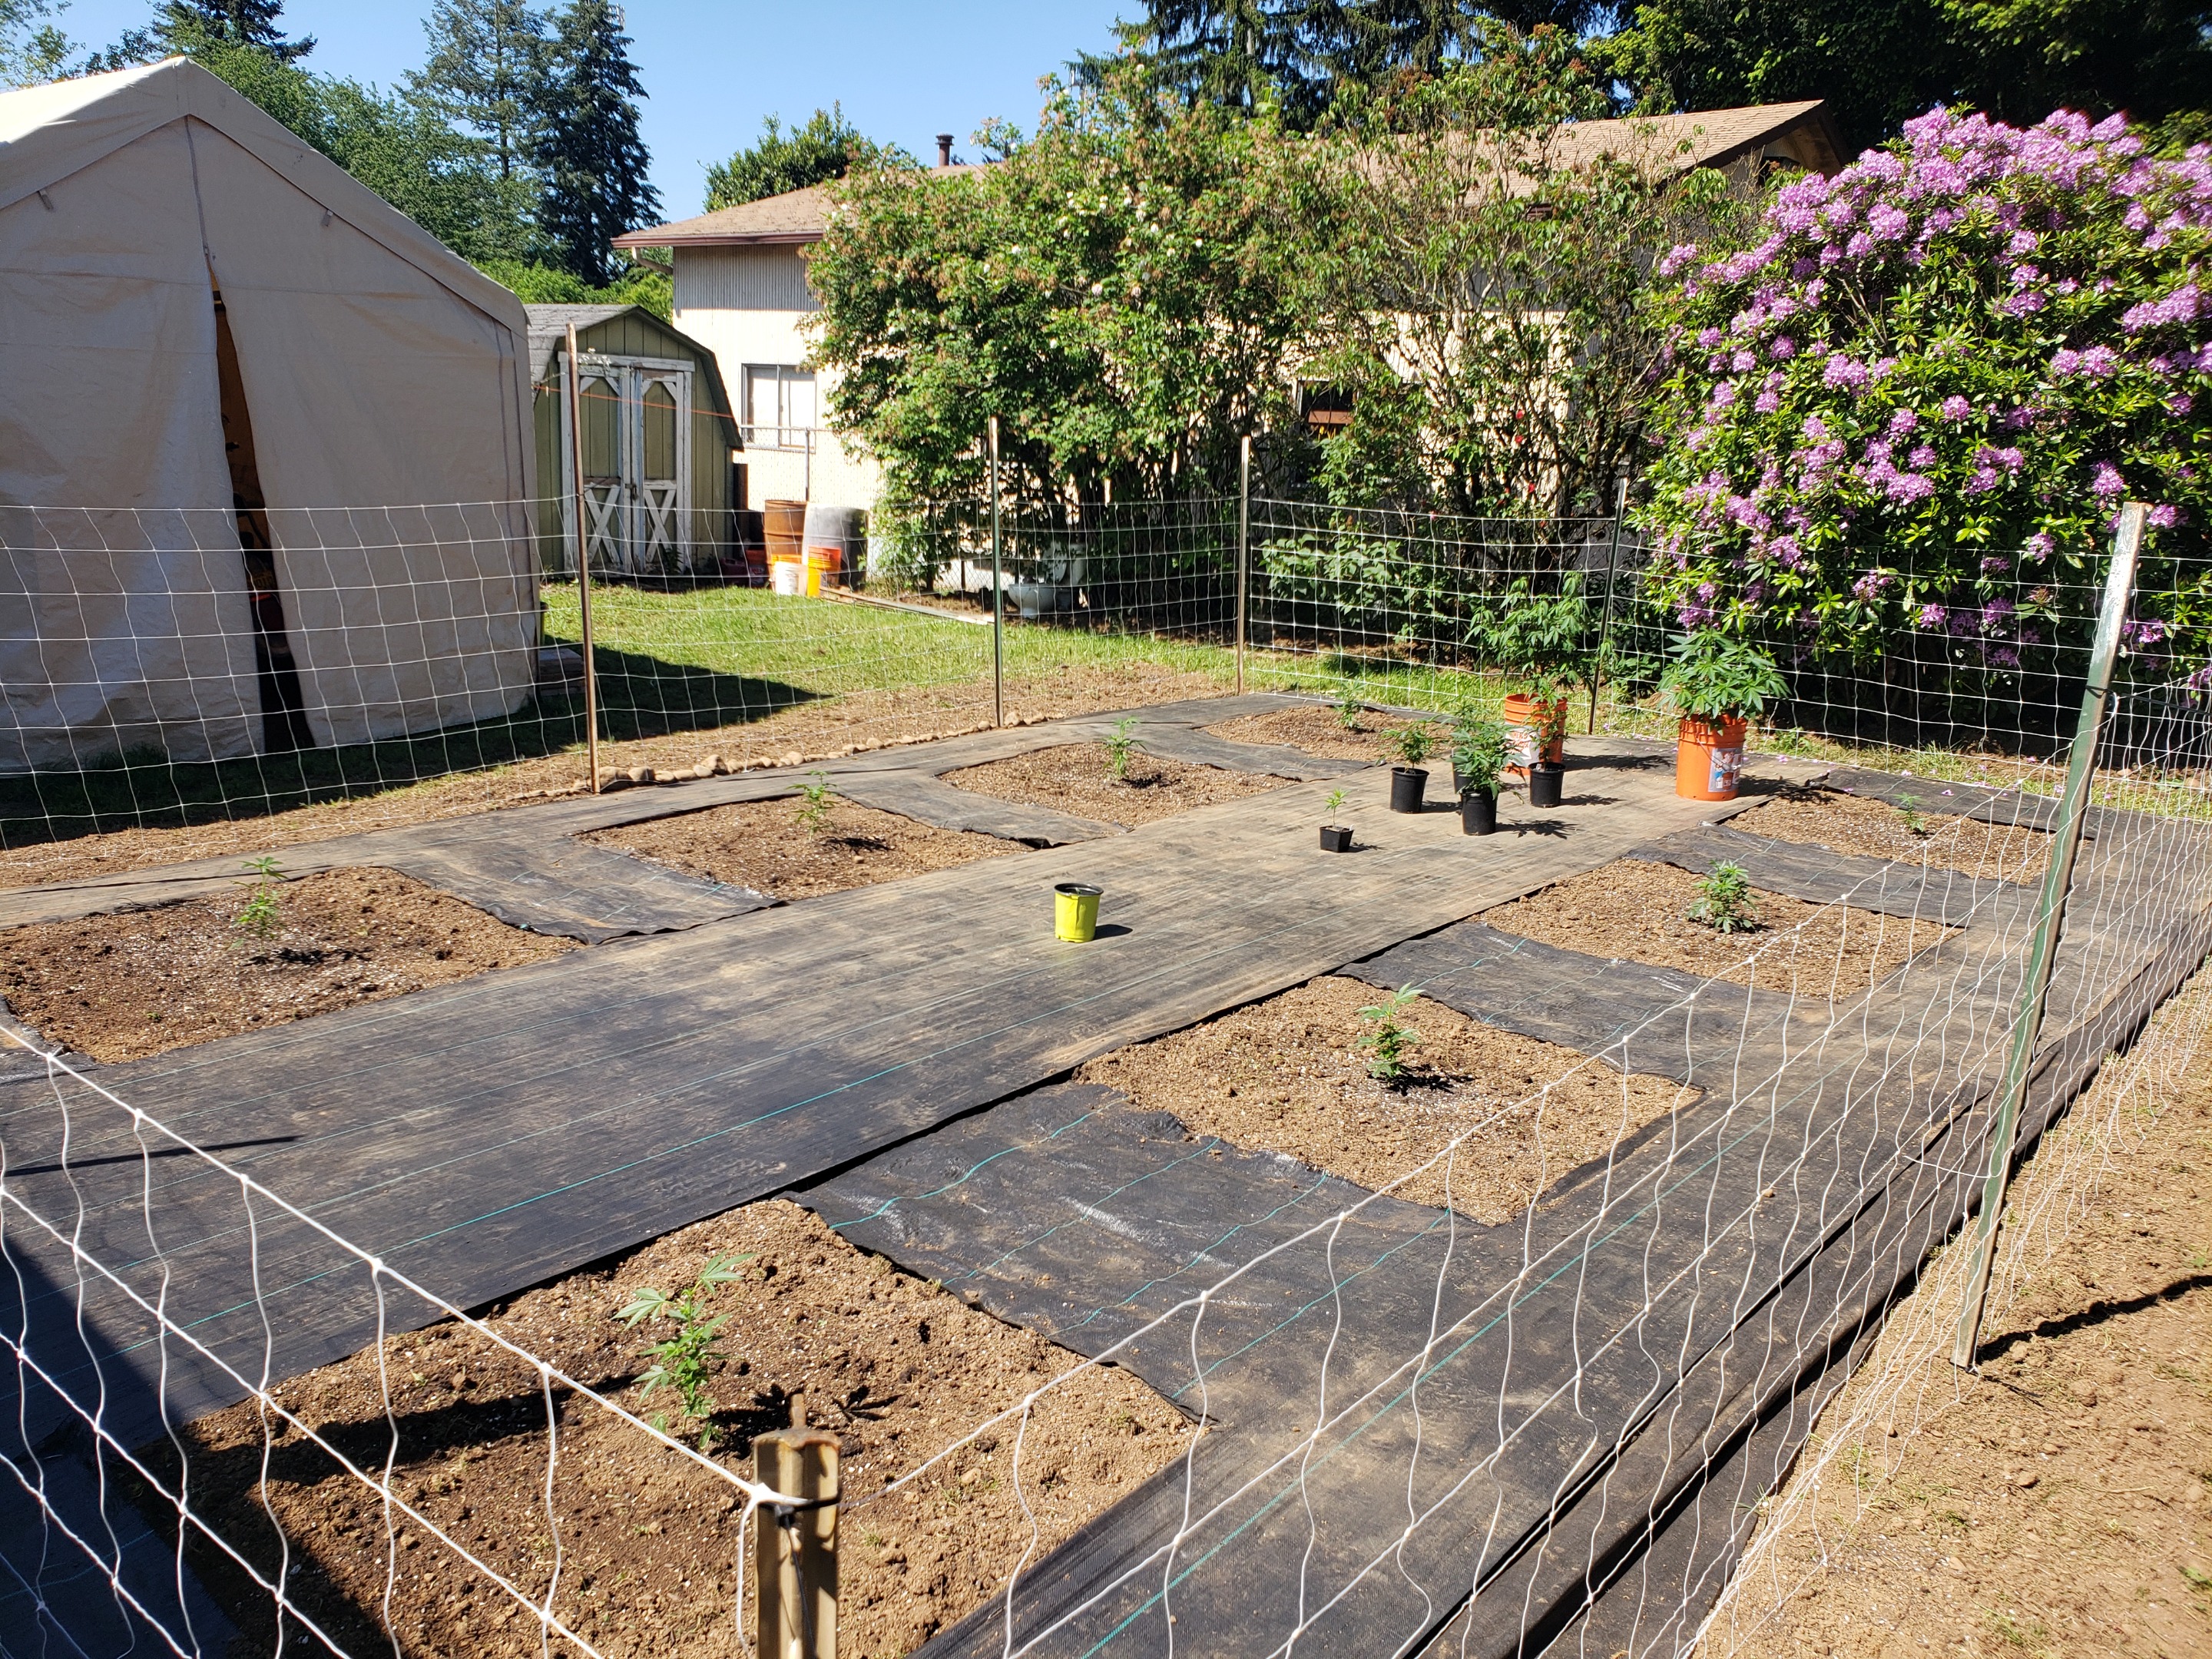
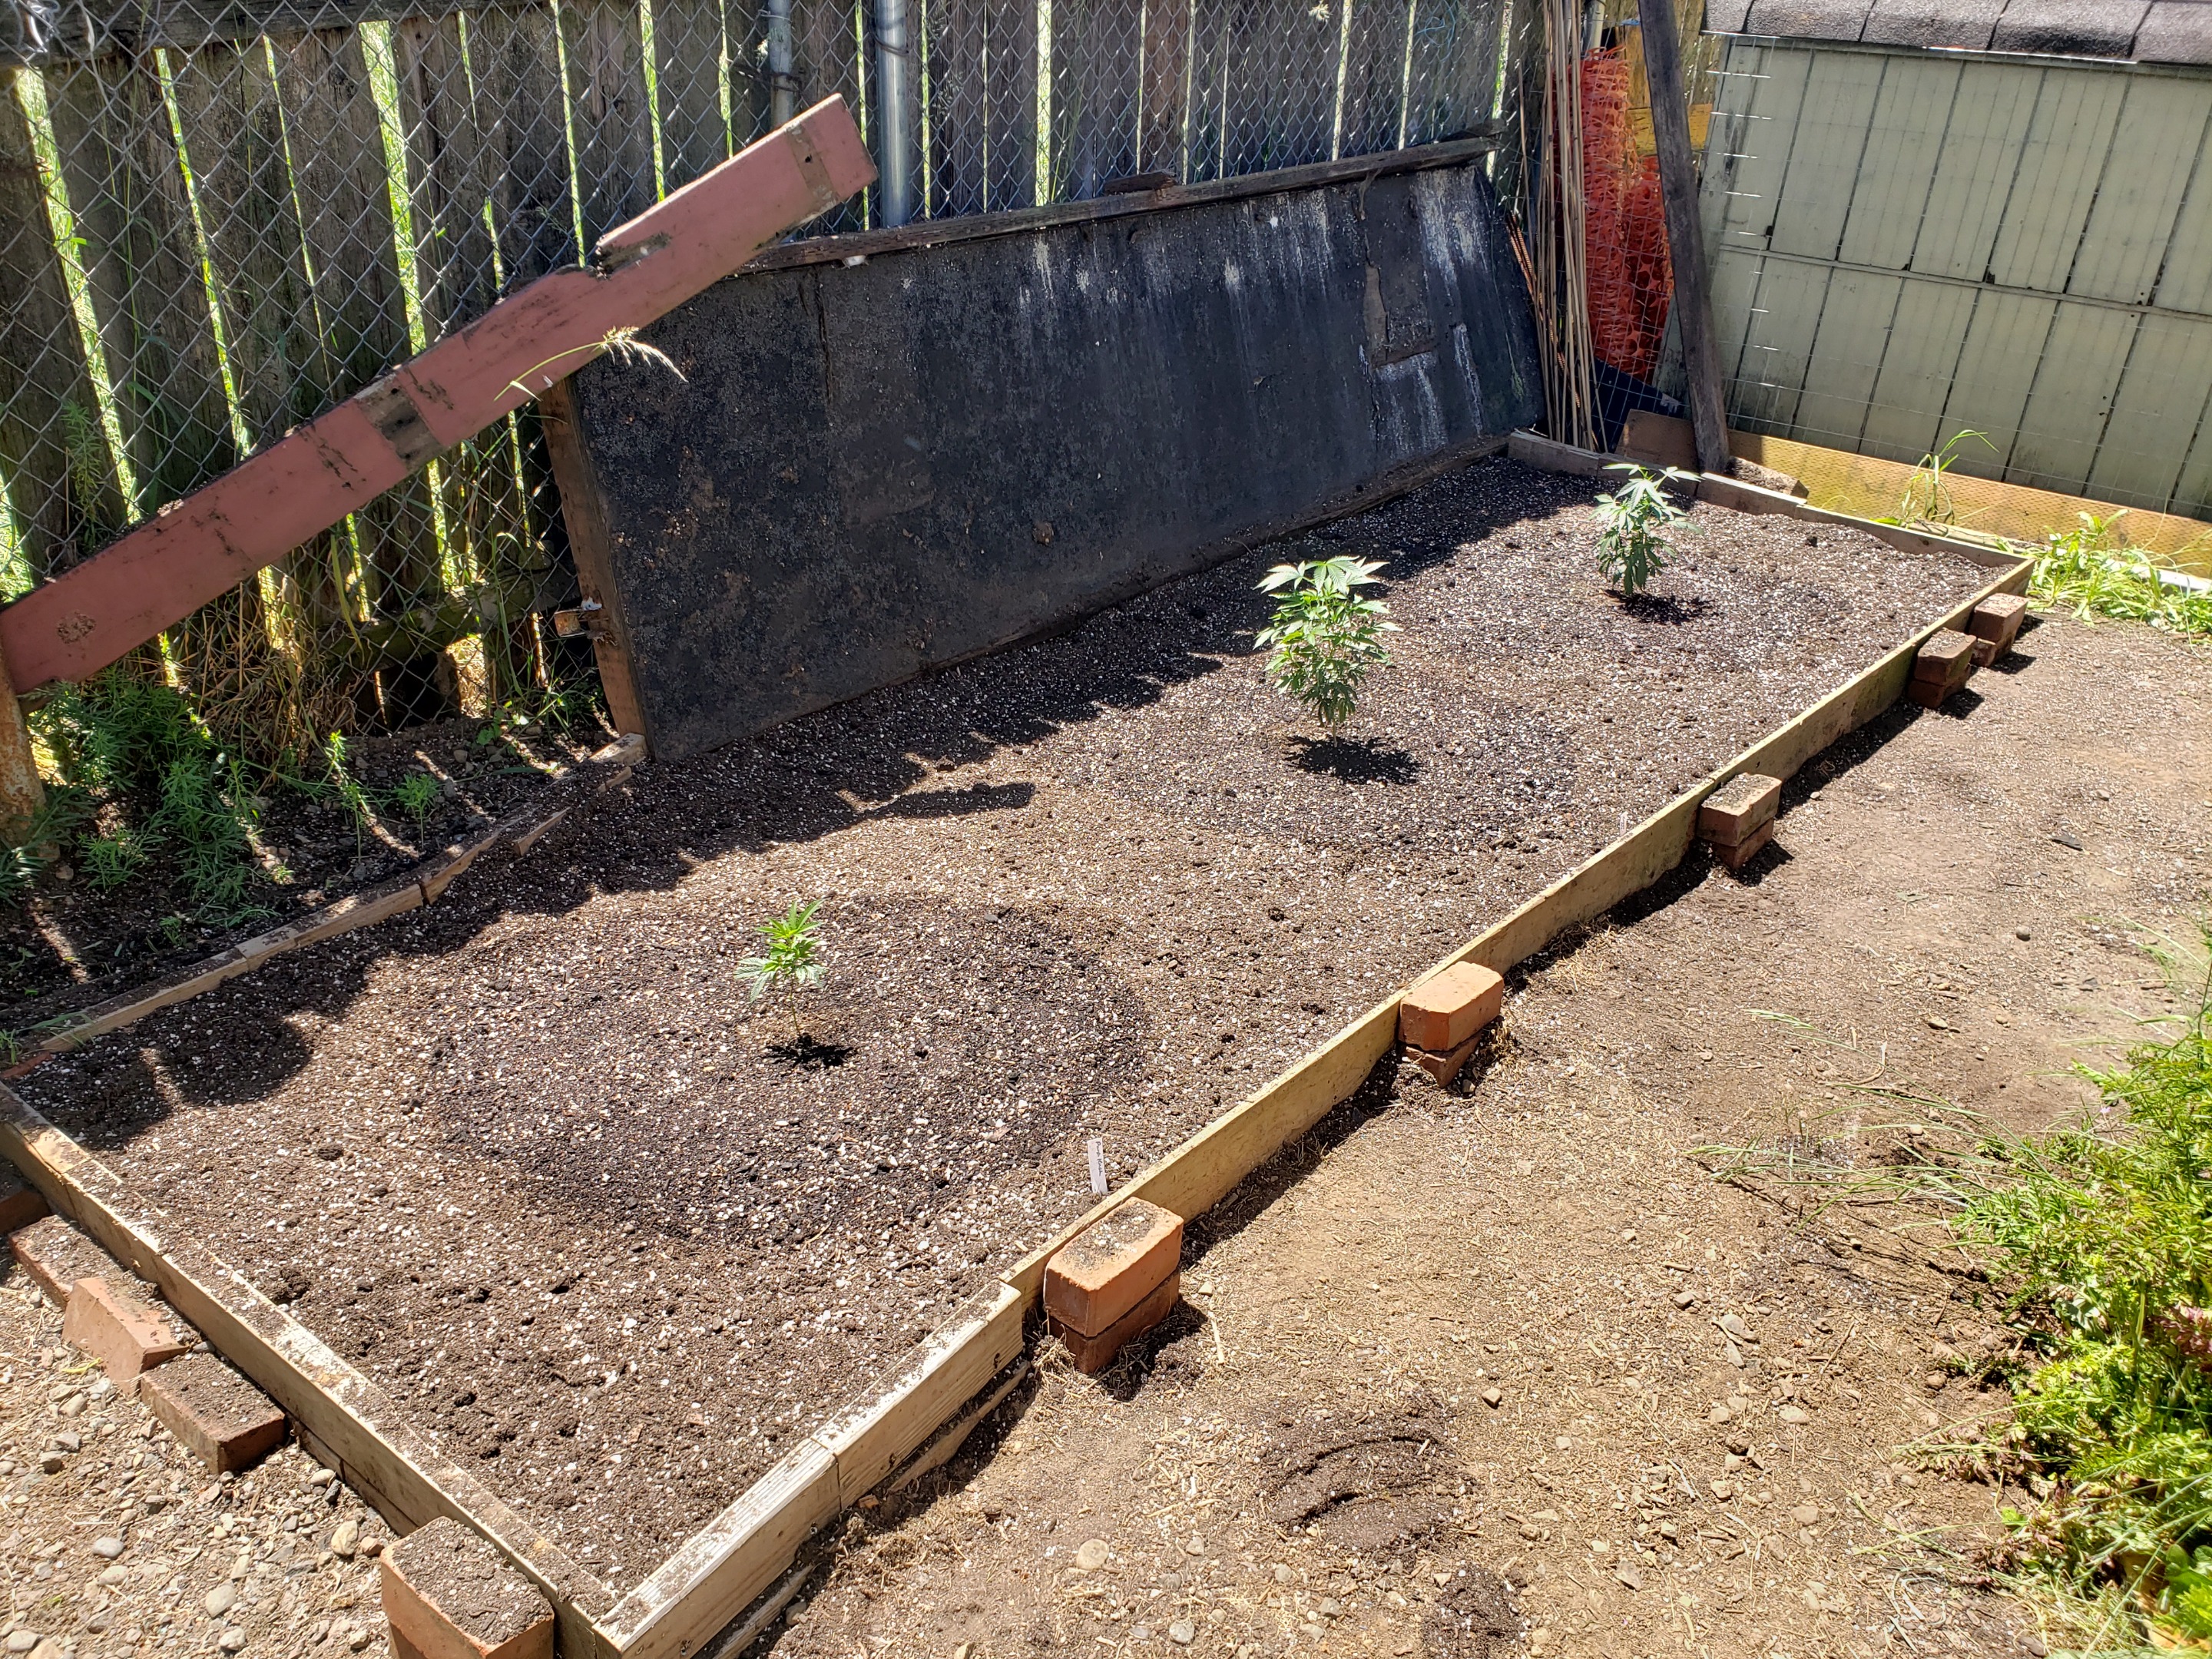
The next morning I realized I purchased the wrong black matting and went to the store to correct the error (you want the thick matting with GREEN LINES on them - other types are not as durable). We then unrolled the matting in sections, overlapping them so there were no gaps, and then pinning all of it down with garden stakes in the shape of long thick staples. We then cut out boxes for each plant I plan to grow there in two rows, offsetting the placement of each row in relation to the other.
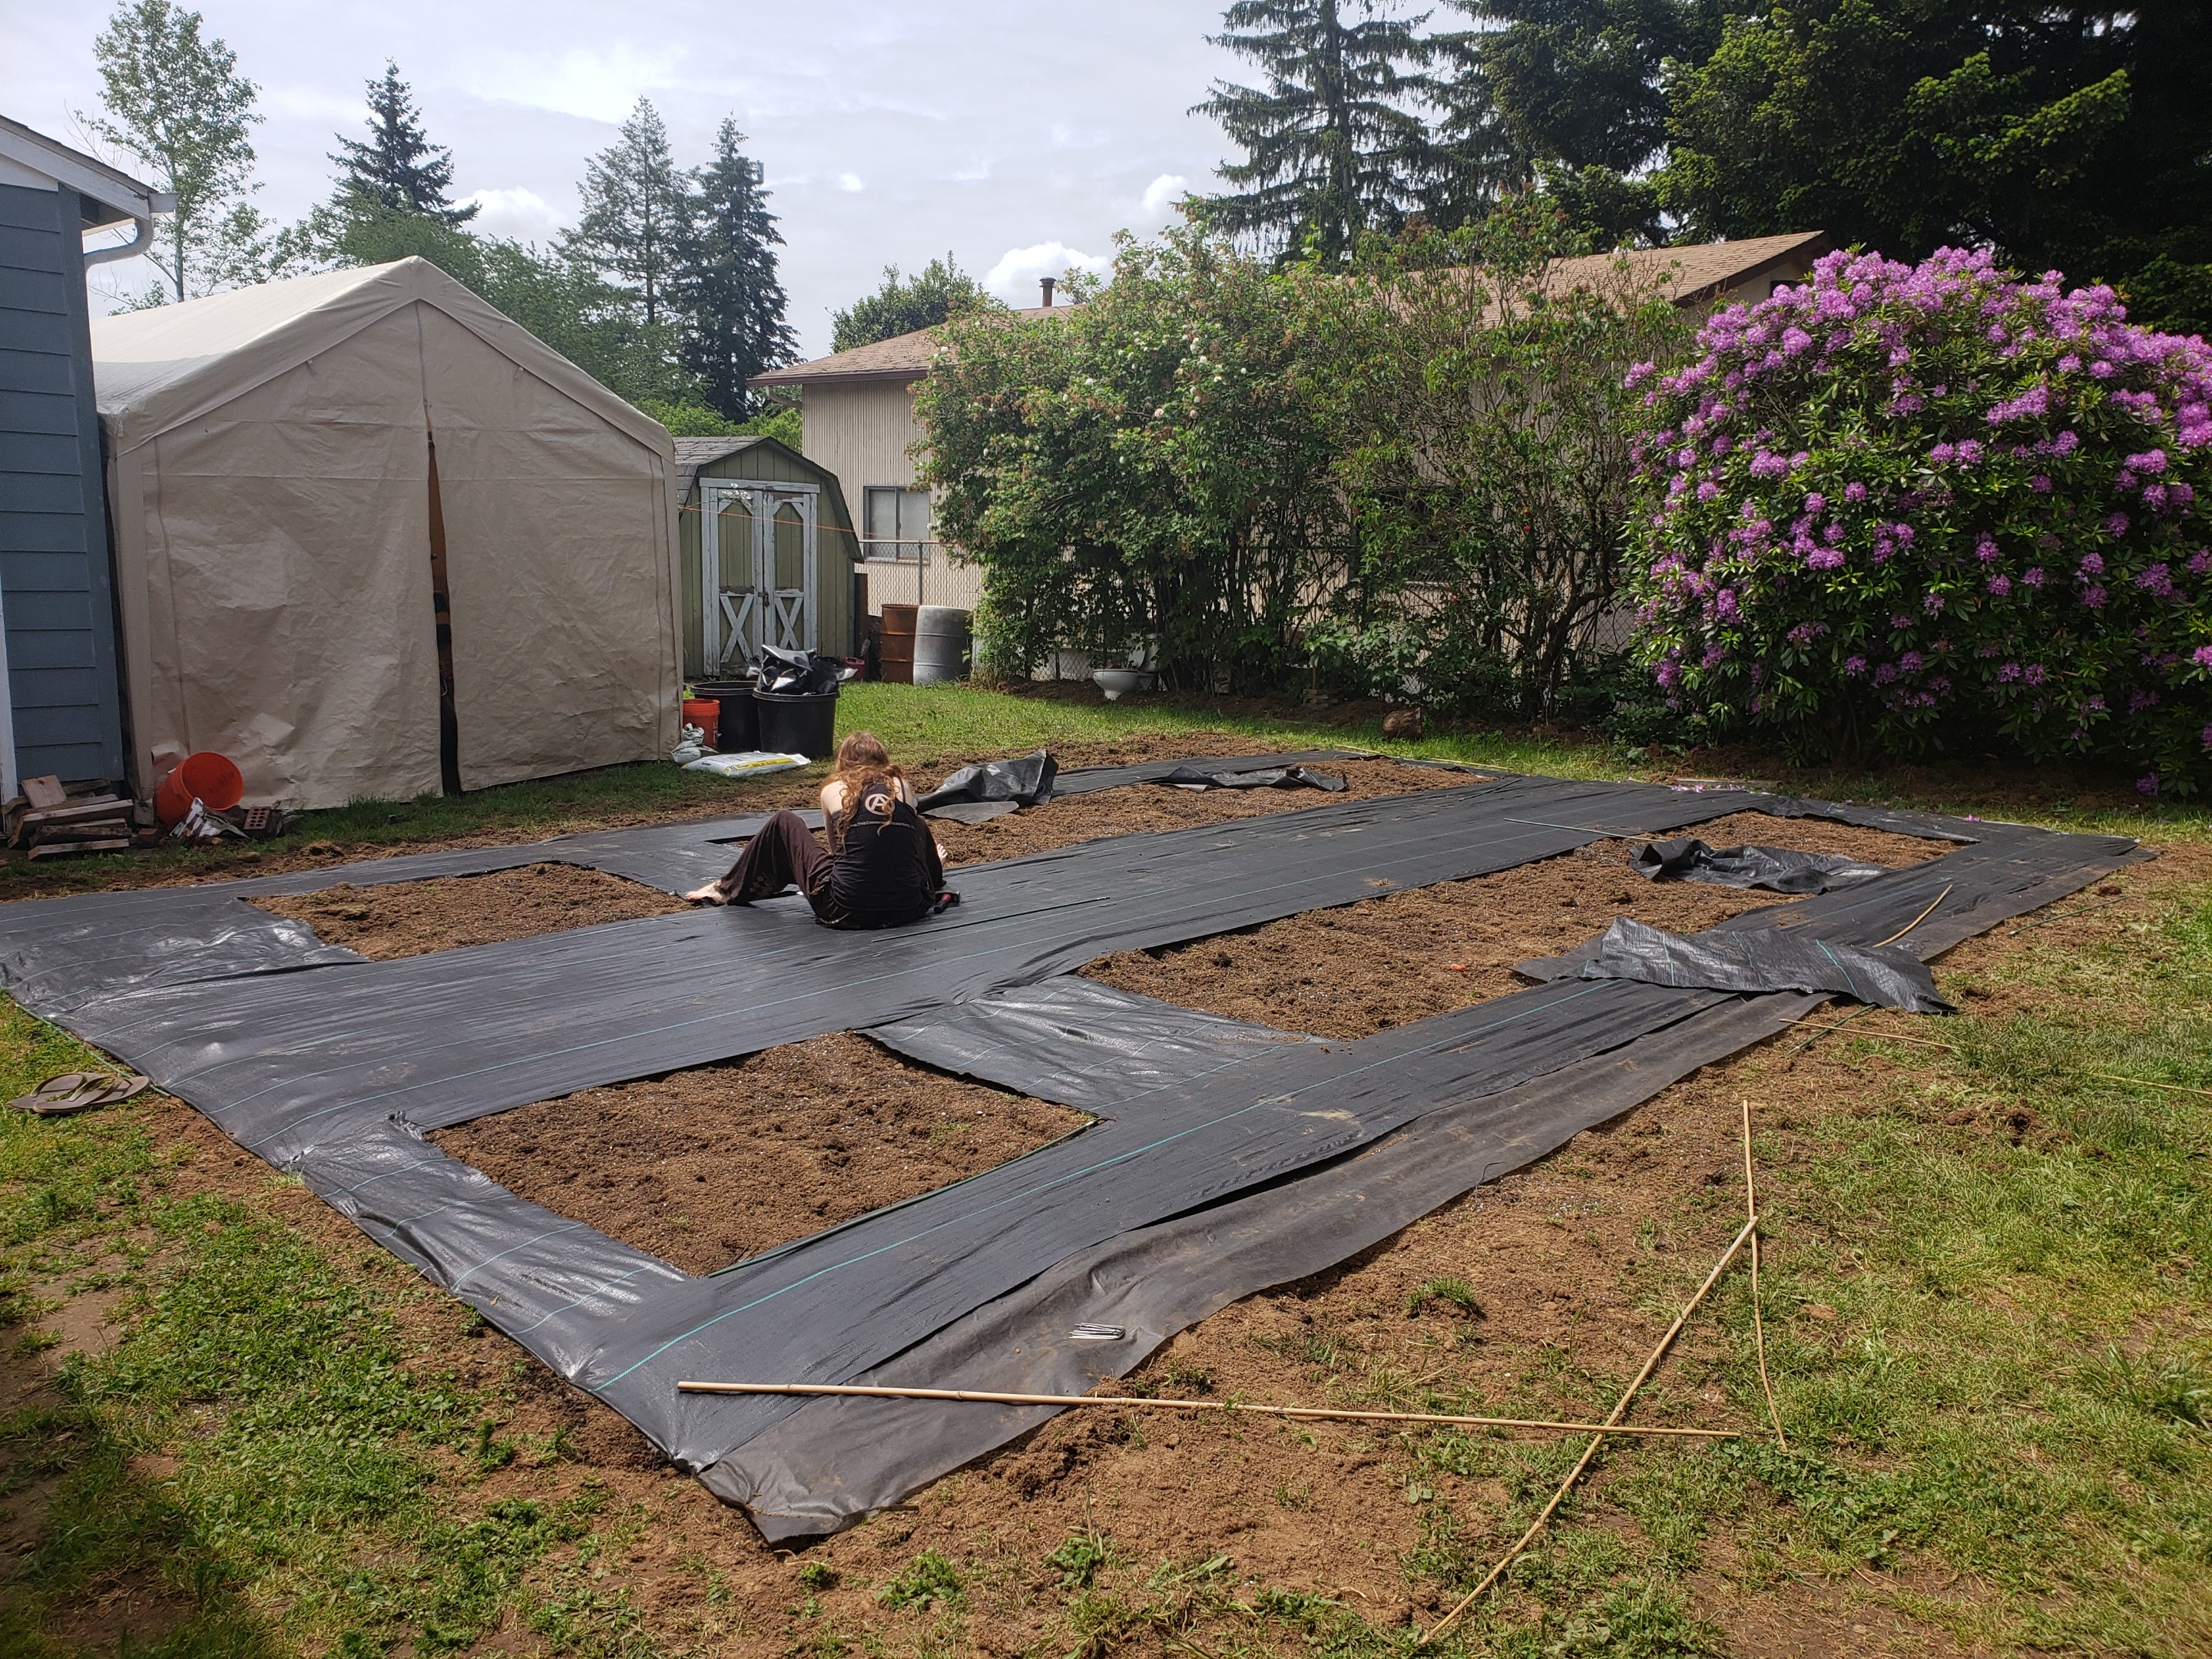
The purpose of laying black matting is to prevent light from getting to areas outside your boxes where grass and weeds would grow. This makes it so you only have to pull weeds from inside your grow boxes, instead of the entire grow area. If you lay down black matting weeks prior to tilling, it makes the grass removal process much easier. It is always easier to remove dead grass than when it is still alive, you just have to remove the matting for tilling and reinstall it afterwards (They were sold out of black matting at the time which is why this was not implemented here).
Next we moved onto transplanting the clones into their well prepared final grow spaces and homes for this season. All the clones in this part of the garden are Purple Hindu Kush. After digging an over-sized and centered hole in each grow box, I mixed the fill dirt with a higher concentration of the till-amendments listed above, and thew down an additional handful of worm castings as the bottom of the hole. We then placed the one gallon sized clone in each hole, and replaced and covered with the mixed concentrated nutrient rich back-fill dirt. Afterwards, applying slight pressure to the soil where the plant was placed is helpful to assist bonding in the new medium. The final step in the transplant is to give a small amount of water that surrounds the outer backfill area of the transplant, NOT directly in the center onto the already established roots - this will force the roots outwards when they detect the moisture and enhance quicker adjustment and more vigorous growth.
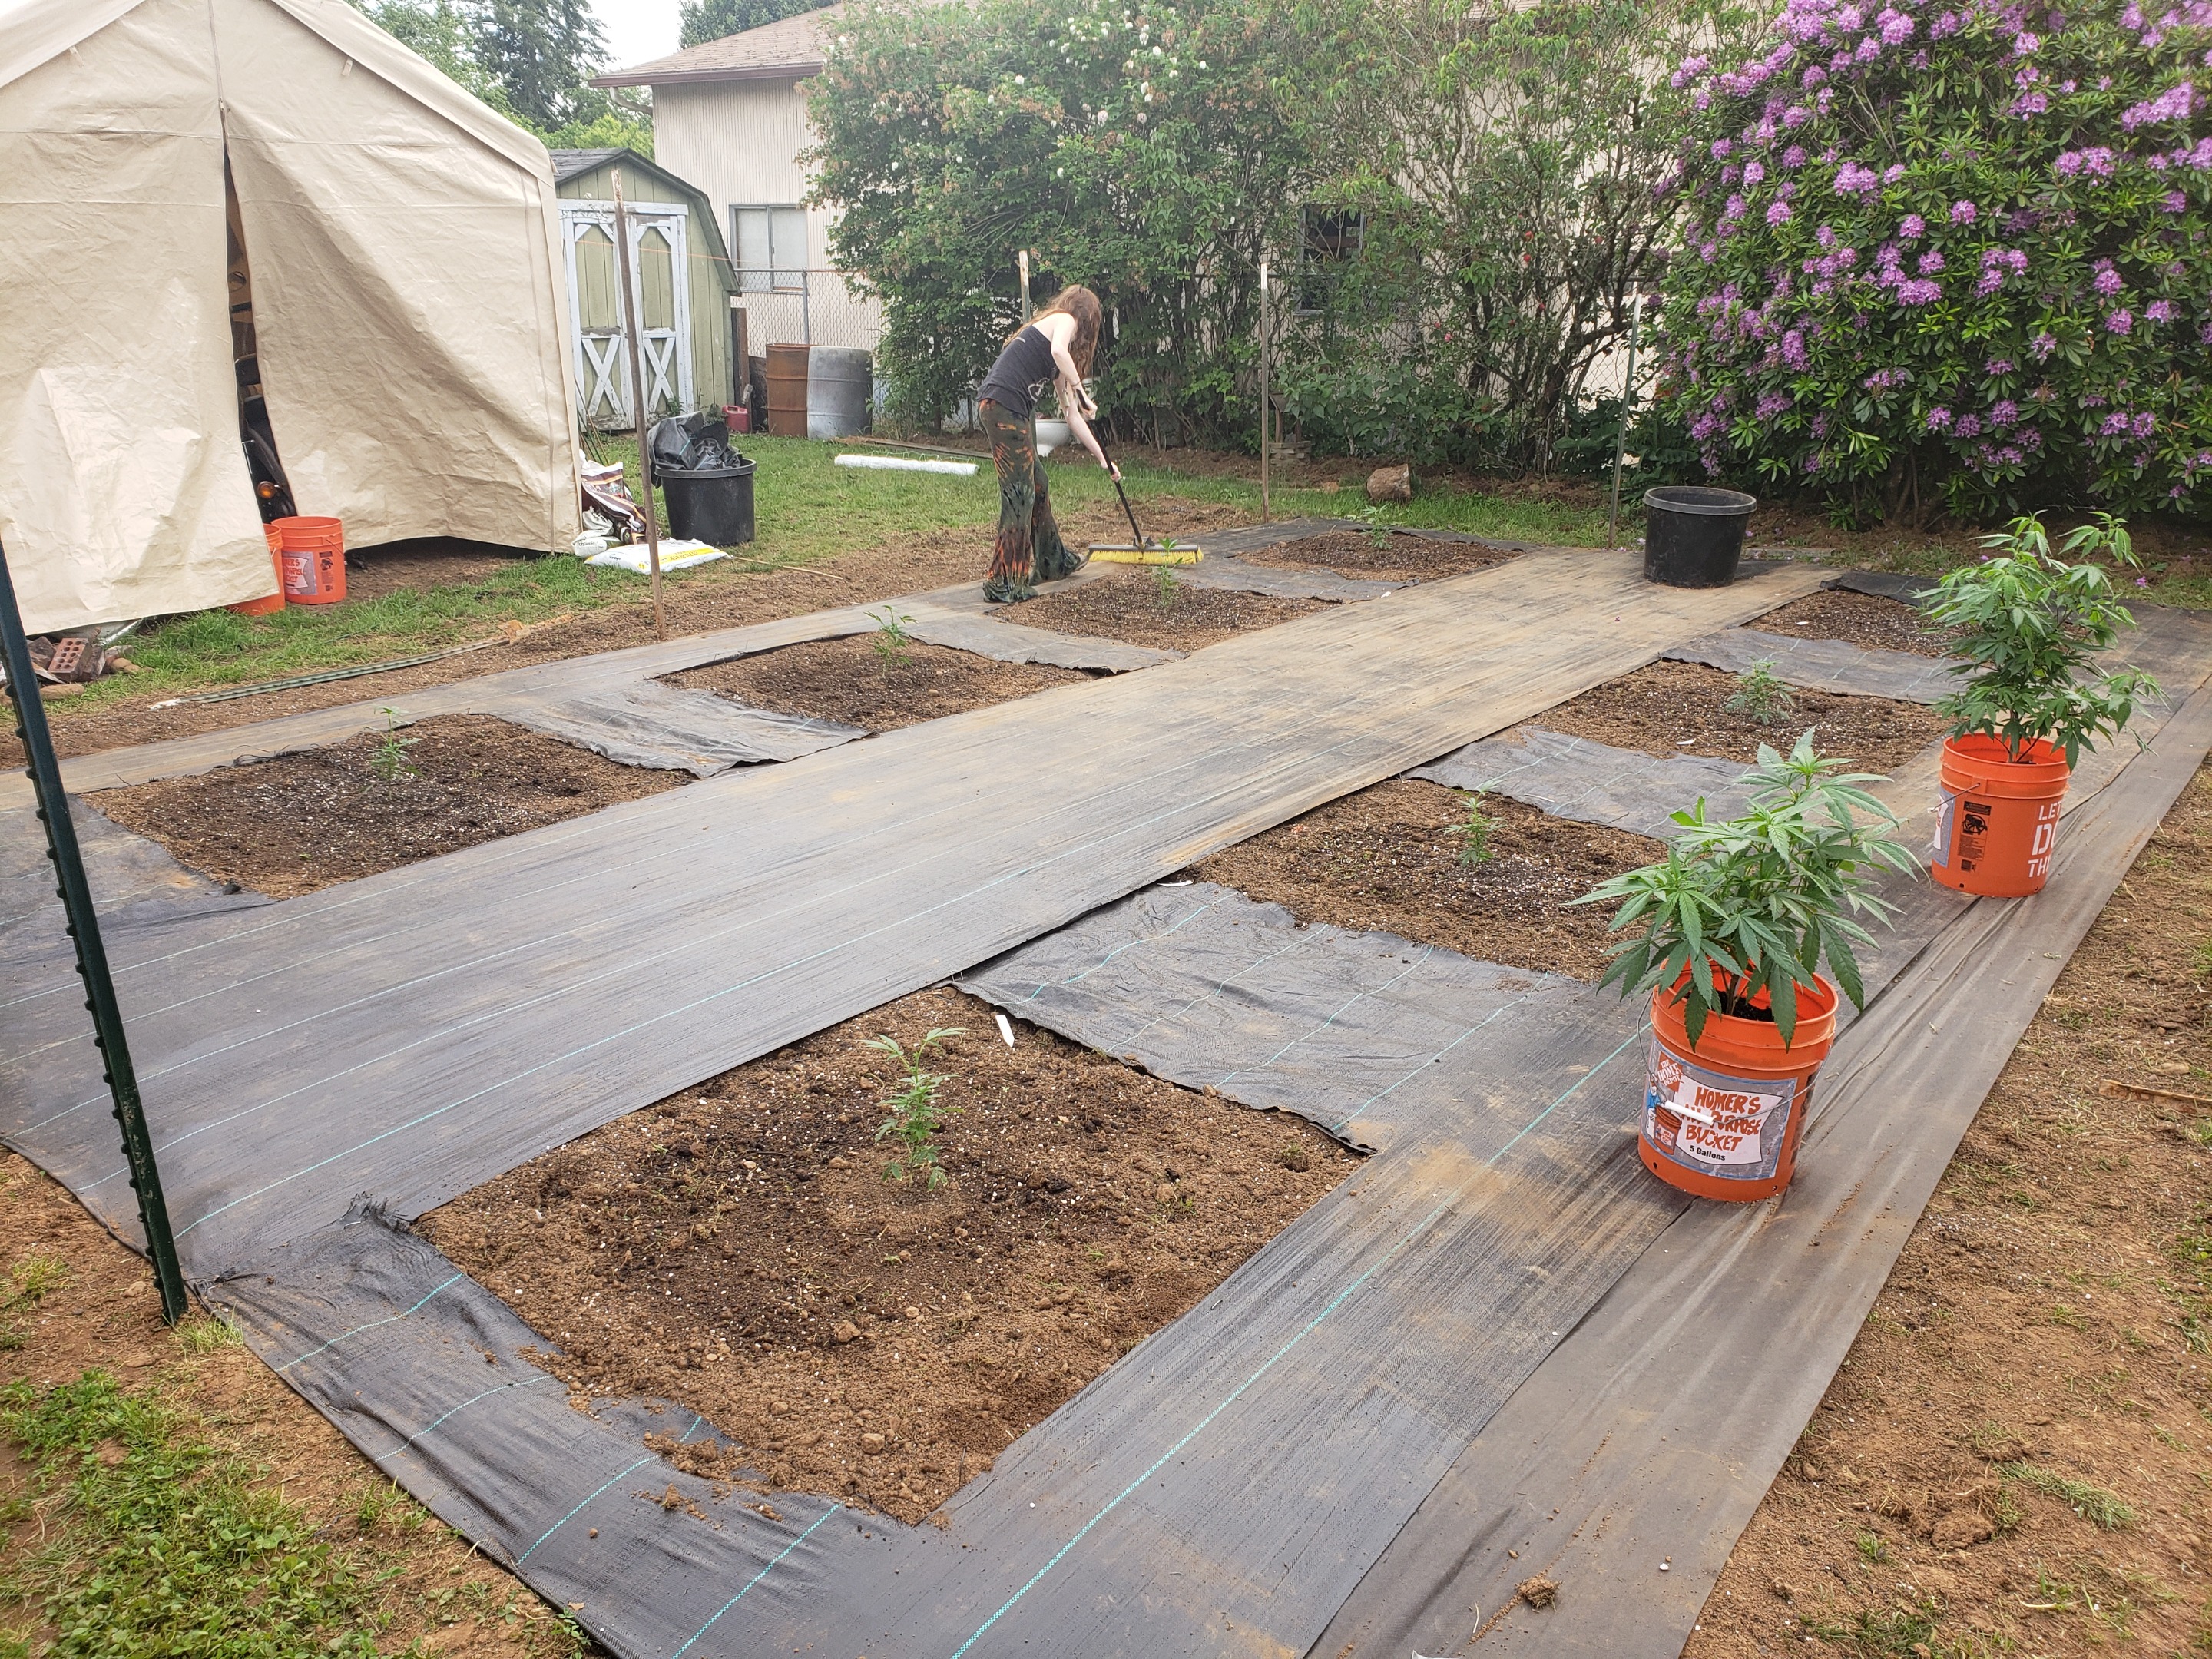
Since the plants will be in shock for a few days from the transplant before they start growing, I always top the clones at the time of transplant. It is best to shock your plants all at once instead of multiple times over a period if possible. The topping will also promote growth of new tops, and remove shade from lower preexisting branches (see season 2 for more details on topping - link below).
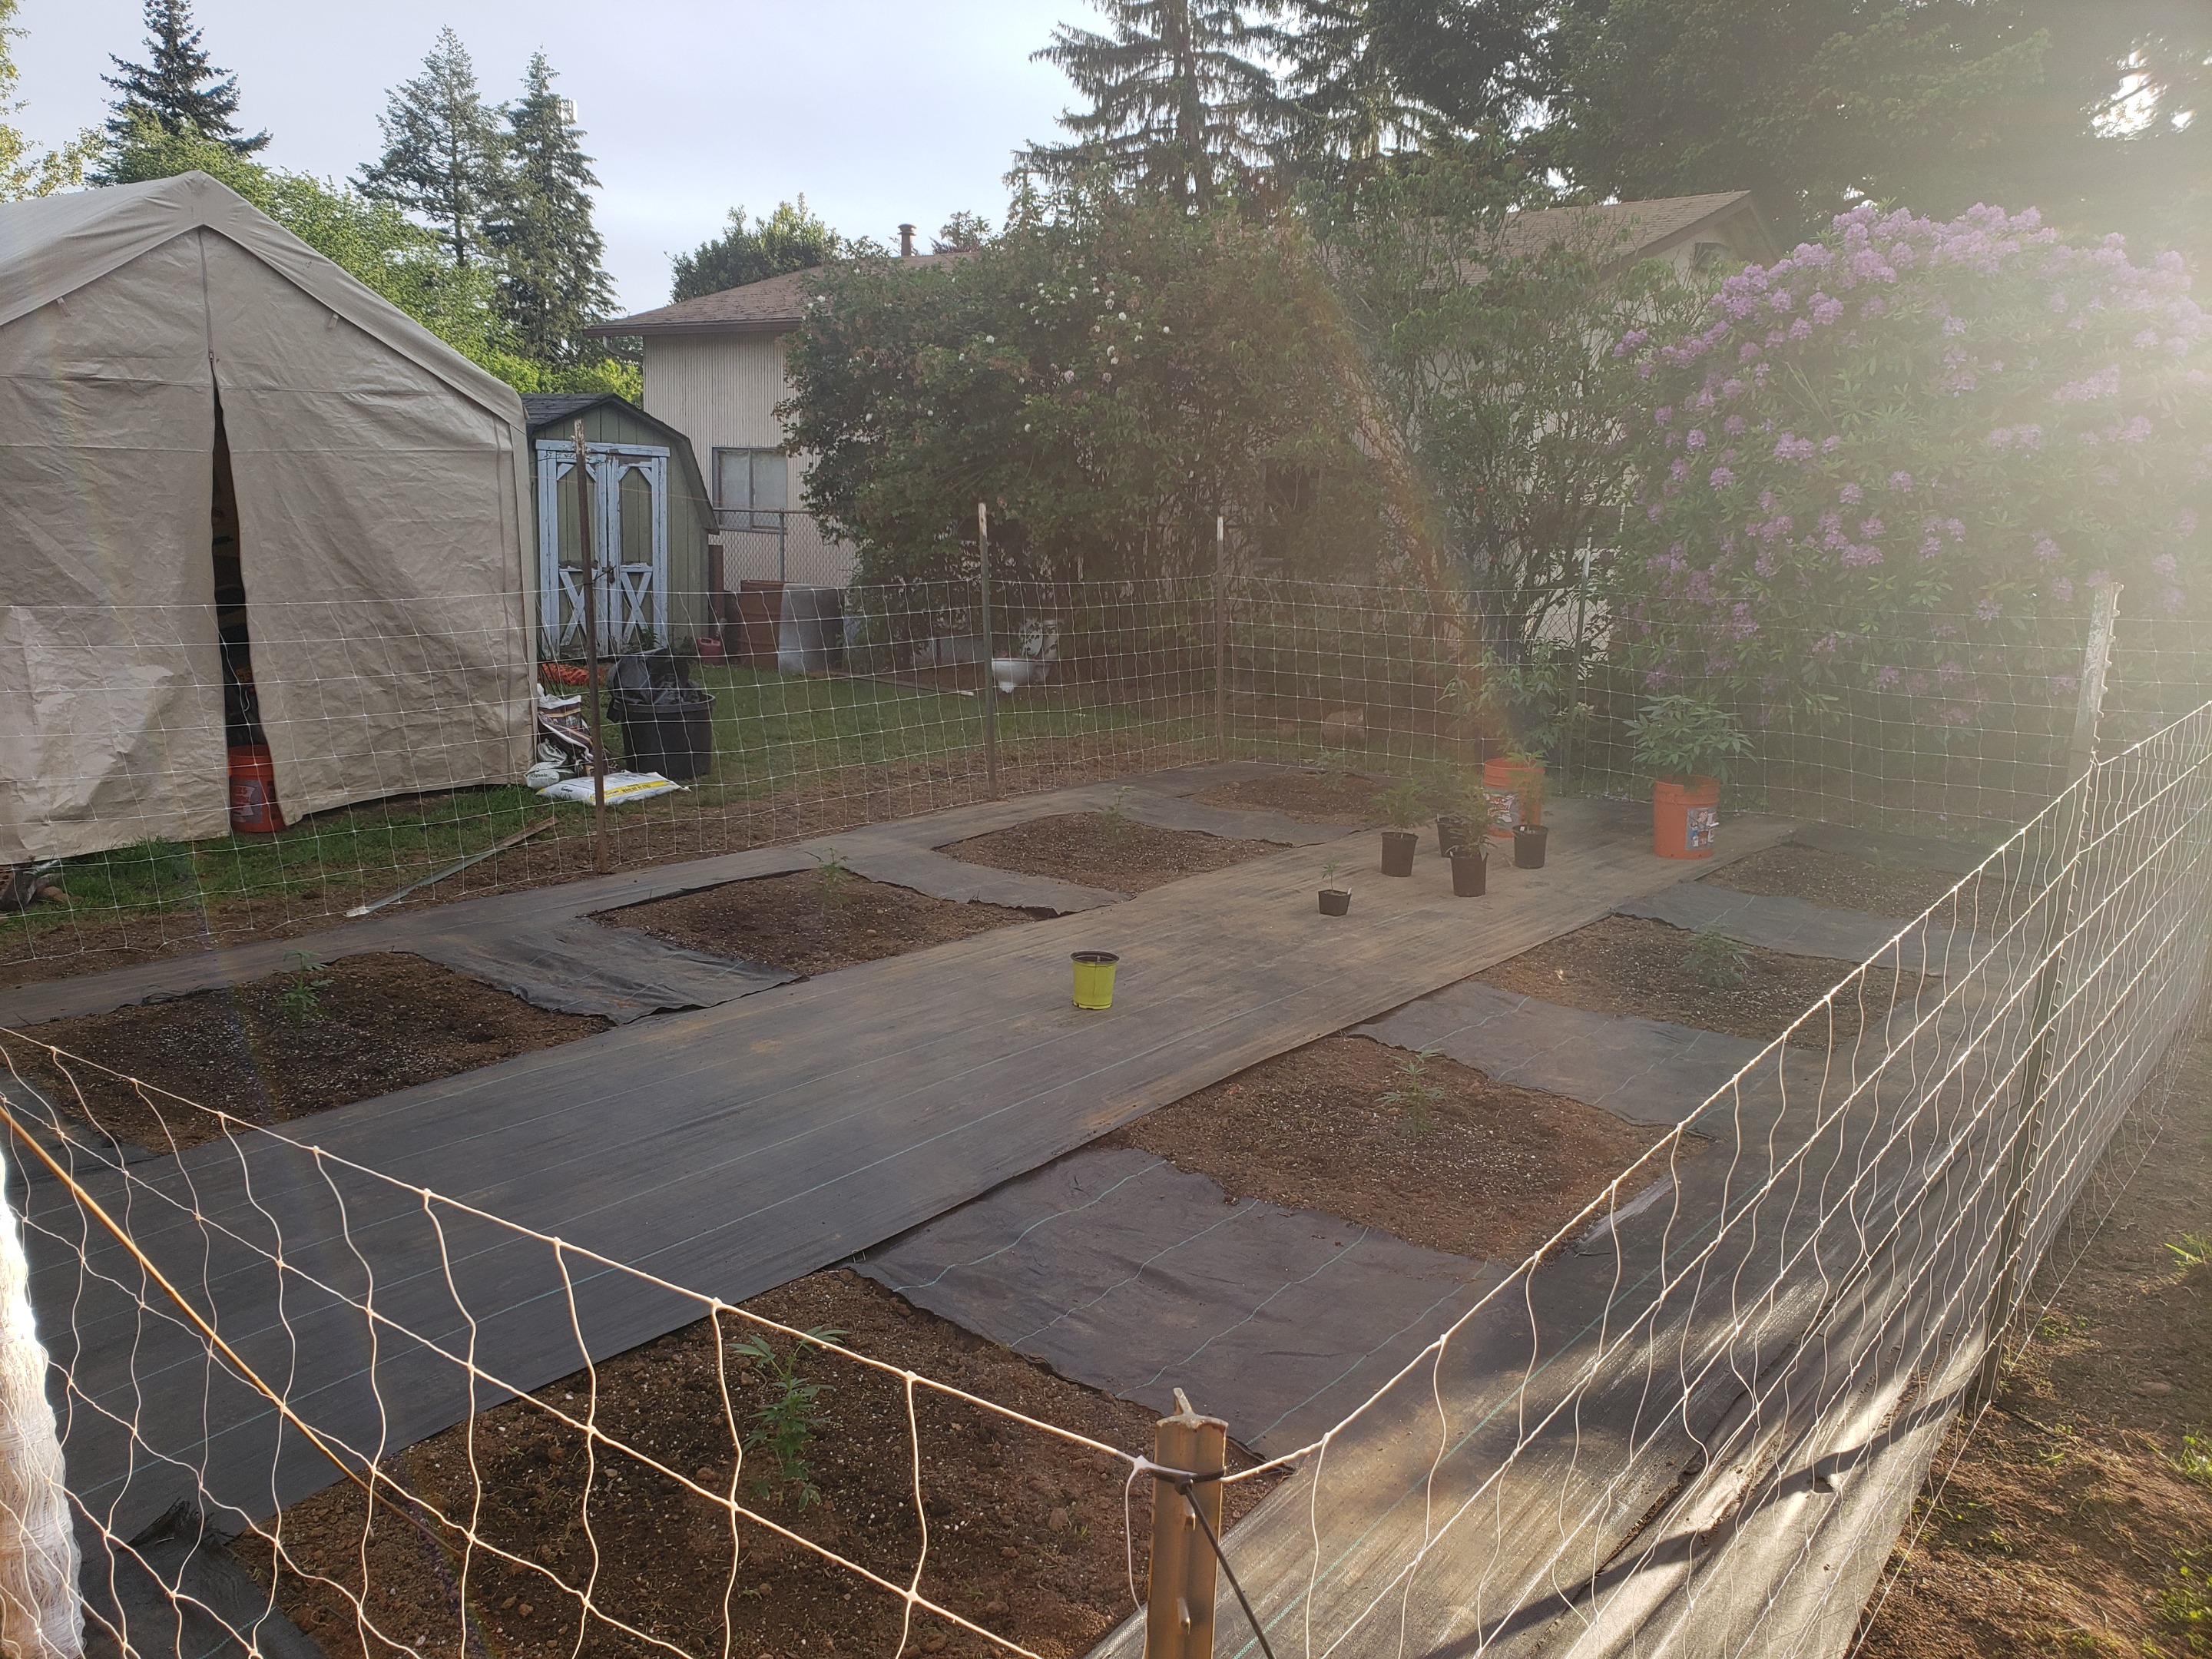
The final step in finishing this part of the garden was to create a animal barrier to prevent dogs and cats from defecating on and trampling the plants (this is essential if you have pets around frequently). I was able to use some trellising plastic that I had laying around for years for the fencing itself, all the t-posts were re-used and got extras I needed used from a farm, even the ground stakes I used to seal the lower part of the fence were reused from last year and when I came up short I did the rest with tent stakes (works fine). Since I reused all the items as well as a few pots and many other things, this post also doubles as #EarthDeeds = another win for Gaia (and my pockets).
Thank you to my friends who helped me bang in the t-posts with a mini sledge and ladder - you guys rock! Also a special thanks to my lady for helping me through the whole process - I love you & am so grateful for you baby!
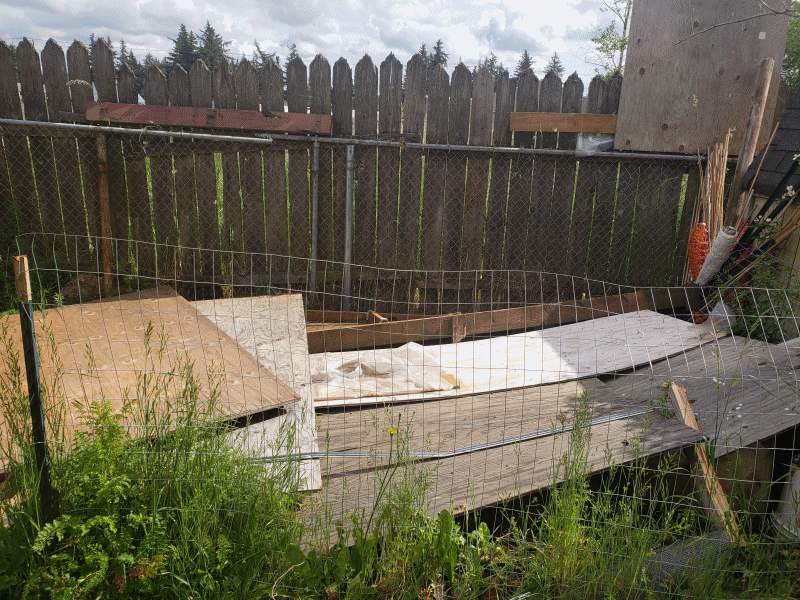
The next day I resurrected my absolutely destroyed raised bed - which was a whole task in itself. I had to shovel out a good bit of dirt and replace some of the topsoil, but I was able still re-use a good bit of it, along with ALL the wood for the bed itself.
By the time I was done this grow area also looked immaculate - and I executed the transplants in a similar fashion as the rest. These plants are Grape Ape & Purple Kush - the ladder of which was the only plant I did not top since it was still too young. I actually topped that one today (6/17/2020) - weeks after this transplant episode was recorded.
The next episode will include the transplanting of my backup plants, which include two mothers and two clones. Those are the only plants that will remain in pots this season.

Click here for ALL of Season 1 (2018)
Click here for ALL of Season 2 (2019)
SEASON 3 SO FAR:
Episode 1: Transplanting Clones & Planning Your Grow Space

Please enjoy episode 2 of the 2020 Backyard Cannabis Farming series. Hopefully we all acquire great wisdom for growing cannabis effectively and organically together..
From 5/25 - 5/27/2020
Show more
Tags :
Woo!
This creator can upvote comments using 3speak's stake today because they are a top performing creator!
Leave a quality comment relating to their content and you could receive an upvote
worth at least a dollar.
Their limit for today is $0!
Their limit for today is $0!

5 views
2 years ago
$

4 views
2 months ago
$

4 views
2 years ago
$

7 views
2 years ago
$

4 views
a year ago
$
More Videos

2 views
2 years ago
$
2 views
2 years ago
$

3 views
2 years ago
$

3 views
a year ago
$

8 views
3 years ago
$
16 views
2 years ago
$

1 views
a year ago
$
5 views
a year ago
$
5 views
3 years ago
$

2 views
2 years ago
$

4 views
5 months ago
$

9 views
3 years ago
$

17 views
a year ago
$

11 views
2 years ago
$

12 views
2 years ago
$

7 views
2 years ago
$
2 views
2 years ago
$
0 views
2 years ago
$

28 views
9 months ago
$

3 views
3 years ago
$

4 views
a year ago
$

33 views
2 years ago
$
4 views
3 years ago
$
Comments:
Reply:
To comment on this video please connect a HIVE account to your profile: Connect HIVE Account