Woodworking Wednesdays || DIY Project: Proyecto en Bruto (Esp/Eng}
10
About :

Español
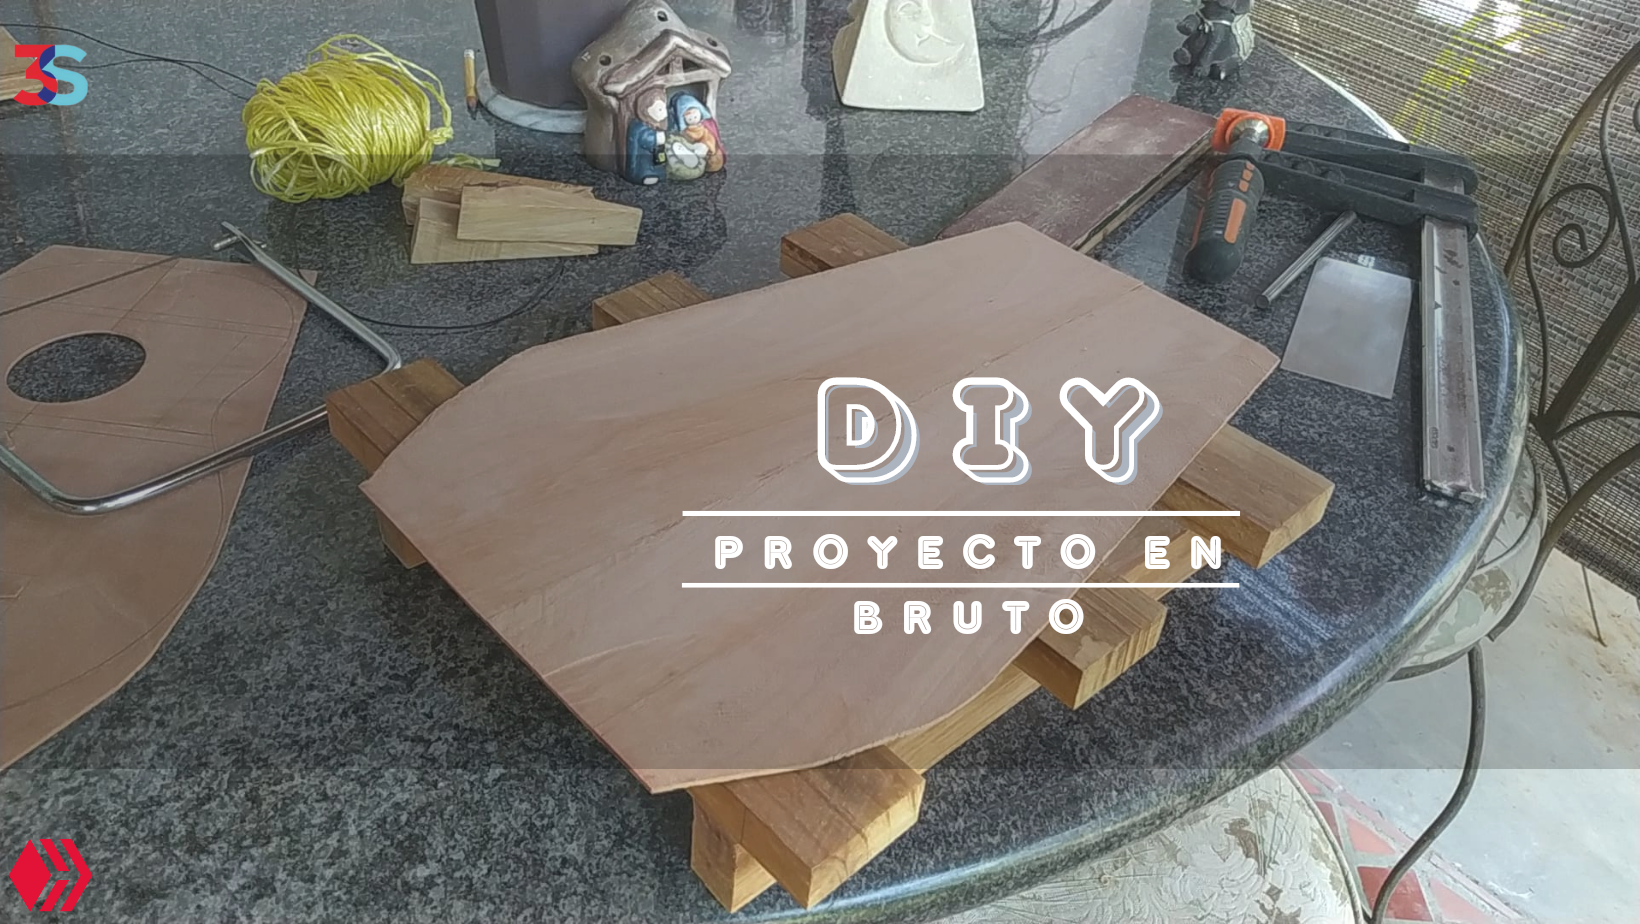
Hola a todos. Espero se encuentren muy bien. Es miércoles, lo que significa que hoy traigo para ustedes el progreso de uno de mis proyectos más recientes. De hecho,es un proyecto que no lleva nada de hacer comenzado como lo pueden ver aquí y aquí.
Lo que vengo a enseñarles en esta oportunidad es lo que está detrás de las fotos de esas dos publicaciones anteriores. Sin duda que el trabajo que no se ve en el taller es lo más relevante y delicado. Disfruto mucho haciéndolo y crear contenido en base a ello es otro nivel.
Está comisión es un cuatro básico hecho casi en su totalidad de cedro criollo (cedrela odonata.
Junta
En el video me encuentro trabajando en los detalles de la junta de las partes del fondo. Un proceso que requiere un ojo fino para saber cuándo dejar de reducir las tablas y dar con una unión que no permita el paso de luz a través de ella.
Esto nos permite tener una unión más resistente. Está se reforzará luego, pero si no es perfecta de vaba notar la unión de las maderas. Detalle que no es nada atractivo a la vista de los clientes.
Pegado
Para unir estas piezas, se emplea cola blanca. El útil de madera empleado para esta unión nos permite utilizar un cordel para juntar ambas partes del fondo con la presión necesaria para lograr un pegado correcto.
Se utilizan unas cuñas como apoyo extra para lograr que la pieza completa de mantenga a ras del útil. Esto último, nos facilita el rebaje posterior del fondo a su grosor adecuado.
Rebaje
Las suelen tener pequeños desniveles que son producto del corte. Los discos de corte y otras máquinas dejan marcas o partes irregulares. Hay varias formas de eliminar esto. En mi casi, utilizo una rasaueta y lija para nivelar toda la pieza.
La opción más fácil sería utilizar una lijadora de banda dónde las piezas son aplanadas mediante un lijado uniforme y progresivo que se puede ajustar de acuerdo a las necesidades que se tengan. En lutheria, los espesores de las piezas son específicos para lograr ciertos tipos de sonidos, pero también dependen de la dureza de los materiales.
Corte
Lo último por hacer es cortar los bordes de las piezas para darles una forma mas parecida al producto final. Con la ayuda de un arco calador manual y un util de corte parecido al que utilizan los joyeros, esto es trabajo fácil. Solo hay que tener cuidado con el cedro porque es una madera blanda. Así que hay que utilizar otra pieza para sostenerlo conrra el útil para que el corte no vaya a romper algo la pieza de manera irreparable.
Reflexiones
Dar una mirada al proceso de fabricación de un instrumento es una tarea interesante. Sin duda que era una de las cosas que más quería hacer con mi trabajo debido a que #hive es una parte fundamental de mi vida y ya tengo una mentalidad de creador de contenido muy arraigada.
Espero que está ventana a mi taller haya sido de su agrado. Los espero en la sección de comentarios.
English
Hi there. I hope you're having a great day. It's Wednesday! You know what that means. It's woodworking day! So, I'm here to show you some of the thing I've been doing in my workshop during week. I have a new project. You can see some of the progress on it by clicking here y here.
I wanna show the behind the scenes of these posts and the whole process of arriving at those photos. Showing this part of my craft is interesting. Cresting content based in it is another thing. I enjoy a lot doing both.
This project is one of my basic instruments comprised almost entirely of cedar ( cedrela odonata). Hop aboard and enjoy.
Joinery
In the video, I work on joining these pieces of wood. The idea is to create the back of the instrument. The sound board is made the same way. With the help of a plane, I try to even the sides that will be in contact. First, I do both prices at the same time. Then, separately. The idea is to remove material until you can't see light coming through when you put both parts together.
Good joinery is strong and visually appealing. It will he reinforced in the inside, but making it look good is important.
Gluing
To glue these pieces we go ahead and place then on this jig. It allows us to apply glue and use a rope to keep both parts tight. This is to ensure a proper gluing of the back.
Once we have tightened the rope, we go ahead and place wooden wedges in top of the back. This is to prevent it from rising from the jig and making it uneven. It is a important measure for the next step.
Thicknessing
This is the process of making the piece even. It remove any marks of created by a cutting disc or bandsaw. There's many ways to do it. I use the manual way. That's going with a card scraper and sandpaper. The other component are loads of elbow grease to get the job done.
The easiest option is to have a drum sander. This tool provides adjustable thicknessing for any piece of wood. It is basically a sanding band with adjustable heights. This means you can get any kind of piece of wood in it and adjust it's thickness to your desire.
Sounds in luthierie depend a lot on different thicknesses and materials.
Trimming
Finally, we cut the pieces to make them resemble a bit more the shape of the instrument. We use a coping saw and an jig very similar to the ones used by jewelers. Also, we need to keep an eye for the top side of the pieces. Cedar is a particulary soft wood. It could break easily under stress while making these cuts. To a holder on top is recommended when cutting.
Conclusions
Giving everyone the chance to have a glimpse at the process of building an instrument is an interesting challenge. I've been trying to come up with new ways of showing the process. Doing it in video format is even more interesting. Cresting content for #hive helps have the initiative to do so as this platform is an important parte if my life.
I hope this glimpse at my workshop has been interesting. I'll be waiting for you in the comment section.
- Foto/Photo 📷: @bertrayo (Redmi Note 8 smartphone)
- Portada/Thumbnail: @bertrayo. Created with Canva.
- Video 🎞️: @bertrayo (Redmi Note 8 smartphone).
- Edición/Editing: @bertrayo. Using Capcut.
- Música Libre de Copyright/Copyright Free Music: 1 2
Follow me on Instagram for enquires and commission.
If you'd like to help the workshop grow, you can make a donation here. You can find me at discord as bertrayo#1763
Show more
Tags :
Woo!
This creator can upvote comments using 3speak's stake today because they are a top performing creator!
Leave a quality comment relating to their content and you could receive an upvote
worth at least a dollar.
Their limit for today is $0!
Their limit for today is $0!
8 views
a year ago
$

18 views
2 years ago
$

25 views
2 years ago
$

12 views
a year ago
$

5 views
a year ago
$
More Videos

20 views
3 years ago
$

12 views
2 years ago
$

68 views
3 years ago
$
27 views
2 years ago
$

53 views
2 years ago
$

7 views
2 years ago
$
3 views
3 years ago
$
16 views
a year ago
$

6 views
5 years ago
$

2 views
4 years ago
$

17 views
2 years ago
$

2 views
2 years ago
$

11 views
2 years ago
$

2 views
4 months ago
$

29 views
3 years ago
$

6 views
a year ago
$

10 views
5 years ago
$

14 views
2 years ago
$

1 views
3 years ago
$

Torneo Estadal | La Sub-12 y Sub-14 de Academia de Fútbol Fariñas avanzaron a los Cuartos de Final -
9 views
2 years ago
$

3 views
2 years ago
$

34 views
2 years ago
$
Comments:
Reply:
To comment on this video please connect a HIVE account to your profile: Connect HIVE Account